Page 6 of 11
Re: Joe's Auto Garage-Updates-01/11
Posted: Fri Jan 12, 2018 6:33 am
by mustang1989
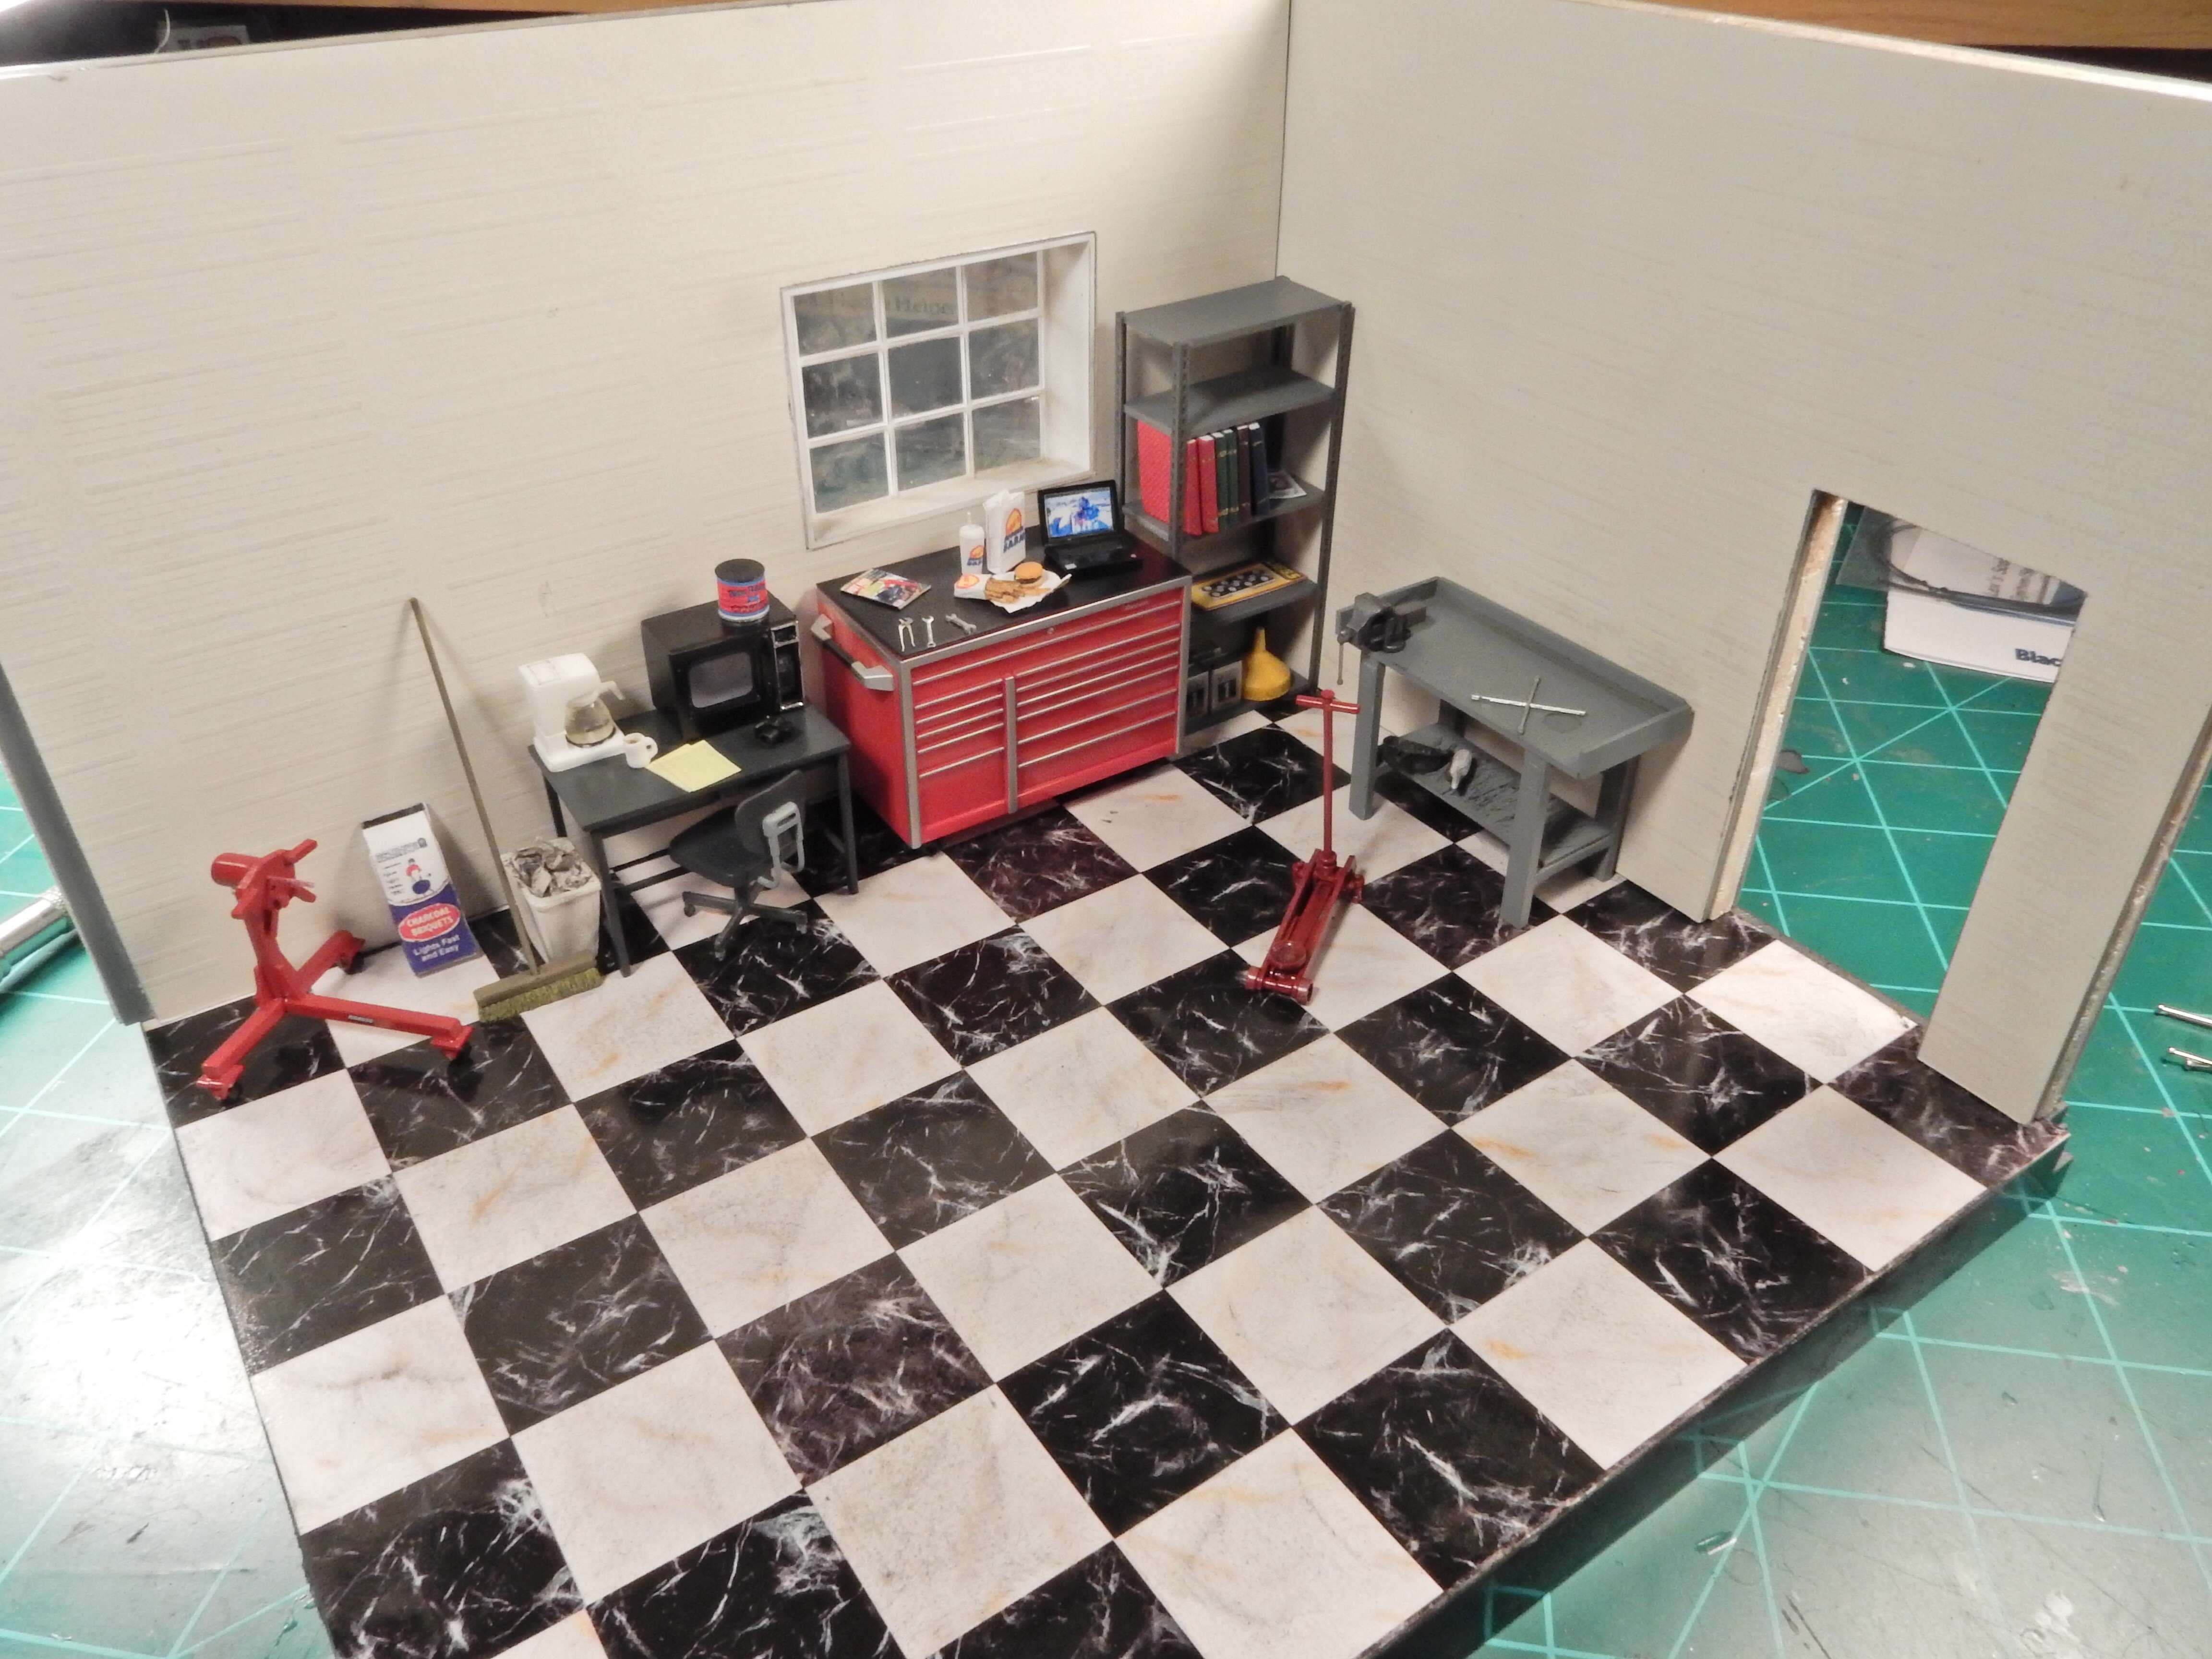
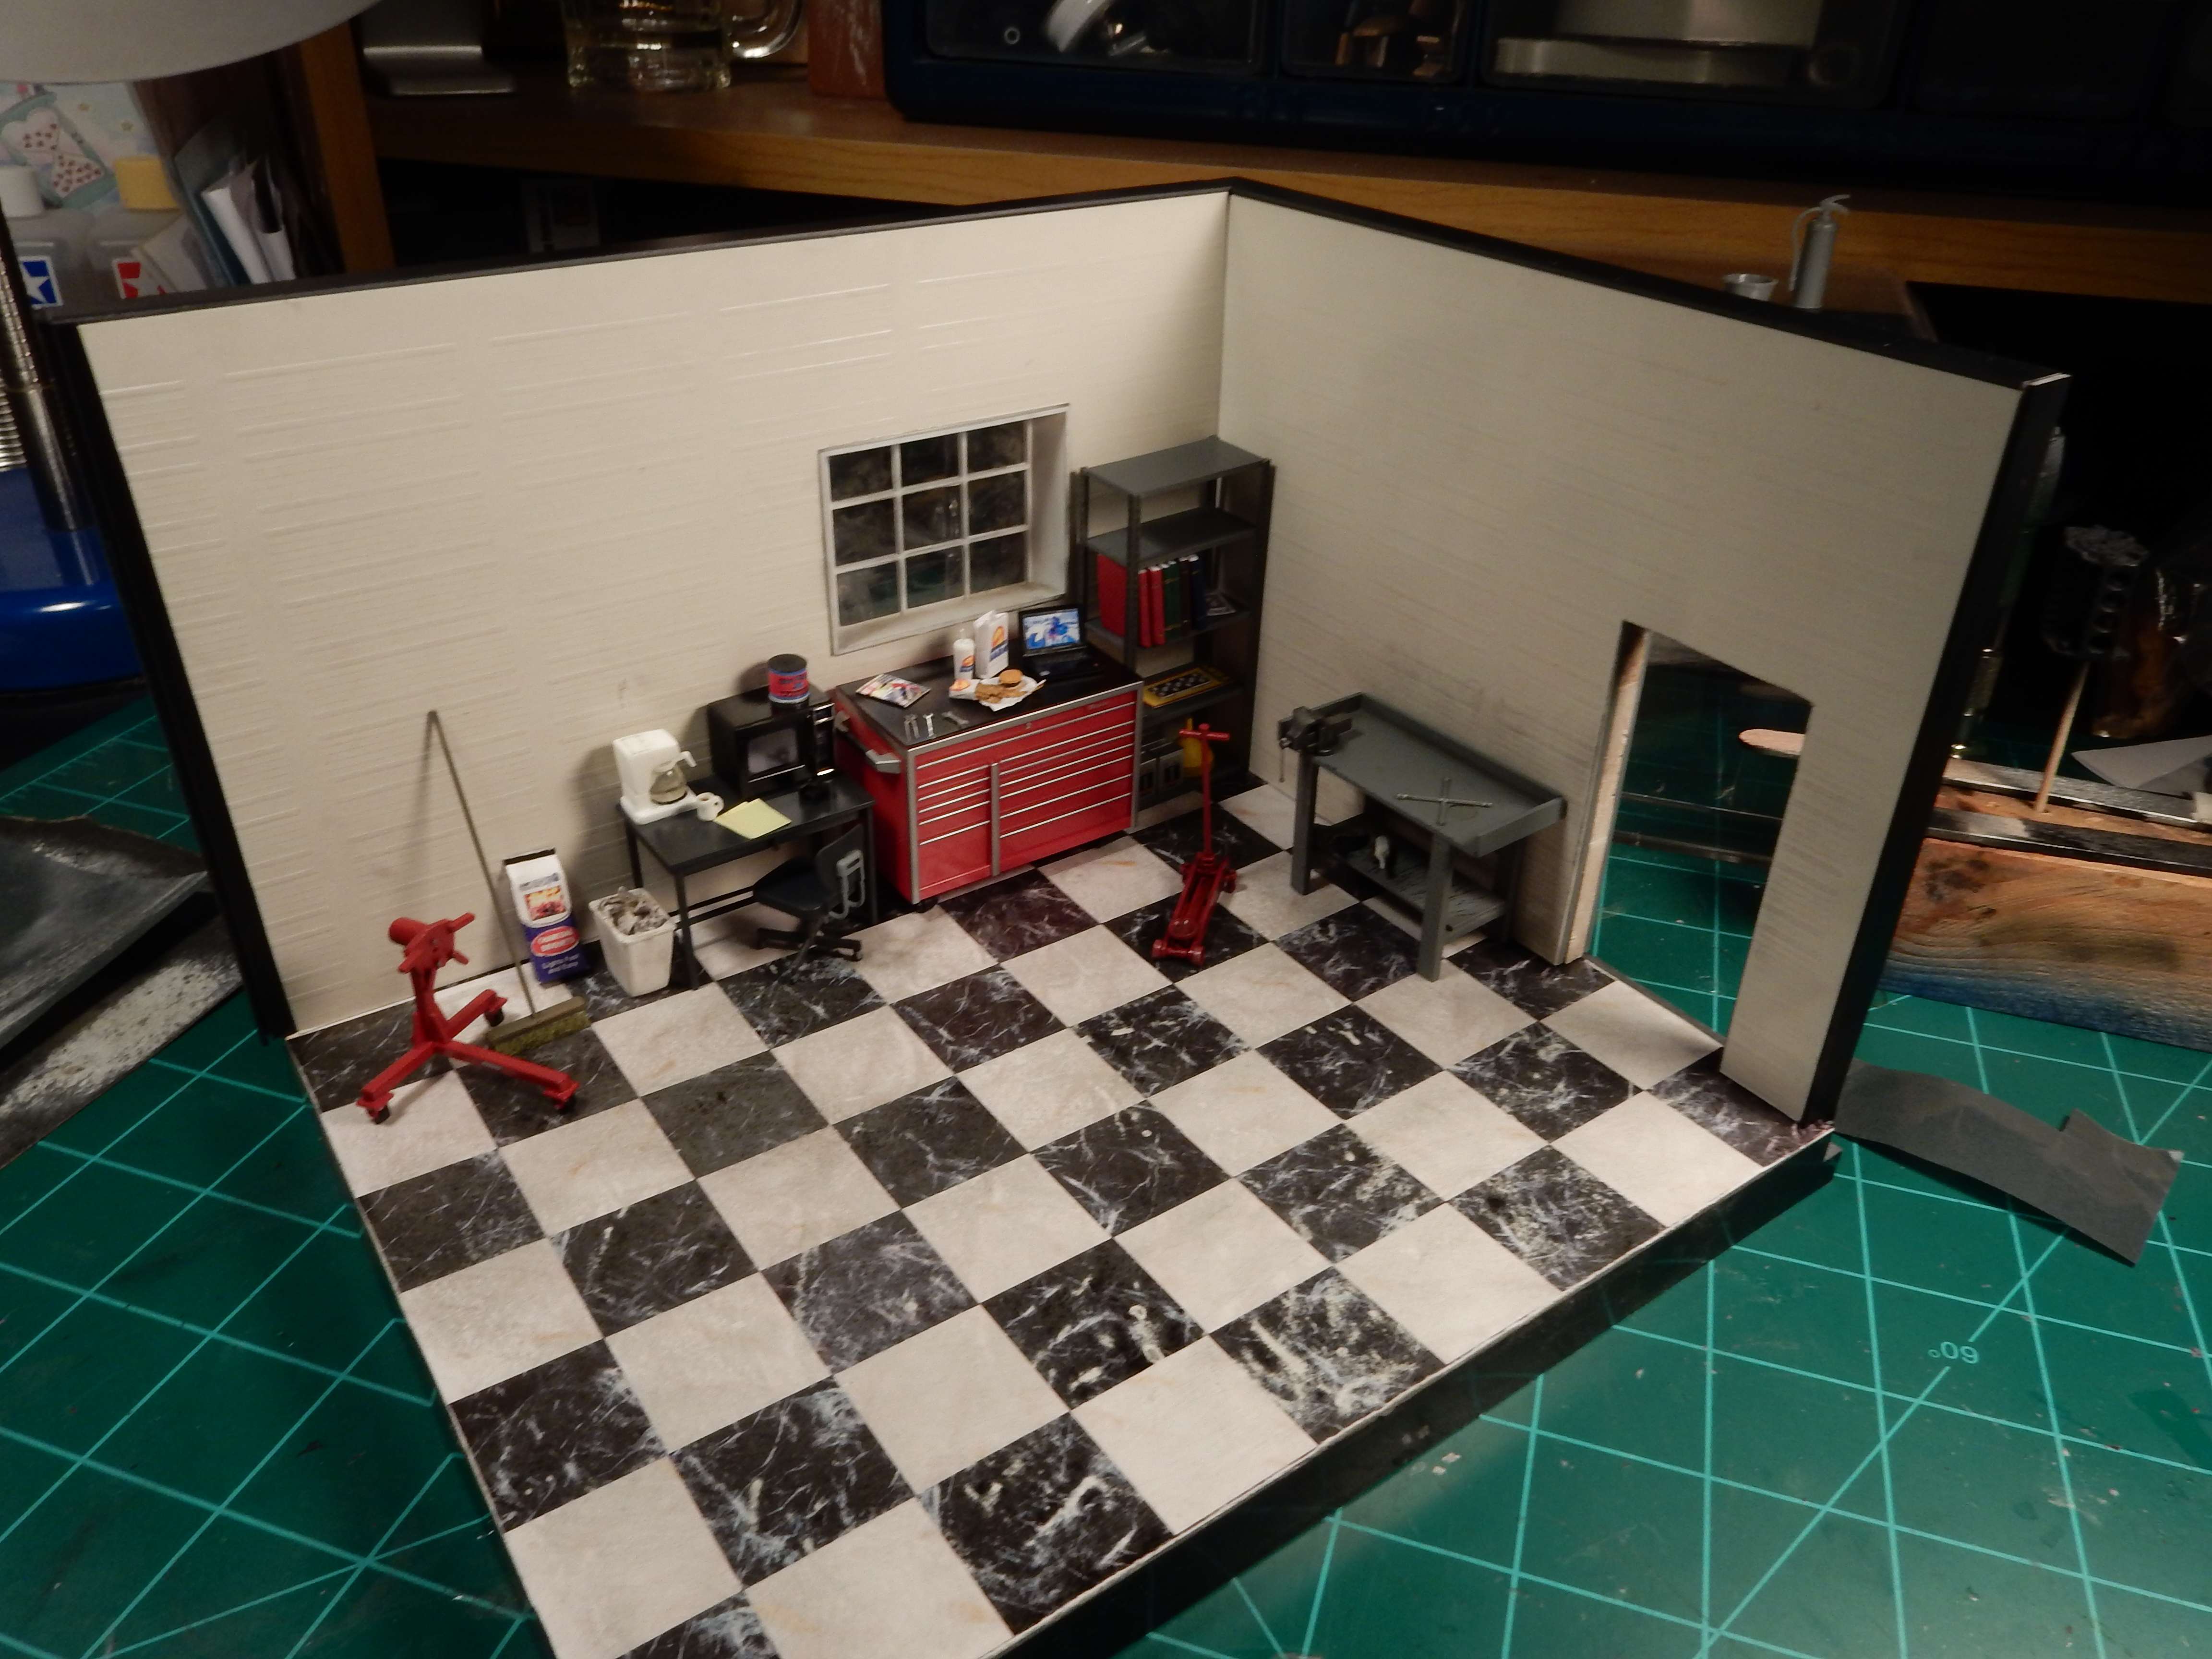
Got the walls free standing now with nothing propping them up. The more I looked at the whole shop floor and walls , the more I felt the need to grime it up just a tad. I didn't want it nasty, just used somewhat. So I used some ground up black and a little brown pastels and rubbed in some brown to dirty it and smudged some in the window sill and framing for the dust effect. I hit the areas directly behind the work bench and on the sides of the door entrance with some rubbed in black pastel. I'll be working on the door and putting some other goodies on the walls in addition to panel close outs at the top and end edges of the walls as well.
Here's a top side view so far:
Re: Joe's Auto Garage-Walls Up! 01/12
Posted: Fri Jan 12, 2018 4:39 pm
by Stikpusher

Now where is that Snap On Tools calendar...

Re: Joe's Auto Garage-Walls Up! 01/12
Posted: Sat Jan 13, 2018 5:51 pm
by mustang1989
Thanks Carlos and I actually do have a couple of calendars but I won't be using those. I have some other things that you'll like

Re: Joe's Auto Garage-Walls Up! 01/12
Posted: Mon Jan 15, 2018 1:38 am
by Handiabled
I wish my floors looked this good! Unfortunately some childish person has mine covered in small burn out patches......
Re: Joe's Auto Garage-Walls Up! 01/12
Posted: Mon Jan 15, 2018 9:30 am
by mustang1989
Somebody git a rope!!!!!!!!!!!!

Re: Joe's Auto Garage-Walls Up! 01/12
Posted: Mon Jan 15, 2018 10:06 am
by BlackSheep214
Walls are bare, brah...

You need to be adding some automotive advertisement signs like Gulf, Standard Oil or the like.
Looking good...
Re: Joe's Auto Garage-Walls Up! 01/12
Posted: Mon Jan 15, 2018 11:15 am
by mustang1989
lol. No worries Tom as I've already got that base covered.
Re: Joe's Auto Garage-Walls Up! 01/12
Posted: Fri Jan 19, 2018 7:23 am
by mustang1989
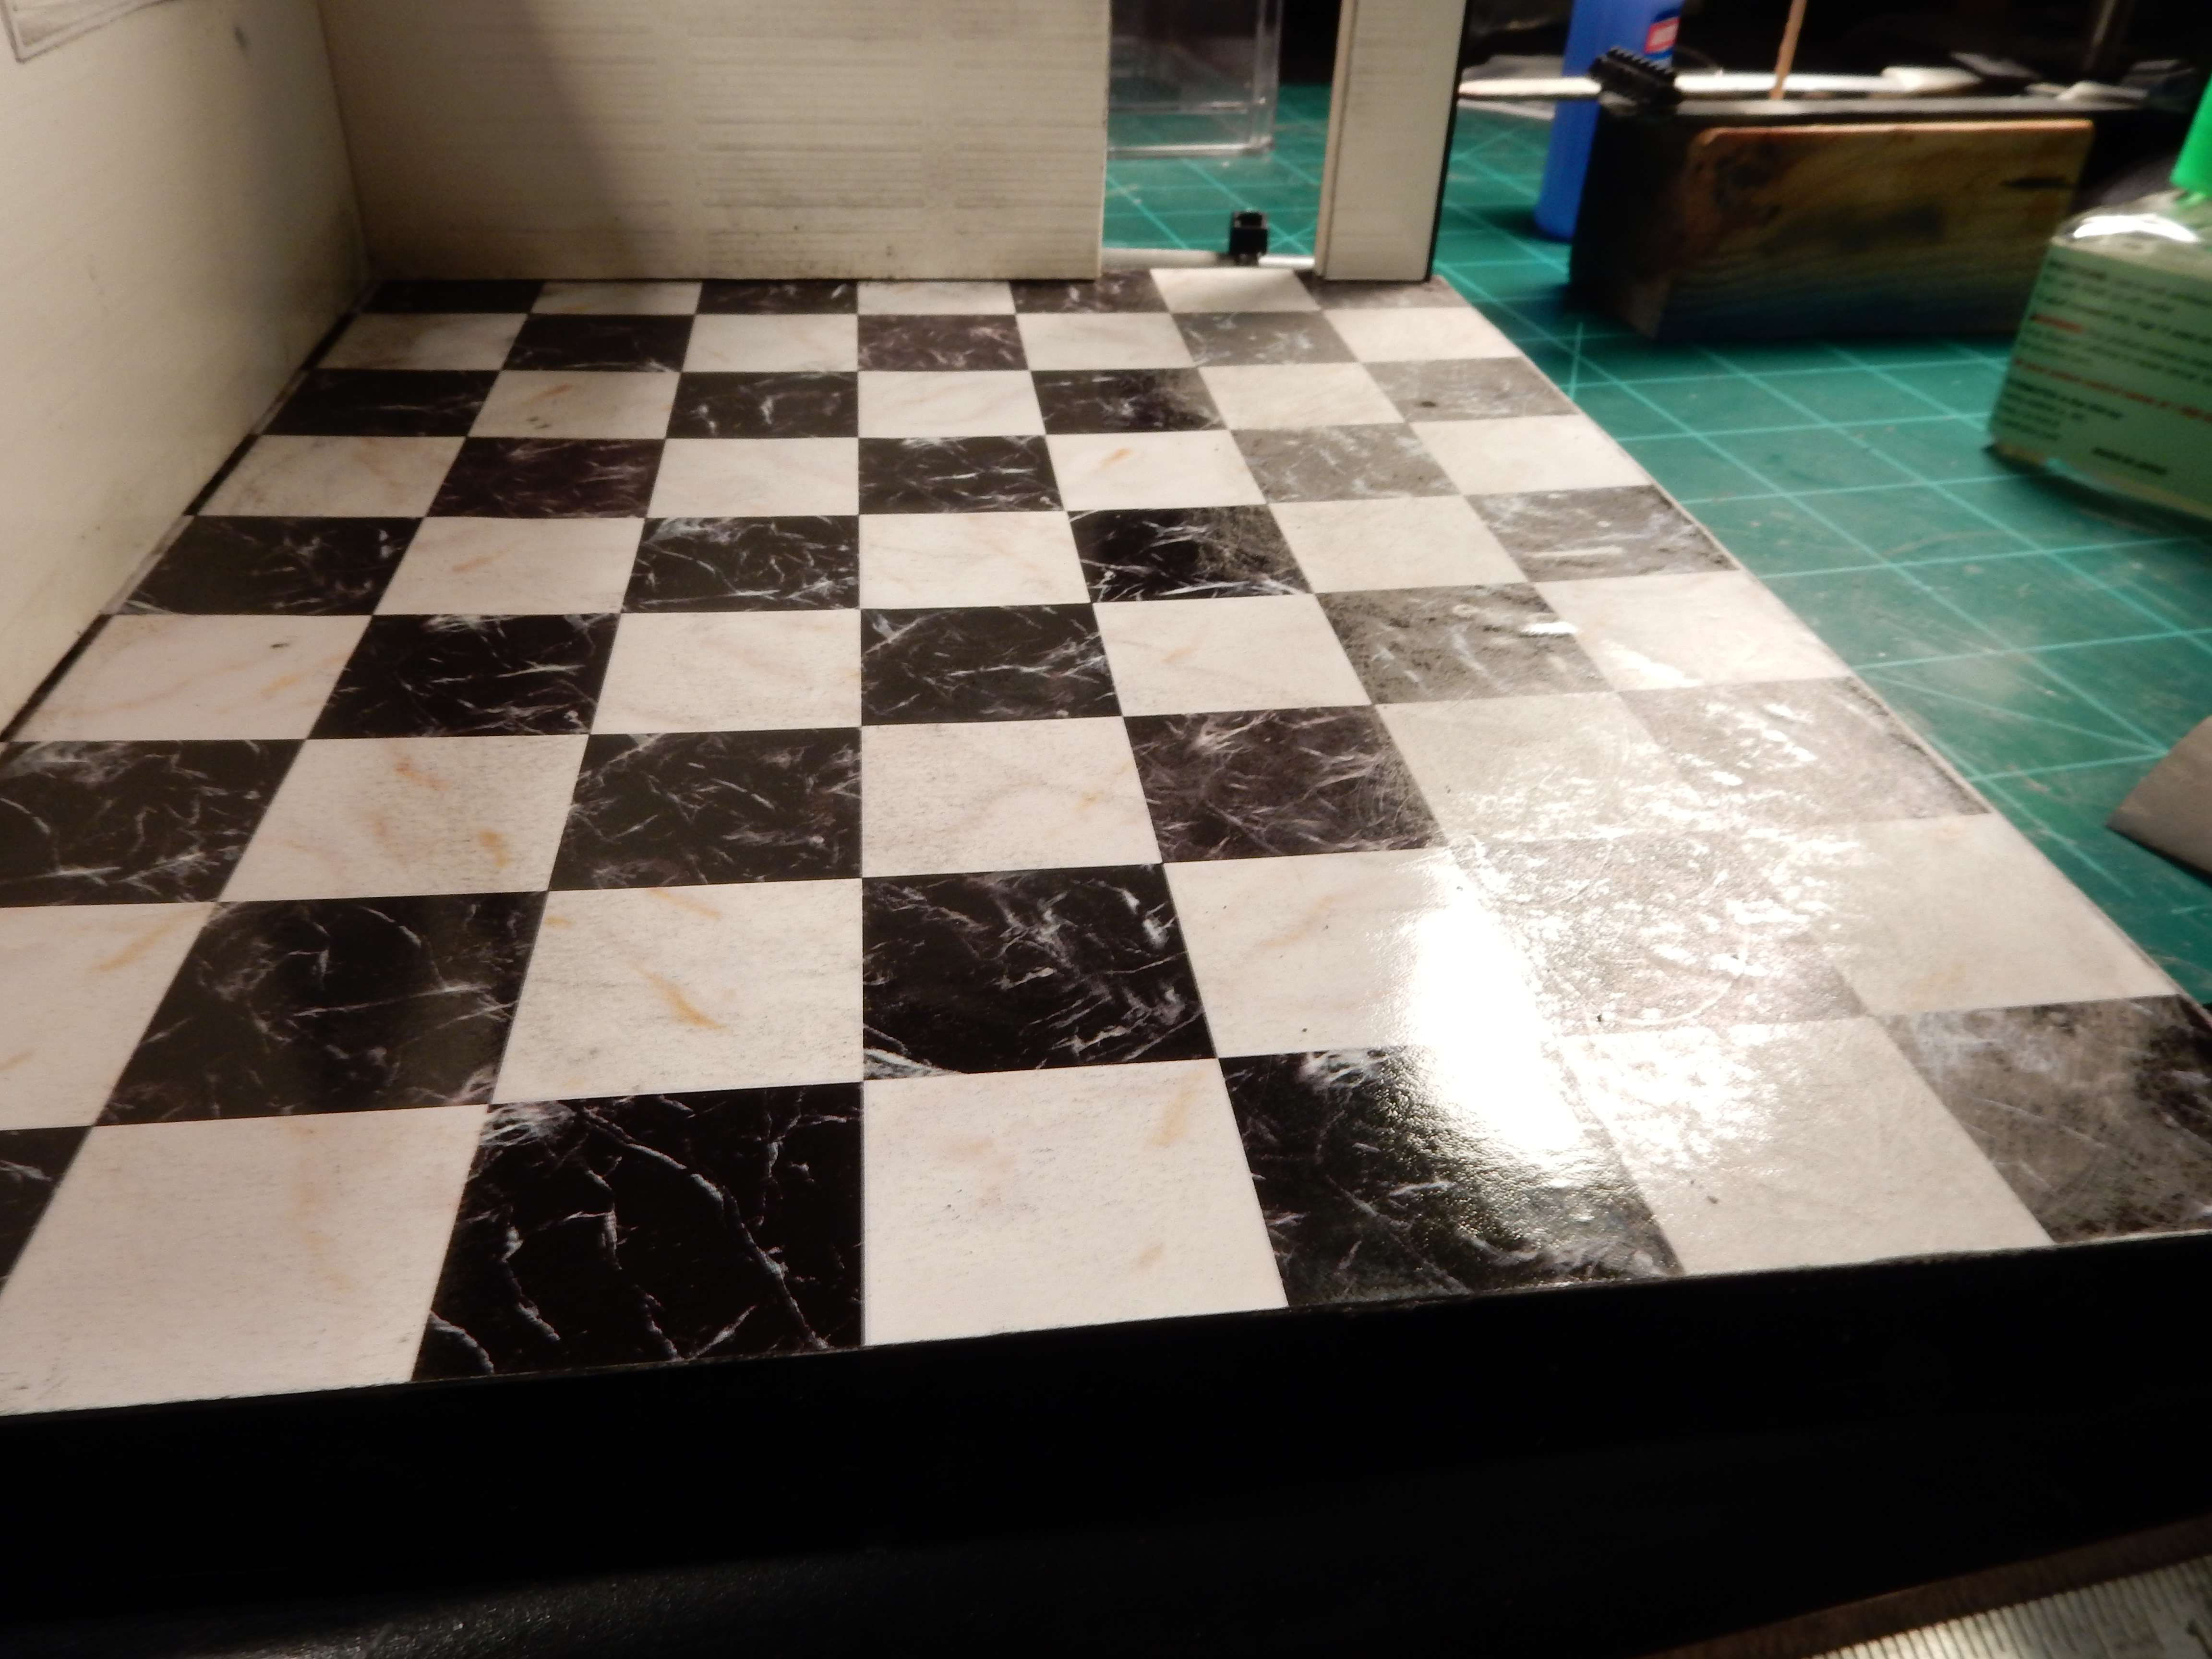
Ok folks. I've been rackin' my brain trying to figure out two of my problems with this build. First off , the floor was just too dang clean.
I tried dirtying up the paper based flooring with ground up brown and black pastel rubbed into the flooring but it wasn't enough. As you all know, it would just rub off. Then my thoughts turned to some 1000 grit sandpaper. . Now that............might just work. So I started on the first two rows of tile and lo and behold.........it was just what I wanted!!

You can see the difference between the first two rows and the rest of the flooring in the following photo:
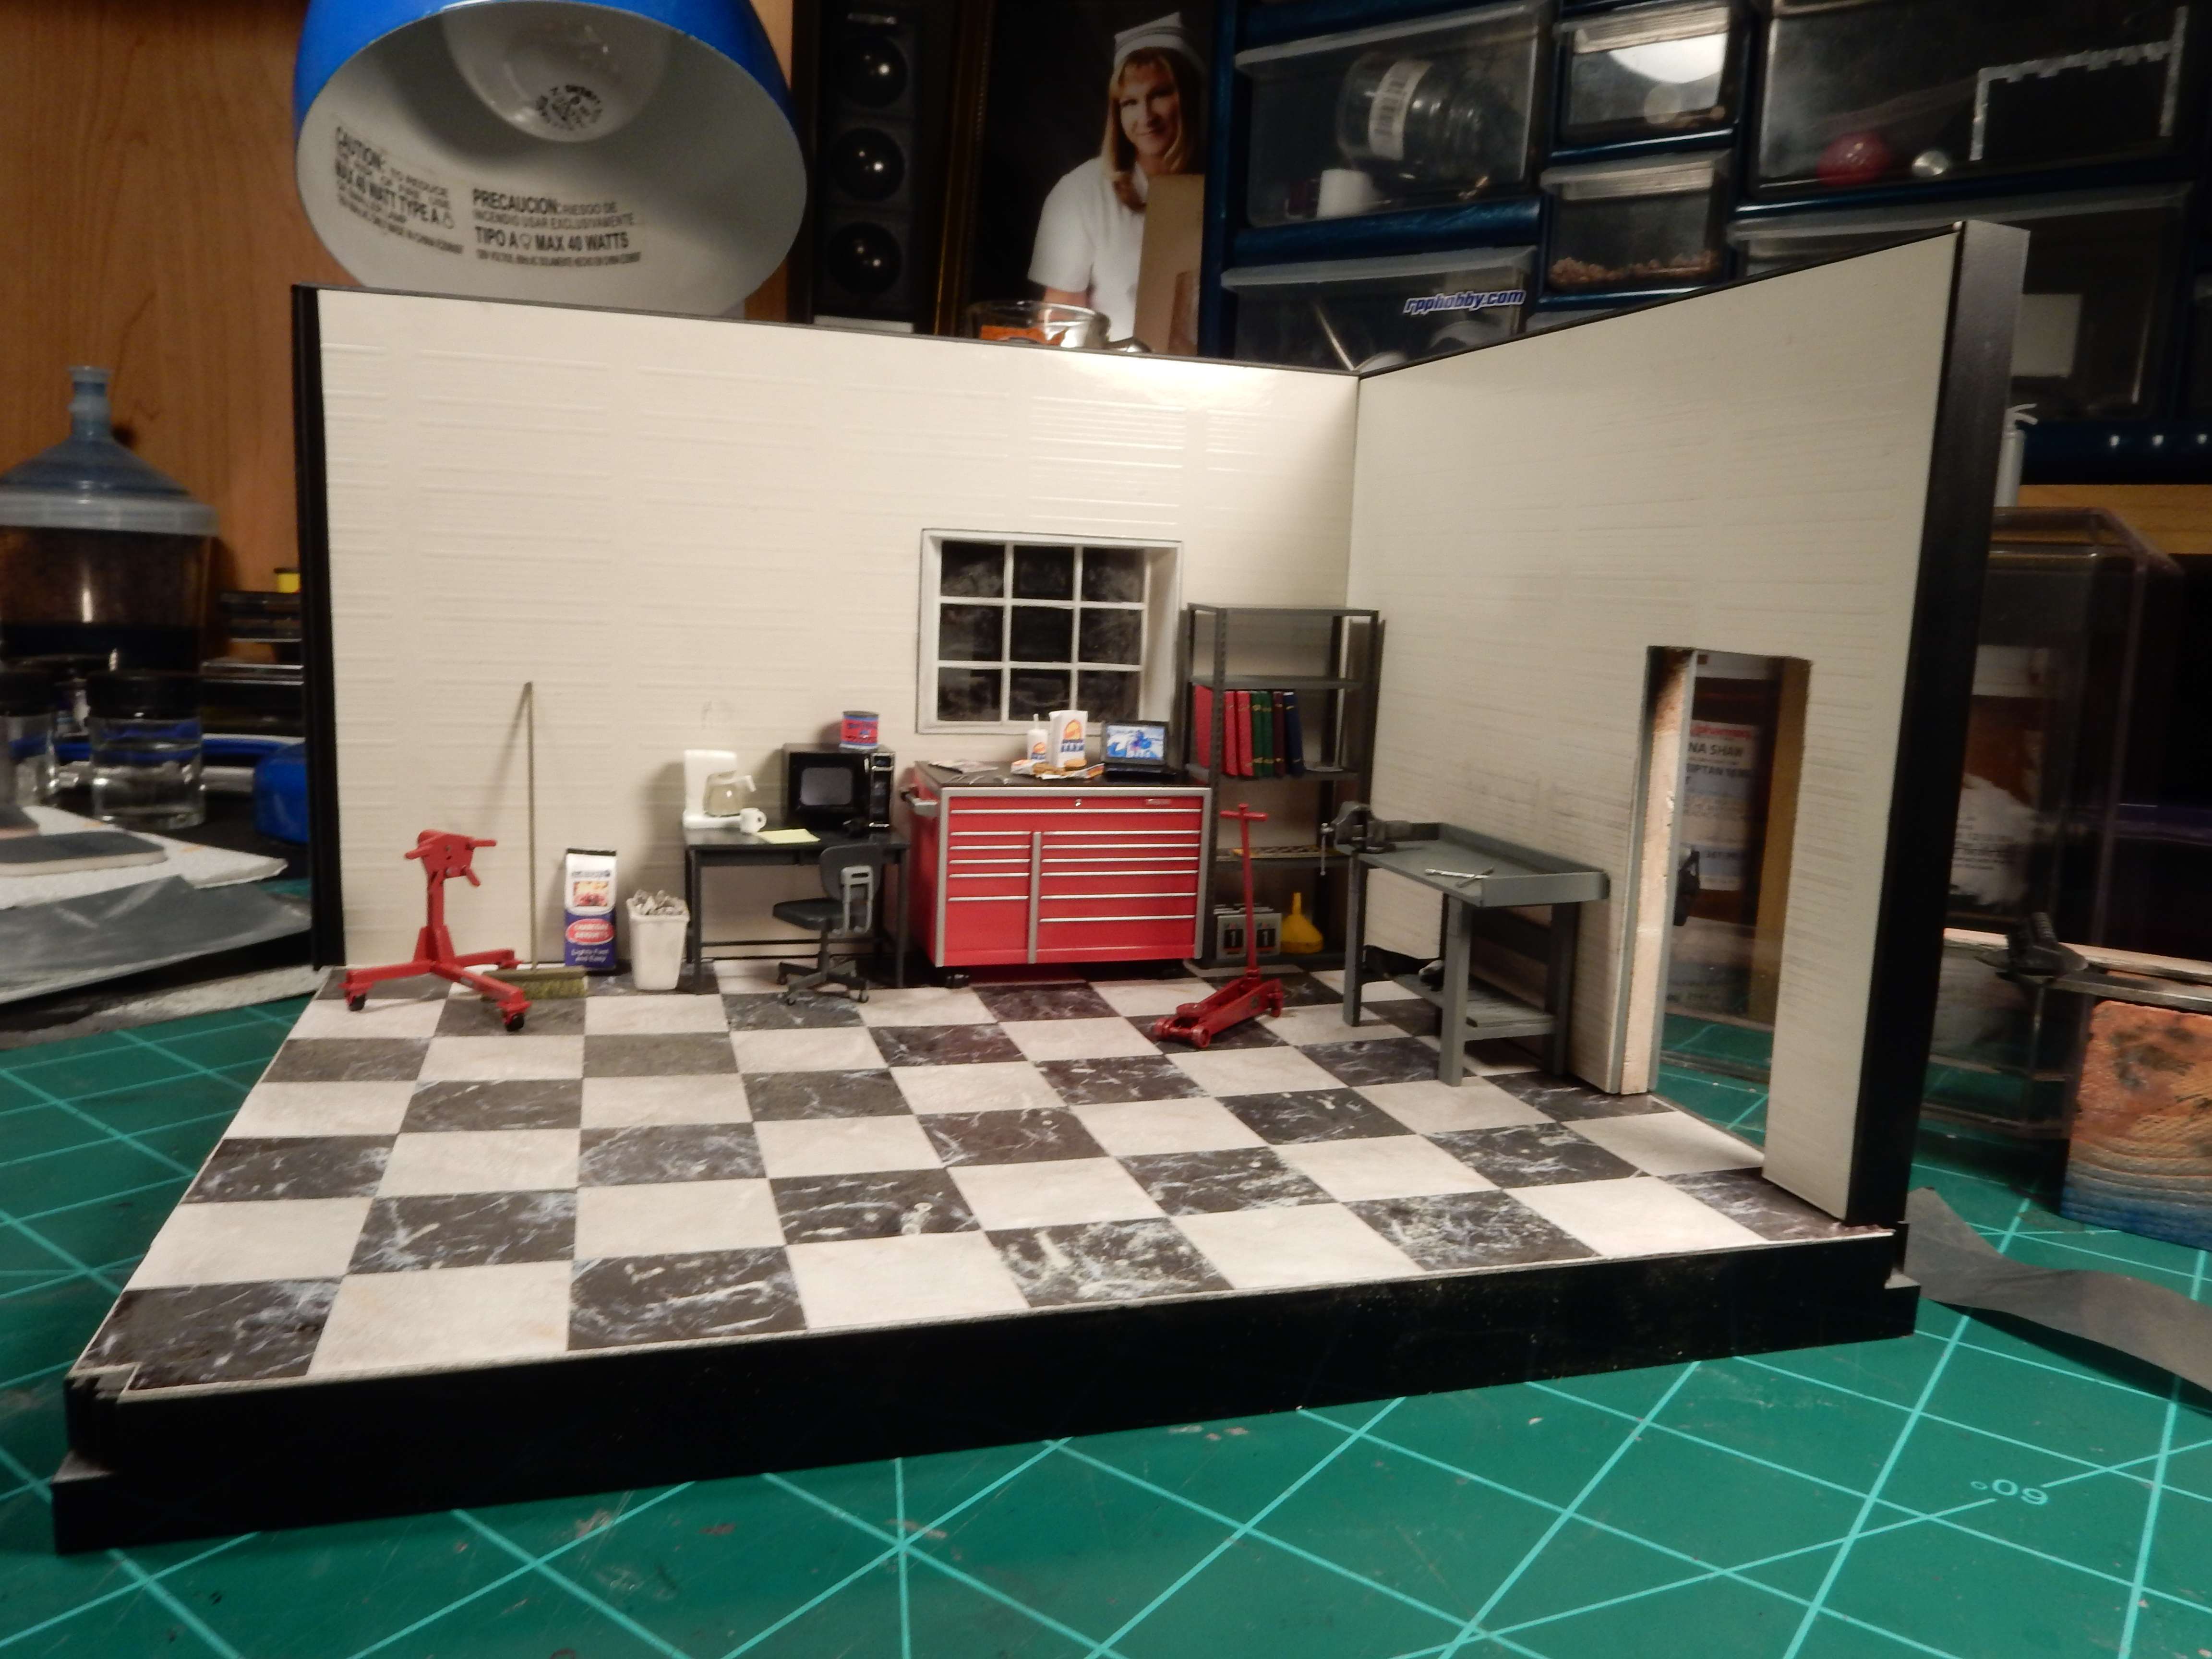
So I sanded the whole floor and put some more "dirt and grime" on the walls:

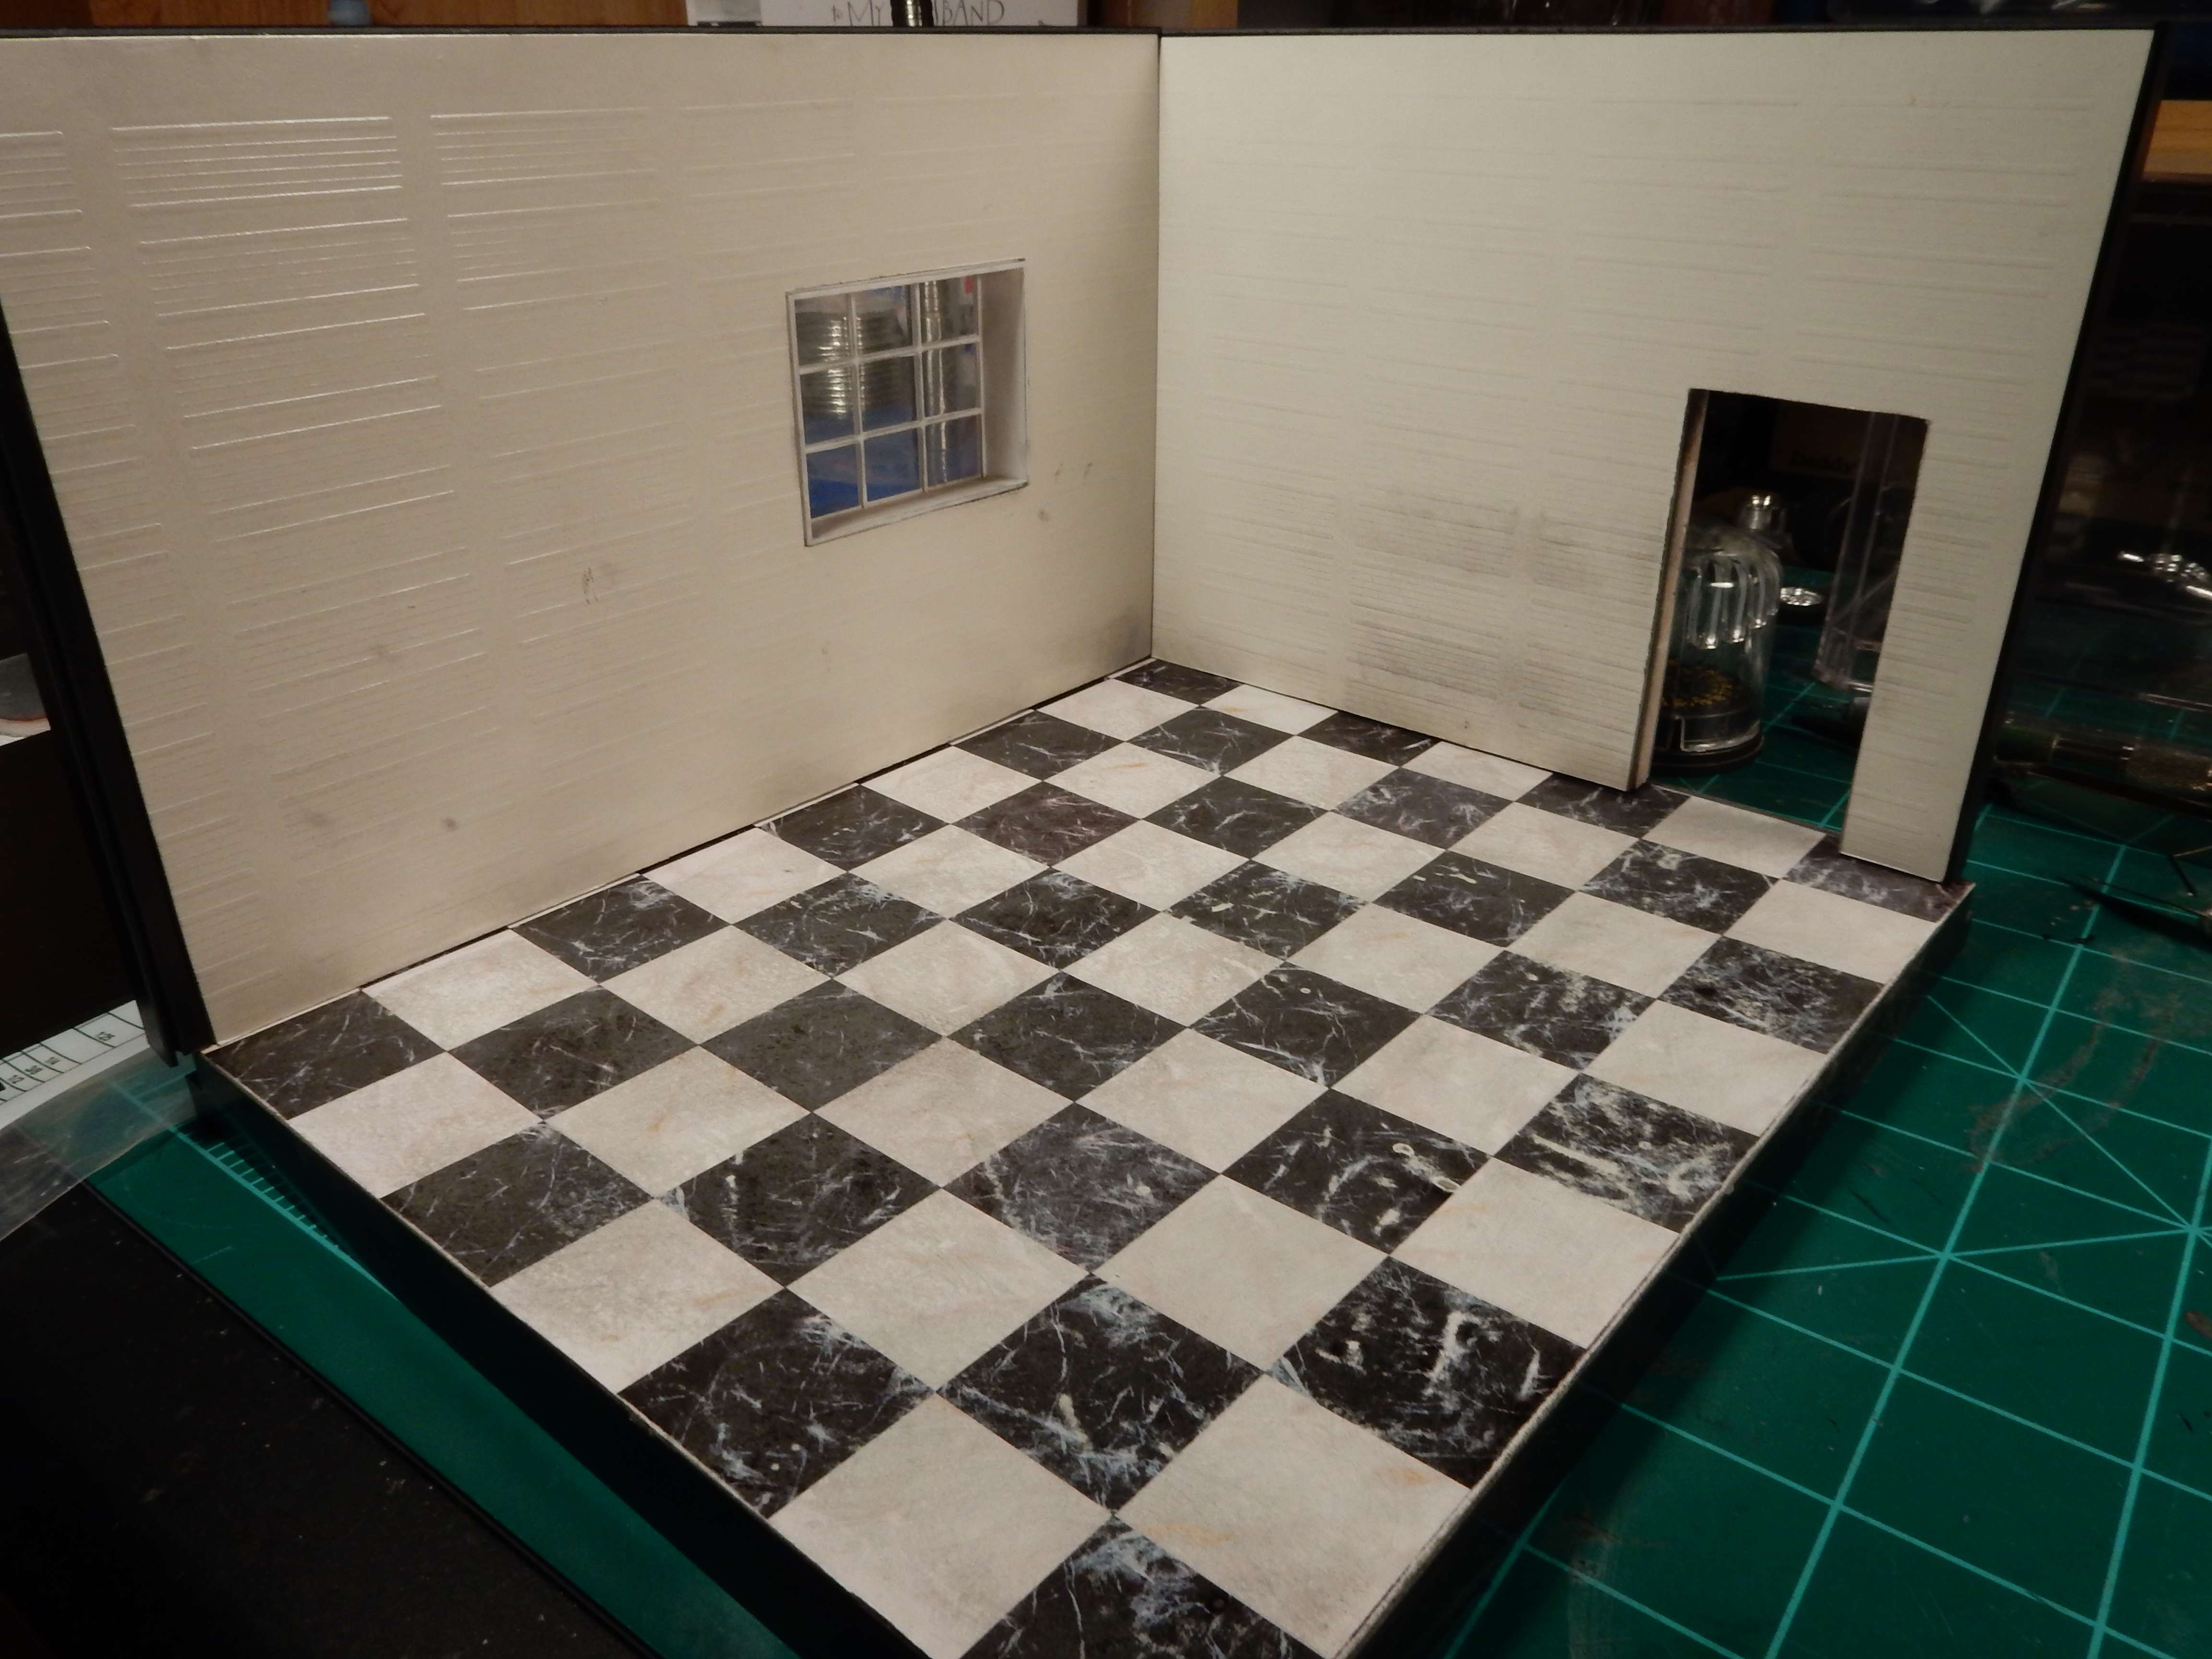
This is also going to be an "inside" display with the only outside reference being seen through the window in the back of the shop so I had to put terminating ends on the sides and tops of the walls. I was at odds on how to accomplish that until this morning. I grabbed some black Evergreen styrene sheets that I had and started measuring, cutting and gluing.
Before:

and after (I'll be installing a door to hide the doorway wall innards):
Work will resume on Sunday when I get back from Houston. Stay tuned.........................................
Re: Joe's Auto Garage-Progress-01/19
Posted: Fri Jan 19, 2018 10:07 pm
by Stikpusher
This is coming together so well!

Re: Joe's Auto Garage-Progress-01/19
Posted: Sun Jan 21, 2018 10:08 am
by Handiabled
Looks great Joe! Here is some dirty floor inspiration for you............ too many projects going at once
(It's a lot cleaner toward the back)
