Page 6 of 16
Re: Trumpeter 1/32 Me262A-1 Yellow 3
Posted: Fri Feb 15, 2019 6:34 am
by Floki
KSaarni wrote:jkim wrote:What a sharp eye you have, Bruce! That blob is actually a bit of Micro Mask on the tail light. The Experten sheet describes the tail as being partially painted over so the mask job on it was purposefully vague. It's actually visible on both sides and they are not symmetric... again, done on purpose. Believe it or not!
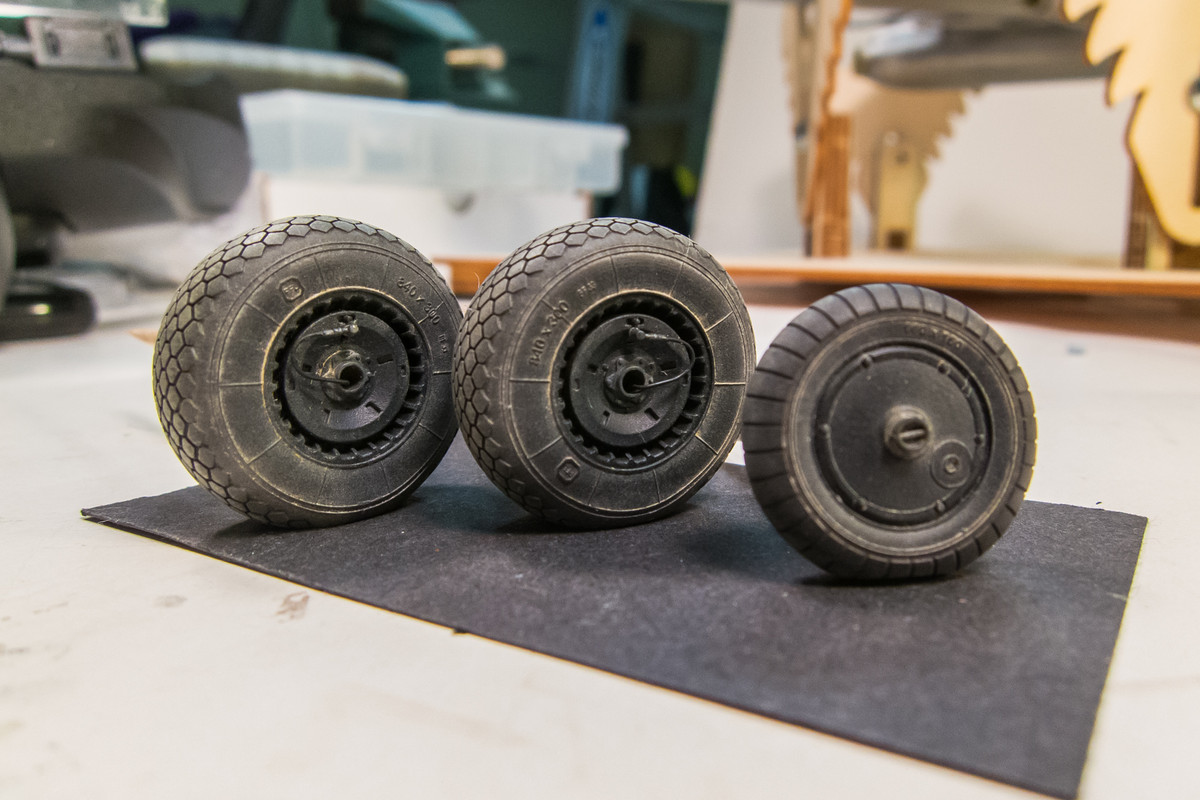
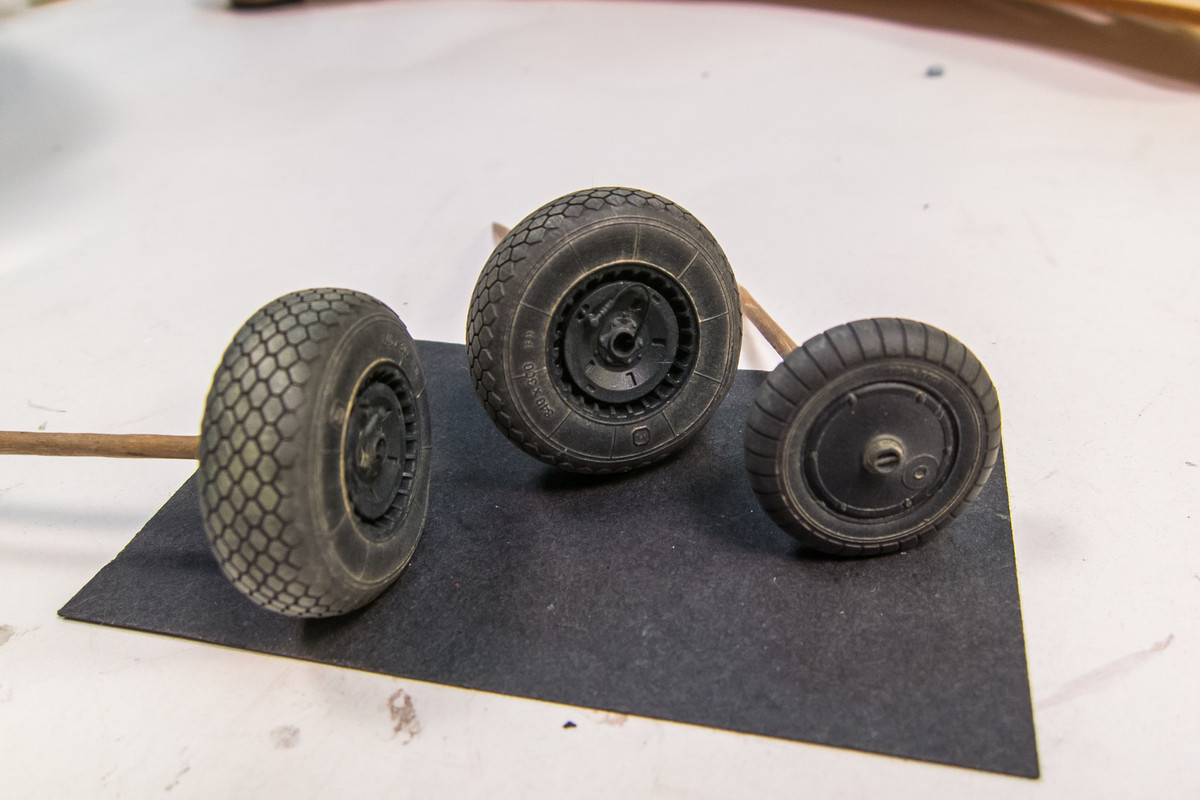
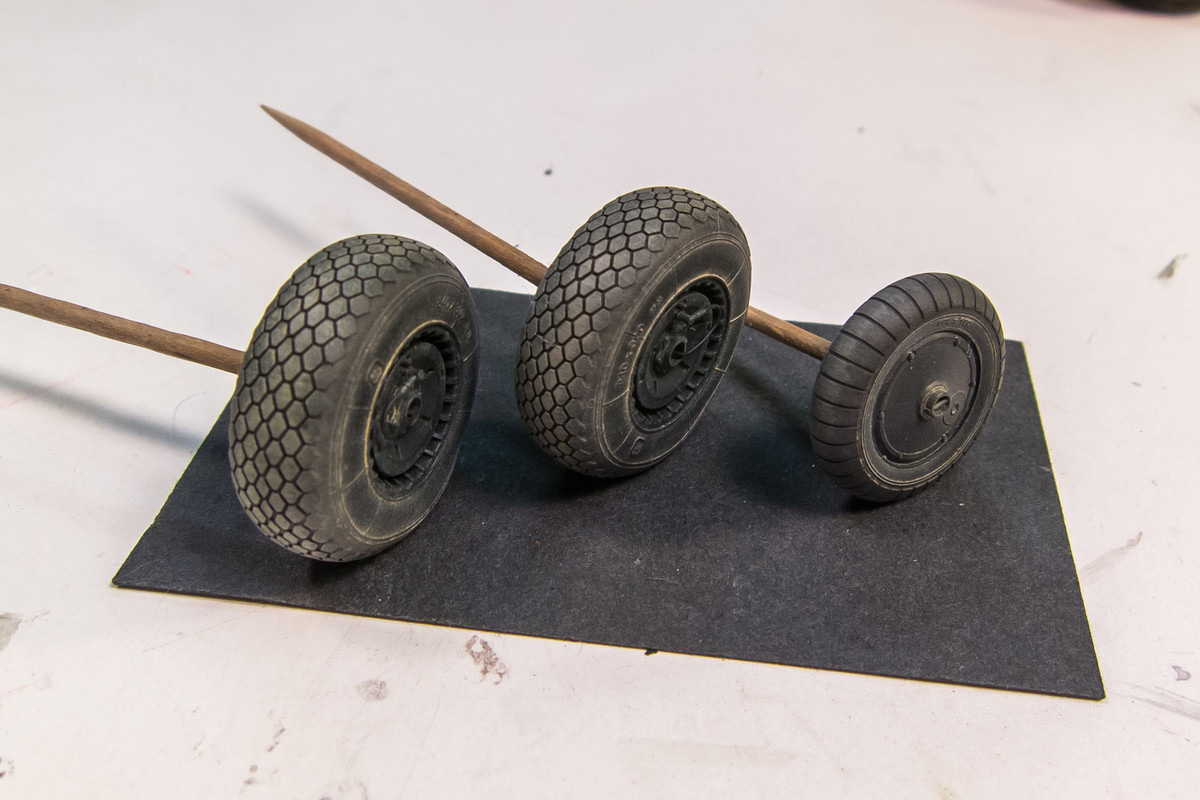
I've added some additional weathering on the tires. Mostly to dirty up the sidewalls. I also had to re-treat the tread grooves with a dark wash. Every time I tried to lighten the tread surfaces with dry pastels, the grooves got that much lighter. In the end, I dry-brushed a lighter dusty grey color and put wash in the grooves one final time.
Even more fantastic John,
and many thanks for your explanation how you did the painting/weathering of the tires!
- Kari
Just beautiful they look just like the real thing.
Re: Trumpeter 1/32 Me262A-1 Yellow 3
Posted: Fri Feb 15, 2019 8:13 am
by LyleW
They look real. Wow.
I hope you don't mind, I've copied the pictures and your "how I did it" and put it in a Word document. I may start trying that with tips since I cannot ever remember to go find them on the web.
Re: Trumpeter 1/32 Me262A-1 Yellow 3
Posted: Fri Feb 15, 2019 11:33 am
by speedgraflex
 I have folders of images, too, because Photobucketgate happened.
Re: Trumpeter 1/32 Me262A-1 Yellow 3
Posted: Fri Feb 15, 2019 11:57 am
by jkim
mostrich wrote:jkim wrote:I need a kick in the pants to start the next stage, which is to establish the puttied/painted seams. I still have not decided HOW I'm going to do this... brush paint? Airbrush?
I'd go with the before mentioned oilpaint approach. Nice opacity and easy to control. Drying time can be an issue, but there are ways to manipulate that.
And I'm never getting tired seeing your tires. Fantastic work, like also on the stabilizer!
Thanks Torben! Another vote for oils eh? No you've got me REALLY thinking. I have worries though... the drying time and also the stability of the oils under hairspray and the acrylic camo paint. Will it stand up to the water soaking and aggressive brushing when I I to hairspray chipping?
speedgraflex wrote:John, Thank you for your explanation. I am truly glad that is not what it looked like. Whew—great. Onward. I was going to ask why not take your spare Jumo engines and try out the putty techniques. Use 'em as mules. You already have used 'em as mules, so why not keep using 'em? Also, I agree with Torben, and I do like the Holbein Duo because it dries fast (minutes) and cleans up with water. However, I just don't know what you are going to use for your camouflage—acrylics? Also I agree with Torben—fantastic work especially on the tires. I believe you just leveled up with your tire techniques, sir! Congratulations.
Thanks Bruce! See above for my primary concern using oils. I could do a test on oils but that would delay the build for at least a few days and I'm eager to move forward especially given the approach of the weekend. Since the putty representation is going to be buried, for the most part, under the camo, I don't want to spend too much time on this. So if I can get an acceptable result using the materials that I have on hand and materials that I have confidence that will stand up to the layers to come, I'm most likely going to do that. I think. Just in case... what would be a good source for those Holbeini Duo oils?
KSaarni wrote:Even more fantastic John,
and many thanks for your explanation how you did the painting/weathering of the tires!
- Kari
Floki wrote:Just beautiful they look just like the real thing.
LyleW wrote:They look real. Wow.
I hope you don't mind, I've copied the pictures and your "how I did it" and put it in a Word document. I may start trying that with tips since I cannot ever remember to go find them on the web.
Thanks for the comments on the tires! Although I was happy with the initial paint work, I wanted to go the extra step and impart some wear on the sides. Almost regretted it. The sidewalls were weathered using a pastel wash of light grey. I established a ring of the grey wash around the hub and let it dry. I then started removing it using a moistened piece of paper towel, pulling it radially outwards. The effect was WAY too strong initially and I thought OOOPS! had to remove almost all of it by using a stiff paint brush moistened with water and cleaning if off every 2-3 strokes. Luckily water-base pastels are removable.
Re: Trumpeter 1/32 Me262A-1 Yellow 3
Posted: Fri Feb 15, 2019 12:41 pm
by speedgraflex
Blick store locally if these are near you. Online at Dickblick. I was literally planning to purchase “Grey of grey” to try out acrylic topcoats, but now I can use darker colors to create exhaust and paint effects.
https://www.dickblick.com/mobile/produc ... uble-oils/
Re: Trumpeter 1/32 Me262A-1 Yellow 3
Posted: Sat Feb 16, 2019 1:14 pm
by mostrich
jkim wrote:
Thanks Torben! Another vote for oils eh? No you've got me REALLY thinking. I have worries though... the drying time and also the stability of the oils under hairspray and the acrylic camo paint. Will it stand up to the water soaking and aggressive brushing when I I to hairspray chipping?
I hear you and those are good points. I made good experiences with Aqua Gloss for sealing oil paints, but that'd be an extra layer that could be avoided.

Re: Trumpeter 1/32 Me262A-1 Yellow 3
Posted: Sat Feb 16, 2019 10:56 pm
by jkim
I took Bruce's advice and used the spare engine nacelle to run a test bed using the painted putty lines on metal as a base for the camo. It didn't turn out well. I am going to have have to approach this in a different way... my idea of using Micromesh (or fine sandpaper) to "wear" away the RLM76 and 83 away from the panel lines to reveal the putty lines didn't work. It simply took off paint all the way to the plastic. I can't guarantee any degree of control using this method. So what to do? If I had a choice, I think I would just do things as I've always done... black mottle preshade on bare plastic but I am already 2-3 layers deep in paint. I've got the silver on, which is necessary for the chipping but not so great for establishing any type of tonal variance in the camo. I'm thinking of doing the putty panels in a darker grey than initially planned and carefully avoiding those areas with the camo paint. I feel like I have to achieve the appearance of wear with the application of the camo paint, NOT as a post-shade exercise.
Re: Trumpeter 1/32 Me262A-1 Yellow 3
Posted: Sat Feb 16, 2019 11:58 pm
by speedgraflex
John, I feel badly about the mule—isn't that ridiculous? Yep. Don't answer that! There was something in what you wrote about doing this the old way that makes sense to me—especially because you are working on top of AS-12 and I'm sorry whatever the metal equivalents are for the nose sections, too. So, you are running into a lot of delicate layers here. At least the tests with the mule show you what does not work. That is a very important part of what you are exploring. One of the reasons I was thinking of the Holbein oils was its ability to "grab onto" the painted surface. You could apply it with a blending stick similar to a makeup stick. I suppose you could also use crushed charcoal? Yeah! You could crush charcoal in a liquid suspension and paint that on with a soft brush. Hit it with your clear coat to harmonize the entire surface... and move forward with your layers. You would only be adding a clear coat to the mix, really. The charcoal putty lines would simply by there as a weathering effect. The other tonal method is one Thomas uses by tinting Future. I have not tried this, but he has used it and it is one reason (I think) his finishes have a unique look to them. Check out his Horten...
Re: Trumpeter 1/32 Me262A-1 Yellow 3
Posted: Sun Feb 17, 2019 1:58 am
by jkim
For reference... some photos of the metalized mule before I put the camo colors on.
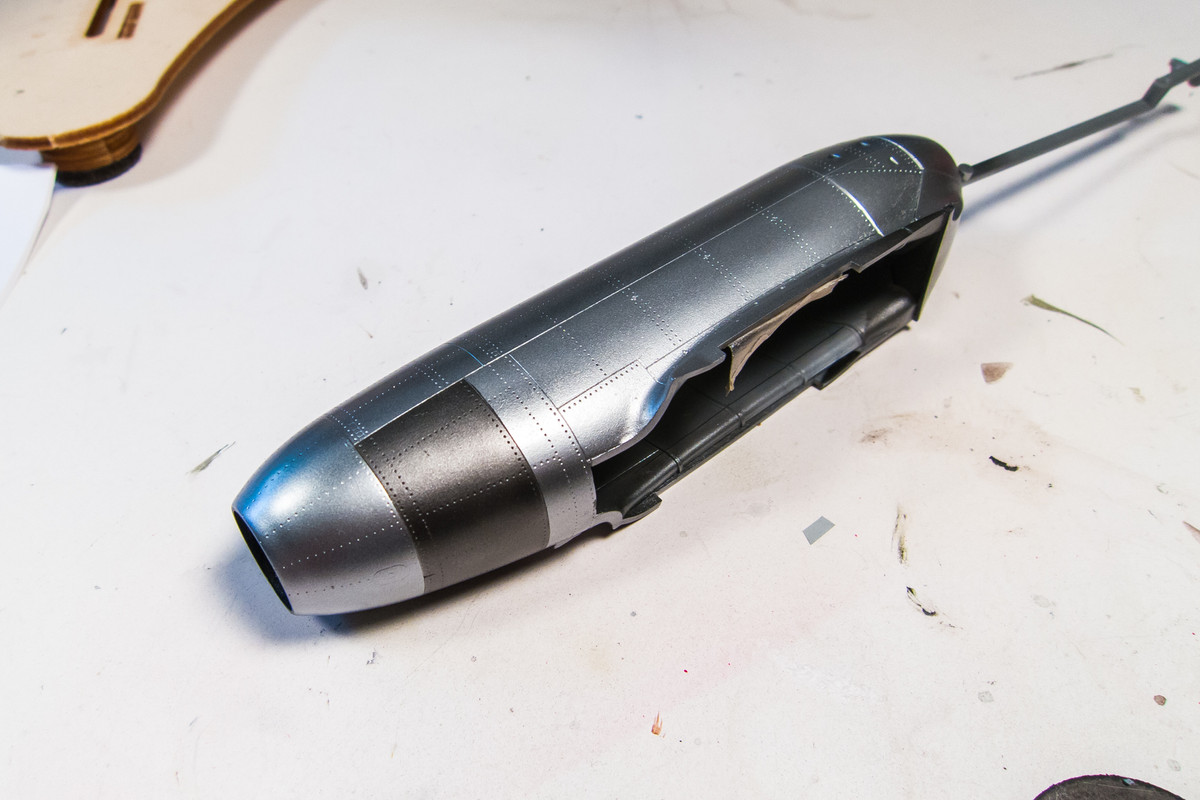
Airbrushed putty lines...
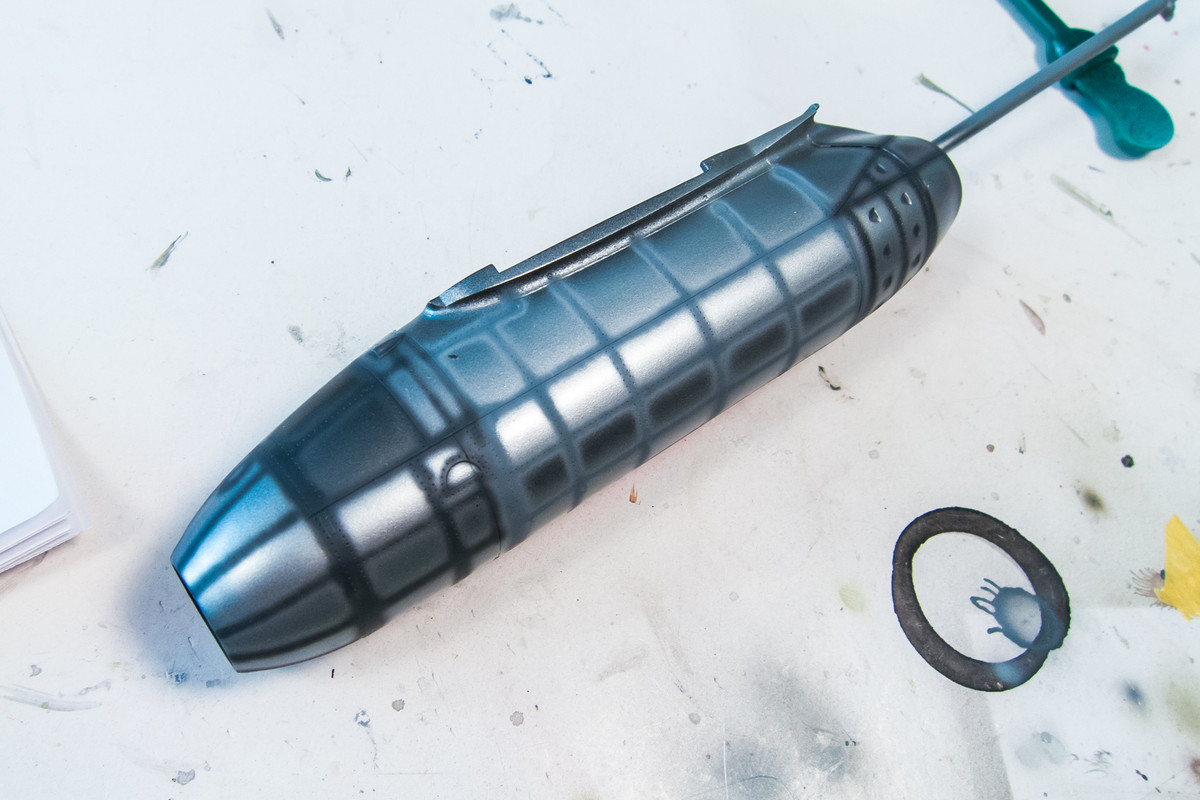
Brush painted putty lines...

I didn't photograph what happened afterwards as I was just going to scrap this approach. But what I've found is... what comprises the putty layer is not critical, whether it is brush painted or airbrushed, oil or acrylic. The thing that is hanging me up is how to reveal what is underneath the camo. It seemed like removal of the camo layer via Micromesh wasn't working. So I was thinking that I could preserve the putty layer by restricting the depth of the camo painting along those seams. Careful painting... not sure if that was do-able without visible grain from the airbrush.
Ya know Bruce... I may have been presumptuous about my efforts on that mule. After reading your last reply, I went back into the modeling room to shut things down for the night and I looked at the mule in disappointment. I had put on some chipping via sponge along the bottom seam just to see what that would look like. It was bad. I took a piece of 3600 grit Micromesh and started rubbing it off. I then started Micromeshing the whole thing, taking off post-shading dark grey that I had tried to salvage things. The results were interesting...
Side where I brush painted the putty lines.

Side where I airbrushed the putty lines.
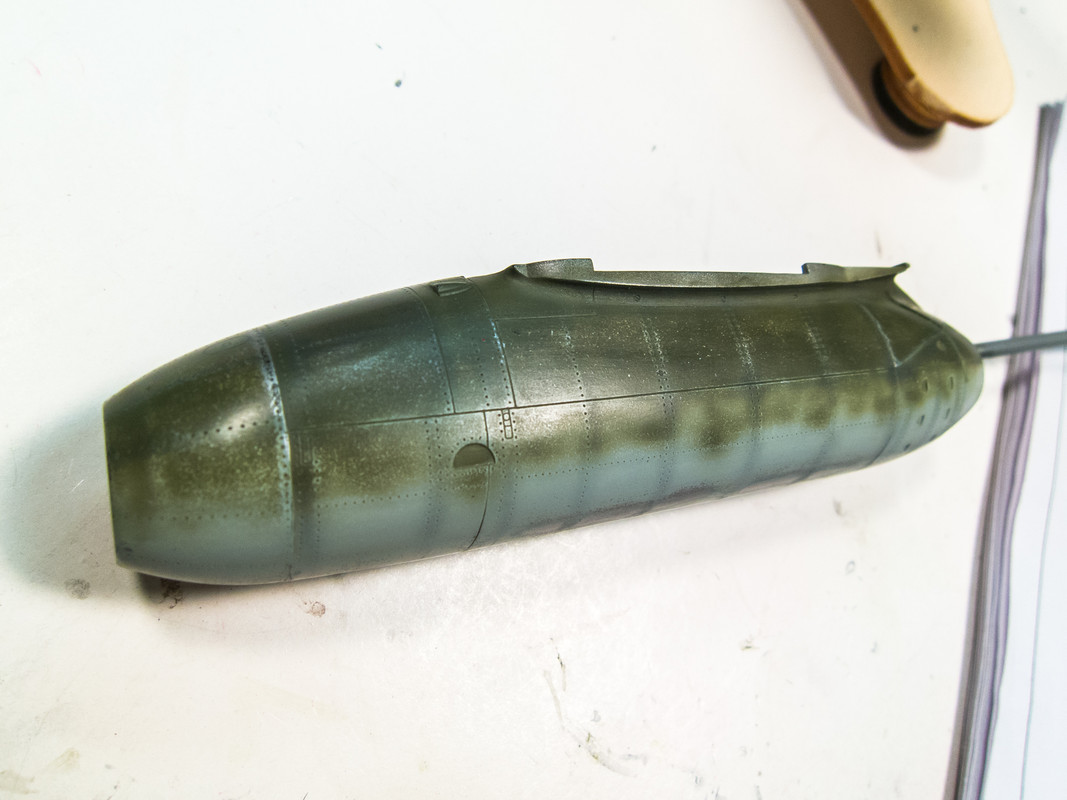
This approach might be workable after all. The key seems to be applying the Micromesh over ALL of the surfaces, not just the panel lines. This spreads paint removal over a larger area and doesn't take as deep a "bite" into the paint as rubbing it in one small area.
Re: Trumpeter 1/32 Me262A-1 Yellow 3
Posted: Sun Feb 17, 2019 3:06 am
by speedgraflex
John—approaches are solid! Keep going!!! Personally your brush painted version really works based on references I have seen, but each approach shows promise!!!!