
Fade away... I'm a Tamiya acrylic user and use salt fading all the time.KennyX wrote:Gracias, Mr. Black Sheep!
Say folks, I have a question. I want to salt fade this beast. Is that doable with Tamiya acrylics?
1:48 Tamiya Corsair
Re: 1:48 Tamiya Corsair
John aka JKim
-----------<><

-----------<><

Re: 1:48 Tamiya Corsair
SA-WEEEET!! I’m gonna do a test on my paint mule today/tomorrow.
Kenny X
Head Mother Trucker In-Charge @ Kenny X’s Reichs Winzigkleines Flugzeugewerks *and now* Airboat Records, too!
Head Mother Trucker In-Charge @ Kenny X’s Reichs Winzigkleines Flugzeugewerks *and now* Airboat Records, too!
-
BlackSheep214

- Elite Member
- Posts: 13604
- Joined: Sun Apr 06, 2014 8:47 pm
Re: 1:48 Tamiya Corsair
I get it that Kenny is inquiring how to get the salty look, but how is it done? Using transparent dust acrylics?
“Who controls the skies, controls the fate of this Earth”
Author unknown- 352nd Fighter Group, Blue-Nosed Bastards of Bodney
“Send one plane it’s a sortie; send two planes it’s a flight; send four planes it’s a test of airpower. - Richard Kohn
Author unknown- 352nd Fighter Group, Blue-Nosed Bastards of Bodney
“Send one plane it’s a sortie; send two planes it’s a flight; send four planes it’s a test of airpower. - Richard Kohn
Re: 1:48 Tamiya Corsair
Hot damn boys, we got insignias!
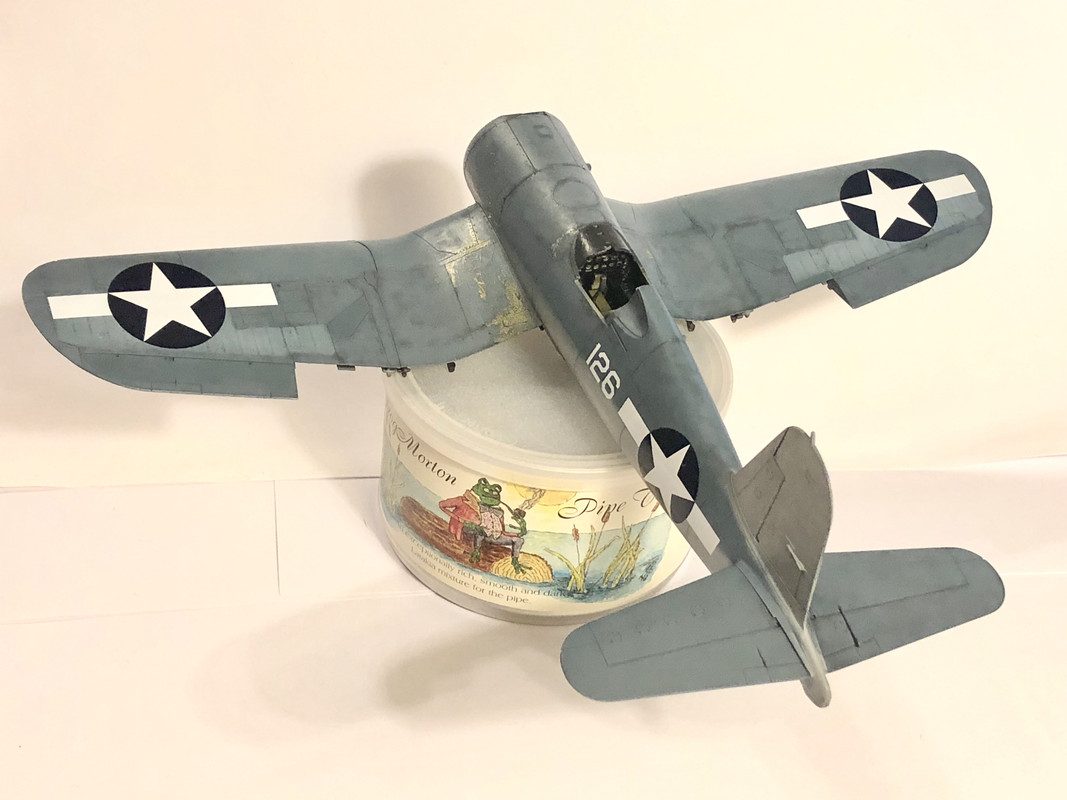
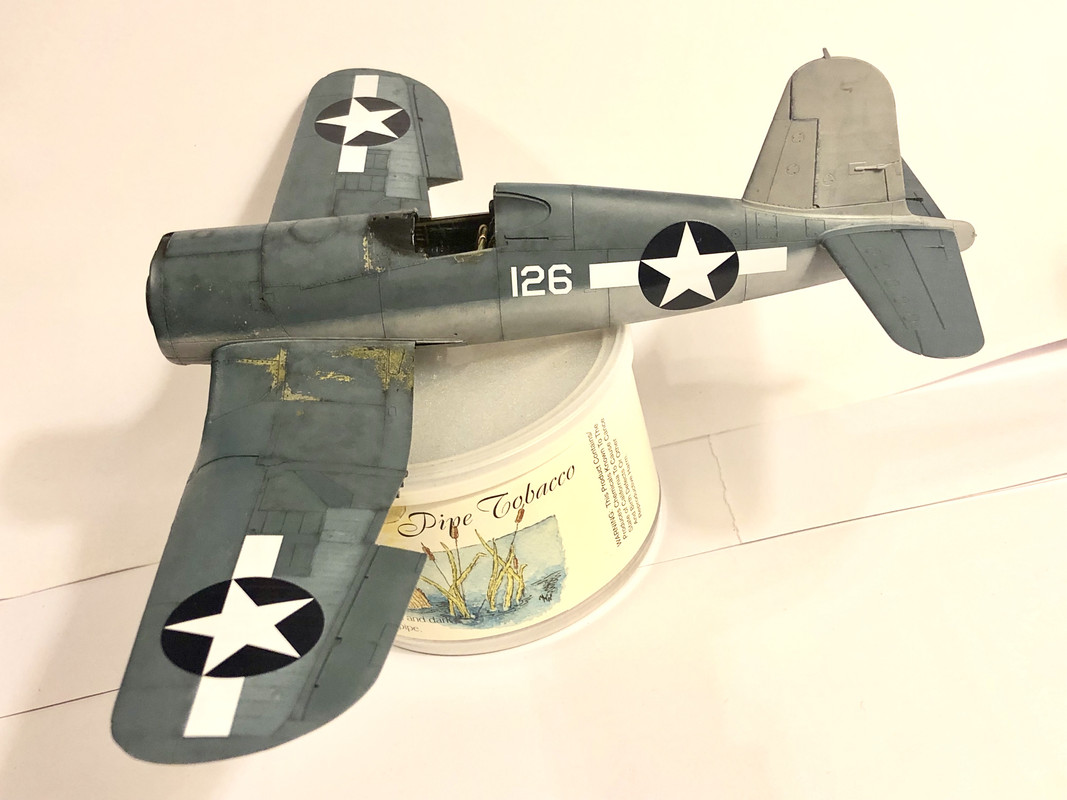
Black sheep, as to the salt fading- you just seal her up, dump salt all over her, and spray some super-thinned gray or brown or whatever color paint at her. That’s the basic process. Gives a neat salt-faded effect of done right. I’m going to run tests on my paint mule first.
Those insignias are comprised of three separate decals. Two bars and a roundel. The bars were field applied later, on the real aircraft. Let me tell you. Putting those on is not the time to let one’s mind drift back to a certain series of mishaps with two German crosses.
I measured and leveled as best I could this time. They came out very well,
I’d say, and the Mrs. approves.
Black sheep, as to the salt fading- you just seal her up, dump salt all over her, and spray some super-thinned gray or brown or whatever color paint at her. That’s the basic process. Gives a neat salt-faded effect of done right. I’m going to run tests on my paint mule first.
Those insignias are comprised of three separate decals. Two bars and a roundel. The bars were field applied later, on the real aircraft. Let me tell you. Putting those on is not the time to let one’s mind drift back to a certain series of mishaps with two German crosses.
I measured and leveled as best I could this time. They came out very well,
I’d say, and the Mrs. approves.
Kenny X
Head Mother Trucker In-Charge @ Kenny X’s Reichs Winzigkleines Flugzeugewerks *and now* Airboat Records, too!
Head Mother Trucker In-Charge @ Kenny X’s Reichs Winzigkleines Flugzeugewerks *and now* Airboat Records, too!
Re: 1:48 Tamiya Corsair
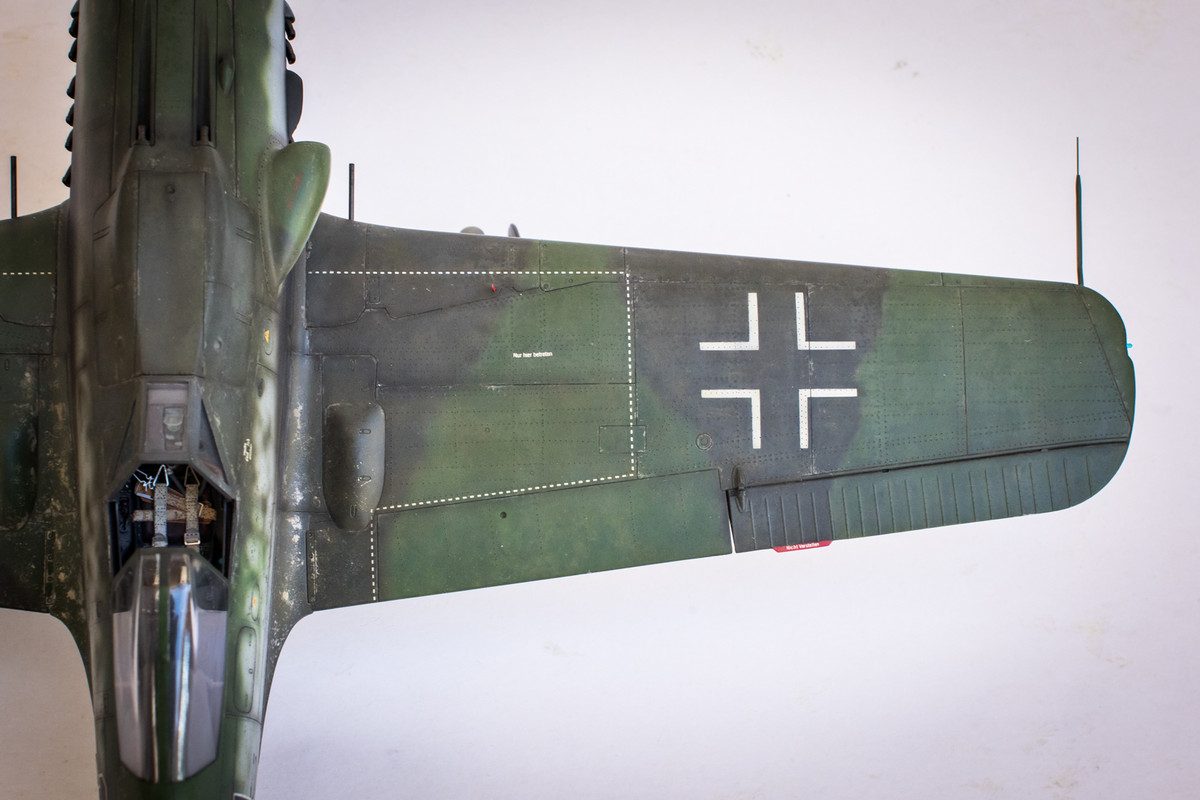
Salt fading is a technique to add wear/fade to a surface. It's most commonly used as a chipping technique using salt crystals to form an irregular mask but it can be used to impart wear. You can refer to my Black 1 build to see one way of using salt to add wear to the upper surfaces of a Fw190D-9 model...BlackSheep214 wrote:I get it that Kenny is inquiring how to get the salty look, but how is it done? Using transparent dust acrylics?
http://www.spamodeler.com/forum/viewtop ... &start=500
I really like salt fading as way of adding another layer of tonal variation to the finish.
John aka JKim
-----------<><
-----------<><
-
BlackSheep214
- Elite Member
- Posts: 13604
- Joined: Sun Apr 06, 2014 8:47 pm
Re: 1:48 Tamiya Corsair
Now I understand. I had forgotten you have done it on the Black 1. I'm gonna need to bookmark that thread link for future references.
“Who controls the skies, controls the fate of this Earth”
Author unknown- 352nd Fighter Group, Blue-Nosed Bastards of Bodney
“Send one plane it’s a sortie; send two planes it’s a flight; send four planes it’s a test of airpower. - Richard Kohn
Author unknown- 352nd Fighter Group, Blue-Nosed Bastards of Bodney
“Send one plane it’s a sortie; send two planes it’s a flight; send four planes it’s a test of airpower. - Richard Kohn
Re: 1:48 Tamiya Corsair
Thank you John! I’ll be experimenting with this on my paint mule tomorrow/Saturday. I’m looking forward to seeing how that goes!
I got some more decal work done tonight. Just a few. Taking it slow. Here are some shots.
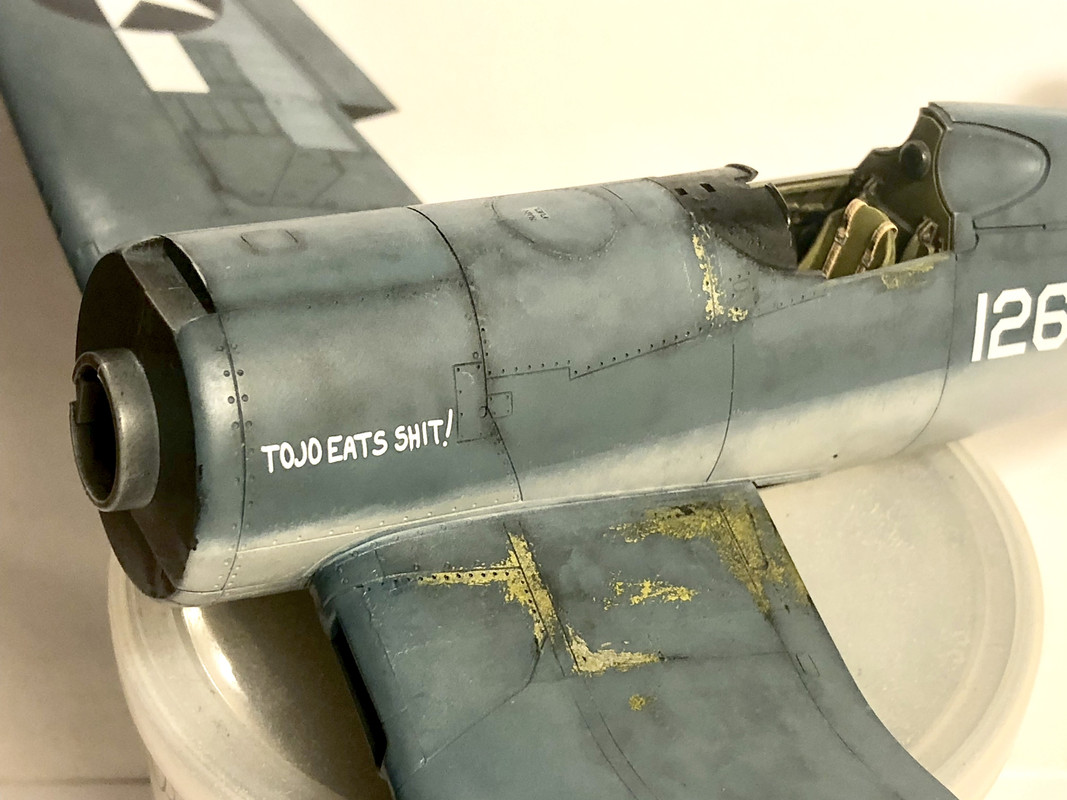
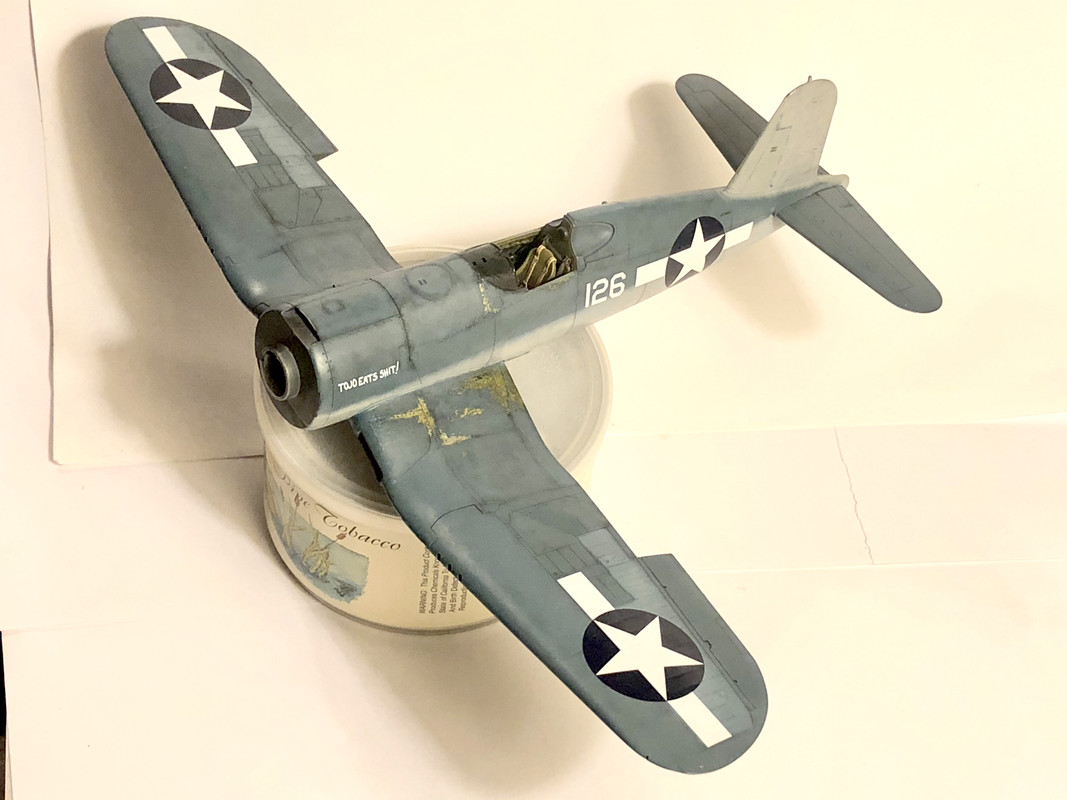
I do my best to measure and mark out positioning with Tamiya tape beforehand. Then I put the decal down, adjust, check with my level, and once I’m satisfied, I remove the Tamiya tape guides and then-off my scrutinizing eye. They’ve come out well. More tomorrow, then another Clear coat. And meanwhile, I’ll be testing salt fading out on the mule. Will post results.
I got some more decal work done tonight. Just a few. Taking it slow. Here are some shots.
I do my best to measure and mark out positioning with Tamiya tape beforehand. Then I put the decal down, adjust, check with my level, and once I’m satisfied, I remove the Tamiya tape guides and then-off my scrutinizing eye. They’ve come out well. More tomorrow, then another Clear coat. And meanwhile, I’ll be testing salt fading out on the mule. Will post results.
Kenny X
Head Mother Trucker In-Charge @ Kenny X’s Reichs Winzigkleines Flugzeugewerks *and now* Airboat Records, too!
Head Mother Trucker In-Charge @ Kenny X’s Reichs Winzigkleines Flugzeugewerks *and now* Airboat Records, too!
Re: 1:48 Tamiya Corsair
Exquisite! I love how the colors turned out. It just looks... right!
John aka JKim
-----------<><
-----------<><
Re: 1:48 Tamiya Corsair
I am cursed.
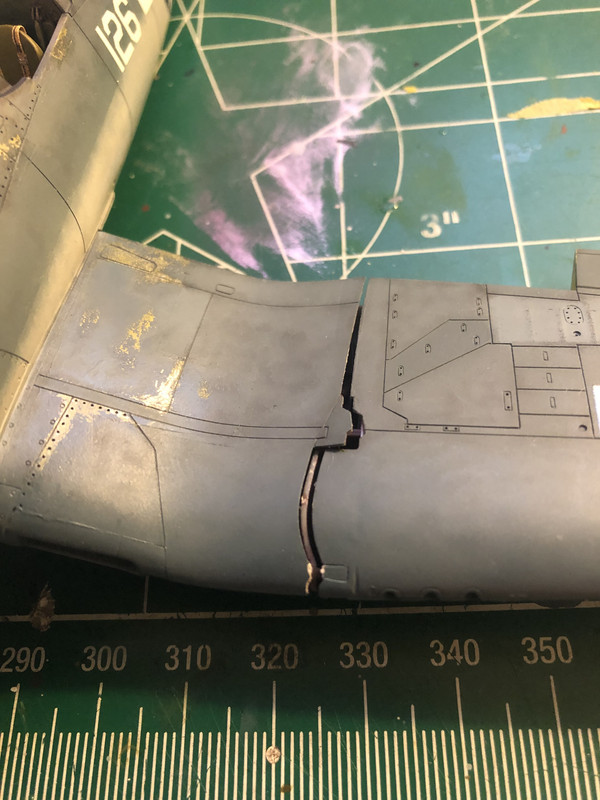
I was preparing to set the aircraft down after installing the cowling/engine, and *drop*.
The wings break down you know. To let you build them up or down. The pieces inside, one of them twisted when it got dropped. I could not push it back into place and have it sit correctly. I tried several times. It wasn’t going to work no kind of way that I could think of.
I went in and cut that piece out. I couldn’t just glue it back as it is though, there’s not enough material to hold.
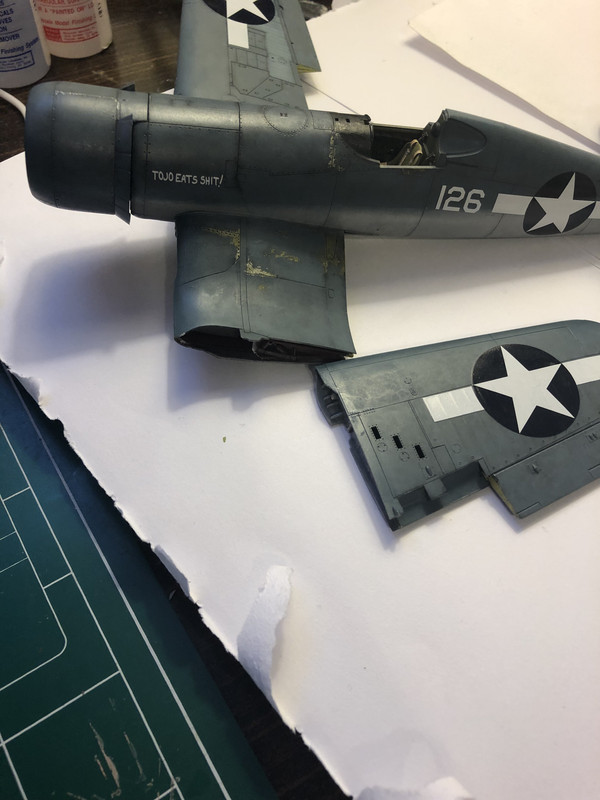
I have more of those parts that go inside the wing join. Maybe I could get those out somehow and install new ones? I’m not sure.
So, I guess it’s back to The Shelf Of Doom for my 3rd. Corsair, while I try to figure out what to do fix it.
I was preparing to set the aircraft down after installing the cowling/engine, and *drop*.
The wings break down you know. To let you build them up or down. The pieces inside, one of them twisted when it got dropped. I could not push it back into place and have it sit correctly. I tried several times. It wasn’t going to work no kind of way that I could think of.
I went in and cut that piece out. I couldn’t just glue it back as it is though, there’s not enough material to hold.
I have more of those parts that go inside the wing join. Maybe I could get those out somehow and install new ones? I’m not sure.
So, I guess it’s back to The Shelf Of Doom for my 3rd. Corsair, while I try to figure out what to do fix it.
Kenny X
Head Mother Trucker In-Charge @ Kenny X’s Reichs Winzigkleines Flugzeugewerks *and now* Airboat Records, too!
Head Mother Trucker In-Charge @ Kenny X’s Reichs Winzigkleines Flugzeugewerks *and now* Airboat Records, too!
-
kahunaminor
- Advanced Member
- Posts: 375
- Joined: Thu Jul 07, 2016 4:53 am
Re: 1:48 Tamiya Corsair
Don’t shelf it Kenny, it is such a great build.
If putting replacement parts in does not work, this might be worth a try. Take some small pieces of plasticard, sanded down sprue to a flat side or similar and attach them to the inside of the wing cavity as support pieces. A couple along the upper and lower should suffice. Let them set up then attach the wing outer using Tamiya Extra Thin or similar. Once in position, let it set up for a few hours. The additional plastic will create a stronger bond than just the edges alone. Done with care you will never know there was an issue.
A fix well within your skill set and it should get you back on track with minimal delay.
Regards,
If putting replacement parts in does not work, this might be worth a try. Take some small pieces of plasticard, sanded down sprue to a flat side or similar and attach them to the inside of the wing cavity as support pieces. A couple along the upper and lower should suffice. Let them set up then attach the wing outer using Tamiya Extra Thin or similar. Once in position, let it set up for a few hours. The additional plastic will create a stronger bond than just the edges alone. Done with care you will never know there was an issue.
A fix well within your skill set and it should get you back on track with minimal delay.
Regards,
Kent in Oz