Page 57 of 70
Re: Pacific Coast Models 1/32 Fw 190A-1. Black 13. Belgium,
Posted: Mon Apr 08, 2019 4:28 am
by Stuart
I look at the work going on here on SPAM - then I look at the pile of plastic on my own bench... Ah...
Great to see this progressing Bruce!
Re: Pacific Coast Models 1/32 Fw 190A-1. Black 13. Belgium,
Posted: Mon Apr 08, 2019 12:50 pm
by speedgraflex
portman wrote:I look at the work going on here on SPAM - then I look at the pile of plastic on my own bench... Ah...
Great to see this progressing Bruce!
I recognize this line of thinking. I get this way, too or rather I let myself get this way by comparing myself to others. The reality is we are all modelers. I wrote this one fella Ralph with no idea who he is... and he is just a really great guy who happens to be a master model builder as well. Truly. A master. What Ralph has in common with our masters here is his willingness to answer questions and even more important to call what we do an “adventure,” and I write that to you because you are very much an adventurer, Stuart. I follow you where you lead because of who you are. By following your builds, I became a little better at brush painting and much more aware of what types of paints and brushes to use. In 2015 I thought the sun rose and set on the Testors military paint sets because Testors was all I knew. You, Carlos and others here widened my gaze—and my collection of enamel pots has grown! Cheers, mate.
Re: Pacific Coast Models 1/32 Fw 190A-1. Black 13. Belgium,
Posted: Mon Apr 08, 2019 1:11 pm
by mustang1989
jkim wrote:Moving along is good! Those engine pieces look really simple... why not glue them onto the engine and paint them in place? Saves you a step and you'll get a better glue joint.
And before you drill a hole from behind the engine, do a test with the magnets at that spacing. I think it's much too far. I would be thinking of mounting the magnet where the eraser gob is at... right at the end of the prop shaft. Perfect place for it, no? Does the A-1 have a cannon firing through the spinner?
In the years that I've researched and built these radial beauties, this is something I've never heard of on a 190A series. Does that exist on these? Just curious is all.
John's got a good point about gluing them bad boys in place and painting them afterwards. Looking forward to more Bruce.
Re: Pacific Coast Models 1/32 Fw 190A-1. Black 13. Belgium,
Posted: Mon Apr 08, 2019 2:02 pm
by Stikpusher
No propeller hub guns on any 190A. I can think of any radial engined Aircraft with that feature. Only inline engine types come to mind.
Re: Pacific Coast Models 1/32 Fw 190A-1. Black 13. Belgium,
Posted: Mon Apr 08, 2019 2:13 pm
by jkim
If the magnet has a similar diameter to the prop shaft, it might be a good location for it.
Re: Pacific Coast Models 1/32 Fw 190A-1. Black 13. Belgium,
Posted: Mon Apr 08, 2019 3:33 pm
by speedgraflex
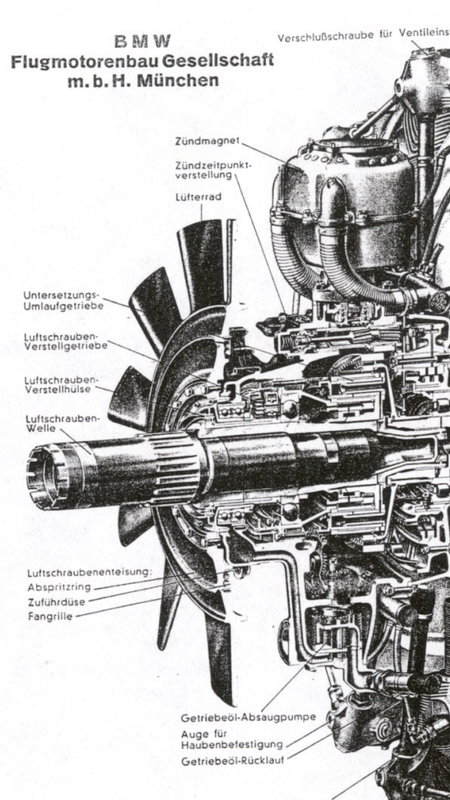
Hullo Zündmagnet!
Thank you, Joe and John—I was following a kit instruction to paint those four pieces in gray and not black—what you advise makes more sense. I am going to glue 3/4 pieces on the engine plug. Piece 4, the zündmagnet or magneto is gonna receive a little detailing love. I believe it will be the most visible piece behind the fan, so at the very least I am going to remove the thick band of the kit part and wrap a wire around the center. I think though that I can add the cabling for the dual spark plugs leaving the sides (at least this is visible on the 801-A, the A-1 was fitted with the 801-C and night not even be a Bosch part, hmm). This will not be a new and shiny bare metal part although it is tempting to suggest repairs—I intend to embrace atmospheric dirt being blown all around the zündmagnet.
Technical illustration
Re: Pacific Coast Models 1/32 Fw 190A-1. Black 13. Belgium,
Posted: Mon Apr 08, 2019 3:34 pm
by speedgraflex
Stikpusher wrote:No propeller hub guns on any 190A. I can think of any radial engined Aircraft with that feature. Only inline engine types come to mind.
You, sir, are an Ace. You truly are. Cheers!
Re: Pacific Coast Models 1/32 Fw 190A-1. Black 13. Belgium,
Posted: Mon Apr 08, 2019 7:33 pm
by Floki
speedgraflex wrote:portman wrote:I look at the work going on here on SPAM - then I look at the pile of plastic on my own bench... Ah...
Great to see this progressing Bruce!
I recognize this line of thinking. I get this way, too or rather I let myself get this way by comparing myself to others. The reality is we are all modelers. I wrote this one fella Ralph with no idea who he is... and he is just a really great guy who happens to be a master model builder as well. Truly. A master. What Ralph has in common with our masters here is his willingness to answer questions and even more important to call what we do an “adventure,” and I write that to you because you are very much an adventurer, Stuart. I follow you where you lead because of who you are. By following your builds, I became a little better at brush painting and much more aware of what types of paints and brushes to use. In 2015 I thought the sun rose and set on the Testors military paint sets because Testors was all I knew. You, Carlos and others here widened my gaze—and my collection of enamel pots has grown! Cheers, mate.
I've been on several sites that have excellent builders but unlike here they was closed lip and wouldn't answer any questions or was just uppity with their answer. Here we have great builders and great people, I've learned more on this site in my short time here than I ever had elsewhere. Thank you all.
Re: Pacific Coast Models 1/32 Fw 190A-1. Black 13. Belgium,
Posted: Mon Apr 08, 2019 10:06 pm
by speedgraflex
I feel the same way, Clint. You expressed the idea perfectly and far more succinctly than I could. I don’t understand why a technique has to be a mystery. The simple fact is if someone else used a technique that I used I would be really happy and supportive, but that’s why I’m here. I want us all to succeed in our pursuits. Anything I can do to help is the juice for me to keep plugging away at my own work. Cheers.
Re: Pacific Coast Models 1/32 Fw 190A-1. Black 13. Belgium,
Posted: Tue Apr 09, 2019 1:11 am
by speedgraflex
Interesting. I wrapped .020” Evergreen Rod around the Part after sanding off the detail. I think it looks a lot better. Thoughts?

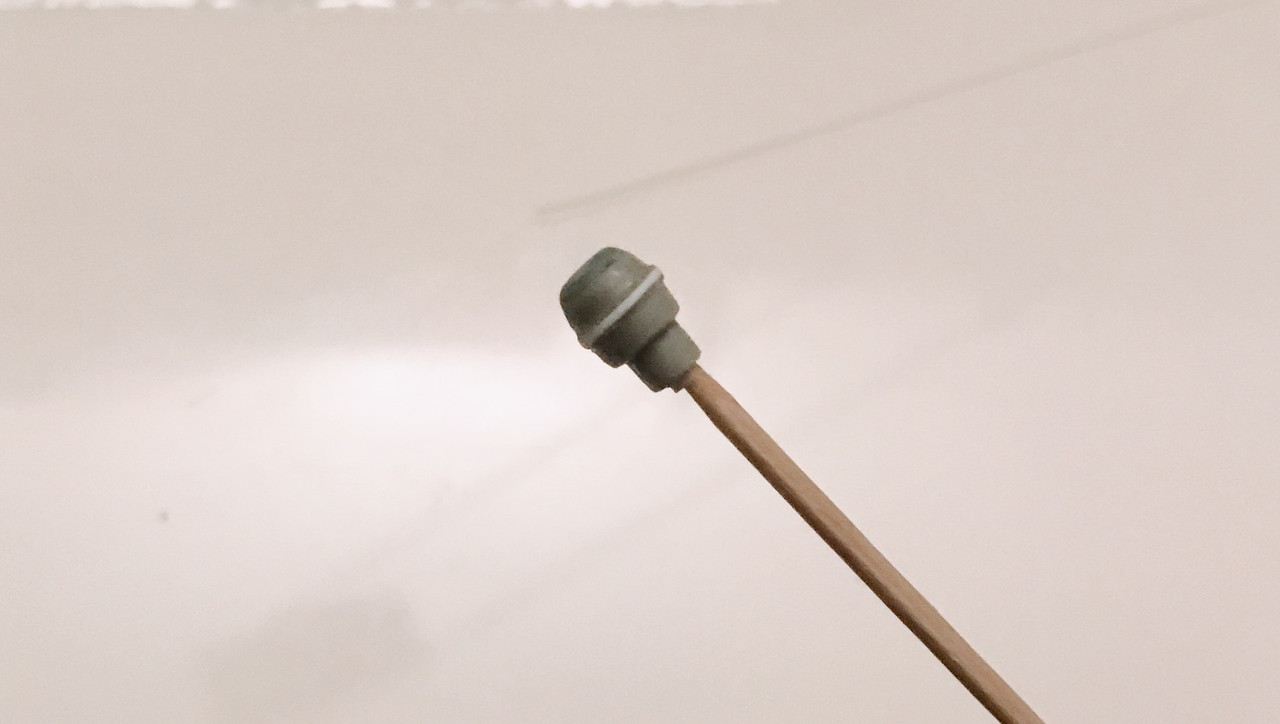
I am not sure this entirely works. It reminds me of a mechanical pencil eraser. Well, time to sleep.