1/32 Revell Me262B-1/U1 Nachtjager

Post your work in progress of your aircraft builds in here.
Post Reply
User avatar
jkim
Elite Member
Posts: 4073
Joined: Mon Apr 10, 2017 4:03 pm

Re: 1/32 Revell Me262B-1/U1 Nachtjager

Post by jkim »

Thanks guys! Lots of the little details that I've been adding is due to comments I am getting over at LSP. Some of it I can do but others... out of my league (and also not my list of important things to do).

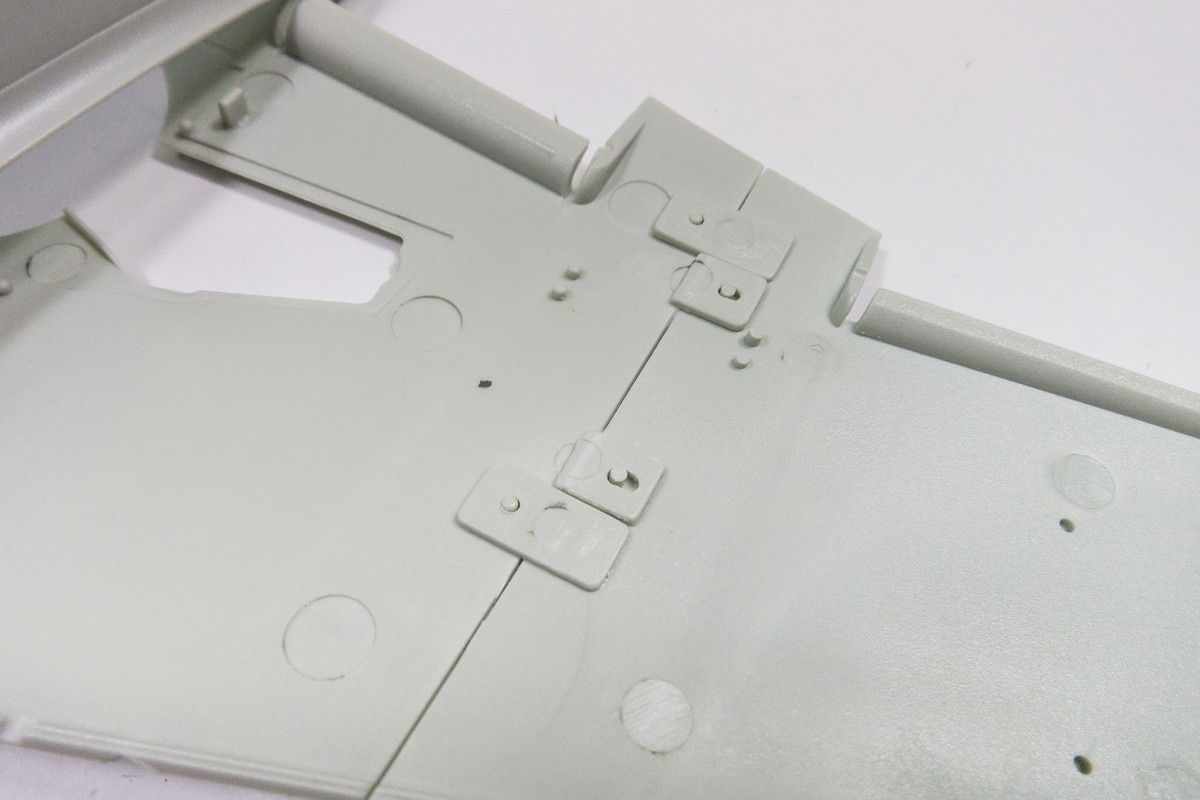
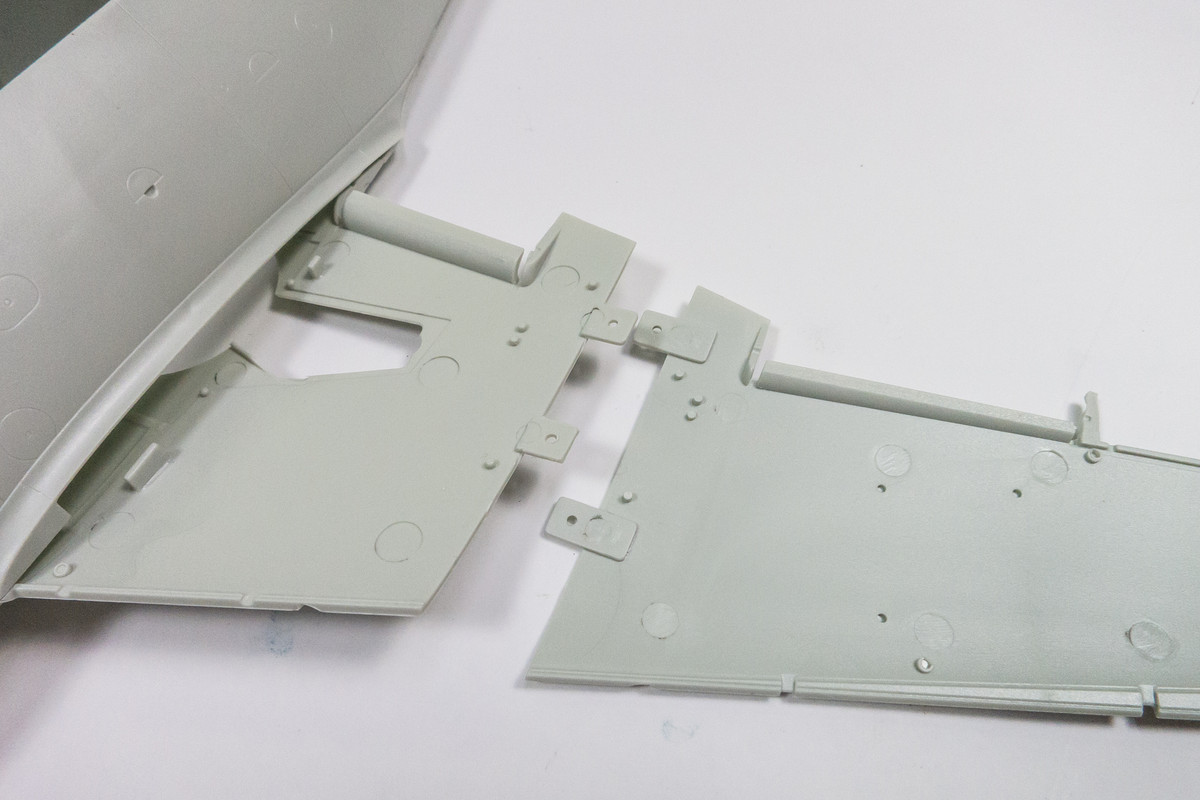
Lots to share in this update. I expanded my preliminary dry-fitting to the wings. The outer wing bottoms attach in a strange arrangement of tabs and pins.
Image

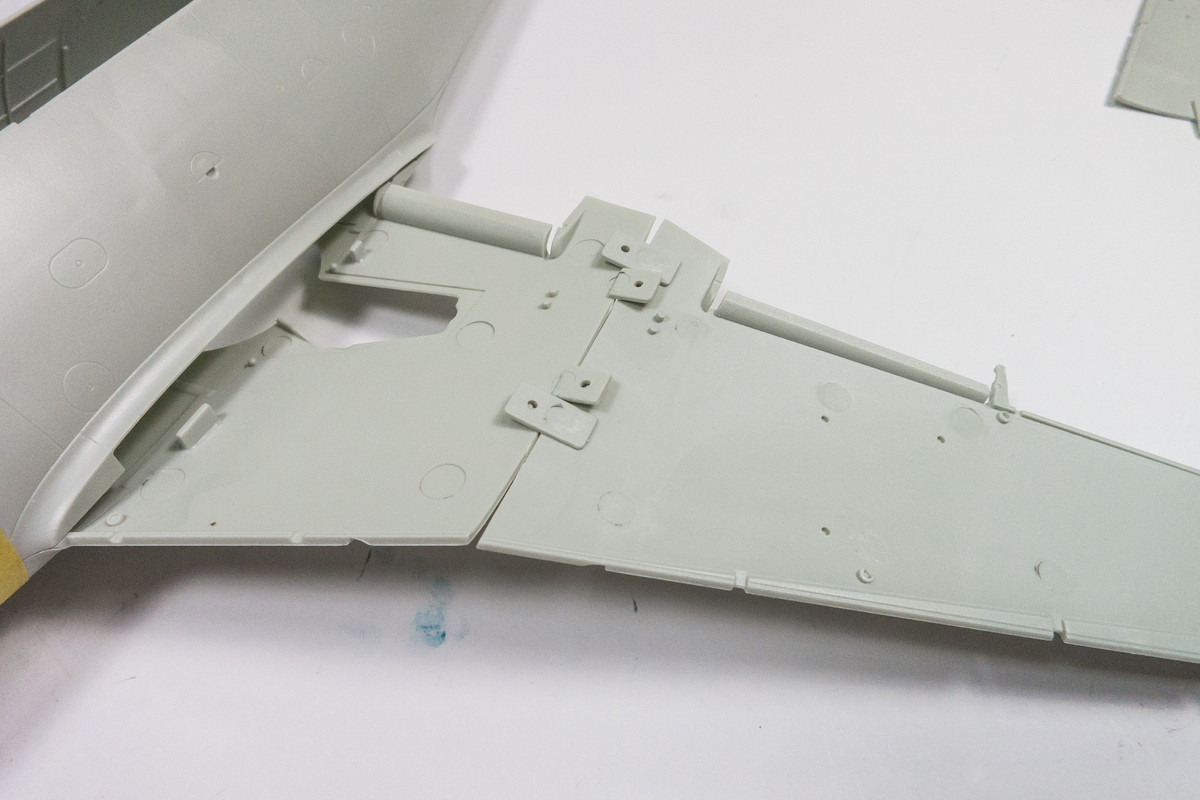
Due to the forced geometry of this connection, it was very difficult in getting the locating pins to go in their proper hole at an angle. Reminds me of the Zoukei Mura Ta152H push-and-twist landing gear legs. I figured something was going to break either forcing the pieces into place or trying to disassemble them.
Image

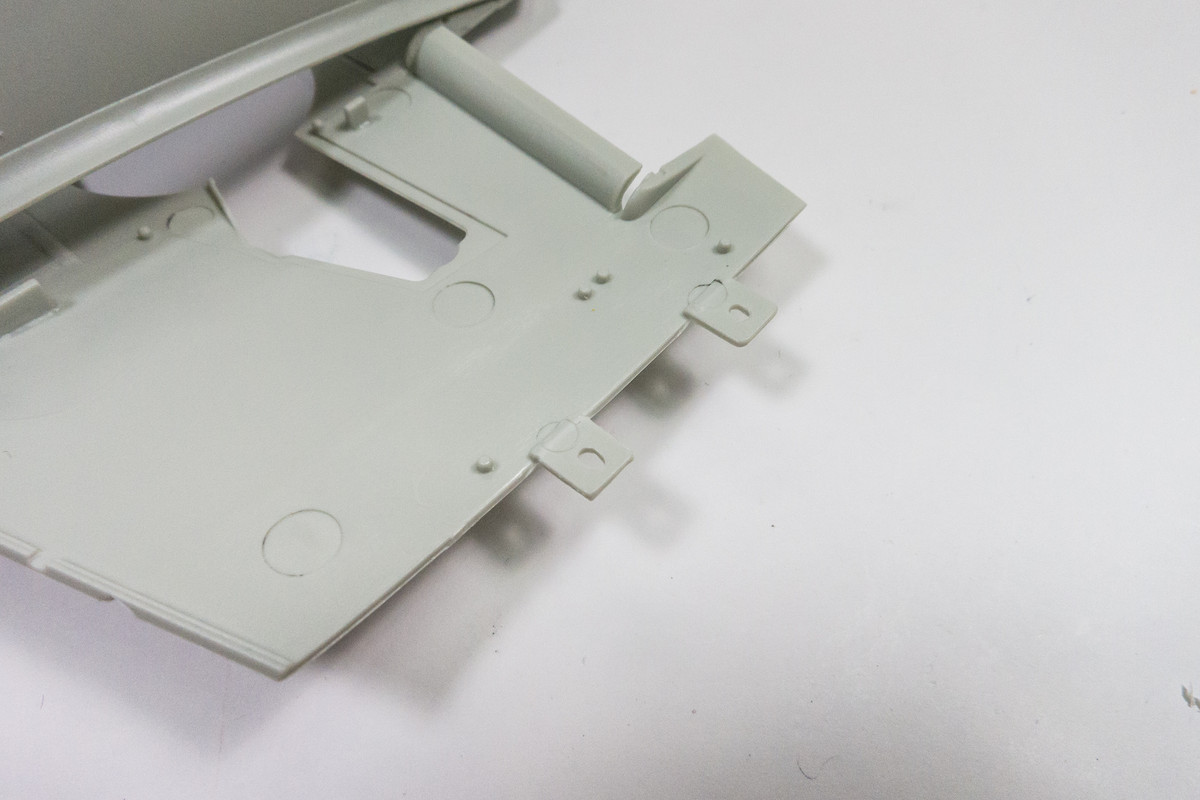
Put my engineer's hat on for a sec and decided to enlarge the two of the holes into ovals. It gives me just enough clearance to get the wings on and off and still providing a positive fit.
Image
Image

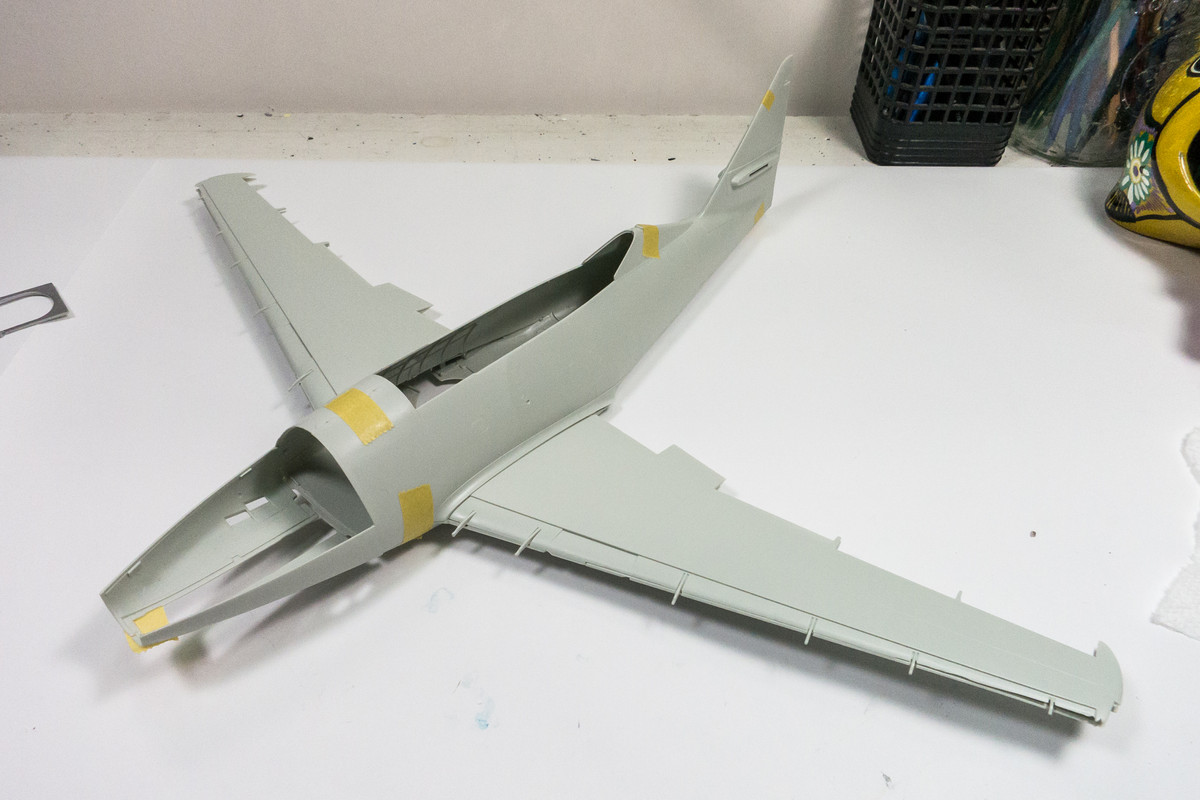
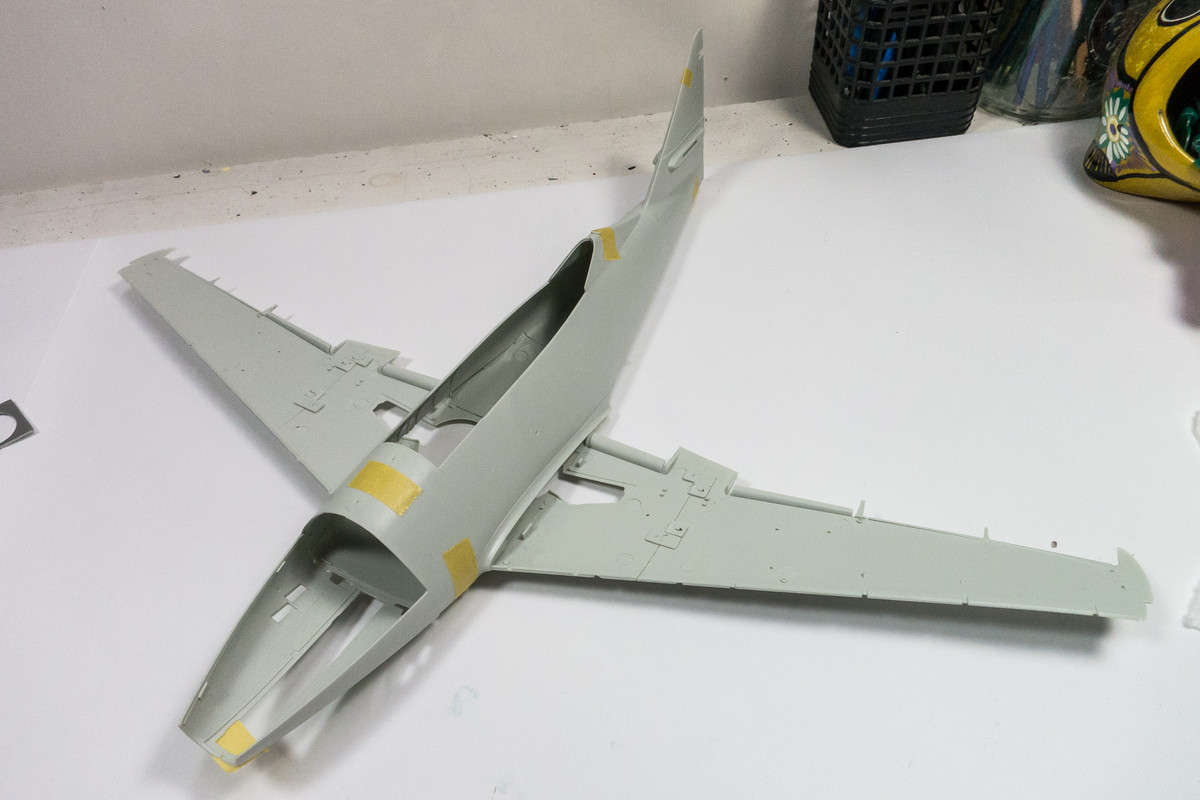
Just a quick look to see how the fuselage and wings go together. Hard to tell from this stage since so little has been glued together but I haven't spotted any obvious trouble spots yet.
Image
Image

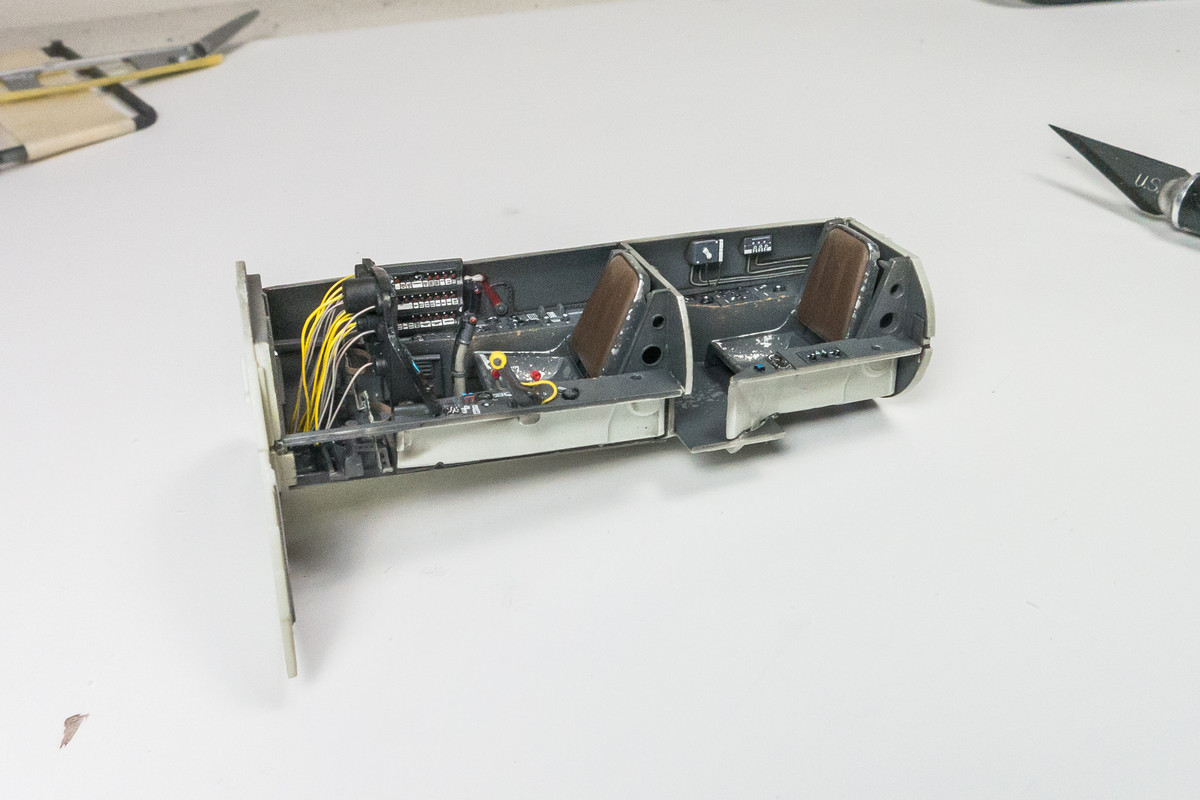
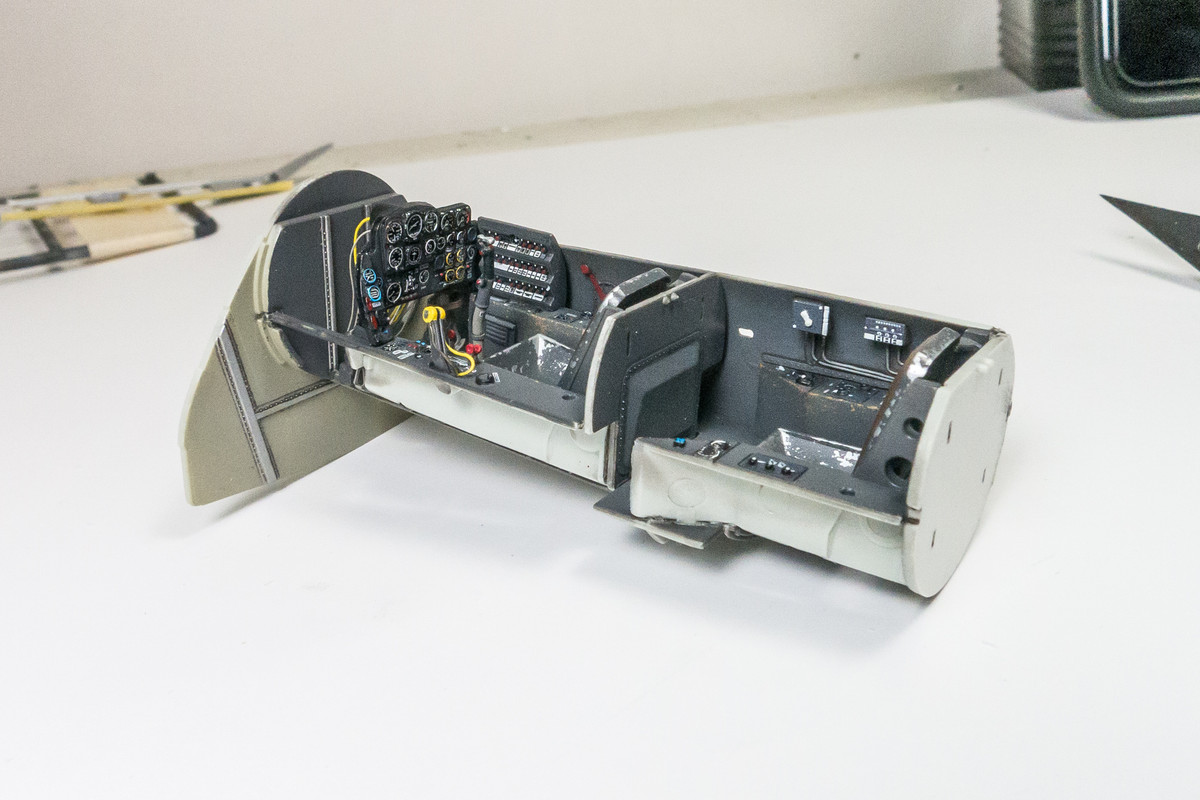
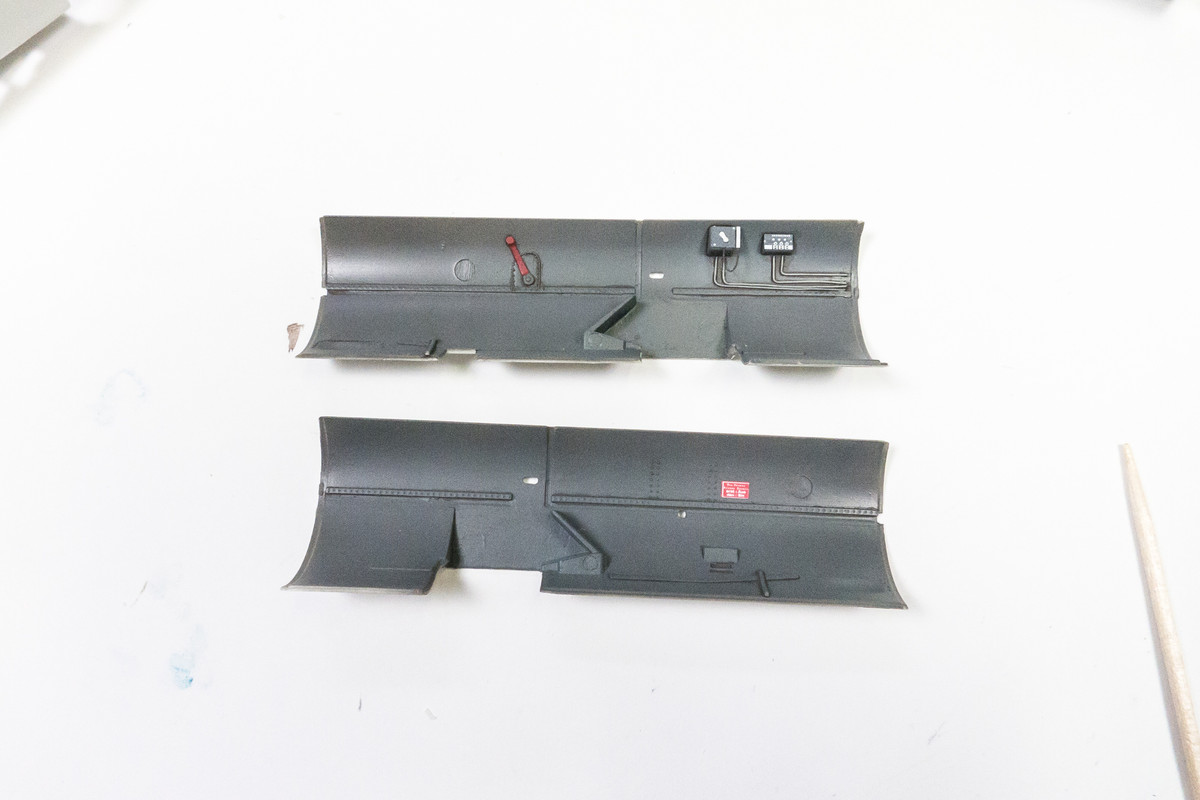
The cockpit inner side of the "tube" have been painted. I added some wiring to the radio operator's starboard wall.
Image
Image
Image
Image

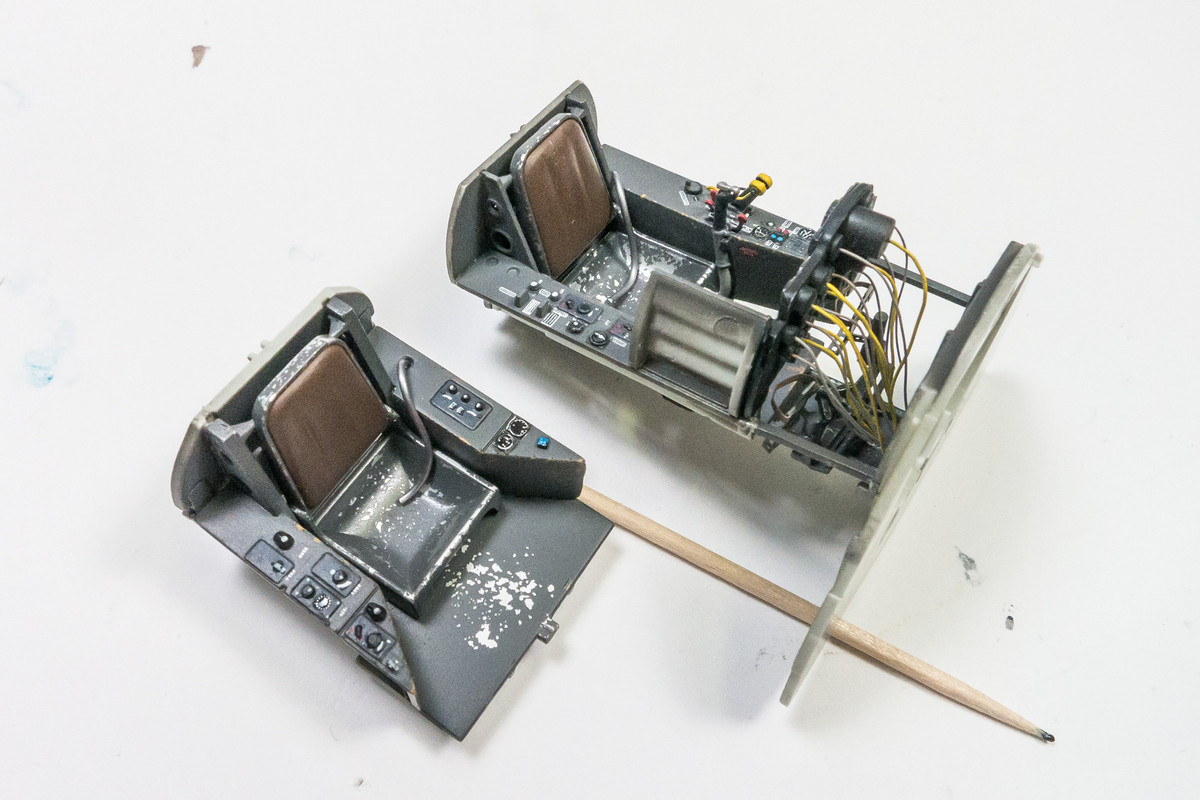
Thinking about adding oxygen tubes to the cockpit using lead wire.
Image
Image

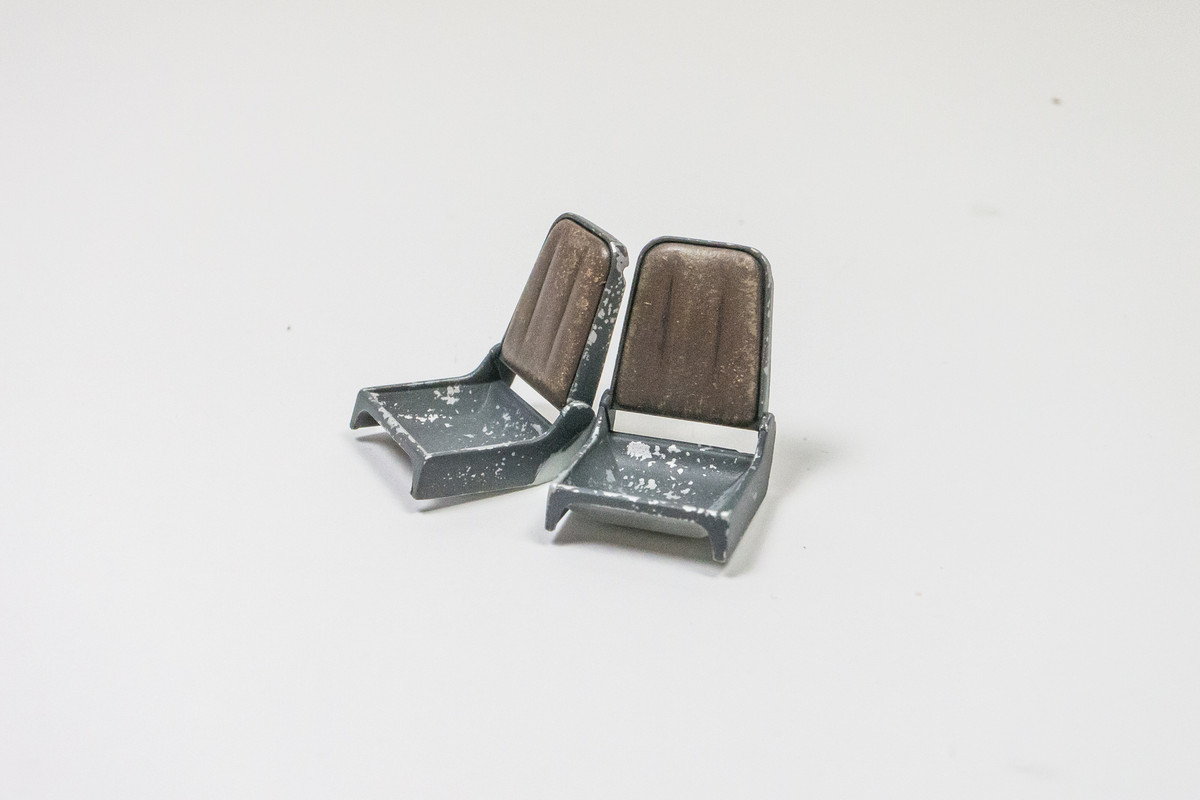
Finished off the painting of the seats with some dry-brushing to simulate cracked leather.
Image

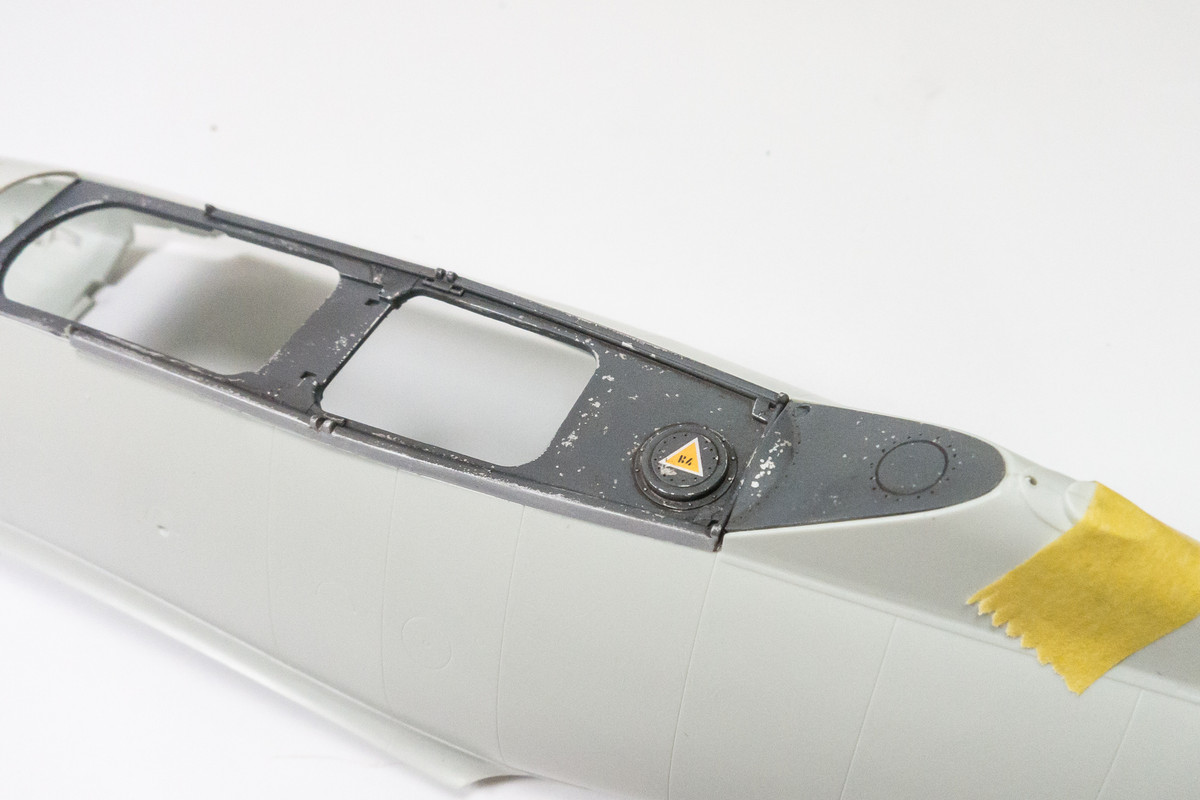
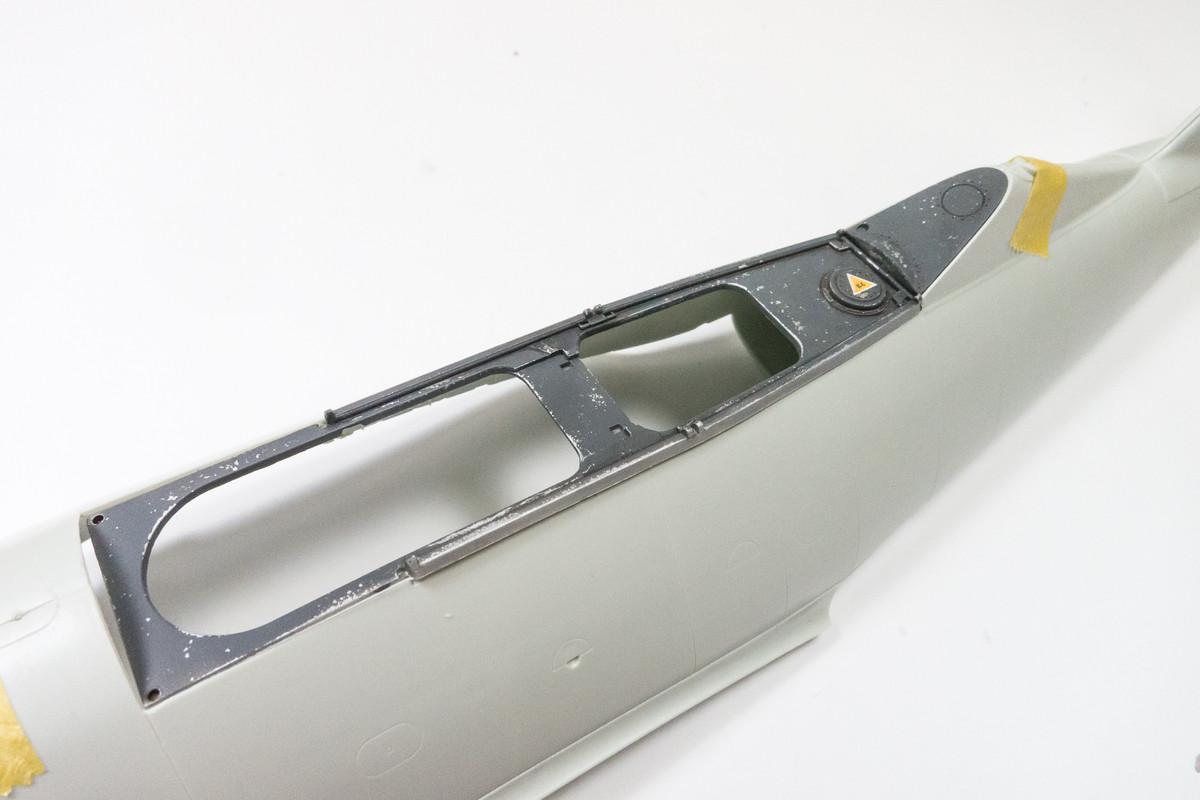
The cockpit sill has been painted and chipped.
Image
Image
John aka JKim
-----------<><
Image
User avatar
Floki
Elite Member
Posts: 3548
Joined: Wed Dec 12, 2018 2:23 am
Location: Muncie, Indiana

Re: 1/32 Revell Me262B-1/U1 Nachtjager

Post by Floki »

Nice bit of work and problem solving John. The oxygen tubes and seats are also looking really good. To show even more wear you can take just a touch of off white and hit the biggest areas of the lighter dry brushed spots to represent the backing of the leather on the seats.
March as one, Don't look back
Odin's sons... Attack!
Unleash hell! Do not repent! Warfare grants us no lament
Let your weapons slash and tear This is no place for fear
Hold the lines! Move as one! In unity our victory's won
Our shields will form a mighty wall
United we shall never fall
User avatar
jkim
Elite Member
Posts: 4073
Joined: Mon Apr 10, 2017 4:03 pm

Re: 1/32 Revell Me262B-1/U1 Nachtjager

Post by jkim »

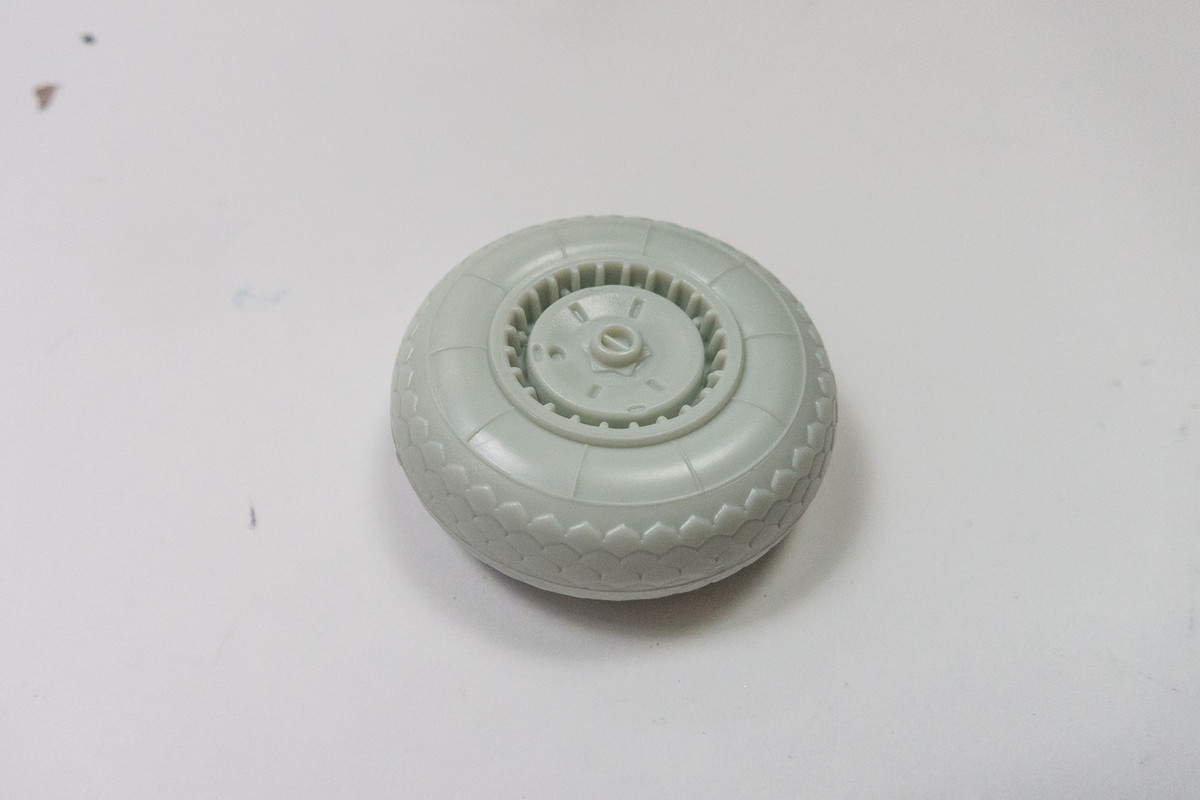
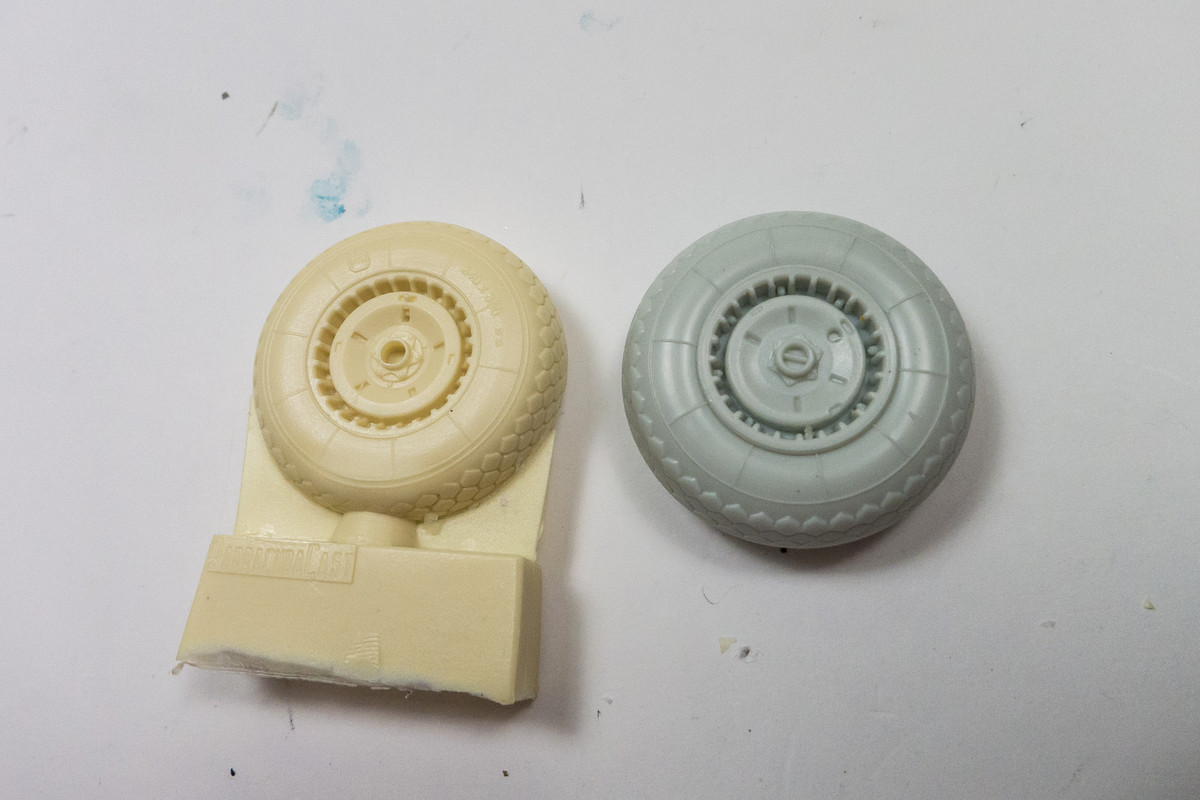
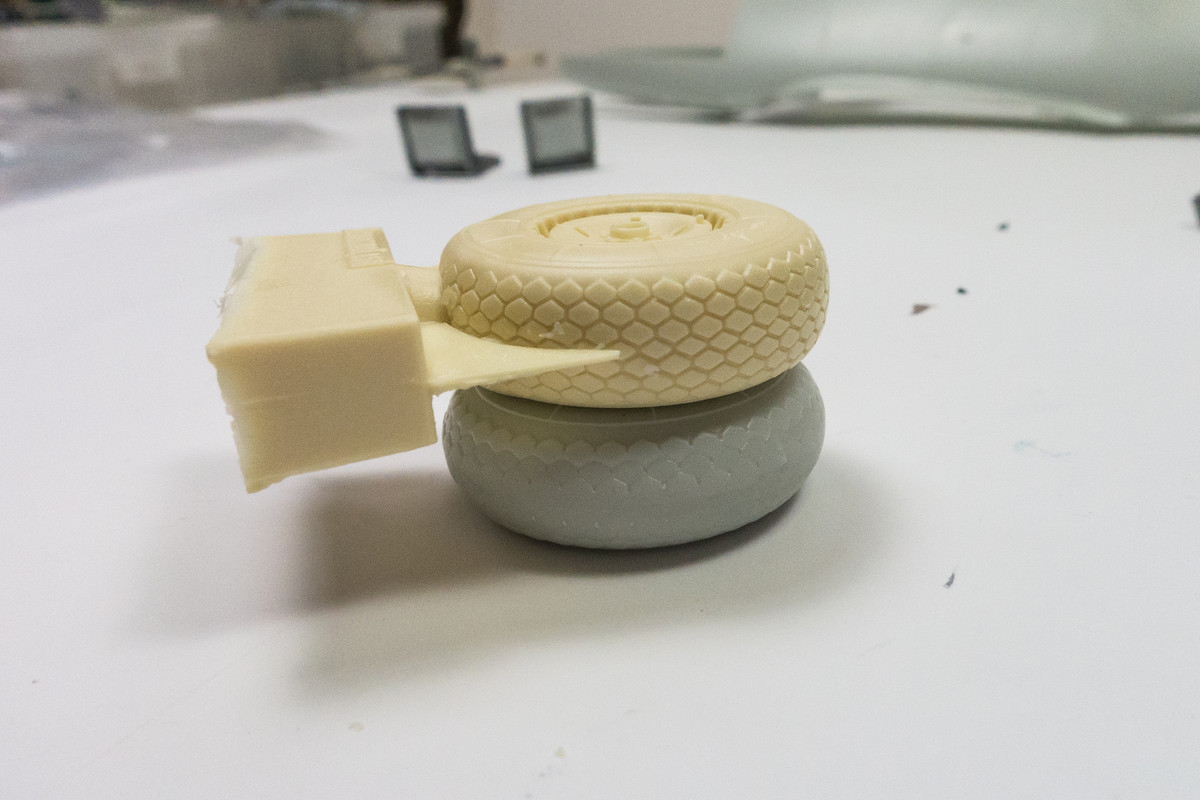
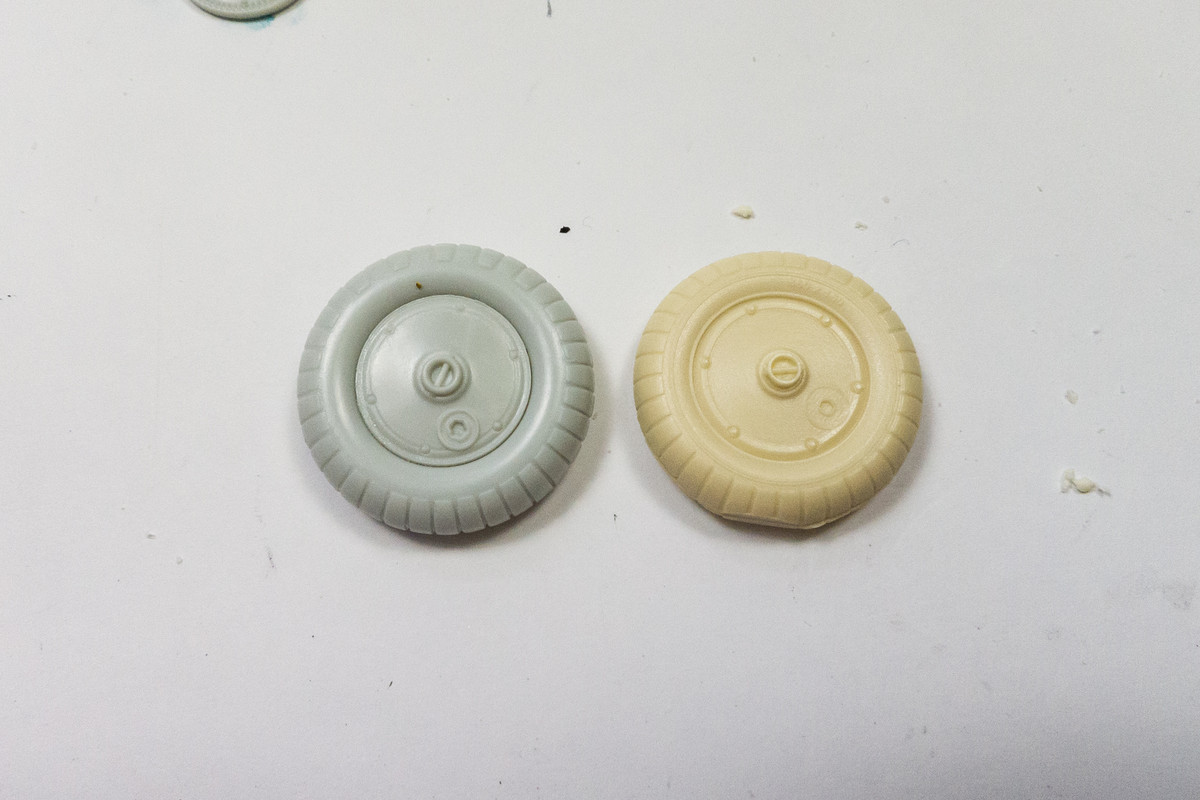
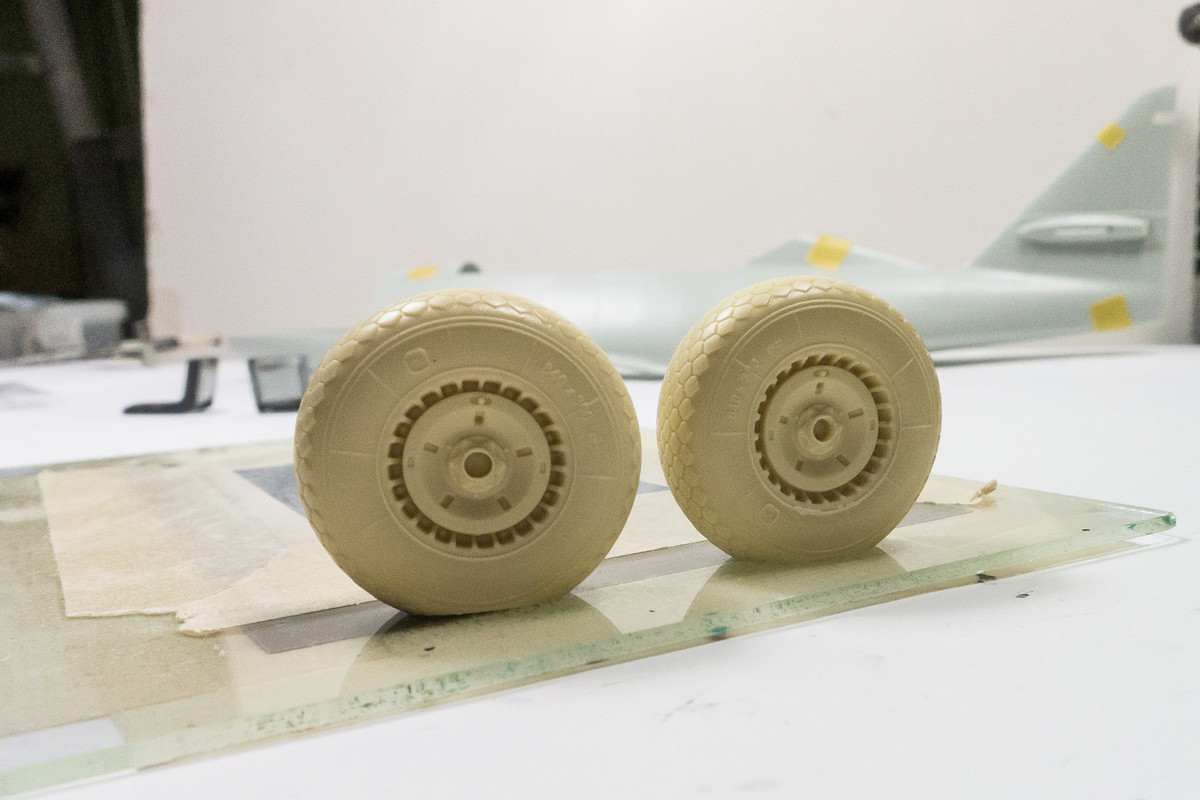
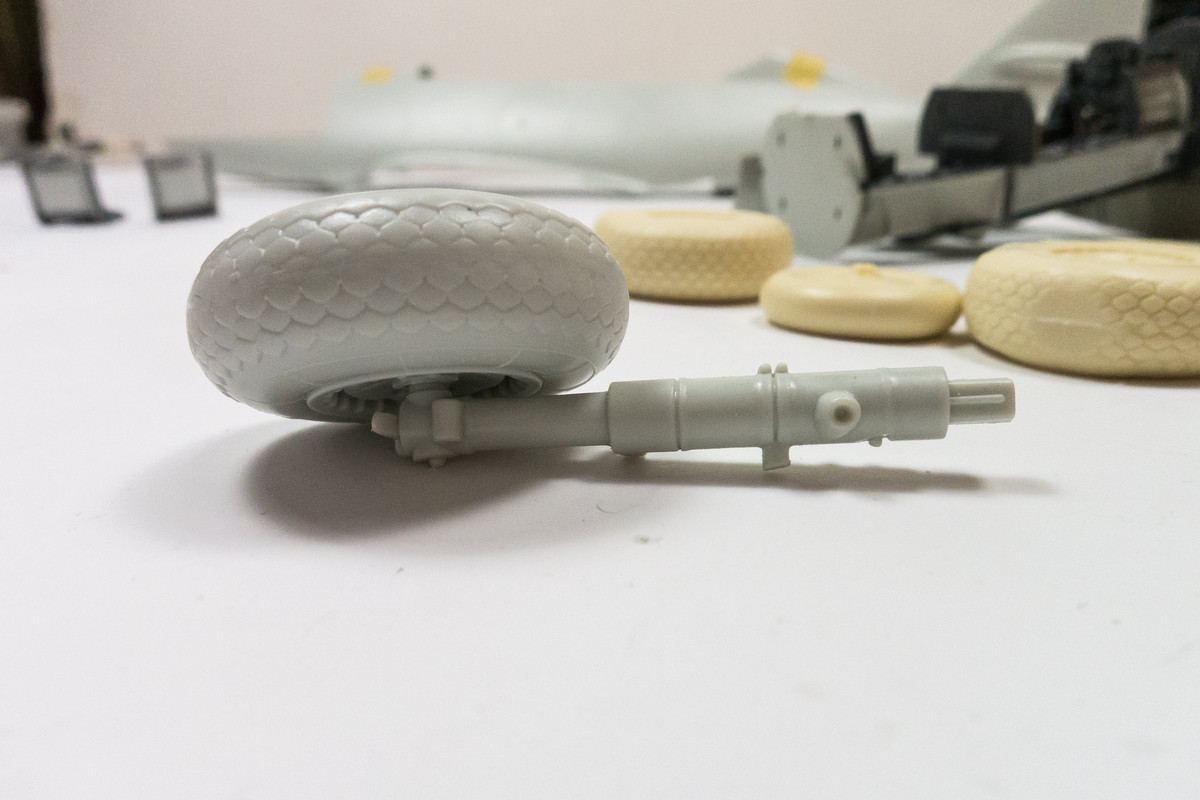
Continuing on with today's work... The kit wheels are very nice and compare very favorably to the resin ones from Barracuda Studios.
Image
Image

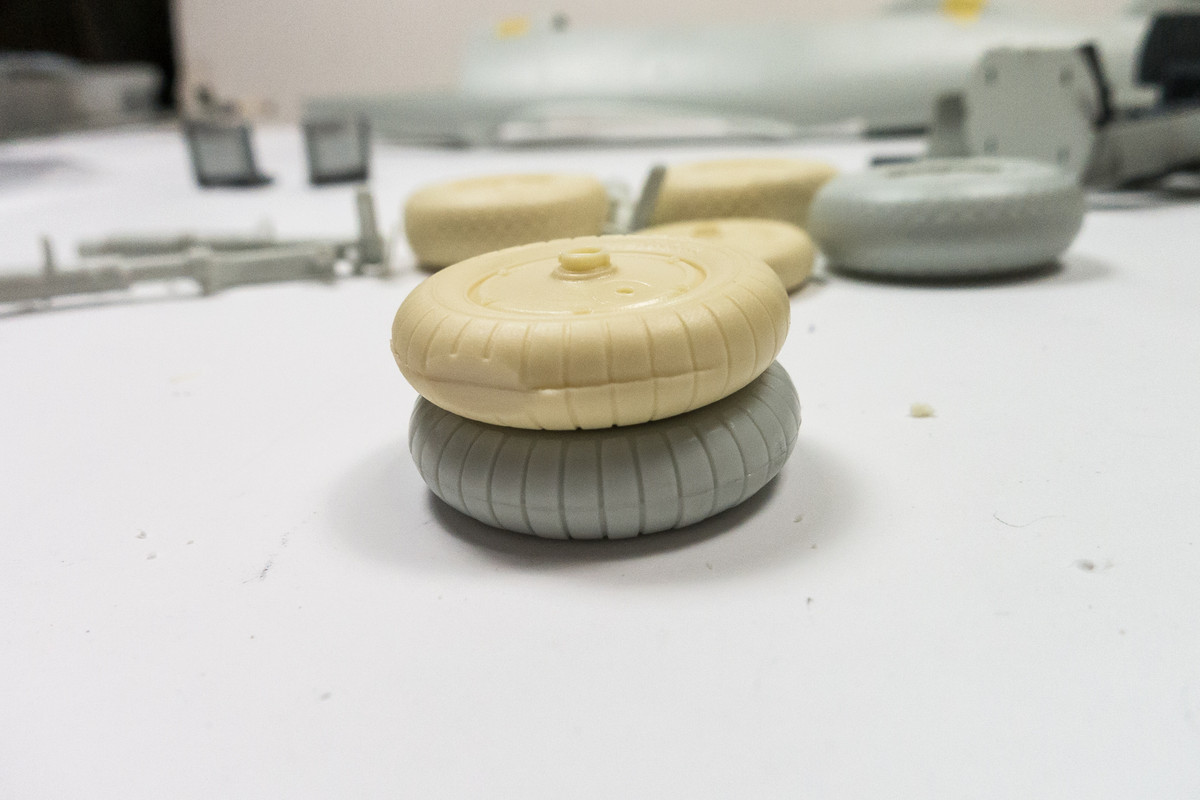
Where the kit wheels lose points is along the seam line. The tread detail loses significant definition at the join edges. What little detail there is will be eroded even further when it comes time to clean up that joint. So the resin wins hands down in this comparison.
Image

A similar comparison of the nose wheel results in a different verdict. This time, the casting irregularities on the resin wheel near the casting block may be more difficult to repair than the glue joint on the kit wheel.
Image
Image

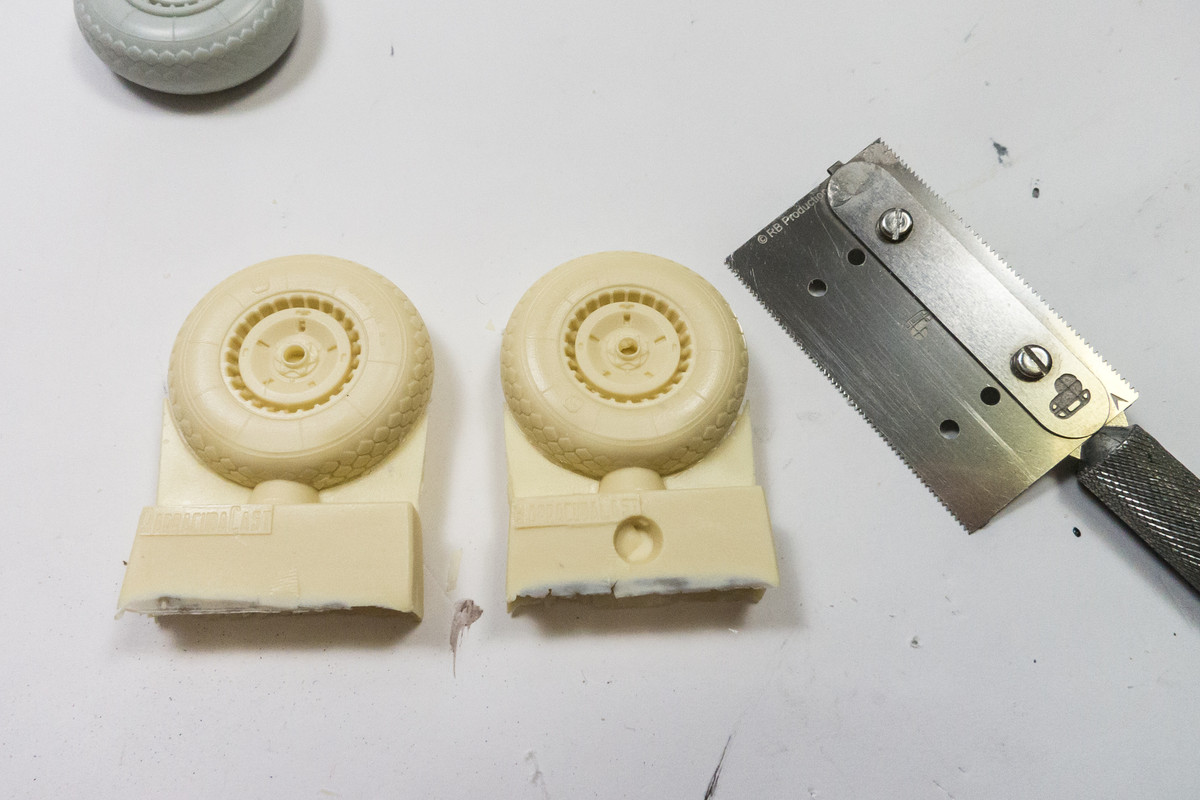
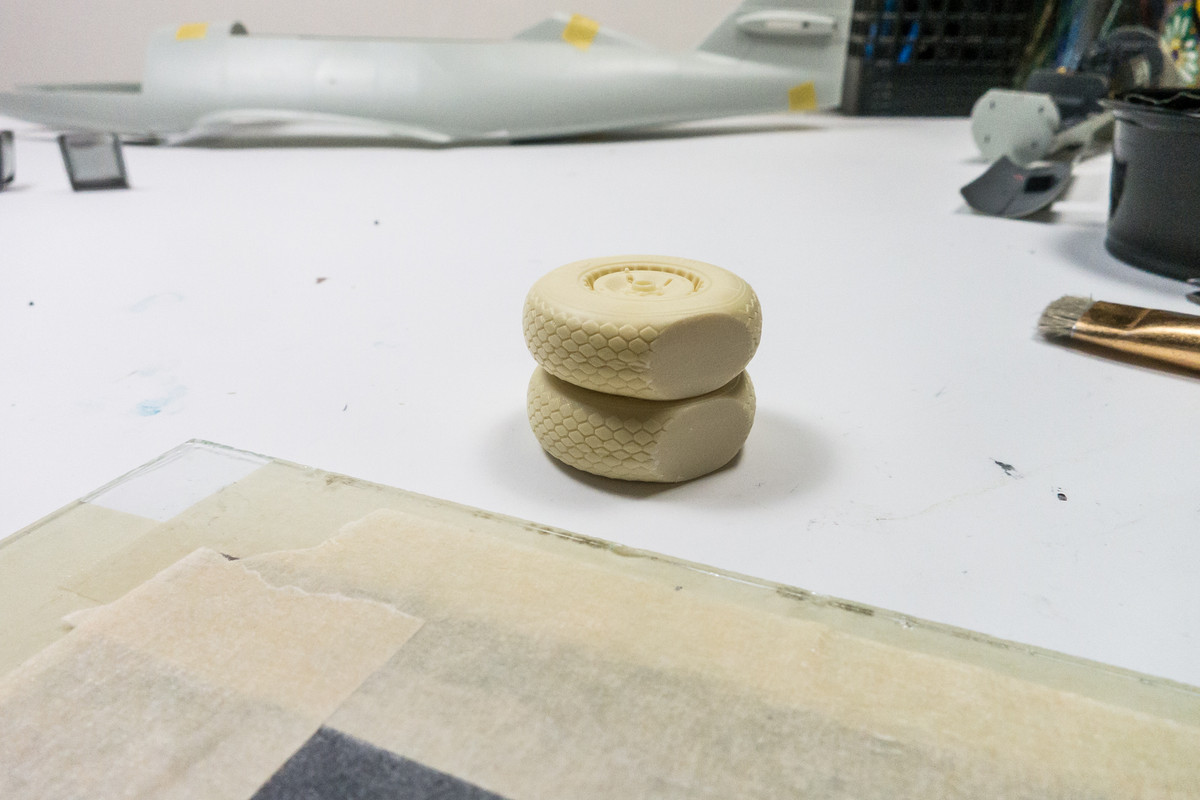
The resin main wheels are sawed off their casting blocks using a fine razor saw (RB Productions Medium).
Image

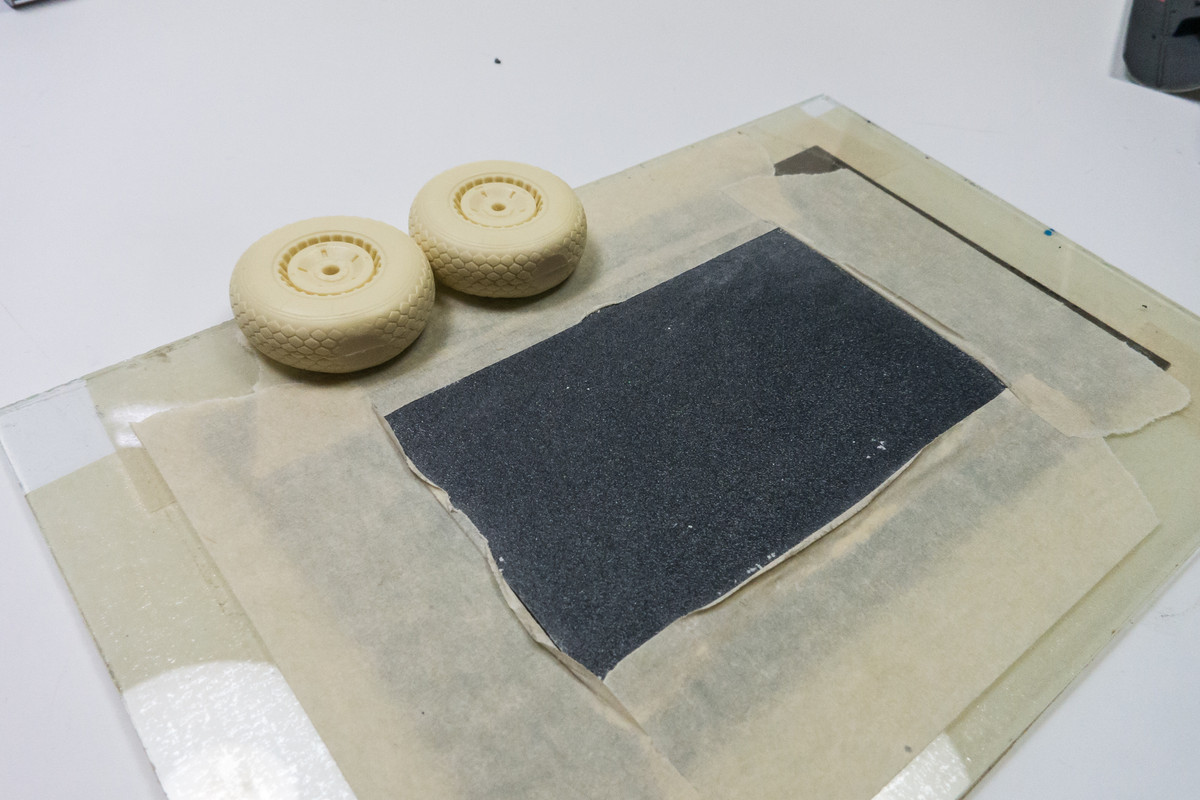
To help establish a flat spot on the tire, I use a piece of coarse sandpaper taped to a small sheet of glass.
Image
Image

The tires are slightly bulged at the casting block where I established my flat spot, which will help facilitate that "weighted" look to the inflated tires as they compress under the great weight of this aircraft. It's a subtle but significant effect.
Image

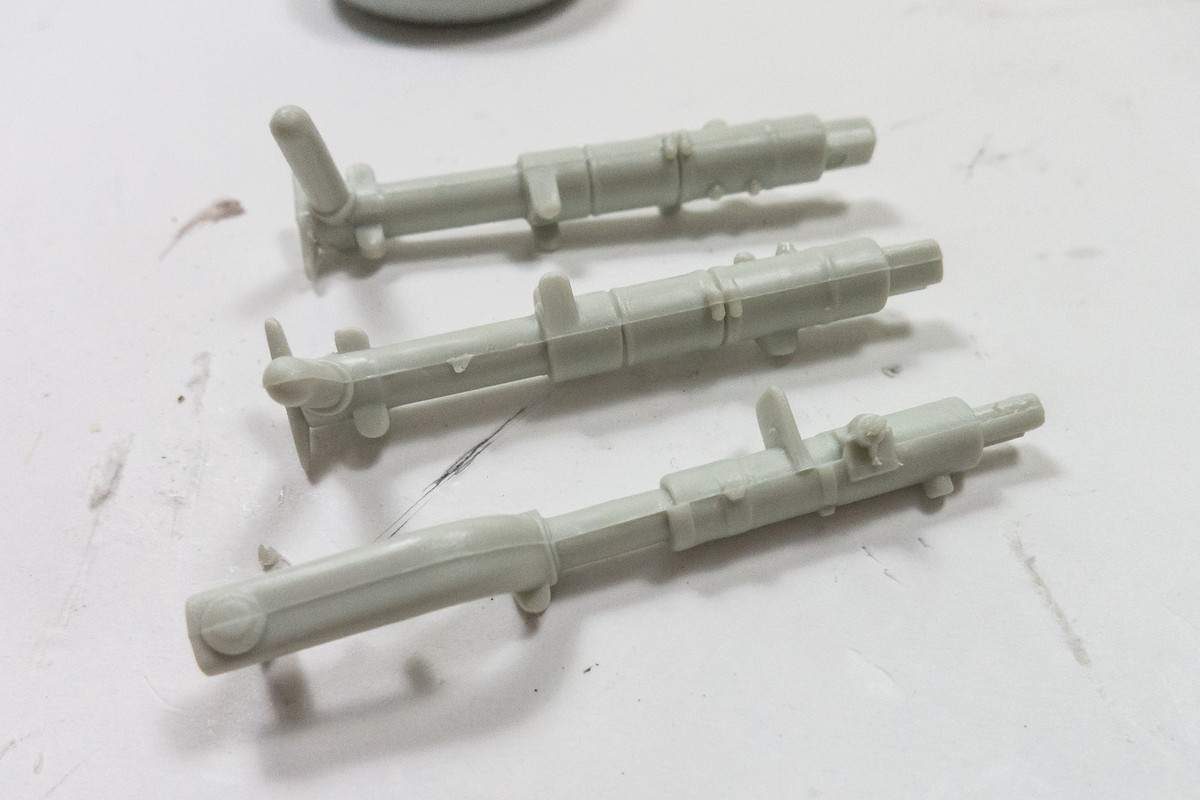
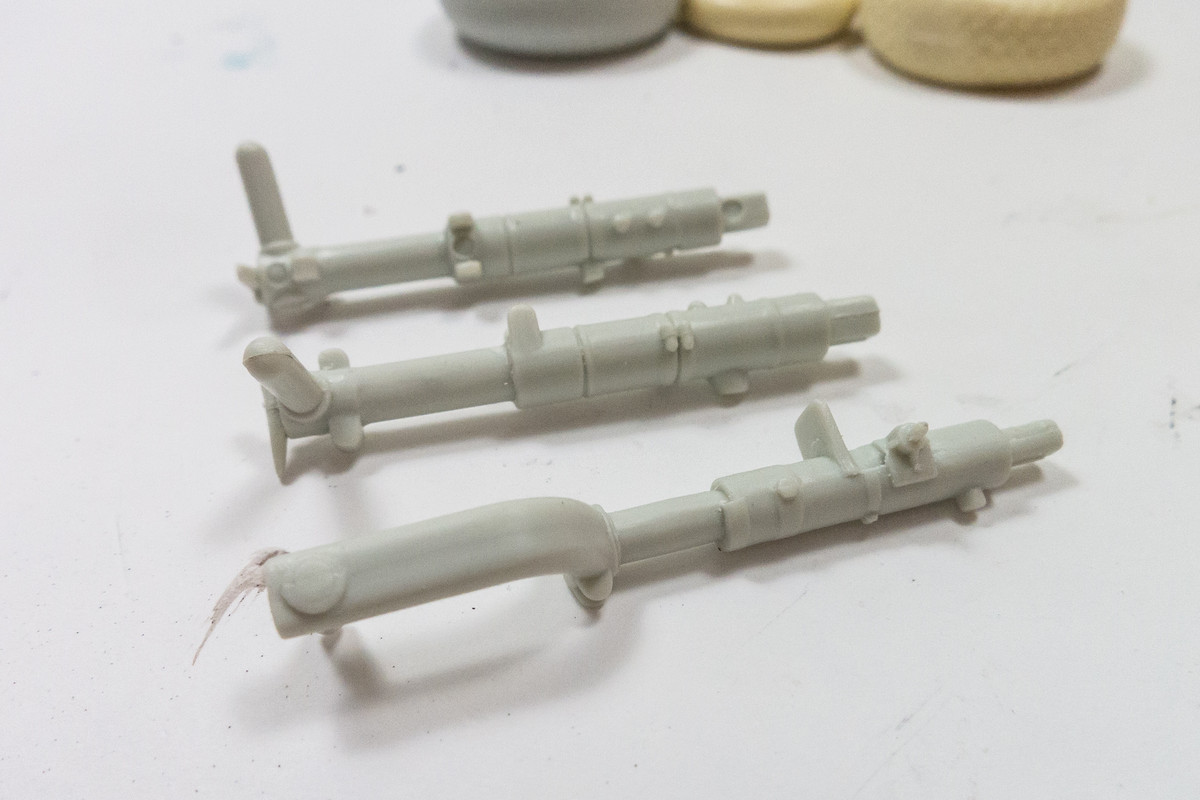
Finally, a word about parts clean-up. I don't usually document the very basic step of cutting pieces off of the fret and preparing them for painting/assembly. But I think it is something at all modelers should pay attention to. It's important to remove any and all mold lines from your parts. Some flat-sided parts won't have a visible mold line but many curve and almost all cylindrical parts have them. I usually scrape them off with the edge of an x-acto blade and then re-establish the round contour with sandpaper.
Image
Image

The kit tires fit perfectly on the kit landing gear leg, of course. One of the tricky things about using resin wheels is that the hole in the wheel usually needs to be deepened or enlarged to accommodate the landing gear. Without a drill press, it is difficult to drill that hole perfectly perpendicular. I usually counter this by drilling the hole a tad larger so that the wheel has some wriggle room sitting on the axle and can be adjusted as needed. I don't have the appropriate drill bit size so I'm going to have to come back to the resin main wheels later.
Image
John aka JKim
-----------<><
Image
User avatar
jkim
Elite Member
Posts: 4073
Joined: Mon Apr 10, 2017 4:03 pm

Re: 1/32 Revell Me262B-1/U1 Nachtjager

Post by jkim »

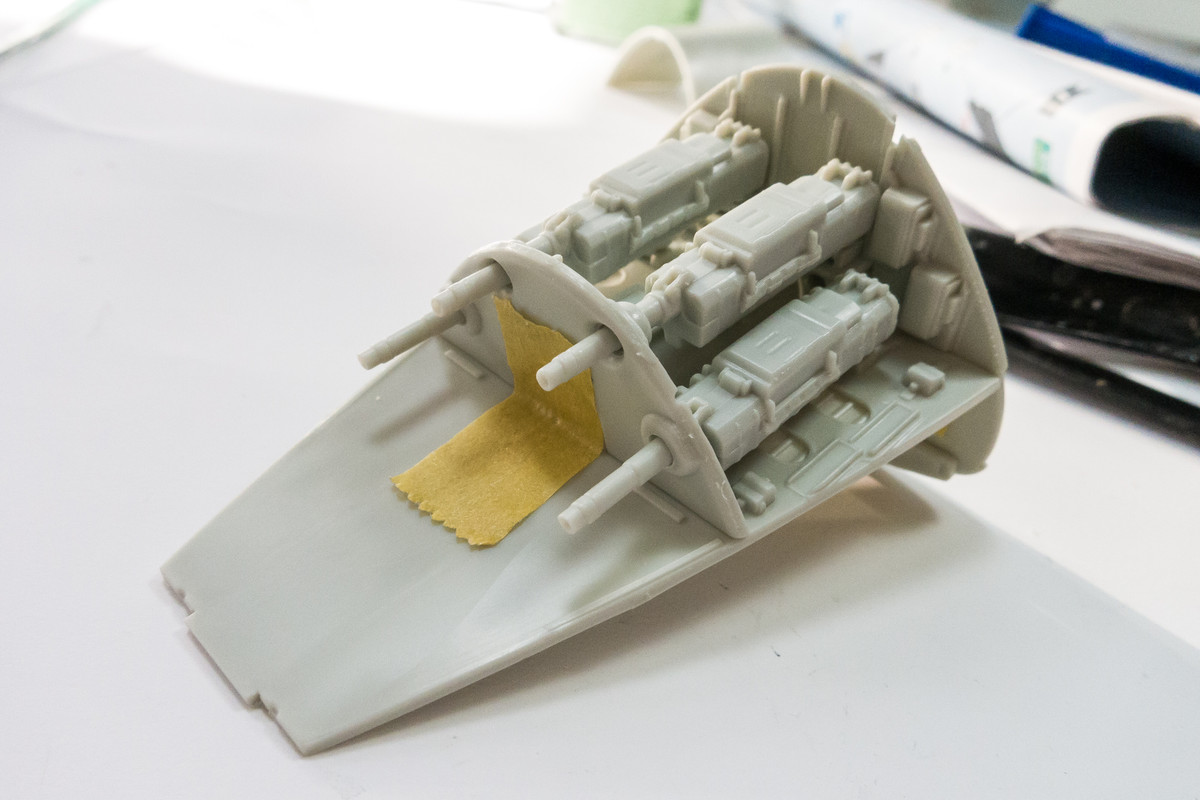
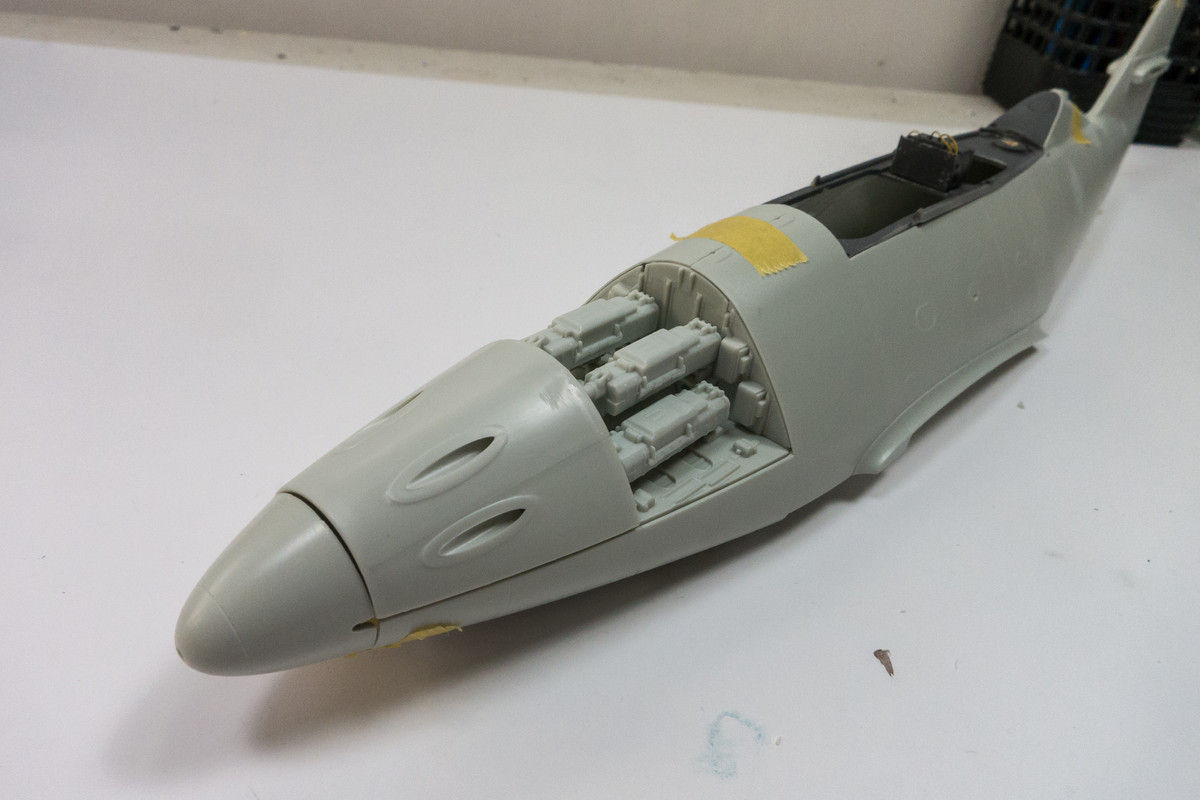
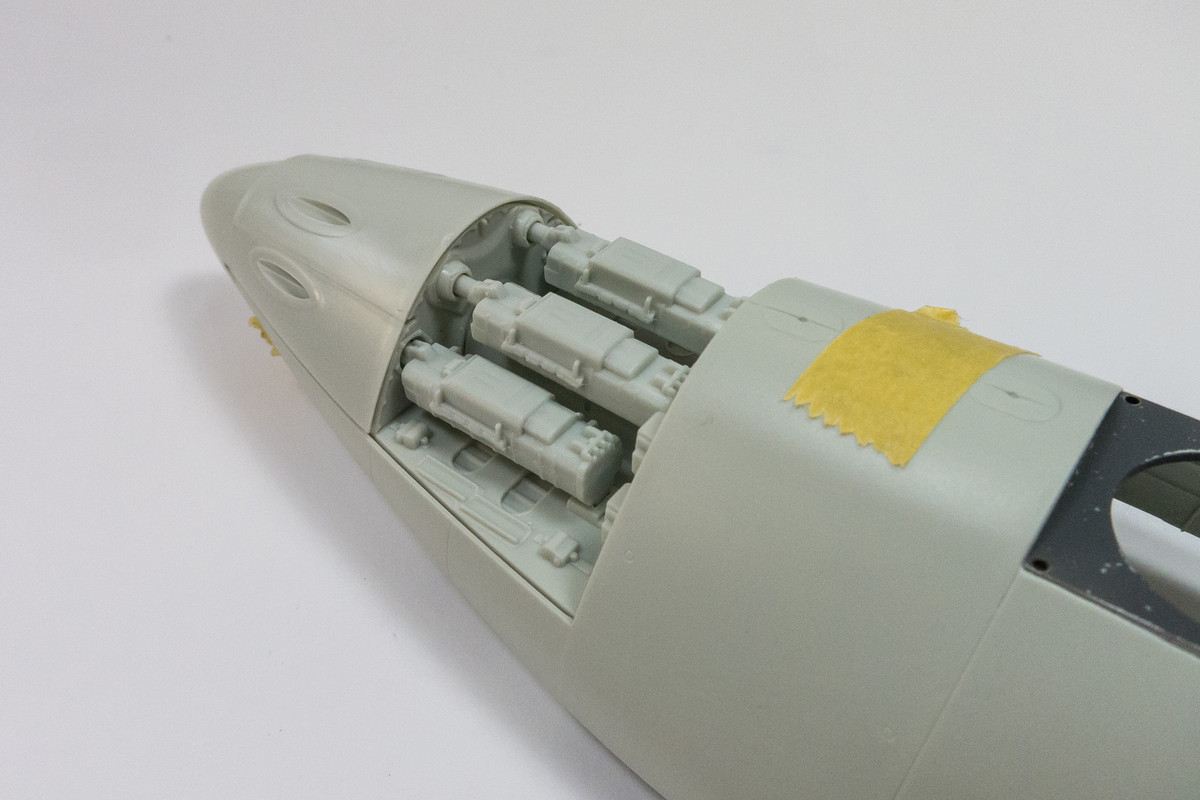
The cockpit is connected to the main wheel wells, which requires a bit more thought and preparation. The gun compartment and the nose gear well are similarly connected. I'm just starting to look at these areas and trying to form a strategy. Adding details like wiring can be difficult when construction is modular like this. And I have to start looking for places to place weight to keep the model from tail sitting.
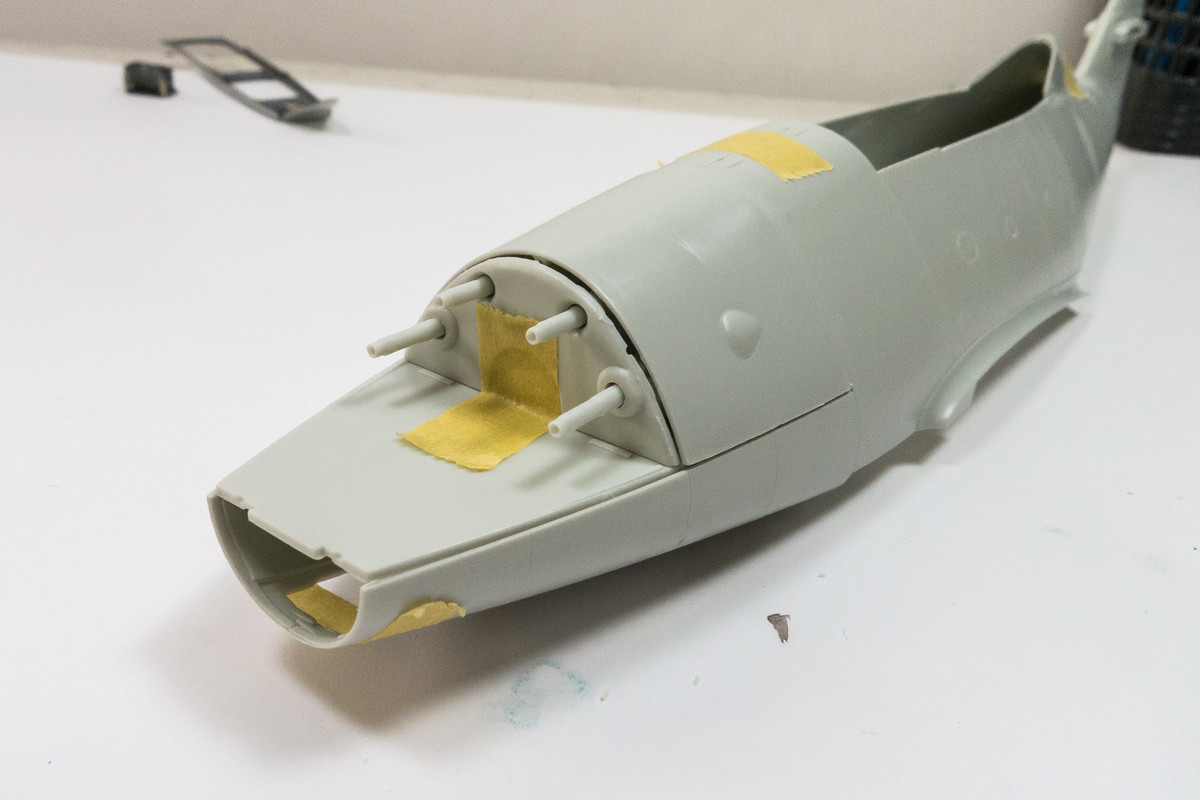
Like most of my builds, my preference is to preserve the lines of the Me262 and close all panels and canopies. But that hasn't stopped me from admiring the included gun parts. The gun compartment has some nice details and I took some time today to place the Mk108 cannons into place.
Image
Image
Image
Image
Image
Image
Image
John aka JKim
-----------<><
Image
User avatar
Floki
Elite Member
Posts: 3548
Joined: Wed Dec 12, 2018 2:23 am
Location: Muncie, Indiana

Re: 1/32 Revell Me262B-1/U1 Nachtjager

Post by Floki »

The main barracuda wheels are a big improvement. The compartment in front of the gun bay should be big enough to add weight to keep it from tail sitting. This is still the nicest looking Revell kit I've seen.
March as one, Don't look back
Odin's sons... Attack!
Unleash hell! Do not repent! Warfare grants us no lament
Let your weapons slash and tear This is no place for fear
Hold the lines! Move as one! In unity our victory's won
Our shields will form a mighty wall
United we shall never fall
User avatar
jeaton01
Elite Member
Posts: 2374
Joined: Thu Apr 23, 2020 9:20 am
Location: Northern California
Contact:

Re: 1/32 Revell Me262B-1/U1 Nachtjager

Post by jeaton01 »

As usual, a great bit of modeling.
My modelling website, with build logs.

http://goldeneramodel.com/mymodels/mymodels.html
User avatar
jkim
Elite Member
Posts: 4073
Joined: Mon Apr 10, 2017 4:03 pm

Re: 1/32 Revell Me262B-1/U1 Nachtjager

Post by jkim »

Thanks guys! I'll give the off-white a try on the seats, Clint. I've found the new Revell kits that I've built (Bf109G-6, Bf109G-10 and this one) to be quite good. Not in the same class as Tamiya but there is alot to like in this kit.

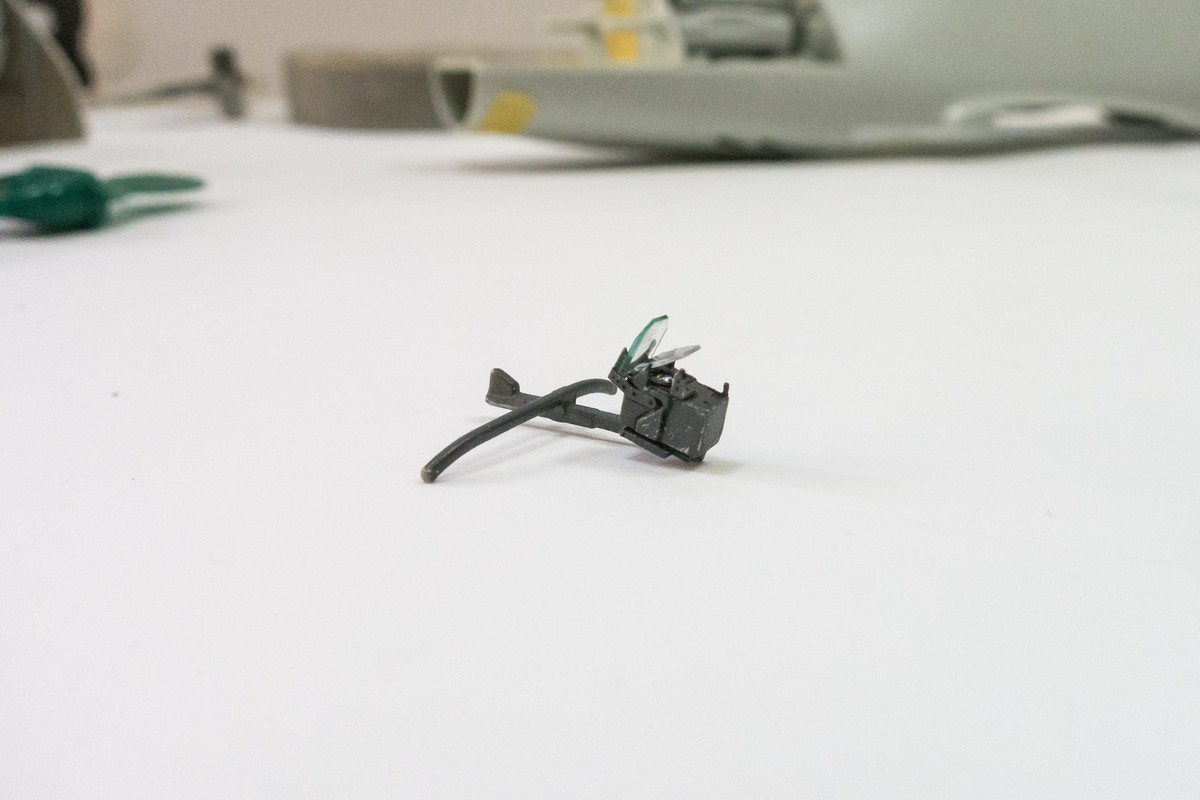
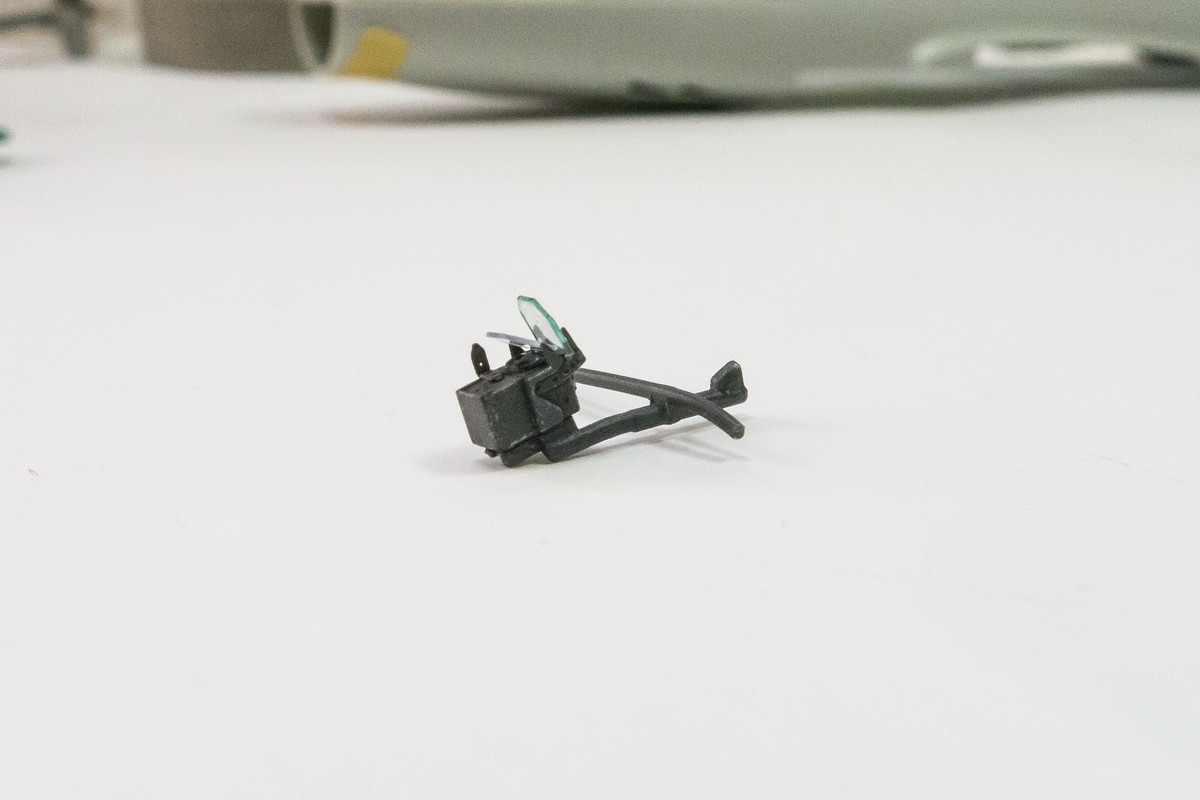
The photoetch Revi 16B gun sight has been finished. Instead of the supplied clear acetate, I used a slightly thicker acetate sheet for the reflector glass. That way, I can highlight the edges of the rear glass with clear blue/green.
Image
Image

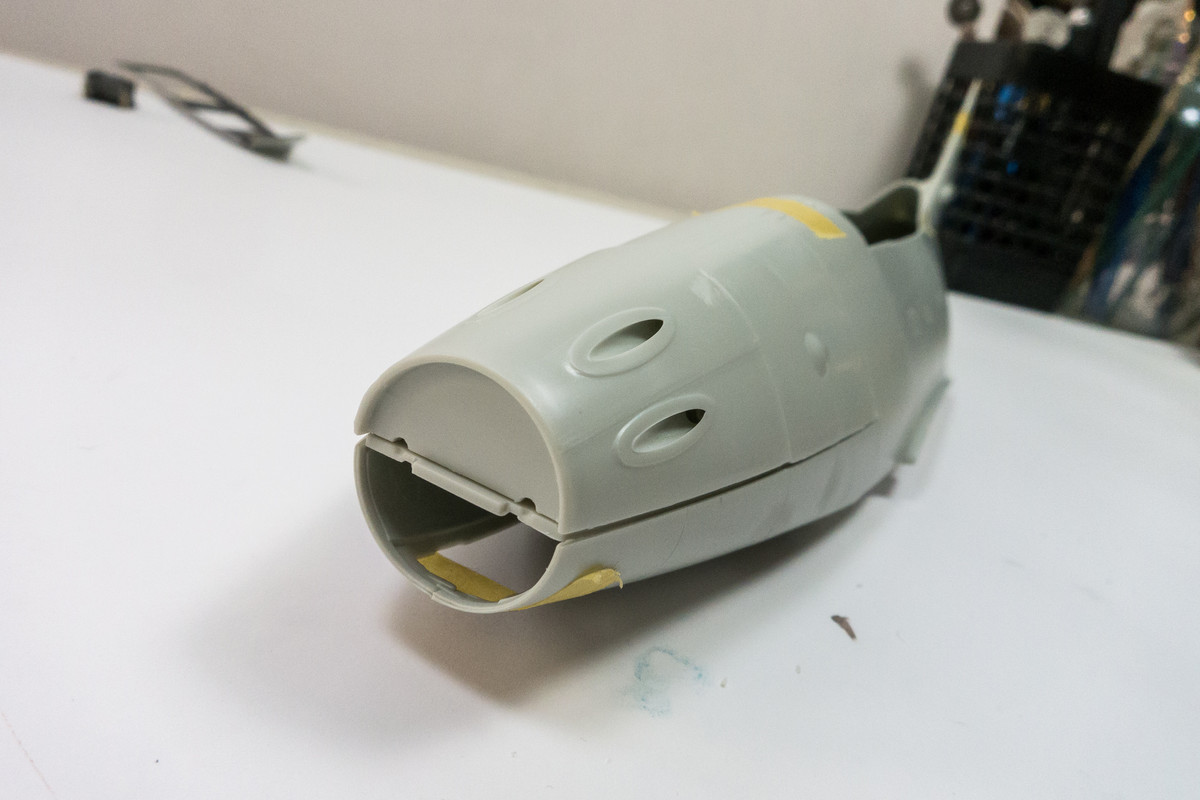
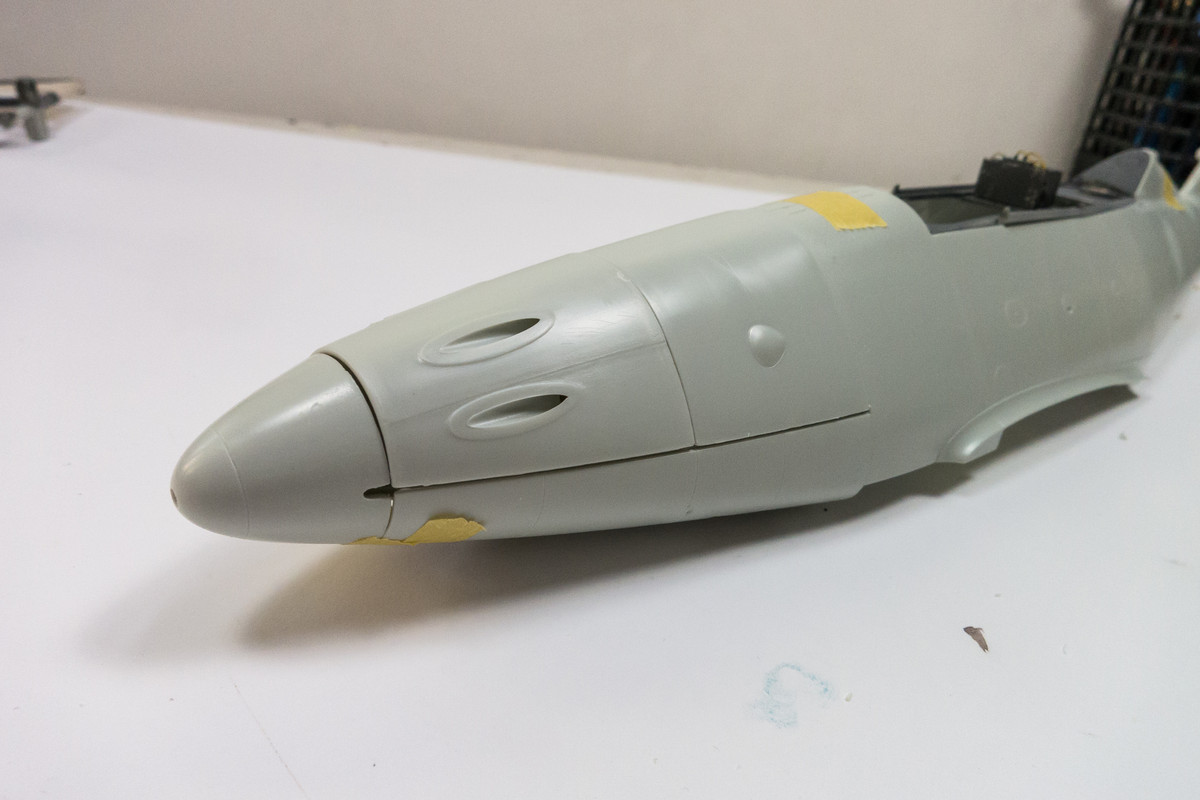
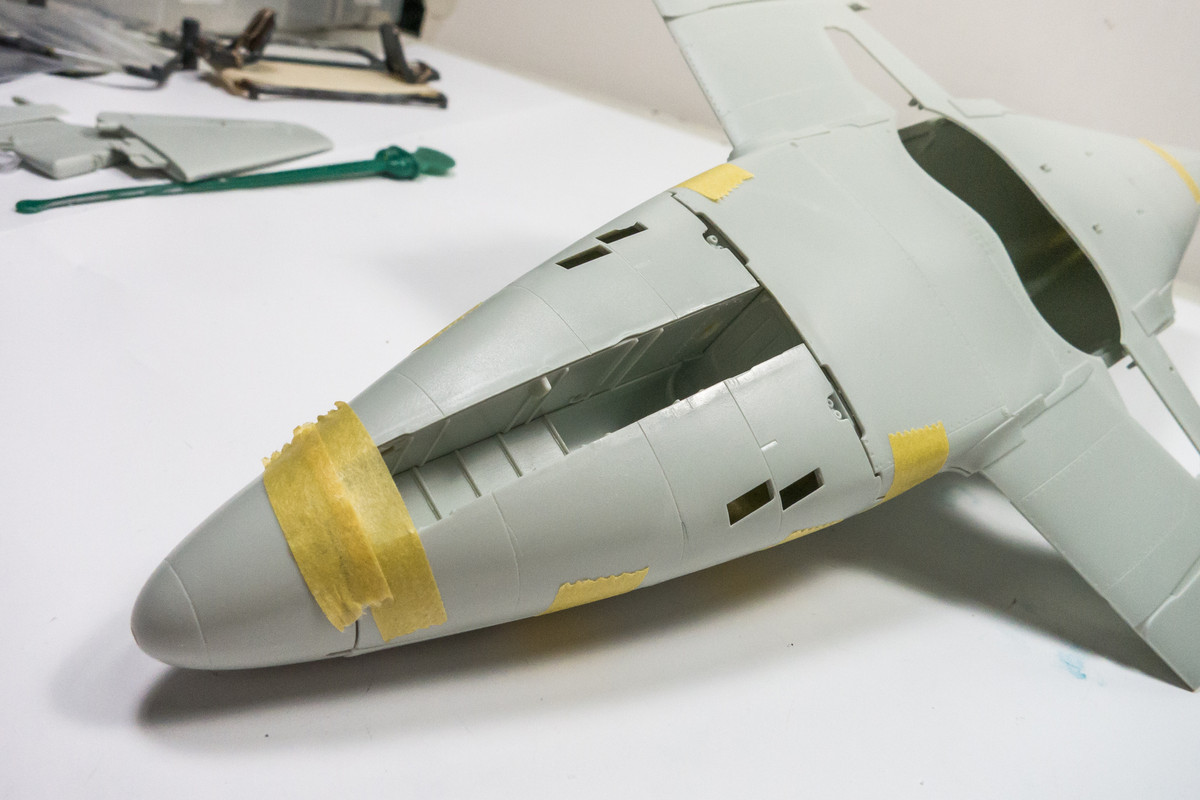
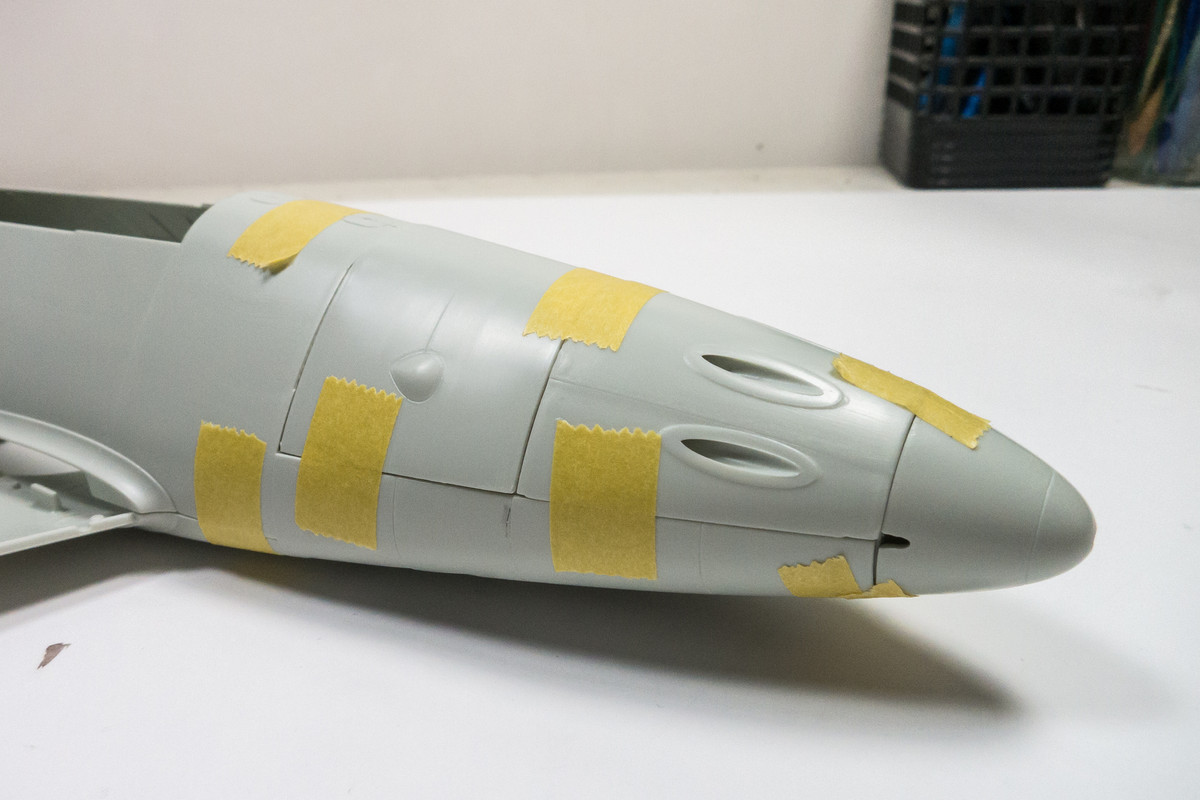
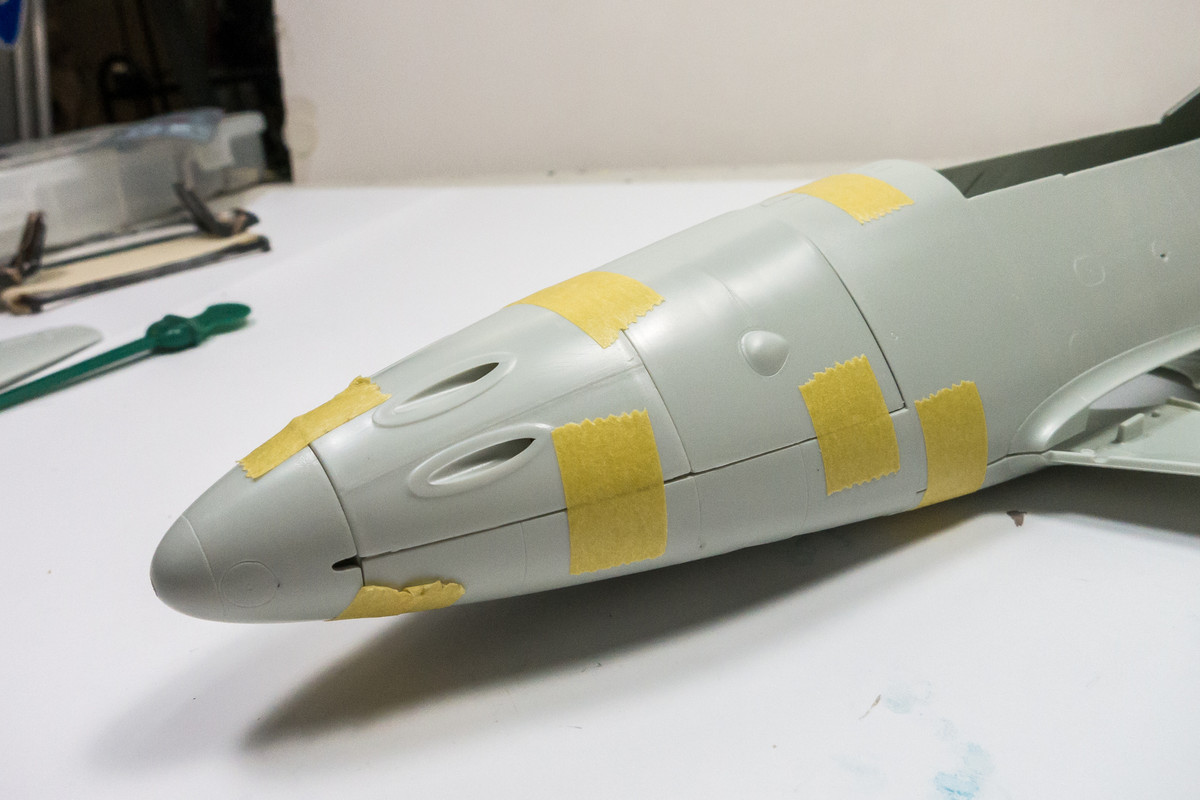
Some more dry-fitting... this time I added the nose gear wheel wells to the underside of the gun station. Actually, the fit of the these frontal exterior panels is not that bad. Similar to the Trumpeter kit, which is probably not saying much.
Image
Image
Image

There is a molding irregularity in the fuselage joint with the gun cowling that is causing the most noticeable gap.
Image

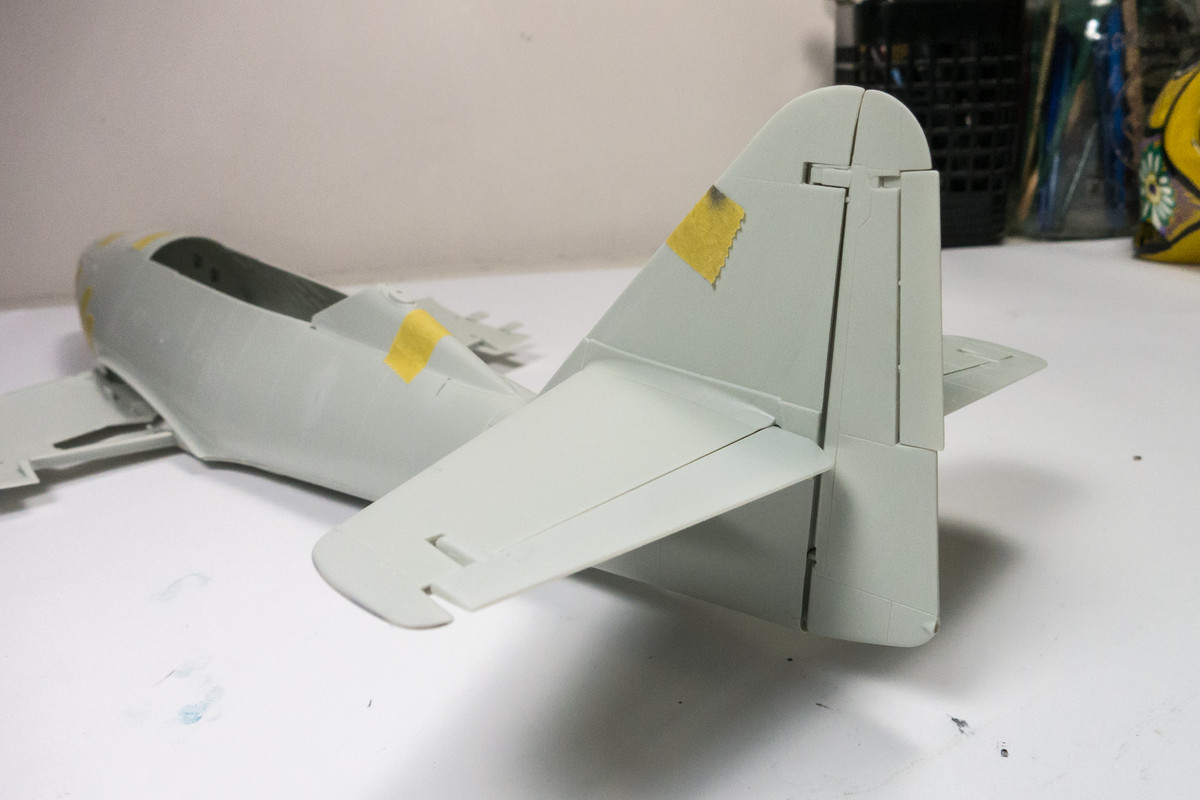
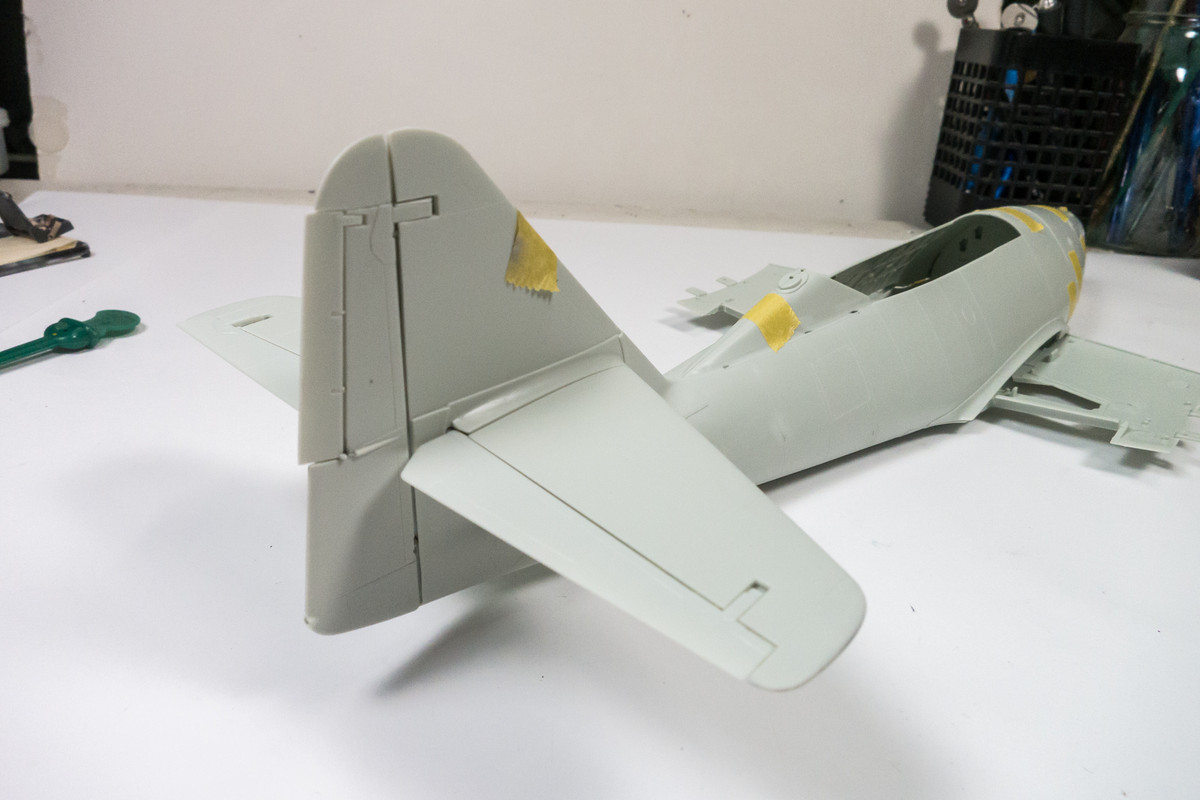
Test fitting the horizontal stabilizers and rudder onto the tail prior to riveting. Yes, I am going to rivet the entire aircraft. And yes, I know that the Me262 was supposed to have putty/primer over the rivets but the airframe exterior is just too smooth and featureless for my tastes.
Image
Image

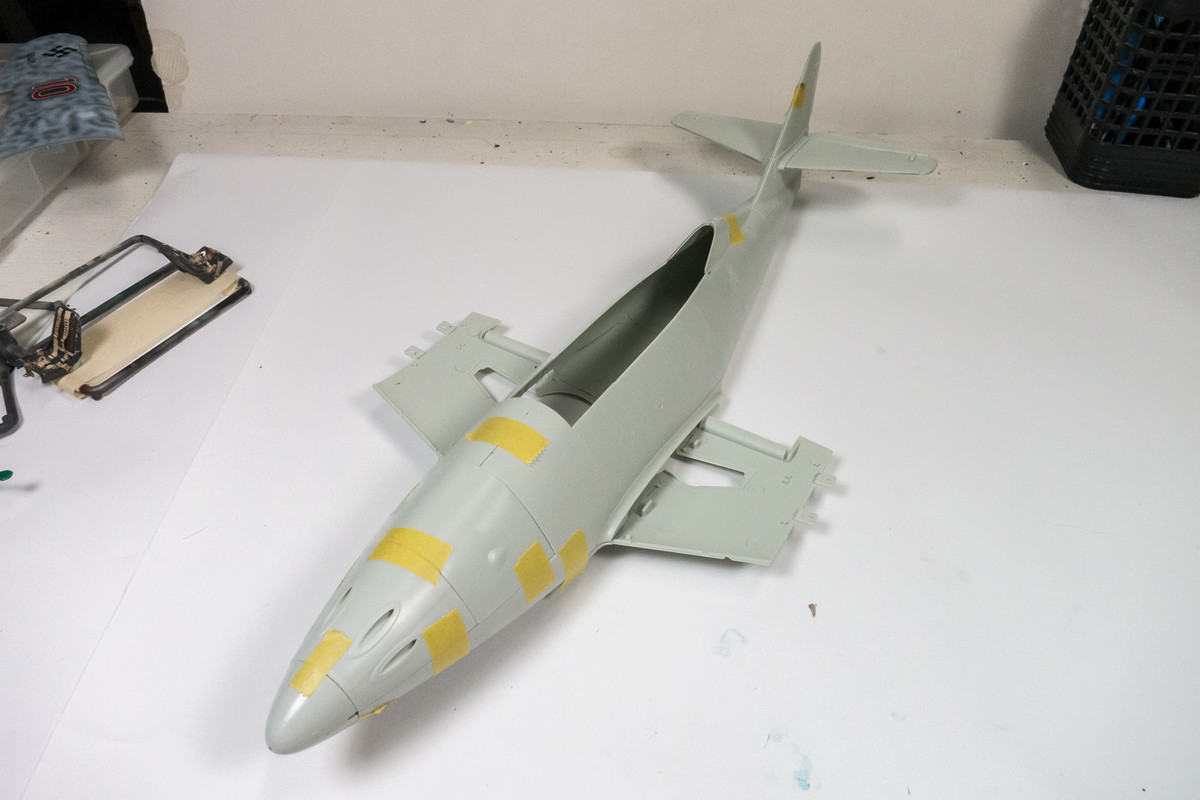
Even without the wings, the futuristic shape of the Me262 is very evident.
Image
John aka JKim
-----------<><
Image
User avatar
jkim
Elite Member
Posts: 4073
Joined: Mon Apr 10, 2017 4:03 pm

Re: 1/32 Revell Me262B-1/U1 Nachtjager

Post by jkim »

I know I've posted a lot of build updates this weekend. That's what happens when normal Thanksgiving activities have been cancelled and your adult children have elected to stay at school instead of coming home.

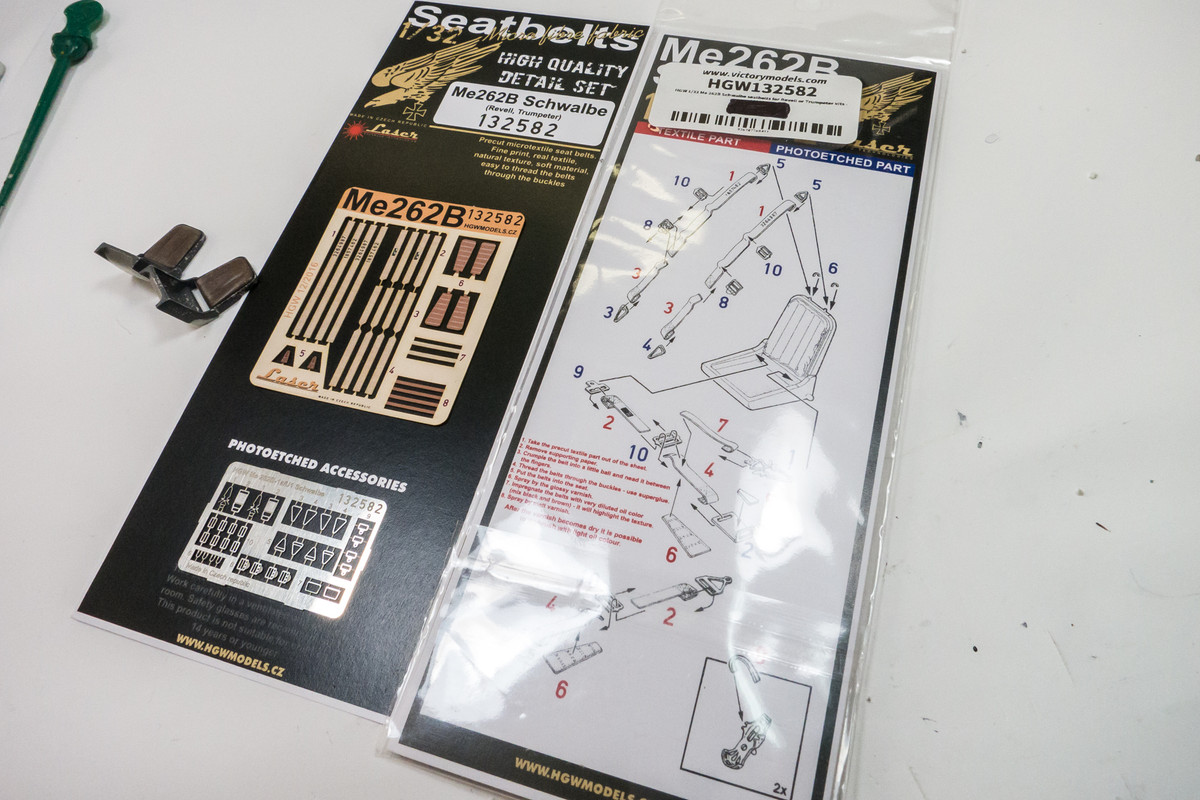
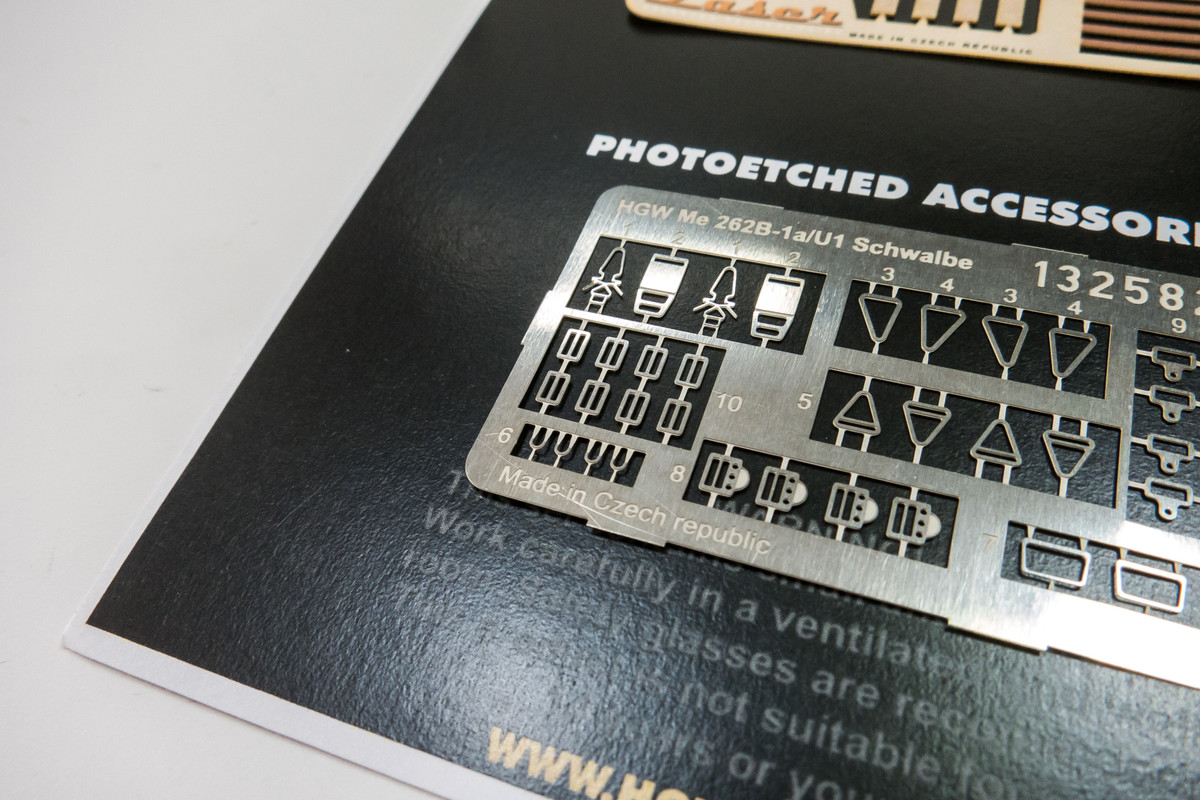
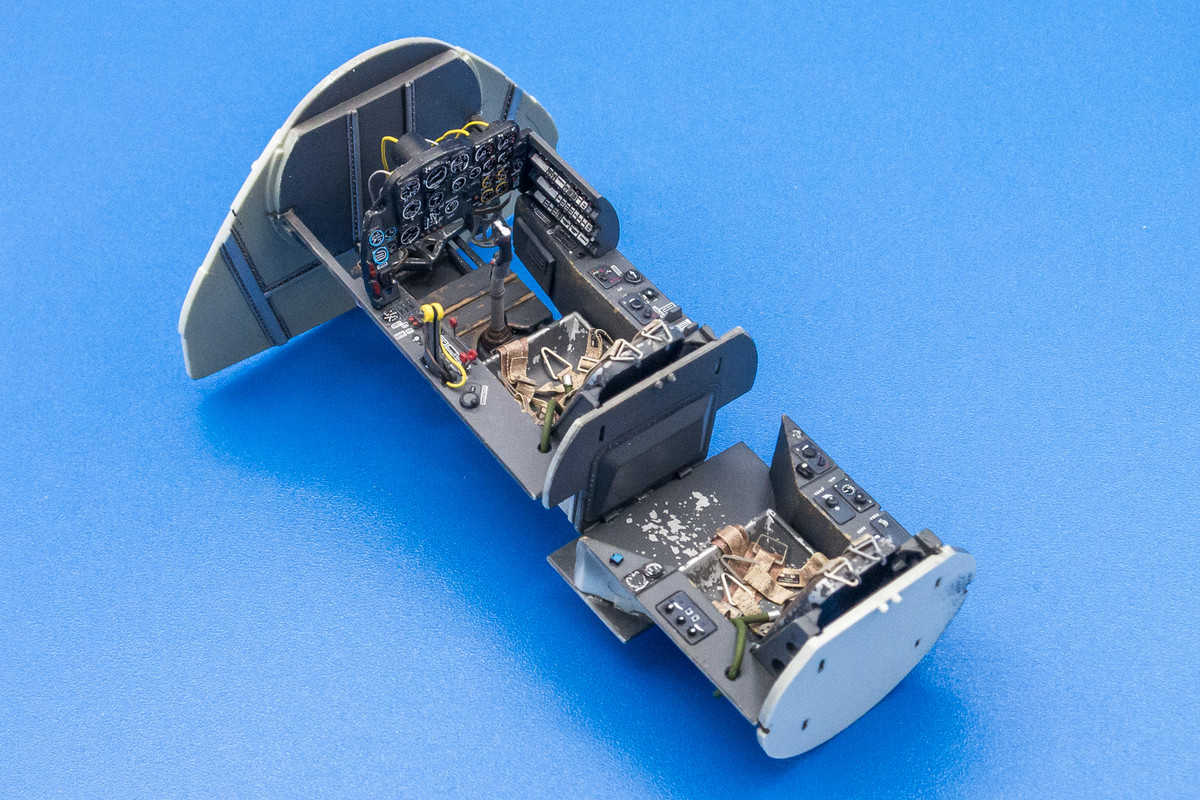
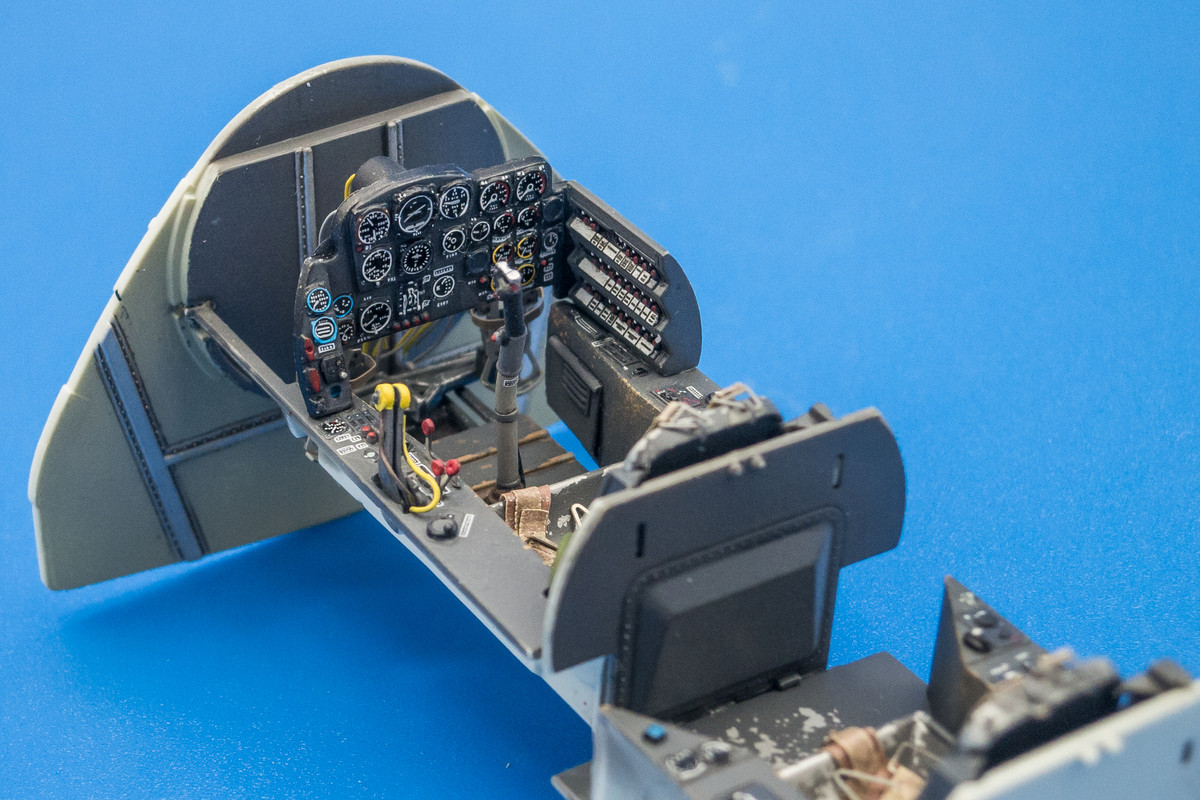
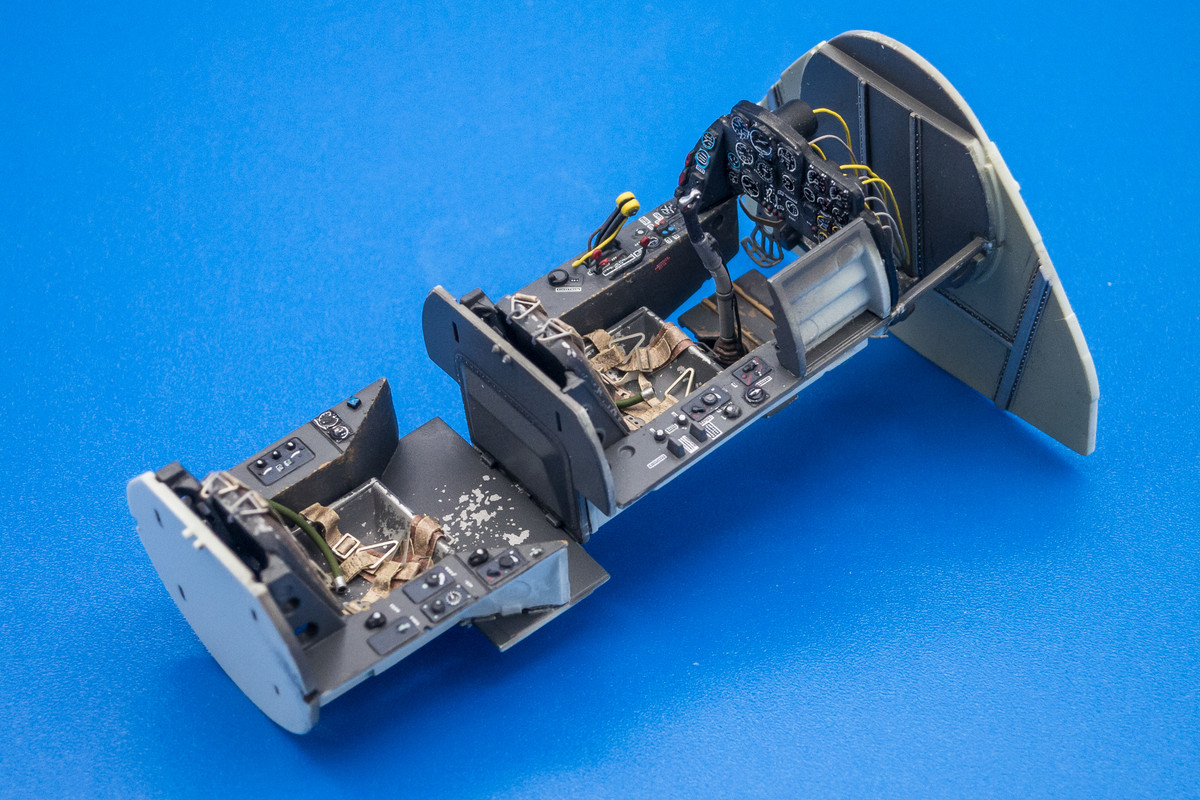
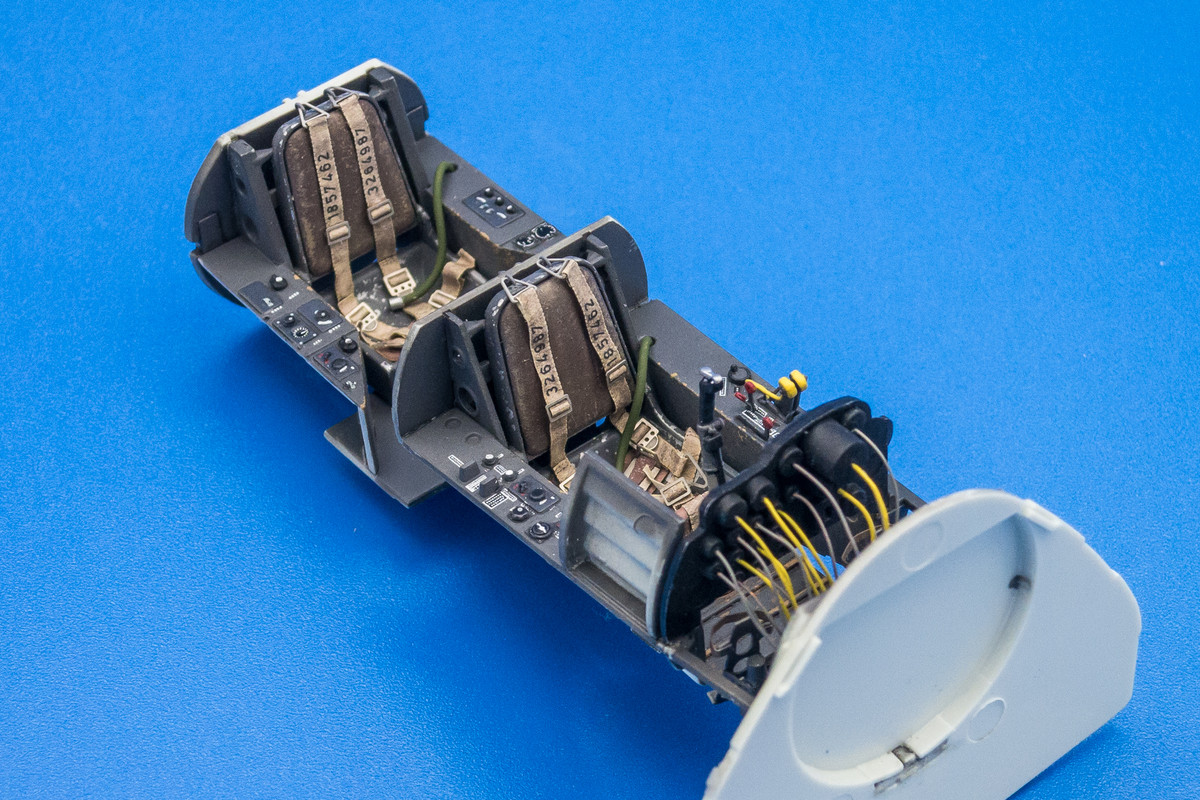
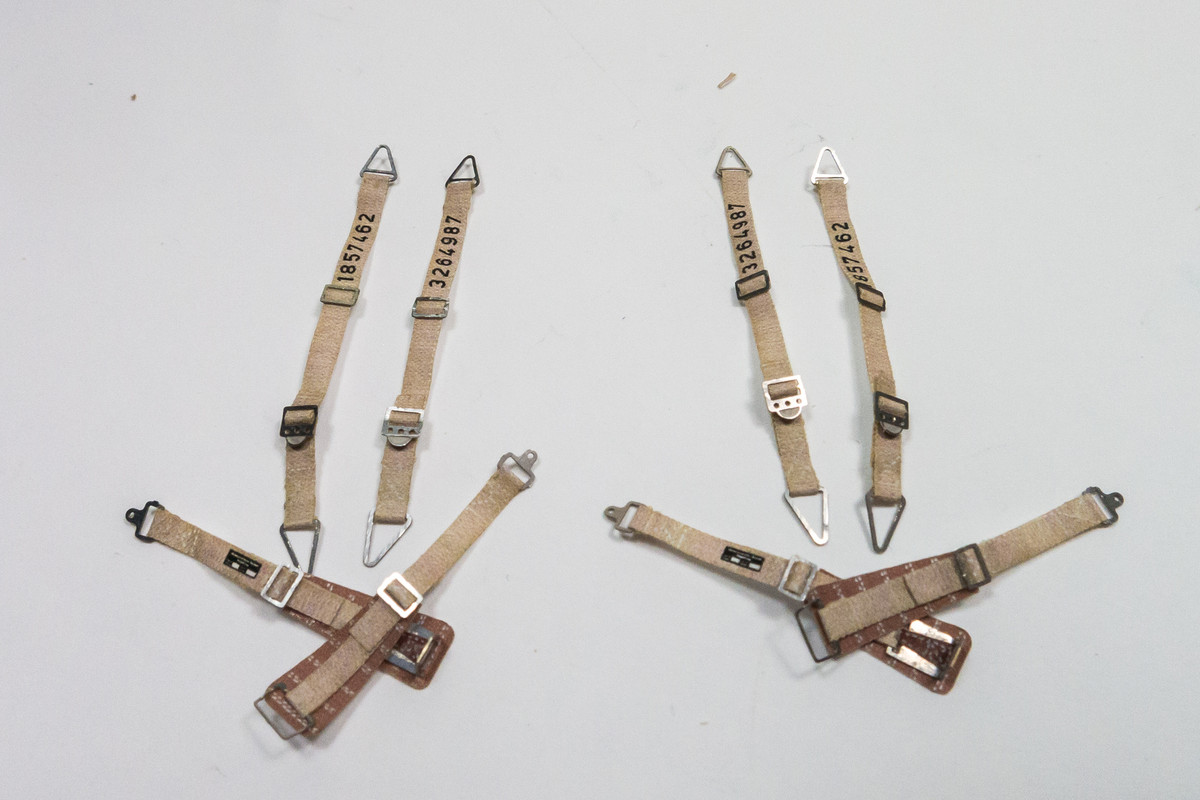
I actually spent most of today putting together the HGW seatbelts. This is a two-seater so twice the fun, eh?
Image

Although I love them and use them on most of my builds, I'm still of the opinion that the HGW harnesses are a bit overscale. I wish they were consistent and made the harness attachment loops (Part #6) overscale. They are way too small for me to effectively use. Instead, I looped copper wire around a small drill bit and cut my own, larger attachment loops, which were attached to the seat prior to the seat belts.
Image

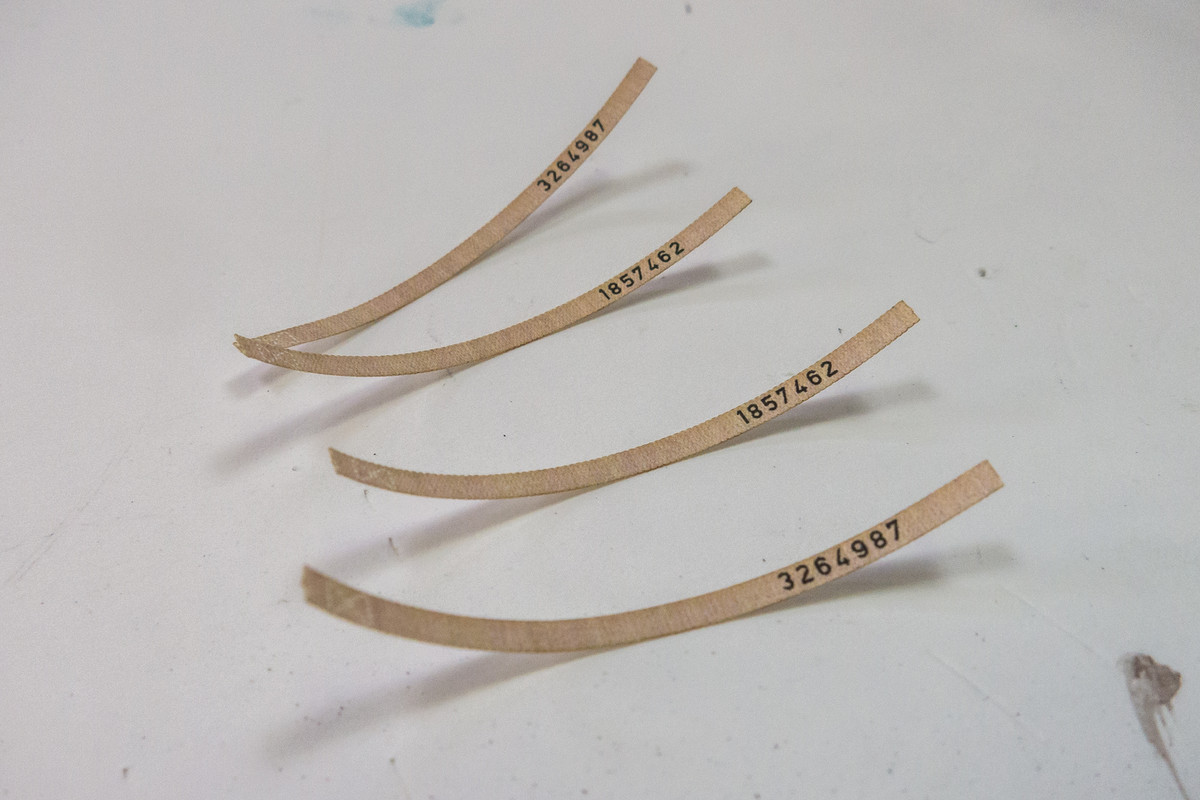
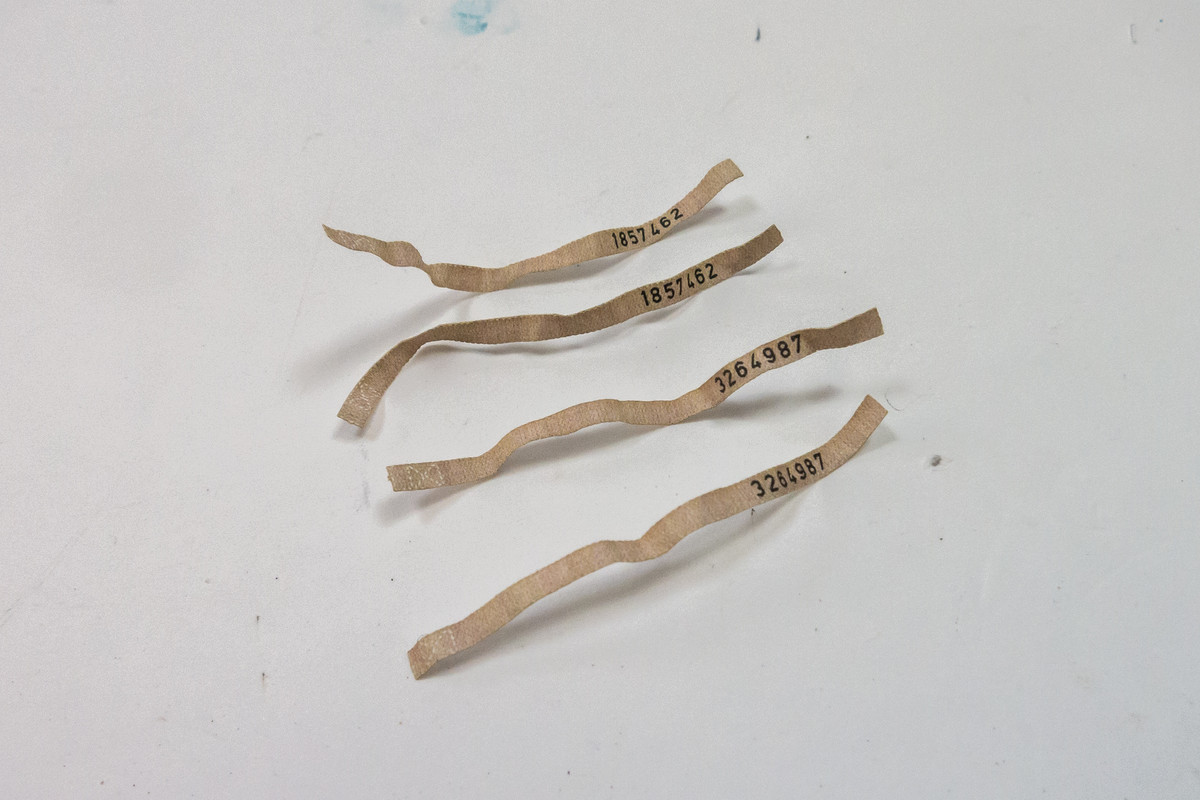
HGW uses a fabric material that is pre-printed in the appropriate color. Make sure you take off the backing before using.
Image

I like to crumple my belts prior to assembly per the instructions to loosen them up a bit and add some irregular wrinkles and bends.
Image

A few hours later... I have two sets of assembled harnesses for the Nachtjager.
Image

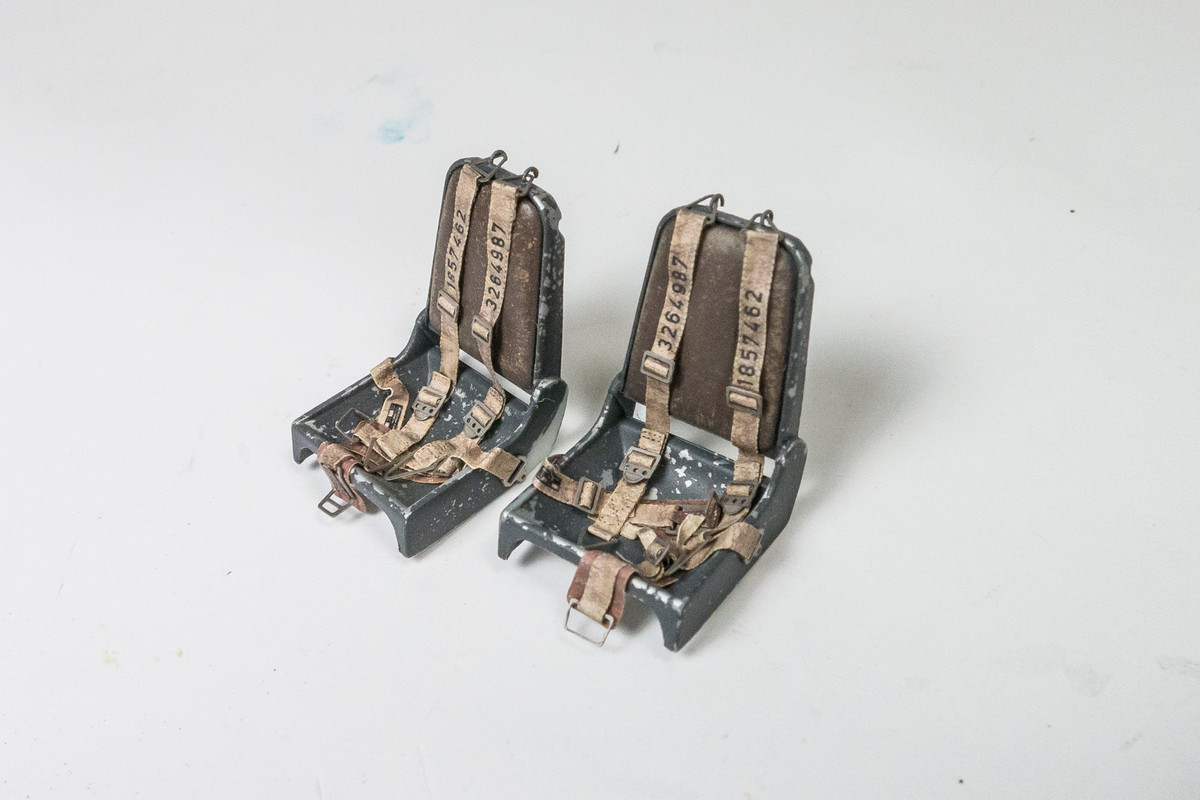
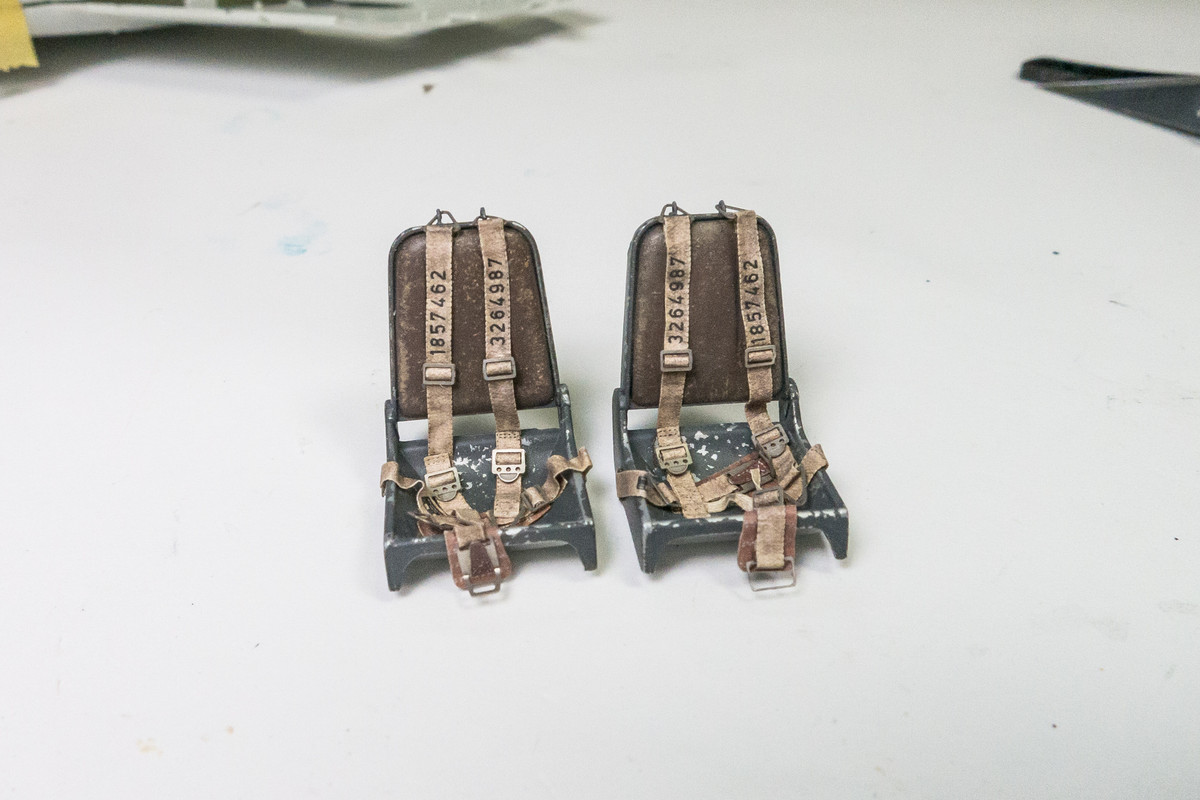
Attachment to the seats was accomplished in two stages. The lap belts were glued into place using dots of CA glue. The belts were then given a clear coat and a wash to bring out some of the stitching details on the HGW belts. I then attached the shoulder belts and repeated the gloss and wash. A flat coat seals the deal and the seats are done.
Image
Image

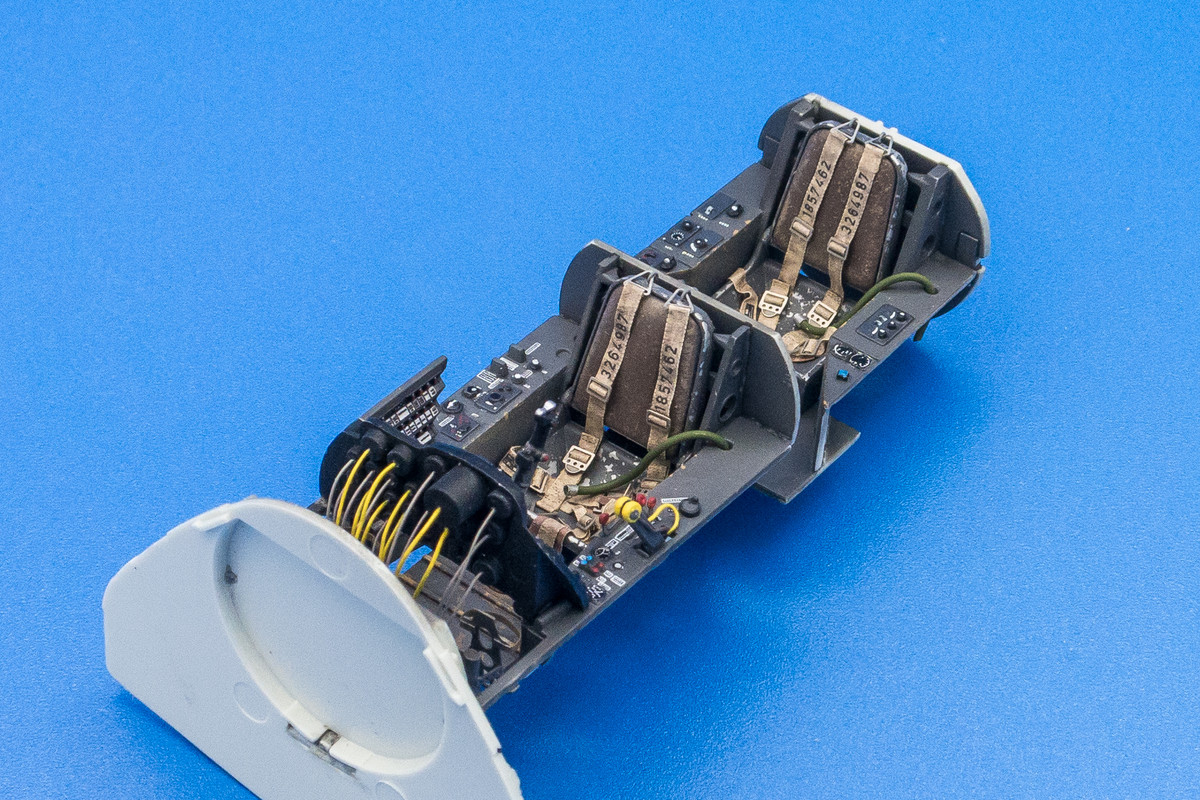
I can now glue the seats into the cockpit and get some shots of the nearly completed cockpit in the light box.
Image
Image
Image
Image
Image
John aka JKim
-----------<><
Image
User avatar
keavdog
Elite Member
Posts: 4780
Joined: Thu Jan 10, 2019 1:14 am
Location: Earth

Re: 1/32 Revell Me262B-1/U1 Nachtjager

Post by keavdog »

Pit looks great! I'm sure you will deal with the fit issues. :bow:
Thanks,
John
User avatar
Floki
Elite Member
Posts: 3548
Joined: Wed Dec 12, 2018 2:23 am
Location: Muncie, Indiana

Re: 1/32 Revell Me262B-1/U1 Nachtjager

Post by Floki »

That's one beautiful cockpit John. The HGW belts are great I just ordered me some more for my 109s
March as one, Don't look back
Odin's sons... Attack!
Unleash hell! Do not repent! Warfare grants us no lament
Let your weapons slash and tear This is no place for fear
Hold the lines! Move as one! In unity our victory's won
Our shields will form a mighty wall
United we shall never fall
Post Reply

Return to “Aircraft Work in Progress”