1/48 Eduard Nie.11 N1135 by speedgraflex

Post your work in progress of your aircraft builds in here.
Post Reply
User avatar
speedgraflex
Moderator
Posts: 11273
Joined: Fri Feb 10, 2017 11:08 pm
Contact:

Re: 1/48 Eduard Nie.11 N1135 by SPEEDGRAFLEX

Post by speedgraflex »

COCKPIT VERSION 1

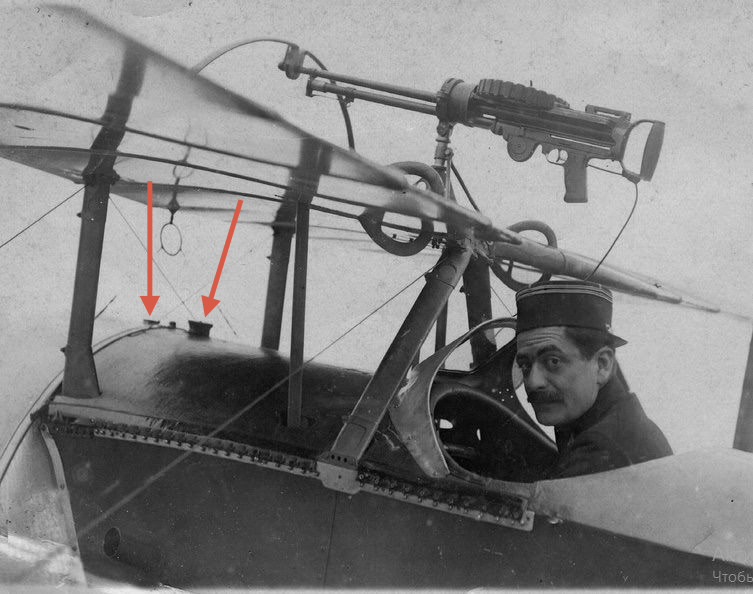
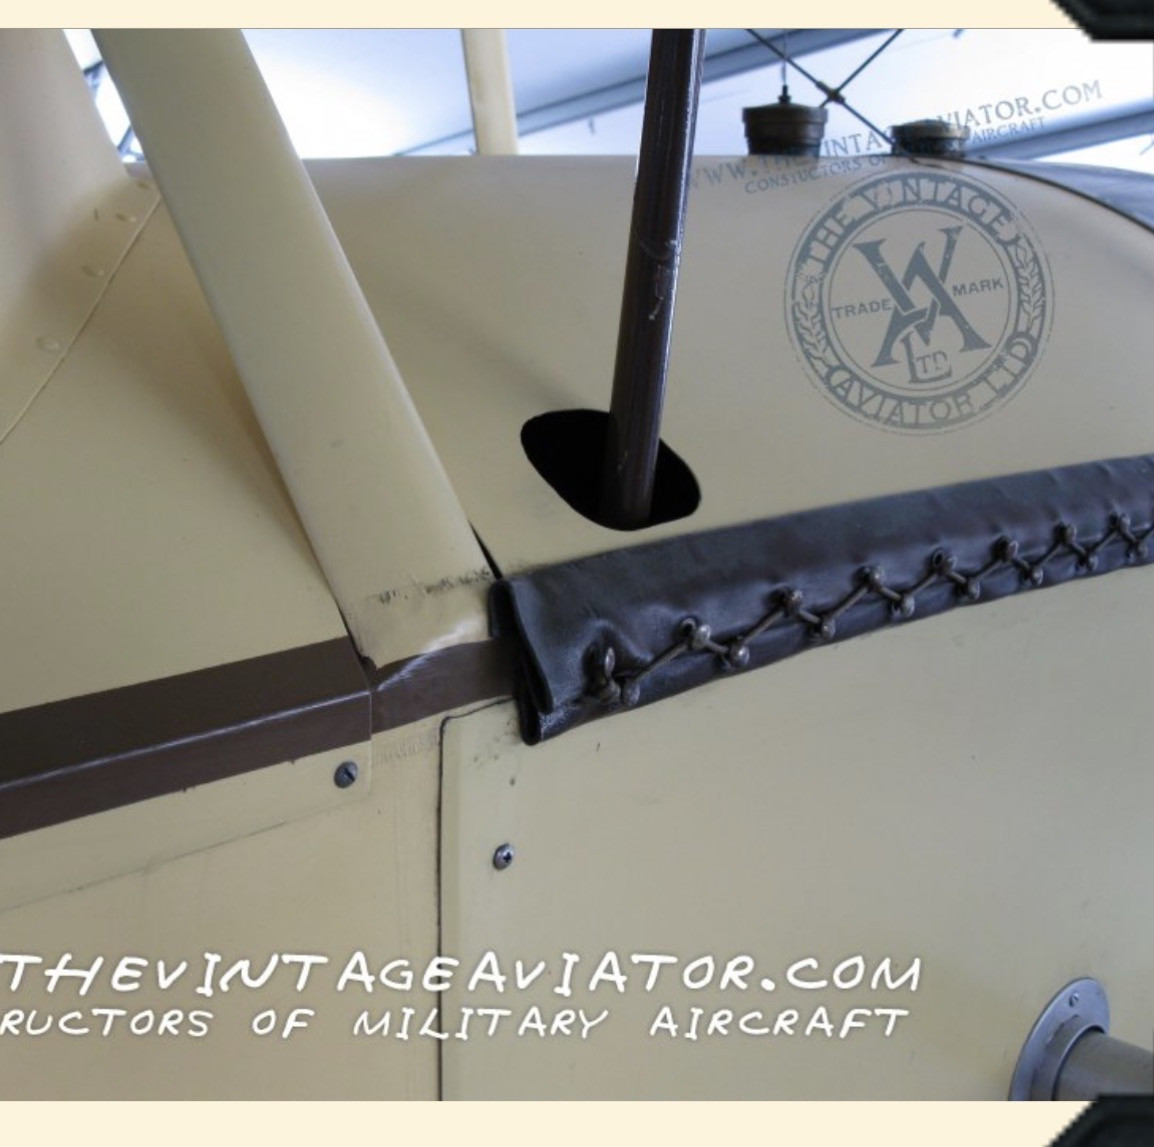
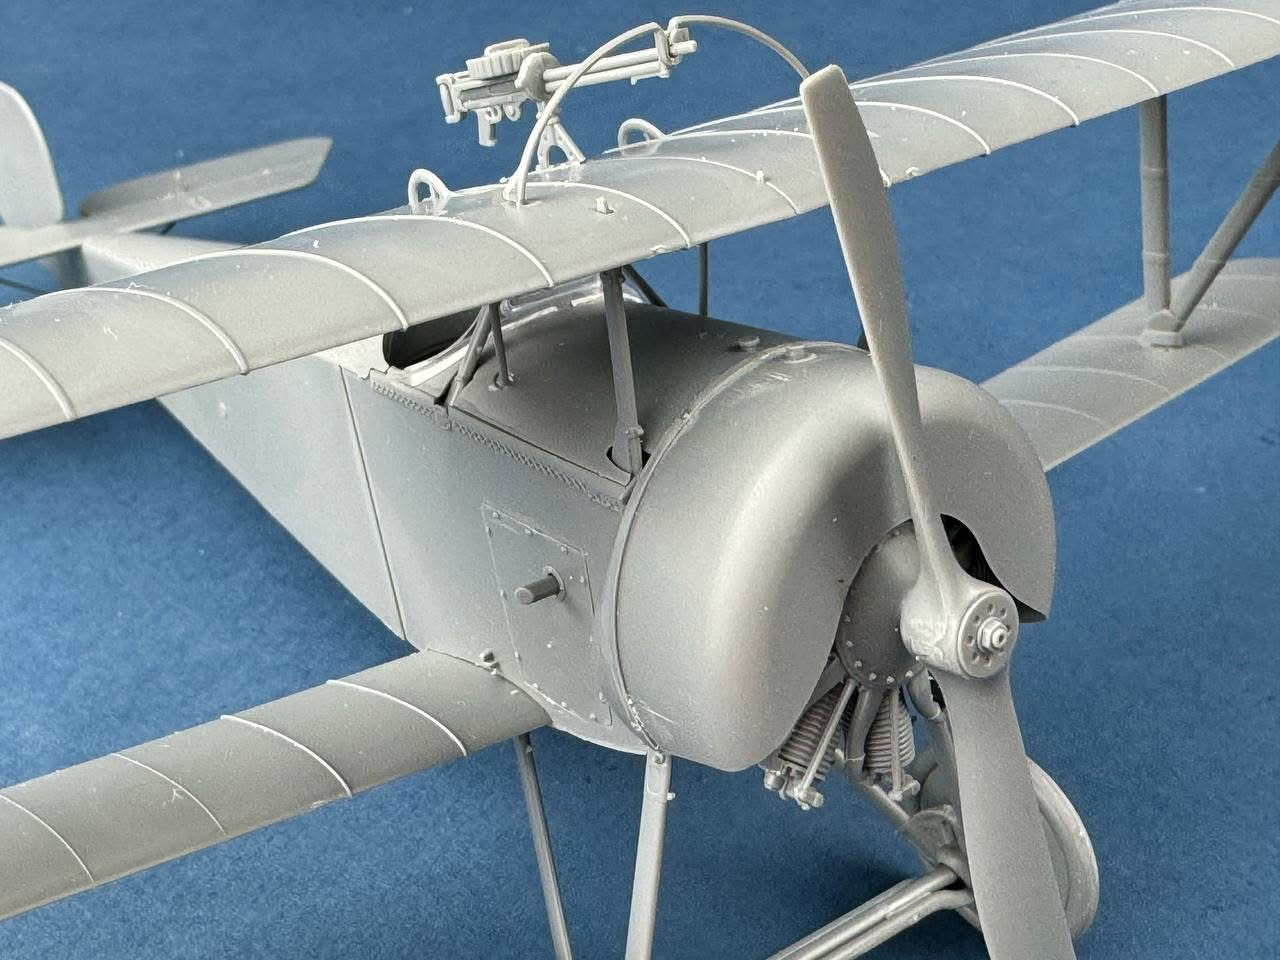
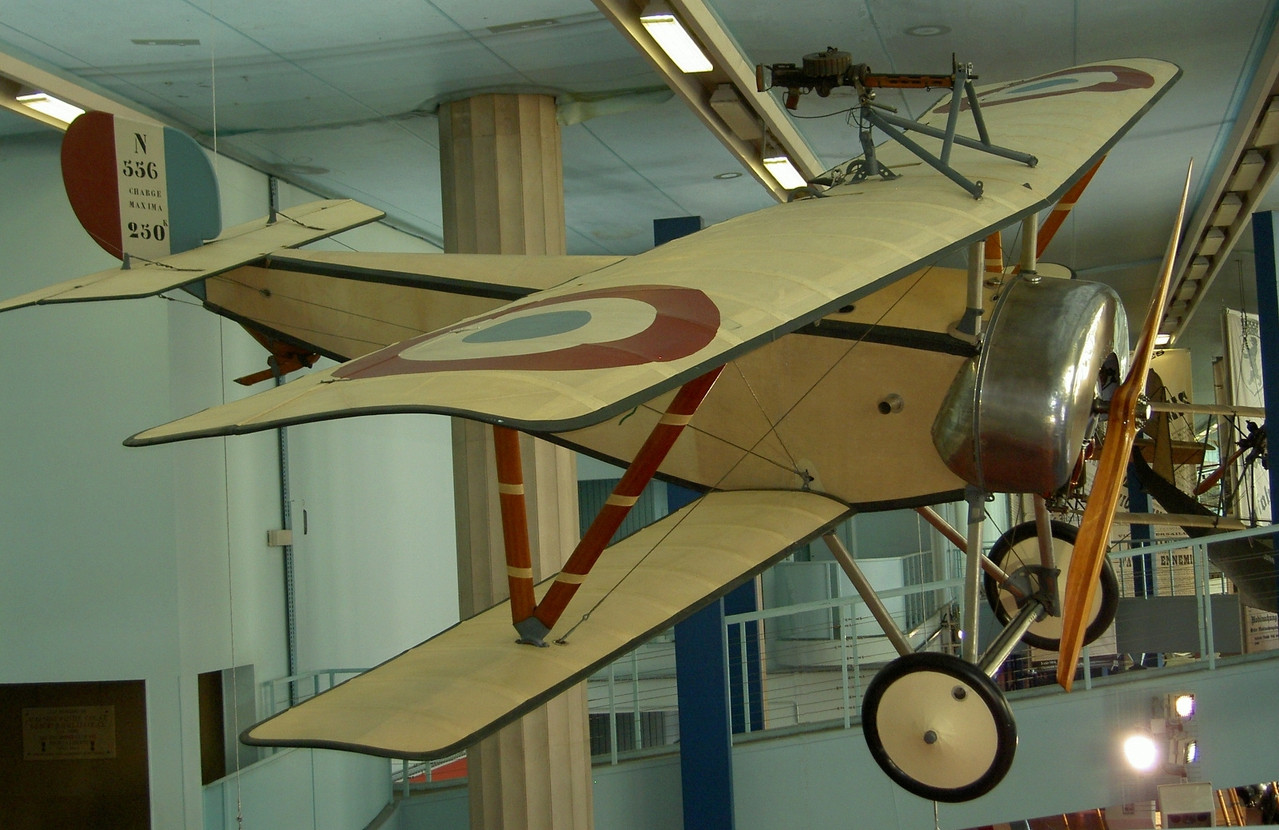
I did a quick second coat of primer on the fuselage. I still need to measure and drill out two holes for the cabane-strut rigging. I’m not sure if I’m going to do that now until I have the fuselage buttoned up, probably not. Which means I’ll be finalizing the cockpit details next.

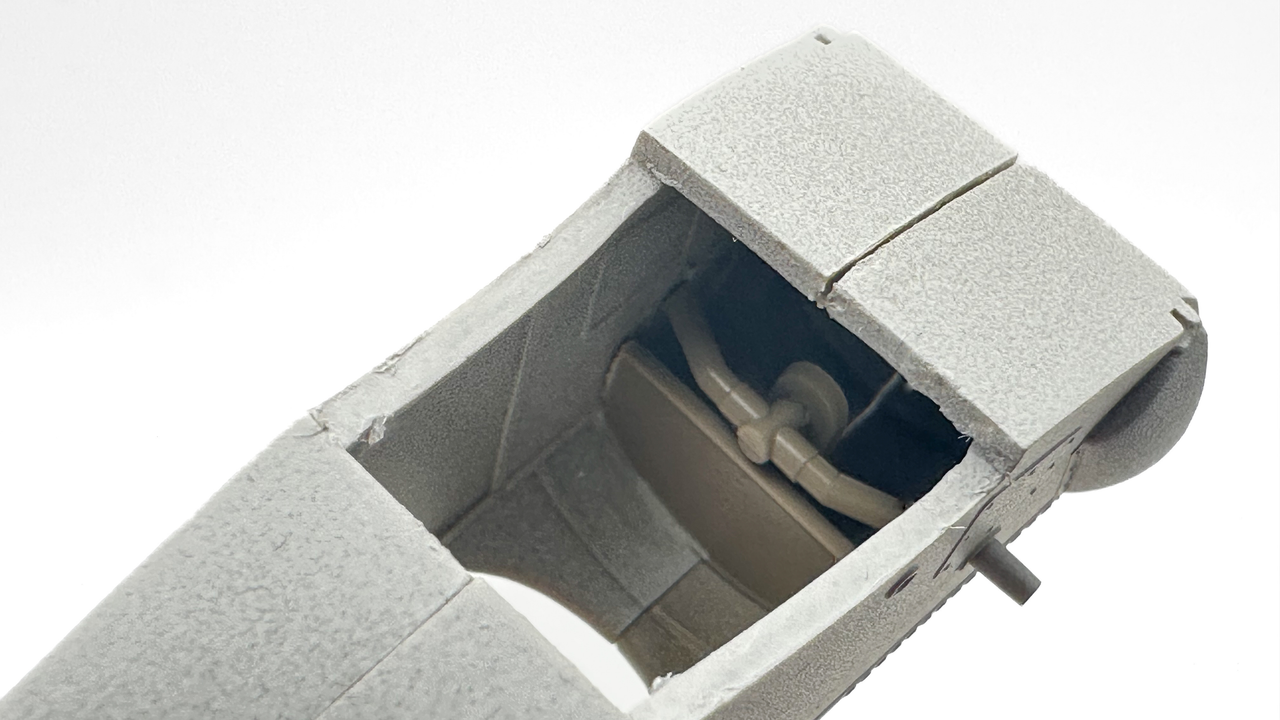
INT COCKPIT - UPSIDE DOWN

Eduard provides a series of interesting details for the cockpit, starting with the fuel tank cover and the exhaust manifold. I have the fuel tank cover glued to one half of the fuselage frame per instructions, but I have chosen to trap the pieces inside both halves in order to finalize adjustments.

Image

INT COCKPIT

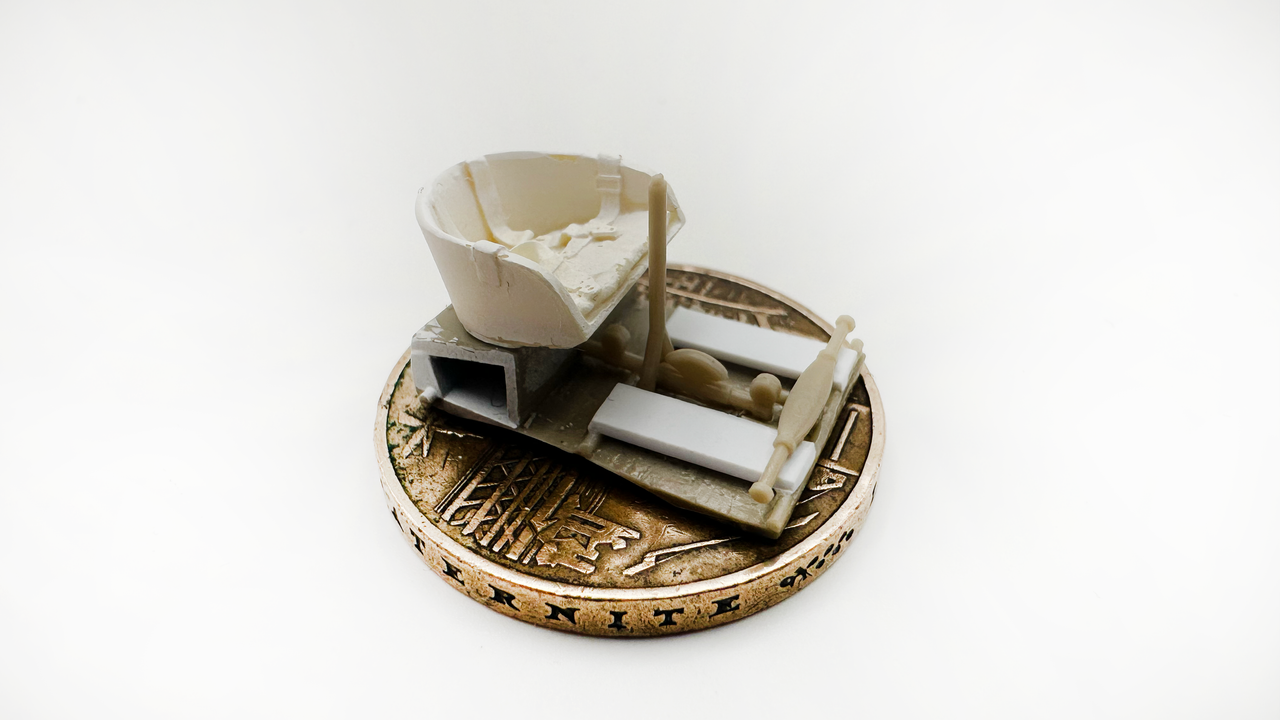
Here I have added stretched sprue and styrene sheet stock pieces to represent floorboards. The stretched sprue pieces were lined up with the interior framework mainly to keep the floorboards in the right place. No one will see the area that goes under the dashboard. The seat which was held in place with white glue has been removed to facilitate assembly. Since I now know (thanks, Remco) that the locating pins are a little tricky to set up, I was careful to trim pieces closely to the sides of the existing seat platform. This platform is Eduard's concession but it's really not to much of an issue at this scale and it comes from a long line of model kit designs where the interior of the pilot's seat is set upon a false floor.

Image

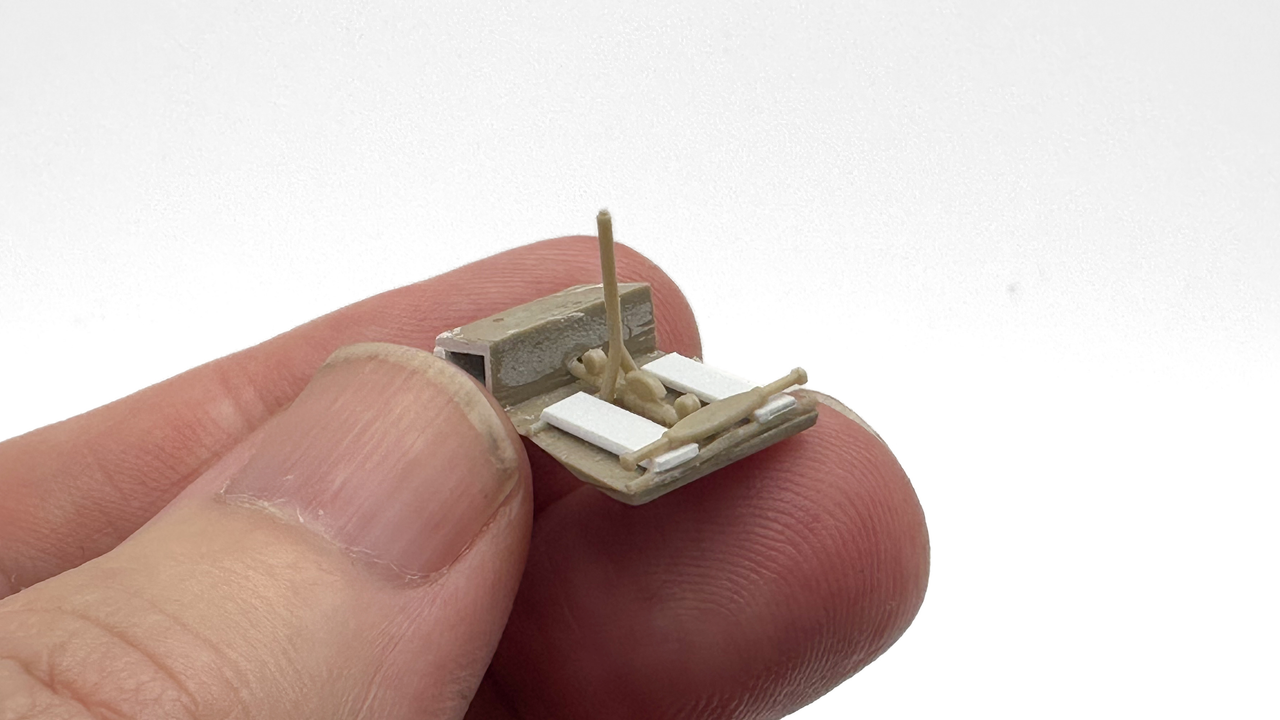
The floorboards feel a little thick but that's not really a concern because you will never catch the side view only the top; the control bar for the pilot's feet lacks stirrups. I also know that the control bar should not sit on the floorboards but I'm not sure if that's worth adjusting. Is it? I'm pretty positive that those are PE in the Profil-Pack version but are not included in the Weekend Edition. Honestly, I think this idea of a Weekend Edition came after this kit was introduced. I believe what Eduard did was repackage their existing kits with PE, calling them as Profil-Pack then rebranded their previous kits as Weekend versions. In 2001 when this kit was first released, I'm not sure how much PE was being included in any kits, except the Trimaster WWII ones. Maybe that was already happening, but other than the privateers such as Tom's Modelworks and the Early Eduard line of PE, was there all that much going on with PE?

I'm not sure if I should cobble together stirrups or not. Should I?
Make more models!
User avatar
speedgraflex
Moderator
Posts: 11273
Joined: Fri Feb 10, 2017 11:08 pm
Contact:

Re: 1/48 Eduard Nie.11 N1135 by SPEEDGRAFLEX

Post by speedgraflex »

COCKPIT VERSION 1

On a 10-Franc Coin

Image

PS. Seat may be too far forward; it's still not glued in place. I'm thinking about spraying primer on the platform area that's detailed, maybe add some stirrups hi yo silver and then begin detail painting, hoo ray! I was looking up the history of photo-etch as used in model building: starting with Model Technology, Gunze, Eduard, Tom's, Reheat, all the Trimaster kittys from the Eighties.... What are your memories of photo-etch suppliers at the dawn of usage, which I guess is the Eighties.
Make more models!
User avatar
speedgraflex
Moderator
Posts: 11273
Joined: Fri Feb 10, 2017 11:08 pm
Contact:

Re: 1/48 Eduard Nie.11 N1135 by SPEEDGRAFLEX

Post by speedgraflex »

hah it’s on me—the stick should be riding on top of that half round bit and the floorboards should be shorter! Wish me luck as I tear this apart!!

Image

I should have referenced CSM’s tooling CAD; oh well, version two time!
Make more models!
User avatar
speedgraflex
Moderator
Posts: 11273
Joined: Fri Feb 10, 2017 11:08 pm
Contact:

Re: 1/48 Eduard Nie.11 N1135 by SPEEDGRAFLEX

Post by speedgraflex »

COCKPIT VERSION 2

Here we go again: I made a short horizontal pin from stretched sprue and mounted the flight control stick in situ, which sounds cool but just means I fudged a glued piece that I didn't want to move; the new attachment point does allow movement back and forth. After that I cut much thinner pieces of evergreen polystyrene card per Carlos's recommendations and mounted those with Mr. Cement. I'm using a much hotter glue than I would like for this plastic. I also have some Tamiya thin which I'll try to use as much as possible. You can see the ravaging of the cockpit base. I'm not worried abou this appearance because I think it won't even show up. Ditto the stirrups but I thought I'd try to make this a complete basic cockpit.

LEFT SIDE

Image

For me, it was totally worth it and easier than I thought to remove the previous parts and reuse the flight stick and the cross brace for the stirrups. Carlos did give me a "crash" course in avionics so I would sound a bit more informed. Please feel free to correct any errors! I feel Eduard gave the hypothetical builder of this 2001 kit a basic, soundly designed cockpit. I'm sure the stirrups are PE in the Profil-Pack Edition which I think is still being produced. This kit has been discontinued. Sadly. It does live on, sprue-wise, but with additional PE parts and a different subject.

RIGHT SIDE

Image

Image

I'm posting this because I'm gonna dribble castor oil just like this operational Bebe replica because it looks correct, makes sense that these aircraft spewed oil everywhere. Plus, ideas for painting the cockpit and note the metal interior where the engine is mounted.
Make more models!
User avatar
Stikpusher
Moderator
Posts: 21081
Joined: Sat Apr 05, 2014 8:37 pm
Location: Ceti Alpha 5

Re: 1/48 Eduard Nie.11 N1135 by SPEEDGRAFLEX

Post by Stikpusher »

Much better on Take 2! That looks great! :shoutout: :shoutout: :shoutout:
"Surely I have made my meaning plain? I intend to avenge myself upon you, Admiral. I have deprived your ship of power, and when I swing 'round, I intend to deprive you of your life."

FLSM
User avatar
speedgraflex
Moderator
Posts: 11273
Joined: Fri Feb 10, 2017 11:08 pm
Contact:

Re: 1/48 Eduard Nie.11 N1135 by SPEEDGRAFLEX

Post by speedgraflex »

Carlos, Take 2 is much better thanks to your advice, which I truly appreciate. This Christmas Eve it is raining heavily in Los Angeles, my buddy in Culver City lost power and he’s running a genny to save his refrigerator contents, and the garbage was dumped out onto my street by I believe a mentally disturbed homeless man (at least I heard him shouting angrily at 3 am when he woke me up), I went to Ralph’s at 8:30 am thinking it wouldn’t be crowded but it was packed, and my editor is texting me for revised comic book pages as if I could magically make them in a few hours, but it’s all part of life’s journey.
Make more models!
User avatar
speedgraflex
Moderator
Posts: 11273
Joined: Fri Feb 10, 2017 11:08 pm
Contact:

Re: 1/48 Eduard Nie.11 N1135 by SPEEDGRAFLEX

Post by speedgraflex »

And now I’ve had the flu for almost 72 hours. The best laid plans of mice and men! I’m slowing mending after spending most of these past 2-1/2 days in bed. I did wake at one point to find fruit flies dive bombing my bowl of bananas, though. I had to take steps to eliminate these tiny winged bombers.
Make more models!
User avatar
speedgraflex
Moderator
Posts: 11273
Joined: Fri Feb 10, 2017 11:08 pm
Contact:

Re: 1/48 Eduard Nie.11 N1135 by SPEEDGRAFLEX

Post by speedgraflex »

Something I did begin working on was the cowling which I carefully thinned the edges down to a more realistic edge. I see that I need to add a cap on the top for either the fuel filler or the oil—wait there are two caps! I’ll find a photo to post.

From The Vintage Aviator’s website:
The fuel and oil tanks are located under the forward cowling. The oil tank holds about two and a half gallons of Castor oil to supply the rotary engines total loss oil system (ten pints per hour are consumed by the LeRhone) there are no oil pressure or temperature gauges.
Image

Image

Should I assume these caps are both centered?
Make more models!
User avatar
speedgraflex
Moderator
Posts: 11273
Joined: Fri Feb 10, 2017 11:08 pm
Contact:

Re: 1/48 Eduard Nie.11 N1135 by SPEEDGRAFLEX

Post by speedgraflex »

First I found CSM’s version but—

Image

I think the fuselage mounted filler is off set.

Image
Make more models!
User avatar
speedgraflex
Moderator
Posts: 11273
Joined: Fri Feb 10, 2017 11:08 pm
Contact:

Re: 1/48 Eduard Nie.11 N1135 by SPEEDGRAFLEX

Post by speedgraflex »

Image
Make more models!
Post Reply

Return to “Aircraft Work in Progress”