Page 8 of 49
Re: Yeah baw 1:32 Saburo Shindo Zeke!
Posted: Wed May 29, 2019 1:37 pm
by Stikpusher
This is getting better and better.
Re: Yeah baw 1:32 Saburo Shindo Zeke!
Posted: Wed May 29, 2019 2:12 pm
by jkim
The wiring adds a lot of interest to the cockpit! It's always a source of trepidation on my part as I struggle with accuracy/completeness and just trying to add some visual interest. I usually end up somewhere between the two... more on the interest side.
Re: Yeah baw 1:32 Saburo Shindo Zeke!
Posted: Wed May 29, 2019 3:19 pm
by Floki
The wiring looks great in this scale you can really go crazy with detail.
Re: Yeah baw 1:32 Saburo Shindo Zeke!
Posted: Wed May 29, 2019 5:15 pm
by KennyX
Bruce, Lyle, Carlos, John, Clint (and Stewart because I missed you before)—
THANK YOU! The decision to try this freaked me out a little bit. But aim glad I’m doing it and appreciate your feedback and compliments.
I have a couple of references I’ve been, er- “referring to” only in academic sense. In the end, knowing I couldn’t re-create all the intricacies of what they actually did, I went with a simplified version that I thought Incould pull off without making a mess of it. And I think for something like this, in the end that’s a wise decision. Unless you know, you’ve been doing this every day for years and years and wiring with 100% authenticity really turns you on. More power to you if that’s you, too.
That’s not me. This is my first time.
I was going more for “subtle and convincing enough, but simple, not so complex that I’d go crazy or screw it up” HAHAHAHAAAA
Re: Yeah baw 1:32 Saburo Shindo Zeke!
Posted: Wed May 29, 2019 6:43 pm
by pzl66
I should just send you all my kits to wire up my pits!

Re: Yeah baw 1:32 Saburo Shindo Zeke!
Posted: Thu May 30, 2019 3:45 am
by Stuart
Looking good Kenny - that's really added a lot to those panels!
Re: Yeah baw 1:32 Saburo Shindo Zeke!
Posted: Thu May 30, 2019 5:30 am
by KennyX
pzl66 wrote:I should just send you all my kits to wire up my pits!

I appreciate the vote of confidence!
portman wrote:Looking good Kenny - that's really added a lot to those panels!
Stewart, thank you! I do have some concerns about this though. I used the innards of a coaxial cable for the material, and I used Testor’s super glue to affix the wired where I wanted them. I sure hope they’ll last and not come unglued later on. Hindsight being what it is, it would have been wiser of me to ask for advice about materials and adhesives before I tried this. But that’s how I’ve been doing my wiring harnesses on the engines lately too and so far that’s been okay... we’ll see I reckon
Re: Yeah baw 1:32 Saburo Shindo Zeke!
Posted: Thu May 30, 2019 8:07 am
by Stuart
KennyX wrote:I used the innards of a coaxial cable for the material, and I used Testor’s super glue to affix the wired where I wanted them.
I hope it's ok, it's what I've been doing for years...

Re: Yeah baw 1:32 Saburo Shindo Zeke!
Posted: Thu May 30, 2019 8:22 am
by KennyX
HAHAAA! My man!
Re: Yeah baw 1:32 Saburo Shindo Zeke!
Posted: Thu May 30, 2019 6:48 pm
by KennyX
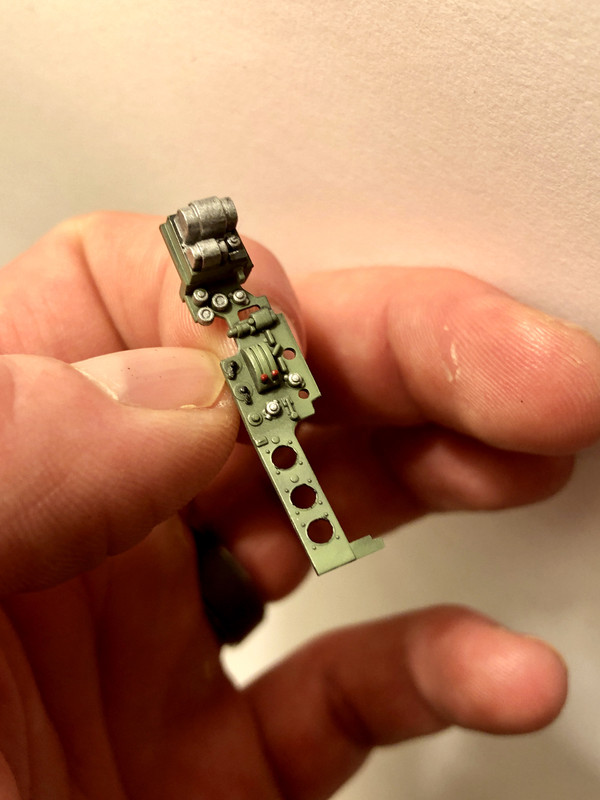
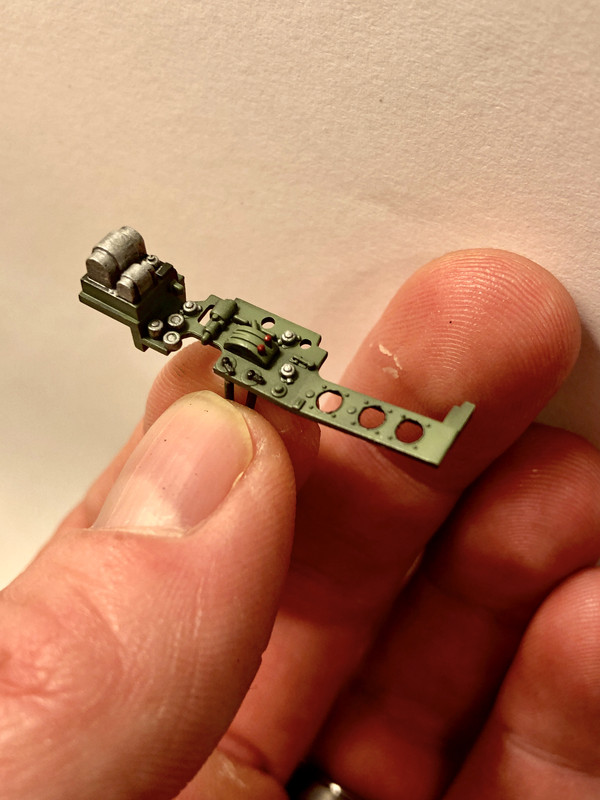
Progress is intentionally slow. This probably doesn’t look like much of an accomplishment for today’s modeling session, but I spent all 60 minutes and change on this one cockpit piece here, the side instrument board. Gauges still need installed but I want to finish with the paint and stuff before I do that. I’m trying to pay as much attention as I can to each subassembly, getting as much detail out as I can. Also, I stripped the wiring I did off the side of the radio, and plan to re-wire it, putting those wires through one of those small holes. I found a reference photo of a restored A6M2’s cockpit, and that’s how the wiring for the side of that radio was installed, and I like how that looks, so I’ll redo that bit once I’m ready to install this piece.