Maddog Manufacturing 2020 Production
-
Medicman71

- Elite Member
- Posts: 11299
- Joined: Mon Apr 07, 2014 9:32 am
- Location: Houston, Tx
Re: Maddog Manufacturing 2020 Production
Great work Duke! Those Abrams look awesome! 
Mike
Sponsored by Boeing, Lockheed Martin, Northrop Grumman, Saab, BAE, and Dassault
Sponsored by Boeing, Lockheed Martin, Northrop Grumman, Saab, BAE, and Dassault
-
Duke Maddog

- Elite Member
- Posts: 7668
- Joined: Tue Jun 03, 2014 11:22 am
- Location: Rowland Heights, CA
Re: Maddog Manufacturing 2020 Production
Thanks Mike! I appreciate you stopping in.
The Duke
Virtuoso of Miniatures
"Do you know what the chain of command is? It's the chain I get and beat you with 'till you understand who's in ruttin' command!"
-Jayne Cobb, Firefly Episode 2 "The Train Job"
We are modelers - the same in spirit, in hunger to insanely buy newly released kits, hustlers in hiding our stash from our better halves and experts in using garbage as replacements for after-market parts.
-
Duke Maddog
- Elite Member
- Posts: 7668
- Joined: Tue Jun 03, 2014 11:22 am
- Location: Rowland Heights, CA
Re: Maddog Manufacturing 2020 Production
Well, it's been a slow week so there's only a small update this time.
I did manage to get the photo etch on the Redstone capsule; these panels make it into the Friendship 7:

Later I shot that black, even though it doesn't show well in this pic:
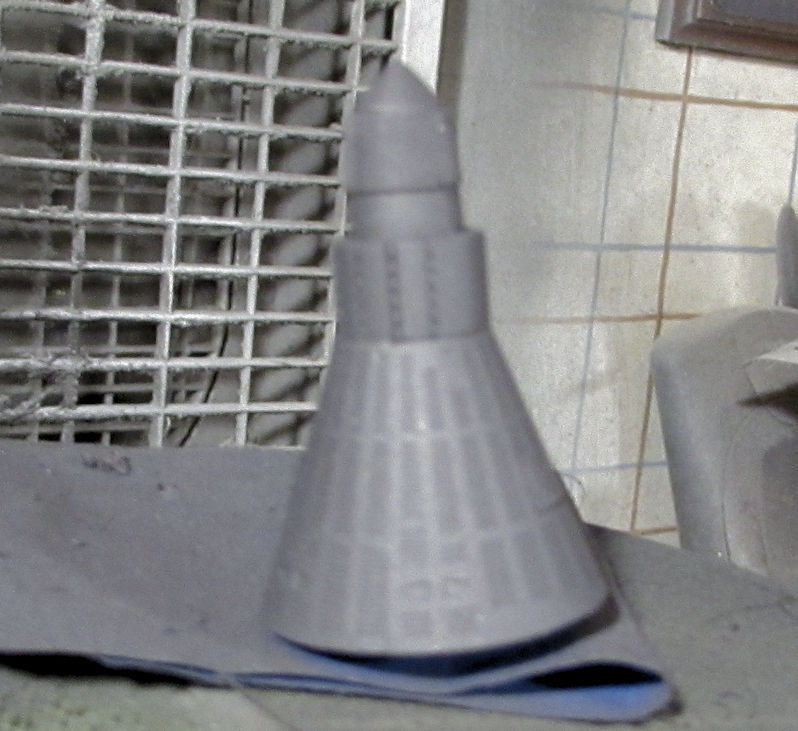
Sorry about the blurriness in that pic; the camera had a difficult time focusing on that capsule. Now for a gloss coat and then decals.
Moving on, I stopped working on the rocket to get going on the tank transporters I've had languishing while I worked on the Abrams and Paladin.
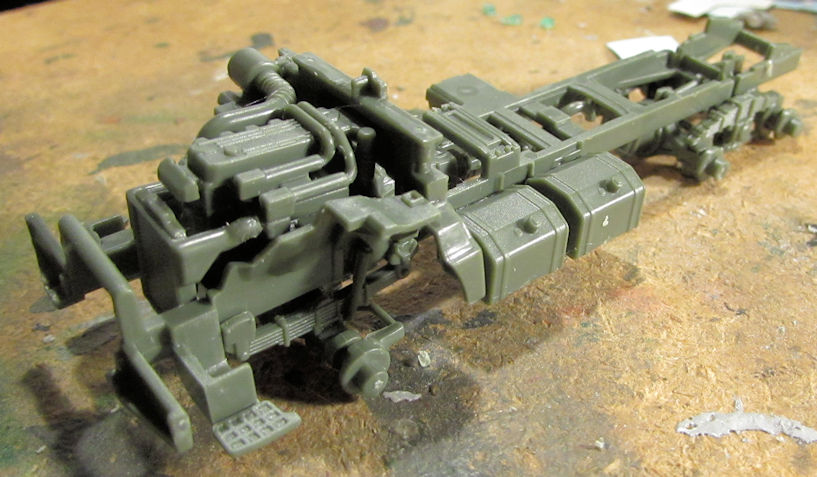
First off, I added more details to the HEMMTT tank transporter chassis. This was starting to take shape:
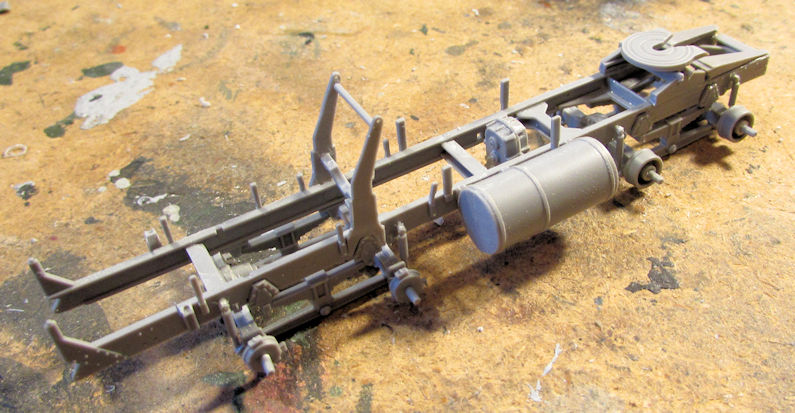
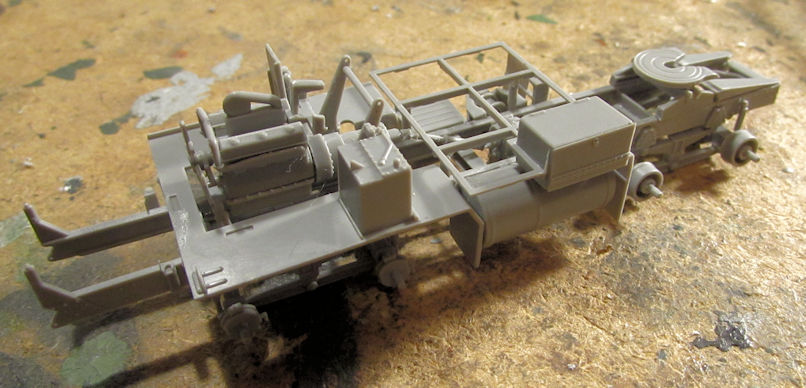
After that, I built the engine and added it to the chassis, along with the exhaust and other platform framework:
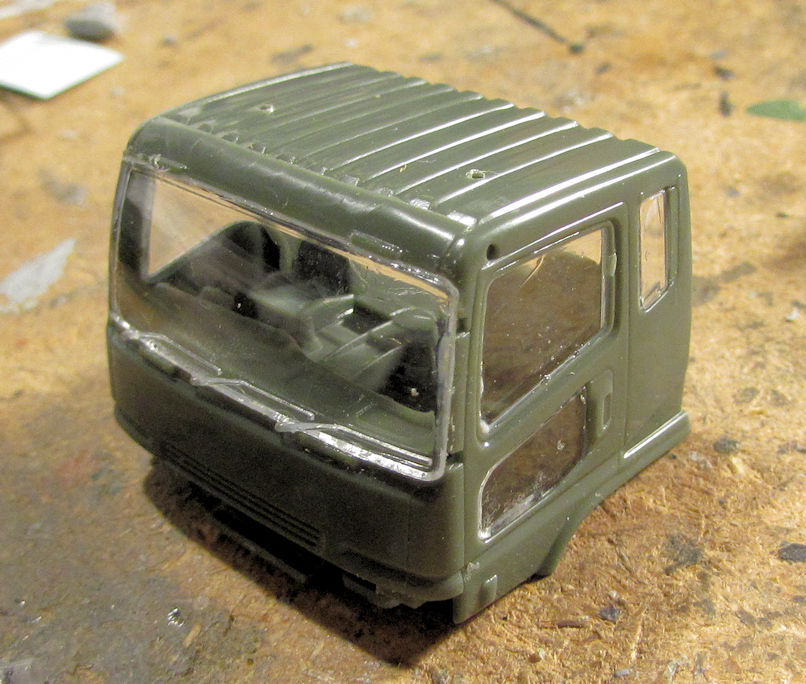
Once I got done with that, I assembled the cab for this truck. In the process of holding it together, I got some glue under my finger and smeared it all over the windscreen:
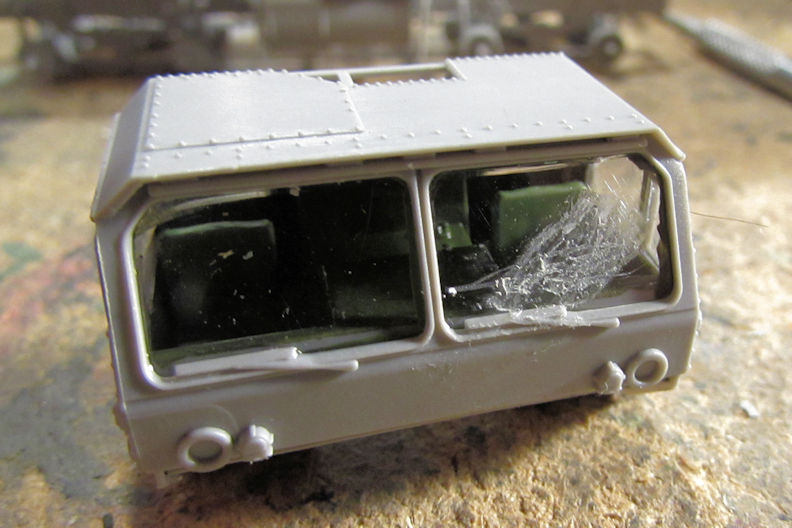
Yeah, that looked really bad. So I disassembled the cab, removed the windscreen and went to work trying to fix it. After some persistent and constant sanding and polishing with ever higher grit levels (from 600 to 12000) I dipped it in Future to try and clear it even more. The final result isn't as great as I had hoped, but there's at least no sign of glue smear:
Time to move on with that. Before I put it aside for the day, I dry-fit everything together that I had done:
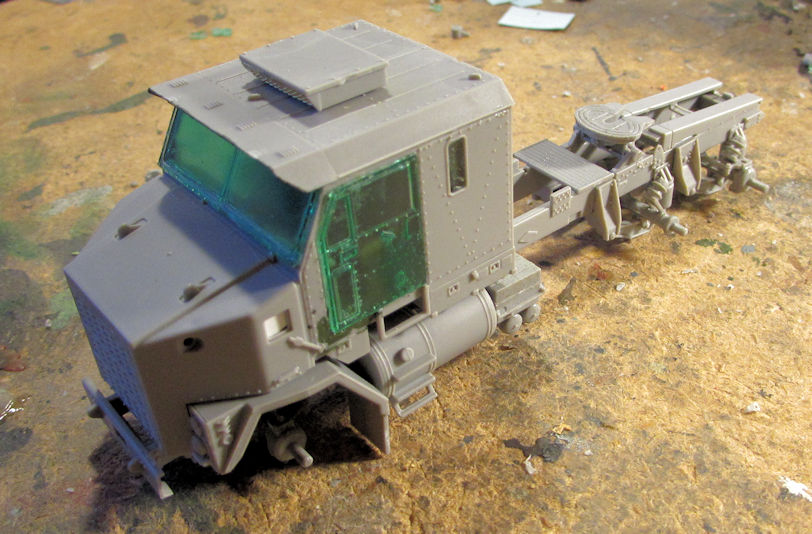
Moving on from there, I finally assembled the cab for the M-1070 tractor:
After that, I wanted to build up the chassis and suspension to mount that cab on, so I built the first two axle sub-assemblies 'A' and 'B':
Then I got called away so I put them both aside before I left. A couple days later, I return to start on this again and sub-assembly 'B' is gone! I tore the room apart for hours looking for it and finally gave up. I assembled the last two axle sub-assemblies 'C' and 'D' and cemented all three to the chassis frame. So now this will be the "light" version of this truck until I either find that sub-assembly or buy a whole new kit to replace it:
Later I cut off the fenders to add to the chassis. One of them flat out broke when I tried cutting it off:
It's like that hole on the left half was inside waiting for the any pressure to be applied so it could break! I glued it back together and added it to the chassis:
Later I added Mr. Surfacer 500 to that crack, but not before this pic was taken. Here is the whole chassis with most of the extra parts added to it:
Later I dry fit the cab to this to see how it would fit:
It's gonna take some finagling, but it'll fit well. After that I can build the winch platform. Until then, I moved on and started the new Japanese Type 73 tank transporter. First was the chassis and engine which went together very fast and easy:
There's still more detail parts to add to that,, but not before I get the cab mounted on it. So, I started the cab; building the interior first:
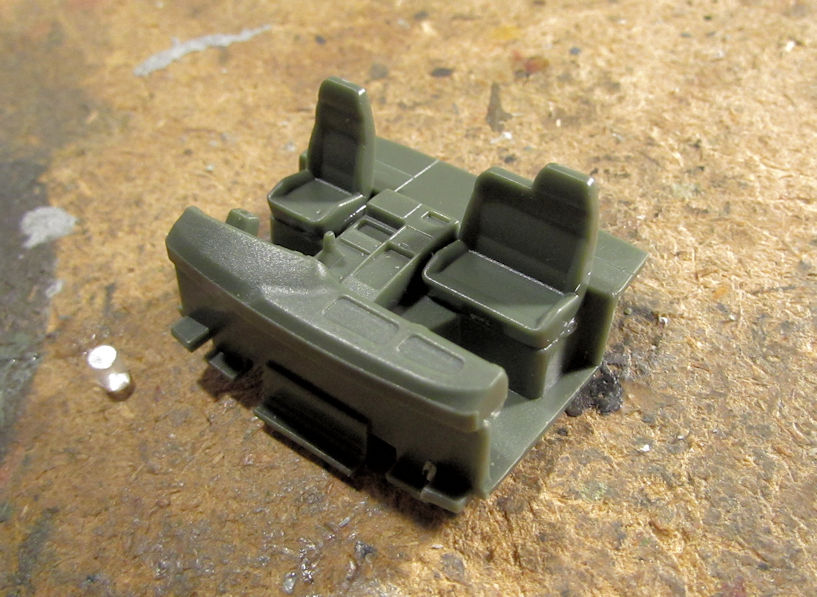
Naturally I get everything done on this except the steering wheel. When I tried cutting that from the sprue, it tumbled down to the floor and disappeared. After another hour of frustrating search; I finally decided that it would not be noticeable enough once the cab was closed so to hell with it; I'm moving on! Life is too short and I have too many models to build to screw around with extra tiny pieces that refuse to stay on the table.
I then added the windows to the cab and popped the interior in to see if my premise was correct. It certainly does not show unless someone really looks hard:
Onward we go from here to start assembly on the trailer:
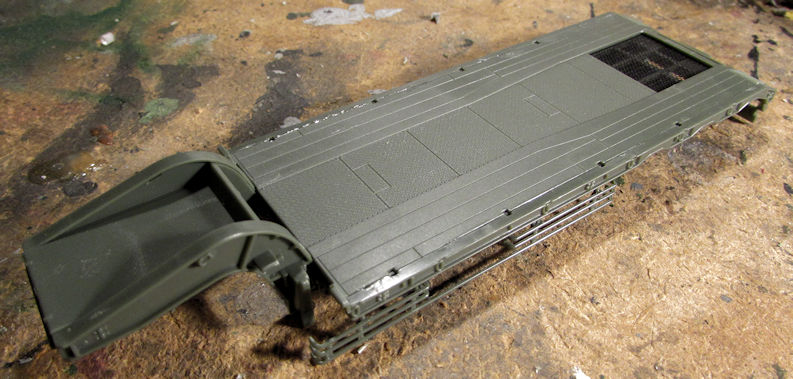
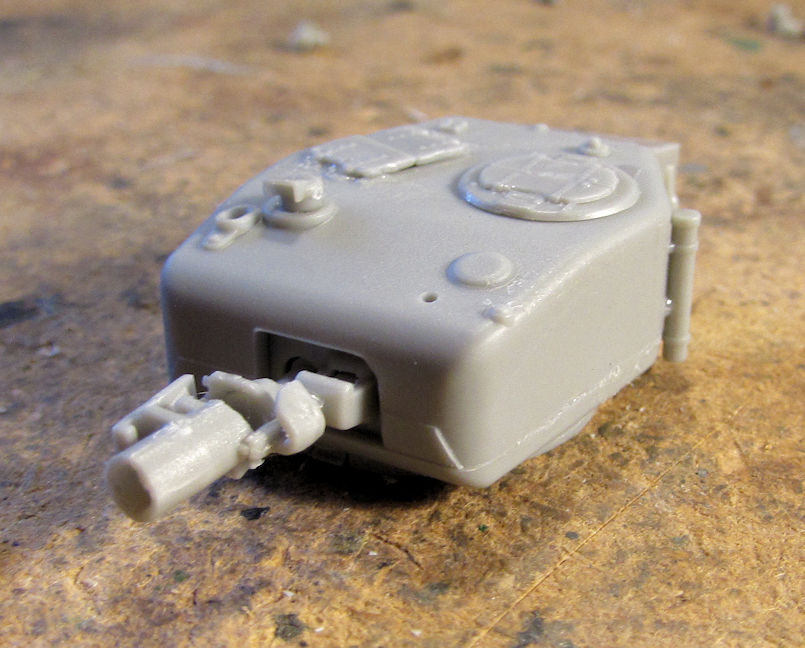
After that I was ready to get back to tanks. Since the Missing Lynx was running the Churchill Group Build, I pulled out two Churchills from Dragon to get started on. First was the Churchill III AVRE, starting with the turret:
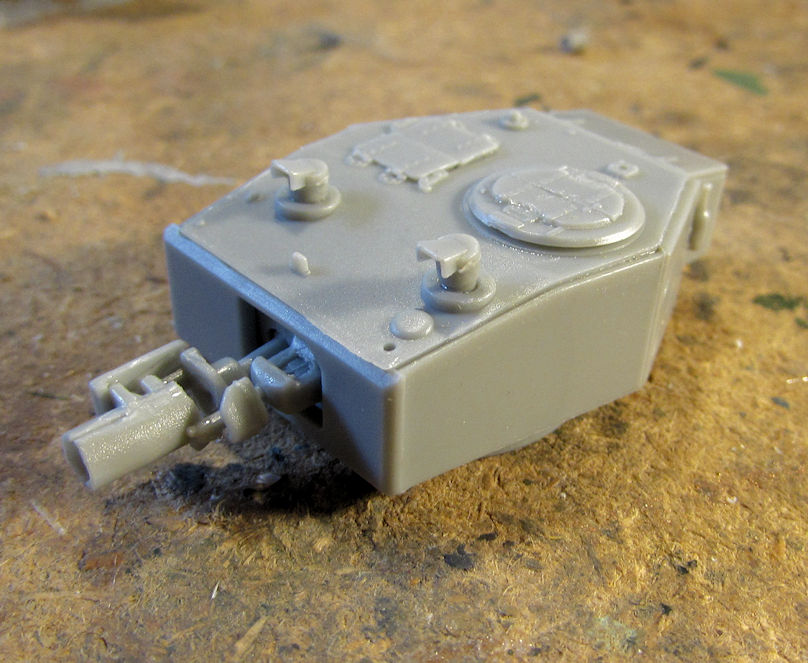
That petard mortar was a real pain to build, but I got it done. Then I added the five parts to the upper hull that are supposed to go on it and then added the turret for the pic:
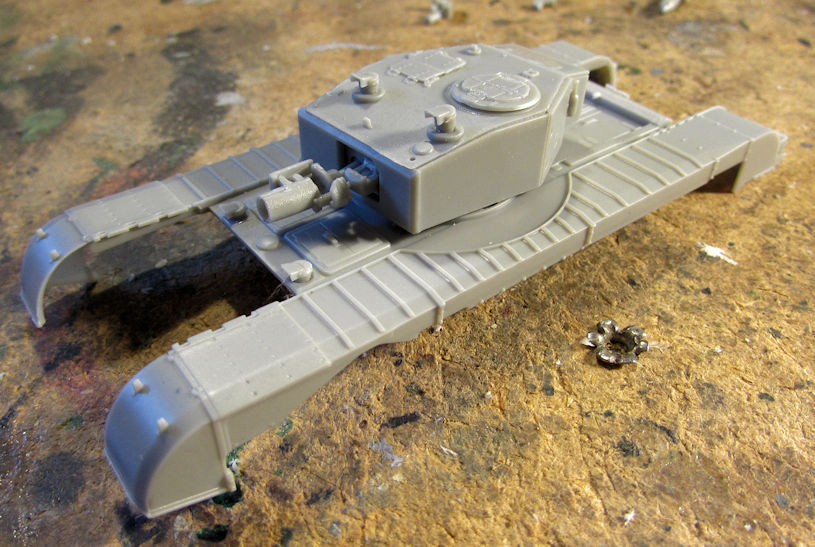
After that, I built the lower hull and roadwheels:
Here's a test fit after all that was done:

There's still a bit more to do on that, not least of which is to add the tracks. Until then, I started the Churchill IV AVRE; building the turret:
By that time it was late so I stopped until I have more time to build later. Until then, thanks for looking in, comments are welcome.
I did manage to get the photo etch on the Redstone capsule; these panels make it into the Friendship 7:
Later I shot that black, even though it doesn't show well in this pic:
Sorry about the blurriness in that pic; the camera had a difficult time focusing on that capsule. Now for a gloss coat and then decals.
Moving on, I stopped working on the rocket to get going on the tank transporters I've had languishing while I worked on the Abrams and Paladin.
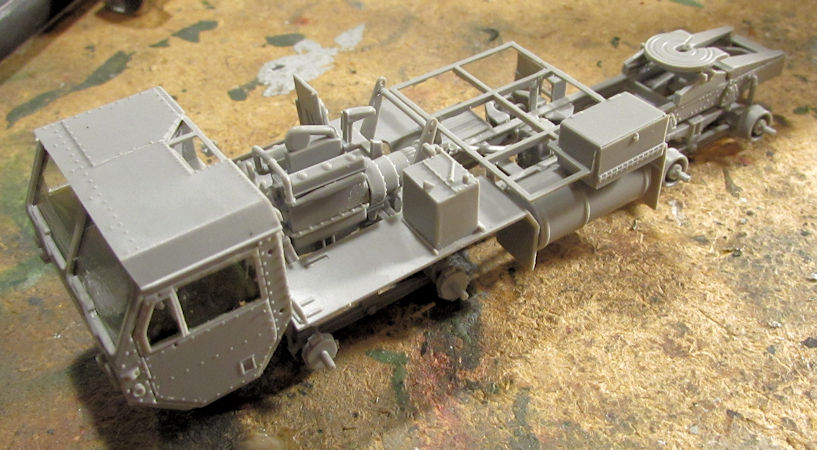
First off, I added more details to the HEMMTT tank transporter chassis. This was starting to take shape:
After that, I built the engine and added it to the chassis, along with the exhaust and other platform framework:
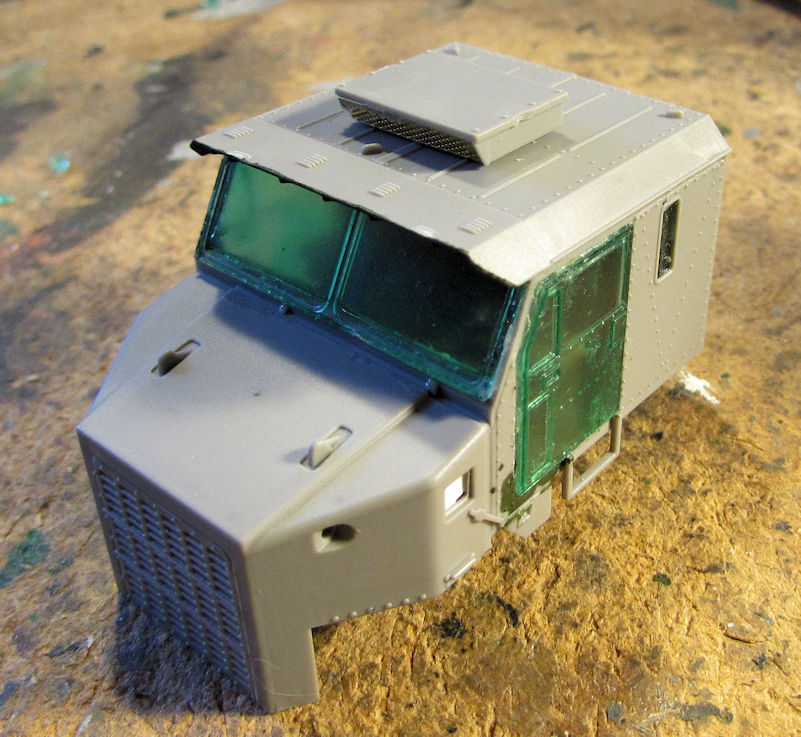
Once I got done with that, I assembled the cab for this truck. In the process of holding it together, I got some glue under my finger and smeared it all over the windscreen:
Yeah, that looked really bad. So I disassembled the cab, removed the windscreen and went to work trying to fix it. After some persistent and constant sanding and polishing with ever higher grit levels (from 600 to 12000) I dipped it in Future to try and clear it even more. The final result isn't as great as I had hoped, but there's at least no sign of glue smear:
Time to move on with that. Before I put it aside for the day, I dry-fit everything together that I had done:
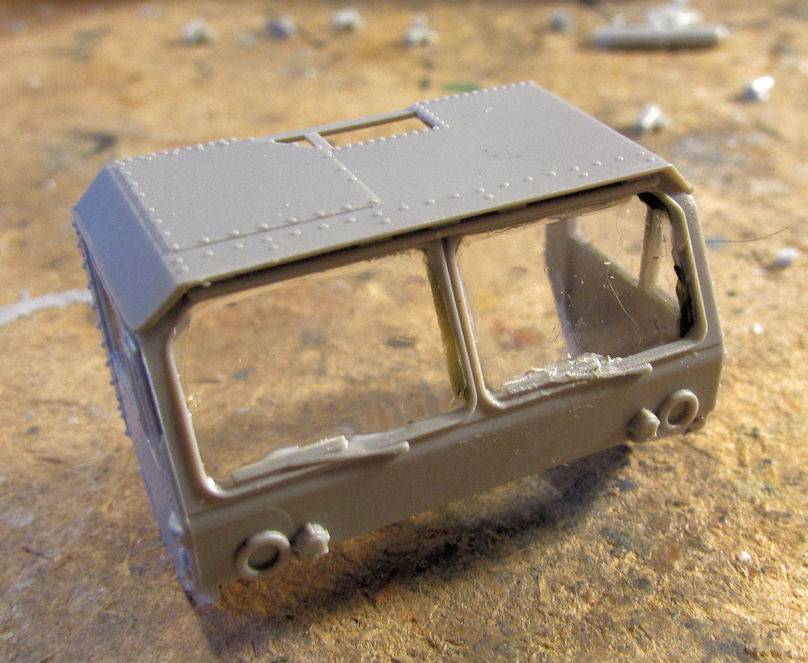
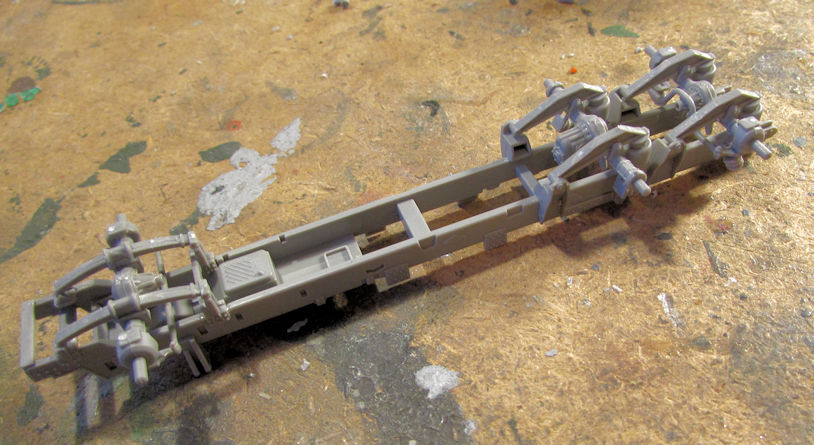
Moving on from there, I finally assembled the cab for the M-1070 tractor:
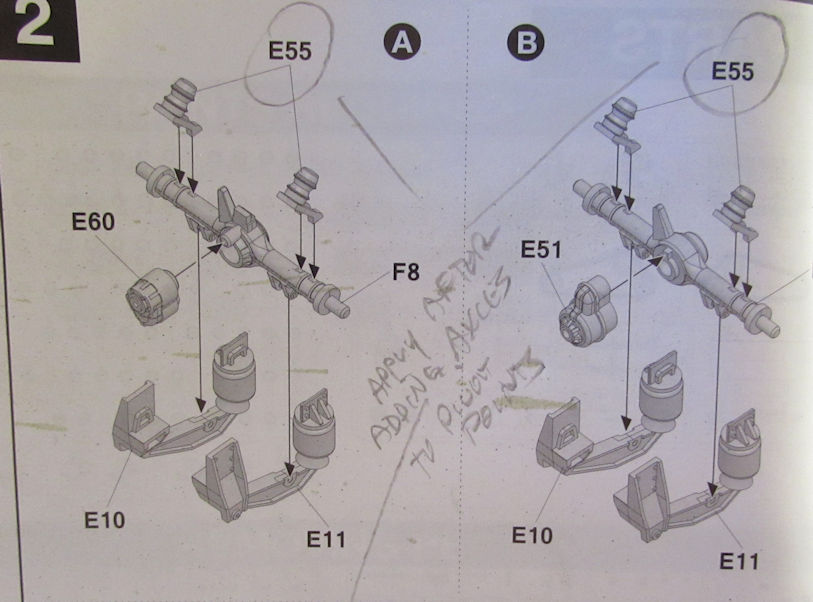
After that, I wanted to build up the chassis and suspension to mount that cab on, so I built the first two axle sub-assemblies 'A' and 'B':
Then I got called away so I put them both aside before I left. A couple days later, I return to start on this again and sub-assembly 'B' is gone! I tore the room apart for hours looking for it and finally gave up. I assembled the last two axle sub-assemblies 'C' and 'D' and cemented all three to the chassis frame. So now this will be the "light" version of this truck until I either find that sub-assembly or buy a whole new kit to replace it:
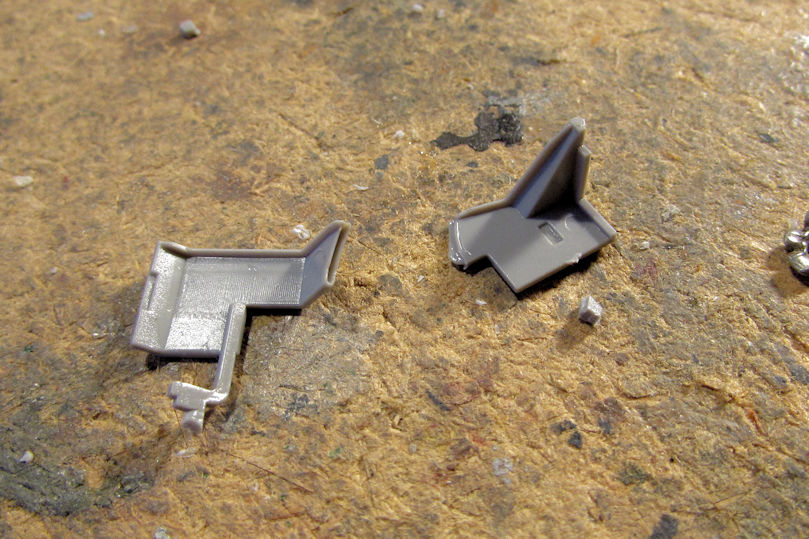
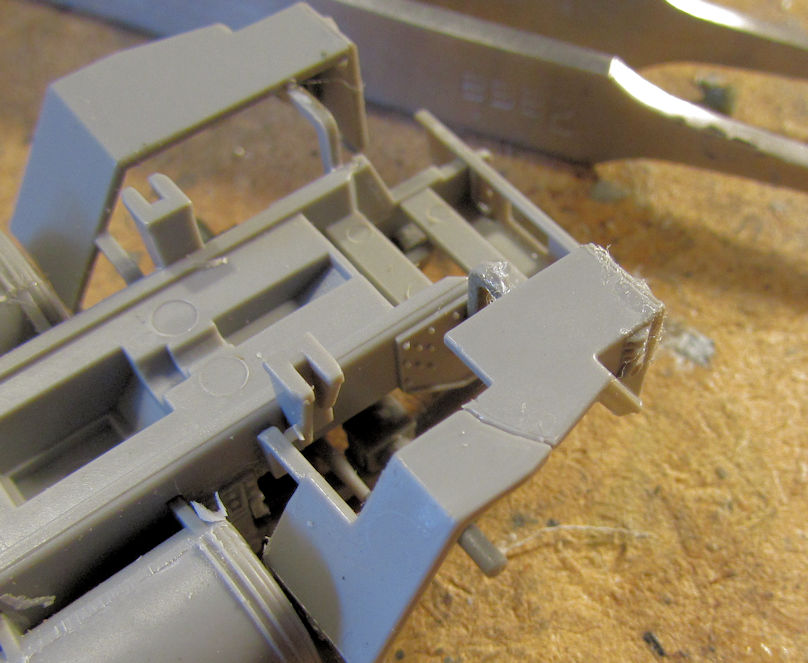
Later I cut off the fenders to add to the chassis. One of them flat out broke when I tried cutting it off:
It's like that hole on the left half was inside waiting for the any pressure to be applied so it could break! I glued it back together and added it to the chassis:
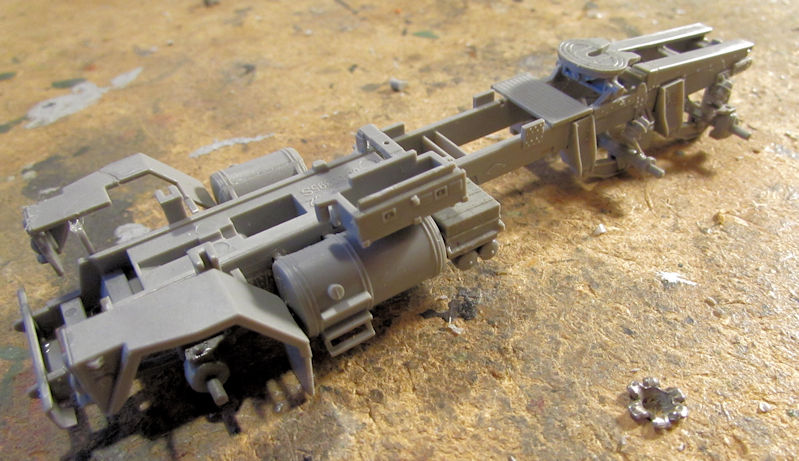
Later I added Mr. Surfacer 500 to that crack, but not before this pic was taken. Here is the whole chassis with most of the extra parts added to it:
Later I dry fit the cab to this to see how it would fit:
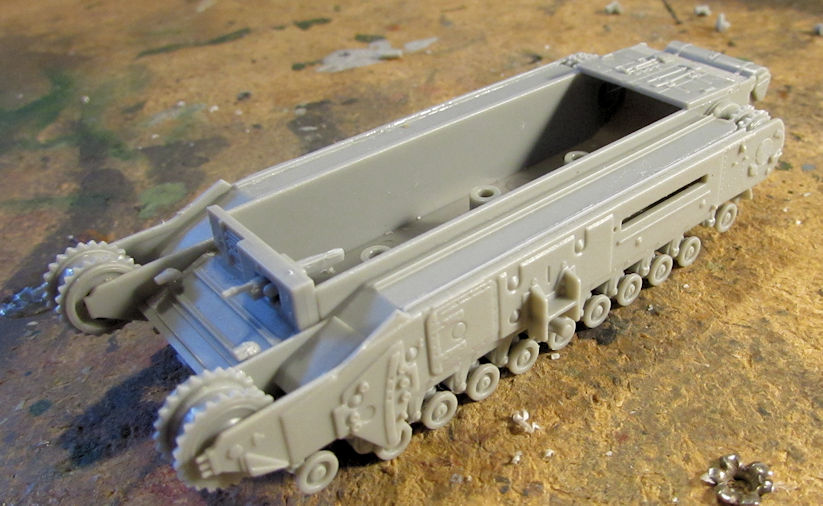
It's gonna take some finagling, but it'll fit well. After that I can build the winch platform. Until then, I moved on and started the new Japanese Type 73 tank transporter. First was the chassis and engine which went together very fast and easy:
There's still more detail parts to add to that,, but not before I get the cab mounted on it. So, I started the cab; building the interior first:
Naturally I get everything done on this except the steering wheel. When I tried cutting that from the sprue, it tumbled down to the floor and disappeared. After another hour of frustrating search; I finally decided that it would not be noticeable enough once the cab was closed so to hell with it; I'm moving on! Life is too short and I have too many models to build to screw around with extra tiny pieces that refuse to stay on the table.
I then added the windows to the cab and popped the interior in to see if my premise was correct. It certainly does not show unless someone really looks hard:
Onward we go from here to start assembly on the trailer:
After that I was ready to get back to tanks. Since the Missing Lynx was running the Churchill Group Build, I pulled out two Churchills from Dragon to get started on. First was the Churchill III AVRE, starting with the turret:
That petard mortar was a real pain to build, but I got it done. Then I added the five parts to the upper hull that are supposed to go on it and then added the turret for the pic:
After that, I built the lower hull and roadwheels:
Here's a test fit after all that was done:
There's still a bit more to do on that, not least of which is to add the tracks. Until then, I started the Churchill IV AVRE; building the turret:
By that time it was late so I stopped until I have more time to build later. Until then, thanks for looking in, comments are welcome.
The Duke
Virtuoso of Miniatures
"Do you know what the chain of command is? It's the chain I get and beat you with 'till you understand who's in ruttin' command!"
-Jayne Cobb, Firefly Episode 2 "The Train Job"
We are modelers - the same in spirit, in hunger to insanely buy newly released kits, hustlers in hiding our stash from our better halves and experts in using garbage as replacements for after-market parts.
Virtuoso of Miniatures
"Do you know what the chain of command is? It's the chain I get and beat you with 'till you understand who's in ruttin' command!"
-Jayne Cobb, Firefly Episode 2 "The Train Job"
We are modelers - the same in spirit, in hunger to insanely buy newly released kits, hustlers in hiding our stash from our better halves and experts in using garbage as replacements for after-market parts.
-
Stikpusher

- Moderator
- Posts: 21183
- Joined: Sat Apr 05, 2014 8:37 pm
- Location: Ceti Alpha 5
Re: Maddog Manufacturing 2020 Production
Nice save on the HEMMT cab window Mark. I’m sure once you have it all painted and weathered that it will be practically invisible. Too bad on the M1070 fender. But it looks like the cab hood will cover most of that repair work anyways. And as far as the Japanese truck steering wheel goes, you know that will turn up as soon as your well past being able to put it in the cab. Probably after you finish the build. It always works out that way for me... 
"Surely I have made my meaning plain? I intend to avenge myself upon you, Admiral. I have deprived your ship of power, and when I swing 'round, I intend to deprive you of your life."
FLSM
FLSM
-
speedgraflex

- Moderator
- Posts: 11358
- Joined: Fri Feb 10, 2017 11:08 pm
- Contact:
Re: Maddog Manufacturing 2020 Production
Duke! Duke! Duke! Great saves and progress! I hope all is well. Sending you my best!!!
Make more models!

Re: Maddog Manufacturing 2020 Production
While I do appreciate you having issues with the window, broken fender and lost parts, please don’t feel you must go the to make me feel better! 
Well don on the repairs and good call on the dropped part.
You could make something from sprue or rod to fill the space...if you were so inclined.
Well don on the repairs and good call on the dropped part.
You could make something from sprue or rod to fill the space...if you were so inclined.
To make each build less crappy than the last one. Or, put another way, "Better than the last one, not as good as the next one!"..
-
Duke Maddog
- Elite Member
- Posts: 7668
- Joined: Tue Jun 03, 2014 11:22 am
- Location: Rowland Heights, CA
Re: Maddog Manufacturing 2020 Production
Thanks Carlos! I think you're right about it being unnoticeable after painting and weathering. As for the fender; I think it'll look okay after the Mr. Surfacer is sanded down and the cab installed. I agree with the steering wheel though; it'll show long after the model is finished but I'll just have to toss it into the spares box for another time. That's what it gets for running off.
Thank you Bruce! Despite the issues and setbacks, I am thrilled with the progress I have made. I also appreciate the compliment on the fix. All is well so far; if you consider I haven't worked any decent job since this whole thing began. My wife is still hanging in at her job. Yesterday; the day I posted the update was my 29th wedding anniversary. Since she had to work, I celebrated by showing my work to you guys. We'll celebrate together somehow on Sunday... if we can figure out a way to.
Lyle, I did hope to make you feel a little better, but believe me: I surely hate when this kind of crap happens! Thanks for the compliments as well; you are always a motivation as you keep plugging along despite issues with your difficult models. That is the example I decided to follow when faced with all these problems I had this week.
Thanks again everyone!
The Duke
Virtuoso of Miniatures
"Do you know what the chain of command is? It's the chain I get and beat you with 'till you understand who's in ruttin' command!"
-Jayne Cobb, Firefly Episode 2 "The Train Job"
We are modelers - the same in spirit, in hunger to insanely buy newly released kits, hustlers in hiding our stash from our better halves and experts in using garbage as replacements for after-market parts.
Virtuoso of Miniatures
"Do you know what the chain of command is? It's the chain I get and beat you with 'till you understand who's in ruttin' command!"
-Jayne Cobb, Firefly Episode 2 "The Train Job"
We are modelers - the same in spirit, in hunger to insanely buy newly released kits, hustlers in hiding our stash from our better halves and experts in using garbage as replacements for after-market parts.

Re: Maddog Manufacturing 2020 Production
A lot of good progress and great save on that windscreen
March as one, Don't look back
Odin's sons... Attack!
Unleash hell! Do not repent! Warfare grants us no lament
Let your weapons slash and tear This is no place for fear
Hold the lines! Move as one! In unity our victory's won
Our shields will form a mighty wall
United we shall never fall
Odin's sons... Attack!
Unleash hell! Do not repent! Warfare grants us no lament
Let your weapons slash and tear This is no place for fear
Hold the lines! Move as one! In unity our victory's won
Our shields will form a mighty wall
United we shall never fall
-
Medicman71
- Elite Member
- Posts: 11299
- Joined: Mon Apr 07, 2014 9:32 am
- Location: Houston, Tx
Re: Maddog Manufacturing 2020 Production
Nice work Duke and an awesome save on that clear part!
Mike
Sponsored by Boeing, Lockheed Martin, Northrop Grumman, Saab, BAE, and Dassault
Sponsored by Boeing, Lockheed Martin, Northrop Grumman, Saab, BAE, and Dassault
-
Duke Maddog
- Elite Member
- Posts: 7668
- Joined: Tue Jun 03, 2014 11:22 am
- Location: Rowland Heights, CA
Re: Maddog Manufacturing 2020 Production
Thank you Floki and Medic. Your comments are keeping me motivated. I'm glad the windscreen turned out well enough to use.
Stay tuned, more to come.
Stay tuned, more to come.
The Duke
Virtuoso of Miniatures
"Do you know what the chain of command is? It's the chain I get and beat you with 'till you understand who's in ruttin' command!"
-Jayne Cobb, Firefly Episode 2 "The Train Job"
We are modelers - the same in spirit, in hunger to insanely buy newly released kits, hustlers in hiding our stash from our better halves and experts in using garbage as replacements for after-market parts.
Virtuoso of Miniatures
"Do you know what the chain of command is? It's the chain I get and beat you with 'till you understand who's in ruttin' command!"
-Jayne Cobb, Firefly Episode 2 "The Train Job"
We are modelers - the same in spirit, in hunger to insanely buy newly released kits, hustlers in hiding our stash from our better halves and experts in using garbage as replacements for after-market parts.