Page 8 of 13
Re: LyleW's C-54
Posted: Fri Feb 14, 2020 8:01 pm
by speedgraflex
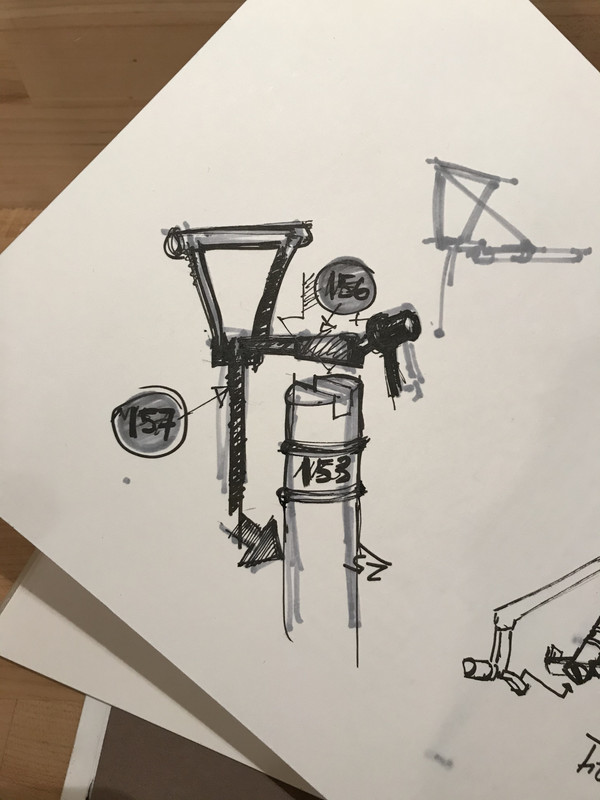
156 to 153 first then locate 157 to both 156 and 153. The key fit is 156 to 153 which is not on the angle as far as I can tell but in the center. This fills the gap the designer left in 153.
Re: LyleW's C-54
Posted: Fri Feb 14, 2020 9:01 pm
by LyleW
I’ve thought of that sequence. There will be a lot of dry fitting.
Re: LyleW's C-54
Posted: Fri Feb 14, 2020 9:16 pm
by speedgraflex
Good plan. All the best!
Re: LyleW's C-54
Posted: Sat Feb 15, 2020 7:51 am
by LyleW
First of all, sorry for short replies. Typing on the IPad is a pain, so I am usually more briefer (I always use goofier grammar, too!). I do appreciate all thesugggesrions and sketches. To take time to give this thought and suggest options is time not given lightly and takes time away from your projects. Thank you!
Re: LyleW's C-54
Posted: Sat Feb 15, 2020 9:41 am
by Stikpusher
speedgraflex wrote:156 to 153 first then locate 157 to both 156 and 153. The key fit is 156 to 153 which is not on the angle as far as I can tell but in the center. This fills the gap the designer left in 153.
Oh this reminds me of drafting class...

but drawn freehand rather that with all those fun drawing tools... lovely work!
Re: LyleW's C-54
Posted: Sat Feb 15, 2020 10:46 am
by speedgraflex
Not to worry, Lyle—I want to be of service; and I still remember how I was frustrated by the Revell Horten instructions. I definitely think when manufacturers stopped using a copy editor to add a few lines of instruction that we modelers stepped into the gap. I know this happened long before Spam appeared in 2014, but the great strengths of the forum are its member narratives and just not being a place of judgement. So thank you both. One other note is that stepping into another modeler’s shoes is for me one of the most important lessons, and always helps me better understand another approach. I think your emphasis on construction and fidelity to the source is awesome, frankly. I truly do. And my only advice after sending that sketch was if I’m ever in this situation I take my white glue and either a toothpick or needle as an applicator, chuck the needle as applicator in a pin vise and glue the pieces with white glue first. That way I get the structure built with some degree of movement so I can adjust the angles. If the glue hardens too early it washes away with water. I’m adding this as a note to the drawing as it was clear the landing gear is really delicate and I would not want to jump to the permanent glue until as you write “fitting is done.”
Re: LyleW's C-54
Posted: Sat Feb 15, 2020 11:44 am
by LyleW
Thanks, Bruce.
I did just that on the original pieces...whilst waiting for the replacement parts from Germany. Anyone know how long that takes?
May take a picture tomorrow of the gear. That pesky arm/rod piece god slip out if the notch, but there was a lot of old glue on it. Seemed to be more of what you might expect. It is also a very difficult fit in the gear well...if it will fit at all. Seems to be wider than the well. Judicious sanding required.
Re: LyleW's C-54
Posted: Tue Feb 18, 2020 10:04 am
by LyleW
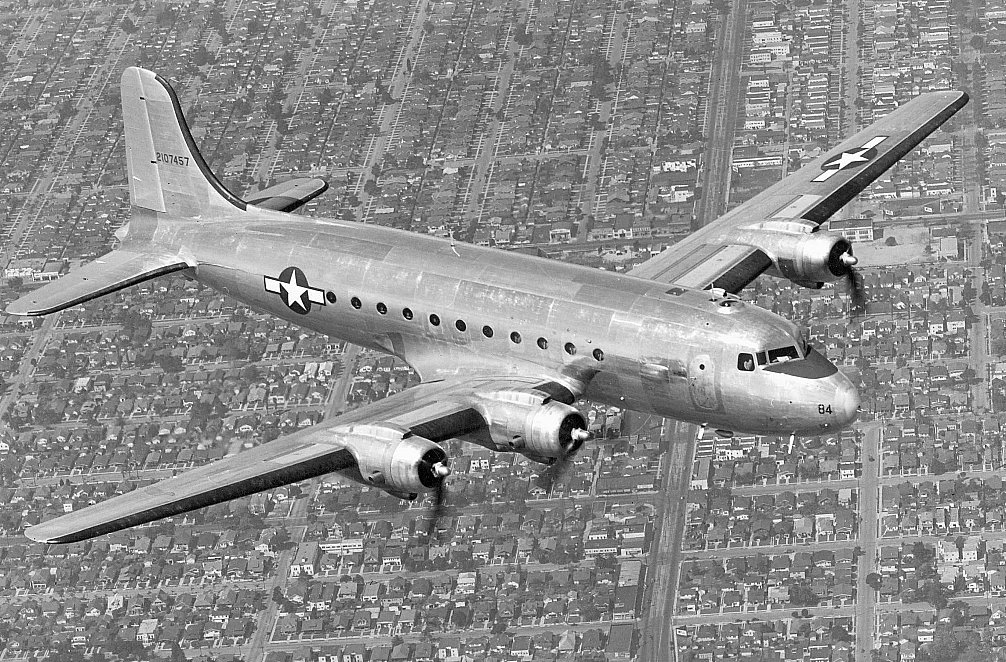
As simple and easy as this looks, I think this is what I want to achieve when I get to that point. I have some Alclad Matte Aluminum, Aluminum and gray and black primer.(assuming it is still viable). What I am thinking is painting the airframe a gray, masking off some panels and spraying the black primer. What say ye? Thoughts and suggestions welcome.
Re: LyleW's C-54
Posted: Tue Feb 18, 2020 5:36 pm
by BlackSheep214
You could try gloss dark grey. Try it on a mule kit.
Re: LyleW's C-54
Posted: Tue Feb 18, 2020 6:15 pm
by LyleW
Thanks, for that. I had not considered a gloss dark grey. I definitely plan on trying out the painting on something else. I also have some Krylon silvers I have gotten fair results with. I’m a long way from this stage, though