Page 8 of 30
Re: 1/32 Hasegawa Fw 190D-13 Yellow 10
Posted: Sat Jan 02, 2021 9:16 pm
by BlackSheep214
Re: 1/32 Hasegawa Fw 190D-13 Yellow 10
Posted: Sun Jan 03, 2021 12:46 am
by jkim
Re: 1/32 Hasegawa Fw 190D-13 Yellow 10
Posted: Sun Jan 03, 2021 7:22 am
by mustang1989
Wow!! And I do mean me some WOW!!
Re: 1/32 Hasegawa Fw 190D-13 Yellow 10
Posted: Sun Jan 03, 2021 10:44 am
by Floki
You have captured the look perfectly John.
Re: 1/32 Hasegawa Fw 190D-13 Yellow 10
Posted: Sun Jan 03, 2021 12:19 pm
by BlackSheep214
Re: 1/32 Hasegawa Fw 190D-13 Yellow 10
Posted: Sun Jan 03, 2021 9:13 pm
by jkim
Thanks guys! Appreciate the feedback!
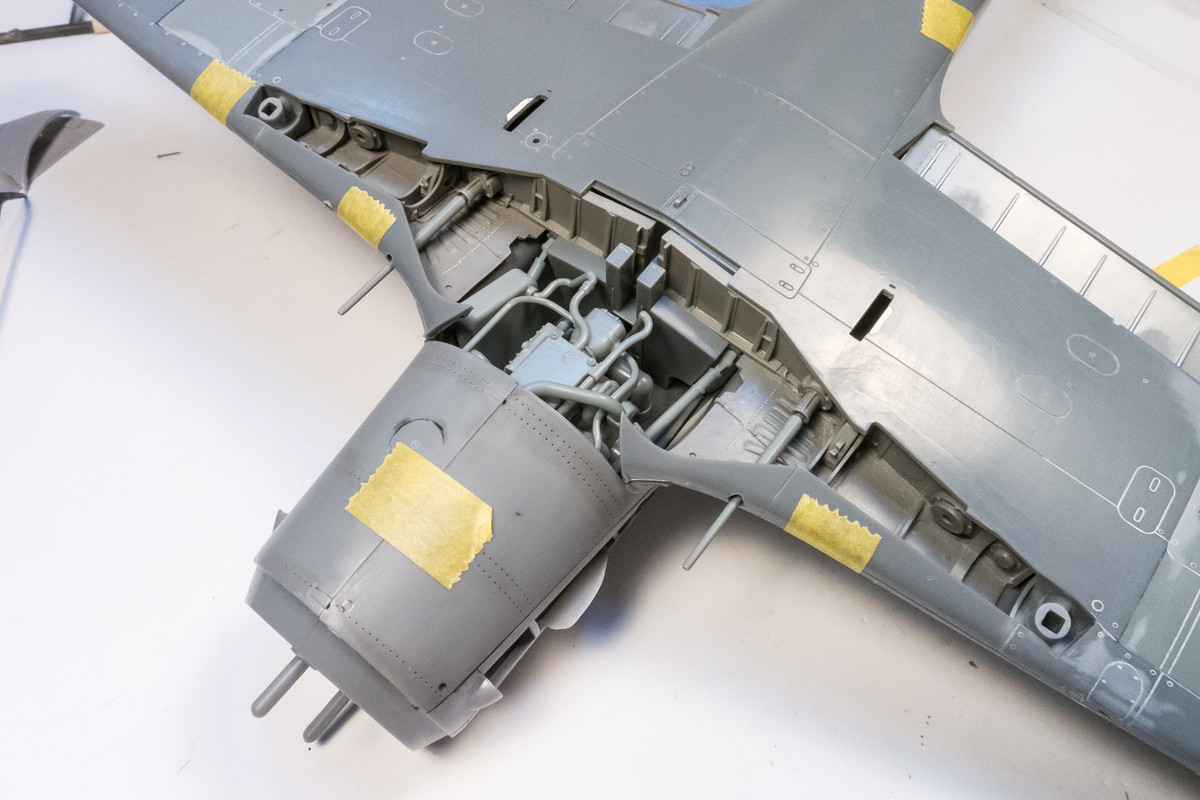
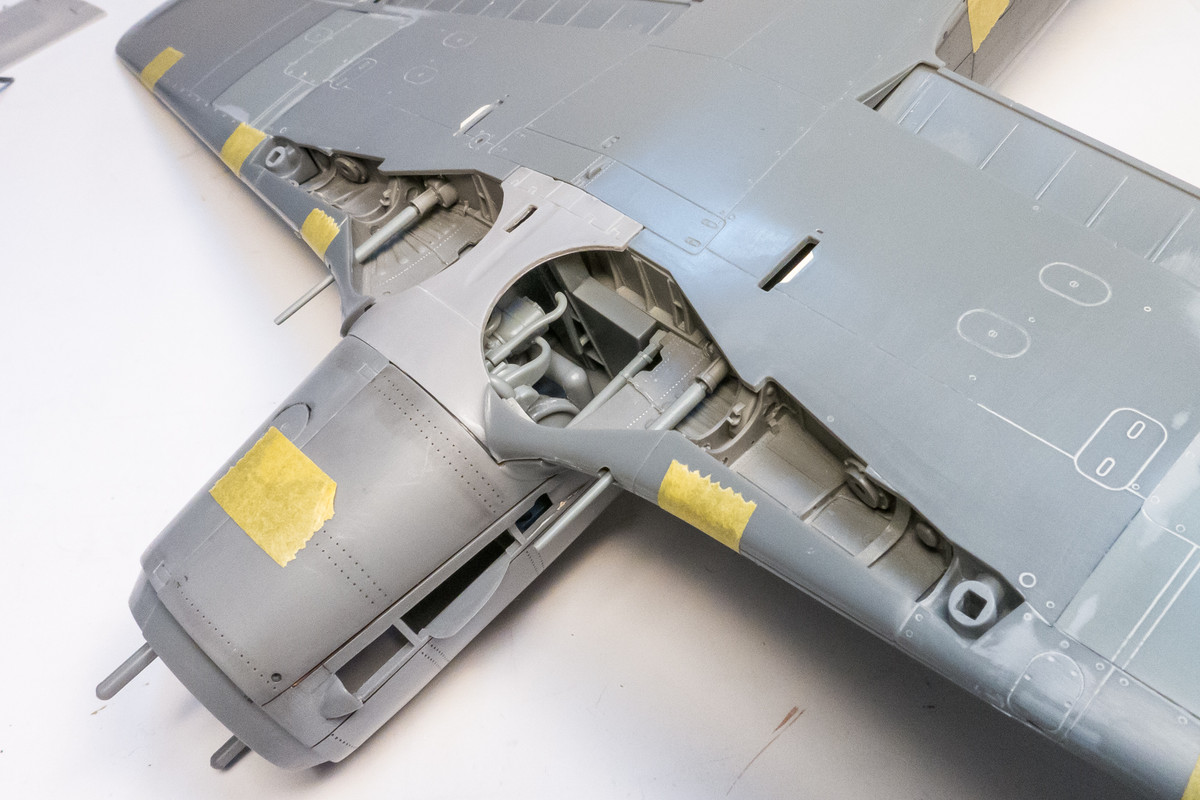
Looking ahead at the wheel well area. Unlike the previous models, the Fw190D series did not have a ceiling for the central wheel well area and allows viewing into the rear of the engine compartment. Hasegawa provides some basic components for this area based on the D-9 and I'm trying to figure out the differences found in the D-13. Again, as always, this model is not meant to be a definitively accurate portrayal of the D-13 but I would like it to at least mimic reality as much as I am able. One of the big differences is that the D-13 had a single cannon firing through the nose while the D-9 had twin cannons mounted on top of the engine.
Dry fitting the Hasegawa D-9 rear engine assembly into the fuselage, along with the Aires resin wheel wells, I'm trying to get a feel for what is visible and what is not. You can see the twin ammo chutes which need to consolidated to a single chute.
Placing the central wing part, which is from the Grey Matter resin set, blocks some of the view but the ammo chutes are still readily visible.
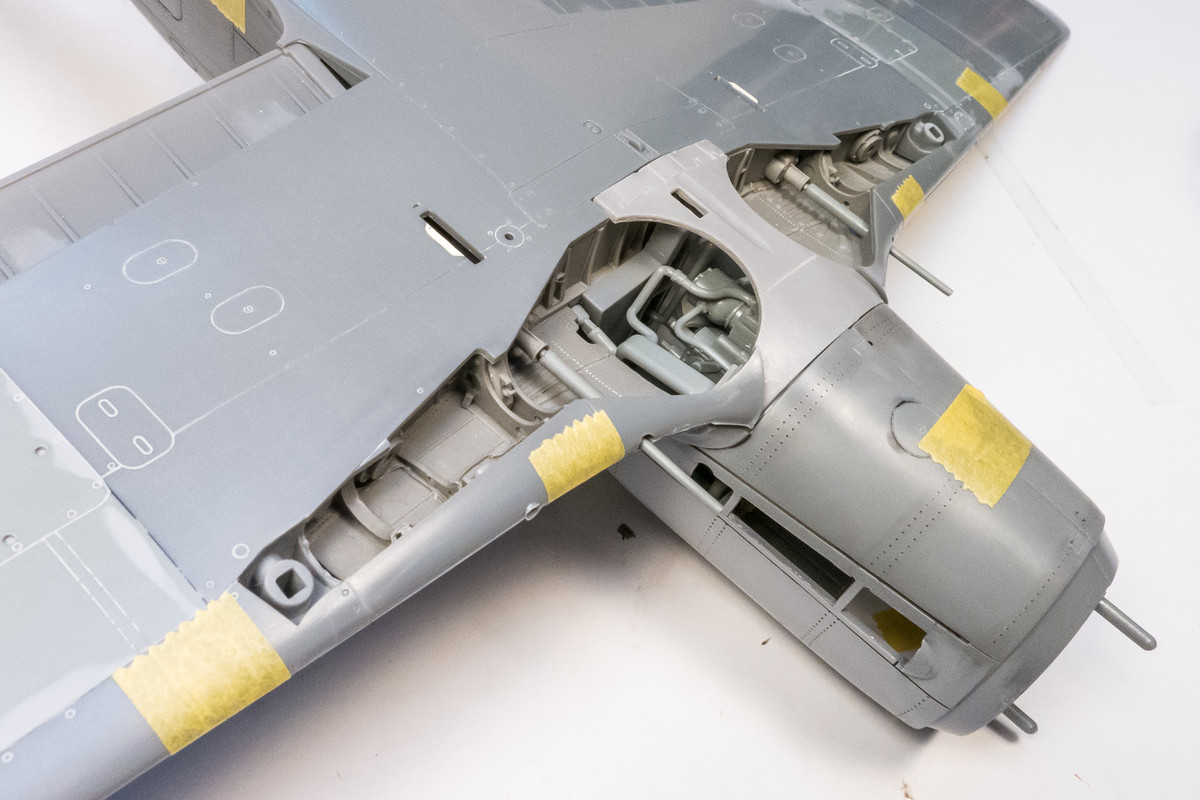
I will be taking a look at my resources which includes Jerry Crandall's Dora Volume 2. If anyone has any photos regarding this area, please do share!
Re: 1/32 Hasegawa Fw 190D-13 Yellow 10
Posted: Mon Jan 04, 2021 3:47 am
by KSaarni
Very nice progress John !
- Kari
Re: 1/32 Hasegawa Fw 190D-13 Yellow 10
Posted: Mon Jan 04, 2021 5:04 am
by Stuart
Superb work as always John!
Re: 1/32 Hasegawa Fw 190D-13 Yellow 10
Posted: Mon Jan 04, 2021 7:04 am
by LyleW
Wow! That’s all I got. Just, Wow!
Re: 1/32 Hasegawa Fw 190D-13 Yellow 10
Posted: Thu Jan 14, 2021 12:53 am
by jkim
Thanks for the comments gentlemen! I'm still kicking around ideas for the visible rear engine area including ordering some aftermarket to help me differentiate this D-13 from a D-9.
In the meantime, I worked a bit on the instrument panels. These are from the Eagle Editions resin set. The new paintbrush is a fancy shmancy Winsor & Newton Series 7 sable brush in Size 1. Getting it doesn't make me a better painter but it has been interesting using it compared to my generic hobby shop paint brushes. One of the biggest things I've noticed is the amount of brush/bristle compared to how fine a point this brush can maintain. Which means more paint on the brush, which lessens dry-out. The yellow and red bezel outlines were easier to make using this brush.
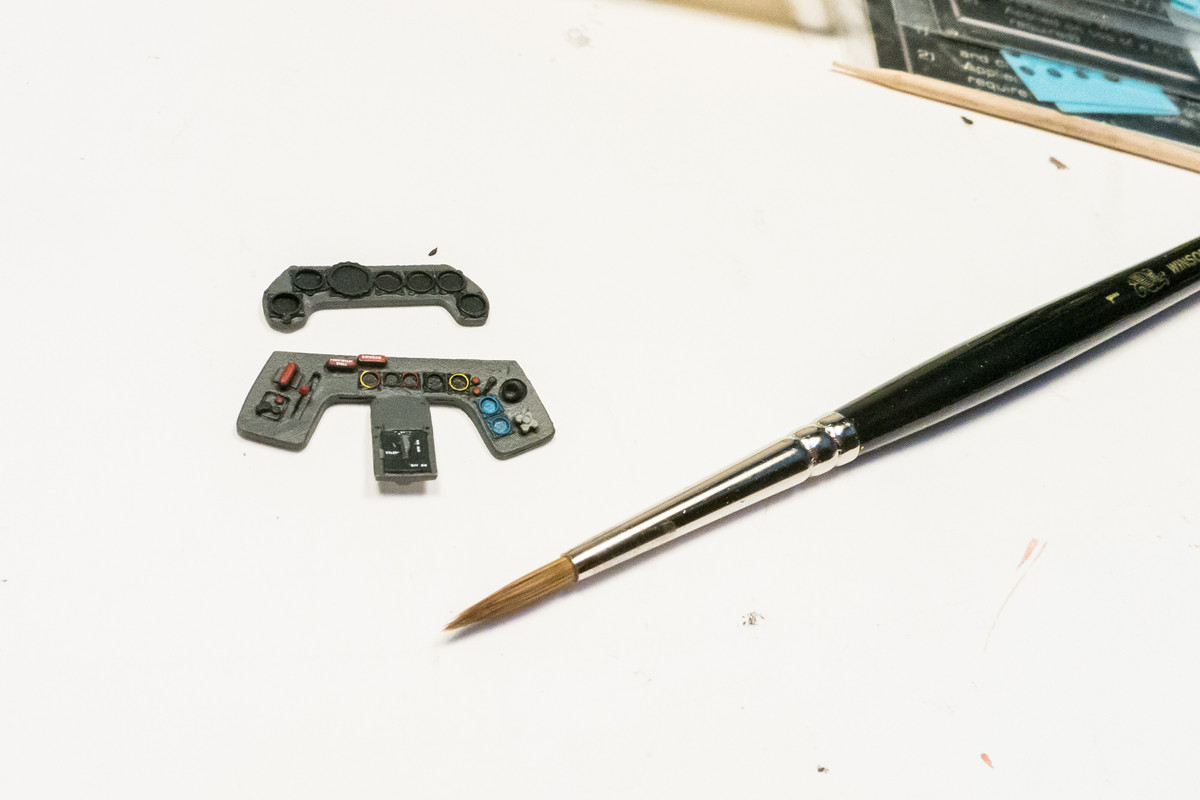
Eagle Editions does not provide any instrument panel decals, recommending instead the use of the kit decals, which are not very good compared to what is available. I elected to use a combination of Airscale and MDC decals. Each individual instrument is punched out using the RP Toolz punch set. I've also been punching out appropriate sized discs from clear acetate to serve as glass covers for the instruments.
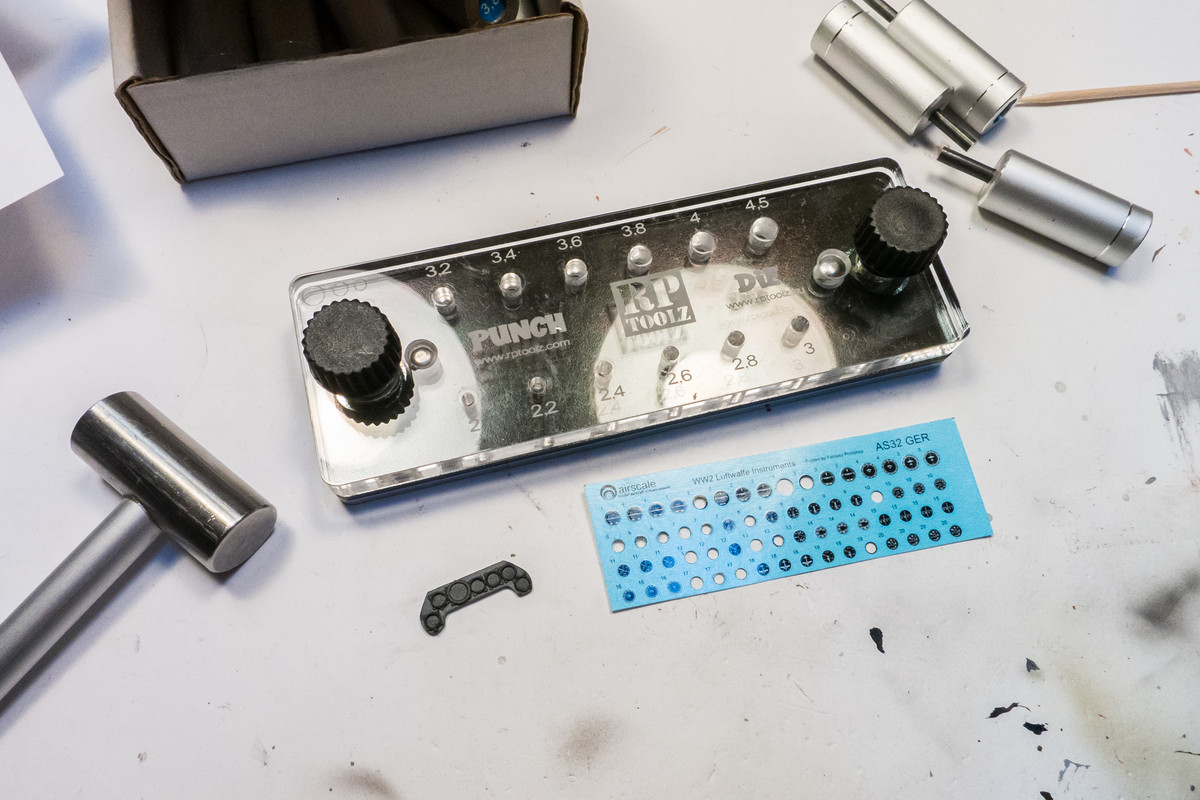
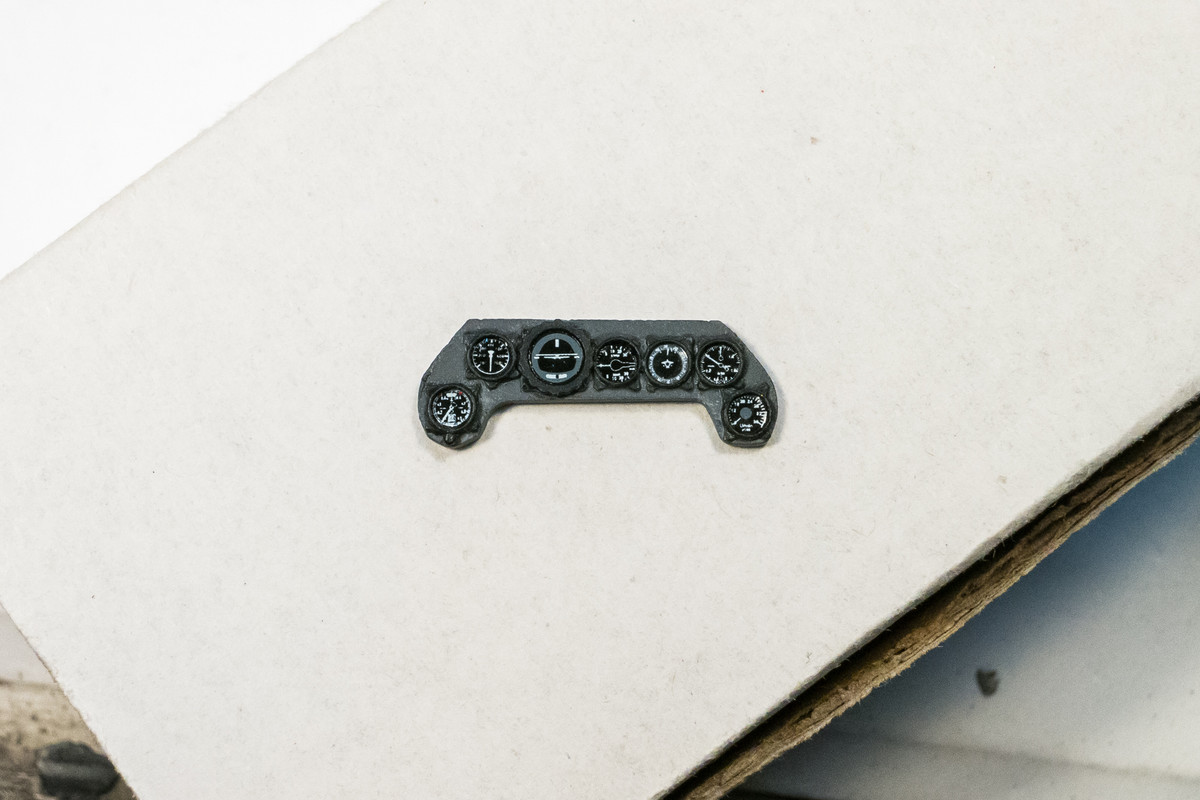
One thing that I've been trying to improve upon is centering the punches a little bit better. This evening, I managed to finish the top instrument panel.
 I’m running out of adjectives to describe your work. Seriously, I’m at a loss of words.