Tamiya M41 Walker Bulldog-Ending at last!
-
jeaton01

- Elite Member
- Posts: 2374
- Joined: Thu Apr 23, 2020 9:20 am
- Location: Northern California
- Contact:
Re: Tamiya M41 Walker Bulldog
Nice work, Gary.
-
Gary Brantley

- Elite Member
- Posts: 2739
- Joined: Tue Apr 08, 2014 9:40 pm
- Location: Cameron, Texas
Re: Tamiya M41 Walker Bulldog
Thank you Clint!Floki wrote:That rust came out great
-
Stikpusher

- Moderator
- Posts: 21183
- Joined: Sat Apr 05, 2014 8:37 pm
- Location: Ceti Alpha 5
Re: Tamiya M41 Walker Bulldog
By that time, the webbing cargo straps should have been in widespread use. They are OD fabric in color, and have a blackened metal alligator clamp type mechanism. Those little straight lengths on the turret sides and rear are welded on points where the straps are fed thru to secure stowage. I use strips of lead foil, tape, or even paper to replicate the tie down straps. Ropes would be a secondary means of stowage tie down, usually fed thru points such as the hull and turret lifting eyes.Gary Brantley wrote:
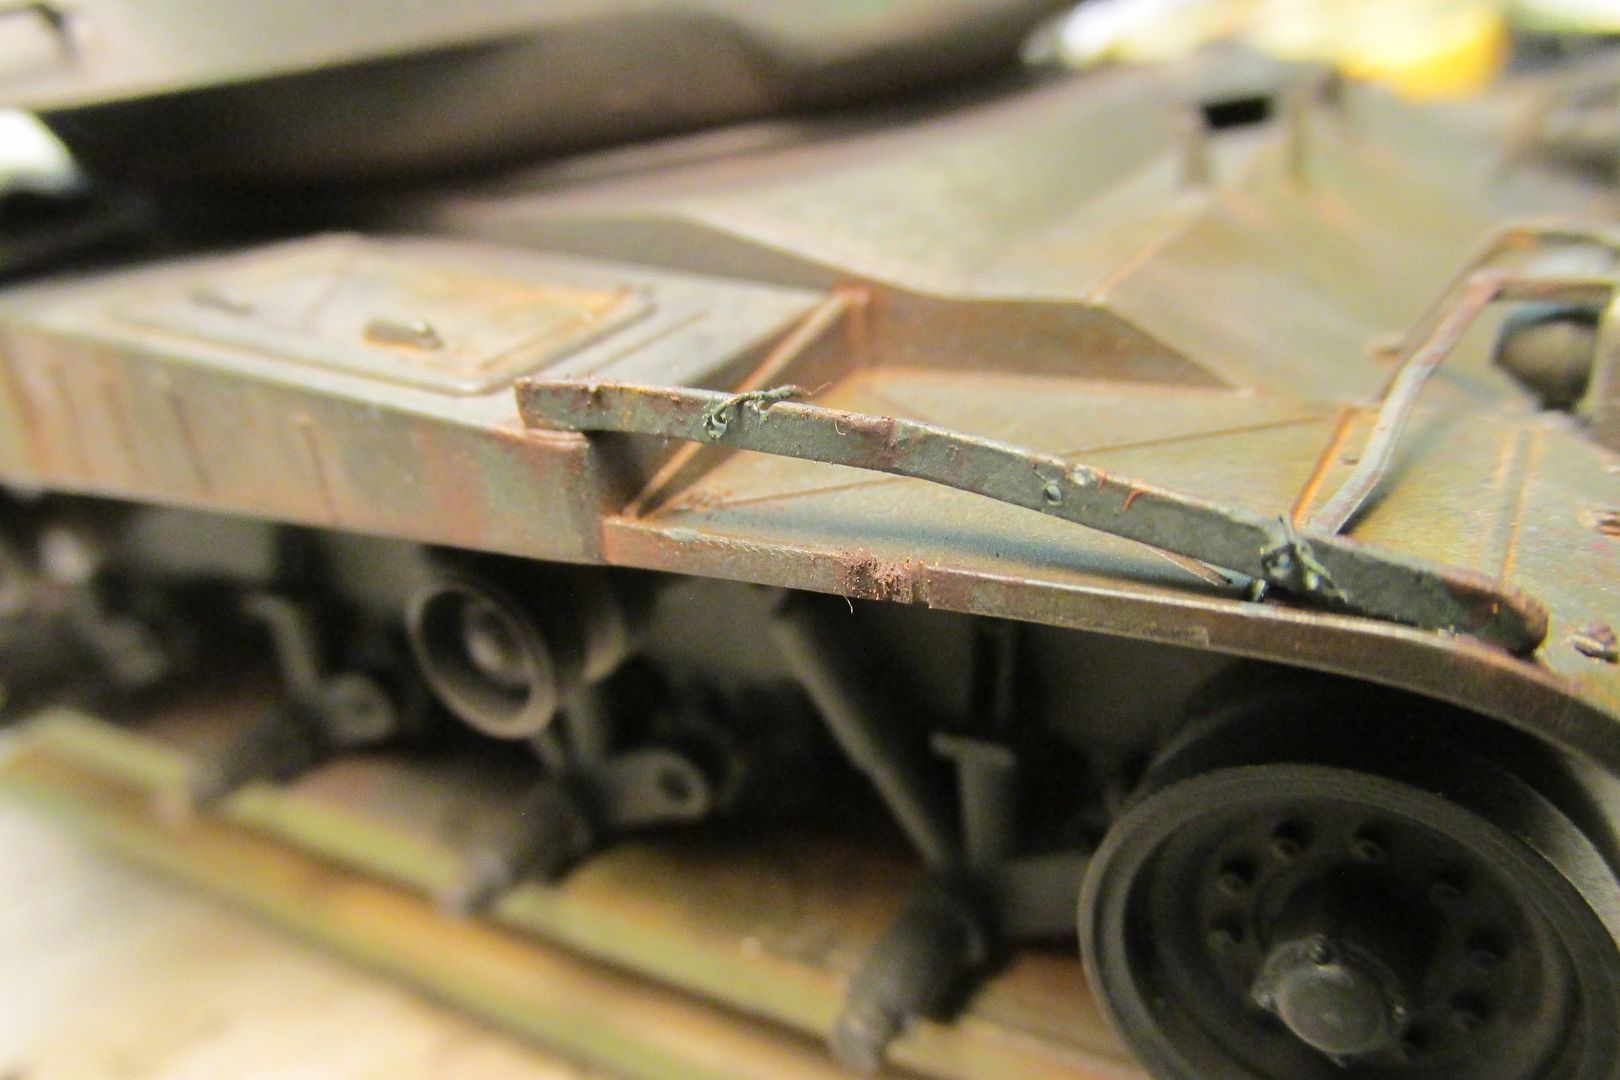
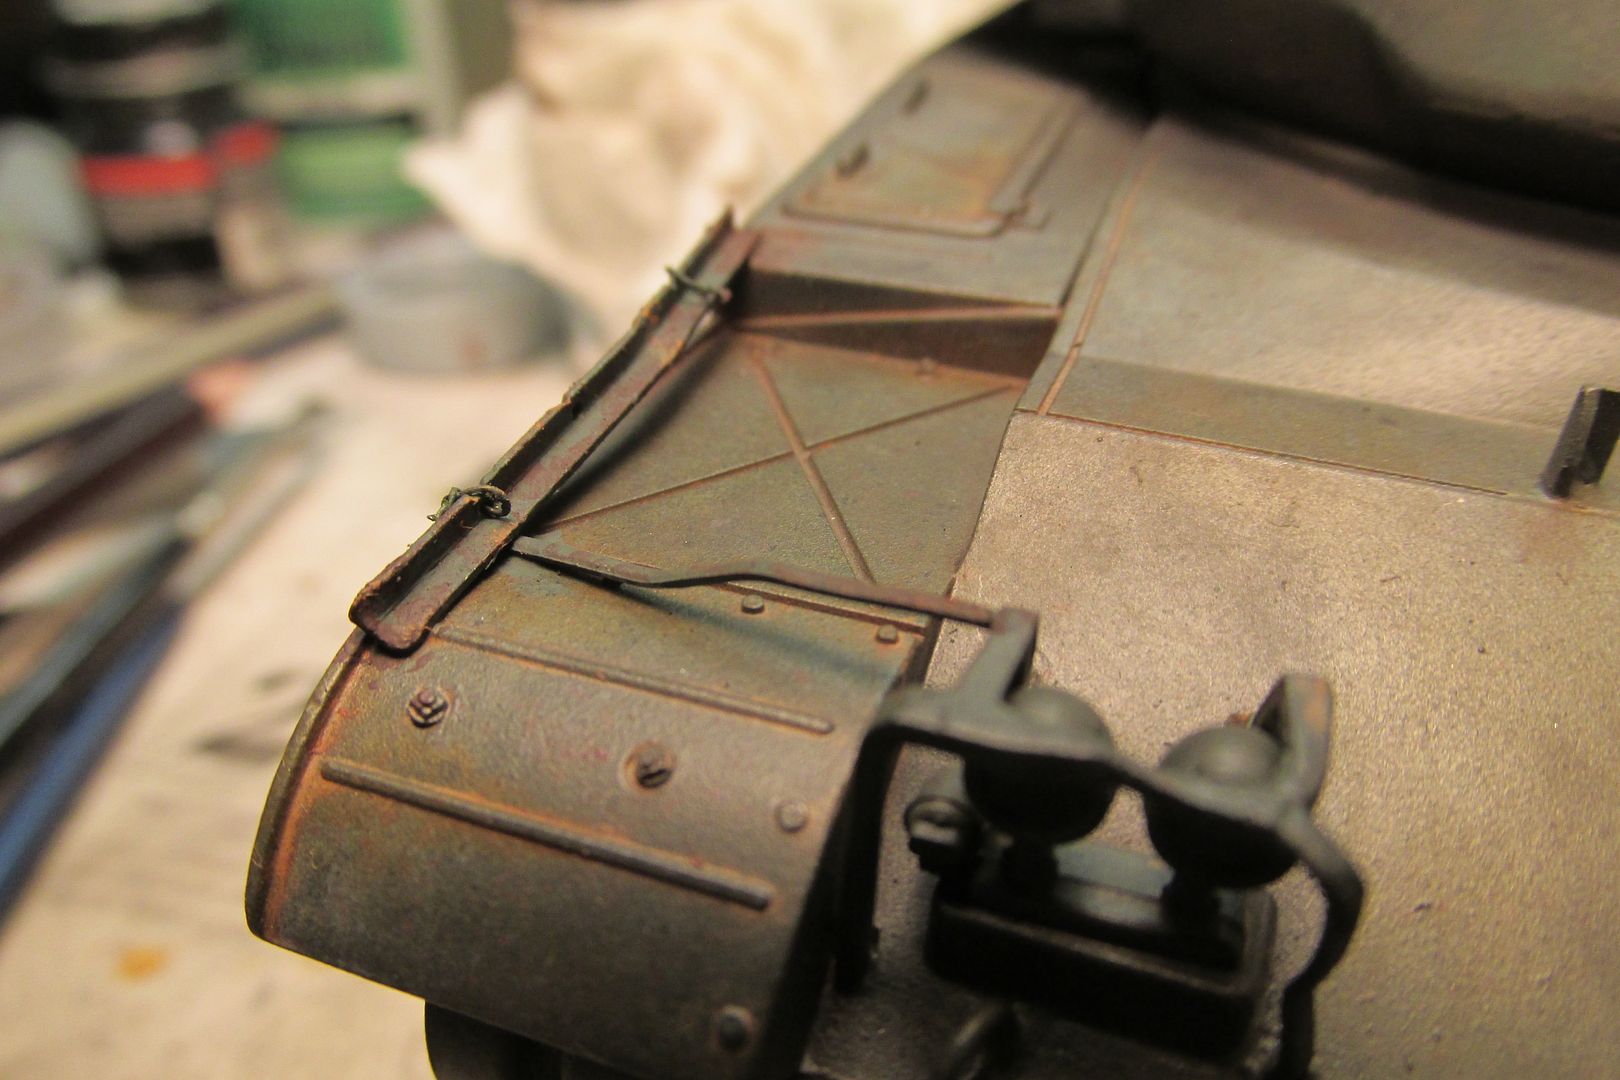
Great advice and good points to remember. I had encountered the clearance issue considering turret traverse and the rear-most crate/pack. I had already been pondering how some of it would be attached; the crushed cardboard box and wooden crate on turret top will be tied down with rope (PVA-soaked thread), going over from a hand-hold on the starboard side to the sledge mount on the port side. I'd like to place another cardboard box on top of the bustle, tied from one jerrycan handle to the other. But I've been wondering about other strap material; what sort would've been used circa '69-'73? Were any sort of bungie cords available then Carlos? I thought about using lead foil to simulate flat straps of some sort; what material do you use to secure tank stowage?
I want to place another smaller, wooden crate on the SB side front fender, where the pioneer tools usually are. But where to secure it? I thought about drilling a hole in the front side of the sponson storage box just behind that and mounting a small eye-bolt type attachment; was this sort of thing ever done? I'm sorry to bombard you with so many questions, but I don't have the great experience that you have! Thanks for any more light you can shed on this!!
Looking at photos for the fender stowage, it appears that the ARVN tankers often left the tool rack frame in place, but put crates in the center,that the frame would hold in place. My guess is that they then stowed their pioneer tools inside the sponson stowage boxes.
"Surely I have made my meaning plain? I intend to avenge myself upon you, Admiral. I have deprived your ship of power, and when I swing 'round, I intend to deprive you of your life."
FLSM
FLSM
-
Gary Brantley
- Elite Member
- Posts: 2739
- Joined: Tue Apr 08, 2014 9:40 pm
- Location: Cameron, Texas
Re: Tamiya M41 Walker Bulldog
Thanks John! I'm sort of feeling my way along, and having fun doing it!jeaton01 wrote:Nice work, Gary.
Thank you for that information Carlos! I'll gin up some cargo straps, about how wide were they typically, 1,1/2-2"?Stikpusher wrote: By that time, the webbing cargo straps should have been in widespread use. They are OD fabric in color, and have a blackened metal alligator clamp type mechanism. Those little straight lengths on the turret sides and rear are welded on points where the straps are fed thru to secure stowage. I use strips of lead foil, tape, or even paper to replicate the tie down straps. Ropes would be a secondary means of stowage tie down, usually fed thru points such as the hull and turret lifting eyes.
Looking at photos for the fender stowage, it appears that the ARVN tankers often left the tool rack frame in place, but put crates in the center,that the frame would hold in place. My guess is that they then stowed their pioneer tools inside the sponson stowage boxes.
I think you're right about the tool frame being used to secure the crates. Last night, I made a piece of brass angle into an improvised angle-iron that would've been welded to the sponson box top and fender front. I would imagine that those sorts of field-expedient additions occurred; especially wherever young troopies had access to a welder and angle-iron stock.
Thanks for the great info Carlos! Drinks on me sir!
-
Stikpusher
- Moderator
- Posts: 21183
- Joined: Sat Apr 05, 2014 8:37 pm
- Location: Ceti Alpha 5
Re: Tamiya M41 Walker Bulldog
The standard cargo straps are approx. 1” in width. There also larger ones for jerry cans that approx 2” in width. They are woven in the same manner as a roller buckle web belt, but thicker than the standard belt.
Here a couple views of the tie down point and straps on some photos from the tank’s Tech Manual

Here a couple views of the tie down point and straps on some photos from the tank’s Tech Manual
"Surely I have made my meaning plain? I intend to avenge myself upon you, Admiral. I have deprived your ship of power, and when I swing 'round, I intend to deprive you of your life."
FLSM
FLSM
-
Gary Brantley
- Elite Member
- Posts: 2739
- Joined: Tue Apr 08, 2014 9:40 pm
- Location: Cameron, Texas
Re: Tamiya M41 Walker Bulldog
Thanks Carlos! Man, those manual illustrations are cool! 
I called my cousin Thomas yesterday afternoon for some brain-pickin'. He was in Vietnam, '68-'69, in the 25th Infantry ("Tropic Lightning") on an M113 APC. I was asking him about stowage straps (haha. didn't recall what they had) and a few other details. He said they kept two canteens full of 30 wt. oil for lubing the feed mechanism on the M2. I'm gonna try to add those around the pintle mount on this Bulldog.
He also said that for a couple months, they had a second M2 mounted on the side of the track, while conducting joint operations with tankers. When asked about markings and such, he laughed and said he had painted a name on the gun-shield for the .50, but that he had misspelled it-Jackel instead of "Jackal". He also said that you would never see an APC "in the woods" with that white star on the side. It was painted over with some OD mighty quick!
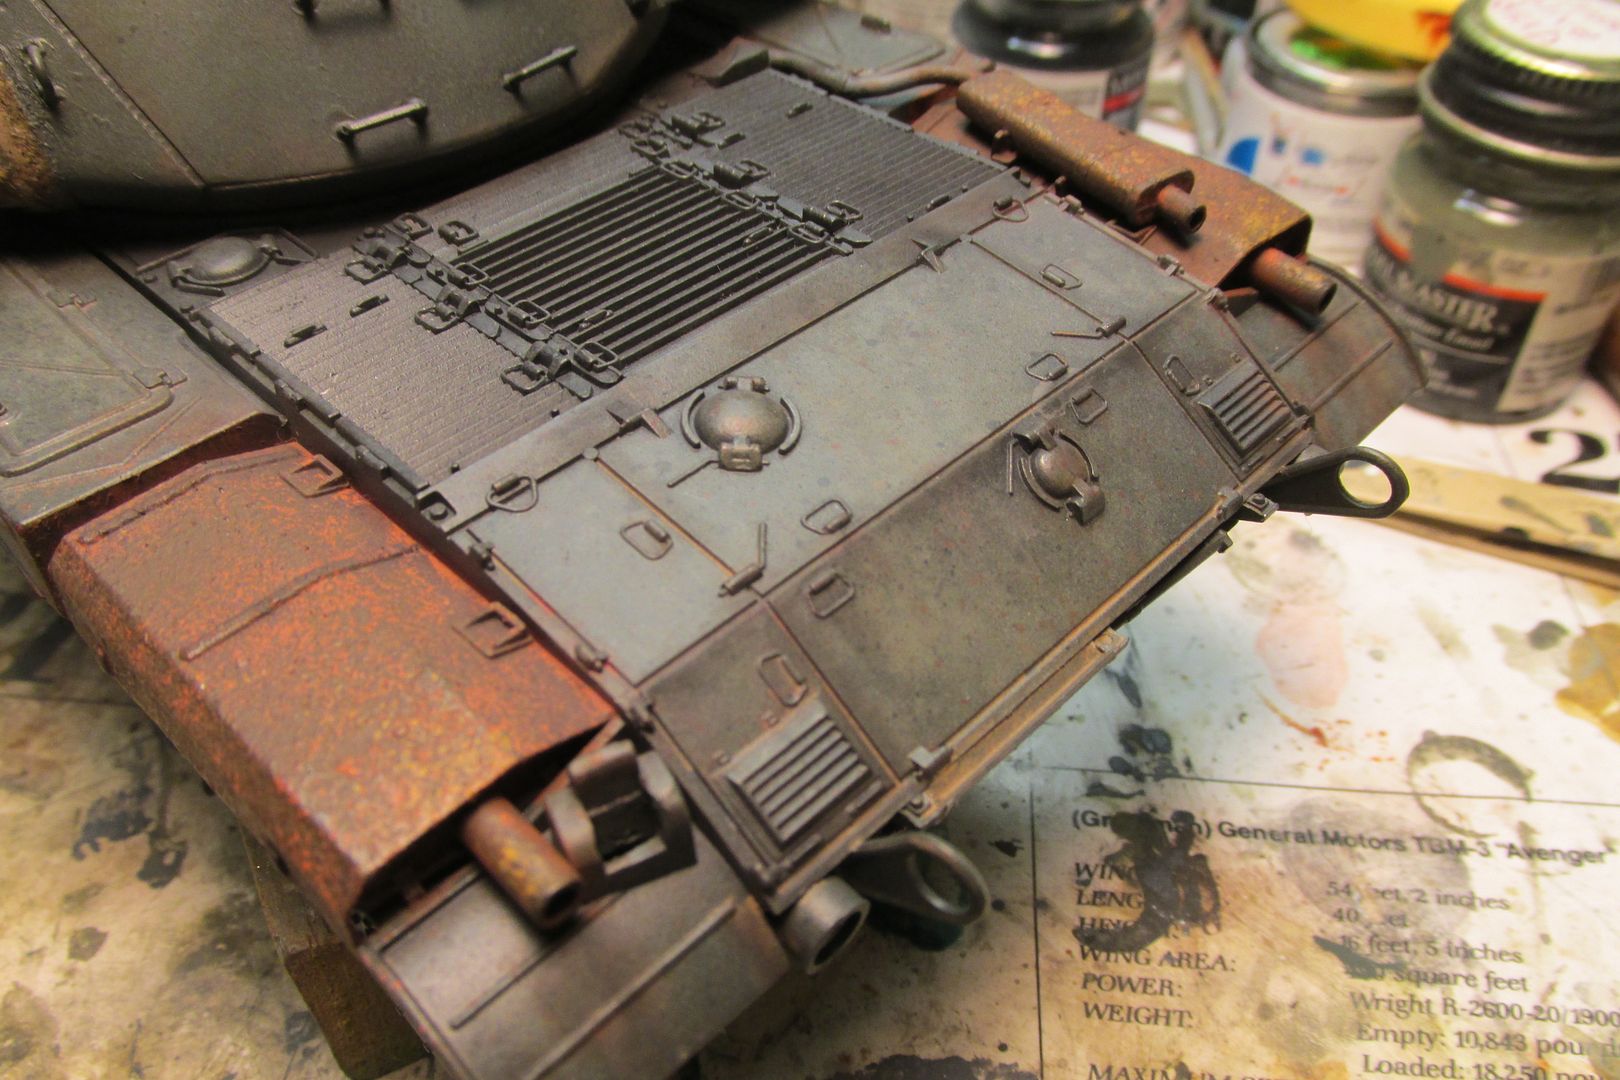
Okay, I added a couple small scratch-built items last night. I needed somewhere to secure stowage in place of the pioneer tool rack. I envisioned a "field-mod" project involving angle-iron and a welder, haha. Here's how it turned out. And, I went over the main muffler covers with more Vallejo brown acrylic to sort of "tone-down" the rust hues; I do like it better now!
Hey everyone, thanks for taking a look and I appreciate your interest!
I called my cousin Thomas yesterday afternoon for some brain-pickin'. He was in Vietnam, '68-'69, in the 25th Infantry ("Tropic Lightning") on an M113 APC. I was asking him about stowage straps (haha. didn't recall what they had) and a few other details. He said they kept two canteens full of 30 wt. oil for lubing the feed mechanism on the M2. I'm gonna try to add those around the pintle mount on this Bulldog.
He also said that for a couple months, they had a second M2 mounted on the side of the track, while conducting joint operations with tankers. When asked about markings and such, he laughed and said he had painted a name on the gun-shield for the .50, but that he had misspelled it-Jackel instead of "Jackal".
Okay, I added a couple small scratch-built items last night. I needed somewhere to secure stowage in place of the pioneer tool rack. I envisioned a "field-mod" project involving angle-iron and a welder, haha. Here's how it turned out. And, I went over the main muffler covers with more Vallejo brown acrylic to sort of "tone-down" the rust hues; I do like it better now!
Hey everyone, thanks for taking a look and I appreciate your interest!

Re: Tamiya M41 Walker Bulldog
Blooming awesome Gary, very nice work - those mufflers (Exhausts!) look superb.
Interesting discussion on stowage, and nice to see a bit of SB going on to overcome the 'stuck on with magic'
Interesting discussion on stowage, and nice to see a bit of SB going on to overcome the 'stuck on with magic'
Stuart Templeton 'I may not be good but I'm slow...'
-
Stikpusher
- Moderator
- Posts: 21183
- Joined: Sat Apr 05, 2014 8:37 pm
- Location: Ceti Alpha 5
Re: Tamiya M41 Walker Bulldog
"Surely I have made my meaning plain? I intend to avenge myself upon you, Admiral. I have deprived your ship of power, and when I swing 'round, I intend to deprive you of your life."
FLSM
FLSM

Re: Tamiya M41 Walker Bulldog
Damn, Gary....that is awesome work! Now, how did you do the rust effect?
To make each build less crappy than the last one. Or, put another way, "Better than the last one, not as good as the next one!"..
-
Gary Brantley
- Elite Member
- Posts: 2739
- Joined: Tue Apr 08, 2014 9:40 pm
- Location: Cameron, Texas
Re: Tamiya M41 Walker Bulldog
Thanks Stuart! I sure appreciate the kind words mate! Yep, gotta have some place to tie 'em.Stuart wrote:Blooming awesome Gary, very nice work - those mufflers (Exhausts!) look superb.
Interesting discussion on stowage, and nice to see a bit of SB going on to overcome the 'stuck on with magic'
Thanks Carlos! Gettin' a lil' nervous 'bout muddying things up...Stikpusher wrote:Not bad for a $10 kit…
Well I dunno 'bout that but I do appreciate it so much Lyle!LyleW wrote:Damn, Gary....that is awesome work! Now, how did you do the rust effect?
For the muffler covers, I followed this guy's instructions:
https://www.youtube.com/watch?v=Tr2aNYO ... yL&index=1