1/32 Tamiya Spitfire

Post your completed aircraft here.
User avatar
lawman56
Advanced Member
Posts: 490
Joined: Sat Apr 12, 2014 2:19 pm
Location: Just this side of insanity....

1/32 Tamiya Spitfire

Post by lawman56 »

Well, seeing how I just joined and all, I thought I would post a picture of my first aircraft build in many, many years. I've been primarily building armor dioramas the last 5 years, or so, and just switched to large scale aircraft in the last year. I plan to build more aircraft than armor for awhile, but still have a diorama to finish, and want to build some WWI stuff during the Great War centennial.

Anyway, here's my Spitfire diorama titled "Falcon At Rest". It depicts the last aircraft flown by George Buerling, who was known as the "Falcon of Malta".

Image

There's a few nit picky things I don't like about it, but I tend to be a perfectionist at times, (as I think we all are, of our own work)

Once I figure out where the rest of these pics are, I'll post some.

Thanks for looking!
Last edited by Thomas_M on Sun Apr 13, 2014 2:59 pm, edited 1 time in total.
Reason: Edited image code - Thomas_M
Joe

Illegitimi Non Carborundum
User avatar
Thomas_M
Admin
Posts: 4407
Joined: Fri Dec 13, 2013 9:43 am
Location: Bad Wurzach - Germany
Contact:

Re: 1/32 Tamiya Spitfire

Post by Thomas_M »

Joe, I hope you will find the other pictures of this build! I like the matte and slightly dusty appearance!

(BTW: please don´t use the image code beginning with [URL]. Thanks!)
User avatar
lawman56
Advanced Member
Posts: 490
Joined: Sat Apr 12, 2014 2:19 pm
Location: Just this side of insanity....

Re: 1/32 Tamiya Spitfire

Post by lawman56 »

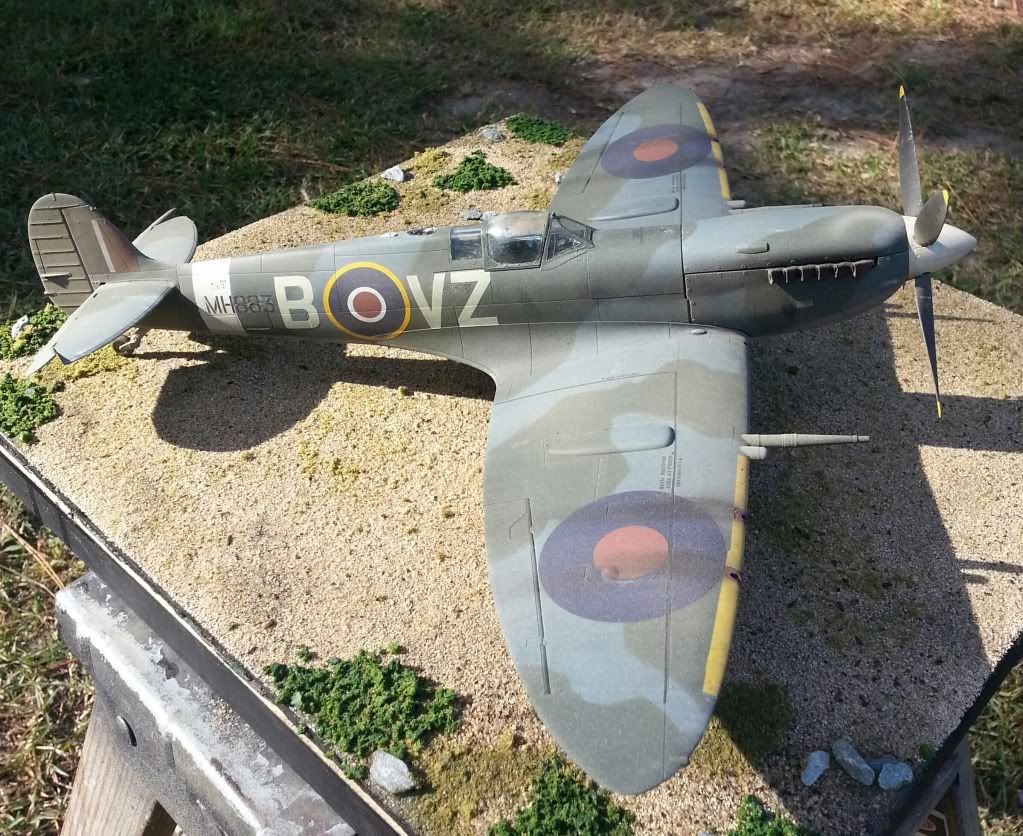
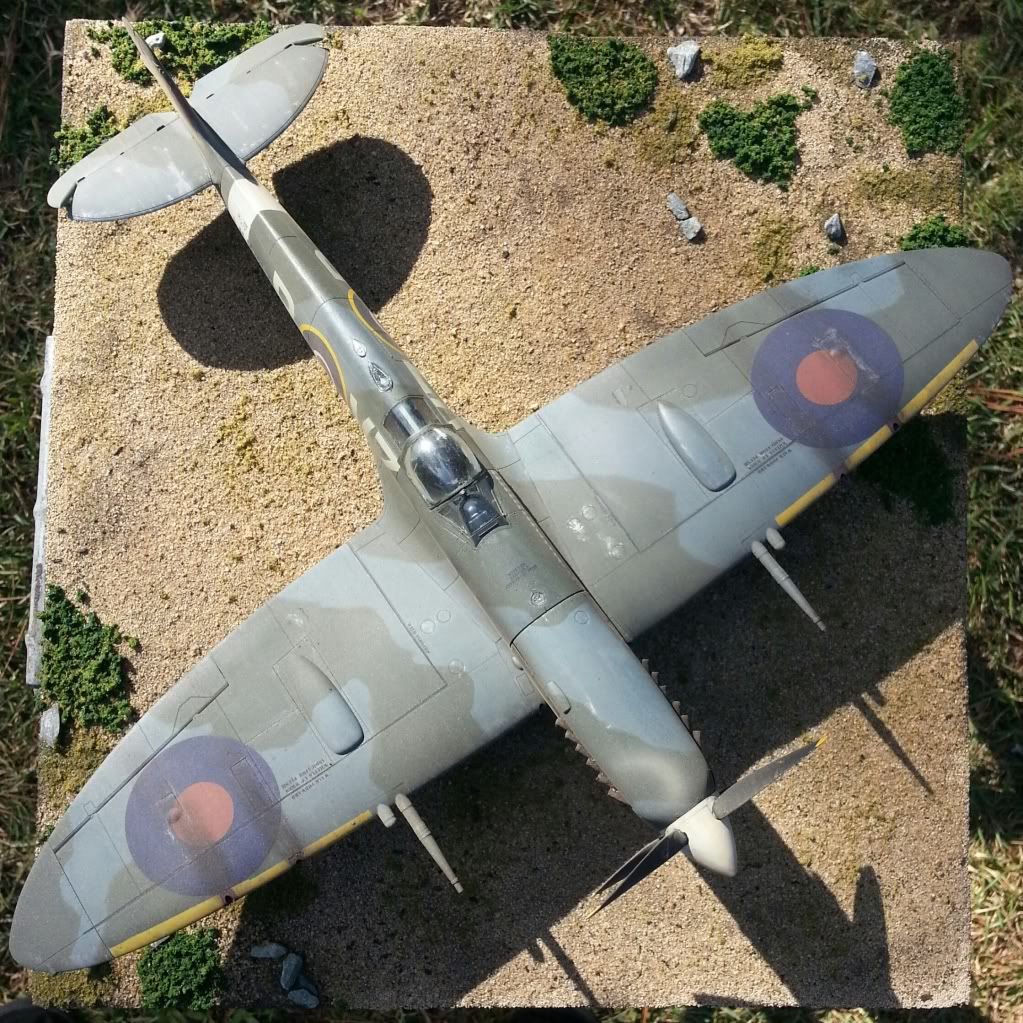
Found them! @Thomas, I figured out what I was doing wrong, and I have since, (it appears), corrected it. Here's some more Spit pics. One thing I hadn't realized until I went to take them, was I had somehow managed to break/lose the antenna mast. Go figure. I also added an IFF antenna afterwards.

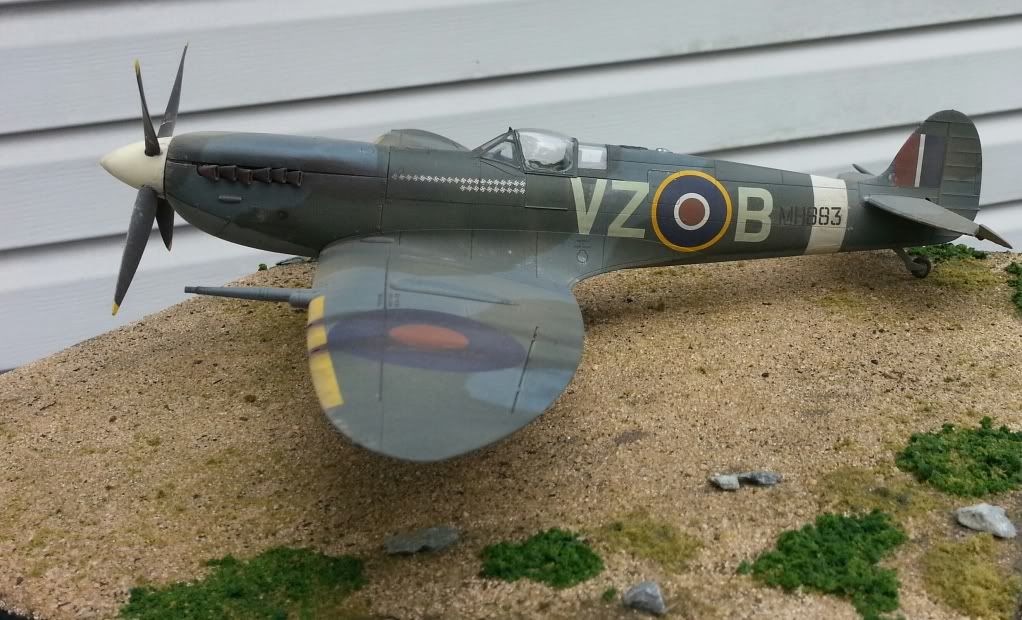
We'll start with obligatory right, left, overhead, etc...

Image

Image

Image

Image

Image
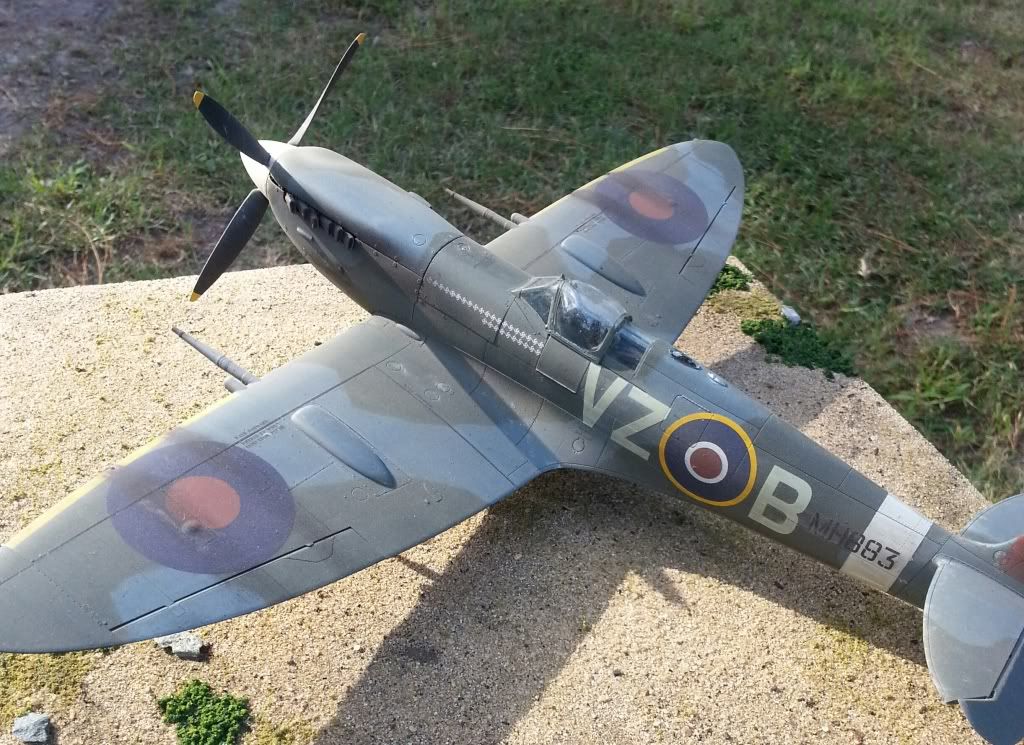
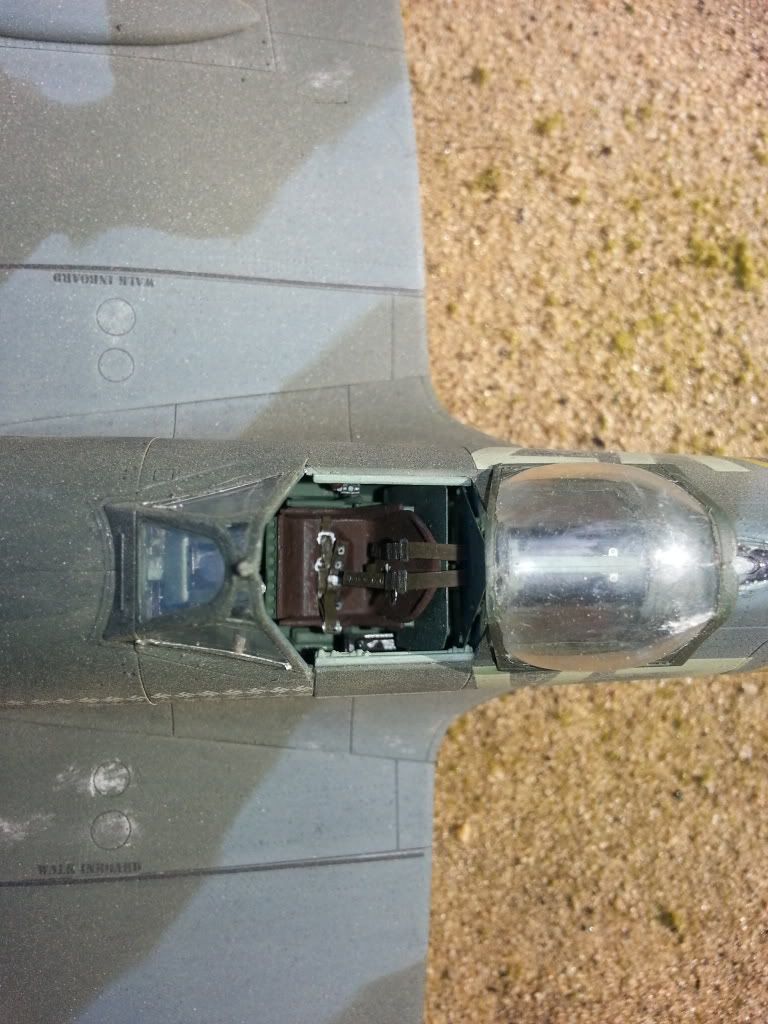
Looking straight down into the cockpit.
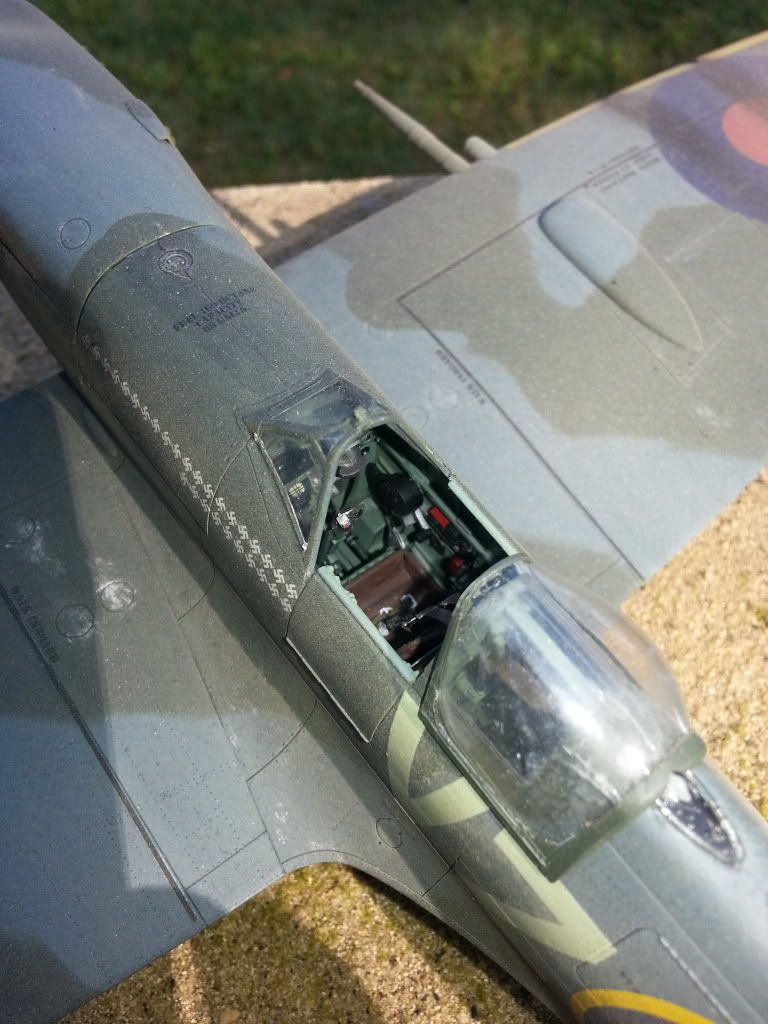
Image
Looking forward.

FYI-the only aftermarket used on this kit, were Barracuda wheels and decals. Everything else was in the kit. I like using Mig pigments for most of my weathering, especially for exhaust stains and weapon residue. After dry-brushing a little wear and tear, and adding my pigments, I added a light mist airbrushed coat of Model Master Tan. Makes it look dusty, but not derelict. This is where research pays off. Know your terrain. Malta was a dusty, hot location, and the terrain reflects that.
Joe

Illegitimi Non Carborundum
User avatar
Thomas_M
Admin
Posts: 4407
Joined: Fri Dec 13, 2013 9:43 am
Location: Bad Wurzach - Germany
Contact:

Re: 1/32 Tamiya Spitfire

Post by Thomas_M »

Did you mix the MM Tan into the final clear coat?

I really like how the markings get in connection to the overall appearance by misting MM Tan on this build! Well done, Sir!
User avatar
LyleW
Admin
Posts: 13657
Joined: Fri Dec 13, 2013 7:25 am
Location: Mt. Washington KY

Re: 1/32 Tamiya Spitfire

Post by LyleW »

Joe, amazing work. Nothing like a convincing dio and outside lighting! looks great.
To make each build less crappy than the last one. Or, put another way, "Better than the last one, not as good as the next one!"..
User avatar
lawman56
Advanced Member
Posts: 490
Joined: Sat Apr 12, 2014 2:19 pm
Location: Just this side of insanity....

Re: 1/32 Tamiya Spitfire

Post by lawman56 »

Thanks all!

@ Thomas, I mixed the MM Tan 60% thinner, 40% paint, then just shot it at a further distance, (2-3 feet +/-), than normal. I like to airbrush outside when possible, so in this case I sprayed from upwind and let nature blow it onto the model. After it dried, I used a 50/50 mix of Testors dullcoat thinned with laquer thinner to seal it all.

One thing I learned from my armor builds, is to paint and weather in layers. I imagine the subject as how it would look in various stages. Pristine and fresh from the factory, then add my chipping and stains from prolonged use. Next comes exhaust and powder residue from recent use, then finally dust from sitting, ready to go again.

Think of your car, and how it looks from the time it was new, through repeated use.

My best inspiration and examples, (especially for armor), comes from construction equipment. None of it looks as pretty as it left the factory, it's stained, chipped and rusty in places from continious use, and gets a good layer of filth on it. Yet it still runs and works every day.
Joe

Illegitimi Non Carborundum
User avatar
lawman56
Advanced Member
Posts: 490
Joined: Sat Apr 12, 2014 2:19 pm
Location: Just this side of insanity....

Re: 1/32 Tamiya Spitfire

Post by lawman56 »

@ Laser equipped shark, as intimidating as AB misting might seem, as my above post to Thomas stated, thin the paint more than normal and stand further away. If you're using a paint booth, (which I don't, preferring to paint outside), I've been told if you turn your pressure down between 5-10psi, and spray above the model, letting the mist fall onto the surface, you can achieve the same effect.

All I can say is practice on some scrap, or an older model you don't mind messing up. Lord knows, I've messed up more than I care to count!
Joe

Illegitimi Non Carborundum
User avatar
Stikpusher
Moderator
Posts: 18880
Joined: Sat Apr 05, 2014 8:37 pm
Location: Ceti Alpha 5

Re: 1/32 Tamiya Spitfire

Post by Stikpusher »

Very nice! Airbrush dusting is a nice armor trick you can use on desert or similar climate aircraft builds. Very well applied there.
"Surely I have made my meaning plain? I intend to avenge myself upon you, Admiral. I have deprived your ship of power, and when I swing 'round, I intend to deprive you of your life."

FLSM
Post Reply

Return to “Completed Builds”