Some Allied Armor Rebuilds
Posted: Tue Oct 22, 2019 10:42 am
I have been working on upgrading/rebuilding a couple of old Sherman’s of mine. Both were originally built back in the late 80s, probably around 1988 or so, back when all I had for reference was the Squadron “Sherman In Action” book.
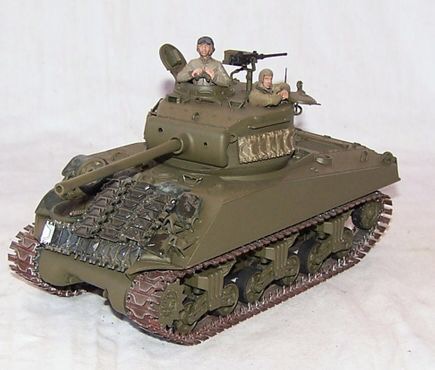
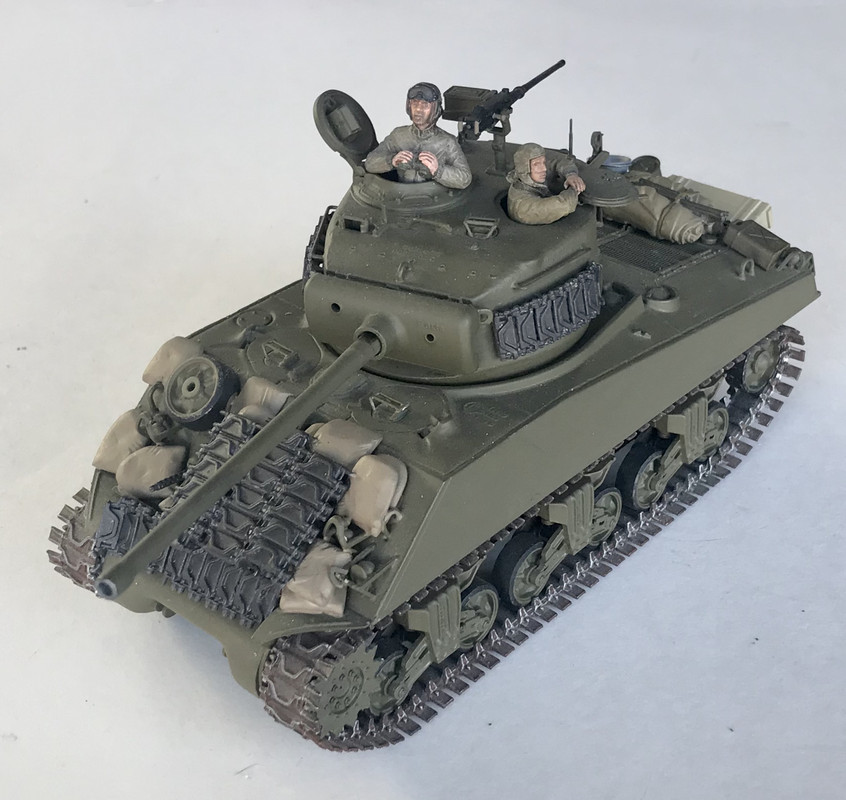
I’ll start with this Tamiya M4A3. It started life as a Firefly conversion (I didn’t know any better due to zero reference on the Sherman Firefly), on which I used a Verlinden Firefly turret. I also added the hull ammo bin external armor plates. Long story short, no Sherman Firefly tanks were made off of wet stowage large hatch welded late production 75mm gun tank hulls. I took no photos of that build back then. When MP Models released their M4A4 hull a few years later, I took the Verlinden Firefly parts off this kit and used them with the MP M4A4 for a proper Sherman Vc Firefly. Anyways, the M4A3 hull languished for years after, until I took an Academy late T23 turret and adapted the two to fit one another. Then after searching my now adequate Sherman reference books in my library, I decided to fit out the kit with sandbags and spare tracks on the glacis and turret as was often seen in 1945 in NW Europe....
Here is the early stages, and as it looks now, just needing a bit more stowage, some markings, and weathering.
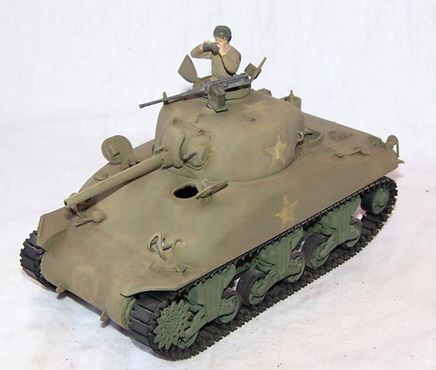
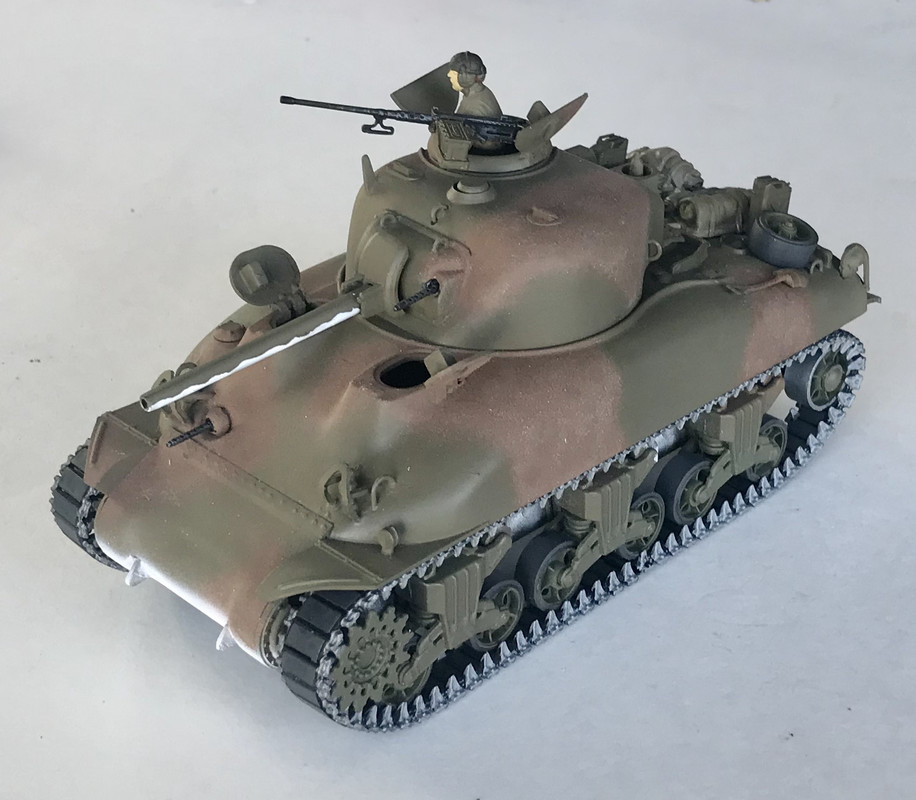
The second is the old Nichimo/Hasegawa/Minicraft M4A1 early production kit built around the same time. And built straight OOB, aside from a hedgerow prong that I originally scratched up, but later removed and got rid of. Again I took no photos of the original build. A few years ago I decided that I wanted to revamp the kit into the type seen with 1st Armored Division during early 1944 in Italy. I did try a “new” OD paint at that point, but I was not too happy with the look. Older photos were taken at that point. A few weeks ago, I tried a different new OD shade and was very happy with it. I recently added a camo pattern of Earth Red, along with some white countershading as was used at that place and time. I replaced the kit .30 cal. gun barrels with some much better resin ones that I had in my spares bin, as well as the kit .50 with a slightly modified .50 from my spares bin. I also added some Value Gear stowage and replaced the kit TC figure with one from Miniart. Again, I still need to do markings and weathering, but for now it looks much better...
Before and after...
I’ll start with this Tamiya M4A3. It started life as a Firefly conversion (I didn’t know any better due to zero reference on the Sherman Firefly), on which I used a Verlinden Firefly turret. I also added the hull ammo bin external armor plates. Long story short, no Sherman Firefly tanks were made off of wet stowage large hatch welded late production 75mm gun tank hulls. I took no photos of that build back then. When MP Models released their M4A4 hull a few years later, I took the Verlinden Firefly parts off this kit and used them with the MP M4A4 for a proper Sherman Vc Firefly. Anyways, the M4A3 hull languished for years after, until I took an Academy late T23 turret and adapted the two to fit one another. Then after searching my now adequate Sherman reference books in my library, I decided to fit out the kit with sandbags and spare tracks on the glacis and turret as was often seen in 1945 in NW Europe....
Here is the early stages, and as it looks now, just needing a bit more stowage, some markings, and weathering.
The second is the old Nichimo/Hasegawa/Minicraft M4A1 early production kit built around the same time. And built straight OOB, aside from a hedgerow prong that I originally scratched up, but later removed and got rid of. Again I took no photos of the original build. A few years ago I decided that I wanted to revamp the kit into the type seen with 1st Armored Division during early 1944 in Italy. I did try a “new” OD paint at that point, but I was not too happy with the look. Older photos were taken at that point. A few weeks ago, I tried a different new OD shade and was very happy with it. I recently added a camo pattern of Earth Red, along with some white countershading as was used at that place and time. I replaced the kit .30 cal. gun barrels with some much better resin ones that I had in my spares bin, as well as the kit .50 with a slightly modified .50 from my spares bin. I also added some Value Gear stowage and replaced the kit TC figure with one from Miniart. Again, I still need to do markings and weathering, but for now it looks much better...
Before and after...