1:48 P-51B “Spare Parts” (Tamiya Kit)
Posted: Tue Feb 02, 2021 3:38 pm
Cheers folks, thanks for stopping by!
Well, shoot... what’s there to say really? I haven’t had much luck getting projects off the ground lately. Black 1 Remixed crashed and burned. Not once, but TWICE! First due to orange peel on the yellow wing tips, second due to a misalignment with the motor causing the lower cowling to push out past the bottom of the top cowling part along the sides -and that was my fault for basically building the god forsaken kit in a manner which was an afterthought to the manufacturer. Seriously, do you know another jackass besides me who’d want to eschew the fantastic engine Eduard supplies with the kit in order to build the thing buttoned up?
Speaking of engines, I ended up terribly unhappy with Marga’s engine. The plumbing I did. So I began the process of removing it and refactoring it...
Look, here’s the problems:
1. I began all those projects when I was drunk. And having been sober now for over two months, my vision has shifted dramatically.
2. I had AMS. That’s not an issue in and of it’s self, but let’s face it- I’ve got a long way to go before I’m an “advanced modeler.” A lot of that custom work was substandard.
3. My methodology for doing things like painting, weathering, etc. has changed.
4. I can actually see myself and my work objectively now.
My wife told me a week or so ago “Babe, I’m sure all those old Renaissance masters have projects they never finished. At least you learned something. Why not carry over what you learned into something you’ve never done before? Something unfamiliar to you instead of trying to get back into it with the same old subjects?”
Makes sense. My confidence to work on my jet was dead. And the old Messerschmitt E3’s and even Corsairs just weren’t doing it for me. I want to start, and complete, an airplane. A WWII airplane. A cool WWII airplane.
So I broke out that old P-51B kit I’ve been planning, and immediately set the ground rules:
1. Build the kit out of the box with the exception of two things:
a. add a safety harness, of which you have a spare you aren’t using
b. use aftermarket decals because Tamiya decals and I don’t necessarily get along
2. Try a bare metal finish
3. Do not worry about correcting kit faults with scratch building or aftermarket. I still need a lot of practice working with resin. I suck at it. I can add a little bit of wiring if I want but that’s it. I’m competent to do that. I’m not competent with working with resin. If I want to work with resin, use a mule and practice there.
4. Along with #3, take it further. Appreciate the kit for what it is, look at my skill set objectively, and do the best job I can with construction and painting to do the kit justice. That means careful parts preparation, good construction methods, test fitting, and painting this thing as best as I possibly can. All while not sweating the small stuff. I get too hung up on small, stupid things that don’t matter. That needs to change. This build will change that.
Once I had established that, I was off to the races.
Here’s the references:
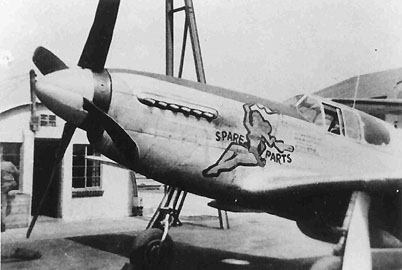
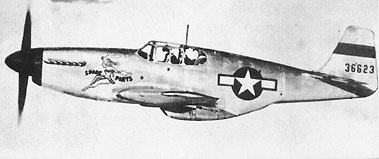
And here’s the work I’ve done so far:
...I’m done using PE IP’s and IP decals if I can help it. I have grown to hate both for various reasons. It pleases me more to paint my own, and detail them myself. Here’s the IP:

And the rest of the cockpit as it was coming together. Under harsh light that green blares. Under soft, normal light, it darkens up a lot. Very interesting:
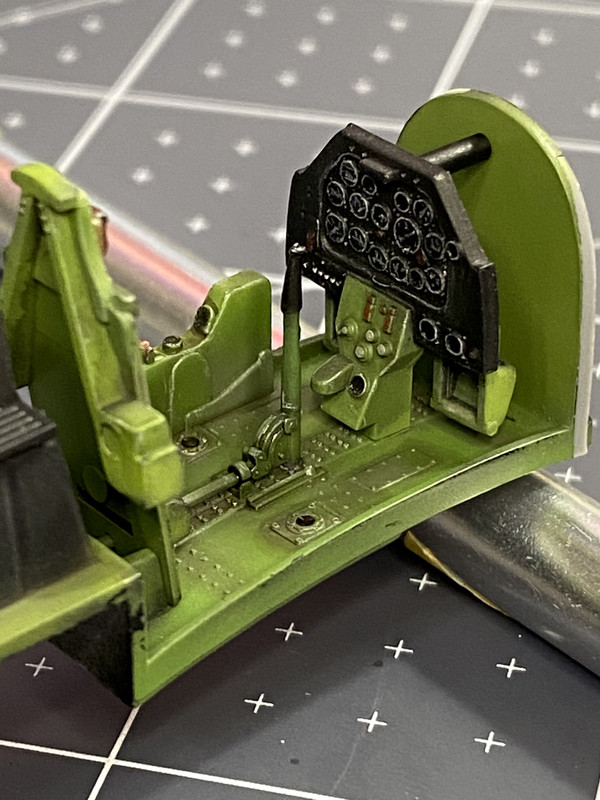
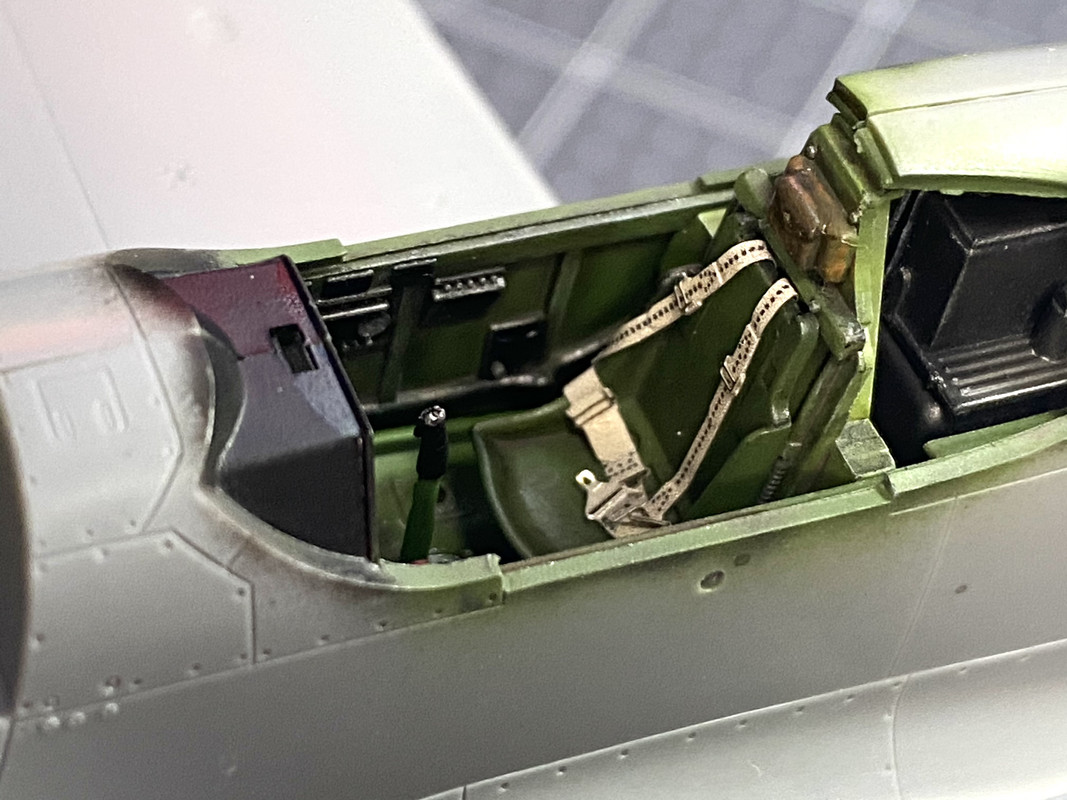
With harness and seat added, and installed inside the fuselage mock-up:
And here she is on my new jig:
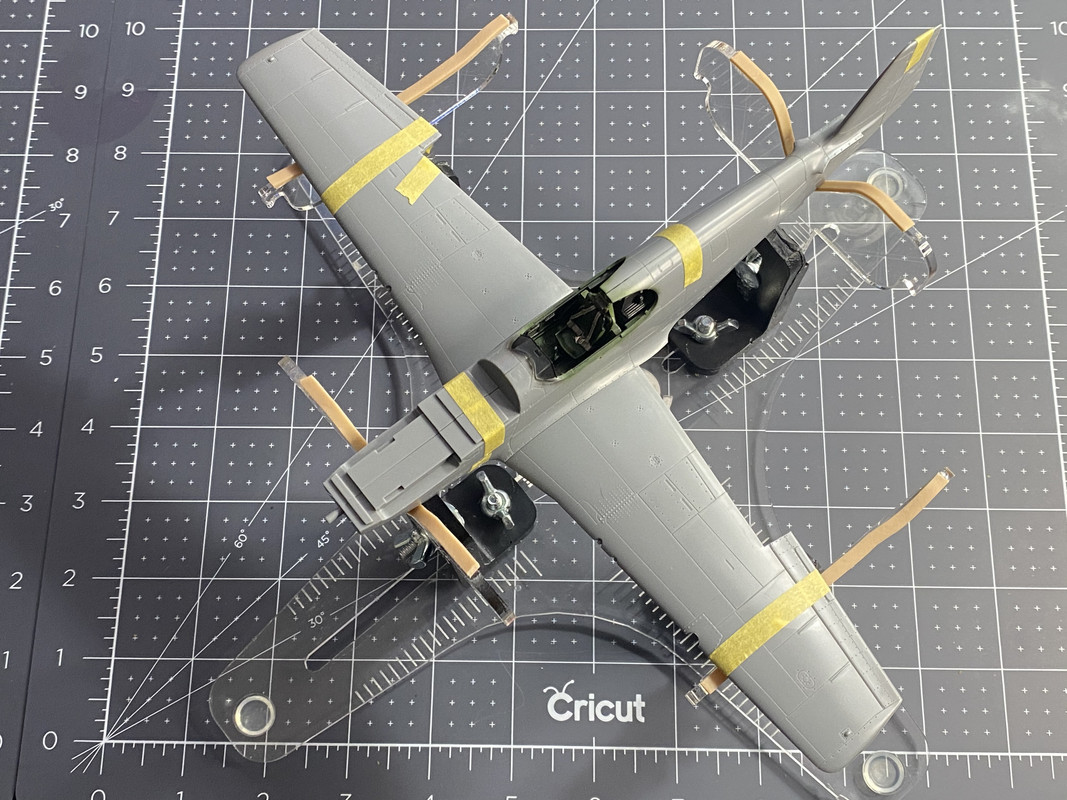
Cockpit needs another coat of flat clear. And some miscellaneous stuff needs done on the install before sealing the old girl up. After that I’ll either paint the gear bays, or get started puttying-up the panel lines on the wings. I’m competent to do that.
This is a great airplane. I’ve really come to like the Pony. If you’re interested in reading about my particular subject and it’s backstory, you can read more here:
http://www.laituk.org/P-51%2043-6623.htm
Well, shoot... what’s there to say really? I haven’t had much luck getting projects off the ground lately. Black 1 Remixed crashed and burned. Not once, but TWICE! First due to orange peel on the yellow wing tips, second due to a misalignment with the motor causing the lower cowling to push out past the bottom of the top cowling part along the sides -and that was my fault for basically building the god forsaken kit in a manner which was an afterthought to the manufacturer. Seriously, do you know another jackass besides me who’d want to eschew the fantastic engine Eduard supplies with the kit in order to build the thing buttoned up?
Speaking of engines, I ended up terribly unhappy with Marga’s engine. The plumbing I did. So I began the process of removing it and refactoring it...
Look, here’s the problems:
1. I began all those projects when I was drunk. And having been sober now for over two months, my vision has shifted dramatically.
2. I had AMS. That’s not an issue in and of it’s self, but let’s face it- I’ve got a long way to go before I’m an “advanced modeler.” A lot of that custom work was substandard.
3. My methodology for doing things like painting, weathering, etc. has changed.
4. I can actually see myself and my work objectively now.
My wife told me a week or so ago “Babe, I’m sure all those old Renaissance masters have projects they never finished. At least you learned something. Why not carry over what you learned into something you’ve never done before? Something unfamiliar to you instead of trying to get back into it with the same old subjects?”
Makes sense. My confidence to work on my jet was dead. And the old Messerschmitt E3’s and even Corsairs just weren’t doing it for me. I want to start, and complete, an airplane. A WWII airplane. A cool WWII airplane.
So I broke out that old P-51B kit I’ve been planning, and immediately set the ground rules:
1. Build the kit out of the box with the exception of two things:
a. add a safety harness, of which you have a spare you aren’t using
b. use aftermarket decals because Tamiya decals and I don’t necessarily get along
2. Try a bare metal finish
3. Do not worry about correcting kit faults with scratch building or aftermarket. I still need a lot of practice working with resin. I suck at it. I can add a little bit of wiring if I want but that’s it. I’m competent to do that. I’m not competent with working with resin. If I want to work with resin, use a mule and practice there.
4. Along with #3, take it further. Appreciate the kit for what it is, look at my skill set objectively, and do the best job I can with construction and painting to do the kit justice. That means careful parts preparation, good construction methods, test fitting, and painting this thing as best as I possibly can. All while not sweating the small stuff. I get too hung up on small, stupid things that don’t matter. That needs to change. This build will change that.
Once I had established that, I was off to the races.
Here’s the references:
And here’s the work I’ve done so far:
...I’m done using PE IP’s and IP decals if I can help it. I have grown to hate both for various reasons. It pleases me more to paint my own, and detail them myself. Here’s the IP:
And the rest of the cockpit as it was coming together. Under harsh light that green blares. Under soft, normal light, it darkens up a lot. Very interesting:
With harness and seat added, and installed inside the fuselage mock-up:
And here she is on my new jig:
Cockpit needs another coat of flat clear. And some miscellaneous stuff needs done on the install before sealing the old girl up. After that I’ll either paint the gear bays, or get started puttying-up the panel lines on the wings. I’m competent to do that.
This is a great airplane. I’ve really come to like the Pony. If you’re interested in reading about my particular subject and it’s backstory, you can read more here:
http://www.laituk.org/P-51%2043-6623.htm


