Giving The Pony Another Go ... P-51D “Donald Duck.”
Posted: Fri Feb 12, 2021 10:14 pm
Being honest- building up my Tamiya P-51 B made me really appreciate the aircraft. I went from never thinking twice about a Mustang to discovering all kinds of interesting details and nuances in the aircraft. There’s a lot to discover, there.
Anyway, I was laying here, recovering from today’s wisdom teeth extraction surgery and subsequent “Return into Earth’s Orbit” from that crazy anesthesia they put me under ... I mean HOLY COW! One moment the Doctor is telling me “I’m pushing a little something to take the edge off” and said “BANZAI! IV Benzodiazepines”! And he’s laughing and then just as that was kicking in the nurse is laying out this HORRIFYING looking tray of instruments and tools in front of me, and I’m looking at it, wide-eyed, saying “COOL!” and then POW! Next thing I remember my wife is helping me into the Chevy and she and she’s saying “No honey, you can’t go skateboarding when we get home.” “I’d strongly advise against that, Kenneth” adds the nurse.
So shoot, where was I going with this? Oh yeah- so I was laying here feeling all despondent and stuff, and decided to give the Mustang another go. Copped a Weekend Edition if the P-51D from Sprue Brothers for 27 bucks. Should be here later this coming week.
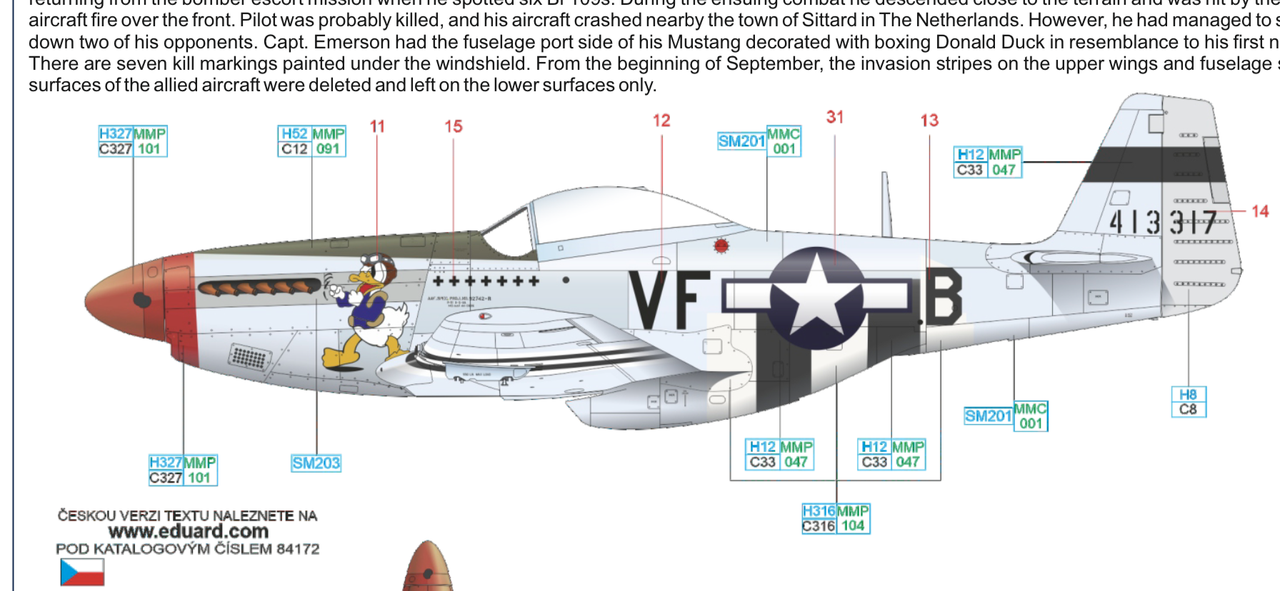
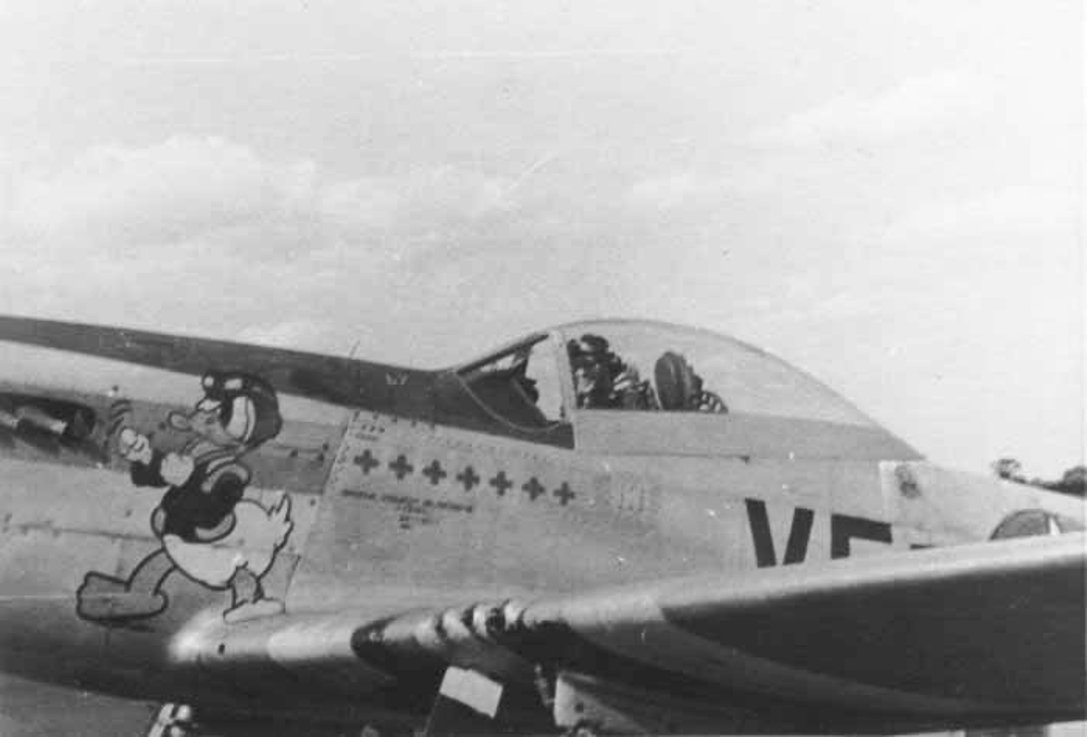
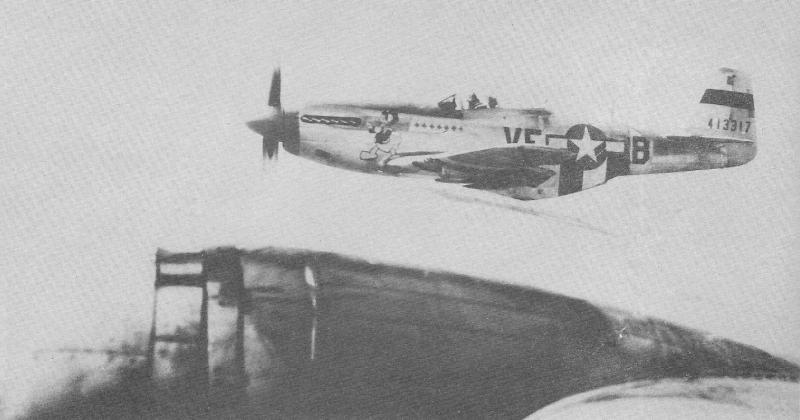
Here’s the marking option I’ll be doing, along with some reference photos:
All of the same rules will apply to this build as applied to Spare Parts.
Now, on the subject of Spare Parts, I did have a go at sanding the lower wing surfaces to re-paint. I quickly grew tired of doing that. It felt way too much like the ordeal I went through with Pip’s Emil and correcting the field-applied overspray. I have no desire or interest in completing that project.
That said, our dear friend John Kim gave me some excellent advice concerning how to handle the irregularities he spotted in the primer on the upper wing surface. I intent to level that out as best I can, Re-Prime, and then, instead of laying down Tamiya Gloss Black mixed with Gloss Clear, I’m going to lay down a lacquer gloss black instead, and then lay down Tamiya AS-12 on top of THAT to act as the “aluminum lacquer” instead of High Speed Siler and see how that looks there on a mule which has had its surface prepped versus on virgin plastic which is where I’d conducted all my experiments last time. Perhaps that’ll yield better results for going forward.
Maybe I’ll get an airplane project off the ground before Summer yet. Who knows!
Anyway, I was laying here, recovering from today’s wisdom teeth extraction surgery and subsequent “Return into Earth’s Orbit” from that crazy anesthesia they put me under ... I mean HOLY COW! One moment the Doctor is telling me “I’m pushing a little something to take the edge off” and said “BANZAI! IV Benzodiazepines”! And he’s laughing and then just as that was kicking in the nurse is laying out this HORRIFYING looking tray of instruments and tools in front of me, and I’m looking at it, wide-eyed, saying “COOL!” and then POW! Next thing I remember my wife is helping me into the Chevy and she and she’s saying “No honey, you can’t go skateboarding when we get home.” “I’d strongly advise against that, Kenneth” adds the nurse.
So shoot, where was I going with this? Oh yeah- so I was laying here feeling all despondent and stuff, and decided to give the Mustang another go. Copped a Weekend Edition if the P-51D from Sprue Brothers for 27 bucks. Should be here later this coming week.
Here’s the marking option I’ll be doing, along with some reference photos:
All of the same rules will apply to this build as applied to Spare Parts.
Now, on the subject of Spare Parts, I did have a go at sanding the lower wing surfaces to re-paint. I quickly grew tired of doing that. It felt way too much like the ordeal I went through with Pip’s Emil and correcting the field-applied overspray. I have no desire or interest in completing that project.
That said, our dear friend John Kim gave me some excellent advice concerning how to handle the irregularities he spotted in the primer on the upper wing surface. I intent to level that out as best I can, Re-Prime, and then, instead of laying down Tamiya Gloss Black mixed with Gloss Clear, I’m going to lay down a lacquer gloss black instead, and then lay down Tamiya AS-12 on top of THAT to act as the “aluminum lacquer” instead of High Speed Siler and see how that looks there on a mule which has had its surface prepped versus on virgin plastic which is where I’d conducted all my experiments last time. Perhaps that’ll yield better results for going forward.
Maybe I’ll get an airplane project off the ground before Summer yet. Who knows!