Fishing season has started so I've not been as hyper-focused on modeling as I have been. Jumped back onto the D-9 build for a few updates. The tail stabilizers have been riveted.
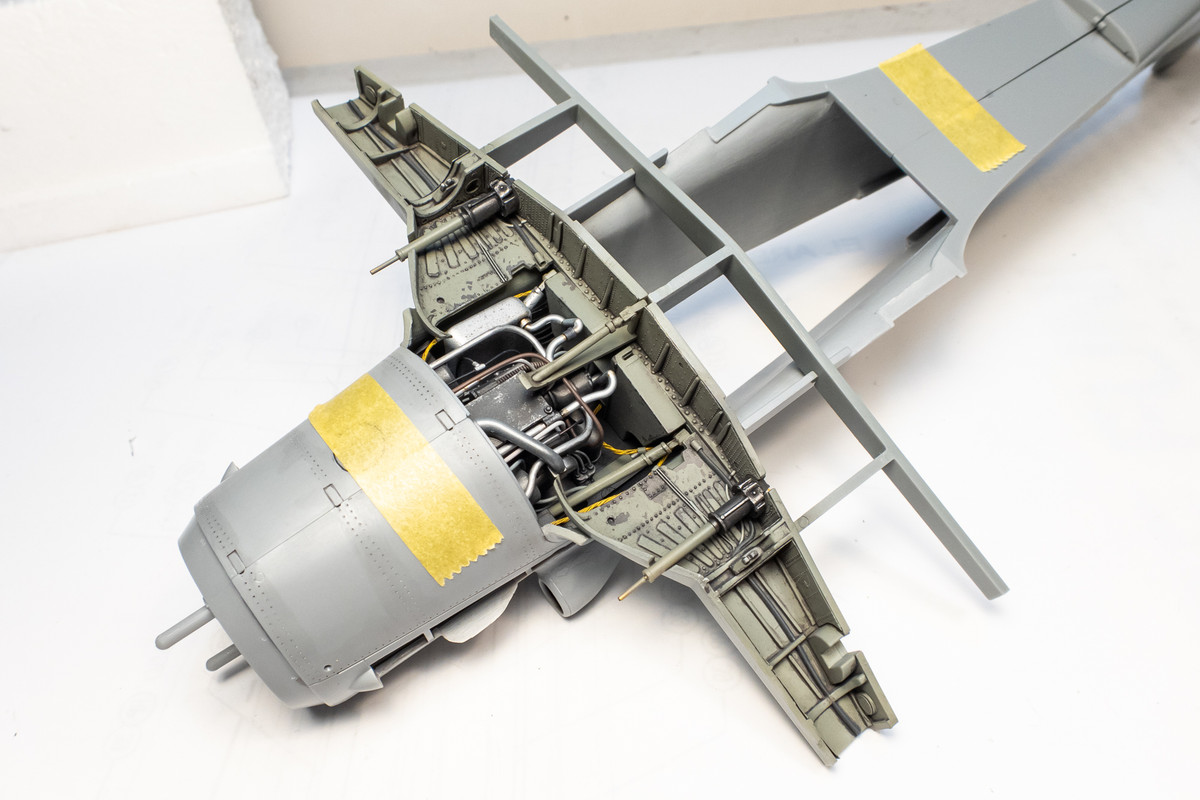
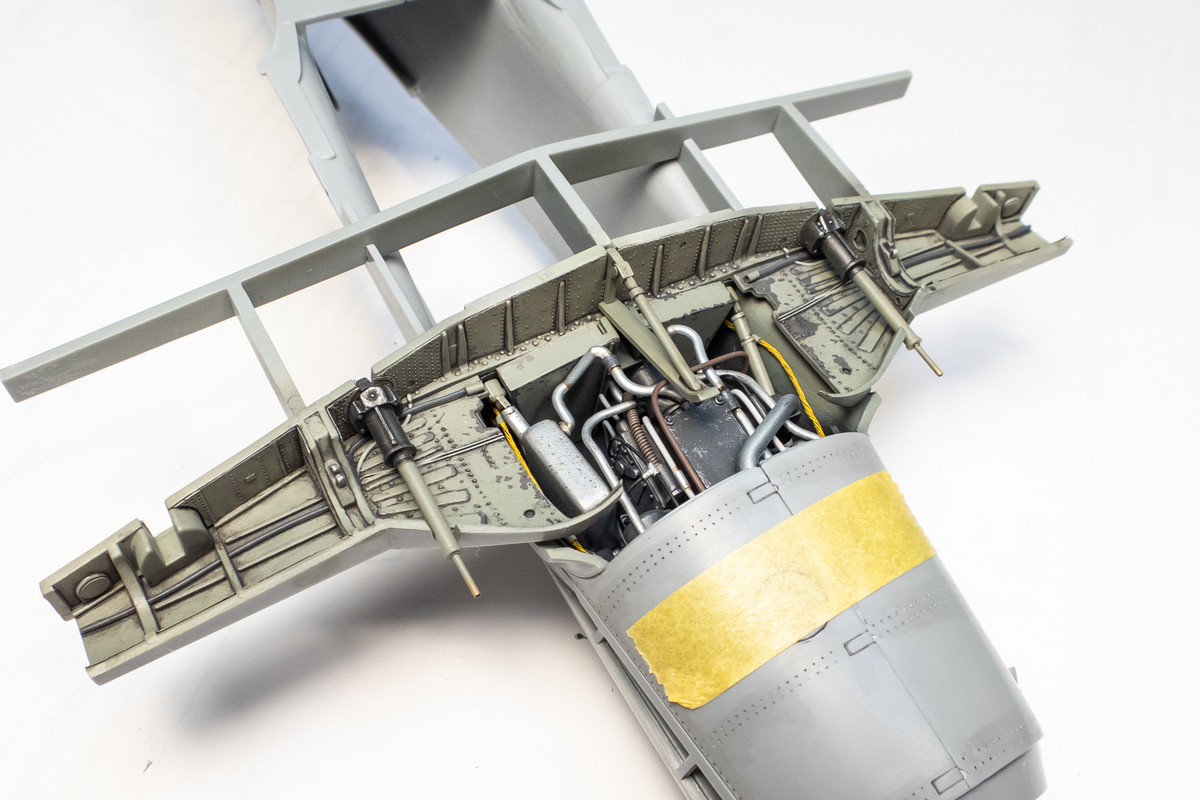
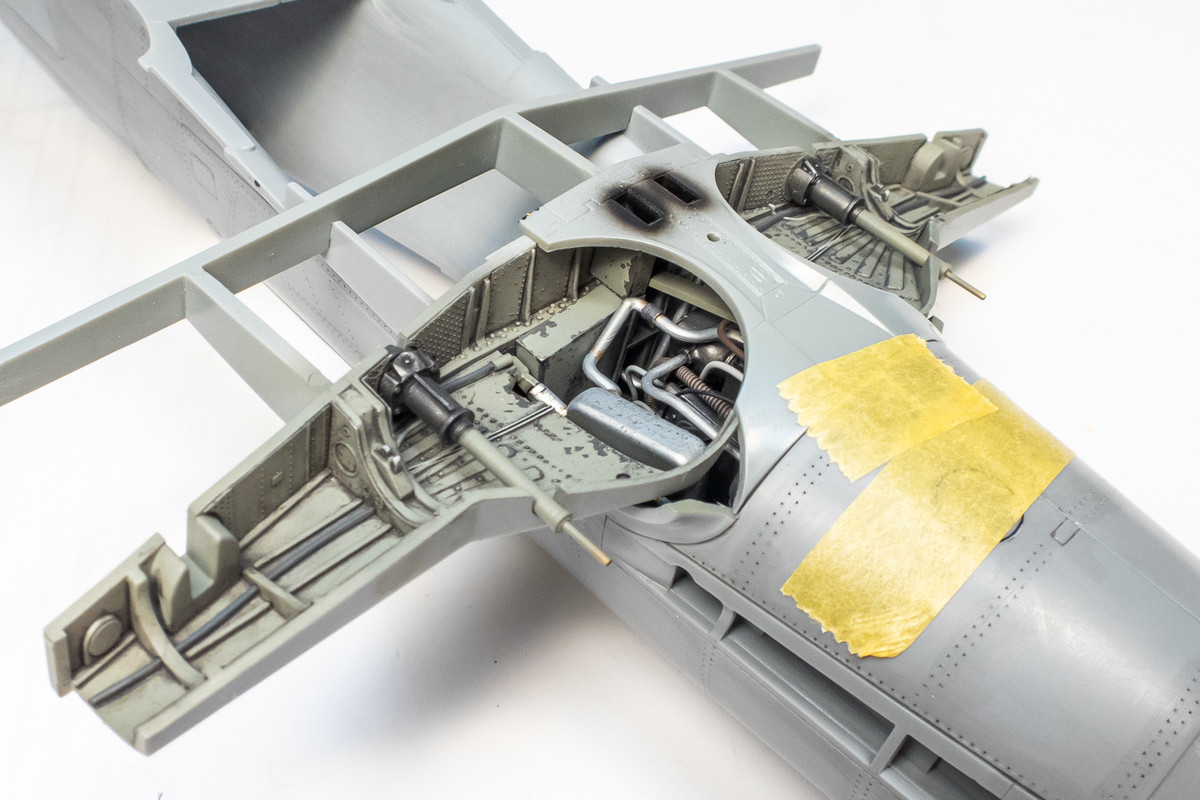
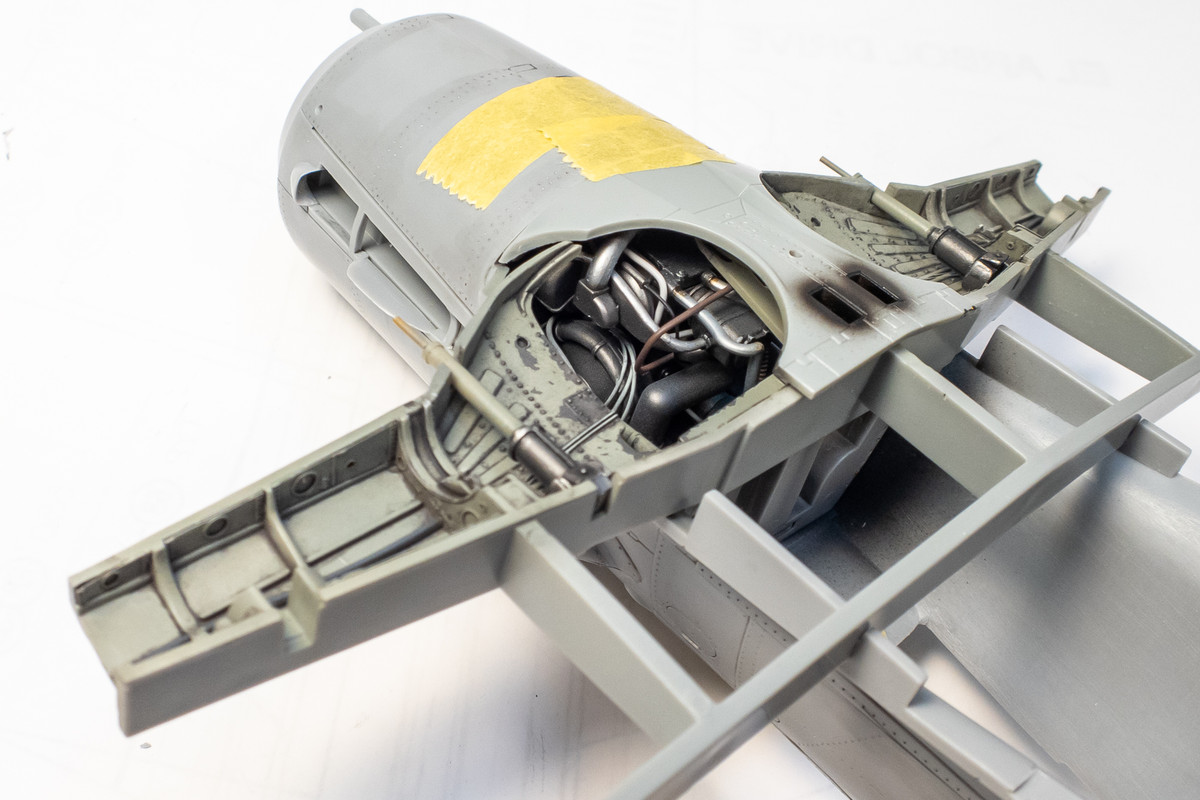
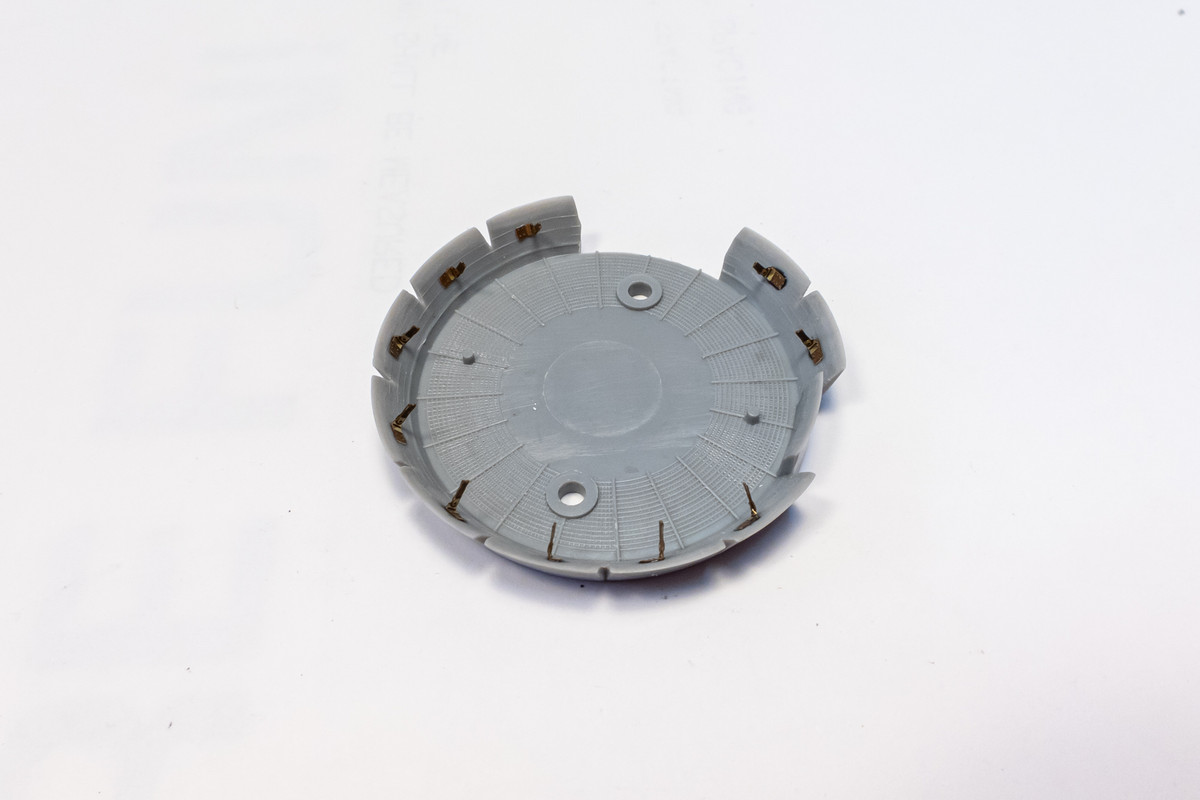
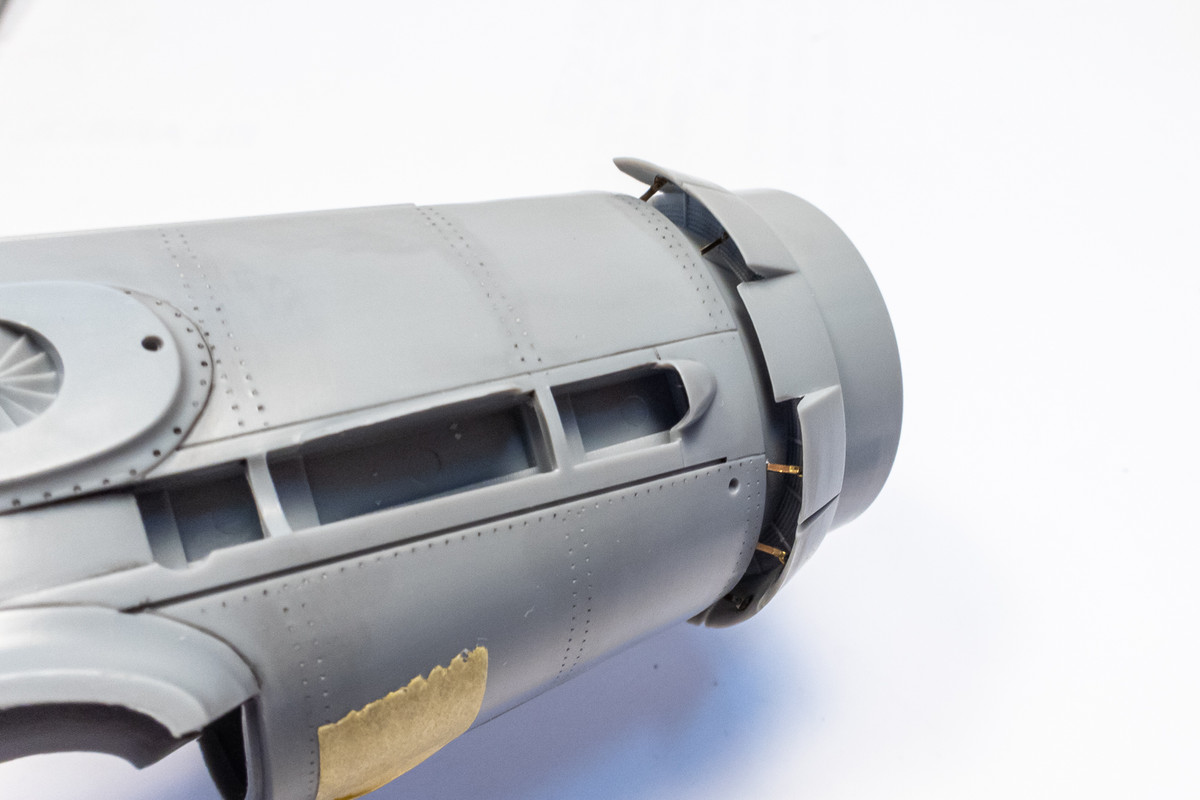
The cowling flap actuating rods were added from the Eduard Exterior set.
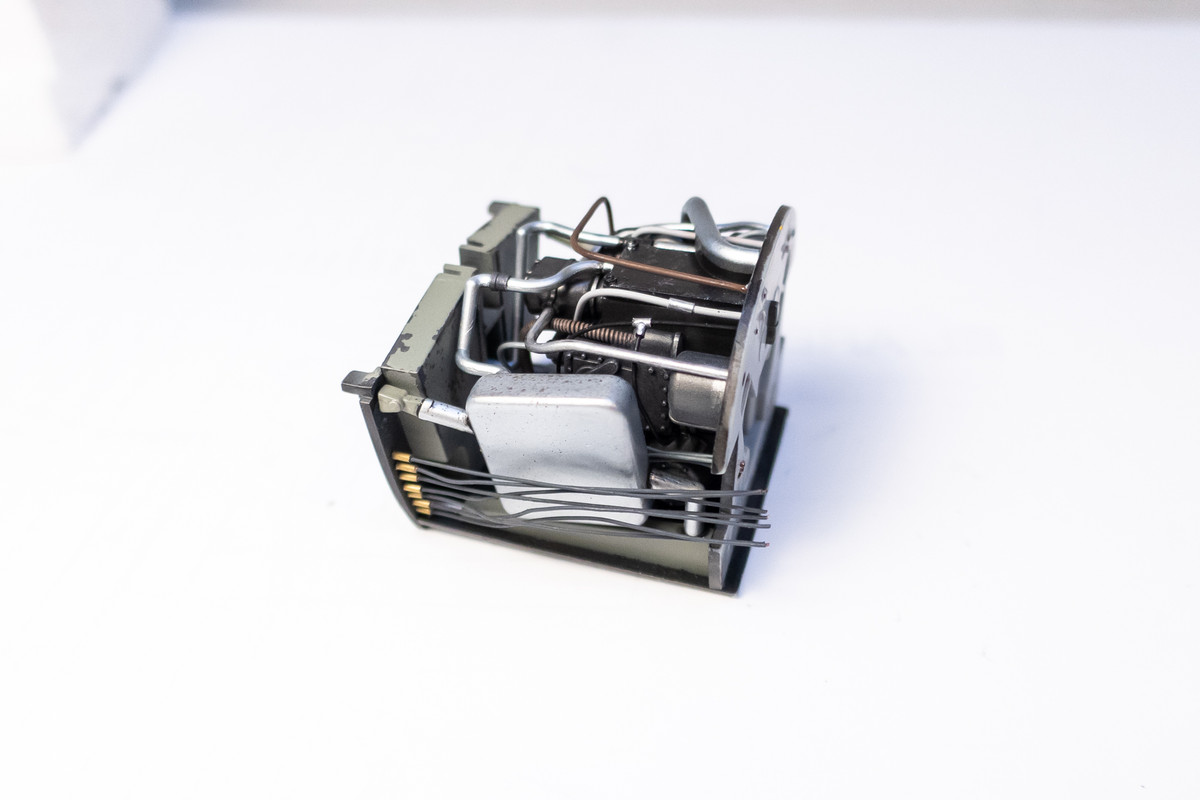
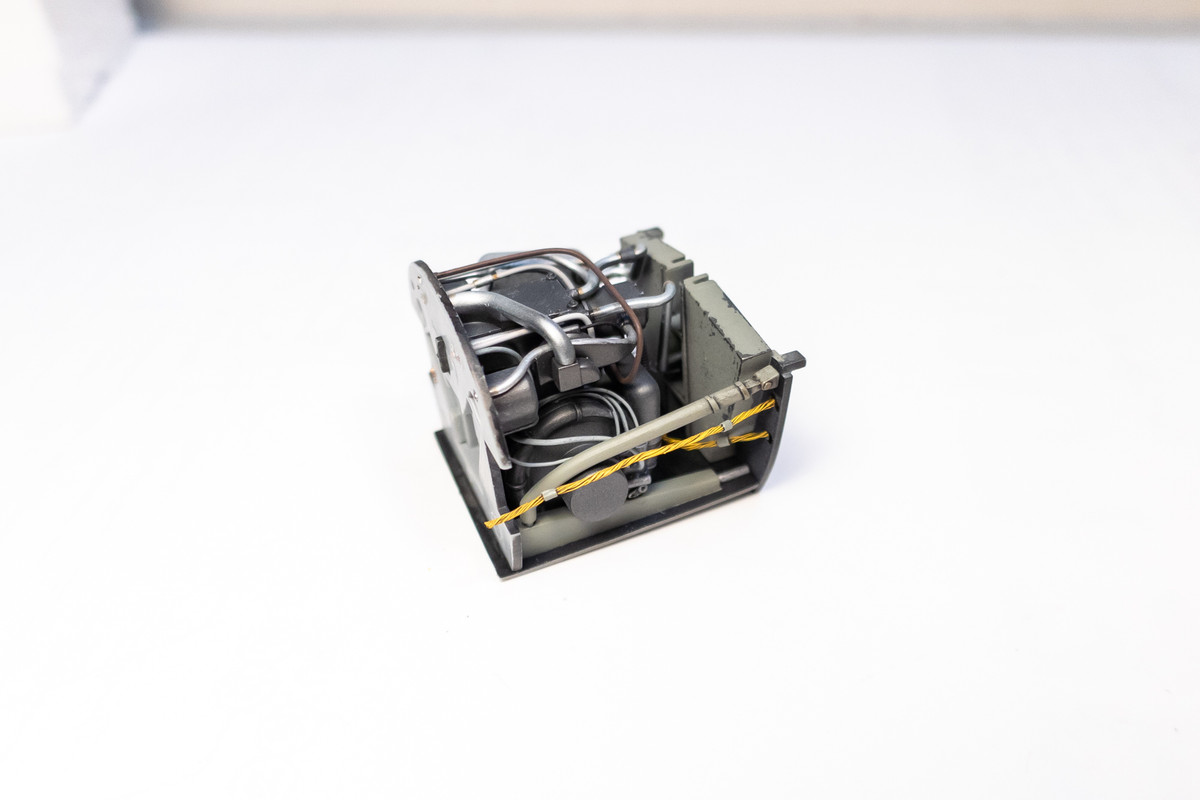
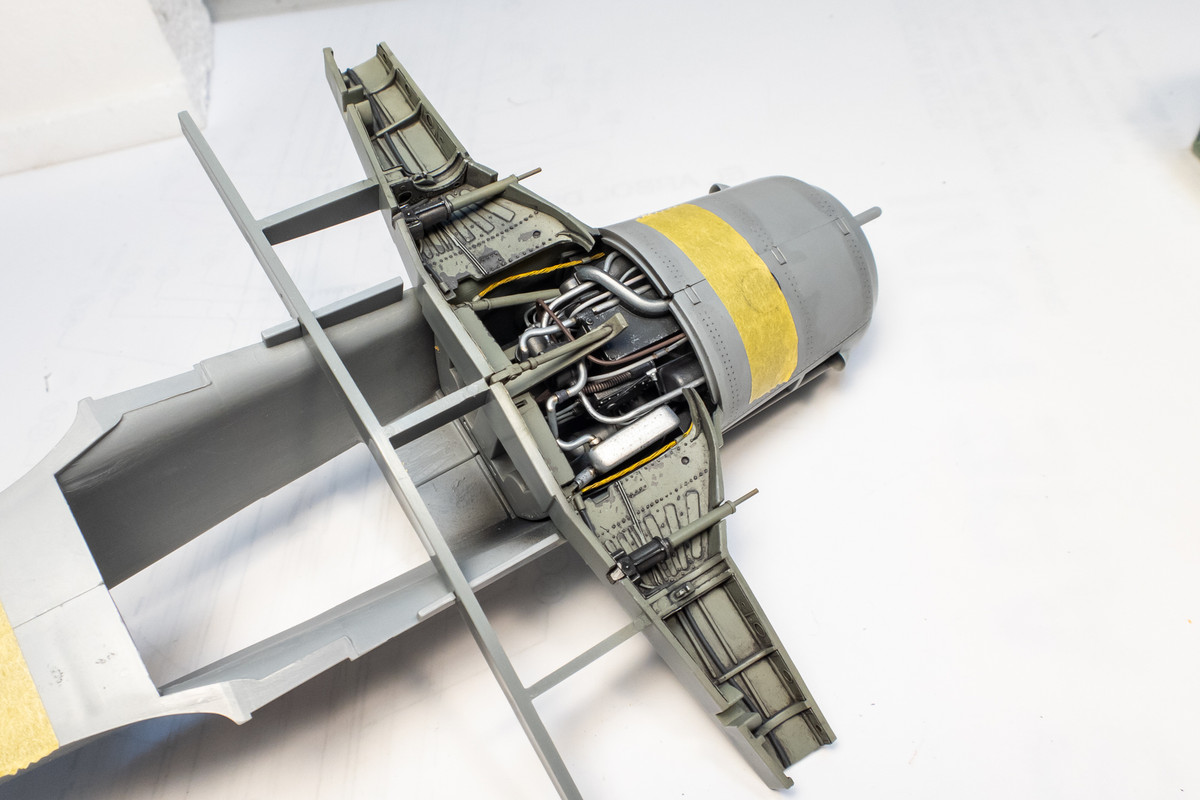
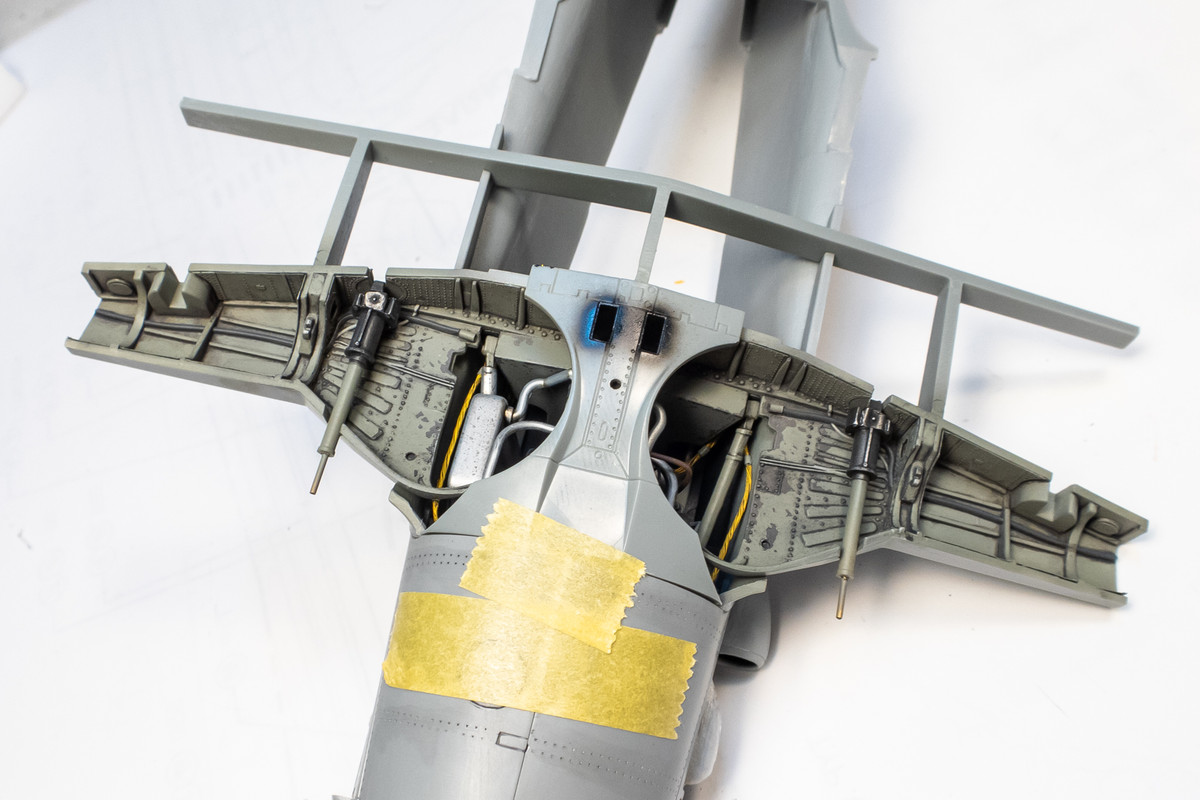
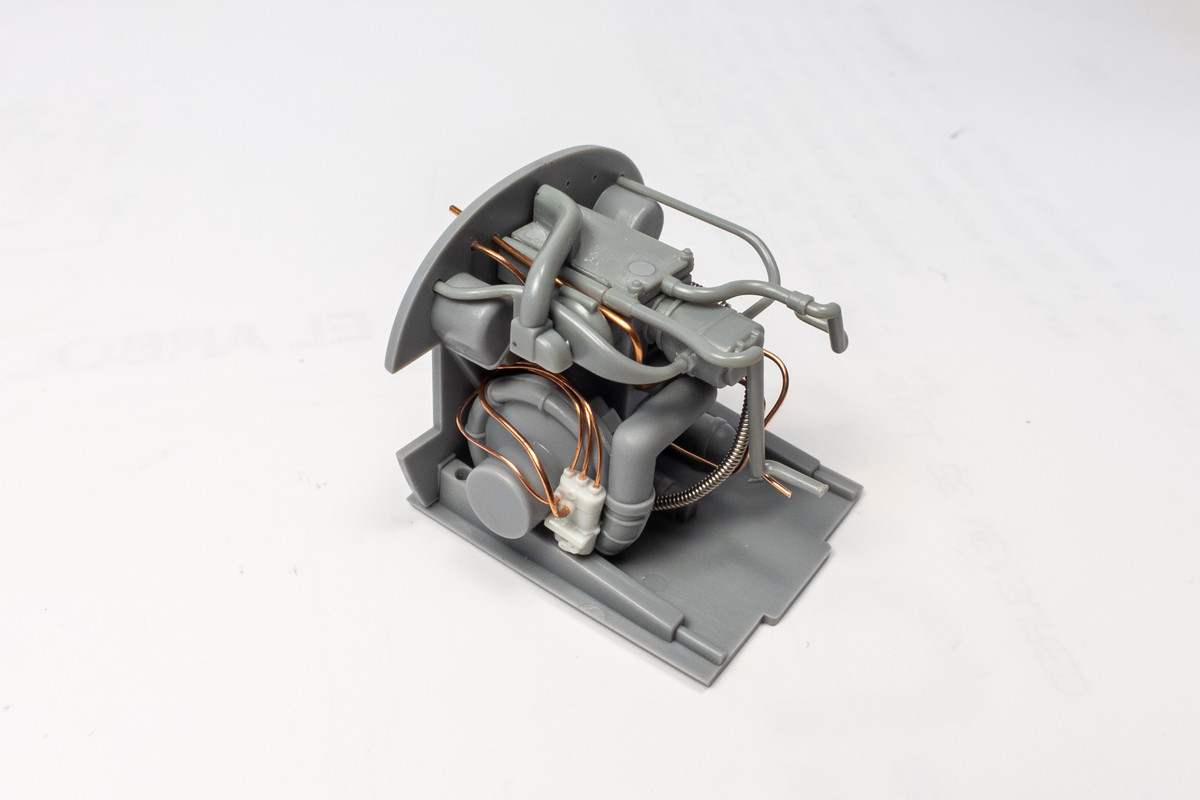
The rear engine assembly has been giving me the most pause, as usual. You'd think that after building this kit for the fifth time, that I'd have some sort of system or at least good idea of how to approach this area but I took a slightly different approach this time. Guided by photos of the Jumo 213 engine, I added some wire junctions on either side of the engine body instead of just spreading random wires around the periphery of the visible engine as I've done in the past. I'll still add the peripheral wiring but I thought working from the inside out might get me a more realistically cluttered look to this area.
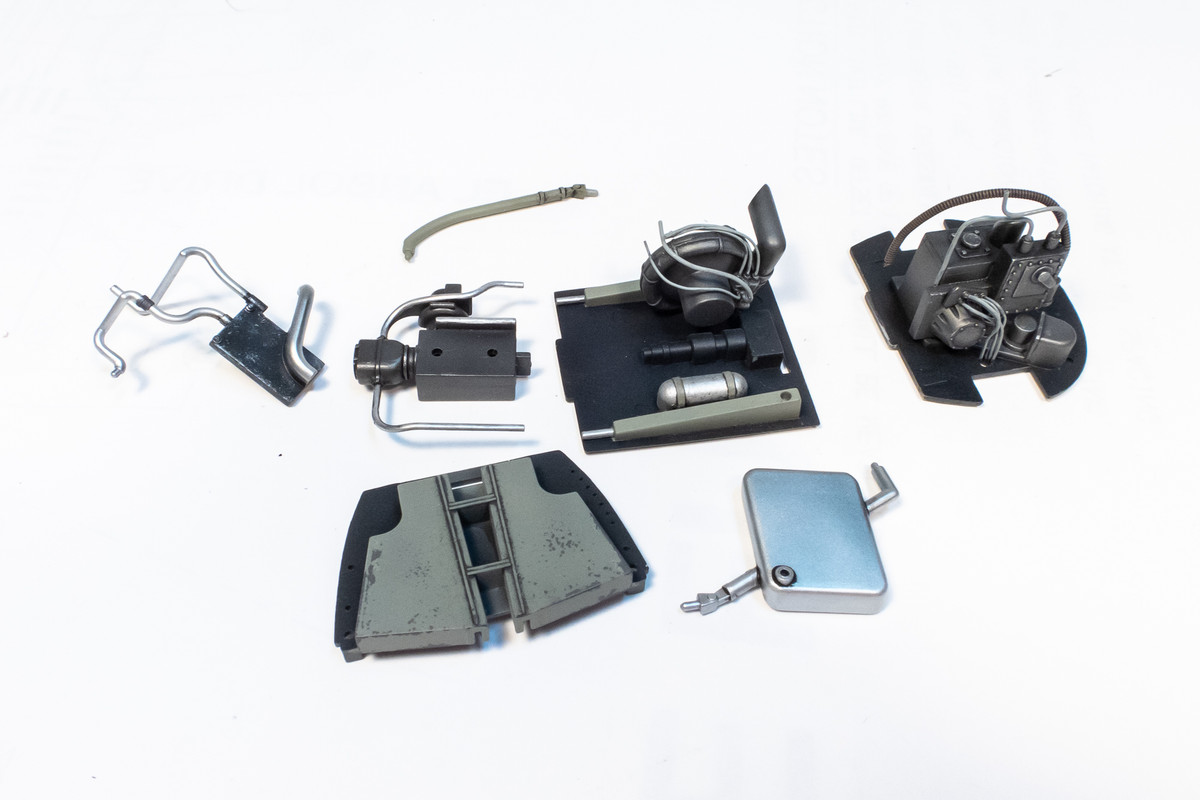
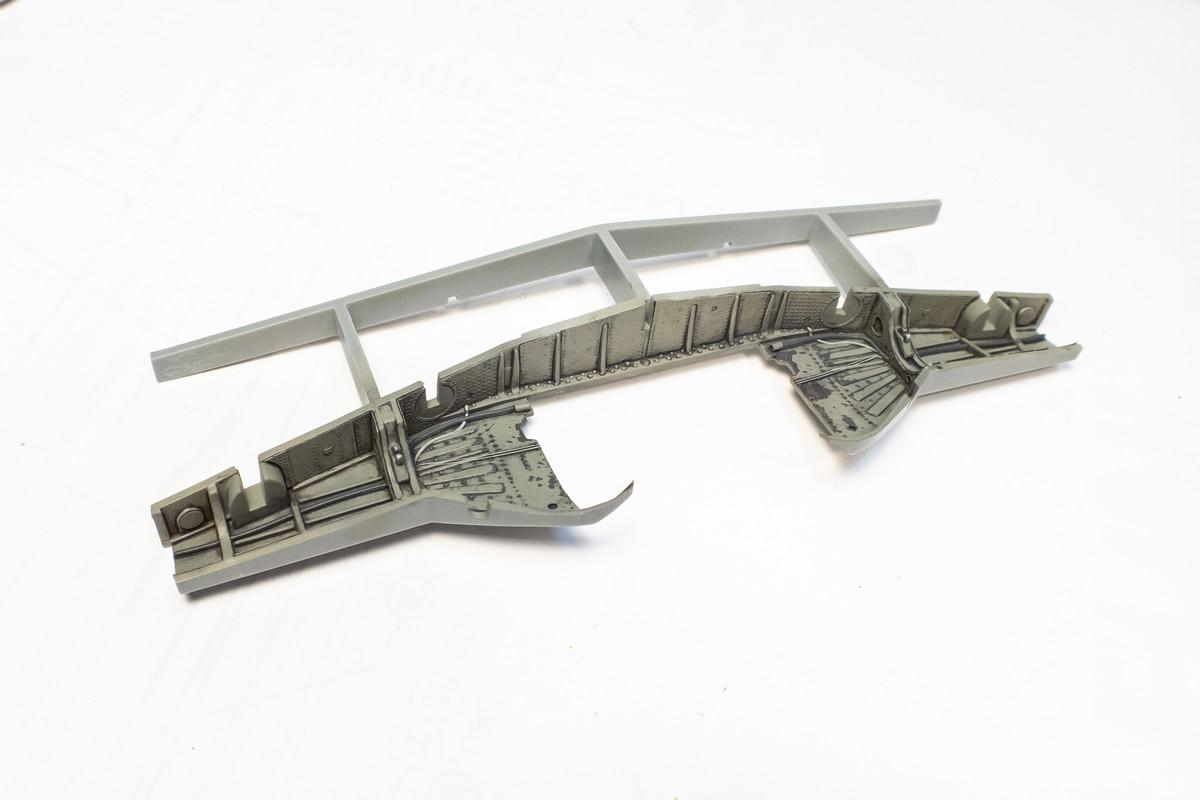
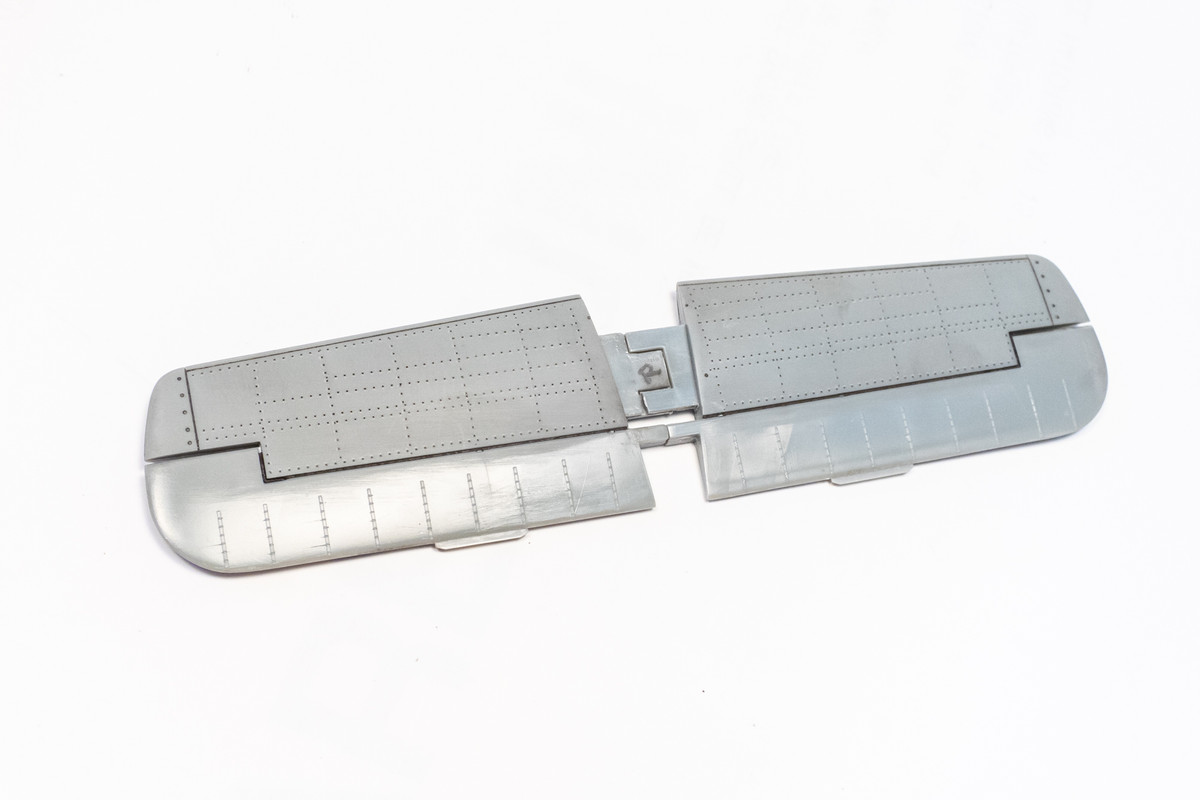
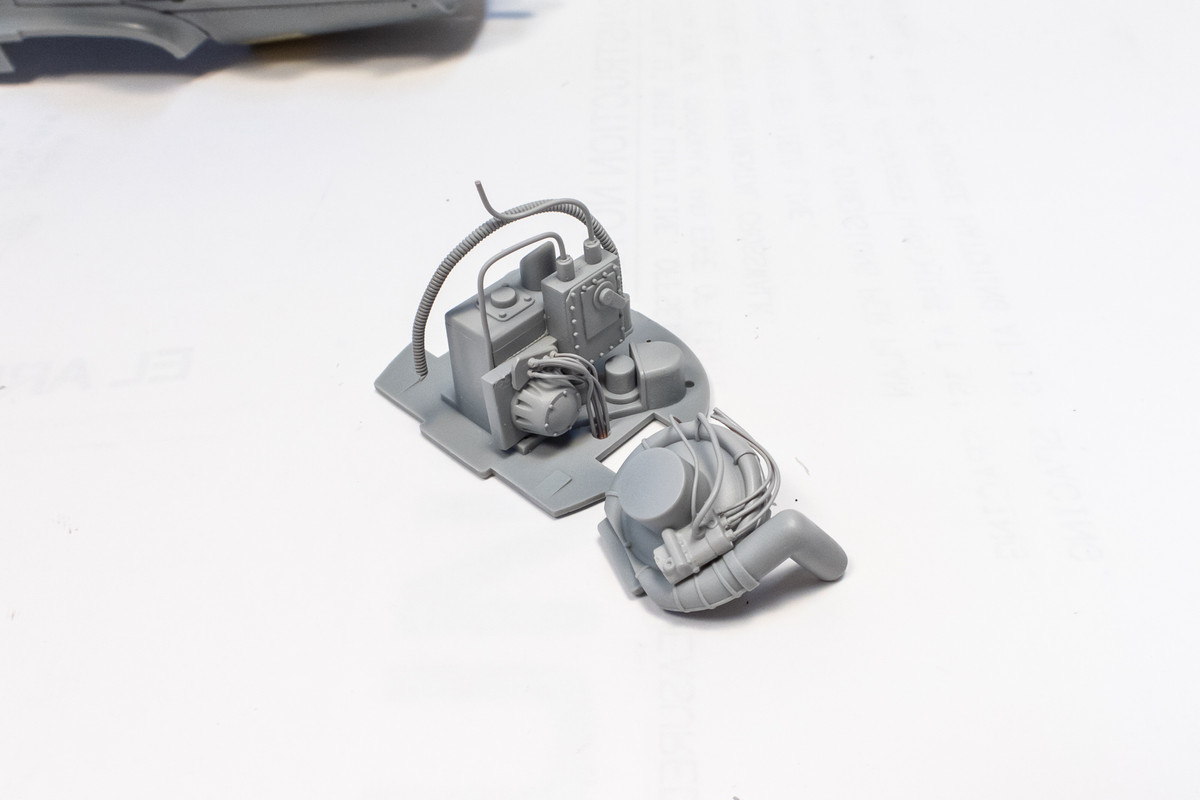
Here are the majority of the engine components ready for painting.
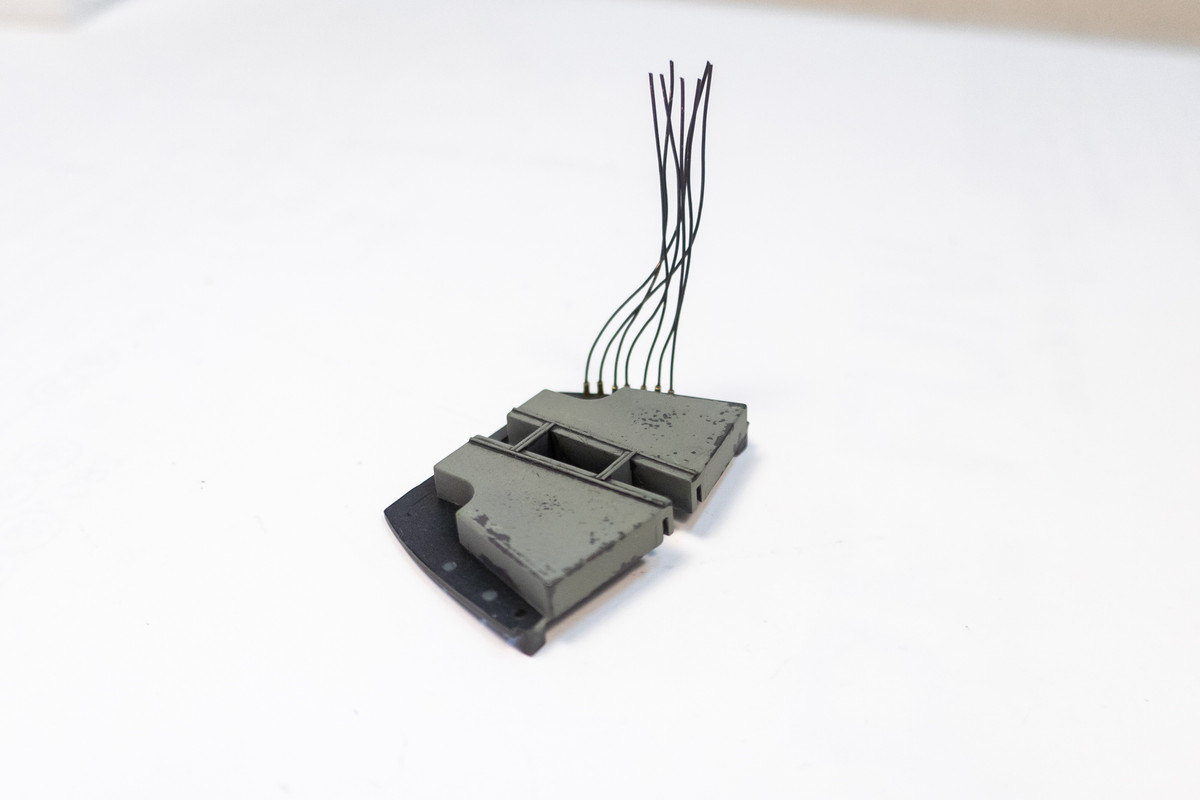
The components with metal wiring are primed with Mr Primer Surfacer 1000 first.
More engine work to come!
Hasegawa 1/32 Fw 190D-9 Brown 4
Re: Hasegawa 1/32 Fw 190D-9 Brown 4
John aka JKim
-----------<><
-----------<><
Re: Hasegawa 1/32 Fw 190D-9 Brown 4
Your work is such a joy to see and follow? Beautifully done.
To make each build less crappy than the last one. Or, put another way, "Better than the last one, not as good as the next one!"..
Re: Hasegawa 1/32 Fw 190D-9 Brown 4
Beautiful work! The best of luck to you this fishing season
March as one, Don't look back
Odin's sons... Attack!
Unleash hell! Do not repent! Warfare grants us no lament
Let your weapons slash and tear This is no place for fear
Hold the lines! Move as one! In unity our victory's won
Our shields will form a mighty wall
United we shall never fall
Odin's sons... Attack!
Unleash hell! Do not repent! Warfare grants us no lament
Let your weapons slash and tear This is no place for fear
Hold the lines! Move as one! In unity our victory's won
Our shields will form a mighty wall
United we shall never fall
- mustang1989
- Moderator
- Posts: 4903
- Joined: Tue Mar 18, 2014 8:35 pm
Re: Hasegawa 1/32 Fw 190D-9 Brown 4
You and these D-9's of yours......you are ALL over it man!! The detail.....the DETAIL!!! I learn a tremendous amount of not only modeling skills but about this airframe in general every time you build one.
- Medicman71
- Elite Member
- Posts: 9730
- Joined: Mon Apr 07, 2014 9:32 am
- Location: Houston, Tx
Re: Hasegawa 1/32 Fw 190D-9 Brown 4
mustang1989 wrote:You and these D-9's of yours......you are ALL over it man!! The detail.....the DETAIL!!! I learn a tremendous amount of not only modeling skills but about this airframe in general every time you build one.
Mike
Sponsored by Boeing, Lockheed Martin, Northrop Grumman, Saab, BAE, and Dassault
Re: Hasegawa 1/32 Fw 190D-9 Brown 4
Awesome work as ever John!
Stuart Templeton 'I may not be good but I'm slow...'
My blog: https://stuartsscalemodels.blogspot.com/
Re: Hasegawa 1/32 Fw 190D-9 Brown 4
Back with another update on the D-9! I finally worked up enough motivation to finish the engine plug. After adding some wiring to the engine body itself, I drilled out some holes in both the forward and rear engine bulkheads for additional wiring runs and then painted the engine parts while the parts were still separated.
I then started gluing the engine components together and adding wiring along the way to further complicate/populate this area. The wiring work is not accurate but is intended to simply give the impression of complexity.
The ammo cannisters and chutes were chipped using hairspray to represent a bit of wear and tear in this area.
The last component of the engine plug to be attached is the rear bulkhead. I've added some yellow electrical wiring bundles.
The wheel well insert was also painted and chipped with hairspray.
Now that the engine plug has been completed, I can dry-fit it into the fuselage to see what it looks like with the wheel well insert in place.
Lots of this work gets hidden once the central wing part is in place but there is enough visible to make the previous work worthwhile.
John aka JKim
-----------<><
-----------<><
- Stikpusher
- Moderator
- Posts: 18880
- Joined: Sat Apr 05, 2014 8:37 pm
- Location: Ceti Alpha 5
Re: Hasegawa 1/32 Fw 190D-9 Brown 4
More gorgeous work John!
"Surely I have made my meaning plain? I intend to avenge myself upon you, Admiral. I have deprived your ship of power, and when I swing 'round, I intend to deprive you of your life."
FLSM
FLSM
- BlackSheep214
- Elite Member
- Posts: 10424
- Joined: Sun Apr 06, 2014 8:47 pm
Re: Hasegawa 1/32 Fw 190D-9 Brown 4
Wow...
“Who controls the skies, controls the fate of this Earth”
Author unknown- 352nd Fighter Group, Blue-Nosed Bastards of Bodney
“Send one plane it’s a sortie; send two planes it’s a flight; send four planes it’s a test of airpower. - Richard Kohn
Author unknown- 352nd Fighter Group, Blue-Nosed Bastards of Bodney
“Send one plane it’s a sortie; send two planes it’s a flight; send four planes it’s a test of airpower. - Richard Kohn