Trumpeter P-47D Razorback "Eileen"

Post your work in progress of your aircraft builds in here.
Post Reply
User avatar
jkim
Elite Member
Posts: 3930
Joined: Mon Apr 10, 2017 4:03 pm

Re: Trumpeter P-47D Razorback "Eileen"

Post by jkim »

speedgraflex wrote: Thu Dec 01, 2022 5:21 pm John, I was thinking in more conventional terms to add a centered post with a secondary insert but I checked online and looks like Doog built this kit in 2012. According to him, once the engine is fitted to the cowl there are no longer issues. He is not very specific - I find his build logs more fantasias on a theme and not a detailed guide so take his thoughts for what they are worth. Good luck! Aaaand also I just think your detail shots are beautiful, truly!
Thank you Bruce! And yes, that is the rough idea that I'm going with... the centered post being the rear-most engine piece closest to the firewall, which would be the intake pipe ring fitted with a magnet. The secondary insert would housed within the circular opening of the firewall and fitted with another magnet. I actually got this idea from surfing Youtube and finding a Razorback build by Doog in 2019 in which he used magnets to attach the engine/cowling and also the blast tubes for the wing guns. I have another idea for the wing guns but magnets for the engine made a lot of sense to me.

mustang1989 wrote: Fri Dec 02, 2022 6:14 am Coming along nicely on this one. The cockpits in these things are HUGE!!! You could dang near play a basketball game in there. :grin:
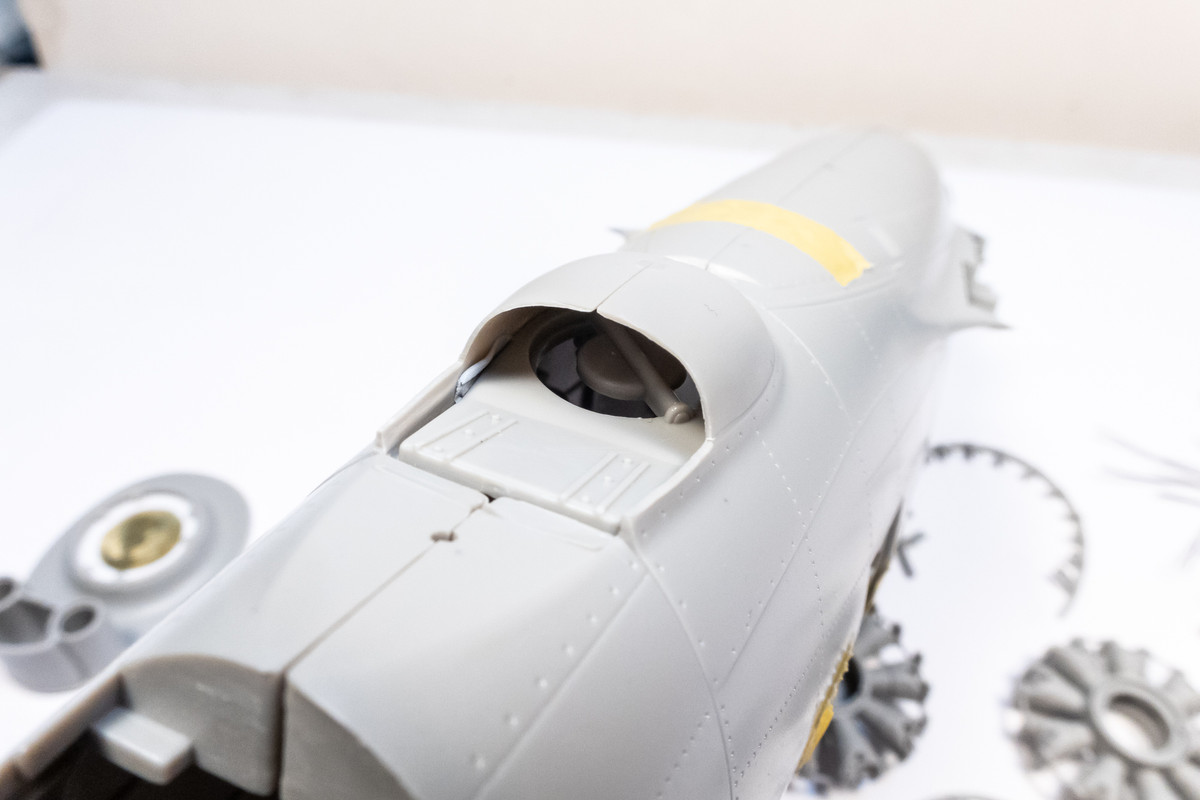
Thank you Joe! Yeah, the office space is quite spacious on this bird. Lots of room, as a modeler, to work with. I'm wanting to go a little beyond what I've normally done with cockpits with this build. I was inspired by a 1/18 P-47 build over at LSP and the modeler there (JayW) compared a photo of his cockpit with the real thing and I had to do a double take because the two were so close. I don't think I'll be able to achieve the same level of detail/completeness but it's a good bar to reach for. I'm poring over all of the documents at the AirCorps Library and found lots of interesting and useful detail that I hope to incorporate into this build. Mostly within the cockpit.

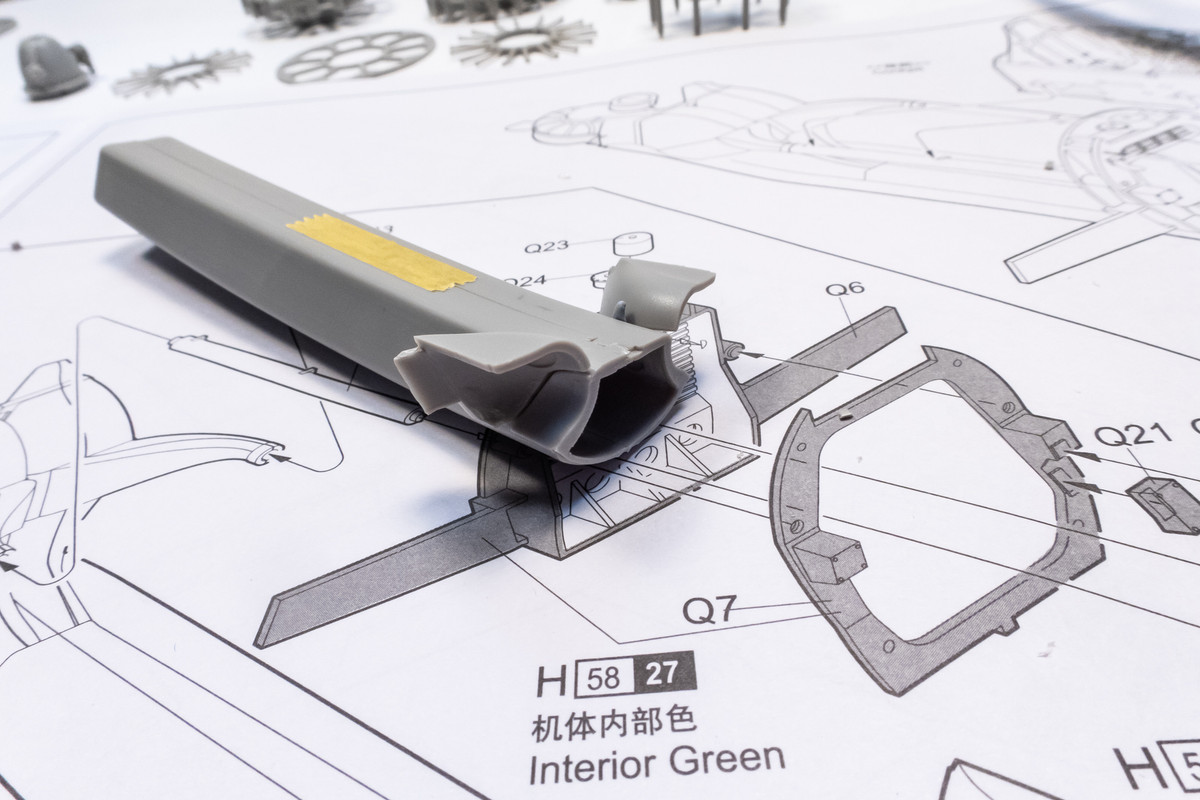
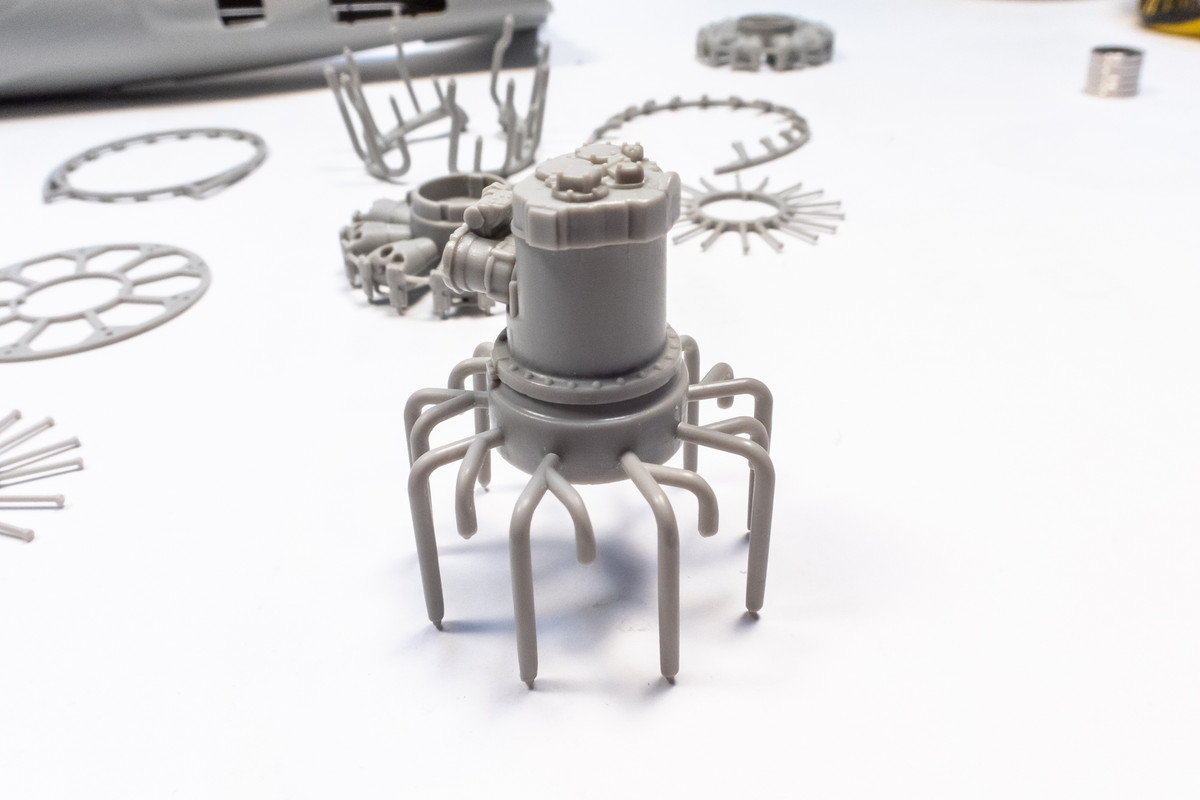
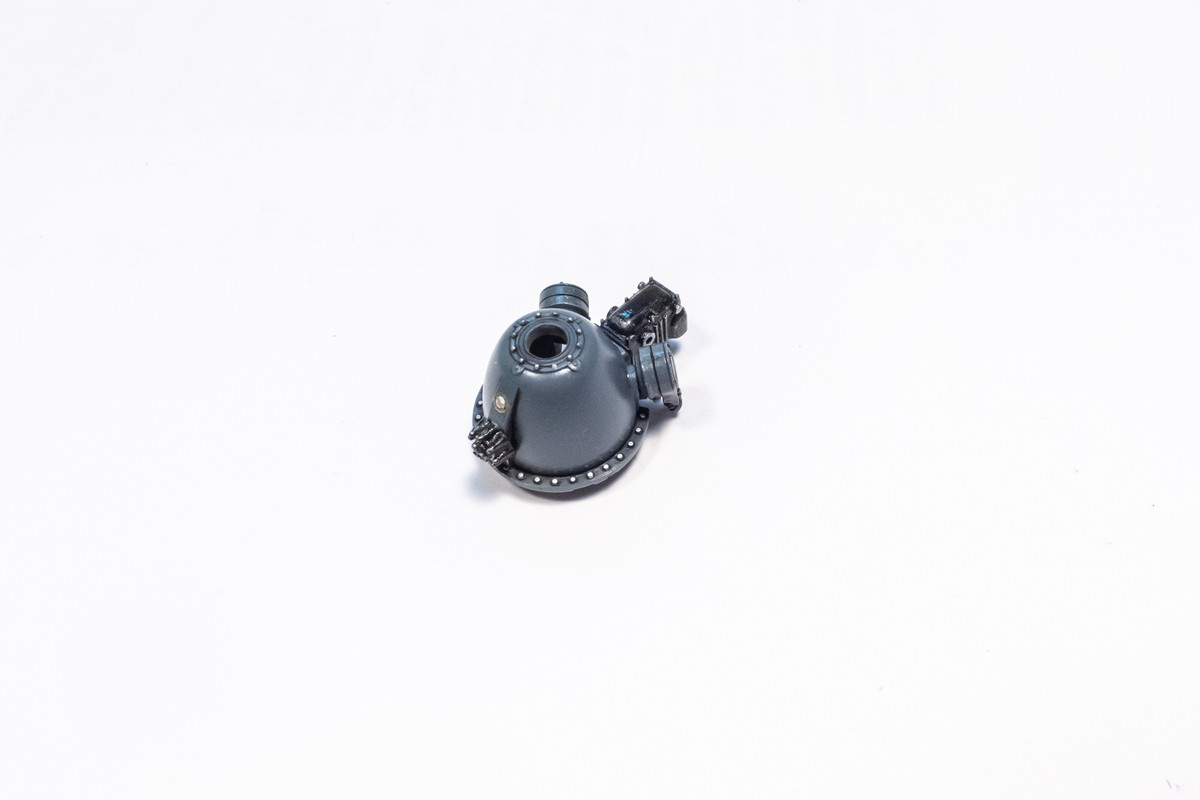
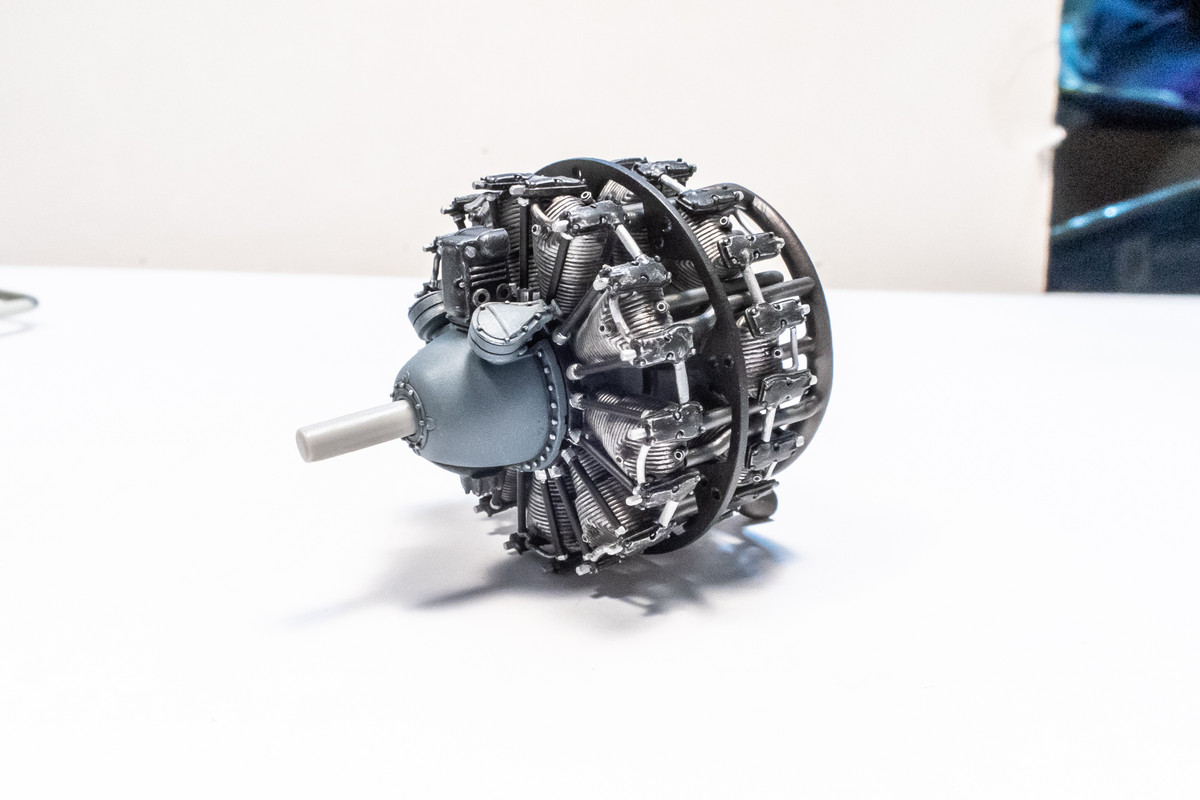
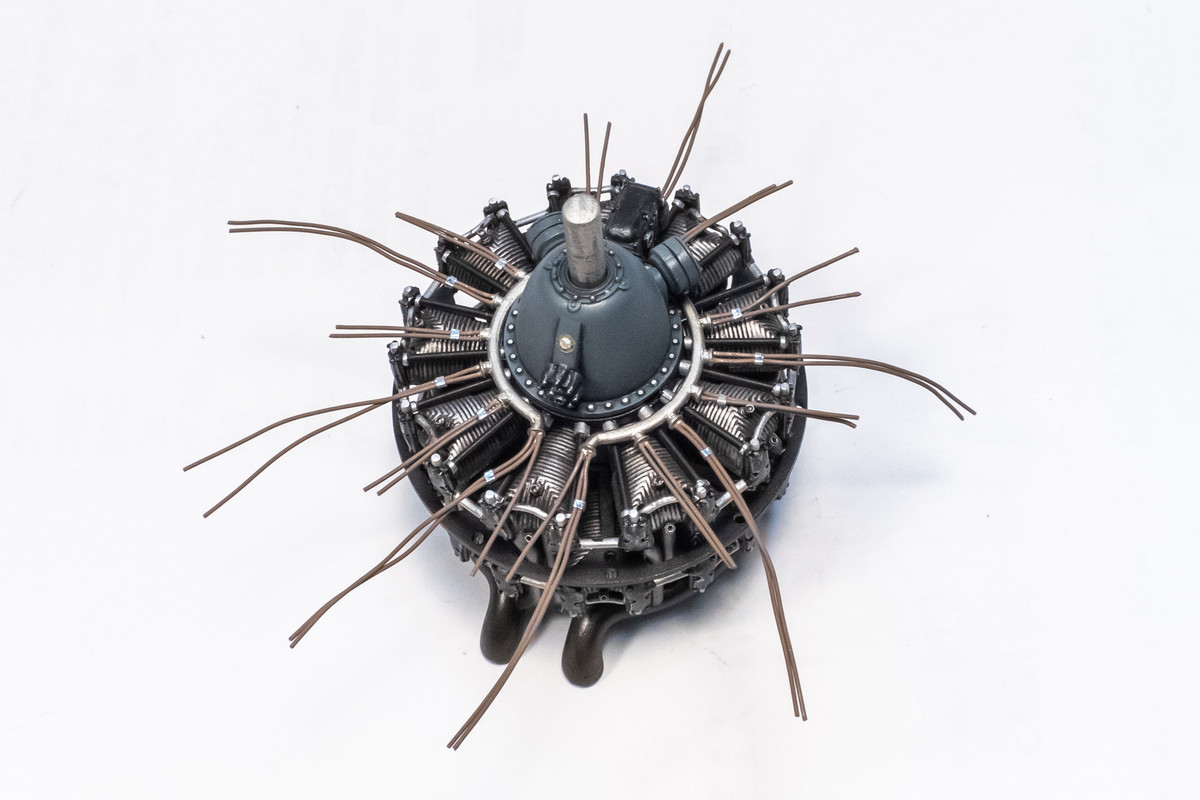
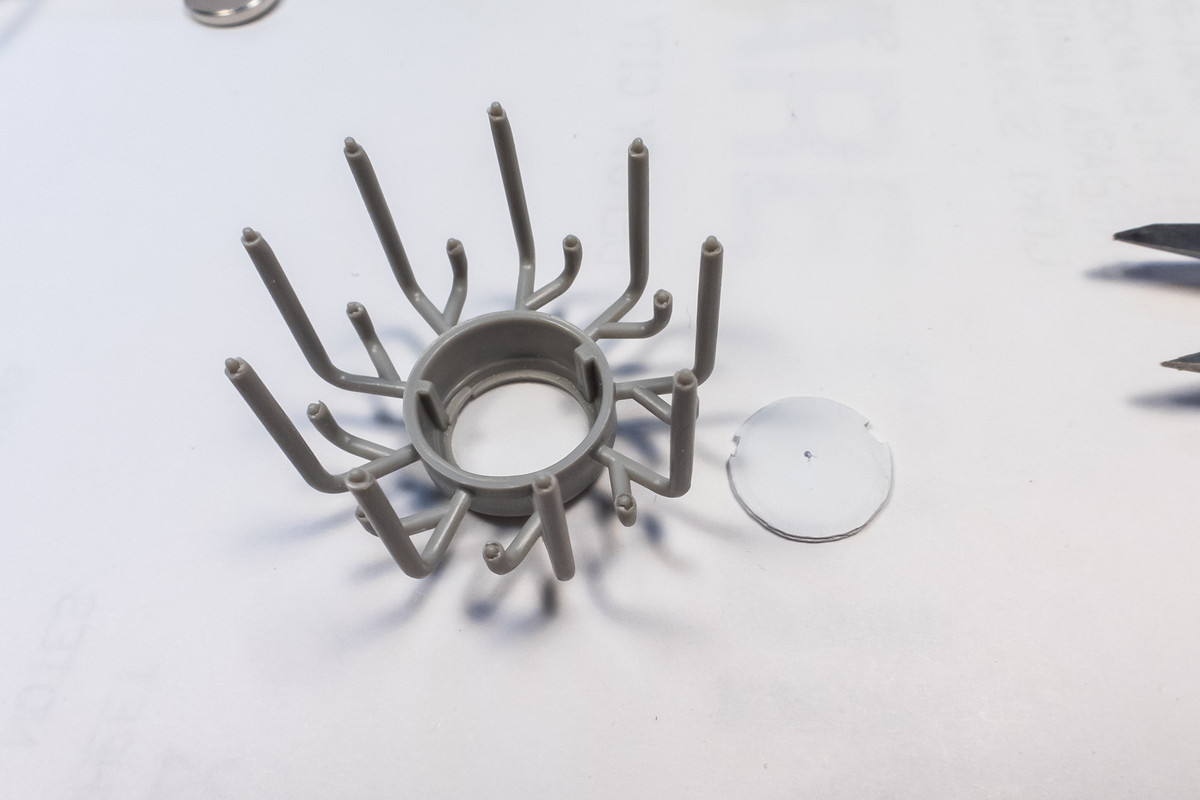
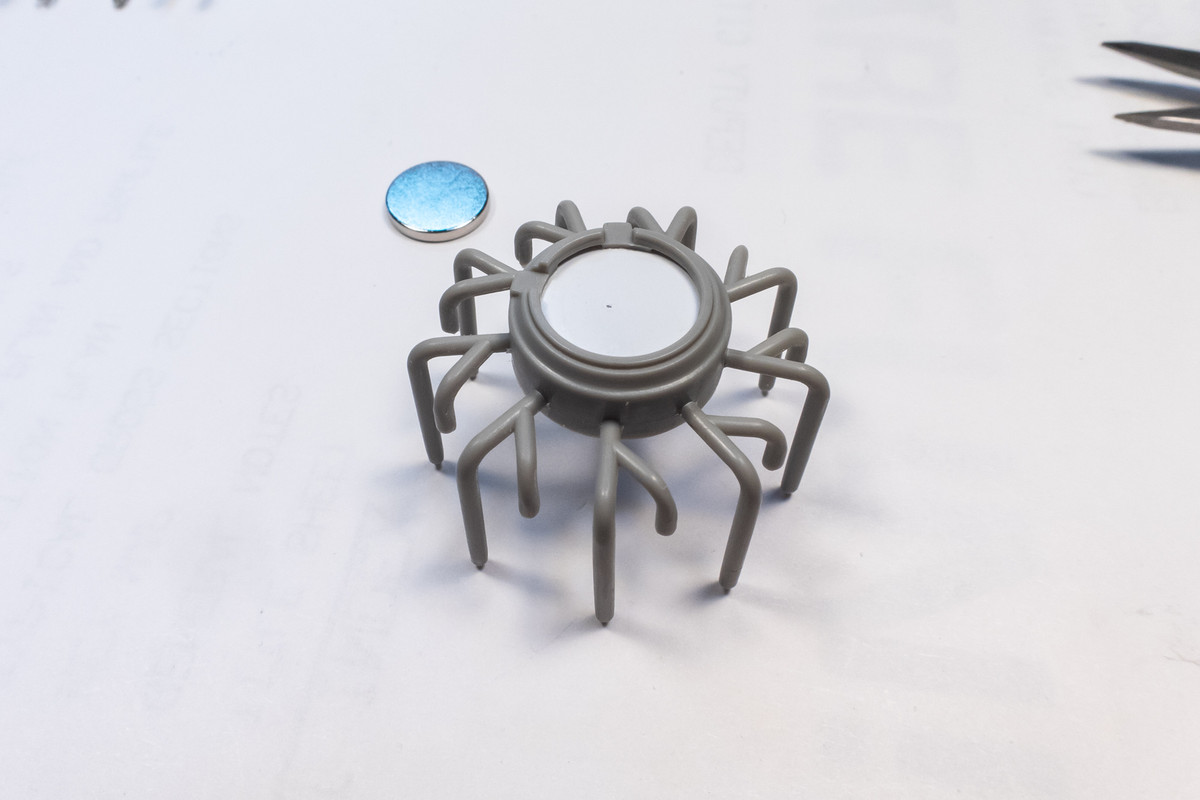
Going back to the magnet idea, I just received a set of 7/16" neodymium magnets in the mail today so I was able to start to test this idea of using magnets to provide a more secure attachment between the engine/cowling and fuselage/firewall. The rearmost engine component closest to the firewall is the intake pipe ring. The circular base of the intake pipe ring is about level with the opening in the firewall so I thought that this would be a natural connection point.
Image

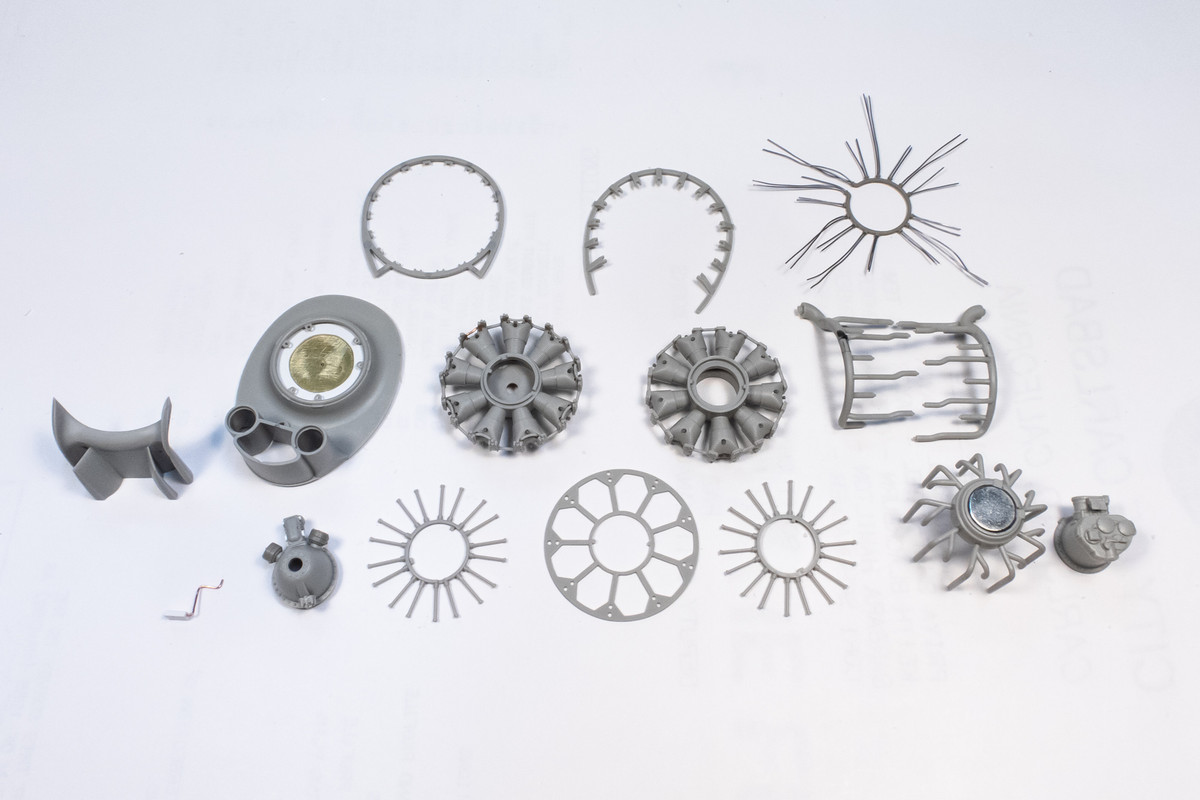
The magnet is almost the same size as the circular opening at the base of the intake ring. But knowing the strength of these magnets, I wanted a more secure glue base. So I cut a small piece of sheet plastic and glued it into the opening from the other side.
Image
Image

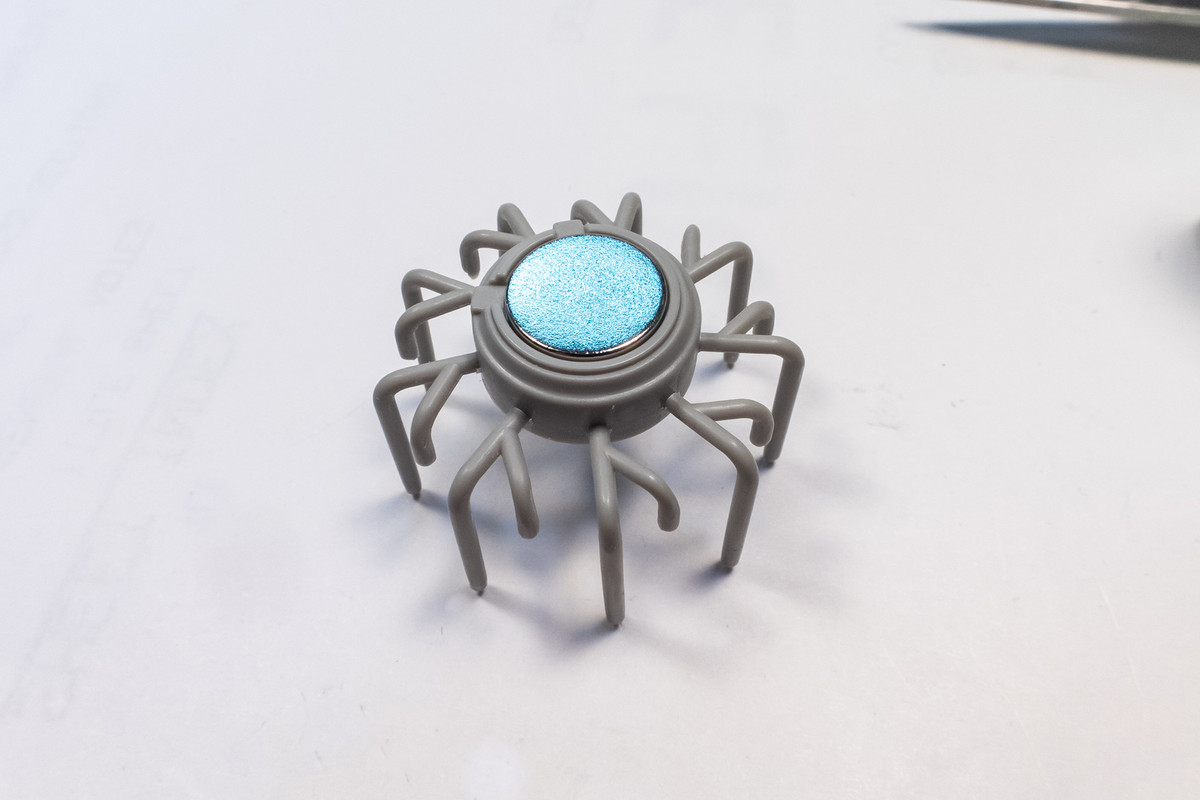
The magnet was attached using CA glue.
Image

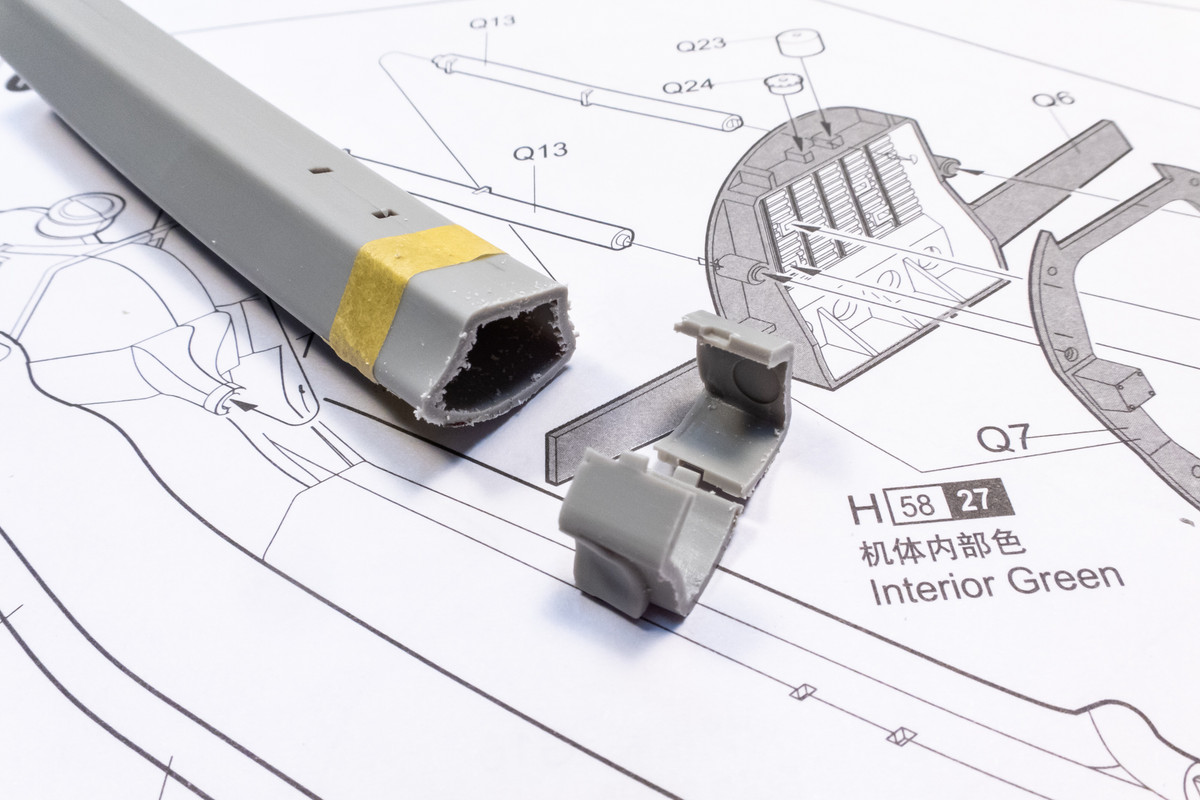
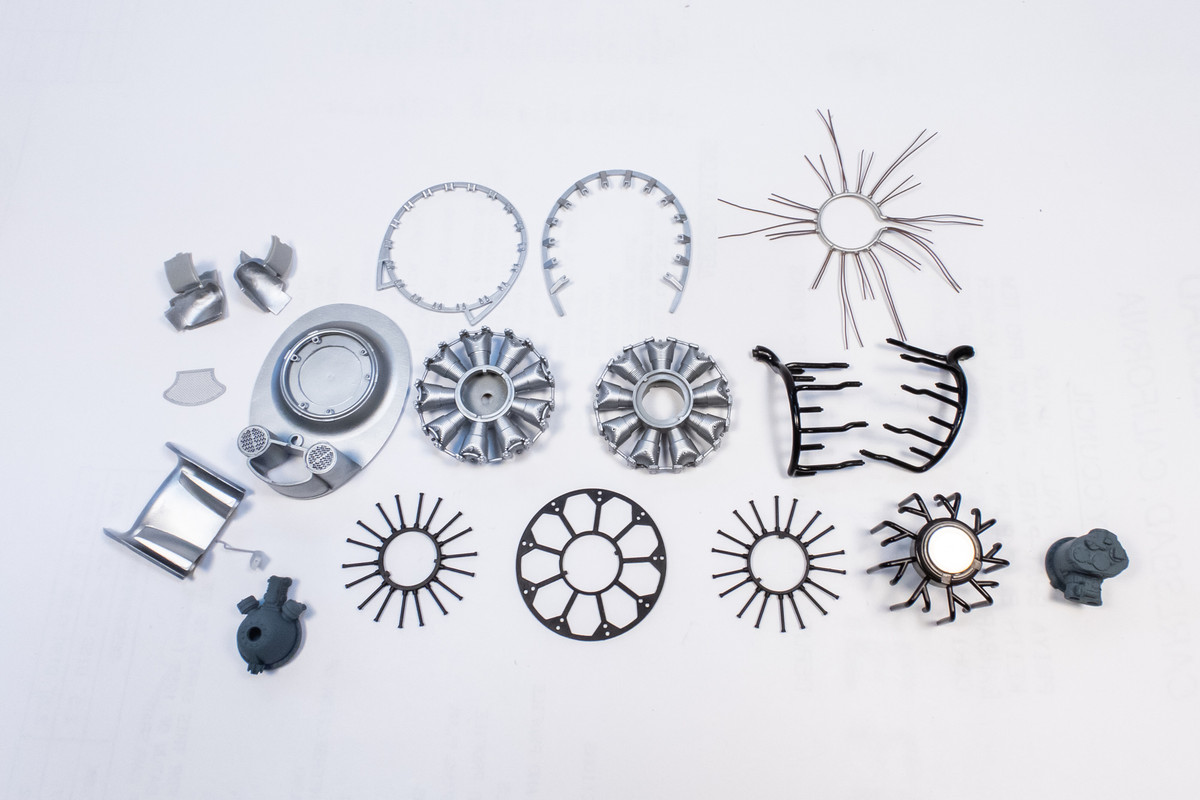
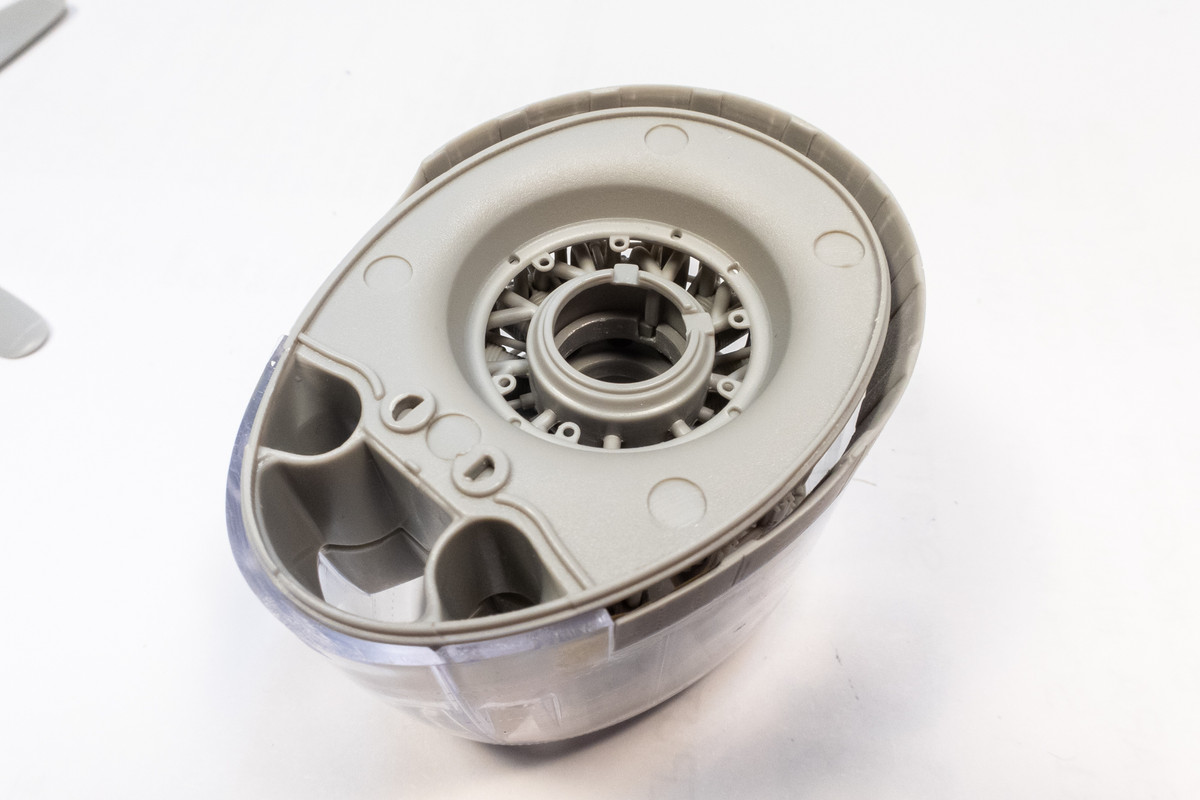
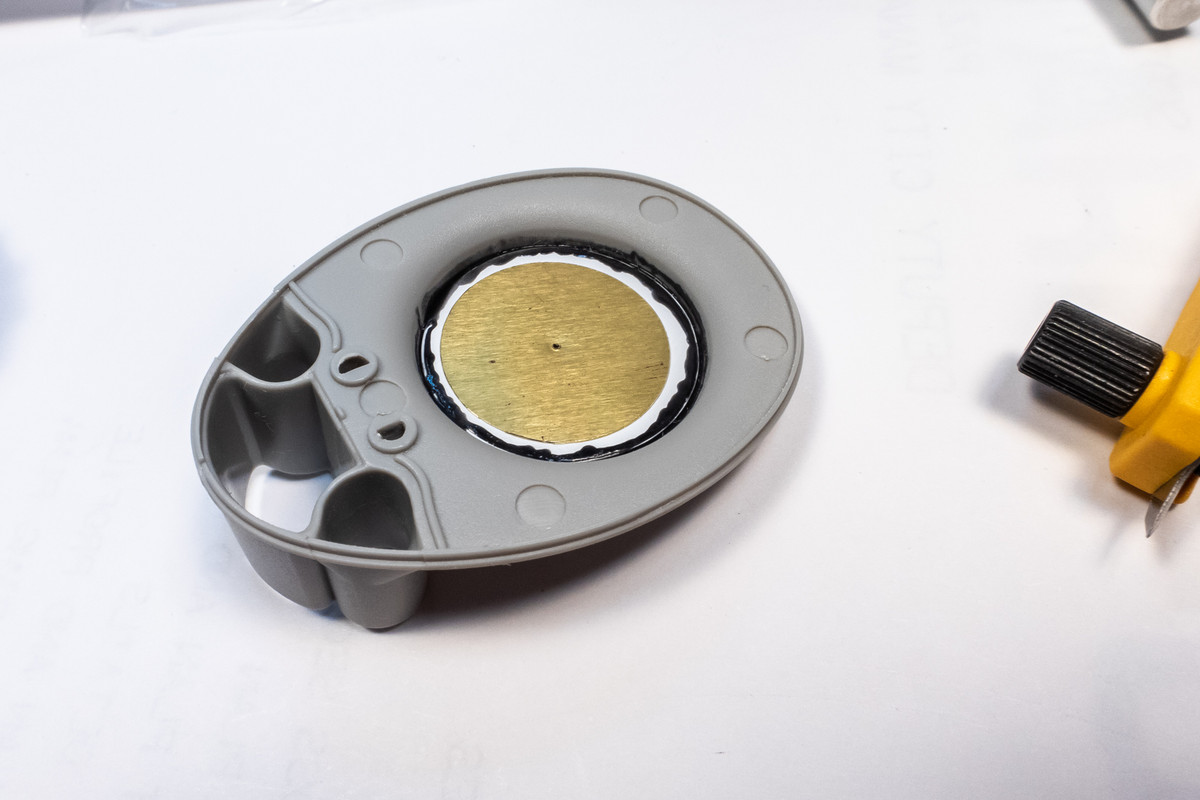
I cut a ring of thicker sheet plastic to serve as a spacer/mount for the other magnet to placed on the firewall opening.
Image

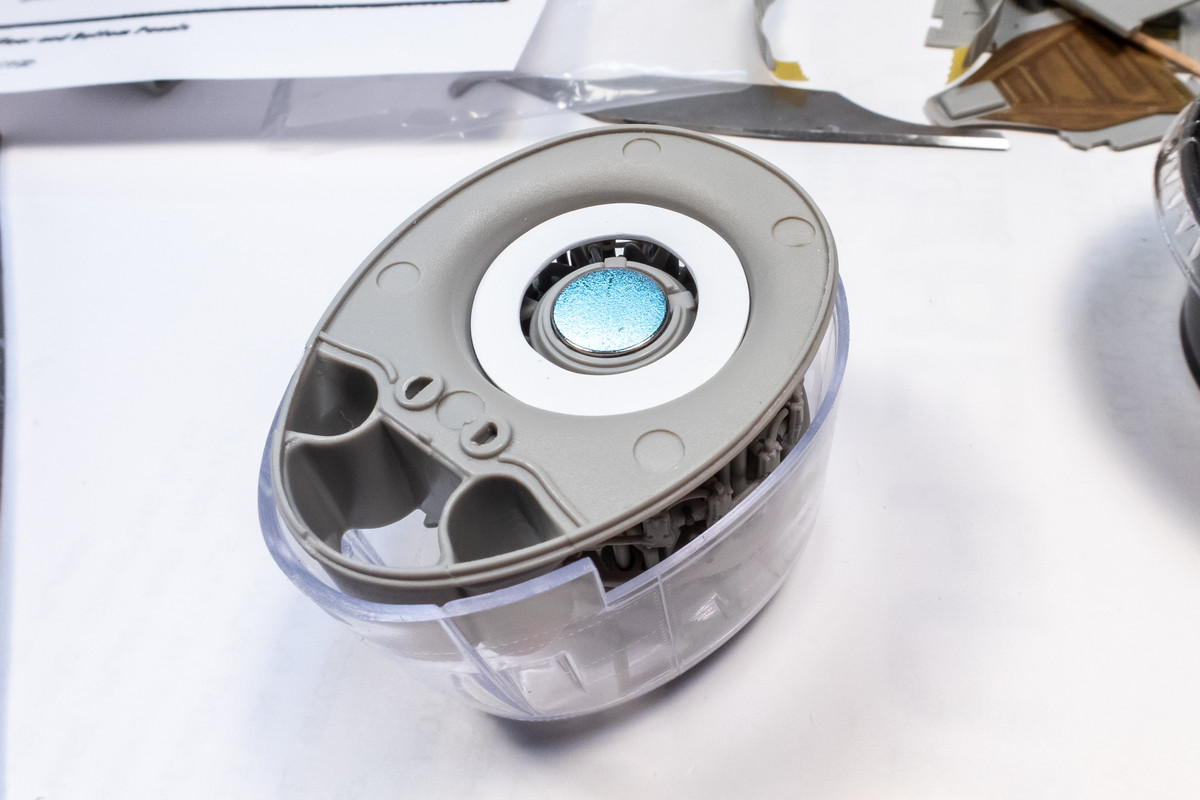
The ring was glued into place using CA glue. Thin CA first and then a ring of black CA to reinforce the bond. The magnet in the engine seems to level with the spacer.
Image

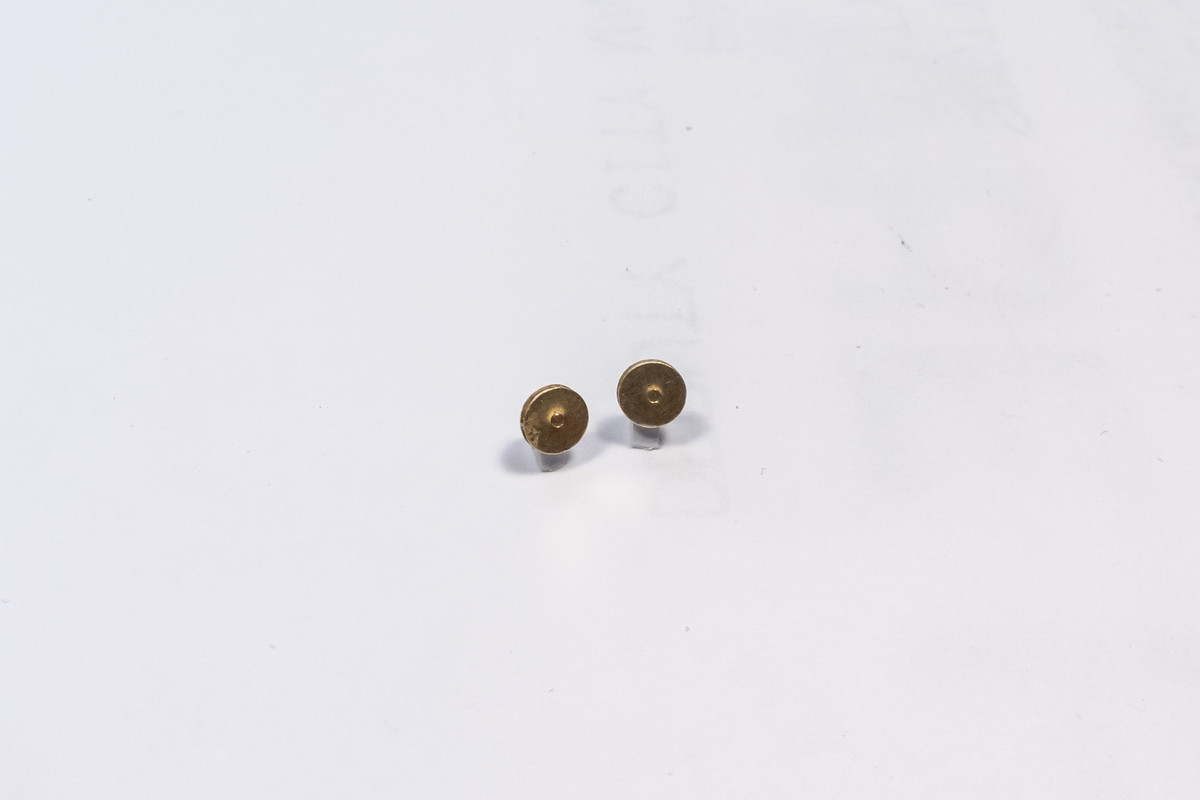
A disc of brass sheeting was used to cover the opening.
Image

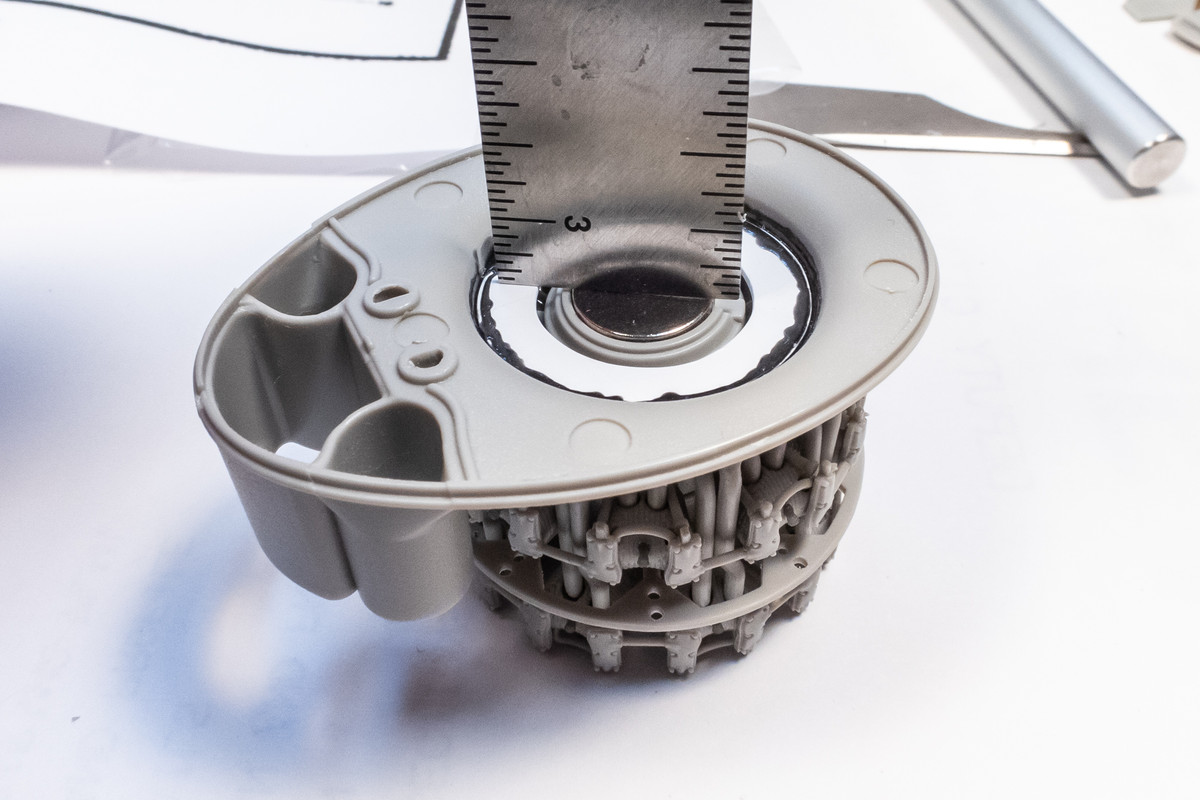
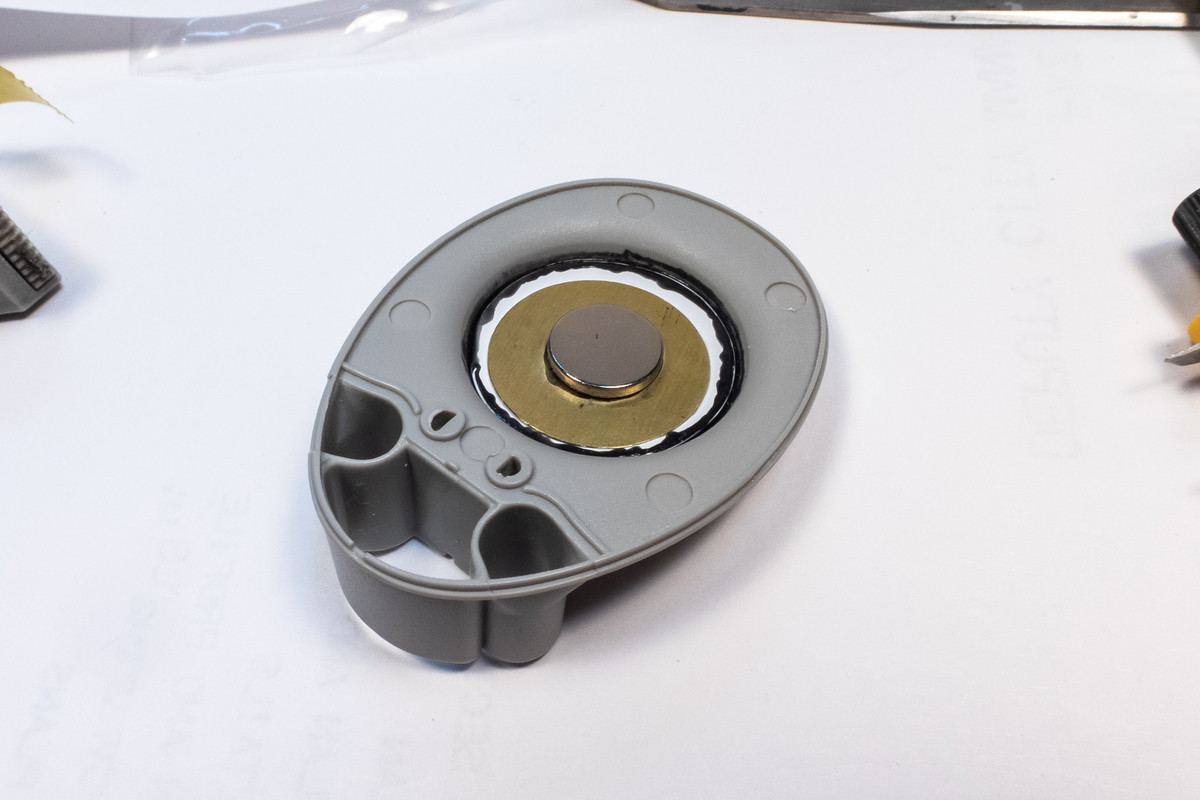
The second magnet is glued into place with CA glue. I actually mounted the engine assembly with the first magnet onto the firewall and used the magnets' irresistible urge to align themselves to locate the second magnet.
Image

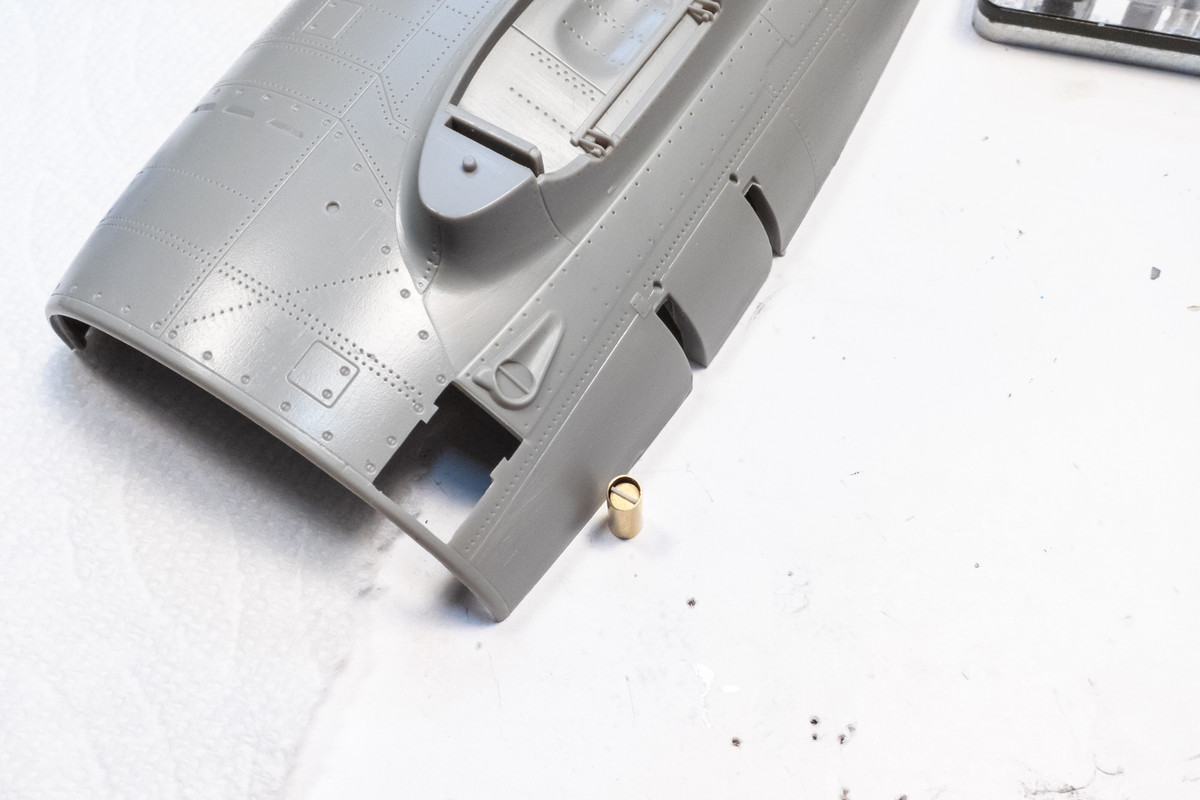
The big test now is to see if this idea will work. The engine components have been dry-fit into the cowling and I've taped the firewall onto the fuselage. The magnetic force is so strong that it pulled the engine out of the cowling and snapped into place.
Image

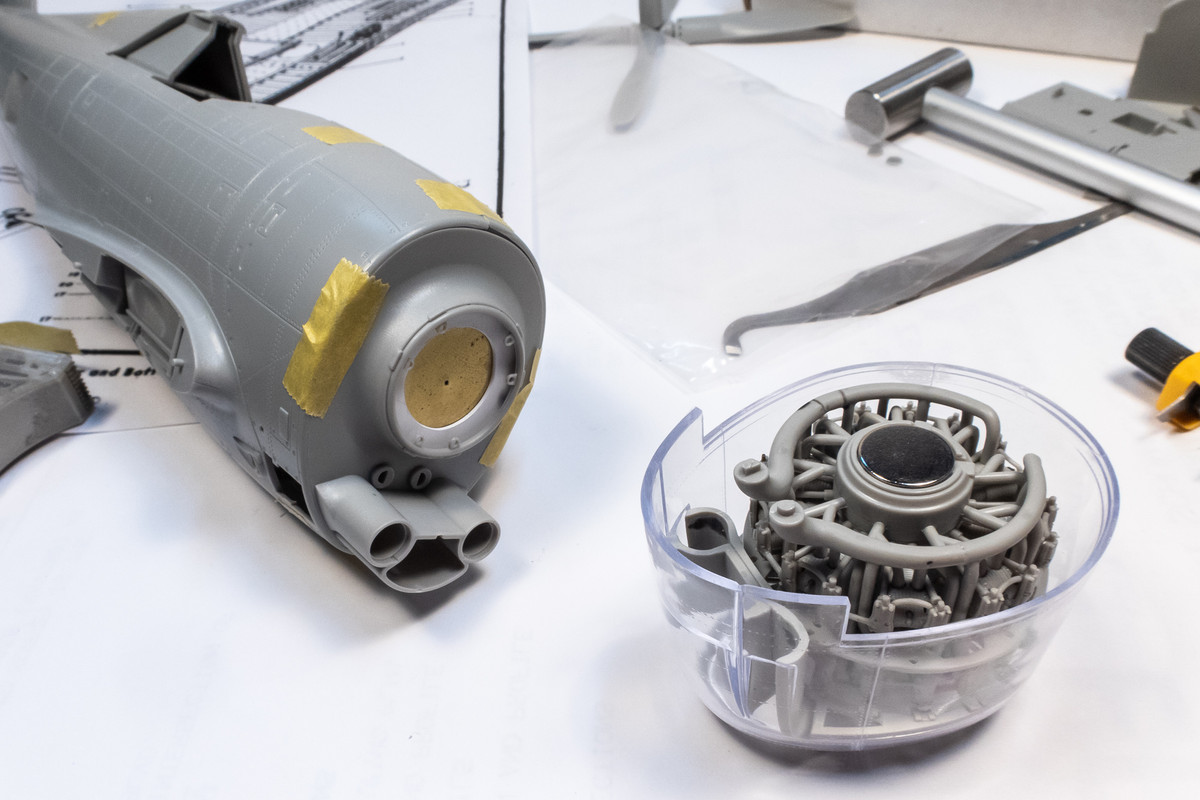
I had to place the firewall onto the engine FIRST and then attach the firewall to the fuselage for this dry fit.
Image
Image
Image

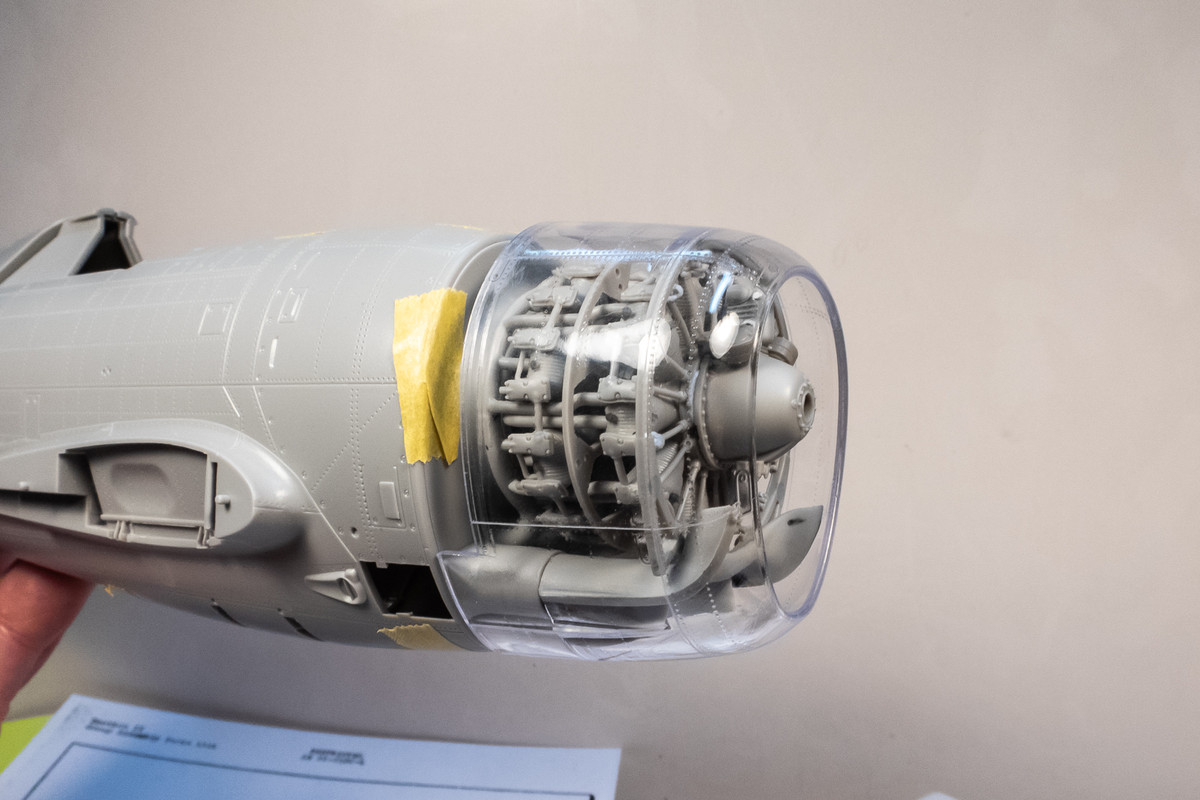
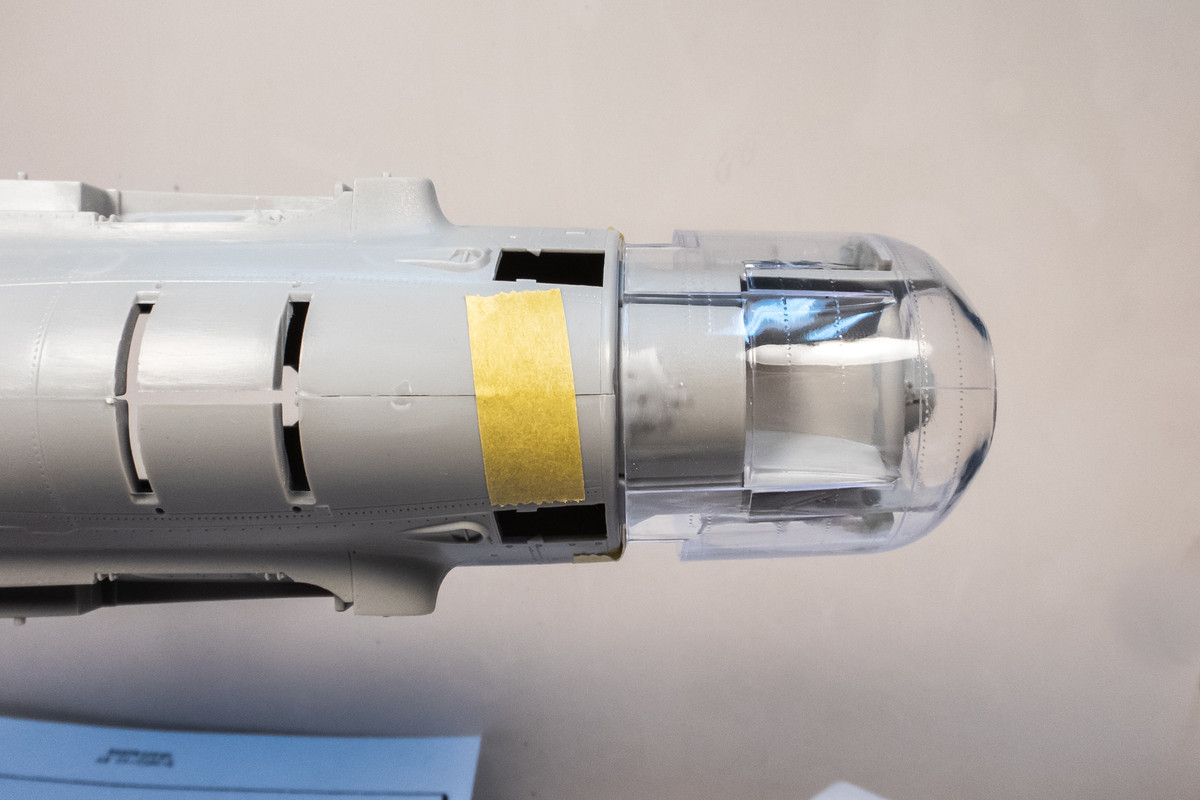
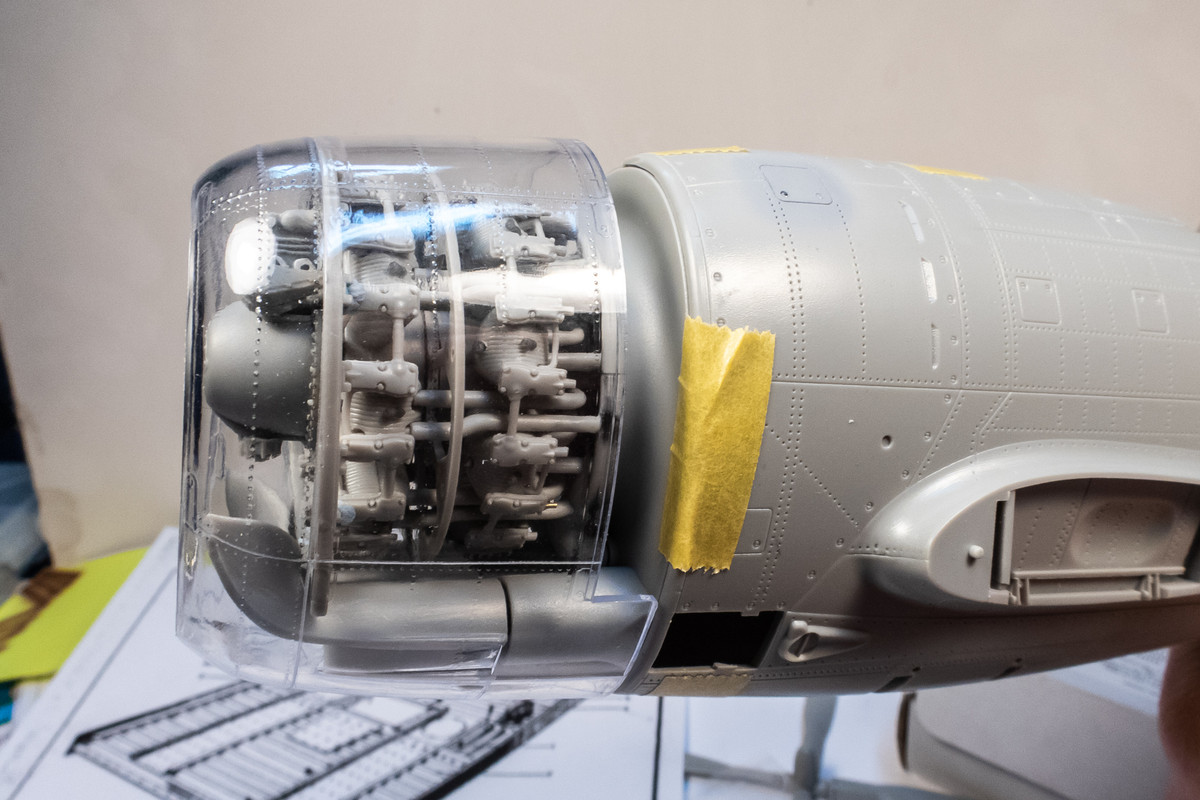
Preliminary tests look really good but we'll have to wait until the glue hits the plastic to see if this is a success or not. If it goes as well as I hope, I'm thinking of keeping the engine cowling removable.
John aka JKim
-----------<><
Image
User avatar
BlackSheep214
Elite Member
Posts: 10422
Joined: Sun Apr 06, 2014 8:47 pm

Re: Trumpeter P-47D Razorback "Eileen"

Post by BlackSheep214 »

Yeah, those magnets have a super strong hold. Looking forward to more. Well done!
“Who controls the skies, controls the fate of this Earth”

Author unknown- 352nd Fighter Group, Blue-Nosed Bastards of Bodney

“Send one plane it’s a sortie; send two planes it’s a flight; send four planes it’s a test of airpower. - Richard Kohn
User avatar
speedgraflex
Moderator
Posts: 9758
Joined: Fri Feb 10, 2017 11:08 pm
Location: Santa Monica, California

Re: Trumpeter P-47D Razorback "Eileen"

Post by speedgraflex »

Looks super, John!
Bruce / SPEEDGRAFLEX
User avatar
Medicman71
Elite Member
Posts: 9729
Joined: Mon Apr 07, 2014 9:32 am
Location: Houston, Tx

Re: Trumpeter P-47D Razorback "Eileen"

Post by Medicman71 »

That’s an awesome idea!
Mike

Sponsored by Boeing, Lockheed Martin, Northrop Grumman, Saab, BAE, and Dassault
User avatar
mostrich
Admin
Posts: 2898
Joined: Sun Apr 06, 2014 2:13 pm
Location: Hamburg, Germany
Contact:

Re: Trumpeter P-47D Razorback "Eileen"

Post by mostrich »

...perfectly executed!
When the sun of culture hangs low even dwarfs throw shadows.
User avatar
keavdog
Elite Member
Posts: 3560
Joined: Thu Jan 10, 2019 1:14 am
Location: Goodyear, AZ

Re: Trumpeter P-47D Razorback "Eileen"

Post by keavdog »

Great idea. I've seen magnets used for ordinance as well. You change your loadout based on your pretend mission :giggles:
Thanks,
John
User avatar
SteveSki
Advanced Member
Posts: 284
Joined: Mon Jun 13, 2022 11:13 am
Location: NE Wash, USA

Re: Trumpeter P-47D Razorback "Eileen"

Post by SteveSki »

Slick idea, incredible detail.
Give Blood, Play Rugby, cause everyone knows football is for wimps!

Image
User avatar
jkim
Elite Member
Posts: 3930
Joined: Mon Apr 10, 2017 4:03 pm

Re: Trumpeter P-47D Razorback "Eileen"

Post by jkim »

Thanks guys! Like I said, I got the idea from a Youtube video by Doogs so I can't take credit for the idea but I adapted it to fit my needs.

I still haven't gotten all of my aftermarket stuff yet so I can't go full bore into the cockpit just yet. However, here is a small detail that I've worked up...
Image

These are small pulleys for the rudder cables that lead from the rudder pedals to the rear of the cockpit. They were fashioned from punched circles of sheet brass and plastic. My initial idea is to use elastic thread to maintain taut and straight lines but I'll have to work on that thought later.
Image

Playing with a mock-up of a potential replacement for the exhaust waste gates. Getting the right size of tubing and the actual thickness of the brass tube are potential issues.
Image

Earlier, I worked out the view from the mid-fuselage intercooler openings. But there are a couple more small openings that need to be addressed. One is the area in front of the exhaust waste gates seen in the photo above. Mostly covered by the oil cooler vents but the ducting is included in the kit as part of the extensive ducting network, which I am planning on leaving out.
Image

So I sawed off the needed bits, which will block any potential view into the fuselage from this area.
Image

The supercharger outlet on the bottom fuselage seems tucked away enough to not worry about the view here.
Image

Moving on to the engine... Since there is a magnet installed onto the intake pipe ring, I put one into the rear engine assembly as well. If all goes as planned, the engine will be removable and I thought it'd be worthwhile to have the rear engine available to snap on when the engine is detached.
Image
Image

The engine components have been have been assemble and ready for paint.
Image

Silver for the engine cylinders, mounting frames and firewall... dark grey for the gear reduction housing and rear engine assembly... black for the pushrods, input and exhaust ducts and duraluminum (a metal shade with a hint of yellow) for the ignition ring harness.
Image

After the base paints have been applied, I detailed by hand-painting the various components.
Image
Image

Because the recessed lines of the cylinders were not very defined and had difficulty holding a pastel wash, I left the pastel wash essentially unwiped after application.
Image

Here are the engine components after the detail painting. The input and exhaust ducts were painted Alclad Steel over the base black. The exhaust ducts were highlighted with Alclad Manifold Exhaust. The ignition wiring was painted a light brown color. I changed my mind about the color of the mounting frames and firewall and painted them zinc yellow chromate instead.
Image

Assembly of the engine could now begin by gluing together the front and rear engine cylinder banks, sandwiching the black baffle plate between. The pushrods were glued onto the ends next. The input pipes are keyed so they only go on one way. The exhaust ducts are not keyed so it is easy to install them in the wrong orientation. So the gear reduction housing was put into place temporarily to help guide the correct placement of the exhaust pipes. The exit ends of the exhausts need to line up at the bottom of the engine.
Image

The last step and most time-consuming task of the build so far was mounting the wired ignition ring to the gear reduction housing and then terminating the ignition wires to their respective cylinders. More than a couple of wires became detached during this process but eventually I got it done. Note the little Pratt & Whitney logo... luckily I had a few left over from the F4U build!
Image

Here is a preliminary look at the engine after the wiring work was completed.
Image
John aka JKim
-----------<><
Image
User avatar
Stikpusher
Moderator
Posts: 18880
Joined: Sat Apr 05, 2014 8:37 pm
Location: Ceti Alpha 5

Re: Trumpeter P-47D Razorback "Eileen"

Post by Stikpusher »

John, that engine looks fabulous with some paint on it! :shoutout:
"Surely I have made my meaning plain? I intend to avenge myself upon you, Admiral. I have deprived your ship of power, and when I swing 'round, I intend to deprive you of your life."

FLSM
User avatar
Medicman71
Elite Member
Posts: 9729
Joined: Mon Apr 07, 2014 9:32 am
Location: Houston, Tx

Re: Trumpeter P-47D Razorback "Eileen"

Post by Medicman71 »

Wow! The engine looks real!
Mike

Sponsored by Boeing, Lockheed Martin, Northrop Grumman, Saab, BAE, and Dassault
Post Reply

Return to “Aircraft Work in Progress”