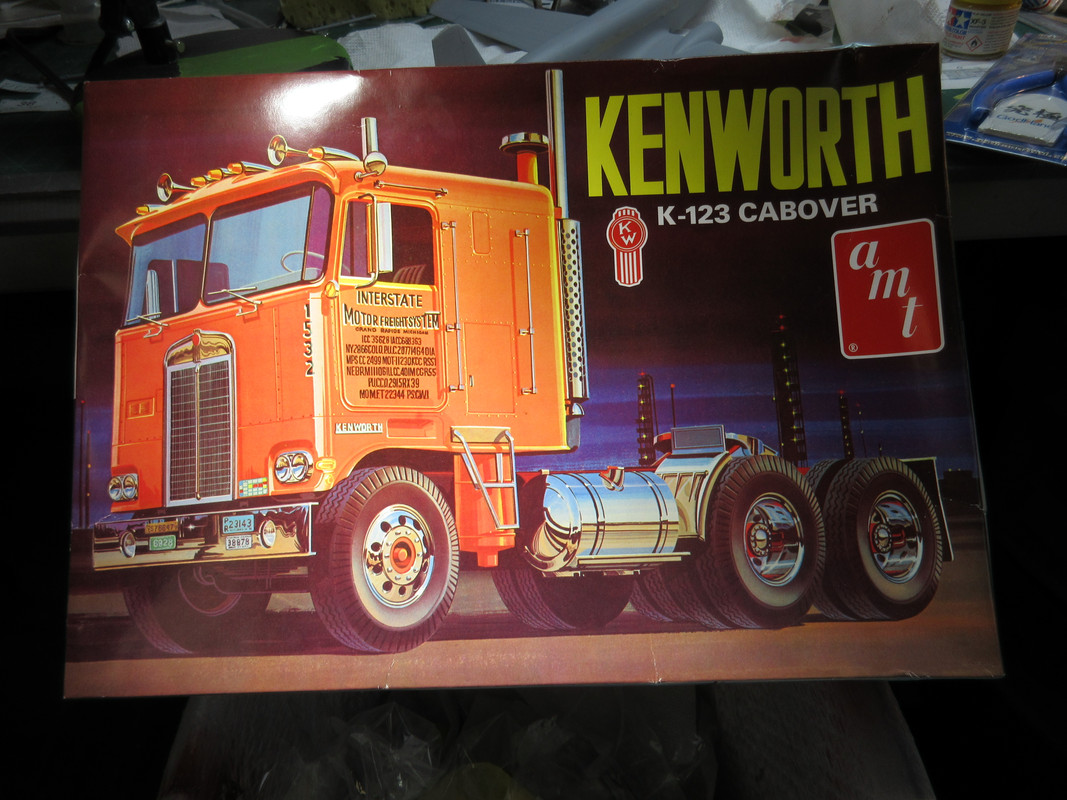
AMT 1/35 Kenworth K-123 Cabover
Posted: Thu Apr 04, 2024 7:42 am
Ahh, the K-123...Soviet sub masquerading as a Kenworth. Great disguise.
Anyway, a typical Round 2 AMT re-pop. Kit number is AMT687/06 and as they proudly tell you, it is a "highly detailed 1/25" kit.
I did start this one as a way to keep the CH-54 "on deck" for a bit longer. Whyy? I don't know. I like trucks.
The chrome is way over the top....two large sprues and 1 small sprue. Soacked some of it in bleach (that normally works) for 24 hours and nothing. Of course, none of the parts are numbered. Well a few are like the cross braces on the chassis so that you can determine the upper and lower parts. But, that is it for the most part.
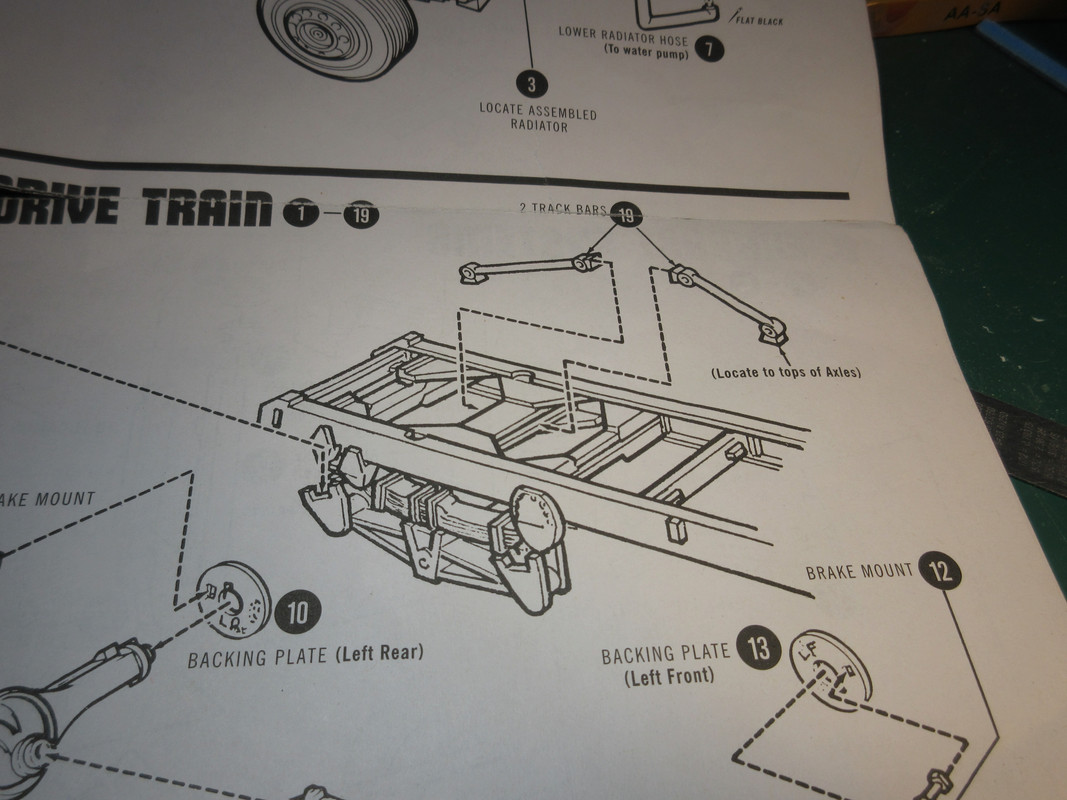
The sprues are not numbered, nor is anything on the handy-dandy map on the bottom of the box. Geez, Louise....spend a buck and put it on your stellar instructions.
Many parts look like blobs, especially the smaller chromed ones. Some I simply could not locate. For those I simply cut nubs from a piece of sprue and there you go....instant part. To say that these molds could use some freshening up would be an understatement. "San Andreas Fault" sized mold seam lines, a lot of ejector marks and less than crisp parts in a lot of cases.
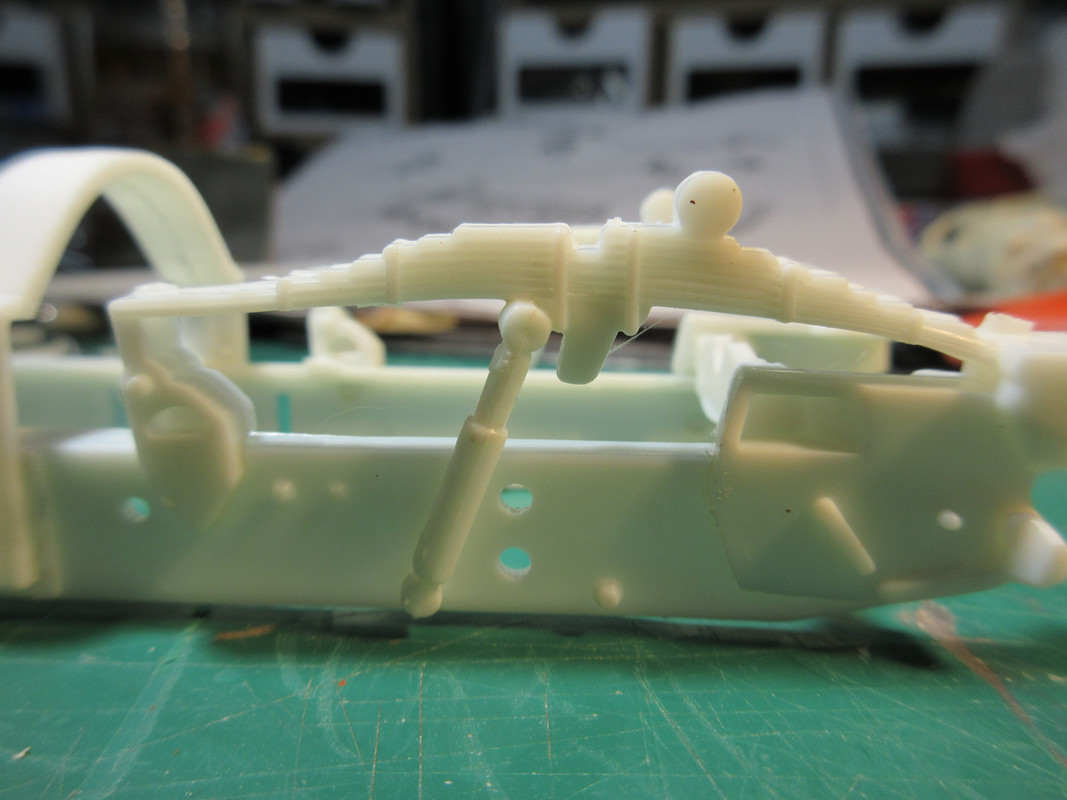
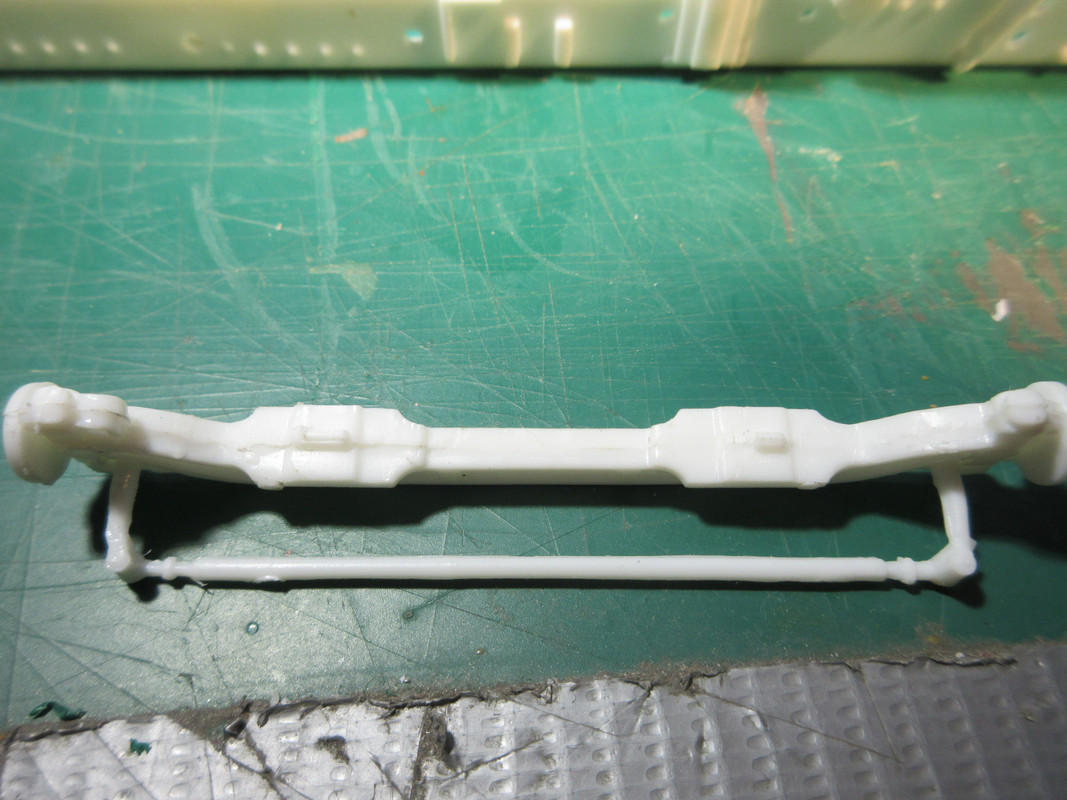
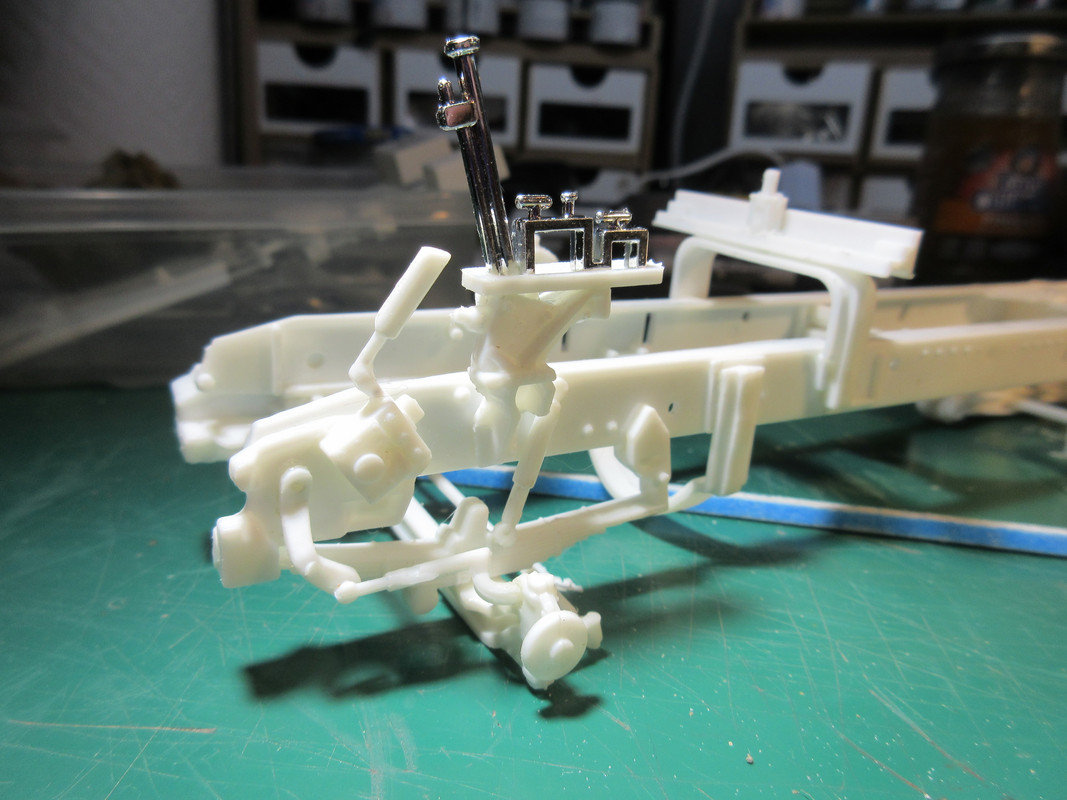
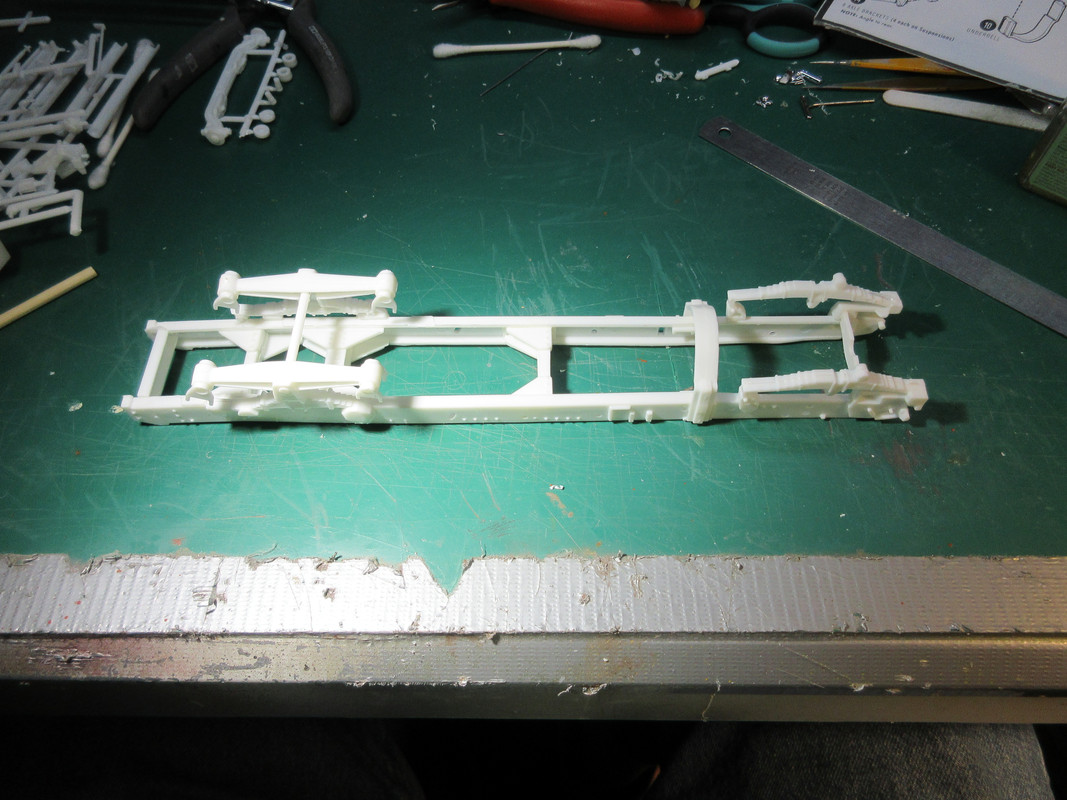
The chassis rails are a tad warped, but so am I. Not terrible, though.
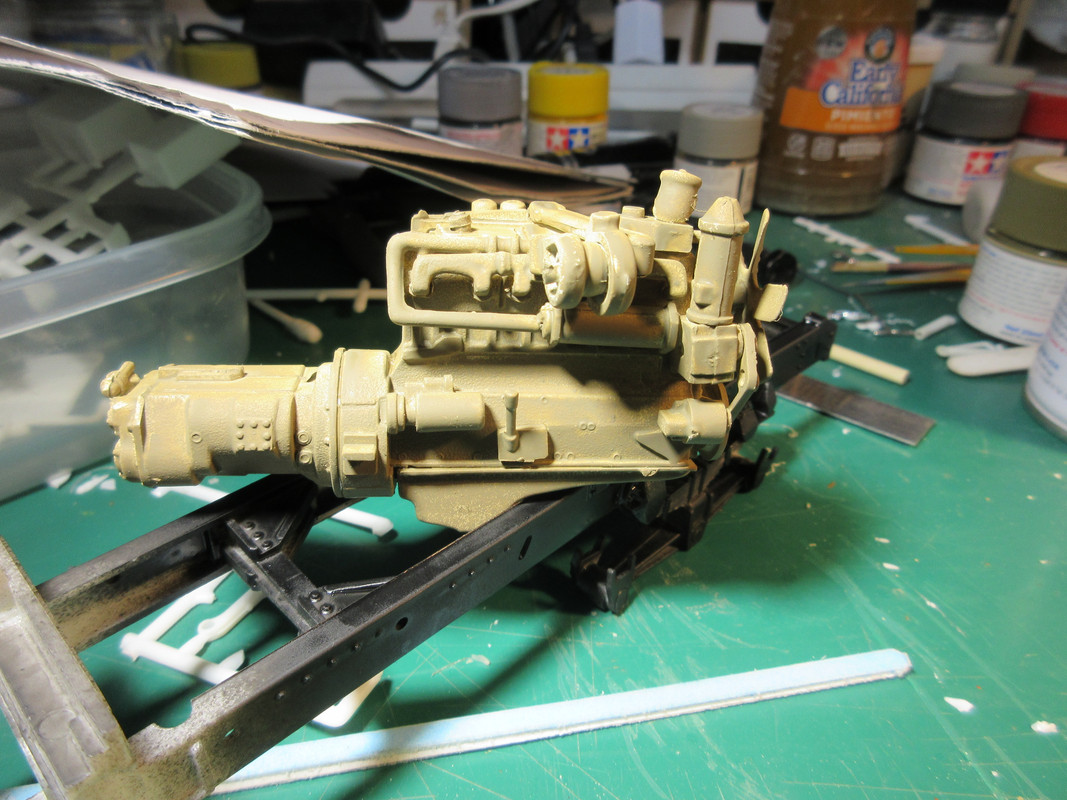
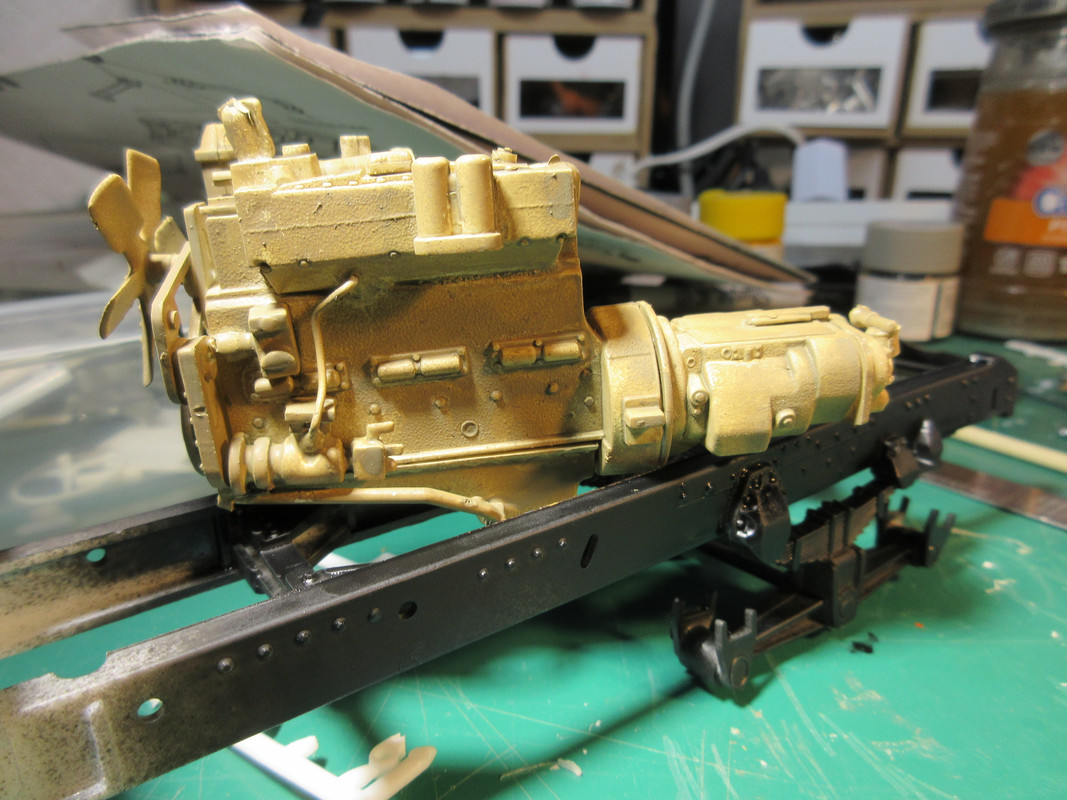
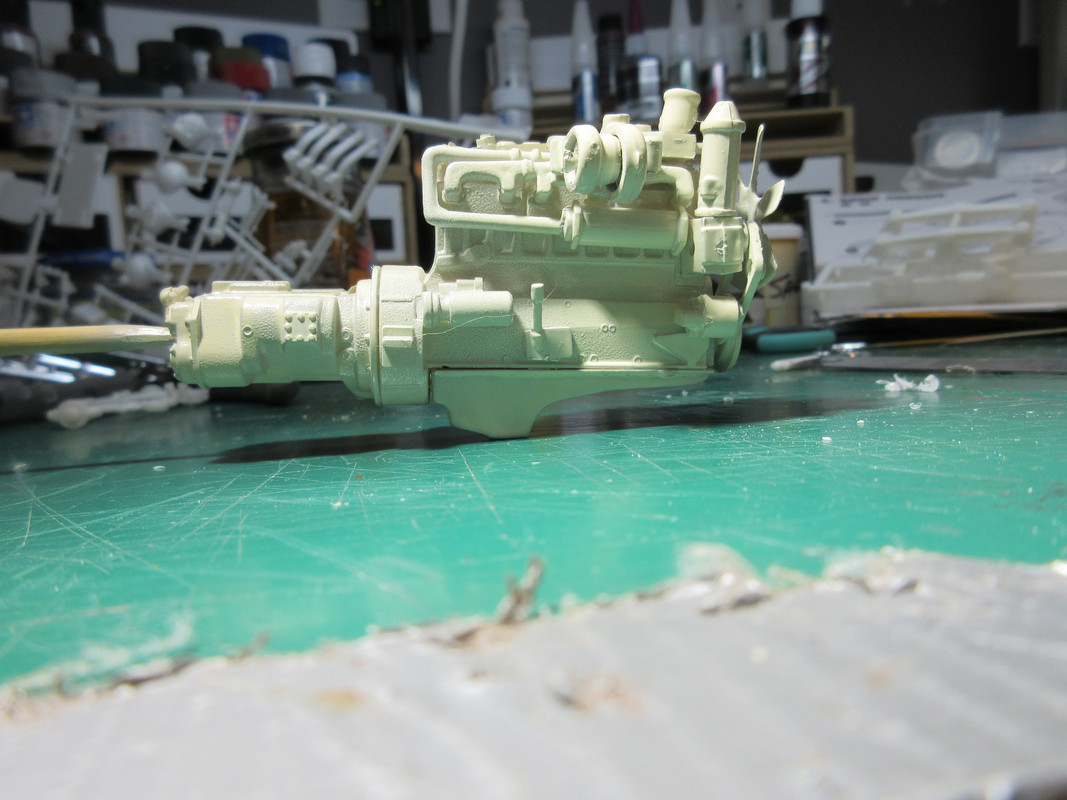
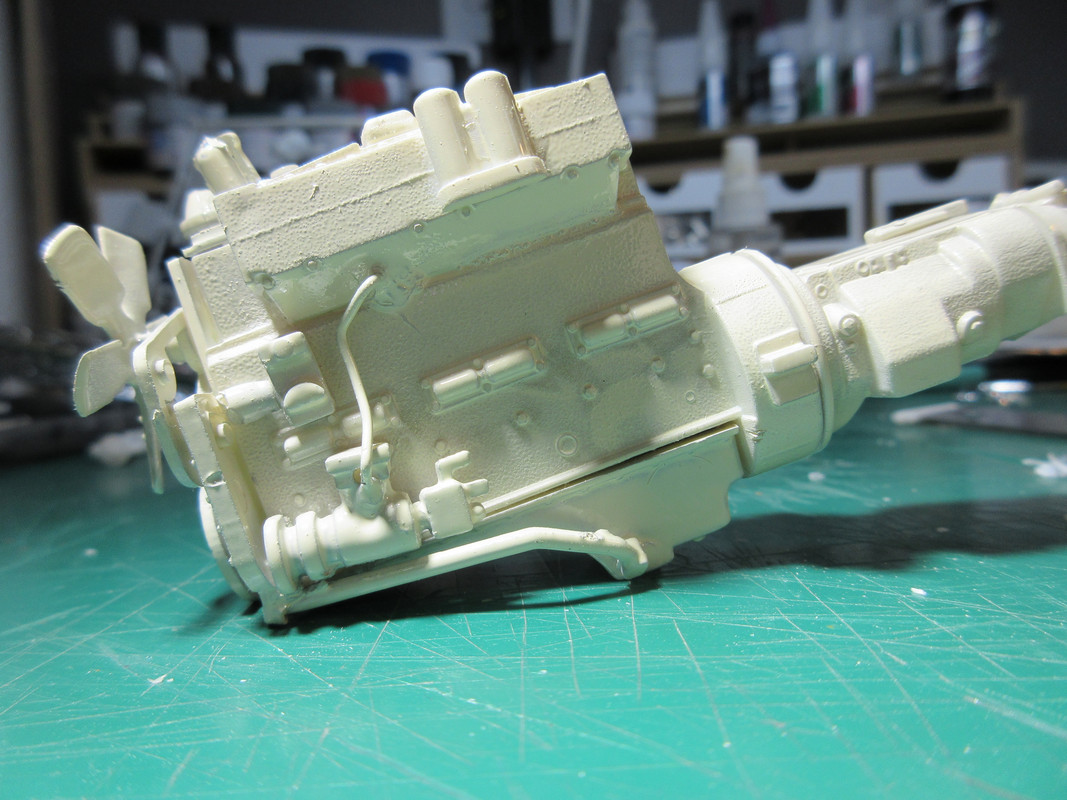
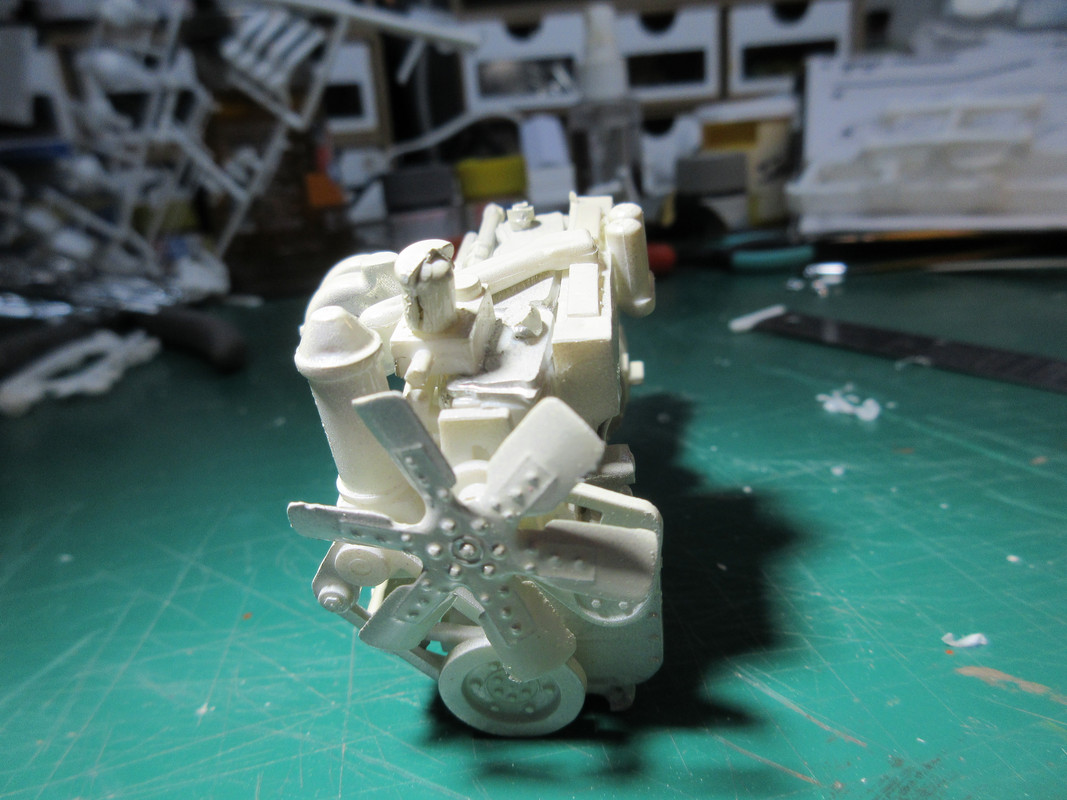
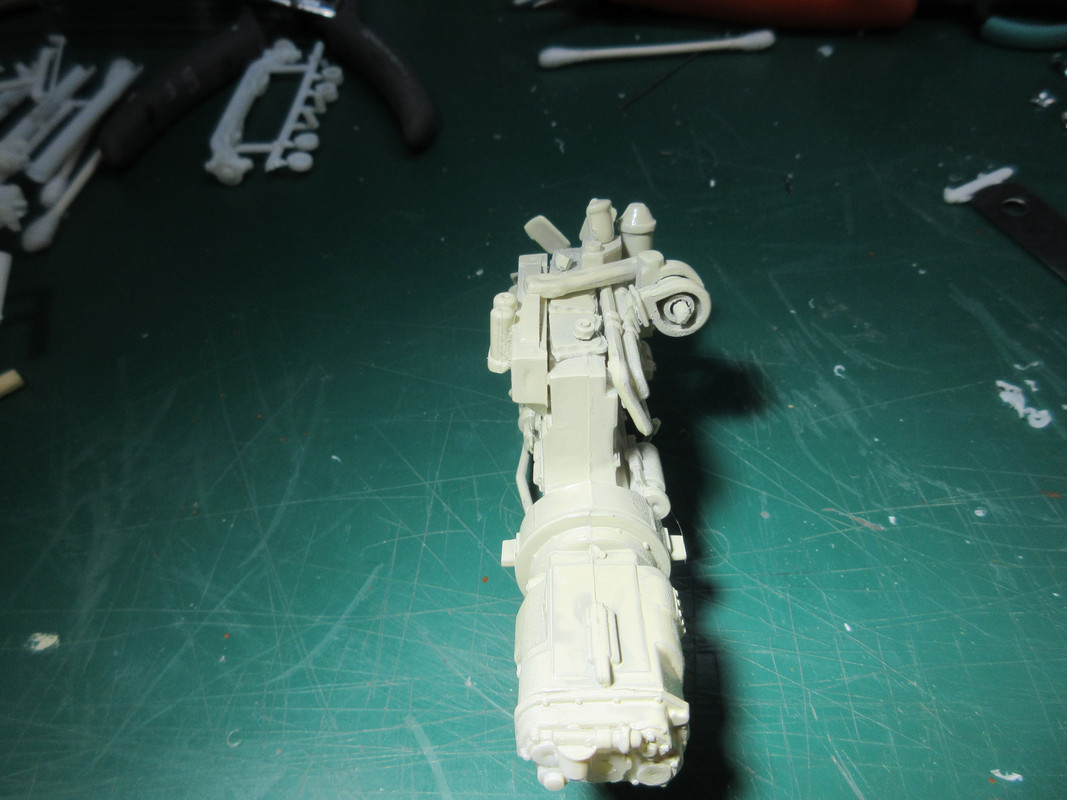
Here is the engine. It is painted in Rustoleum Gloss Enamel in Almond. It is what the Tractor Supply store had, which was more than what I had. . . so that is what used. It took almost 48 hours to dry to my satisfaction. If anyone has a recommendation for a dehydrator or drying box, let me know, please. I still have to paint the belts and other accessories black, etc.
There are only somewhat vague references to where to place the cross members. If you guess correctly, things seem to fit pretty well.
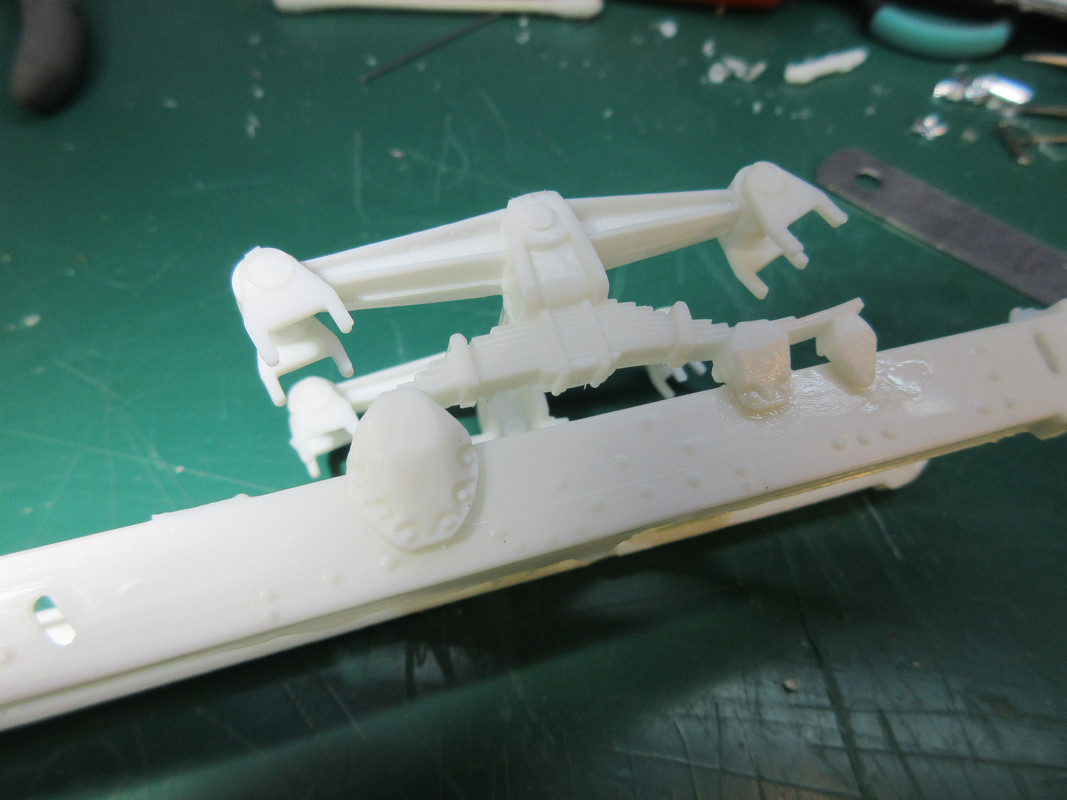
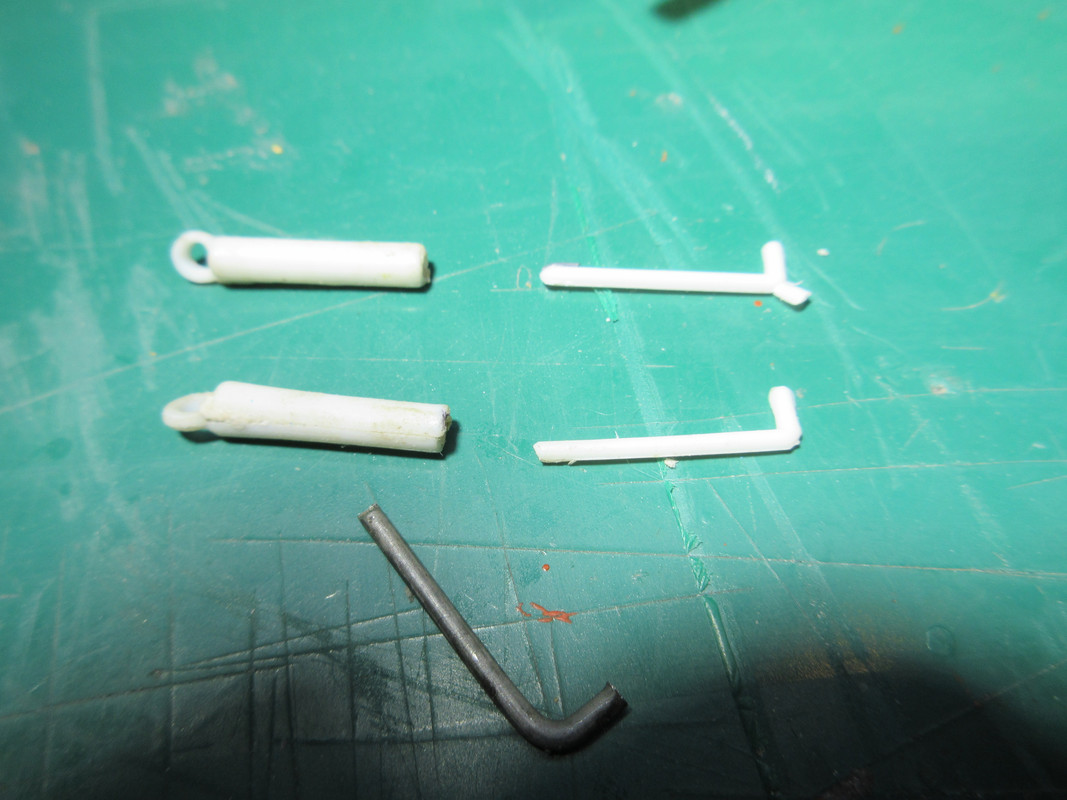
Okay, see these little U-shaped (upside down) brackets? Here is the helpful instruction
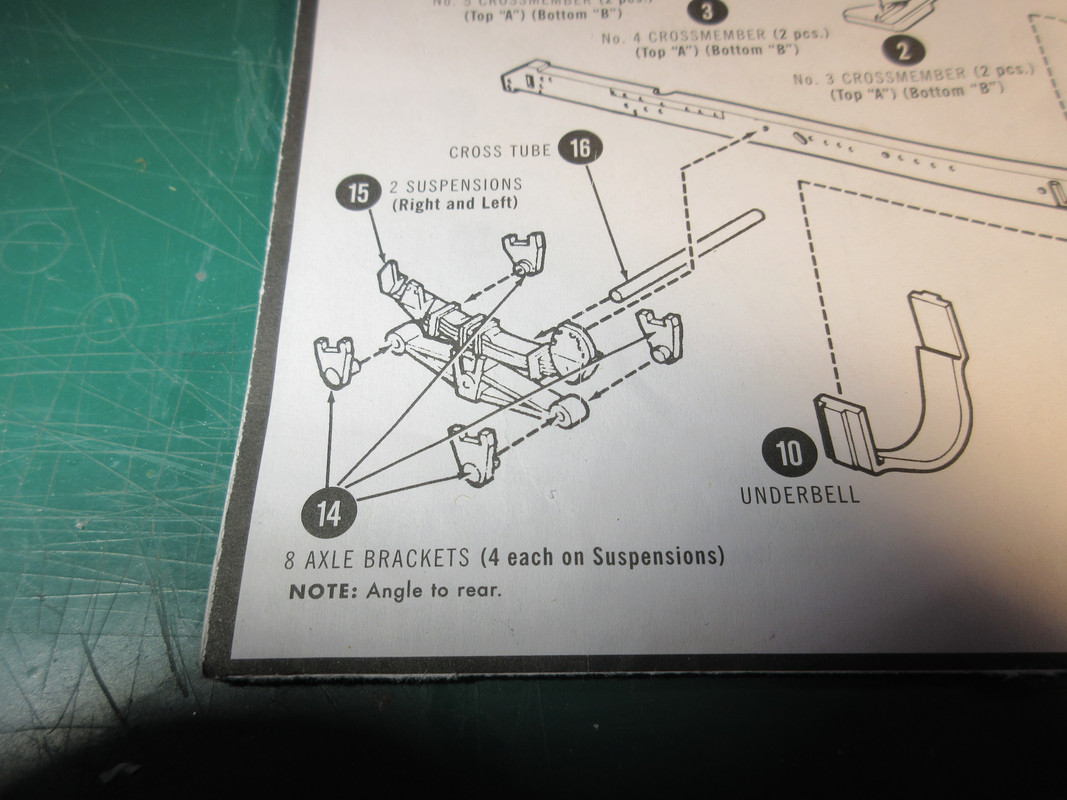
"8 angle brackets. NOTE: Angle to the rear."
Uh, what angle? the entire bracket? is there an angled side that is rear facing? What? How hard would it have been to add a notch on the mounting hole and pin to get what you want? I did find a bit of guidance a couple of steps over. Looks like the front-facing side should be vertical.
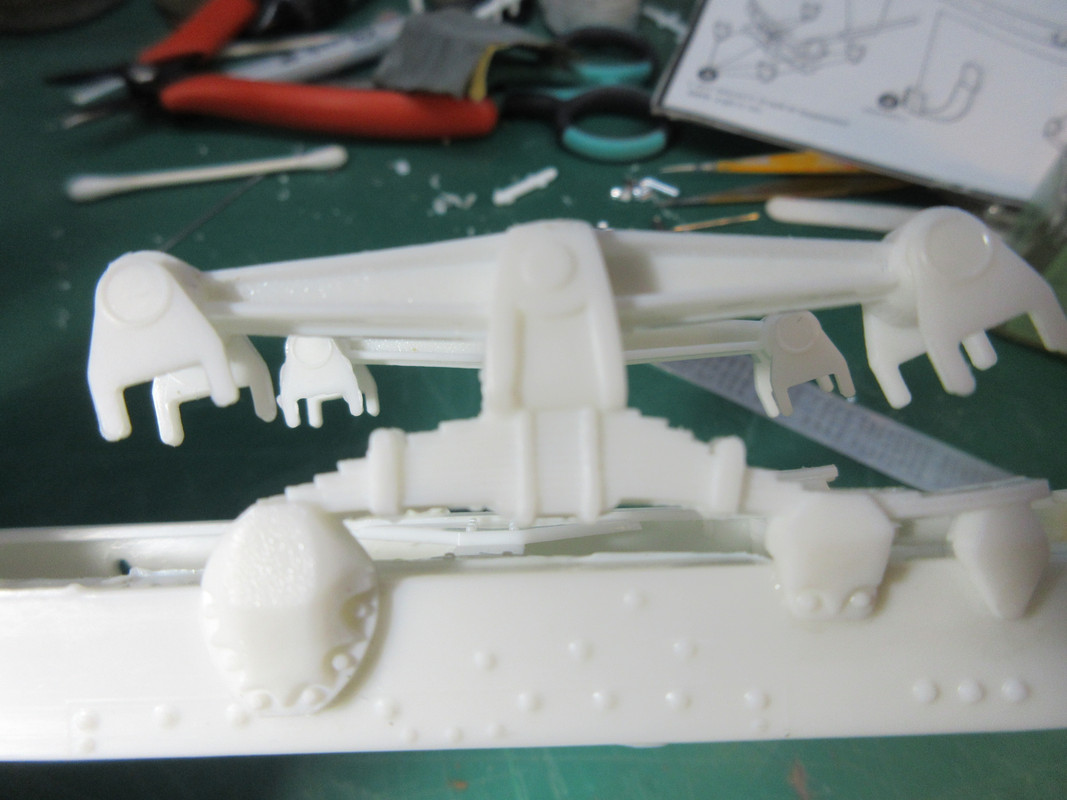
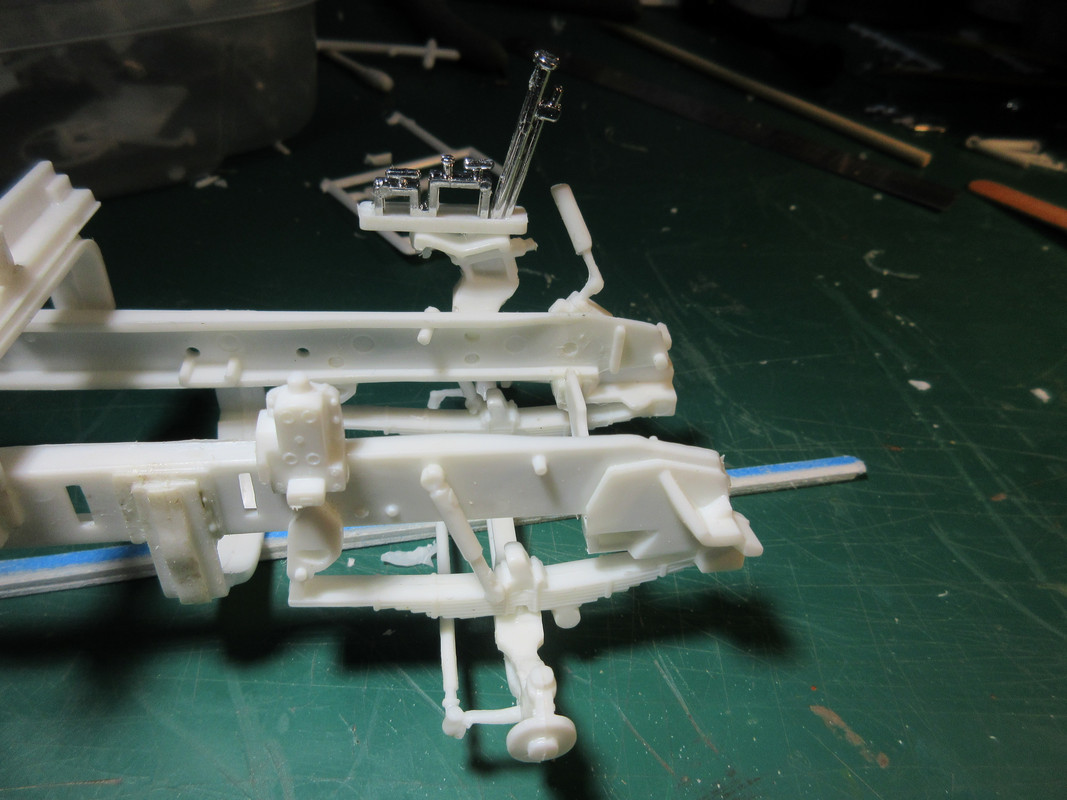
Working on the front suspension and assorted pieces/parts....perhaps more later today.
Anyway, a typical Round 2 AMT re-pop. Kit number is AMT687/06 and as they proudly tell you, it is a "highly detailed 1/25" kit.
I did start this one as a way to keep the CH-54 "on deck" for a bit longer. Whyy? I don't know. I like trucks.
The chrome is way over the top....two large sprues and 1 small sprue. Soacked some of it in bleach (that normally works) for 24 hours and nothing. Of course, none of the parts are numbered. Well a few are like the cross braces on the chassis so that you can determine the upper and lower parts. But, that is it for the most part.
The sprues are not numbered, nor is anything on the handy-dandy map on the bottom of the box. Geez, Louise....spend a buck and put it on your stellar instructions.
Many parts look like blobs, especially the smaller chromed ones. Some I simply could not locate. For those I simply cut nubs from a piece of sprue and there you go....instant part. To say that these molds could use some freshening up would be an understatement. "San Andreas Fault" sized mold seam lines, a lot of ejector marks and less than crisp parts in a lot of cases.
The chassis rails are a tad warped, but so am I. Not terrible, though.
Here is the engine. It is painted in Rustoleum Gloss Enamel in Almond. It is what the Tractor Supply store had, which was more than what I had. . . so that is what used. It took almost 48 hours to dry to my satisfaction. If anyone has a recommendation for a dehydrator or drying box, let me know, please. I still have to paint the belts and other accessories black, etc.
There are only somewhat vague references to where to place the cross members. If you guess correctly, things seem to fit pretty well.
Okay, see these little U-shaped (upside down) brackets? Here is the helpful instruction
"8 angle brackets. NOTE: Angle to the rear."
Uh, what angle? the entire bracket? is there an angled side that is rear facing? What? How hard would it have been to add a notch on the mounting hole and pin to get what you want? I did find a bit of guidance a couple of steps over. Looks like the front-facing side should be vertical.
Working on the front suspension and assorted pieces/parts....perhaps more later today.