Der Beetle Bus XL-Pressing Forward-01/05
-
tempestjohnny

- Elite Member
- Posts: 3392
- Joined: Sat Oct 15, 2016 4:51 am
- Location: Naples. FL
Re: Der Beetle Bus XL-Build Inside of a Build-11/14
You. OOB. Unbelievable
-
mustang1989

- Moderator
- Posts: 4903
- Joined: Tue Mar 18, 2014 8:35 pm
Re: Der Beetle Bus XL-Build Inside of a Build-11/14
Now see..............you can't go sayin' stuff like that because now I've already got some aluminum hollow tubes to use for the 8 air intakes and I'm looking for an electric fan set up out of my Viper kit because a fan on the front of this motor just looks plain stooopid.tempestjohnny wrote:You. OOB. Unbelievable
-
tempestjohnny
- Elite Member
- Posts: 3392
- Joined: Sat Oct 15, 2016 4:51 am
- Location: Naples. FL
Re: Der Beetle Bus XL-Build Inside of a Build-11/14
See see I told yamustang1989 wrote:Now see..............you can't go sayin' stuff like that because now I've already got some aluminum hollow tubes to use for the 8 air intakes and I'm looking for an electric fan set up out of my Viper kit because a fan on the front of this motor just looks plain stooopid.tempestjohnny wrote:You. OOB. Unbelievable
-
mustang1989
- Moderator
- Posts: 4903
- Joined: Tue Mar 18, 2014 8:35 pm
Re: Der Beetle Bus XL-Build Inside of a Build-11/14
I aint to worried about it. I do have an OCD problem......................I think.  I managed to pick up some Mothers Aluminum Polish yesterday to bring all the aluminum to a high shine.
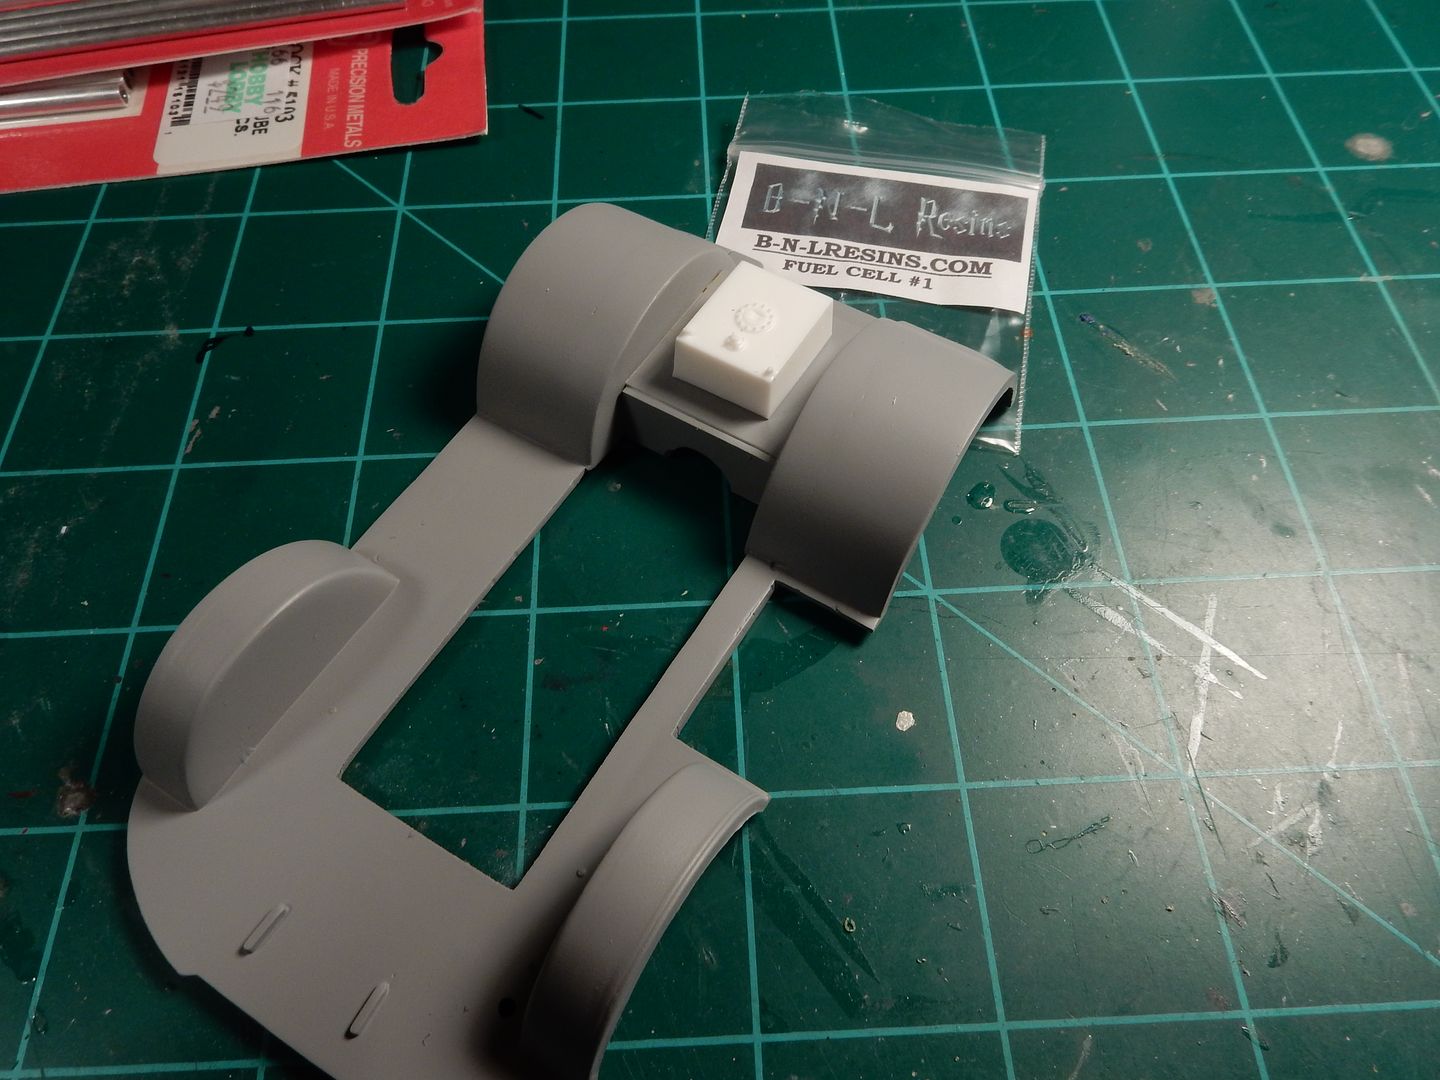
I received my fuel cell yesterday for the XL version that I'm building. This is gonna work out nicely is all I've gotta say....
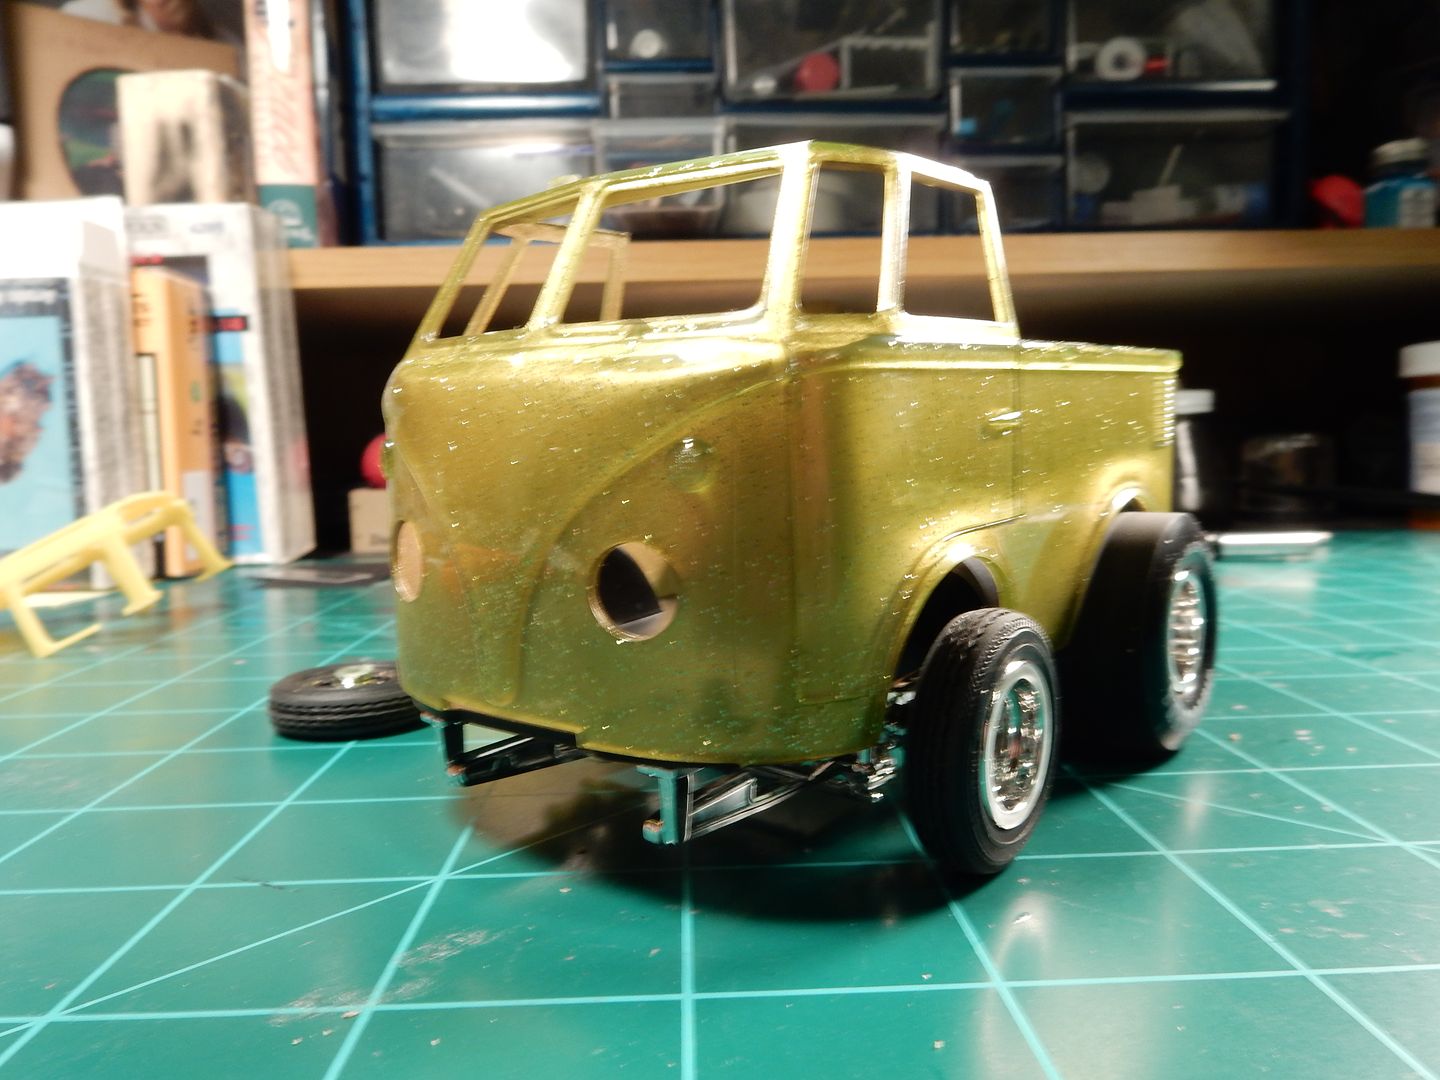
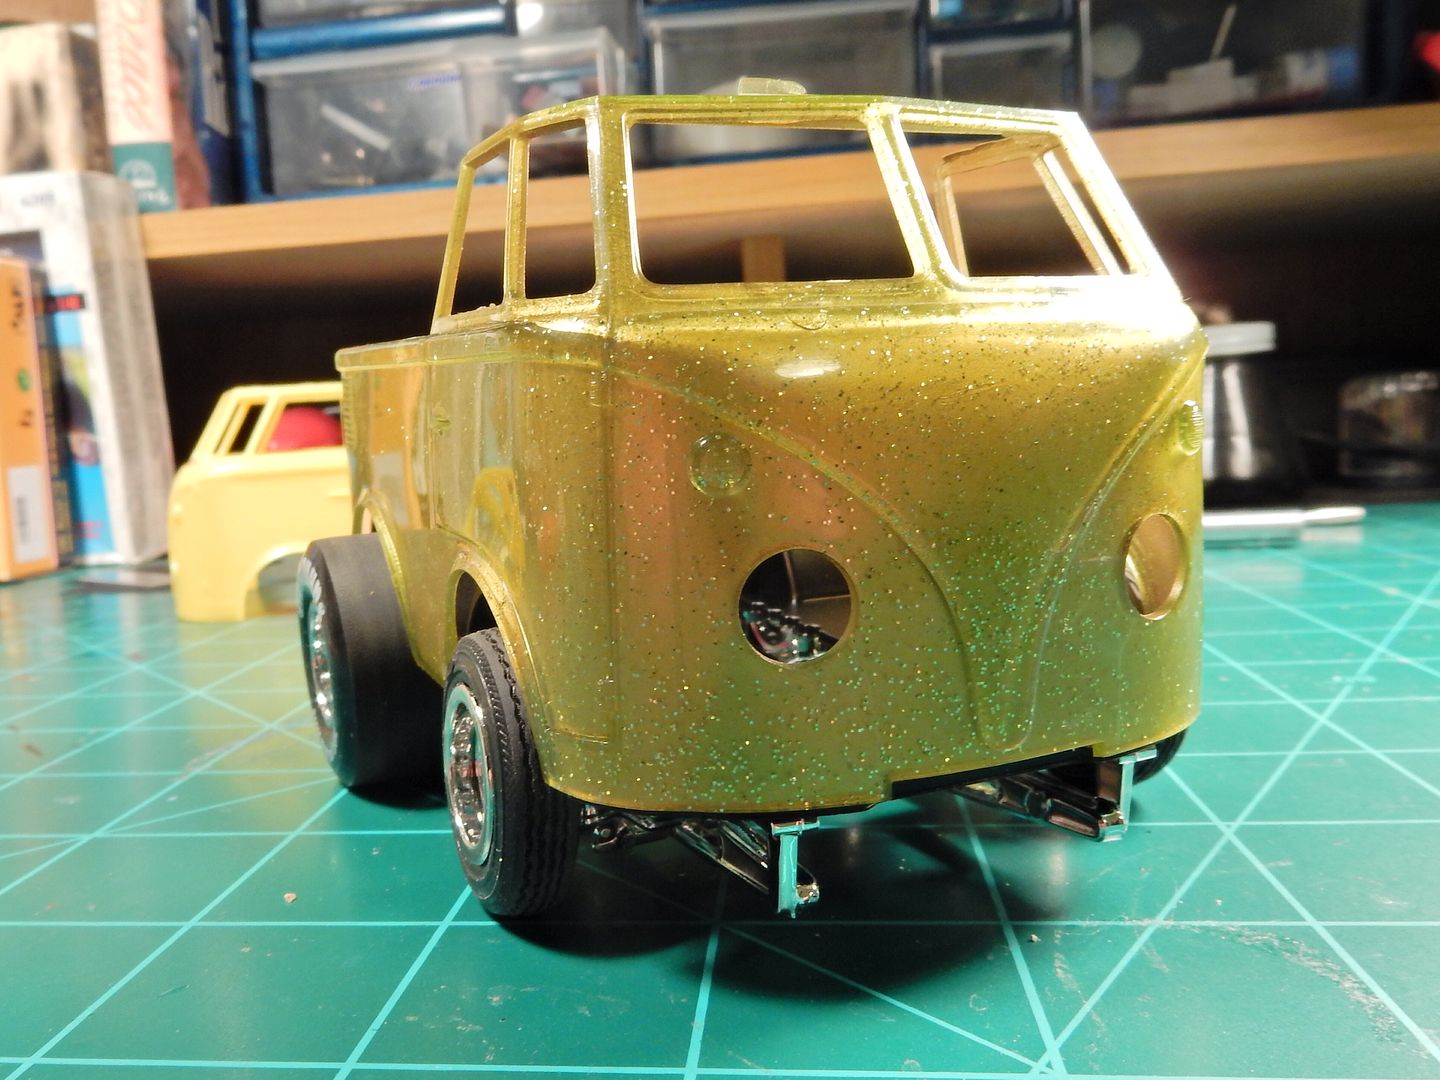
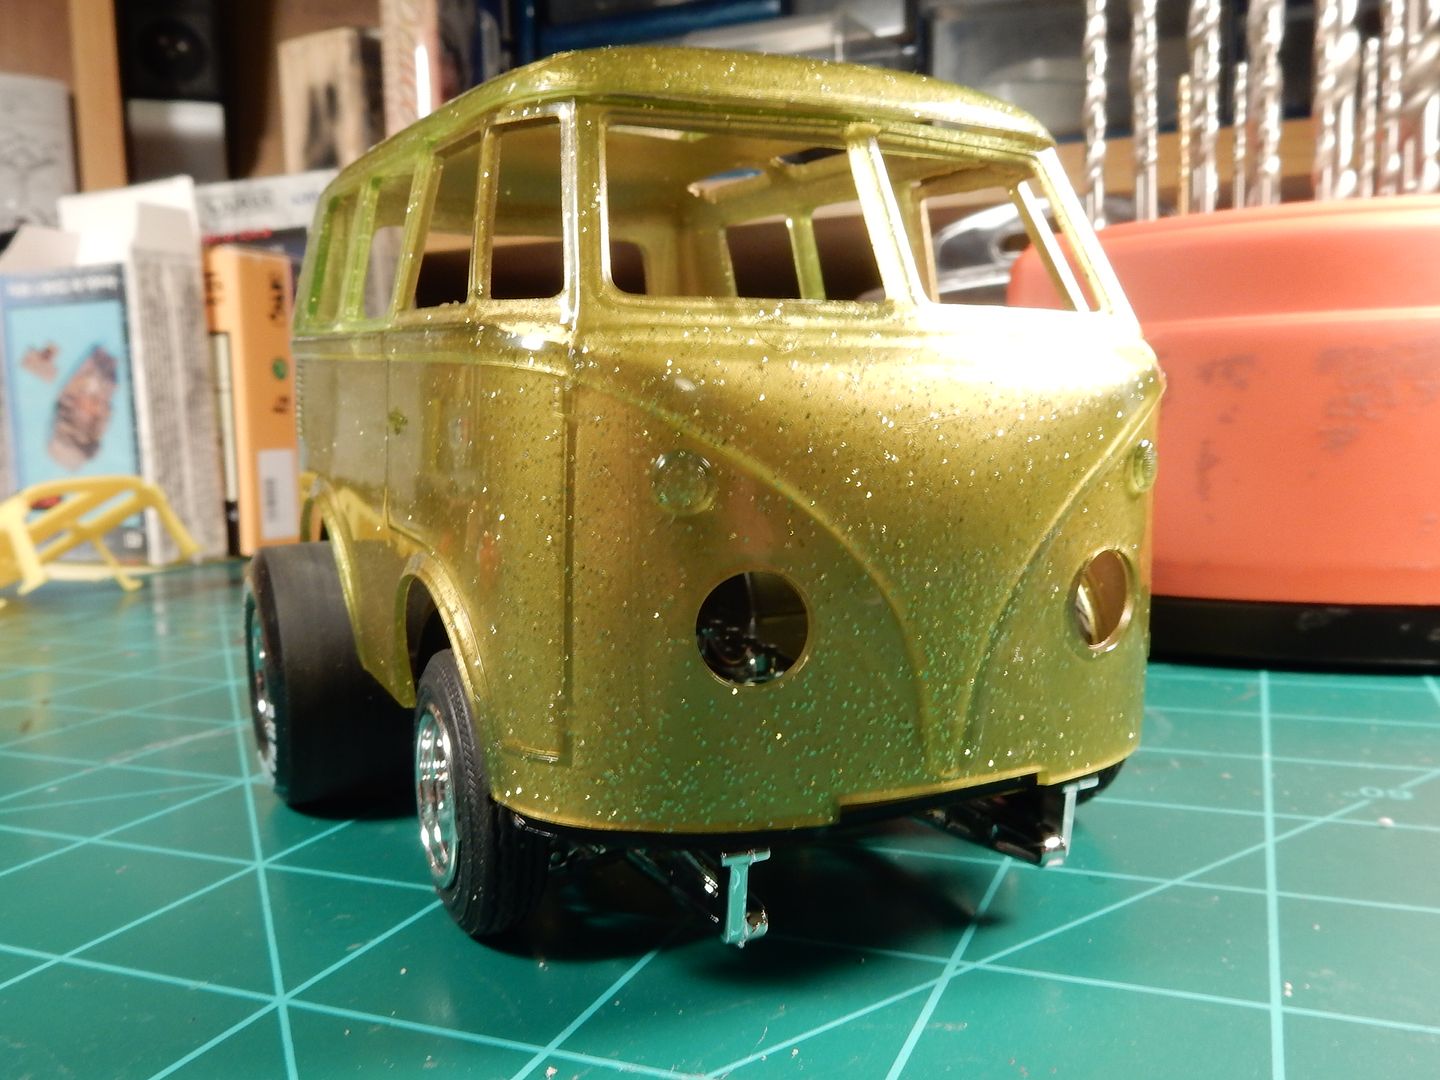
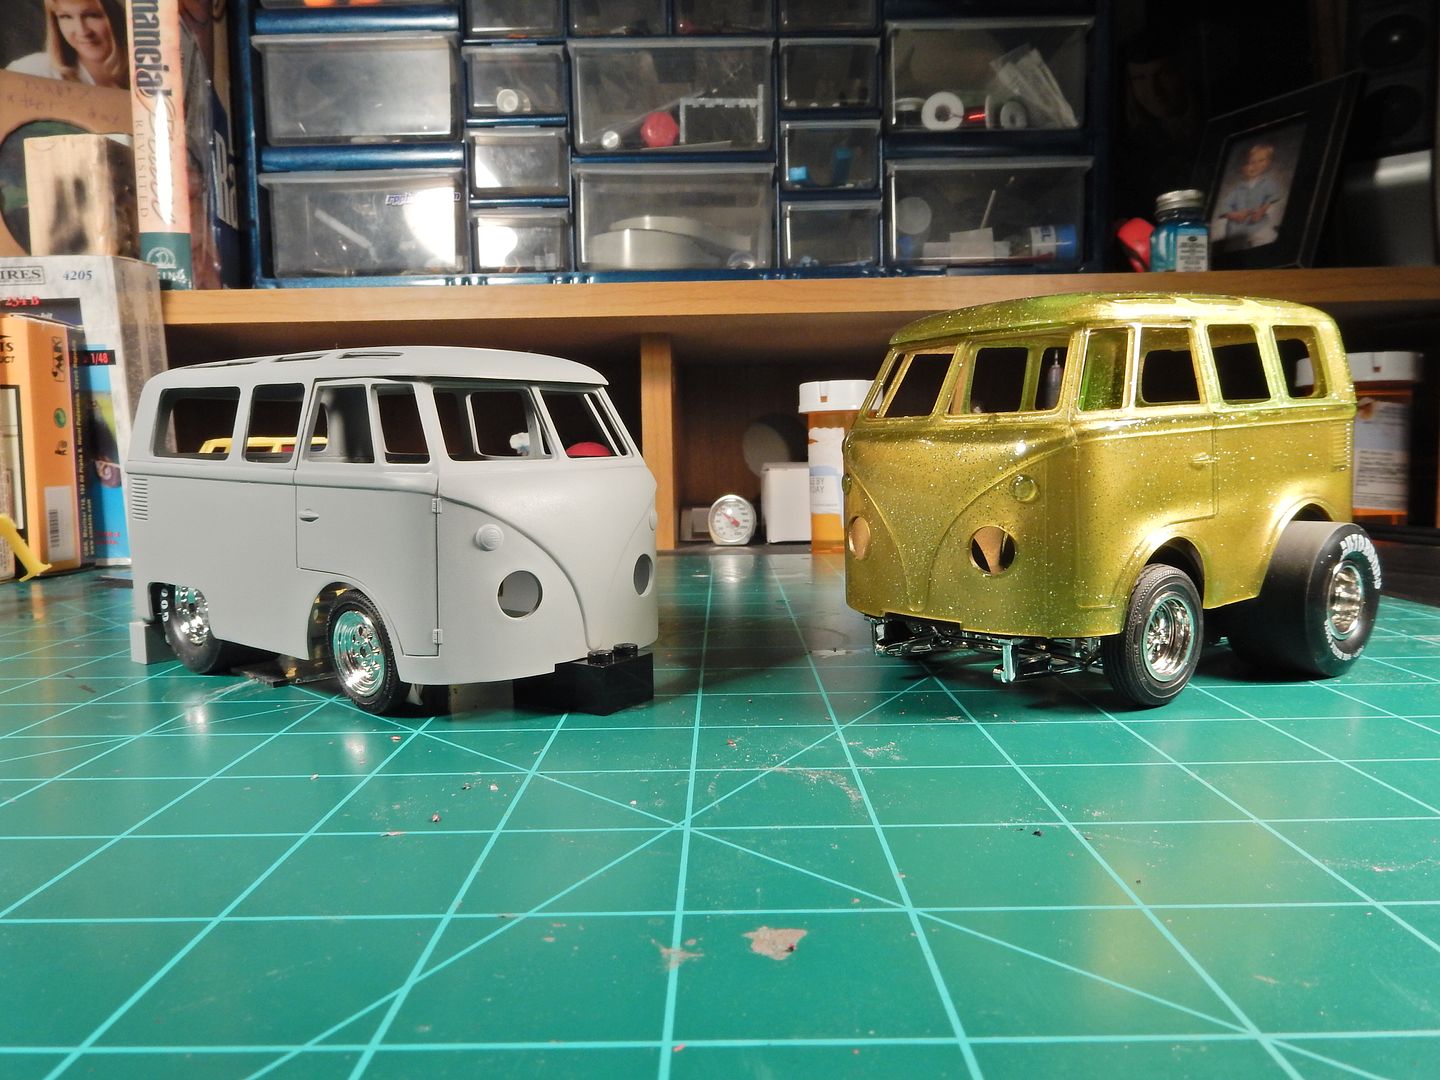
aaaaand I got the inside of the body shot with gold this morning and that's gonna work out well also!
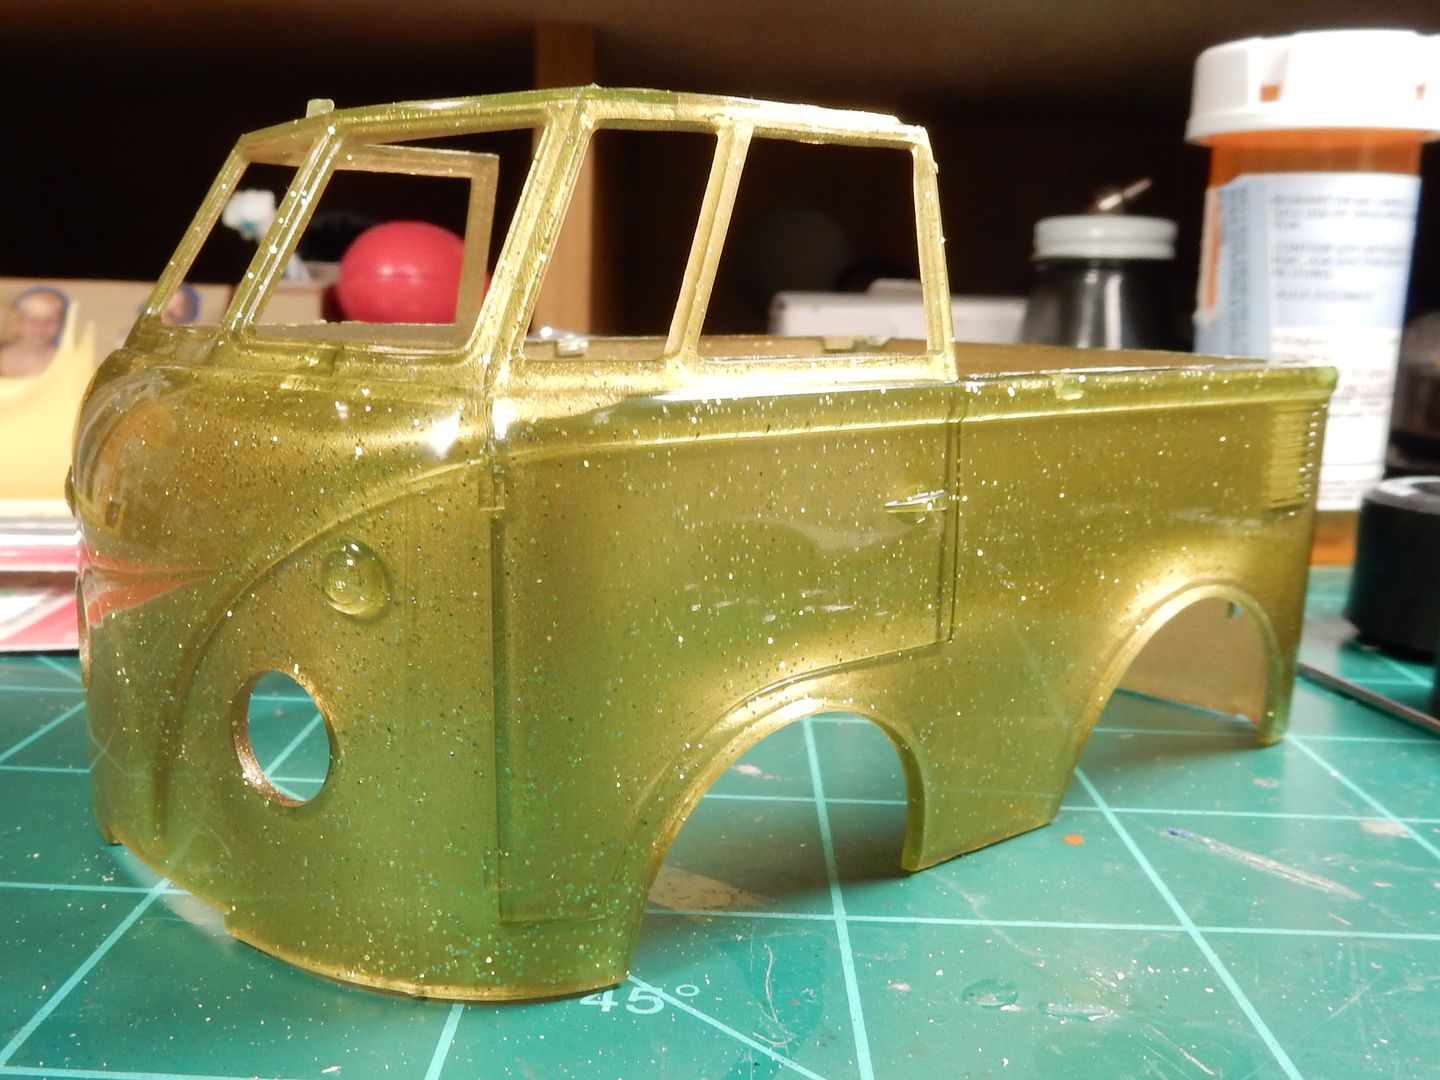
I've got some work to do on the top though. There's those to optional cut out impressions for adding....................antennas????????????
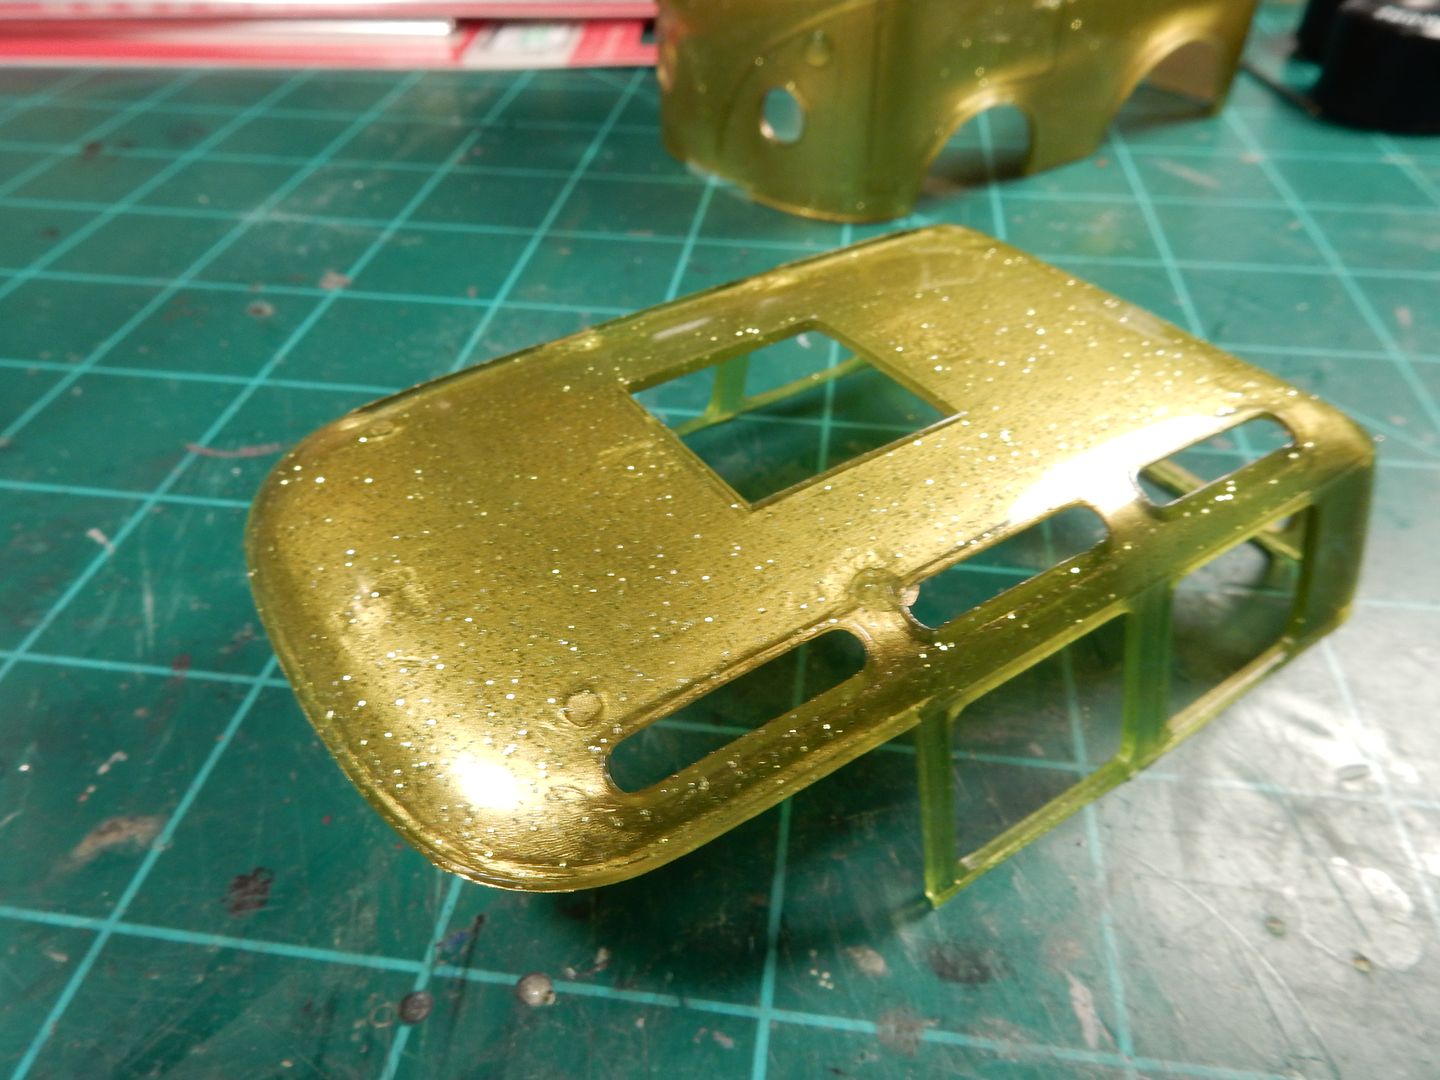
I've got some sanding to do to get not only those to look right but the ejector pin marks all over the inside of the roof as well. No problem.....................we'll get there.
I received my fuel cell yesterday for the XL version that I'm building. This is gonna work out nicely is all I've gotta say....
aaaaand I got the inside of the body shot with gold this morning and that's gonna work out well also!
I've got some work to do on the top though. There's those to optional cut out impressions for adding....................antennas????????????
I've got some sanding to do to get not only those to look right but the ejector pin marks all over the inside of the roof as well. No problem.....................we'll get there.

Re: Der Beetle Bus XL-Progress on Both-11/19
Looks like fun. Try not to get glitter all over the place when you finish sanding them out.
To make each build less crappy than the last one. Or, put another way, "Better than the last one, not as good as the next one!"..
-
mustang1989
- Moderator
- Posts: 4903
- Joined: Tue Mar 18, 2014 8:35 pm
Re: Der Beetle Bus XL-Progress on Both-11/19
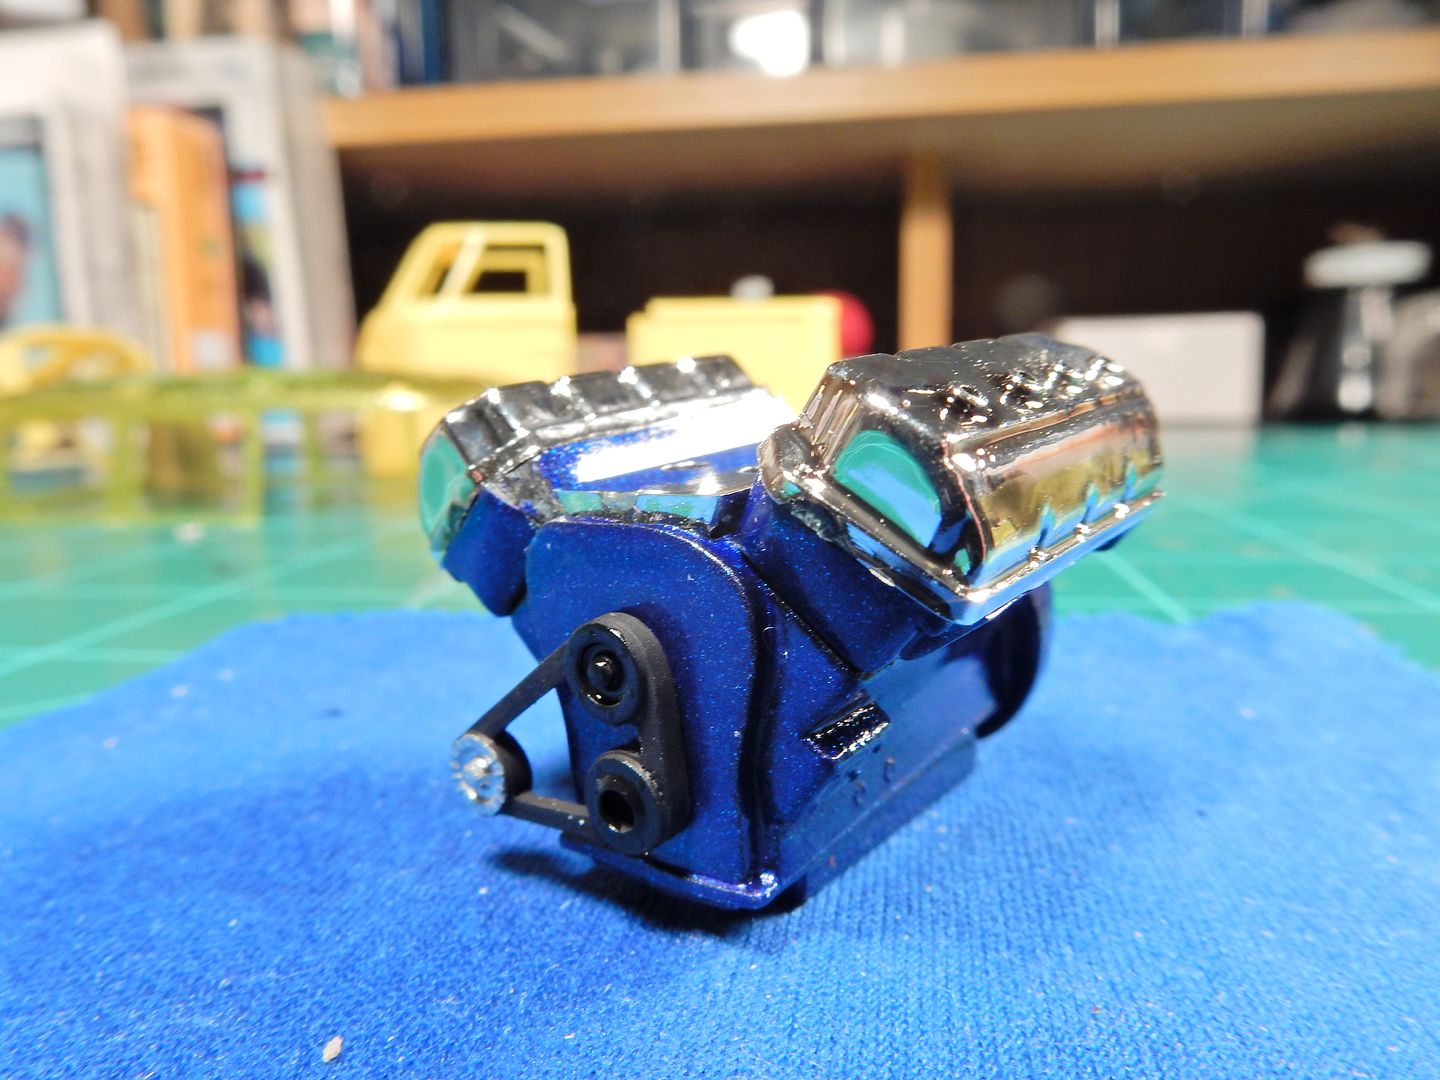
LOL! I'll try Lyle. You should have seen me painting the engine a Blue Metal flake color. There was glitter going all over the place!!!!LyleW wrote:Looks like fun. Try not to get glitter all over the place when you finish sanding them out.
-
mustang1989
- Moderator
- Posts: 4903
- Joined: Tue Mar 18, 2014 8:35 pm
Re: Der Beetle Bus XL-Progress on Both-11/19
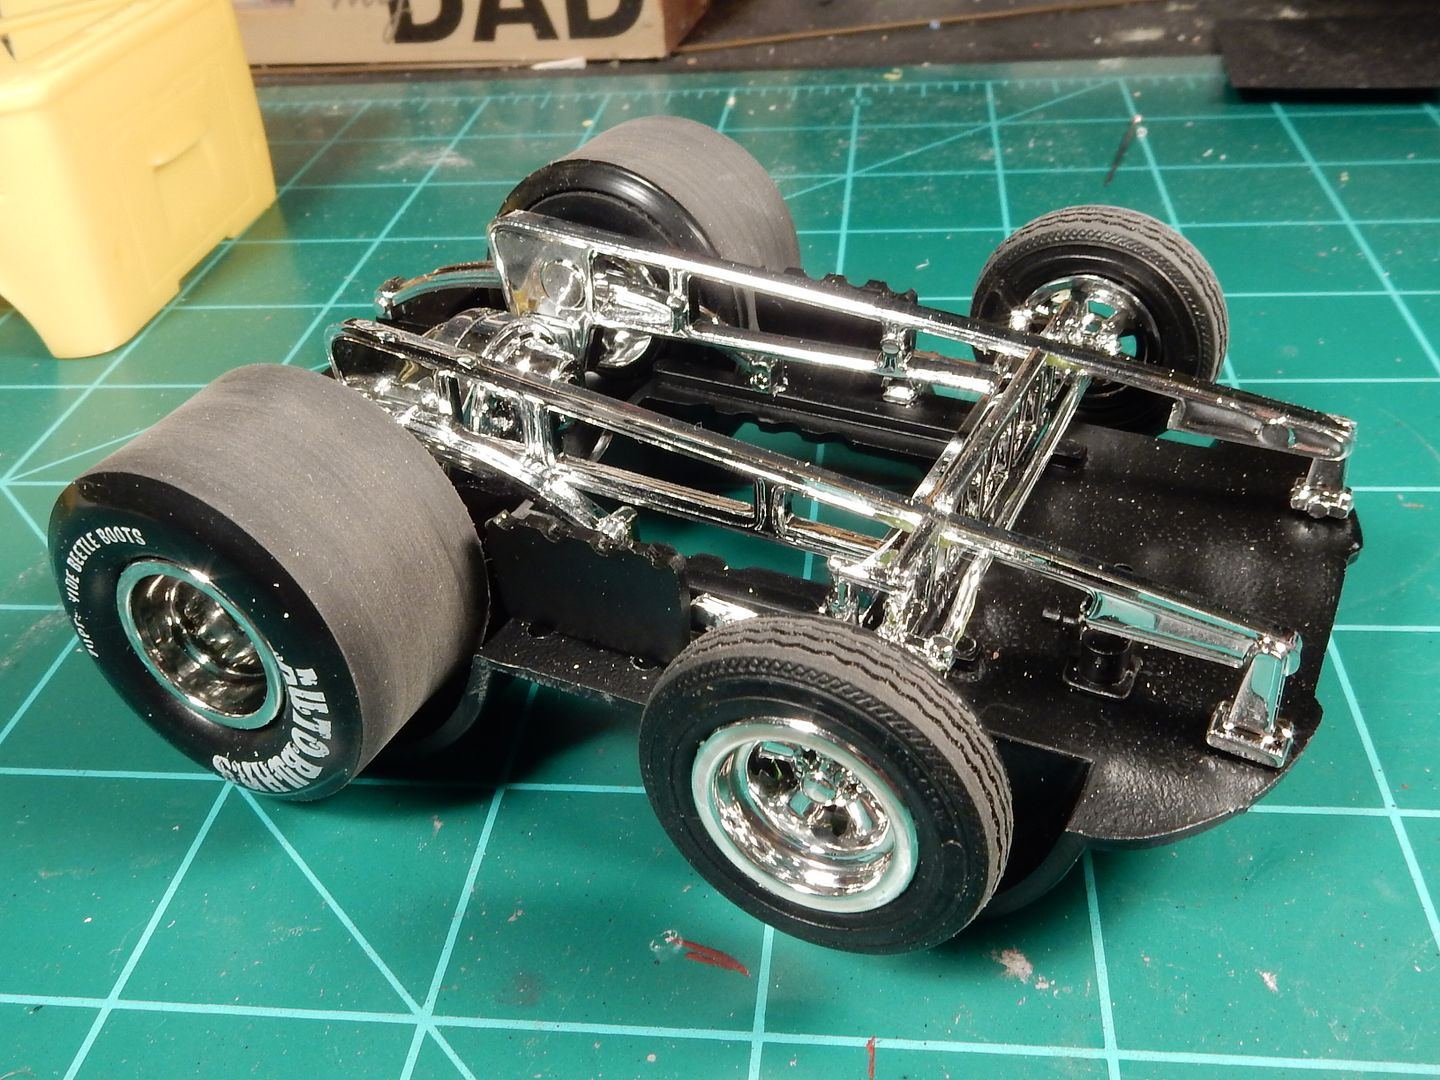
I managed to work on my "OOB" build this morning. I didn't like the front tires from this kit so I used the one's from the AMT '67 Chevelle kit. I chucked a 12mm socket up in my cordless drill and mounted each of the four tires up, one at a time on to the socket and spun the tires up on some sandpaper to rough up the tread araas some. I also treated each of the wheels to a coat of X-22 Smoke for that true metal/ chrome look. After that I installed all four wheel and tires.
Here's the progress so far:
Here's the progress so far:
-
mustang1989
- Moderator
- Posts: 4903
- Joined: Tue Mar 18, 2014 8:35 pm
Re: Der Beetle Bus XL-"OOB" Progress-11/25
Ok I'm back with today's update. Folks I had to ditch the front wheels as well. First off , I just didn't like the way they looked. Secondly , these things, no matter how much I cut them down on the back of the wheel where they mounted up to the axle just stuck out way to far outside of the body.
Here's where I started at this morning when test fitting the body onto the chassis to see if everything was going to work out ok. I'm glad I did because I wouldn't have been very happy with this..........
After cutting the backs of the OOB wheels down it wasn't too much better...........
So I scrapped the OOB front wheels and went with some Cragar SS's I had in the spares bin. Now THAT'S more like it!!!!!!!!!
The engine? Well it's probably the most primitive Hemi engine I've seen but there aint no way in HELL I'm going to use my Ross/Gibson Hemi on THIS build! lol
I painted the engine metal flake blue , drilled some holes in the rocker covers for ignition wires and while I was on the rocker covers , applied a little Tamiya Smoke to them.
Engine progress for this morning.......
After looking at it for a while I don't know if I'll use this 426 Hemi or another OOB Hemi from 30 years ago. Will be thinking on this part....
-
mustang1989
- Moderator
- Posts: 4903
- Joined: Tue Mar 18, 2014 8:35 pm
Re: Der Beetle Bus XL-"OOB" Progress-11/25
Ok. After some re-thinking and internal debate... I'll be going with a 30+ year old Hemi that I've got in the stash. I'll be taking all of the peripherals off like the blower, belts and I'll be replacing the rocker covers but the base engine just has so much more detail than the OOB one in this kit. (Yeah I know, the pink is a little hard to take but you've gotta remember I was going to put this in a Panther Pink Cuda that I built back then as a teenager). That thread for ignition wires'll go too. Hey....It's all I could think of 30 years ago that would work ya know.
I'll be painting this engine the same blue that I did in the pics above....

I'll be painting this engine the same blue that I did in the pics above....
-
mustang1989
- Moderator
- Posts: 4903
- Joined: Tue Mar 18, 2014 8:35 pm
Re: Der Beetle Bus XL-"OOB" Progress-11/25
Ok fellas. I started tearing the pink Hemi down to prepare it for the install and it literally flew apart. I was able to remove the timing cover from the front of the pink engine, sand the backside of it and cut and carve until I had the dimensions of the base timing cover and it's now in a bath of brake fluid where the paint will be stripped and then painted with a coat of the metal flake blue so it looks like I'll be able to use the OOB engine on this thing after all. That means less modification and re-work later.
I pulled the completed chassis down now that the front wheels are set from the glue drying and mocked up my custom VW along with the OOB build. The differences are dramatically different (even more so than I thought they would be with what I thought wasn't much of an extension in the body):
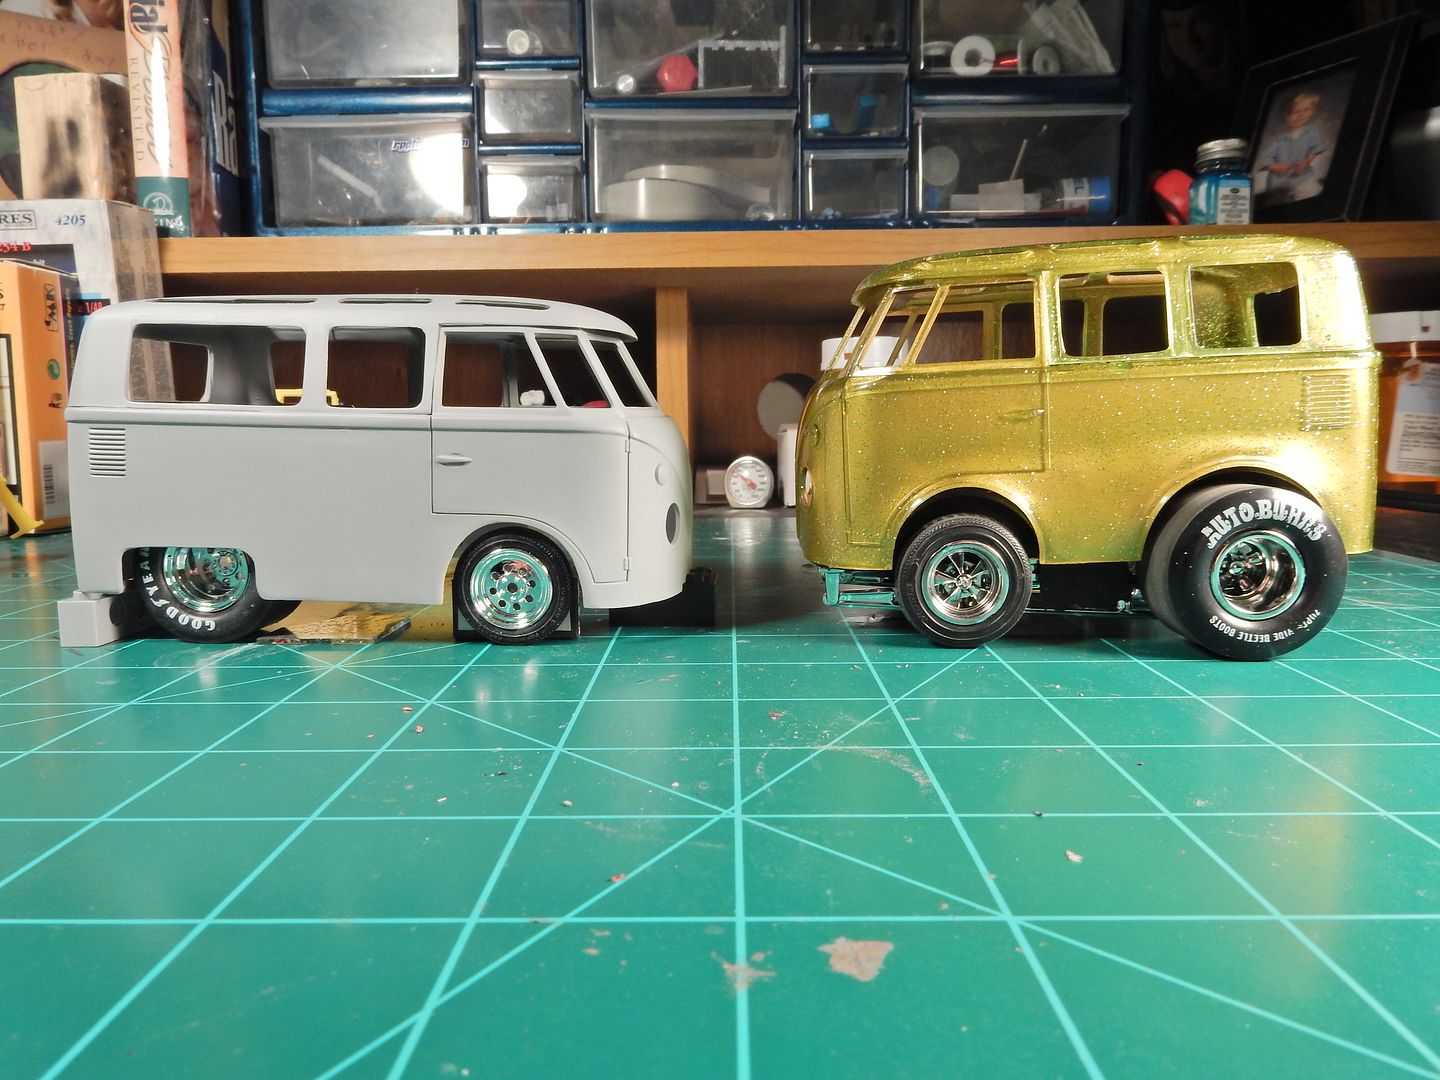
I pulled the completed chassis down now that the front wheels are set from the glue drying and mocked up my custom VW along with the OOB build. The differences are dramatically different (even more so than I thought they would be with what I thought wasn't much of an extension in the body):