1/32 Zoukei-Mura Ta152H-0 White 7

Re: 1/32 Zoukei-Mura Ta152H-1 White 7
Those are frustrating sessions, to be sure.
To make each build less crappy than the last one. Or, put another way, "Better than the last one, not as good as the next one!"..
-
BlackSheep214

- Elite Member
- Posts: 13598
- Joined: Sun Apr 06, 2014 8:47 pm
Re: 1/32 Zoukei-Mura Ta152H-1 White 7
Get this product:
https://www.michtoy.com/item-VMS-CM07-P ... _Type.html
I swear by this product andis my go-to photo etch glue. Mine went bad not too long ago after it went dry and thick. I know why for I discovered I didn’t close the cap tight enough and completely.
This stuff really works far better than any CA glue. It will hold very quickly and I never had any PE pop loose using this stuff.
https://www.michtoy.com/item-VMS-CM07-P ... _Type.html
I swear by this product andis my go-to photo etch glue. Mine went bad not too long ago after it went dry and thick. I know why for I discovered I didn’t close the cap tight enough and completely.
This stuff really works far better than any CA glue. It will hold very quickly and I never had any PE pop loose using this stuff.
“Who controls the skies, controls the fate of this Earth”
Author unknown- 352nd Fighter Group, Blue-Nosed Bastards of Bodney
“Send one plane it’s a sortie; send two planes it’s a flight; send four planes it’s a test of airpower. - Richard Kohn
Author unknown- 352nd Fighter Group, Blue-Nosed Bastards of Bodney
“Send one plane it’s a sortie; send two planes it’s a flight; send four planes it’s a test of airpower. - Richard Kohn

Re: 1/32 Zoukei-Mura Ta152H-1 White 7
Thanks guys!
Got it in my cart on EBay. A bit pricey at $9 plus shipping but it will be worth it if it works. I've always hated working with CA glue.BlackSheep214 wrote:Get this product:
https://www.michtoy.com/item-VMS-CM07-P ... _Type.html
I swear by this product andis my go-to photo etch glue. Mine went bad not too long ago after it went dry and thick. I know why for I discovered I didn’t close the cap tight enough and completely.
This stuff really works far better than any CA glue. It will hold very quickly and I never had any PE pop loose using this stuff.
John aka JKim
-----------<><

-----------<><
Re: 1/32 Zoukei-Mura Ta152H-1 White 7
I conquered the flaps today. Well, maybe not conquered but at least they are done. I'll spray them with metal primer and then some paint to see how they turned out... hard to see right now.

The top of the flaps go here. I'll have to remove the raised spars on the kit wing but that should be easy with a pair of cutters.
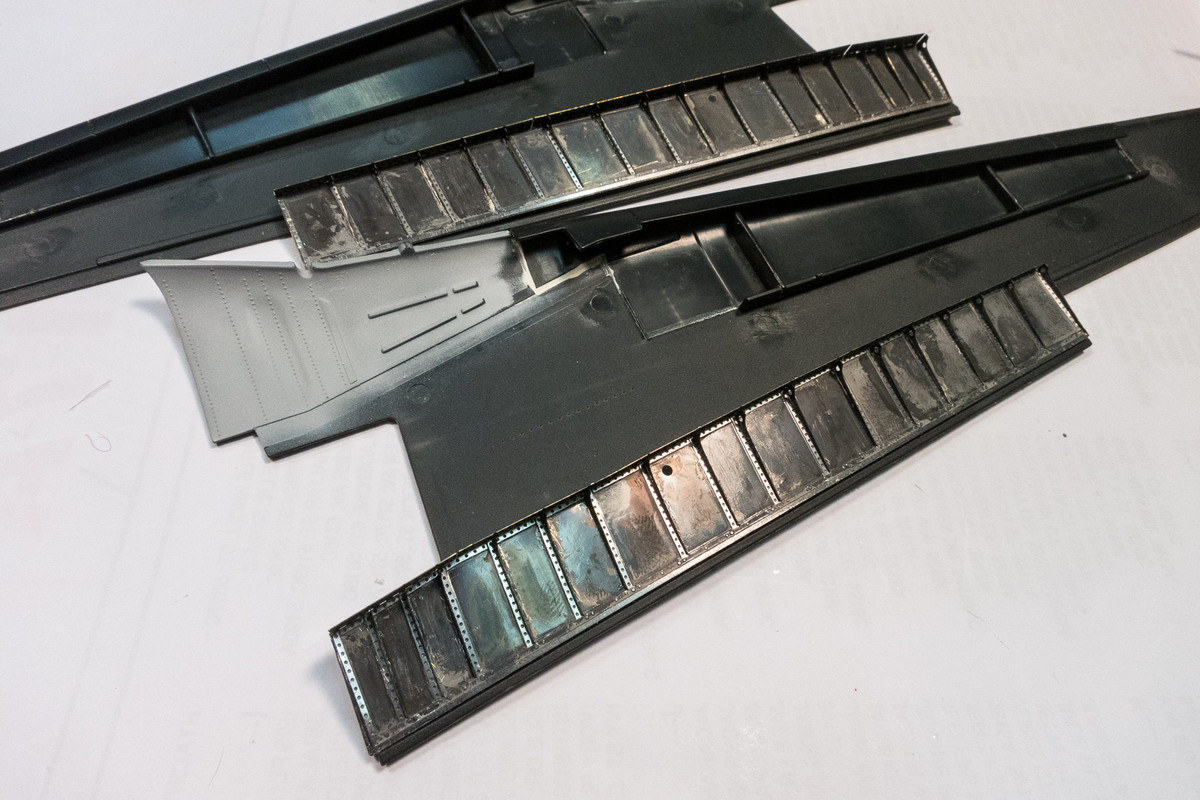
The upper wings have been riveted.
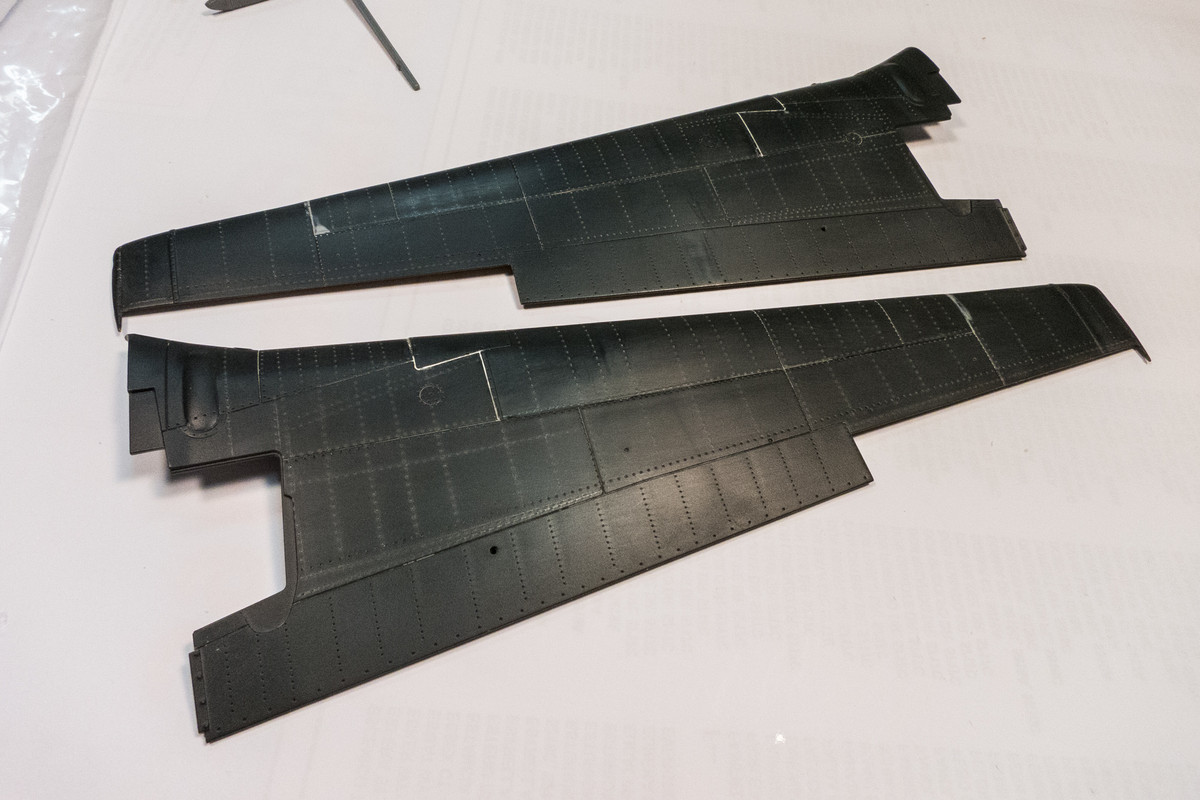
The top of the flaps go here. I'll have to remove the raised spars on the kit wing but that should be easy with a pair of cutters.
The upper wings have been riveted.
John aka JKim
-----------<><
-----------<><
Re: 1/32 Zoukei-Mura Ta152H-1 White 7
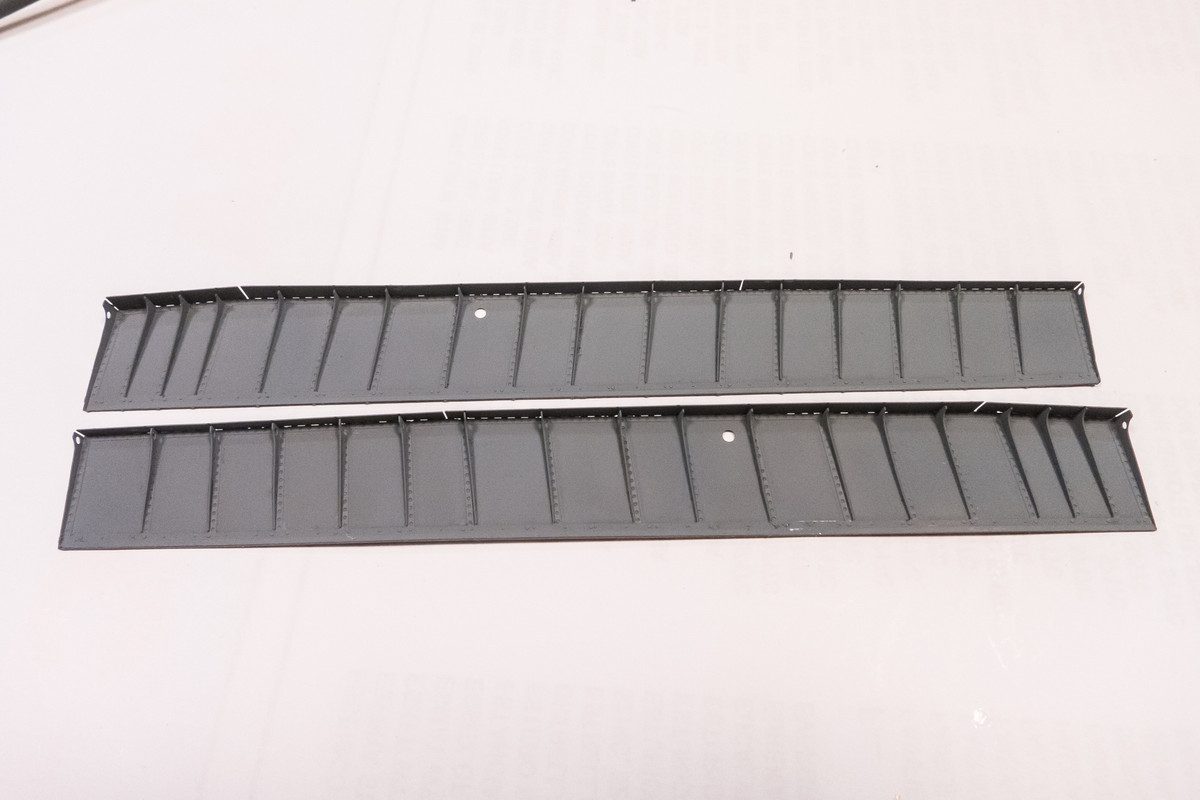
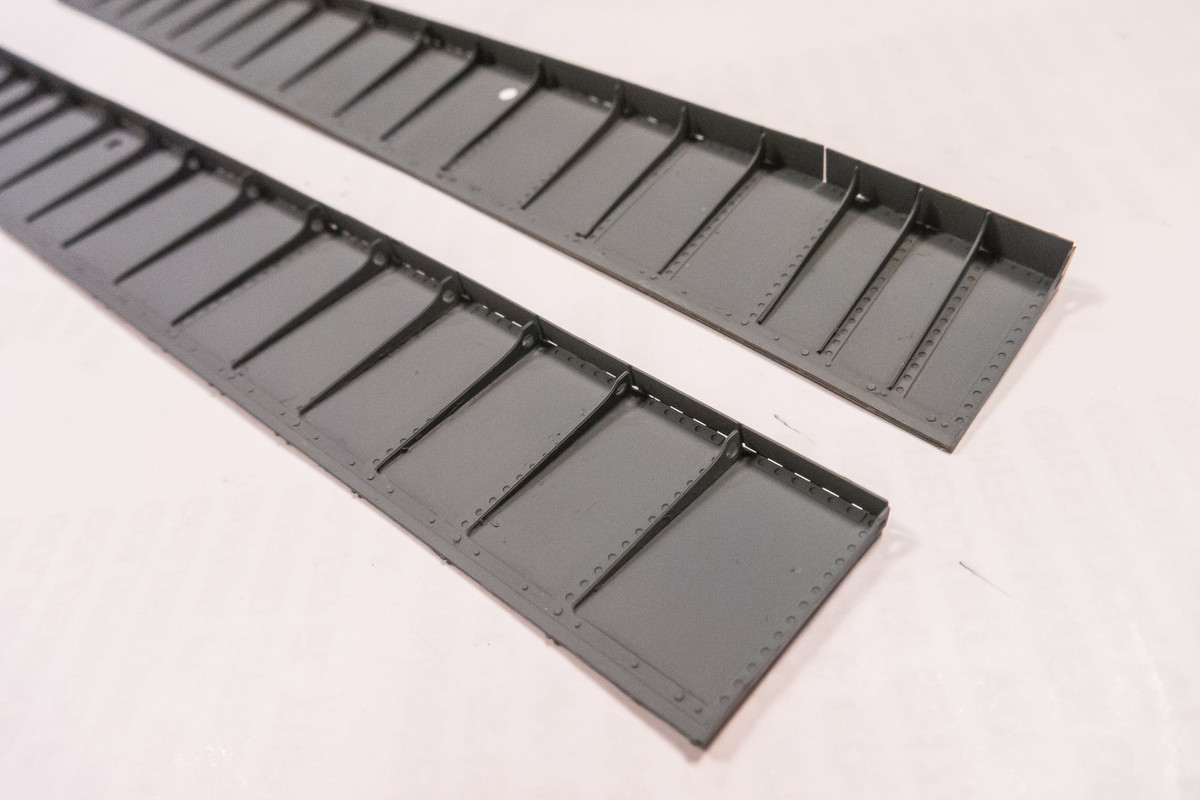
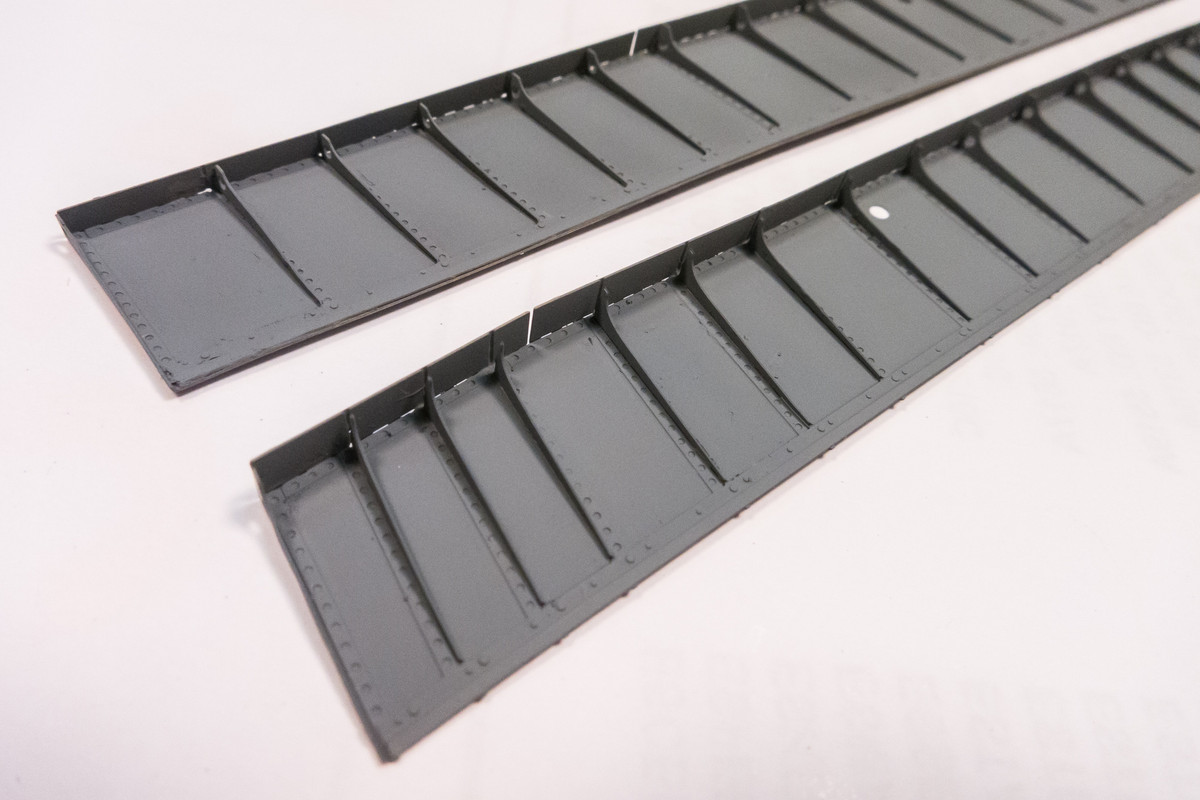
Flap uppers after metal primer and a coat of Neutral Grey paint...
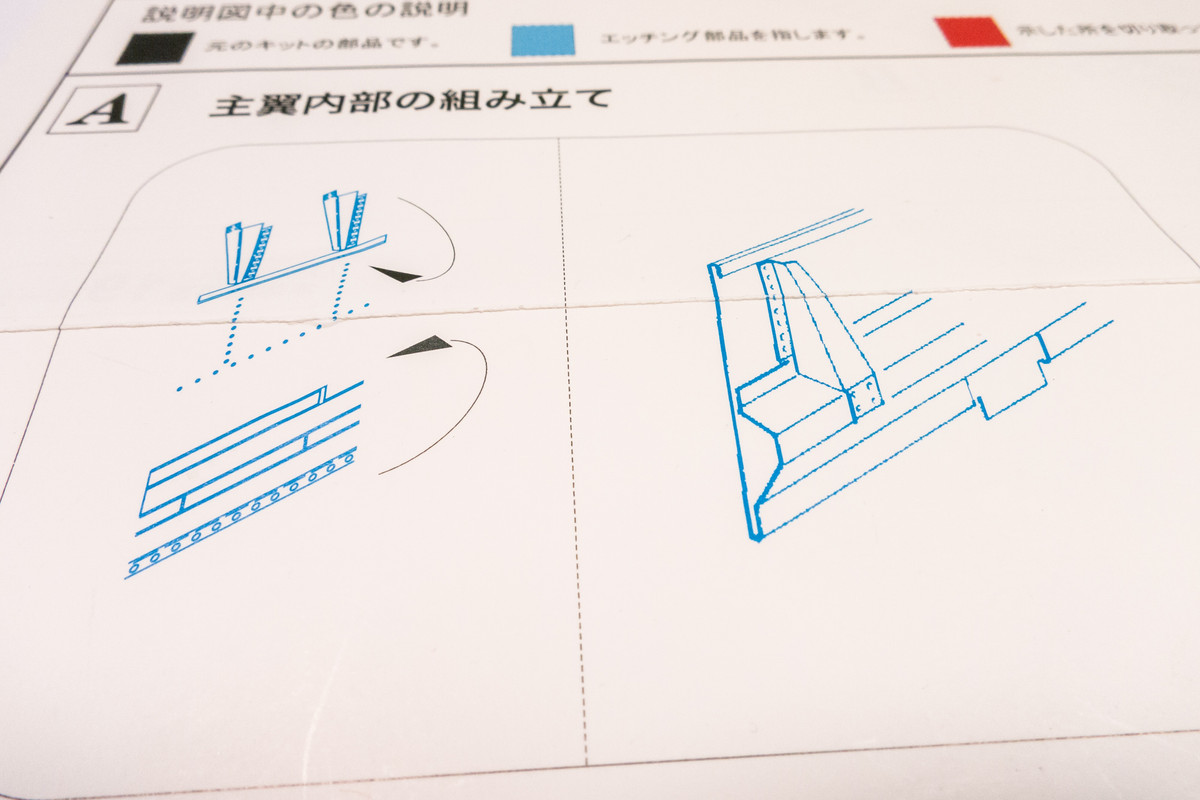
I cut out one of the lower flaps and was expecting to get finished folding at least one of them tonight. The instructions left me dead in my tracks.

How they get from that first image to the next is totally beyond me. That type of complex fold is a mystery given the limited tools I have. It's almost like you require some sort of form to be placed under the length of the flap to ensure the correct and consistent angles? Which is saying, you need to accurately scratchbuild the flaps before you can fold the metal copy. And how on God's green earth can you fold those little spars perfectly square without breaking them off those wisps of metal that they are attached to. I broke off a few on the other flaps and those just needed to placed in the right position without any folding at all. I can just make out the Japanese text above the pic... something like, "please do not contact us if you encounter any problems during assembly, we cannot figure it out either".
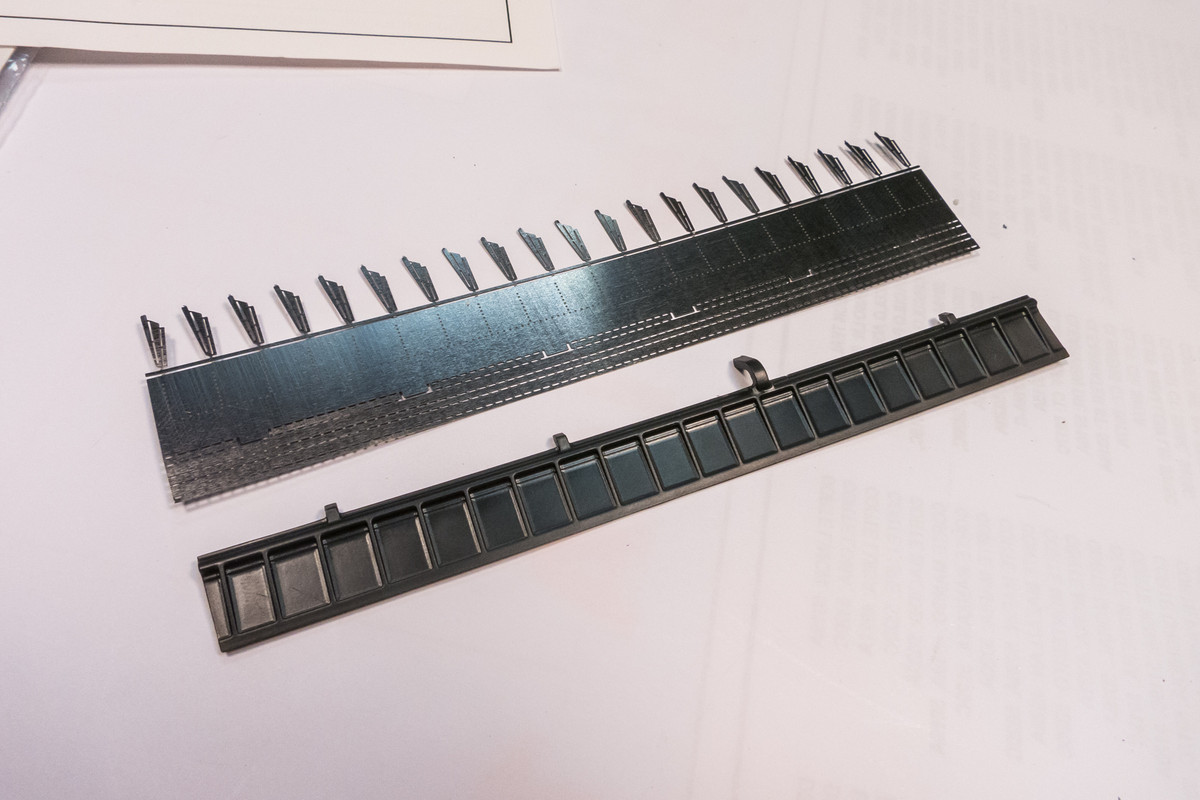
The kit lower flaps are starting to look really good to me. No ejection pin marks!
I cut out one of the lower flaps and was expecting to get finished folding at least one of them tonight. The instructions left me dead in my tracks.
How they get from that first image to the next is totally beyond me. That type of complex fold is a mystery given the limited tools I have. It's almost like you require some sort of form to be placed under the length of the flap to ensure the correct and consistent angles? Which is saying, you need to accurately scratchbuild the flaps before you can fold the metal copy. And how on God's green earth can you fold those little spars perfectly square without breaking them off those wisps of metal that they are attached to. I broke off a few on the other flaps and those just needed to placed in the right position without any folding at all. I can just make out the Japanese text above the pic... something like, "please do not contact us if you encounter any problems during assembly, we cannot figure it out either".
The kit lower flaps are starting to look really good to me. No ejection pin marks!
John aka JKim
-----------<><
-----------<><
-
speedgraflex

- Moderator
- Posts: 11535
- Joined: Fri Feb 10, 2017 11:08 pm
- Contact:
Re: 1/32 Zoukei-Mura Ta152H-1 White 7
Apologies. I saw grey paint and was entranced. As far as the etch folding on the flaps, what I am seeing is (1) fold over the triangular interior ribbing; (2) fold over the opposite edge? That almost seems to cancel each other out. Triangles fit over the long span? Is that made of steel etch? That could be why there are two folds for each triangle after the initial folding. It’s 1 am and I have no idea what is happening; I only know I am not helping.

Make more models!

Re: 1/32 Zoukei-Mura Ta152H-1 White 7
I would work from the bottom up in the first photo. Or maybe cut the flap into two pieces and fold separately? Annealing them first would probably help a lot too
March as one, Don't look back
Odin's sons... Attack!
Unleash hell! Do not repent! Warfare grants us no lament
Let your weapons slash and tear This is no place for fear
Hold the lines! Move as one! In unity our victory's won
Our shields will form a mighty wall
United we shall never fall
Odin's sons... Attack!
Unleash hell! Do not repent! Warfare grants us no lament
Let your weapons slash and tear This is no place for fear
Hold the lines! Move as one! In unity our victory's won
Our shields will form a mighty wall
United we shall never fall

Re: 1/32 Zoukei-Mura Ta152H-1 White 7
You're a braver man than me John - I wouldn't even attempt something like that.
Stuart Templeton 'I may not be good but I'm slow...'
Re: 1/32 Zoukei-Mura Ta152H-1 White 7
John, I expect to be baffled by complx instructions....not expecting you to be baffled1  Your "translation" of the Japanese made me laugh. Thank you! However, I have no doubt you will solve this...one way or the other.
Your "translation" of the Japanese made me laugh. Thank you! However, I have no doubt you will solve this...one way or the other.To make each build less crappy than the last one. Or, put another way, "Better than the last one, not as good as the next one!"..
Re: 1/32 Zoukei-Mura Ta152H-1 White 7
Thanks guys!
My PE folder looks like this...
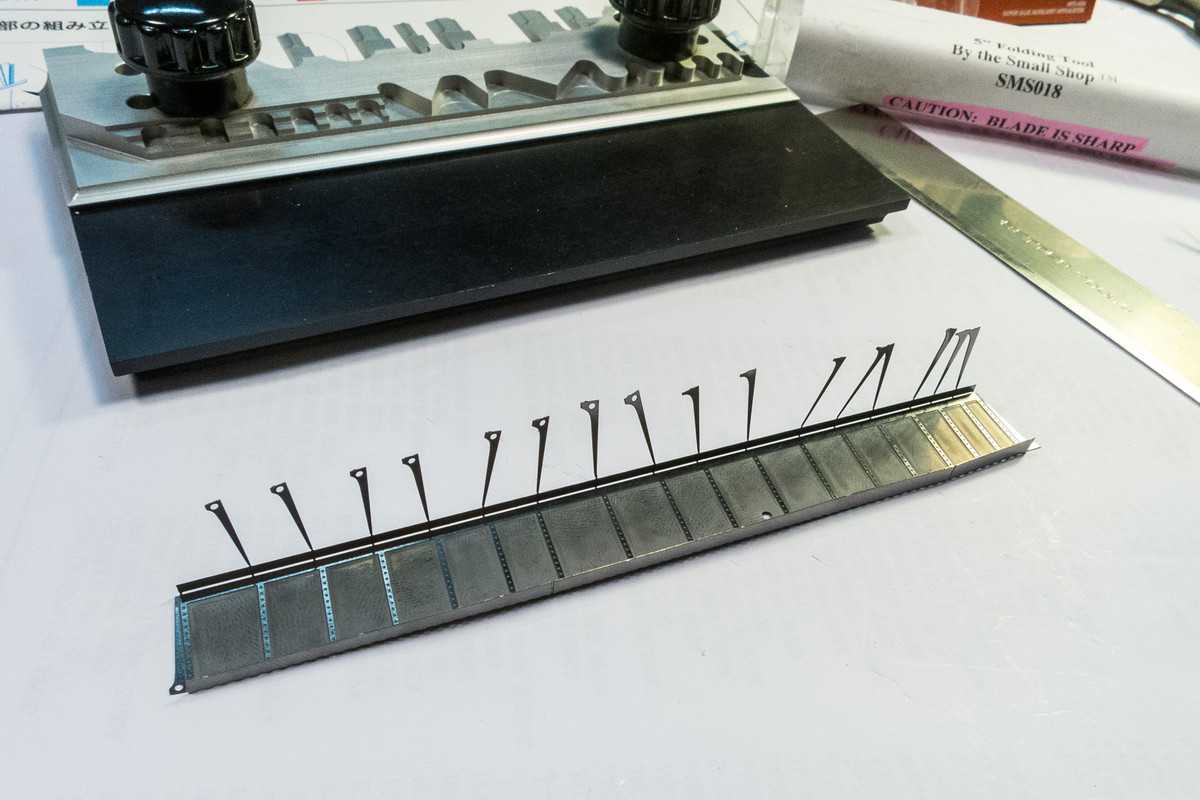
Which means the flap part can only be inserted one way, bottom edge first, due to the screw holders. After I make that first fold, I'm done. At least in terms of using the folding tool on that part of the piece.
Bottom up makes sense. But what is stumping me is what do I do after I make the first fold?Floki wrote:I would work from the bottom up in the first photo. Or maybe cut the flap into two pieces and fold separately? Annealing them first would probably help a lot too
My PE folder looks like this...
Which means the flap part can only be inserted one way, bottom edge first, due to the screw holders. After I make that first fold, I'm done. At least in terms of using the folding tool on that part of the piece.
John aka JKim
-----------<><
-----------<><