Good Man!Modelcrazy wrote:I'm going to make it as an FAA bird.
Modelcrazy's bench production 2022
Re: Modelcrazy's bench production 2020
Stuart Templeton 'I may not be good but I'm slow...'
- Medicman71
- Elite Member
- Posts: 11299
- Joined: Mon Apr 07, 2014 9:32 am
- Location: Houston, Tx
Re: Modelcrazy's bench production 2020
I have that kit as well. I'll be taking notes.Modelcrazy wrote:Thanks Stuart
I'm going to start the 1/48 Kitty Hawk F-35B in a few days. I'm just doing a little research on colors before starting.
Mike
Sponsored by Boeing, Lockheed Martin, Northrop Grumman, Saab, BAE, and Dassault
- Modelcrazy
- Addicted Member
- Posts: 1429
- Joined: Sun Mar 19, 2017 12:01 pm
- Location: Sherman texas
Re: Modelcrazy's bench production 2020
Well Stuart and Mike
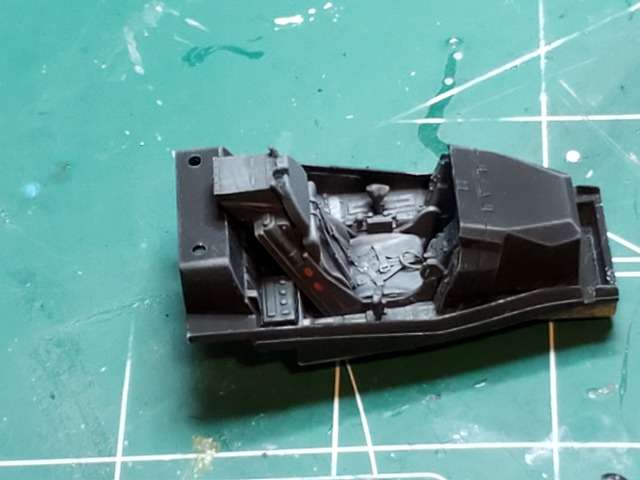
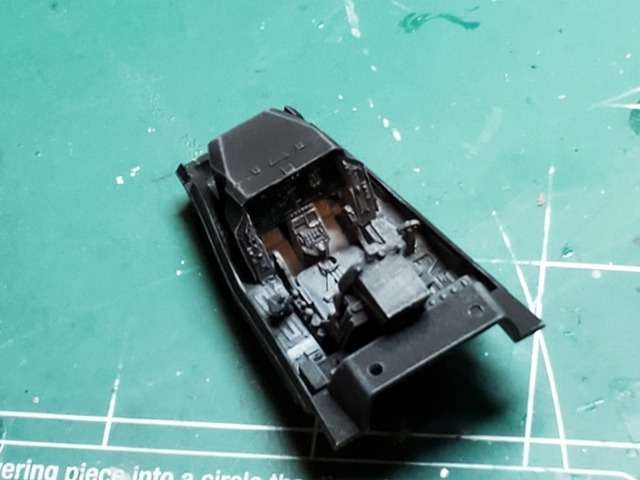
The kit starts with the pit, but there isn't any paint call outs, so I did a little research.


The kit starts with the pit, but there isn't any paint call outs, so I did a little research.


Building a kit from your stash is like cutting the head off a Hydra, two more take it’s place.

https://www.youtube.com/results?search_ ... obby+bench

https://www.youtube.com/results?search_ ... obby+bench
- Modelcrazy
- Addicted Member
- Posts: 1429
- Joined: Sun Mar 19, 2017 12:01 pm
- Location: Sherman texas
Re: Modelcrazy's bench production 2020
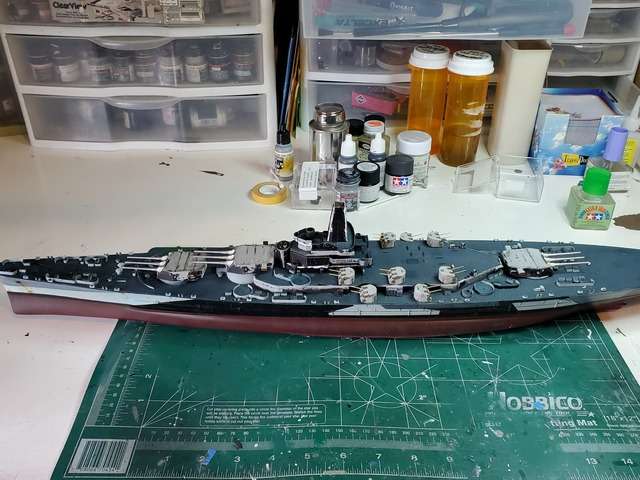
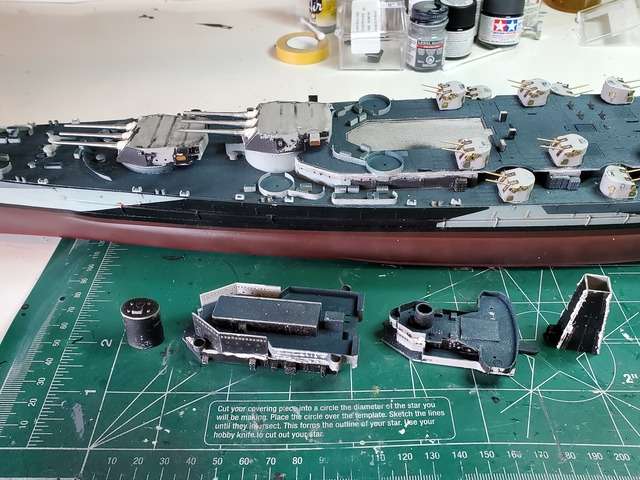
Back on the NC, I'm done with the Main guns and 5"/38 mounts and started on the superstructure. I am filling the bulkhead joins and going to add the PE. The guns are not attached either.


Building a kit from your stash is like cutting the head off a Hydra, two more take it’s place.

https://www.youtube.com/results?search_ ... obby+bench

https://www.youtube.com/results?search_ ... obby+bench
Re: Modelcrazy's bench production 2020
Amazing work!
To make each build less crappy than the last one. Or, put another way, "Better than the last one, not as good as the next one!"..
- Modelcrazy
- Addicted Member
- Posts: 1429
- Joined: Sun Mar 19, 2017 12:01 pm
- Location: Sherman texas
Re: Modelcrazy's bench production 2020
Thanks Lyle
Building a kit from your stash is like cutting the head off a Hydra, two more take it’s place.

https://www.youtube.com/results?search_ ... obby+bench

https://www.youtube.com/results?search_ ... obby+bench
Re: Modelcrazy's bench production 2020
That looks top Notch!
The F-35 cockpit is very nicely done as well - no paint call outs?
Stuart Templeton 'I may not be good but I'm slow...'
- Modelcrazy
- Addicted Member
- Posts: 1429
- Joined: Sun Mar 19, 2017 12:01 pm
- Location: Sherman texas
Re: Modelcrazy's bench production 2020
Thanks Stuart,
No, in fact the only ones I can find is Tire Black and light grey for wheel well interior. I was thinking it's white
I may be wrong. I'll do some more research but it sure looks white to me. The exterior changes from FS-36118, FS-36170 to FS-36176 depending on what uber rivet counter forum you are looking at. The consistence seems to be Have Glass FS-36170 with FS-36270 for the radom.
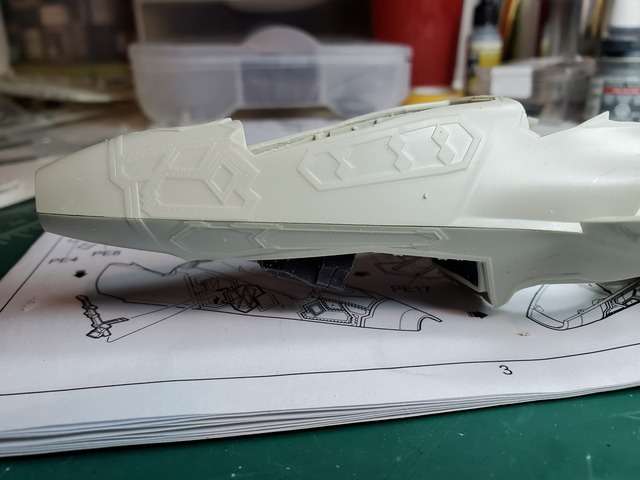
I read where you needed to dry fit the cockpit and nose wheel well sections to the fuse half prior to gluing, I concur. After assembling the wheel well, I stuck the parts together (the instructions have you attach the well and pit together prior to closing the two half's latter) and found trying to get the upper fuse connected to the cockpit was difficult. In fact, my ejection seat broke off during the process but that's OK. I usually don't install the ejection seat until I install the canopy anyway. I temp glued the wheel well in the lower half and snapped the cockpit into the upper half. It's a nice fit so it didn't come out, and aligned the two half's. Yep, the problem I read so much about reveled itself. There's is no wheel well and cockpit clearance so there's a huge gap in the fuse seam. I took my grinder and ground off the cockpit floor 1 mm, maybe a little more and tried again. Still not quite right, There was clearance but the half's still didn't join without some force
. I remembered the tall aligning pins on the wheel well and cut them down. Boom, it fit!
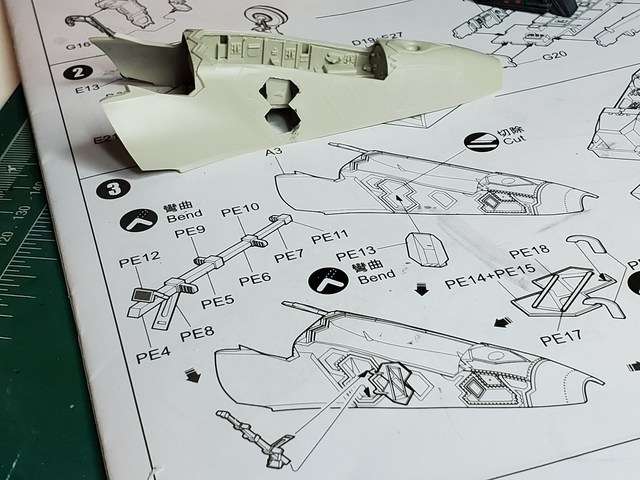
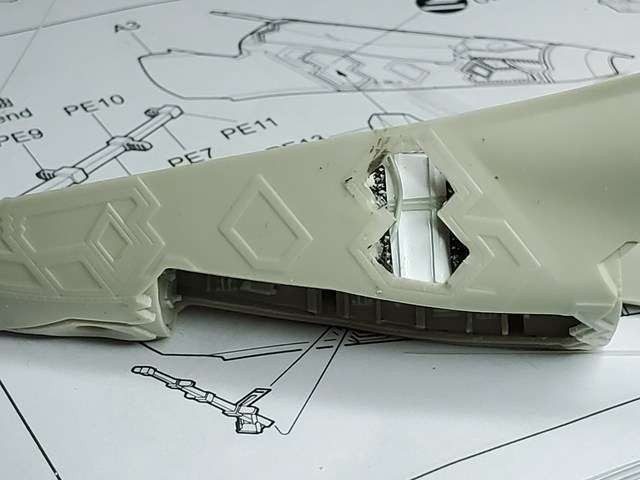
The instructions show a neat little ladder door in PE that can be used along with a PE ladder. This requires the door to be cut out and replaced with the PE part, so after milling this over in my head, in between scenes of Band of Brothers I was bingeing on Prime, I figured "what the heck" everything's going to be open on this bird for the RN fellas to inspect so I'll do it. Back to Google for some more research on the ladder door. I did some scratching, both my head and pieces of sprue, and came up with the best rendition of items I could make out in that little space.
Now on to the engine and driveshaft, the latter I understand is another pain.
The wheel well in the lower fuse assembly.
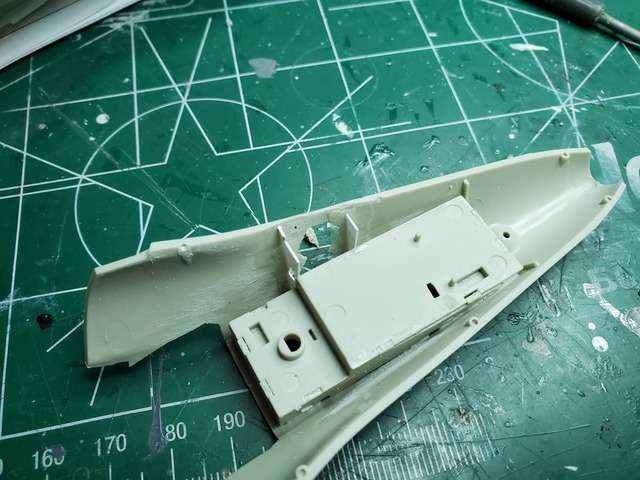
The finished ground down pit assembly in the upper fuse part.

The fit after surgery.
The cut out ladder door and instructions showing such. Not the best instructions. If I was a novice this would seriously confuse me since there doesn't seem to be an option for open or closed.
And finally, my rendition of the interior. the bracing still needs a little work and the RAM tape needs to be re-scored, but otherwise, I'm happy with it. A little paint goes a long way.

No, in fact the only ones I can find is Tire Black and light grey for wheel well interior. I was thinking it's white
I read where you needed to dry fit the cockpit and nose wheel well sections to the fuse half prior to gluing, I concur. After assembling the wheel well, I stuck the parts together (the instructions have you attach the well and pit together prior to closing the two half's latter) and found trying to get the upper fuse connected to the cockpit was difficult. In fact, my ejection seat broke off during the process but that's OK. I usually don't install the ejection seat until I install the canopy anyway. I temp glued the wheel well in the lower half and snapped the cockpit into the upper half. It's a nice fit so it didn't come out, and aligned the two half's. Yep, the problem I read so much about reveled itself. There's is no wheel well and cockpit clearance so there's a huge gap in the fuse seam. I took my grinder and ground off the cockpit floor 1 mm, maybe a little more and tried again. Still not quite right, There was clearance but the half's still didn't join without some force
The instructions show a neat little ladder door in PE that can be used along with a PE ladder. This requires the door to be cut out and replaced with the PE part, so after milling this over in my head, in between scenes of Band of Brothers I was bingeing on Prime, I figured "what the heck" everything's going to be open on this bird for the RN fellas to inspect so I'll do it. Back to Google for some more research on the ladder door. I did some scratching, both my head and pieces of sprue, and came up with the best rendition of items I could make out in that little space.
Now on to the engine and driveshaft, the latter I understand is another pain.
The wheel well in the lower fuse assembly.

The finished ground down pit assembly in the upper fuse part.

The fit after surgery.

The cut out ladder door and instructions showing such. Not the best instructions. If I was a novice this would seriously confuse me since there doesn't seem to be an option for open or closed.

And finally, my rendition of the interior. the bracing still needs a little work and the RAM tape needs to be re-scored, but otherwise, I'm happy with it. A little paint goes a long way.

Building a kit from your stash is like cutting the head off a Hydra, two more take it’s place.

https://www.youtube.com/results?search_ ... obby+bench

https://www.youtube.com/results?search_ ... obby+bench
- Stikpusher
- Moderator
- Posts: 21188
- Joined: Sat Apr 05, 2014 8:37 pm
- Location: Ceti Alpha 5
Re: Modelcrazy's bench production 2020
Man that is one intricate kit! And it sure sounds to be fighting you a bit... 
"Surely I have made my meaning plain? I intend to avenge myself upon you, Admiral. I have deprived your ship of power, and when I swing 'round, I intend to deprive you of your life."
FLSM
FLSM
- Modelcrazy
- Addicted Member
- Posts: 1429
- Joined: Sun Mar 19, 2017 12:01 pm
- Location: Sherman texas
Re: Modelcrazy's bench production 2020
Thanks Stick, from what I understand, after I get past the fan driveshaft it's smooth sailing and turns out to be a nice kit. Kitty Hawk just needs a few tweaks to the instructions and mold. I also understand that Kitty Hawk puts tinted canopy's in the boxing's now. I'll need to tint the canopy I have.
Building a kit from your stash is like cutting the head off a Hydra, two more take it’s place.

https://www.youtube.com/results?search_ ... obby+bench

https://www.youtube.com/results?search_ ... obby+bench