Lyle, it may look like a toilet seat but I wouldn't want be sitting on it when it's flushing
Modelcrazy's bench production 2022
- Modelcrazy
- Addicted Member
- Posts: 1429
- Joined: Sun Mar 19, 2017 12:01 pm
- Location: Sherman texas
Re: Modelcrazy's bench production 2020
Thanks Mike, great photo!
Lyle, it may look like a toilet seat but I wouldn't want be sitting on it when it's flushing
Building a kit from your stash is like cutting the head off a Hydra, two more take it’s place.

https://www.youtube.com/results?search_ ... obby+bench

https://www.youtube.com/results?search_ ... obby+bench
- Medicman71
- Elite Member
- Posts: 11299
- Joined: Mon Apr 07, 2014 9:32 am
- Location: Houston, Tx
Re: Modelcrazy's bench production 2020
No problem! I'm really good at finding pics of modern aircraft so if you need something, just let me know.
Mike
Sponsored by Boeing, Lockheed Martin, Northrop Grumman, Saab, BAE, and Dassault
Re: Modelcrazy's bench production 2020
Bet you woul not need to wipe, huh!?Modelcrazy wrote:Thanks Mike, great photo!
Lyle, it may look like a toilet seat but I wouldn't want be sitting on it when it's flushing
To make each build less crappy than the last one. Or, put another way, "Better than the last one, not as good as the next one!"..
- Modelcrazy
- Addicted Member
- Posts: 1429
- Joined: Sun Mar 19, 2017 12:01 pm
- Location: Sherman texas
Re: Modelcrazy's bench production 2020
Sorry Mike, I answered you on Wed but for some reason it didn't post.
Thank you, I may take you up on that.
Building a kit from your stash is like cutting the head off a Hydra, two more take it’s place.

https://www.youtube.com/results?search_ ... obby+bench

https://www.youtube.com/results?search_ ... obby+bench
- Modelcrazy
- Addicted Member
- Posts: 1429
- Joined: Sun Mar 19, 2017 12:01 pm
- Location: Sherman texas
Re: Modelcrazy's bench production 2020
F-35 long update, lots of pictures.
So, after working on the F-35 for the past few days, I found that there is a lot more than just a fan driveshaft issue. Anyone planning on building this kit take note. It has nice detail and looks to be a good kit when finished, there are just a few fit issues at the beginning and middle of the build. The cockpit and nose gear well I already mentioned.
After working on the pit and well. The next step is the engine, fan and intake assembly. I did not go step by step here. Assemble the sub-assemblies and dry fit everything before gluing. This is what I ran into.
My first step was to make the assemblies. The engine, exhaust duct, and the intake ducting were easy enough but when I made the fan box assembly, I found the lower fan was too large to close the shroud. I filed the fan part outside until the shroud would close.
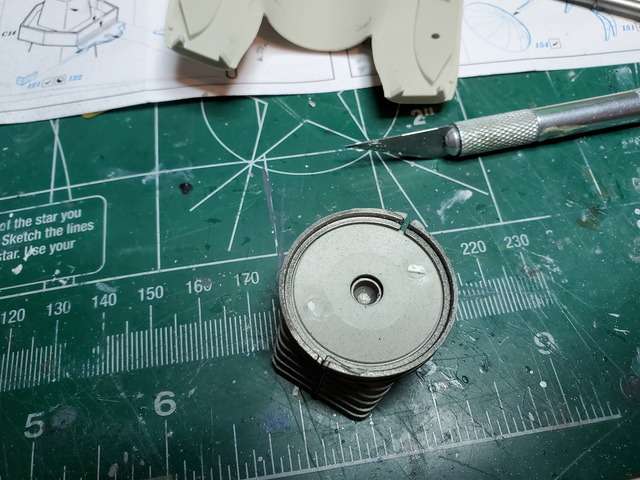
While attaching the upper intake fan and shroud to the fan case I saw there are no aligning pins or snug fit. The only aligning tab was on the upper fuselage. So now knowing the orientation, I sat the shroud on the case and aligned one injection pin mark with the case seam.
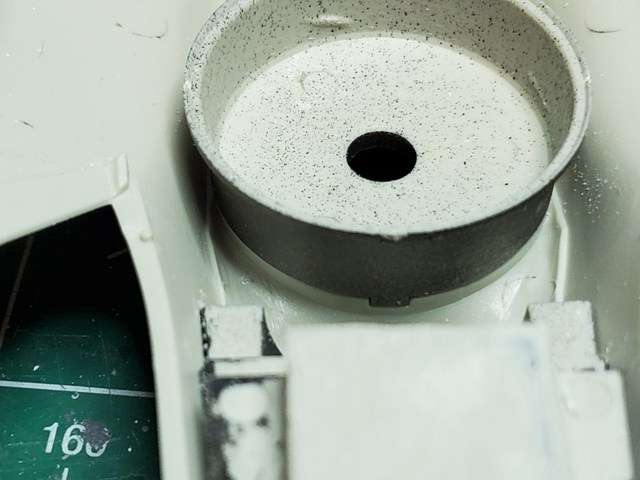
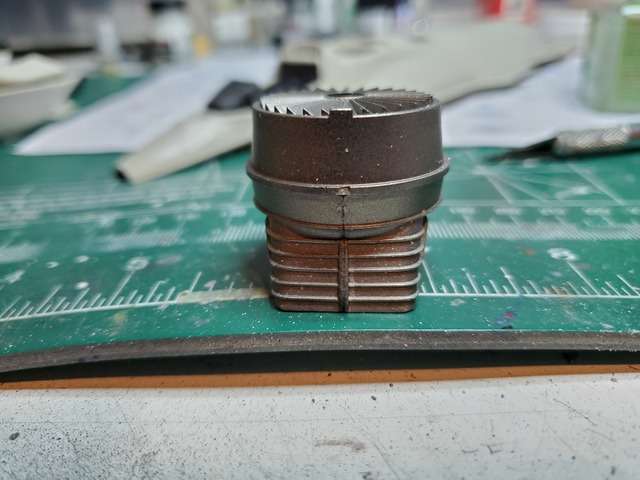
Next, the driveshaft is too small, or the transmission shaft is too large for them to fit so I filed the transmission shaft, then I could attach the driveshaft. Notice the fan box is assembled. I had to disassemble it to install the lower fan. My fault.

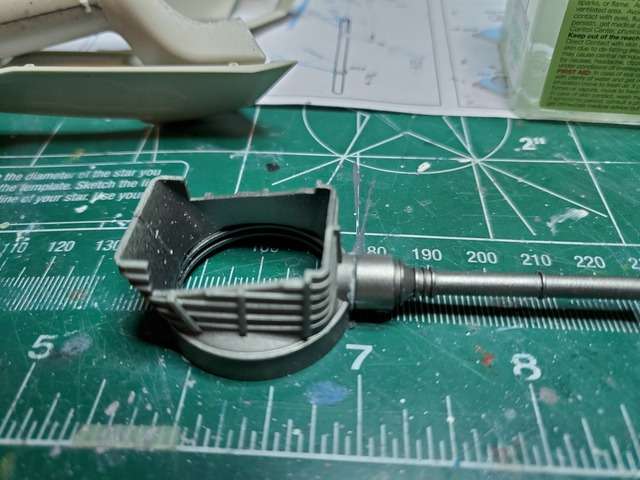
The next issue was the intake assembly and engine assembly. They are too short for the fuse intake opening. The engine is attached to the lower and upper fuse using pins but the intake will not reach the fuse opening with them attached. So, since this join won’t be seen I butted the front of the intake to the fuse intake opening and went with it.
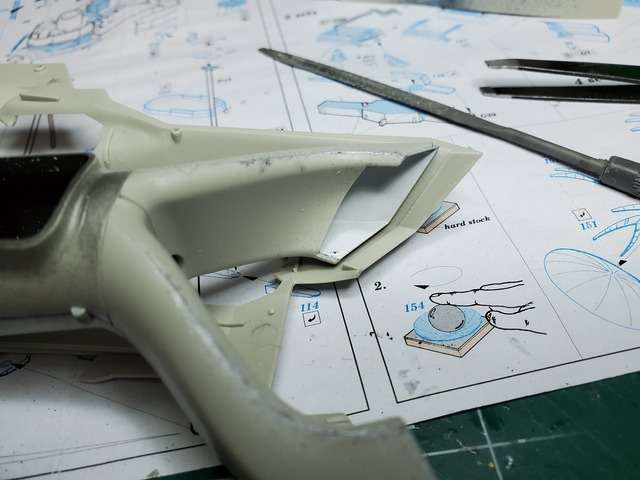

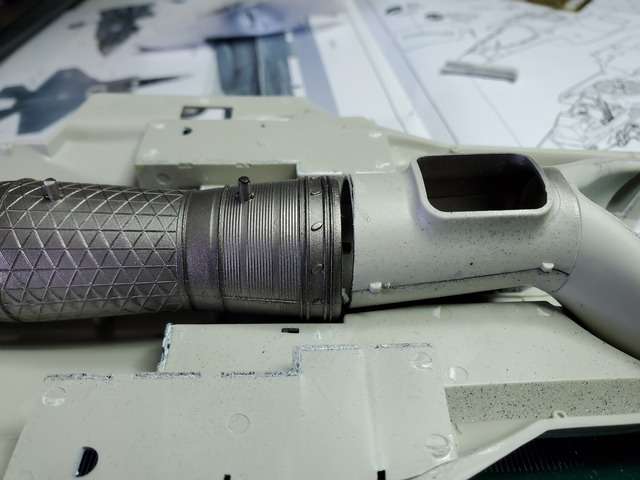
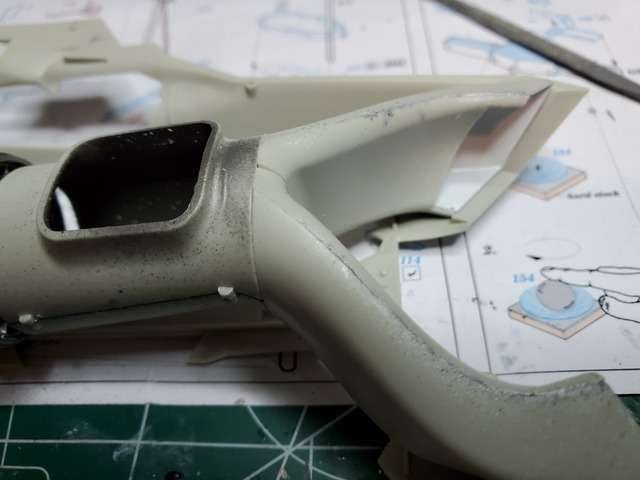
Filled and sanded
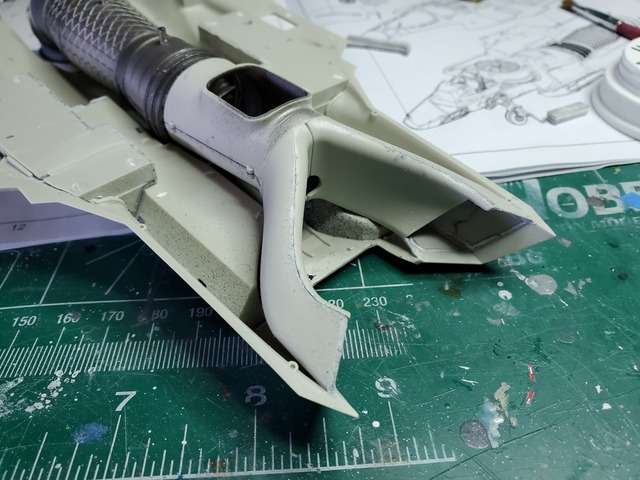
Next was the exhaust nozzle. There are PE parts for this, but they are not called out in the instructions and the PE tree is numbered incorrectly. The nozzle parts are labeled 1, 2 and 3 on the tree, but 1, 2 and 3 are identified as canopy parts in the instructions. The nozzle PE didn’t match the nozzle anyway, so I didn’t install them. Perhaps they are for the A or C versions.
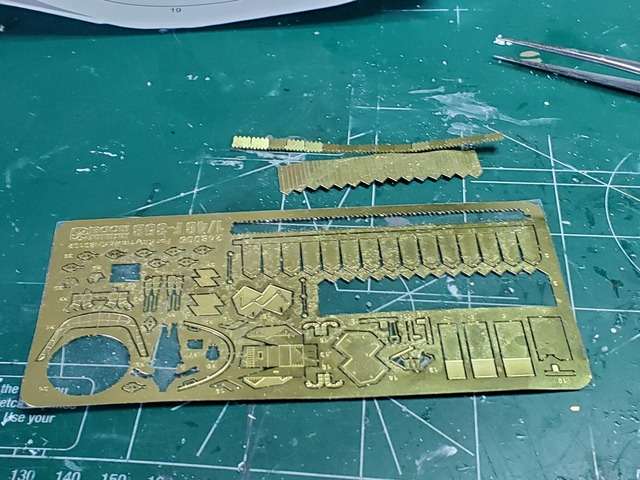
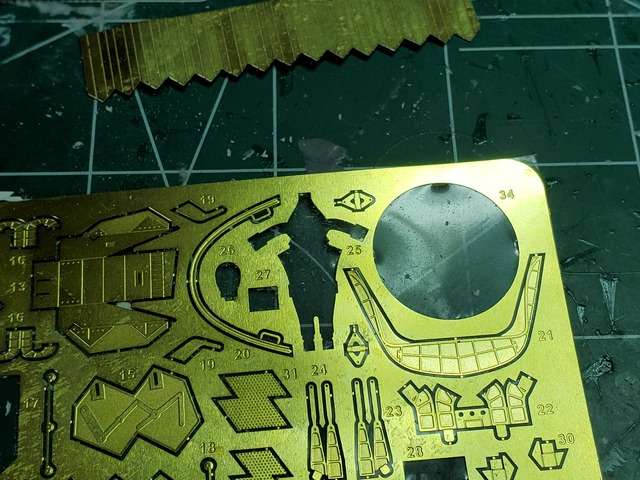
While the intake filler was drying, I worked on the wings and stabs. Again, fit issues. The stab parts needed filing to fit but the wing, slats and flaps went together very well. So, figuring this could not be this smooth I dry fit the wings to the lower fuse and Ha, there it was. The locating pins are receivers on both the wing and fuse, so I cut off the receivers on the fuse so the wing would fit flush. It still wasn’t completely flush, so a little sanding was in order to the fuse wing attachment. Now it’s just right.
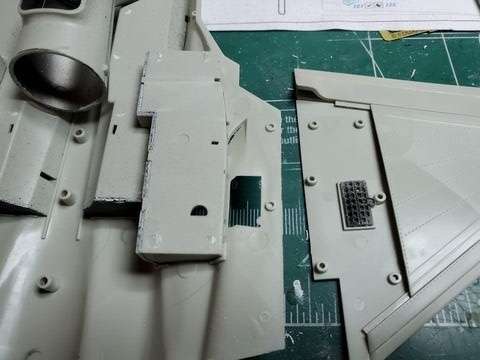

The weapons bays and main gear wells assembled and installed very nicely. Very smooth.
The last thing I did this weekend, before the wife got on to me about spending too much time away, was install all the engine intake and exhaust parts in the lower fuse and glue both halves together, Now again, this step is not even close to the instruction sequence, but I can install the fan just before I attach the lower nose to the completed fuse, which is not in sequence either. I spread some filler on the intake and upper fuse opening and put it aside until tomorrow.
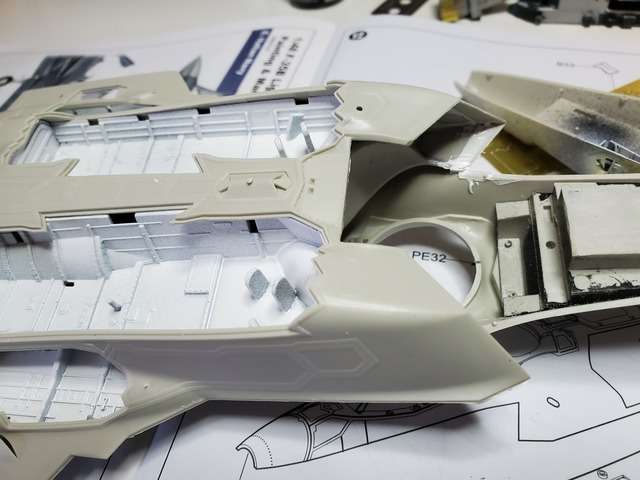
Oh goody, the intake lines up, yea!
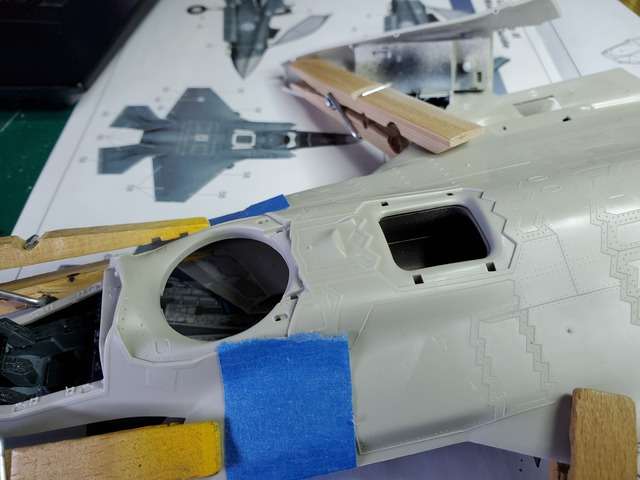
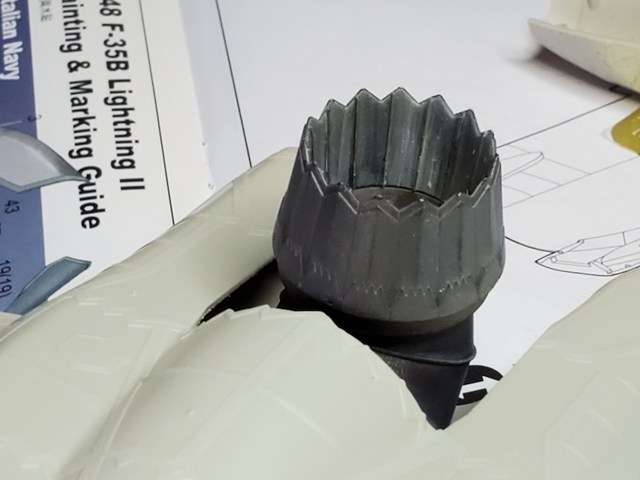
The fan box, transmission, shroud, driveshaft and vanes

This is a fun kit in the way that figuring out a puzzle is fun. It’s not for the beginner. It would have a beginner throwing it against the wall PO’ed for spending the money and swearing off scale modeling for good. For the large majority of the forum members, it is a nice change of pace from the shake and bake Hasegawa or Tamaya kit. This one makes you think and exercise some modeling skills.
I think its smooth sailing from now on. LOL, who am I kidding.
More to come
So, after working on the F-35 for the past few days, I found that there is a lot more than just a fan driveshaft issue. Anyone planning on building this kit take note. It has nice detail and looks to be a good kit when finished, there are just a few fit issues at the beginning and middle of the build. The cockpit and nose gear well I already mentioned.
After working on the pit and well. The next step is the engine, fan and intake assembly. I did not go step by step here. Assemble the sub-assemblies and dry fit everything before gluing. This is what I ran into.
My first step was to make the assemblies. The engine, exhaust duct, and the intake ducting were easy enough but when I made the fan box assembly, I found the lower fan was too large to close the shroud. I filed the fan part outside until the shroud would close.

While attaching the upper intake fan and shroud to the fan case I saw there are no aligning pins or snug fit. The only aligning tab was on the upper fuselage. So now knowing the orientation, I sat the shroud on the case and aligned one injection pin mark with the case seam.


Next, the driveshaft is too small, or the transmission shaft is too large for them to fit so I filed the transmission shaft, then I could attach the driveshaft. Notice the fan box is assembled. I had to disassemble it to install the lower fan. My fault.


The next issue was the intake assembly and engine assembly. They are too short for the fuse intake opening. The engine is attached to the lower and upper fuse using pins but the intake will not reach the fuse opening with them attached. So, since this join won’t be seen I butted the front of the intake to the fuse intake opening and went with it.


Filled and sanded

Next was the exhaust nozzle. There are PE parts for this, but they are not called out in the instructions and the PE tree is numbered incorrectly. The nozzle parts are labeled 1, 2 and 3 on the tree, but 1, 2 and 3 are identified as canopy parts in the instructions. The nozzle PE didn’t match the nozzle anyway, so I didn’t install them. Perhaps they are for the A or C versions.


While the intake filler was drying, I worked on the wings and stabs. Again, fit issues. The stab parts needed filing to fit but the wing, slats and flaps went together very well. So, figuring this could not be this smooth I dry fit the wings to the lower fuse and Ha, there it was. The locating pins are receivers on both the wing and fuse, so I cut off the receivers on the fuse so the wing would fit flush. It still wasn’t completely flush, so a little sanding was in order to the fuse wing attachment. Now it’s just right.


The weapons bays and main gear wells assembled and installed very nicely. Very smooth.
The last thing I did this weekend, before the wife got on to me about spending too much time away, was install all the engine intake and exhaust parts in the lower fuse and glue both halves together, Now again, this step is not even close to the instruction sequence, but I can install the fan just before I attach the lower nose to the completed fuse, which is not in sequence either. I spread some filler on the intake and upper fuse opening and put it aside until tomorrow.

Oh goody, the intake lines up, yea!


The fan box, transmission, shroud, driveshaft and vanes

This is a fun kit in the way that figuring out a puzzle is fun. It’s not for the beginner. It would have a beginner throwing it against the wall PO’ed for spending the money and swearing off scale modeling for good. For the large majority of the forum members, it is a nice change of pace from the shake and bake Hasegawa or Tamaya kit. This one makes you think and exercise some modeling skills.
I think its smooth sailing from now on. LOL, who am I kidding.
More to come

Building a kit from your stash is like cutting the head off a Hydra, two more take it’s place.

https://www.youtube.com/results?search_ ... obby+bench

https://www.youtube.com/results?search_ ... obby+bench
Re: Modelcrazy's bench production 2020
Wow, that's a lot to correct, it looks good in the end. Hope you don't run into anymore problems with it.
March as one, Don't look back
Odin's sons... Attack!
Unleash hell! Do not repent! Warfare grants us no lament
Let your weapons slash and tear This is no place for fear
Hold the lines! Move as one! In unity our victory's won
Our shields will form a mighty wall
United we shall never fall
Odin's sons... Attack!
Unleash hell! Do not repent! Warfare grants us no lament
Let your weapons slash and tear This is no place for fear
Hold the lines! Move as one! In unity our victory's won
Our shields will form a mighty wall
United we shall never fall
- Modelcrazy
- Addicted Member
- Posts: 1429
- Joined: Sun Mar 19, 2017 12:01 pm
- Location: Sherman texas
Re: Modelcrazy's bench production 2020
Thanks Floki.
Mike, I'm calling a friend. I need pics of the weapons bay and wheel wells for a painting guide. Nothing is called out in the instructions......at all.....for anything except tires.Medicman71 wrote:No problem! I'm really good at finding pics of modern aircraft so if you need something, just let me know.
Building a kit from your stash is like cutting the head off a Hydra, two more take it’s place.

https://www.youtube.com/results?search_ ... obby+bench

https://www.youtube.com/results?search_ ... obby+bench
- Stikpusher
- Moderator
- Posts: 21188
- Joined: Sat Apr 05, 2014 8:37 pm
- Location: Ceti Alpha 5
Re: Modelcrazy's bench production 2020
On modern US aircraft those areas are usually gloss white. Fluid lines may or may not be painted white or left bare metal with color coded tabs to indicate the lines purpose. Flexible lines may be braided metallic or rubber.
"Surely I have made my meaning plain? I intend to avenge myself upon you, Admiral. I have deprived your ship of power, and when I swing 'round, I intend to deprive you of your life."
FLSM
FLSM
- Modelcrazy
- Addicted Member
- Posts: 1429
- Joined: Sun Mar 19, 2017 12:01 pm
- Location: Sherman texas
Re: Modelcrazy's bench production 2020
Thanks Stick, I'd also like to add, somewhat, the lines and hoses.
Building a kit from your stash is like cutting the head off a Hydra, two more take it’s place.

https://www.youtube.com/results?search_ ... obby+bench

https://www.youtube.com/results?search_ ... obby+bench
- Stikpusher
- Moderator
- Posts: 21188
- Joined: Sat Apr 05, 2014 8:37 pm
- Location: Ceti Alpha 5
Re: Modelcrazy's bench production 2020
"Surely I have made my meaning plain? I intend to avenge myself upon you, Admiral. I have deprived your ship of power, and when I swing 'round, I intend to deprive you of your life."
FLSM
FLSM


