
Jo-Han Dyno Don Maverick-More Engine Detail-12/17
-
tempestjohnny

- Elite Member
- Posts: 3826
- Joined: Sat Oct 15, 2016 4:51 am
- Location: Naples. FL
Re: Jo-Han Dyno Don Maverick-Dash Complete-04/06
This car has three pedals. Does that mean it's got one of those stick things that you have to move when you go fast? Ugh I suppose its got those cranky things for the windows too?
-
Stikpusher

- Moderator
- Posts: 21386
- Joined: Sat Apr 05, 2014 8:37 pm
- Location: Ceti Alpha 5
Re: Jo-Han Dyno Don Maverick-Dash Complete-04/06

"Surely I have made my meaning plain? I intend to avenge myself upon you, Admiral. I have deprived your ship of power, and when I swing 'round, I intend to deprive you of your life."
FLSM
FLSM

Re: Jo-Han Dyno Don Maverick-Dash Complete-04/06
Skilled drivers drag racing while rowing the gears. Never lift!
https://youtu.be/YHgjfKj07Ds
https://youtu.be/YHgjfKj07Ds
Thanks,
John
John

Re: Jo-Han Dyno Don Maverick-Dash Complete-04/06
Cool!
To make each build less crappy than the last one. Or, put another way, "Better than the last one, not as good as the next one!"..
-
mustang1989

- Moderator
- Posts: 5044
- Joined: Tue Mar 18, 2014 8:35 pm
Re: Jo-Han Dyno Don Maverick-Dash Complete-04/06
You guys are too much.
Well I got some more done on her this week. I cut the rear and two side windows out of thin clear styrene and decaled the side windows up with racing stickers. Just waiting on those to dry so I can dunk 'em in some Future so I should be going in with those tomorrow it looks like.
Then came the moment I've been waiting for at the rear of the car. Upon close inspection of the deck lid you can see some lock studs, quick release pins and cables at the rear most corners of the lid. I received my lock pin set two days ago so I was able to get some progress done on that.
Reference shot:
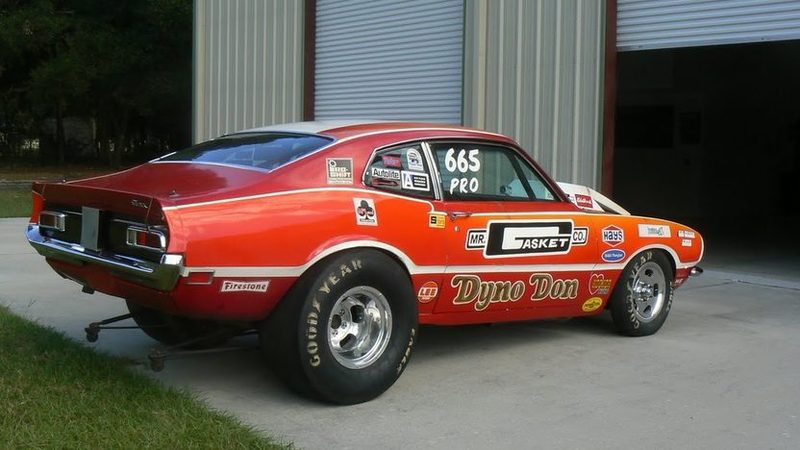
Progress so far. Still have to dot the 4 spots on each plate to simulate screws with some Molotow and add the cables later but here we are for now:

Well I got some more done on her this week. I cut the rear and two side windows out of thin clear styrene and decaled the side windows up with racing stickers. Just waiting on those to dry so I can dunk 'em in some Future so I should be going in with those tomorrow it looks like.
Then came the moment I've been waiting for at the rear of the car. Upon close inspection of the deck lid you can see some lock studs, quick release pins and cables at the rear most corners of the lid. I received my lock pin set two days ago so I was able to get some progress done on that.
Reference shot:
Progress so far. Still have to dot the 4 spots on each plate to simulate screws with some Molotow and add the cables later but here we are for now:
-
Stikpusher
- Moderator
- Posts: 21386
- Joined: Sat Apr 05, 2014 8:37 pm
- Location: Ceti Alpha 5
Re: Jo-Han Dyno Don Maverick-Deck Lid Upgrades-04/09

Love those lock pins!
"Surely I have made my meaning plain? I intend to avenge myself upon you, Admiral. I have deprived your ship of power, and when I swing 'round, I intend to deprive you of your life."
FLSM
FLSM
-
mustang1989
- Moderator
- Posts: 5044
- Joined: Tue Mar 18, 2014 8:35 pm
Re: Jo-Han Dyno Don Maverick-Deck Lid Upgrades-04/09
Thanks Carlos. Couldn't help myself. I saw a set of these installed on a Mustang build at the last show that I went to and it looked great on that build.
-
Handiabled
- Master Member
- Posts: 591
- Joined: Sat Mar 15, 2014 7:13 am
Re: Jo-Han Dyno Don Maverick-Deck Lid Upgrades-04/09
Pins look like the real deal! (except for the inevitable paint being scratched like crazy) For the mods and paint job on this, you are really flying along !
-
mustang1989
- Moderator
- Posts: 5044
- Joined: Tue Mar 18, 2014 8:35 pm
Re: Jo-Han Dyno Don Maverick-Deck Lid Upgrades-04/09
Thanks Brent! I don't know about flying along but I sure appreciate the comments bud.
-
mustang1989
- Moderator
- Posts: 5044
- Joined: Tue Mar 18, 2014 8:35 pm
Re: Jo-Han Dyno Don Maverick-Deck Lid Upgrades-04/09
You know fellas.....every once in a while you have to negotiate a TRUE hurdle in modeling. Sometimes it's paint, sometimes it's fit and sometimes it's things like I've been going through for the past week.....the assembly process. I've been building models for a long time and lemme tell ya.....nothing....I mean NOTHING has tested my patience and my abilities as a modeler as much as this aftermarket Liberty shifter from Futureattraction. To put it lightly...this shifter looks absolutely fantastic after it's all been put together. But therein lies the hurdle.....the assembly. At 26 pieces it is one of the most intricate PE items that I have taken on yet. I kid you not....I've got every bit of 7 hours wrapped up in this thing. I had half of it pieced together one morning after spending an hour + on it and the very next day upon picking it up to continue......it all came apart.  Yeah....stuff like that and then being under the optivisor the whole time.
  Eyes hurt...got a headache...got pissed off......contemplated throwing stuff and I think I made up new curse words along the way
  . Feel free to contact me for the updated curse word list.
I've still got to cut that one long pin off ( I'm leaving it in place to be able to work with it for shift rods install) and have just a little clean up left to go as far as glue smears but a little thinner and that'll go away. I felt a TRUE sense of accomplishment when I got up from the bench this morning and wanted to show that to you all.
The Liberty Shifter:
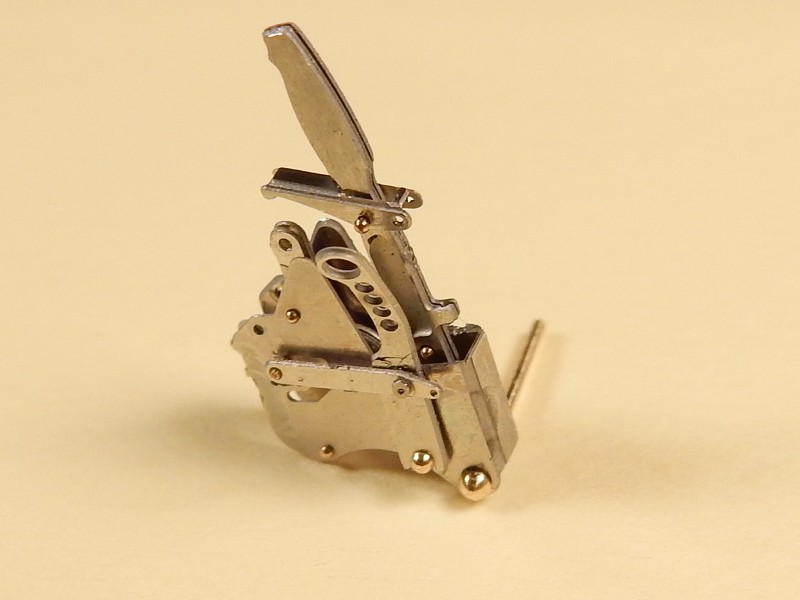
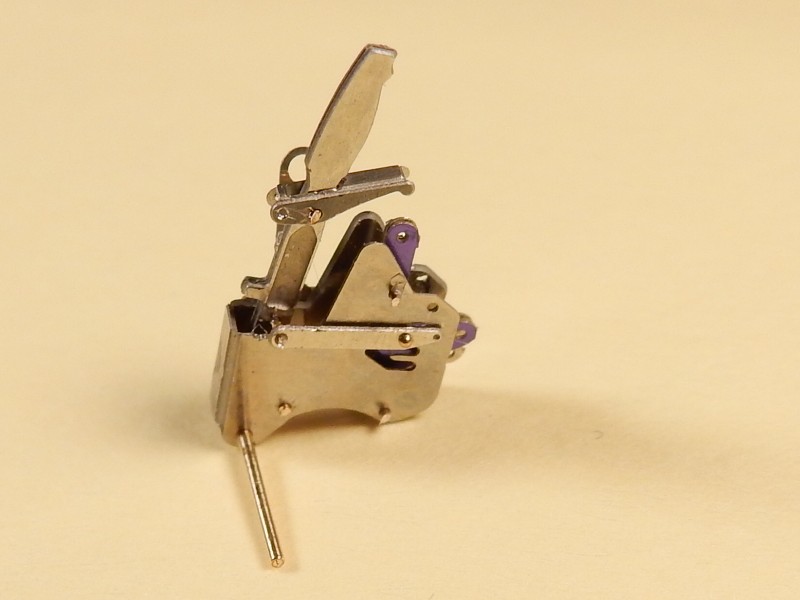
and to show you just how small this is
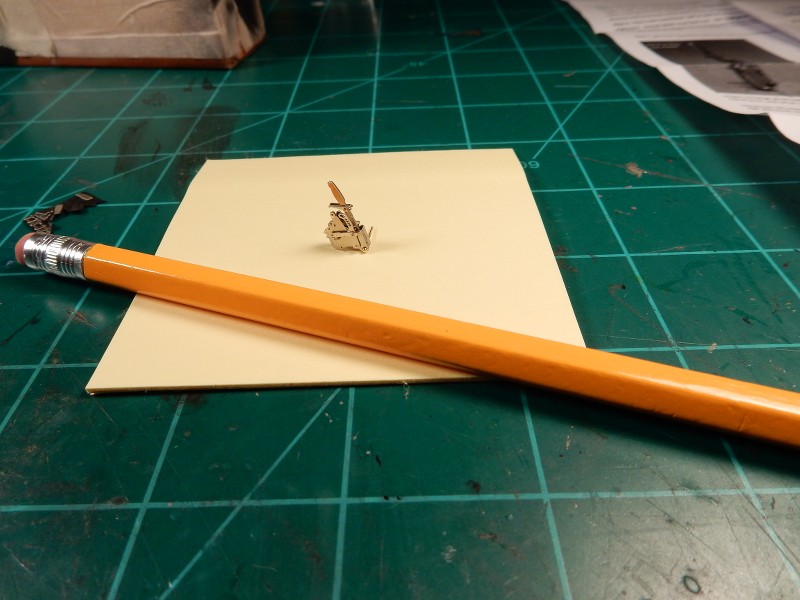
Yeah....stuff like that and then being under the optivisor the whole time. Eyes hurt...got a headache...got pissed off......contemplated throwing stuff and I think I made up new curse words along the way . Feel free to contact me for the updated curse word list. I've still got to cut that one long pin off ( I'm leaving it in place to be able to work with it for shift rods install) and have just a little clean up left to go as far as glue smears but a little thinner and that'll go away. I felt a TRUE sense of accomplishment when I got up from the bench this morning and wanted to show that to you all.
The Liberty Shifter:
and to show you just how small this is