

Grumman TBM-3 Avenger, 1/48, Acc. Min.
Re: Grumman TBM-3 Avenger, 1/48, Acc. Min.
I hate it when the airbag goes off....
To make each build less crappy than the last one. Or, put another way, "Better than the last one, not as good as the next one!"..
-
speedgraflex

- Moderator
- Posts: 11534
- Joined: Fri Feb 10, 2017 11:08 pm
- Contact:
Re: Grumman TBM-3 Avenger, 1/48, Acc. Min.
TBM-3 Exhaust Staining Step by Step
Tools + Materials: 1 wood pencil, 1 brown artist chalk, 1 8-1/2 x 11 sheet of paper, Tamiya tape (any size), 180-200 grit sanding paper, cuticle scissors.
Step 1: Using the edge of your work bench, fold and tear the paper in half, then in quarters. This will leave rough edges instead of smooth. Take one of the quarter sections, fold in half and tear that as well. Mark as port and starboard masks for the exhaust stains. Identifying the masks is important for keeping track of each one as you want the two exhaust stains to be unique to each port.
Step 2: Using the pencil, punch a hole representing the circular stain through the port masking paper. Flip the mask over and use the cuticle scissors to trim the edges around the opening smoother. Nothing here should be perfectly round or smooth, however nothing here should be too rough either. Since you are working with graphite you can always reduce the amount of staining later but the most natural effect will be the one you first get. Repeat with the other side.
Step 3: Locate and attach both port and starboard masks. Use scissors to trim masks to a manageable size. You want a tighter fit here. Tape in place. Set aside.
Step 4: Take the largest piece of paper, fold in half sharply. Unfold. Grind the pencil tip into the “V” to get a pile of graphite. Not a big pile, but enough for adding layers to the exhaust staining to represent multiple start ups. Set aside. Repeat with the brown chalk (this method comes from John Kim who grinds his chalks into powder).
Step 5: Clean your hands and bench. Adjust a lamp to best illuminate the work area. A key step working with graphite is always clean hands.
Step 6: Using the graphite “applicator” from step 4, sprinkle graphite into the first opening. Not a lot, just enough to cover the opening. Use a finger tip to push down the graphite very gently. Do not embed the graphite! Keep it on top of the surface the way exhaust sits. I would then invert the surface to let the excess fall to another piece of scrap paper. I would repeat this process at least twice. Step away then return to look at what is happening each time. You should see the difference between layers one and two. Then take the graphite and do the other side the same way.
Step 7: Apply brown chalk the same way. A very very very very light layer.
Tools + Materials: 1 wood pencil, 1 brown artist chalk, 1 8-1/2 x 11 sheet of paper, Tamiya tape (any size), 180-200 grit sanding paper, cuticle scissors.
Step 1: Using the edge of your work bench, fold and tear the paper in half, then in quarters. This will leave rough edges instead of smooth. Take one of the quarter sections, fold in half and tear that as well. Mark as port and starboard masks for the exhaust stains. Identifying the masks is important for keeping track of each one as you want the two exhaust stains to be unique to each port.
Step 2: Using the pencil, punch a hole representing the circular stain through the port masking paper. Flip the mask over and use the cuticle scissors to trim the edges around the opening smoother. Nothing here should be perfectly round or smooth, however nothing here should be too rough either. Since you are working with graphite you can always reduce the amount of staining later but the most natural effect will be the one you first get. Repeat with the other side.
Step 3: Locate and attach both port and starboard masks. Use scissors to trim masks to a manageable size. You want a tighter fit here. Tape in place. Set aside.
Step 4: Take the largest piece of paper, fold in half sharply. Unfold. Grind the pencil tip into the “V” to get a pile of graphite. Not a big pile, but enough for adding layers to the exhaust staining to represent multiple start ups. Set aside. Repeat with the brown chalk (this method comes from John Kim who grinds his chalks into powder).
Step 5: Clean your hands and bench. Adjust a lamp to best illuminate the work area. A key step working with graphite is always clean hands.
Step 6: Using the graphite “applicator” from step 4, sprinkle graphite into the first opening. Not a lot, just enough to cover the opening. Use a finger tip to push down the graphite very gently. Do not embed the graphite! Keep it on top of the surface the way exhaust sits. I would then invert the surface to let the excess fall to another piece of scrap paper. I would repeat this process at least twice. Step away then return to look at what is happening each time. You should see the difference between layers one and two. Then take the graphite and do the other side the same way.
Step 7: Apply brown chalk the same way. A very very very very light layer.
Make more models!
Re: Grumman TBM-3 Avenger, 1/48, Acc. Min.
Wow. I think even I can follow that advice! Thank you so much.
To make each build less crappy than the last one. Or, put another way, "Better than the last one, not as good as the next one!"..
-
speedgraflex
- Moderator
- Posts: 11534
- Joined: Fri Feb 10, 2017 11:08 pm
- Contact:
Re: Grumman TBM-3 Avenger, 1/48, Acc. Min.
Mask location
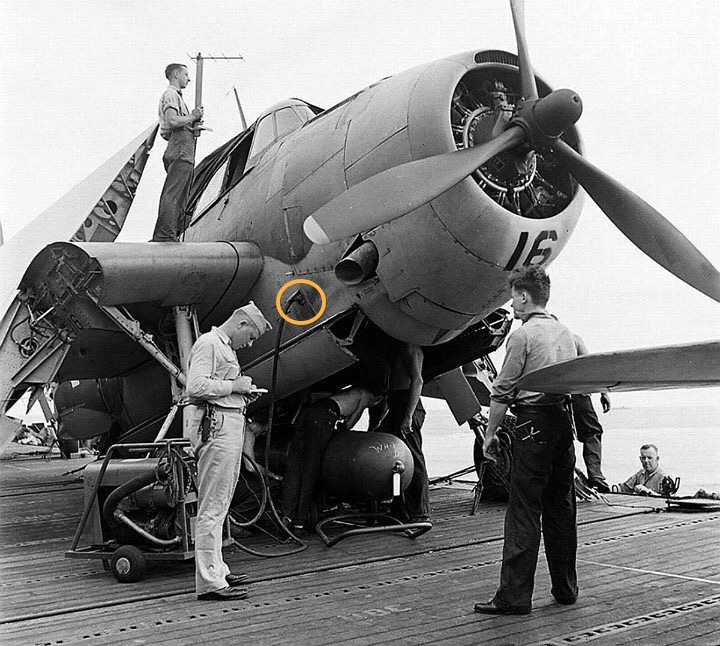
The final step - would be to take a small clean and dry sable brush with a point on it and after you remove the masks you eyeball directional feathering away from the exhaust itself. You can add graphite at this point but do so very lightly. Since both exhausts stand proud of the fuselage, you see the staining further back from each one!
The final step - would be to take a small clean and dry sable brush with a point on it and after you remove the masks you eyeball directional feathering away from the exhaust itself. You can add graphite at this point but do so very lightly. Since both exhausts stand proud of the fuselage, you see the staining further back from each one!
Make more models!
-
speedgraflex
- Moderator
- Posts: 11534
- Joined: Fri Feb 10, 2017 11:08 pm
- Contact:
Re: Grumman TBM-3 Avenger, 1/48, Acc. Min.
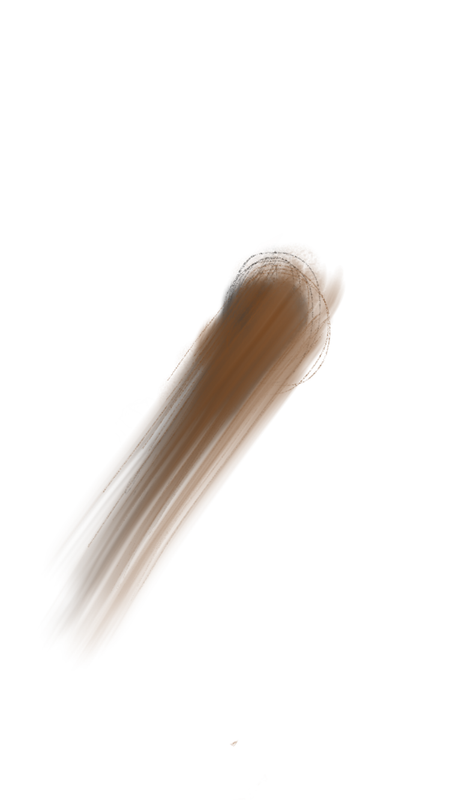
I hope this helps, Lyle. The brown chalk is essentially to give the feeling of the fuel mixture itself, and I believe this will add that character. I use a Flat Clear to protect graphite, but I know others here use Future polish first then a clear follow up.LyleW wrote:Wow. I think even I can follow that advice! Thank you so much.
Make more models!
Re: Grumman TBM-3 Avenger, 1/48, Acc. Min.
Got some primer on her.

To make each build less crappy than the last one. Or, put another way, "Better than the last one, not as good as the next one!"..
-
speedgraflex
- Moderator
- Posts: 11534
- Joined: Fri Feb 10, 2017 11:08 pm
- Contact:

Re: Grumman TBM-3 Avenger, 1/48, Acc. Min.
Thank you! I'm here all weekend! Now, time to go eat some sardines in mustard sauce with crackers.speedgraflex wrote:
To make each build less crappy than the last one. Or, put another way, "Better than the last one, not as good as the next one!"..
-
speedgraflex
- Moderator
- Posts: 11534
- Joined: Fri Feb 10, 2017 11:08 pm
- Contact:
Re: Grumman TBM-3 Avenger, 1/48, Acc. Min.
I am making eggs and onions for breakfast. I am not much of a cook, Lyle—not the way you are! Eggs are cheap and I can make those. I boiled some water, too, for tea. Not eggs. Although I could make some hard boiled eggs later.
Make more models!
Re: Grumman TBM-3 Avenger, 1/48, Acc. Min.
Cooking is easy. Making it edible can be a challenge at times! Last night was frozen fish sandwich patties and tater tots! I like eggs just about any way. Get a box grater and a bag of potatoes. Peel, grate cook in a skillet with butter, you have hash browns!
Can I get your recipe for boiled water?
Can I get your recipe for boiled water?
To make each build less crappy than the last one. Or, put another way, "Better than the last one, not as good as the next one!"..