Thank goodness I don’t have to deal with that anymore...
1/32 Zoukei-Mura Ta152H-0 White 7
- Stikpusher
- Moderator
- Posts: 21188
- Joined: Sat Apr 05, 2014 8:37 pm
- Location: Ceti Alpha 5
Re: 1/32 Zoukei-Mura Ta152H-0 White 7
Most people now don’t have landline phones in their homes anymore, only cell phones. And when they call 911 they get upset when you have to ask for their home address because the cell phone 911 system is not what you see on TV. Often they ping to the address of the nearest cell phone tower and not where the actual problem happens to be.
Thank goodness I don’t have to deal with that anymore...


"Surely I have made my meaning plain? I intend to avenge myself upon you, Admiral. I have deprived your ship of power, and when I swing 'round, I intend to deprive you of your life."
FLSM
FLSM
- BlackSheep214
- Elite Member
- Posts: 13417
- Joined: Sun Apr 06, 2014 8:47 pm
Re: 1/32 Zoukei-Mura Ta152H-0 White 7
Heh... now show kids today if they know what this is. Most likely they’ll ask “How do you text with that phone?”jkim wrote:Probably quite a few of us in that "old" club. I still remember telephones that looked like this...
“Who controls the skies, controls the fate of this Earth”
Author unknown- 352nd Fighter Group, Blue-Nosed Bastards of Bodney
“Send one plane it’s a sortie; send two planes it’s a flight; send four planes it’s a test of airpower. - Richard Kohn
Author unknown- 352nd Fighter Group, Blue-Nosed Bastards of Bodney
“Send one plane it’s a sortie; send two planes it’s a flight; send four planes it’s a test of airpower. - Richard Kohn
Re: 1/32 Zoukei-Mura Ta152H-0 White 7
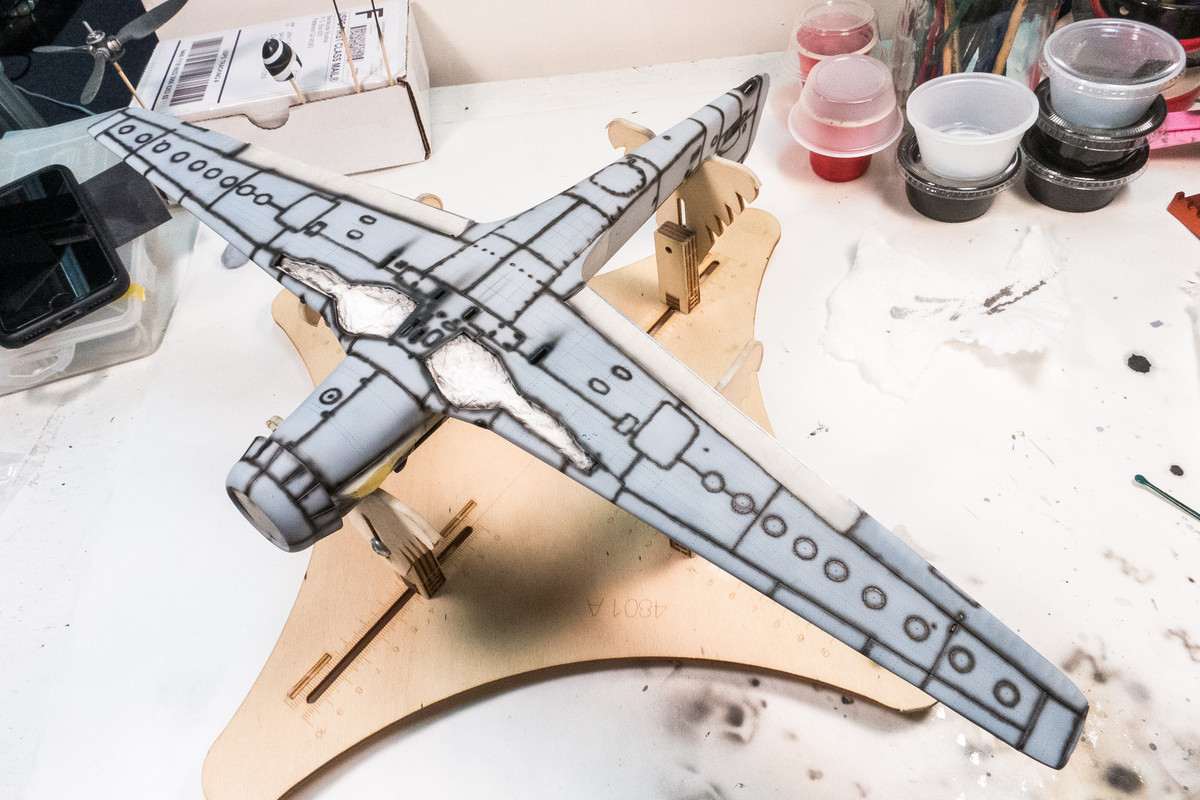
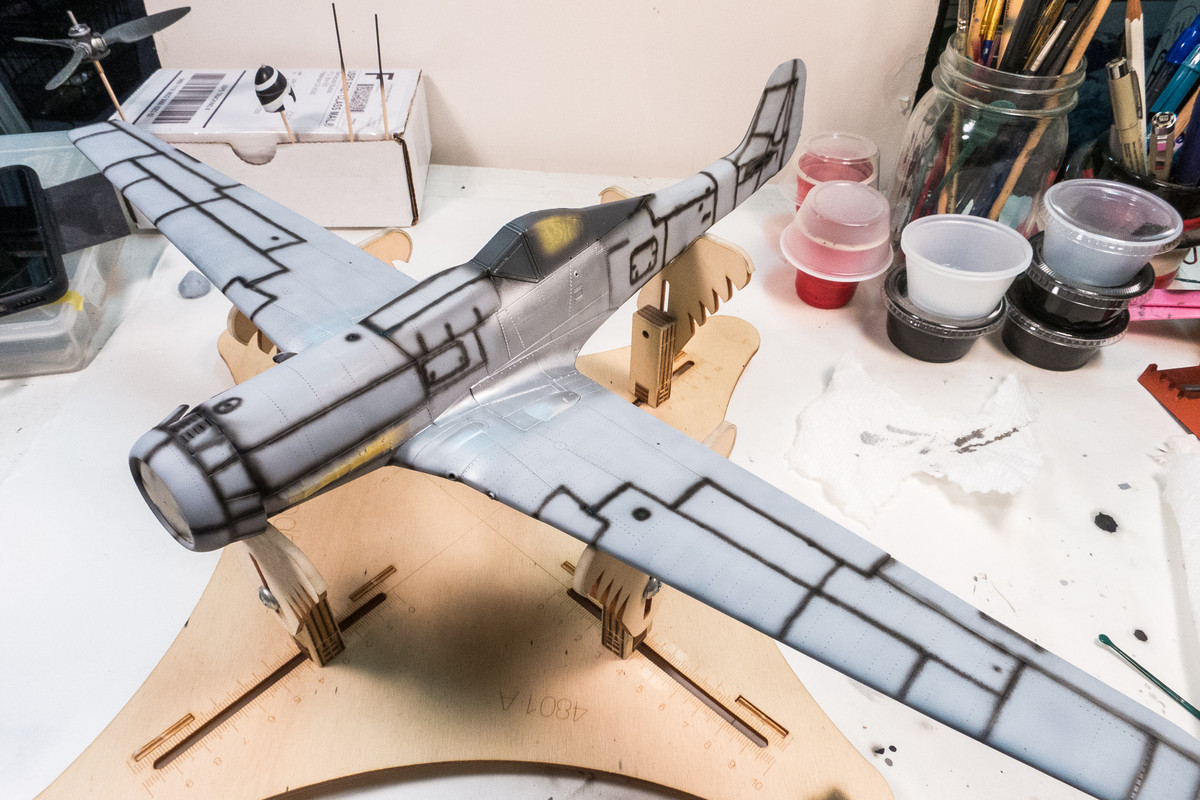
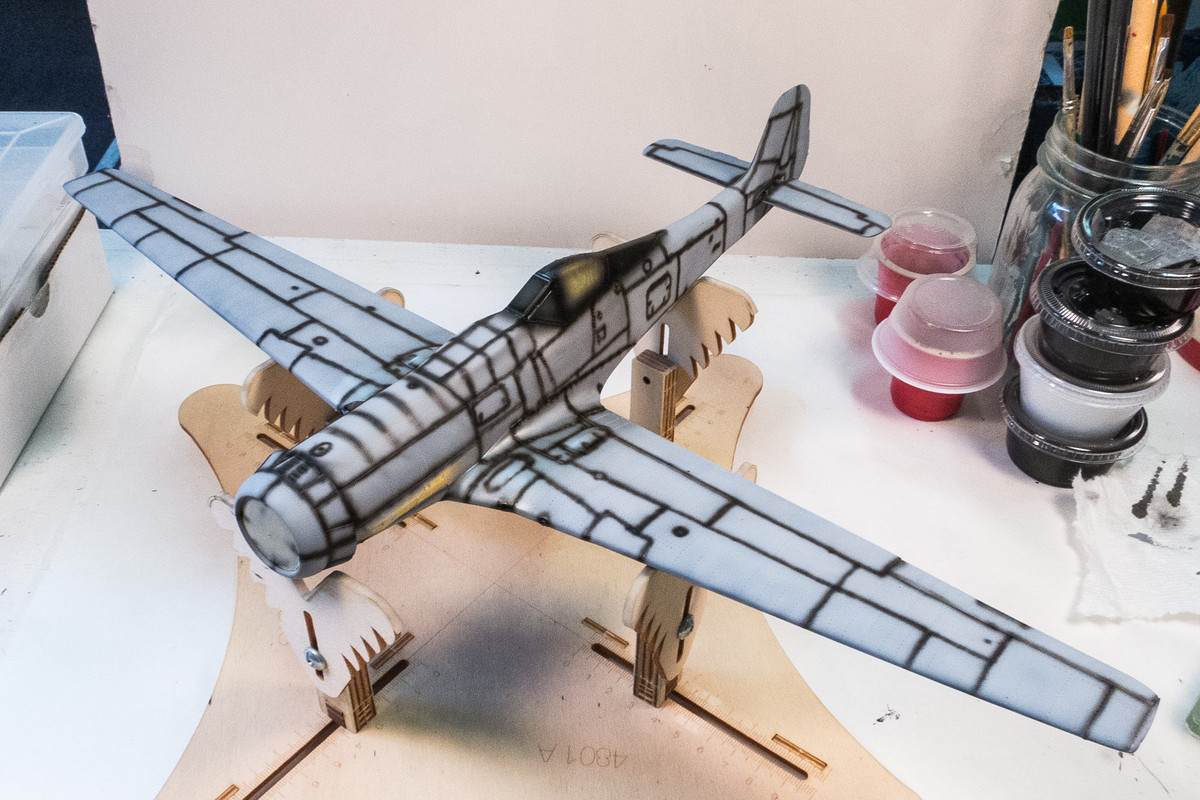
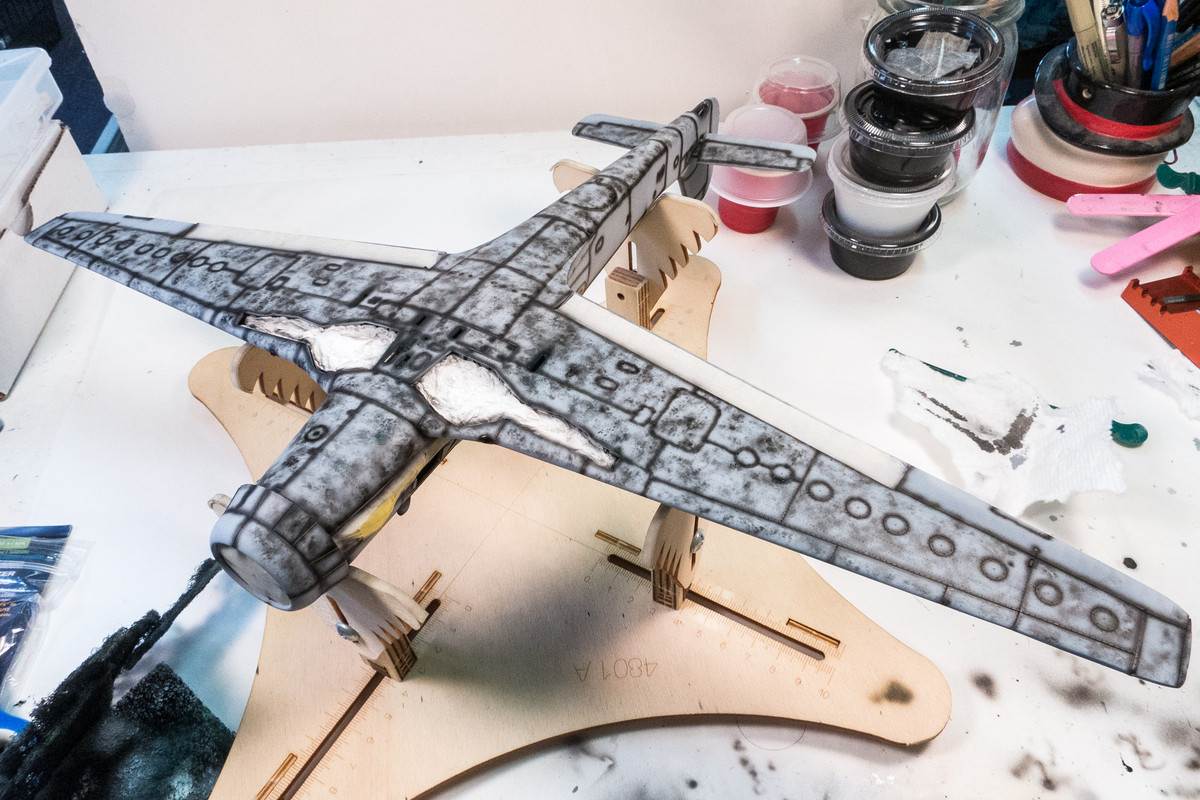
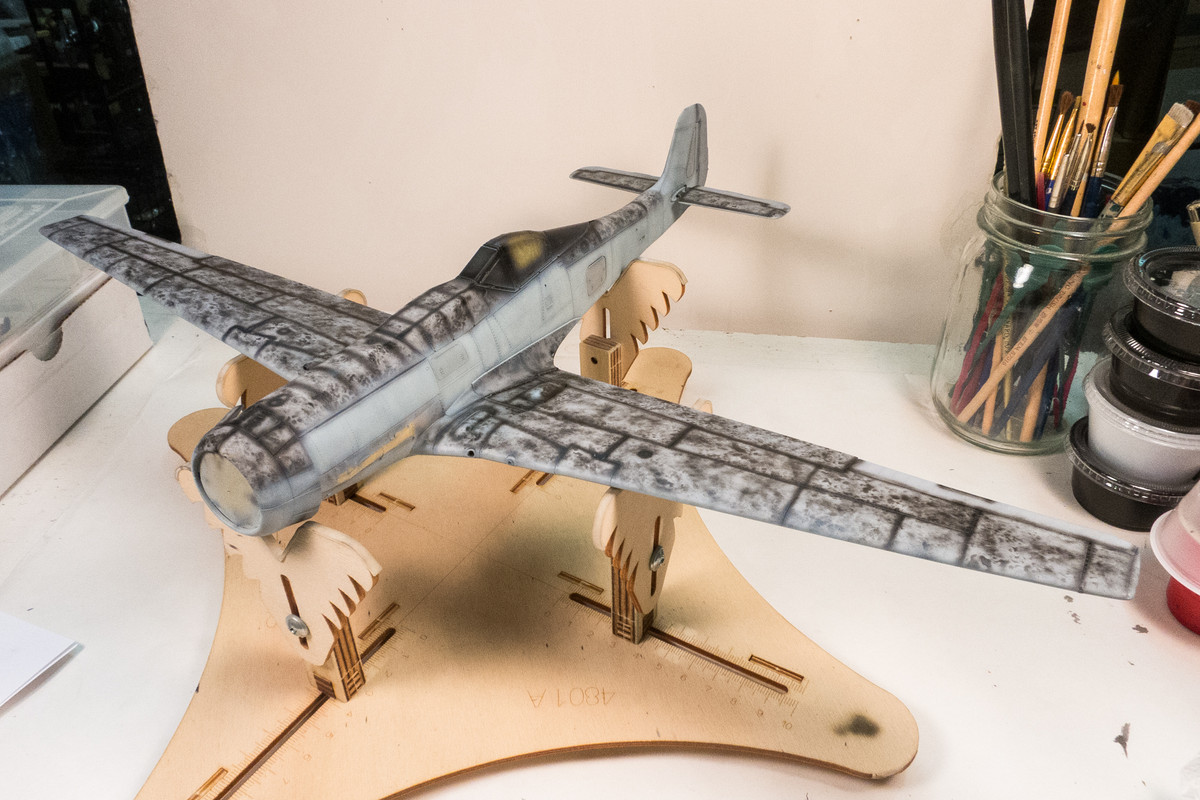
Old geezer John here to report the start of painting on the Ta152H-0. Most of my usual bag of tricks will be employed. Starting with a panel line pre-shade.

When I got to the top, I realized that I wanted to do some wing root chipping with hairspray so I had to stop the pre-shading and get some metal color (Tamiya AS-12) on, followed by hairspray.

I let that dry a full day before I finished the panel line pre-shading.

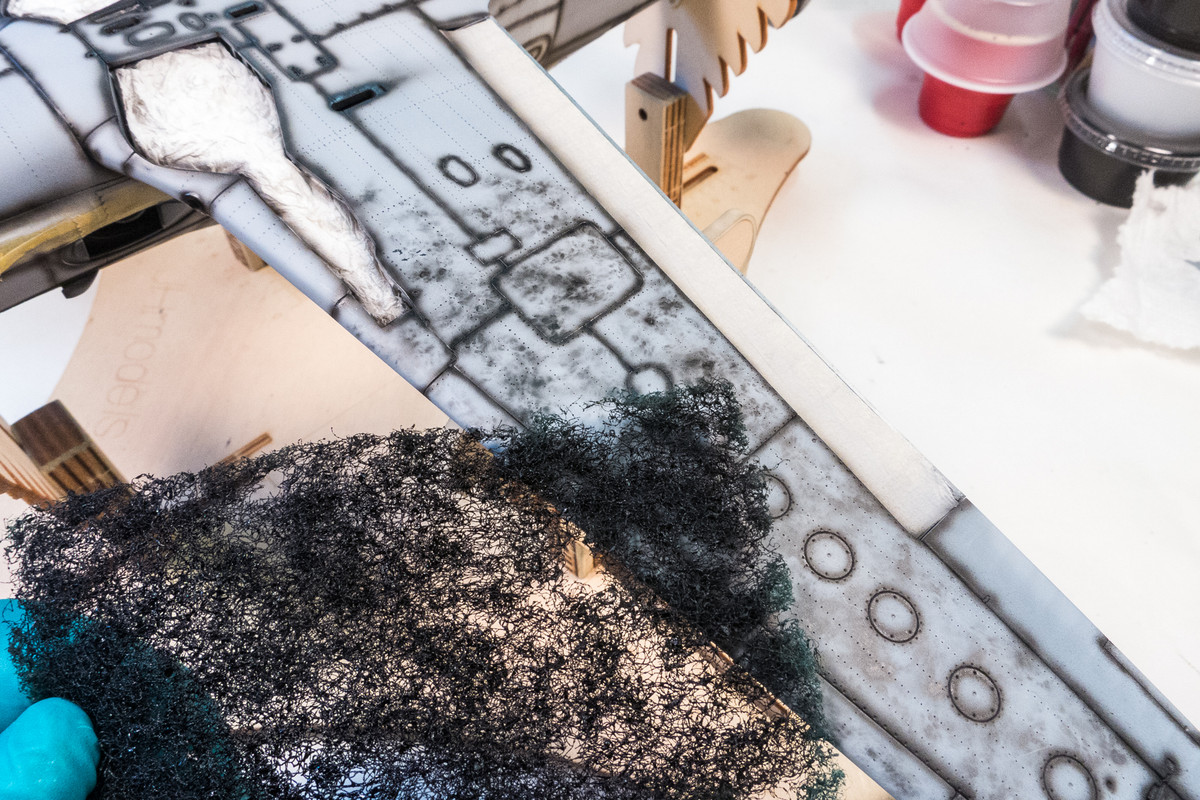
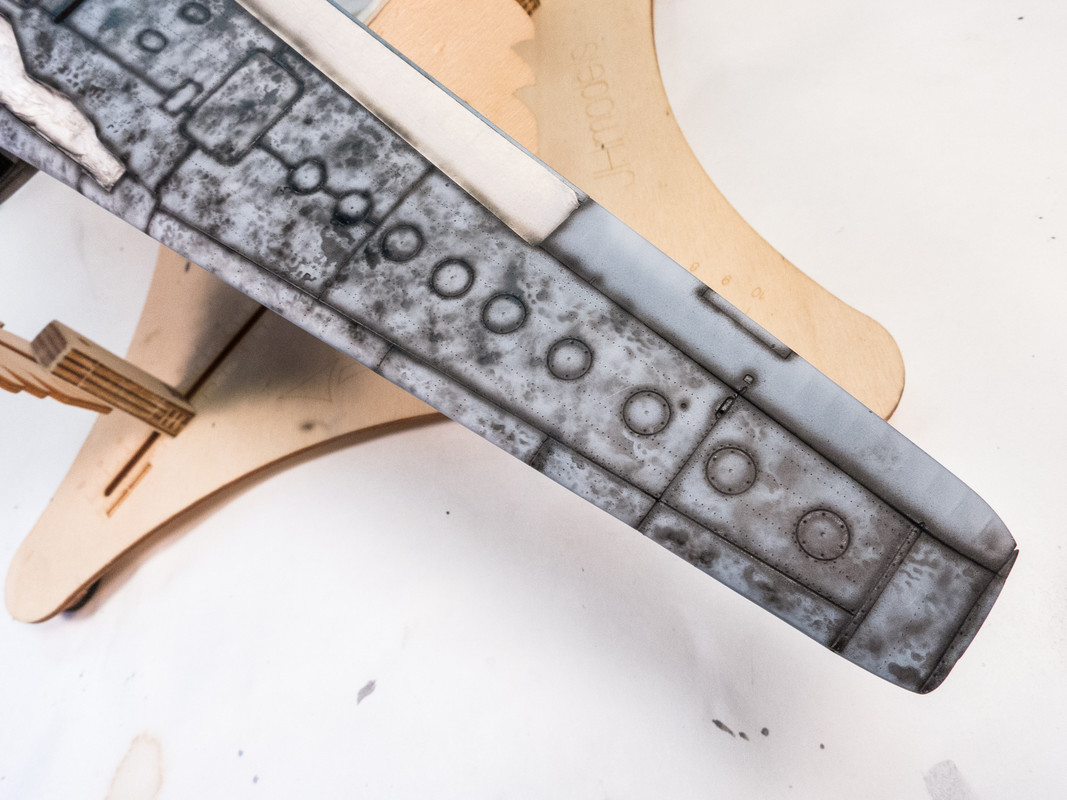
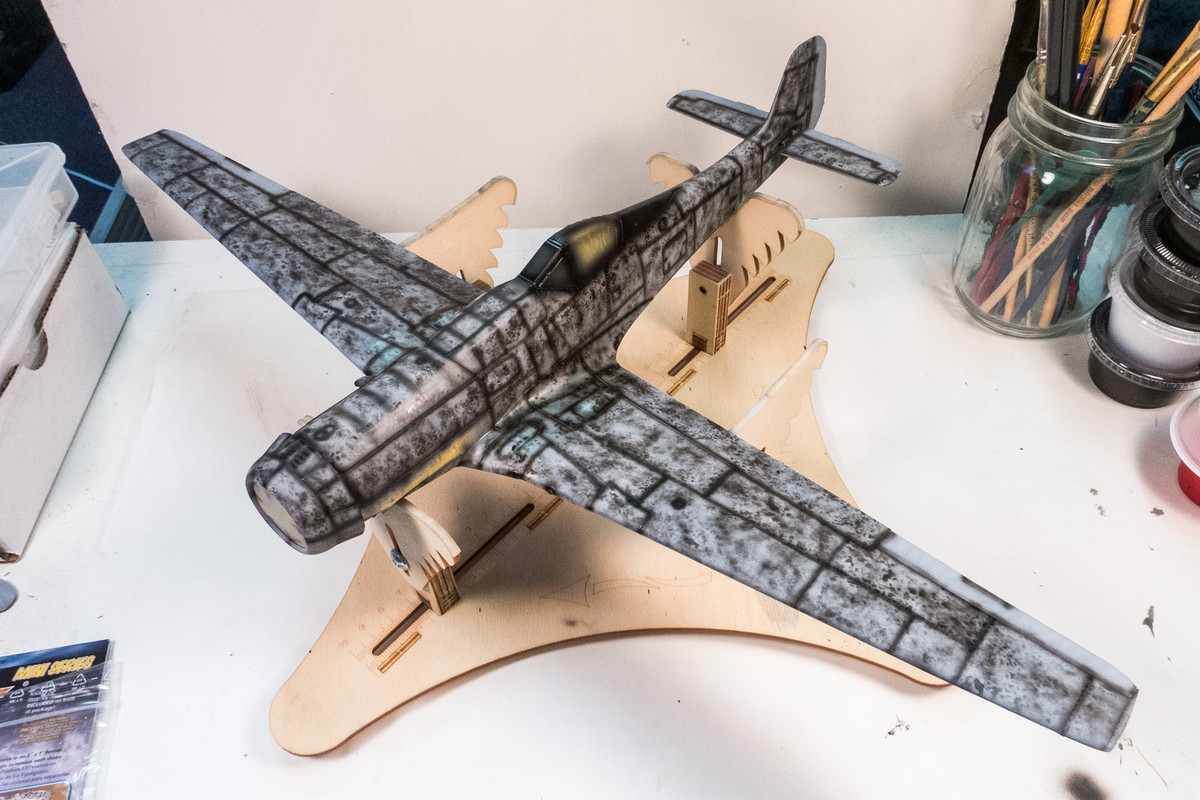
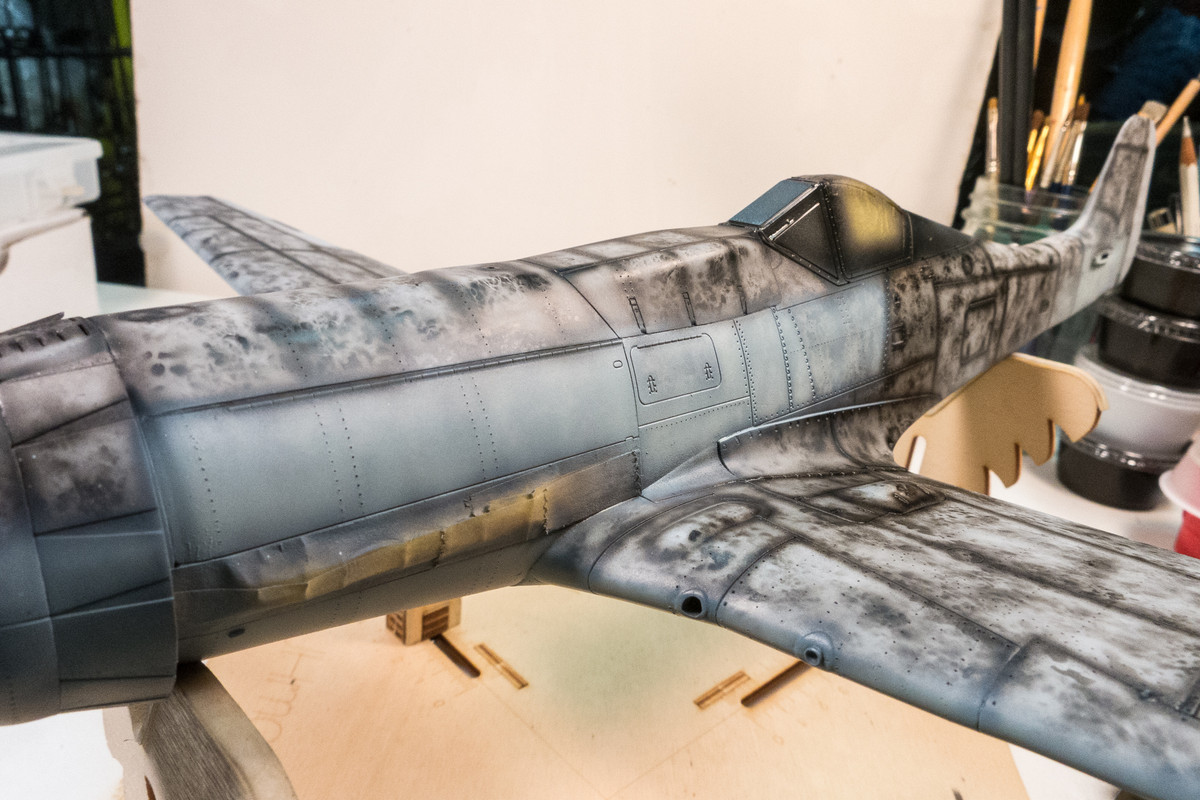
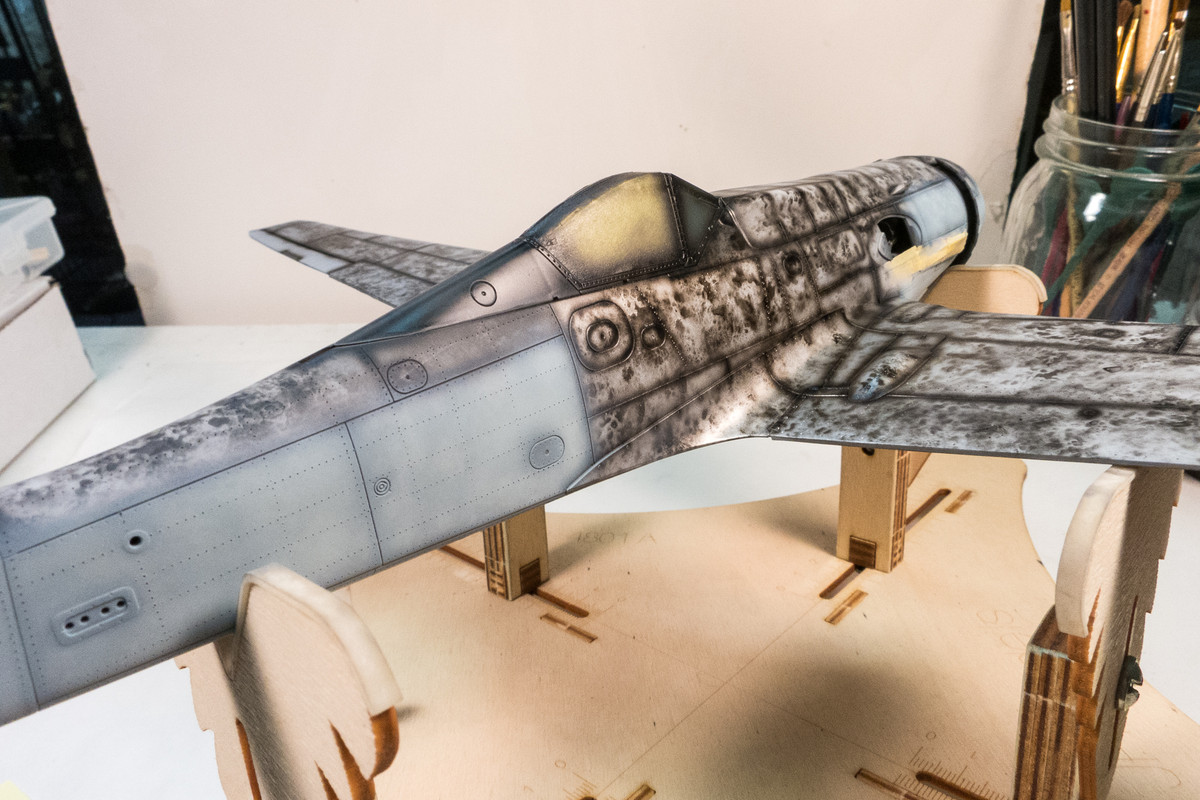
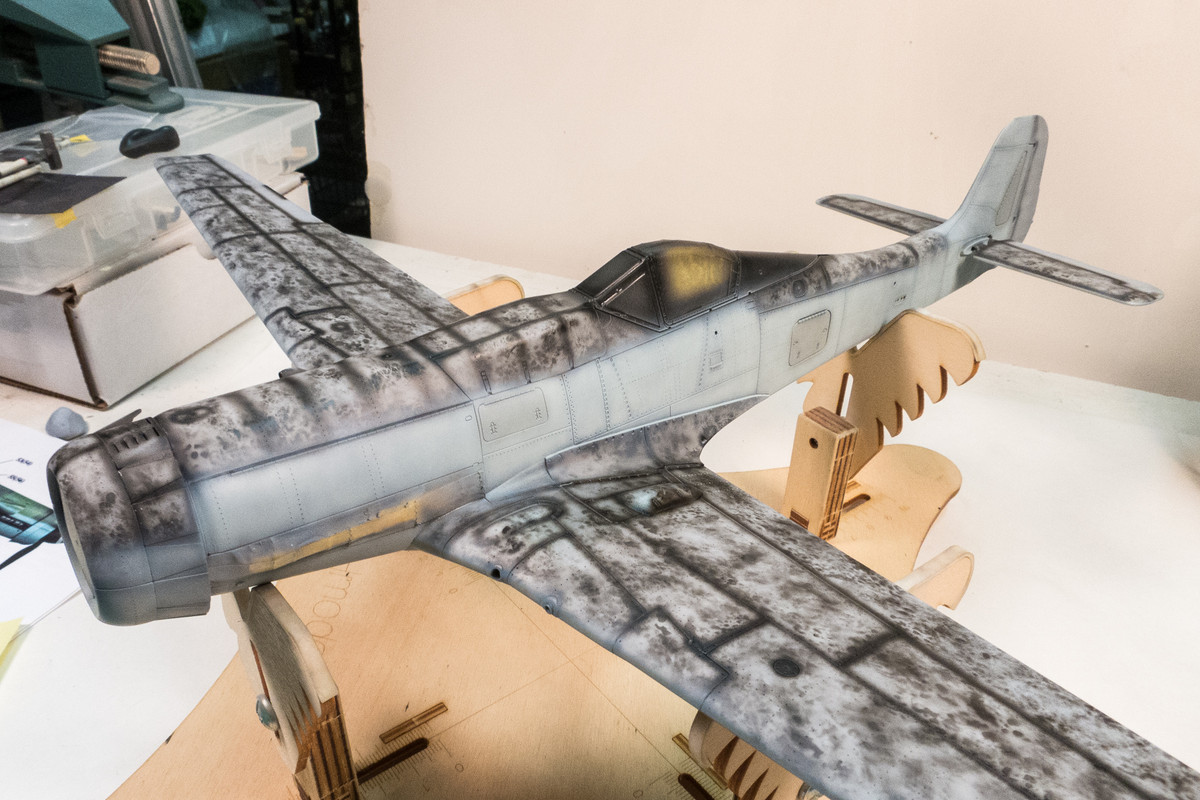
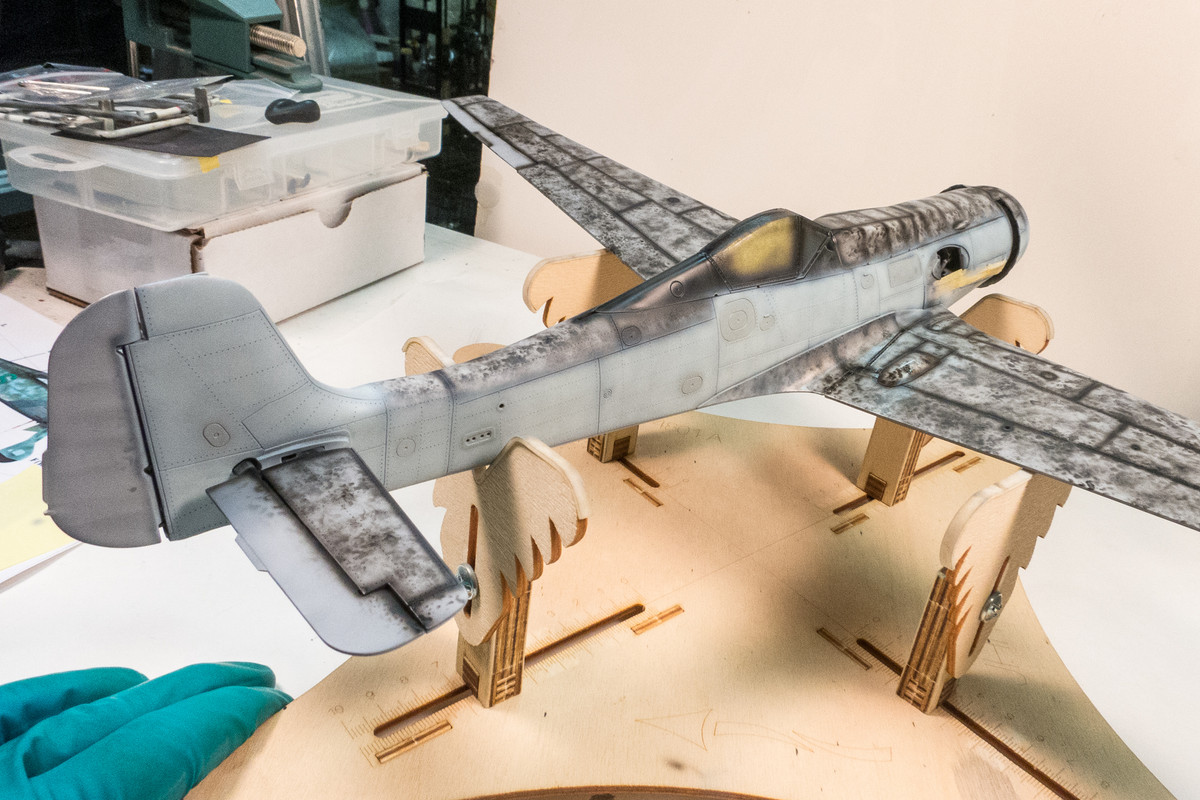
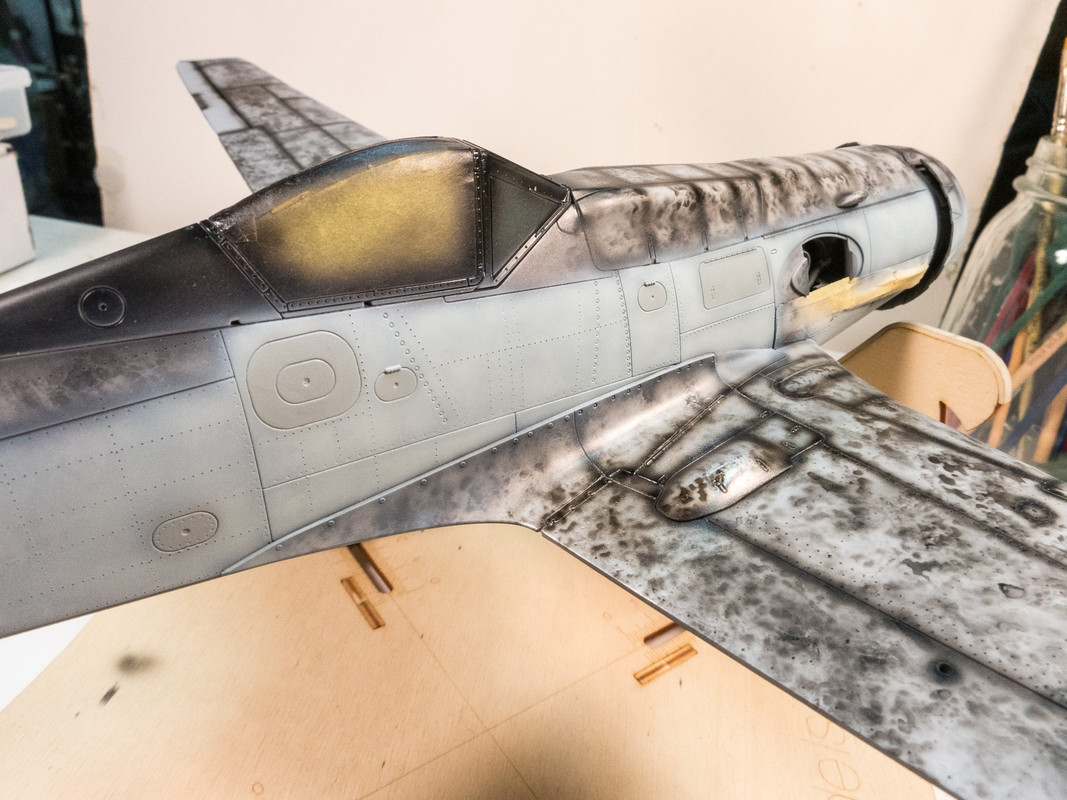
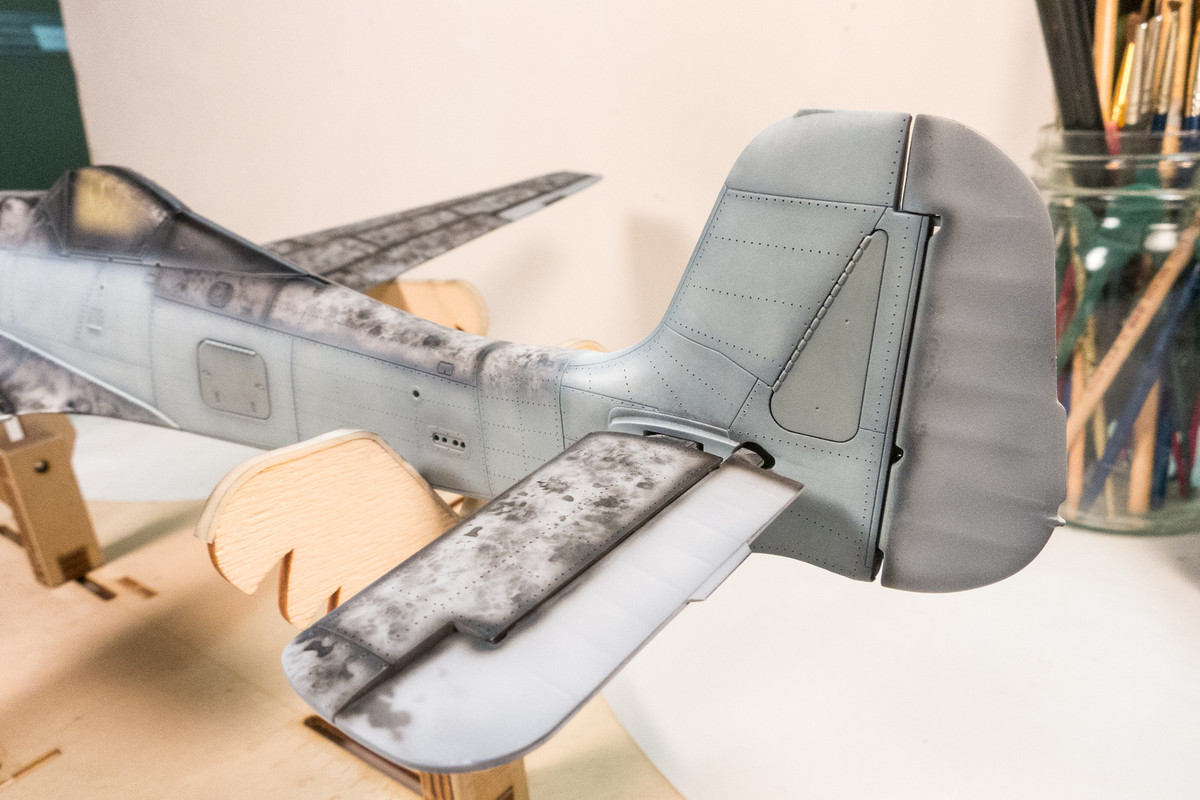
I like to apply an irregular mottled base underneath my camo colors to add a touch of depth to the model. I used to just freehand a mottle pattern but have started to use different masks to create some edge variation. The majority of mottle is created spraying through a piece of green scrubbing pad.

This is then augmented in different areas with a cardboard random pattern template designed for airbrush artists.


Pre-shading done, I can move on to the first color... the light blue RLM 76 on the undersides.


When I got to the top, I realized that I wanted to do some wing root chipping with hairspray so I had to stop the pre-shading and get some metal color (Tamiya AS-12) on, followed by hairspray.

I let that dry a full day before I finished the panel line pre-shading.

I like to apply an irregular mottled base underneath my camo colors to add a touch of depth to the model. I used to just freehand a mottle pattern but have started to use different masks to create some edge variation. The majority of mottle is created spraying through a piece of green scrubbing pad.

This is then augmented in different areas with a cardboard random pattern template designed for airbrush artists.


Pre-shading done, I can move on to the first color... the light blue RLM 76 on the undersides.

John aka JKim
-----------<><

-----------<><

Re: 1/32 Zoukei-Mura Ta152H-0 White 7
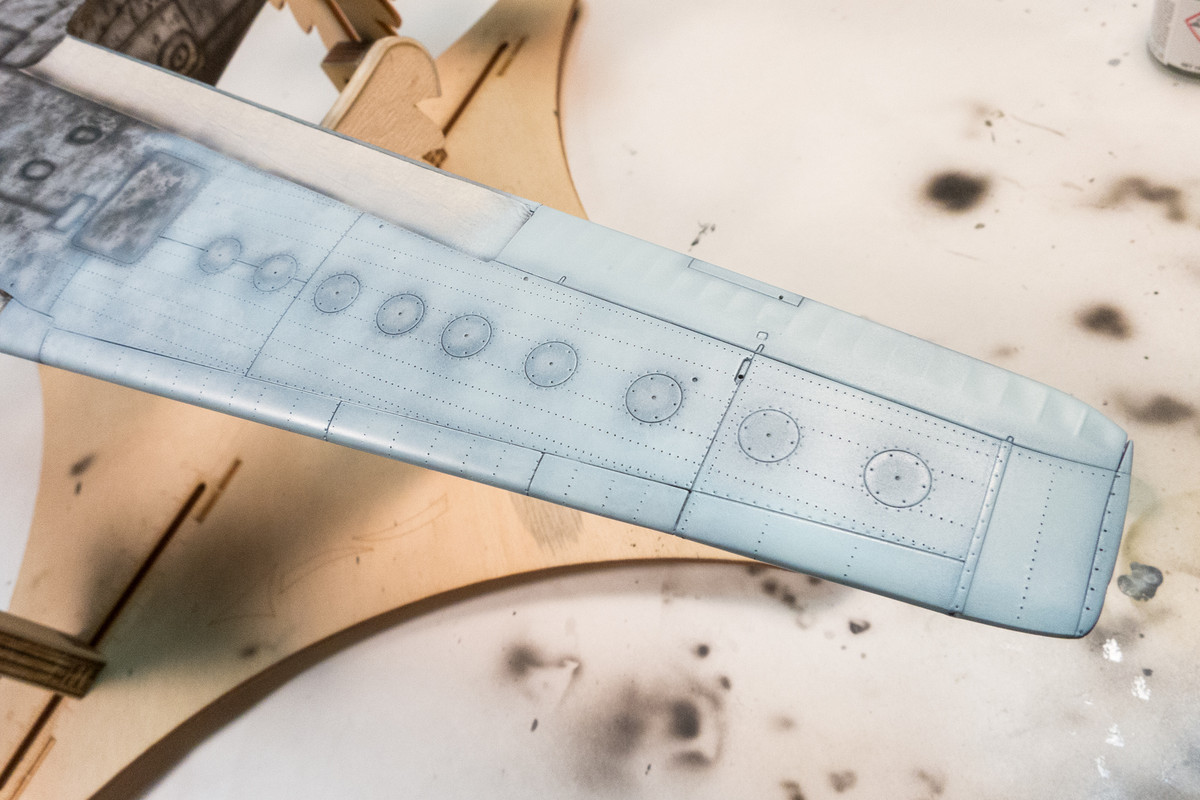
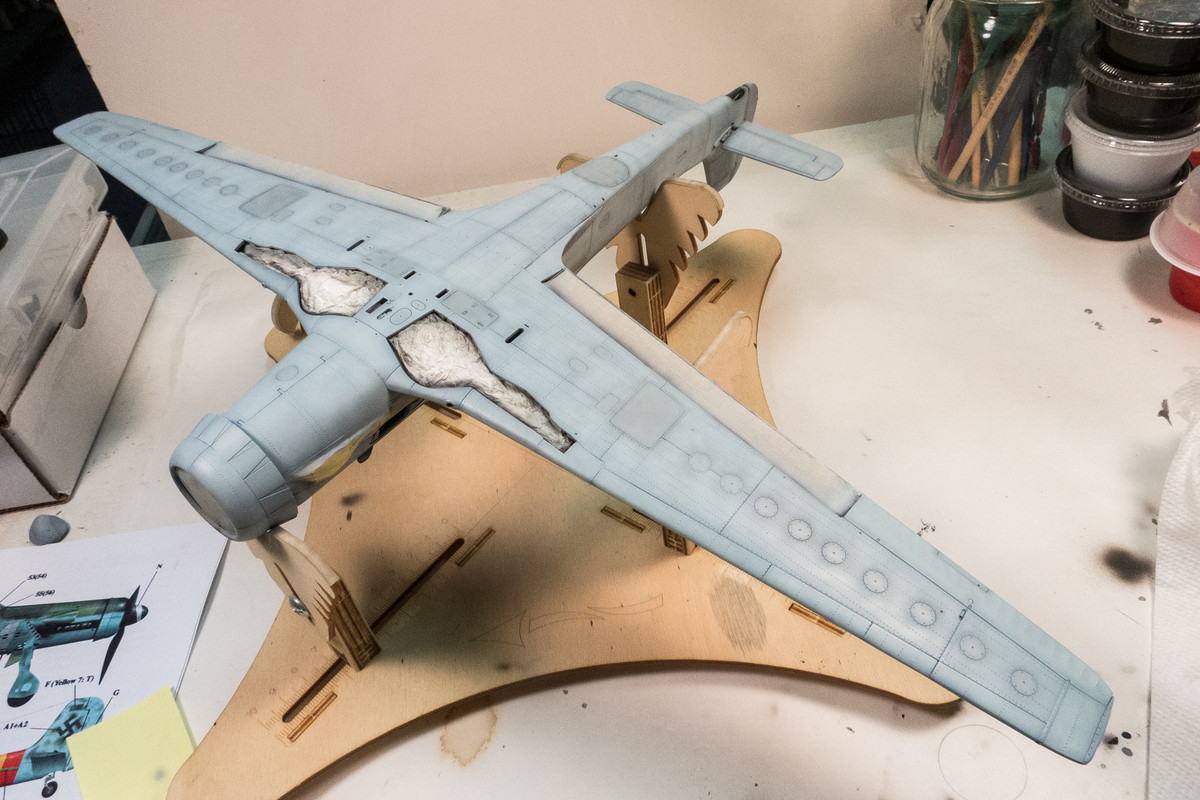
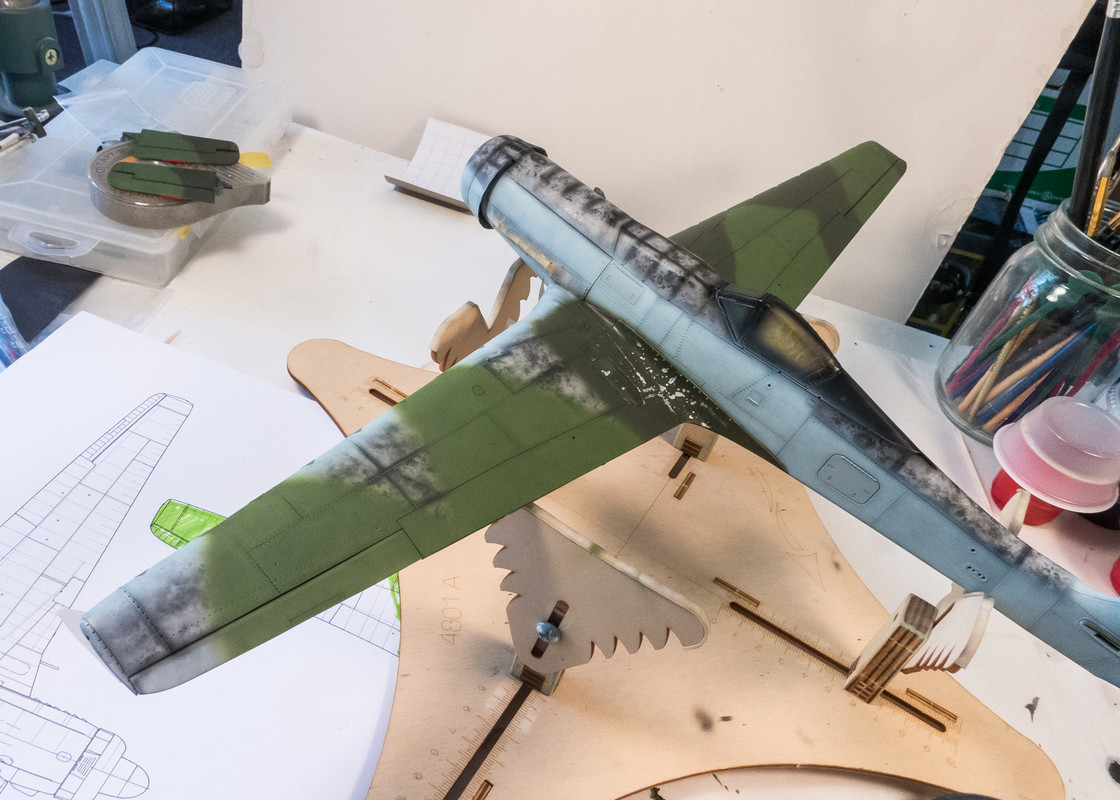
Applying the RLM 76... here we go! I'm using AK Real Colors for this shade. I really like how this color goes on. Thinned at 2:1 with Tamiya Lacquer Thinner, it goes on very smoothly with enough transparency to dial in the pre-shading effect.

I had the bright idea of using Mr Hobby Aqueous RLM 76 to provide a slight contrast to some panels.

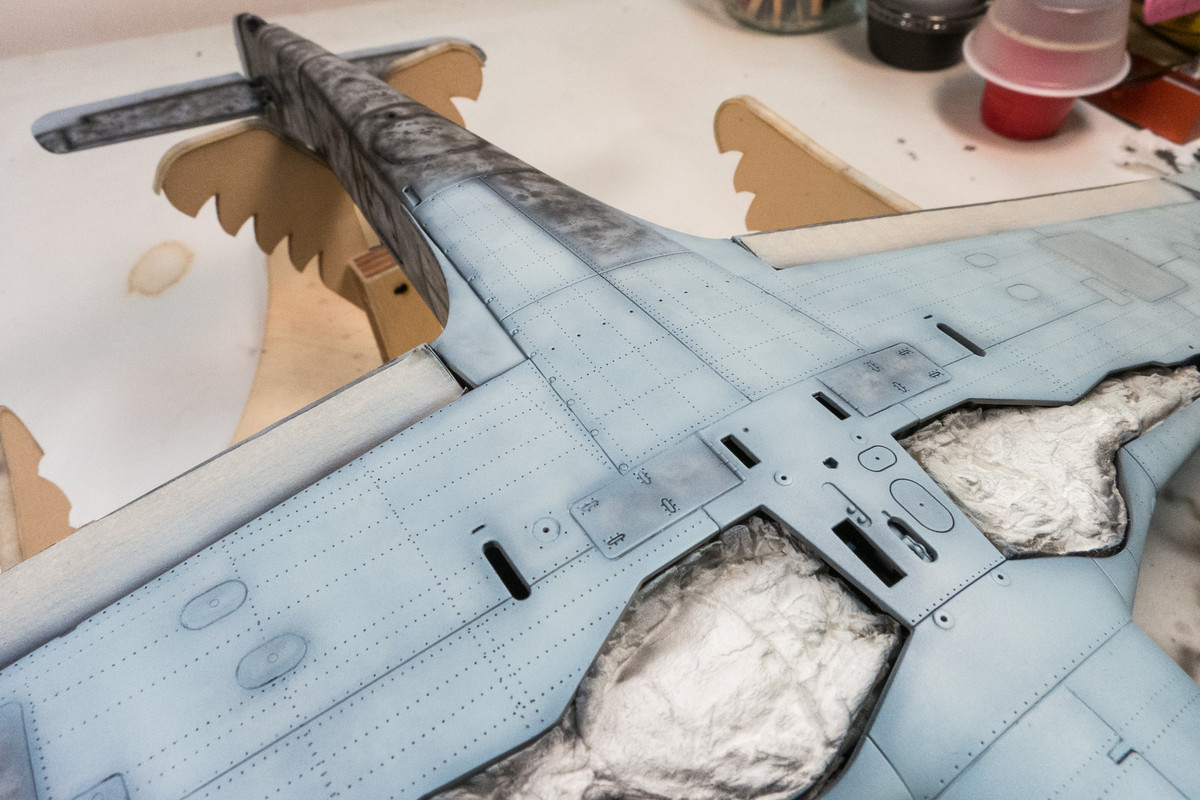
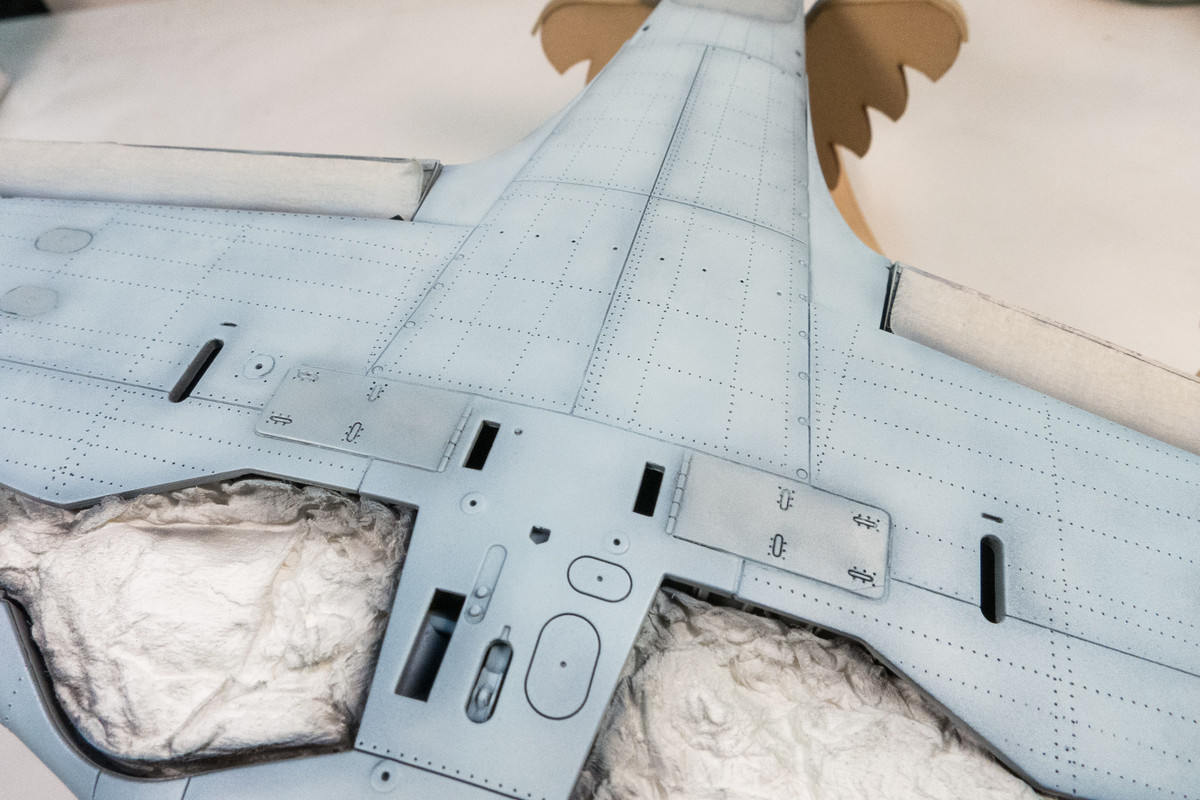
To fully utilize the pre-shading, I paint panel by panel, trying to build up the most paint in the middle of the panel and to leave the edges just a little bit darker. It's ok to be inconsistent and not too uniform so as not create an obvious grid pattern with the panel lines.

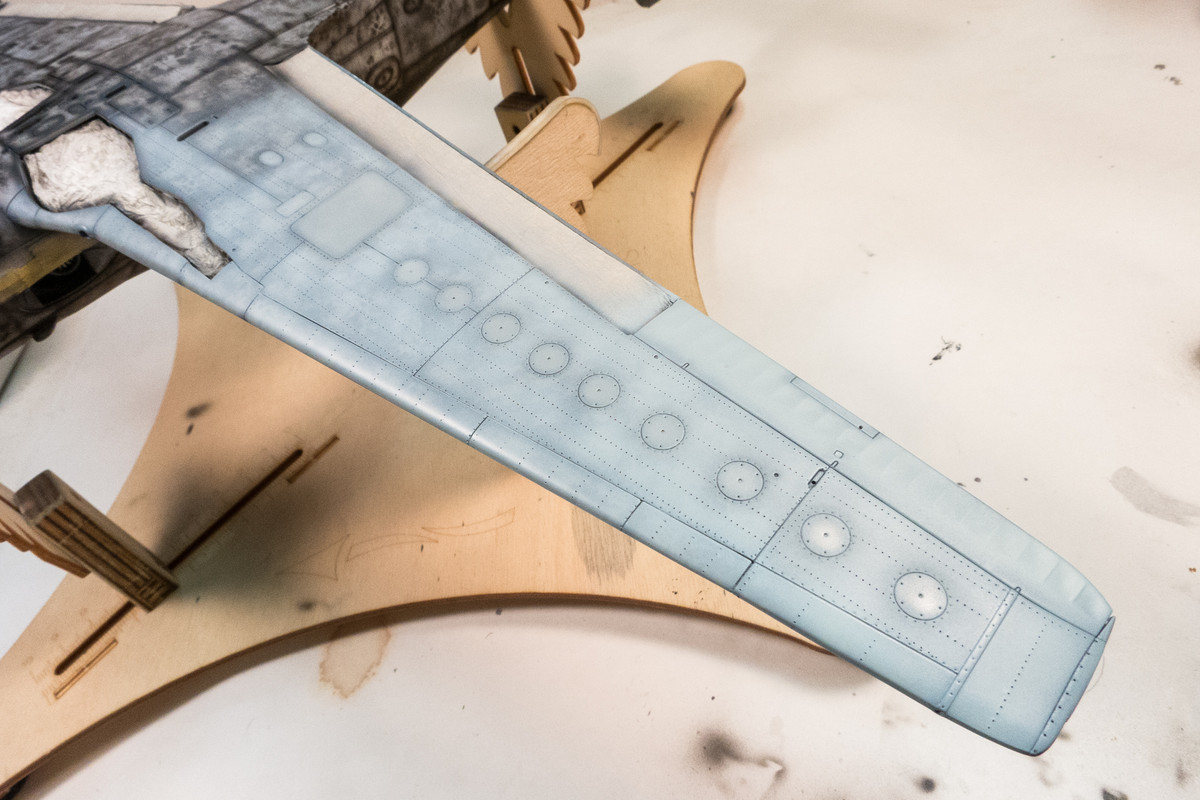
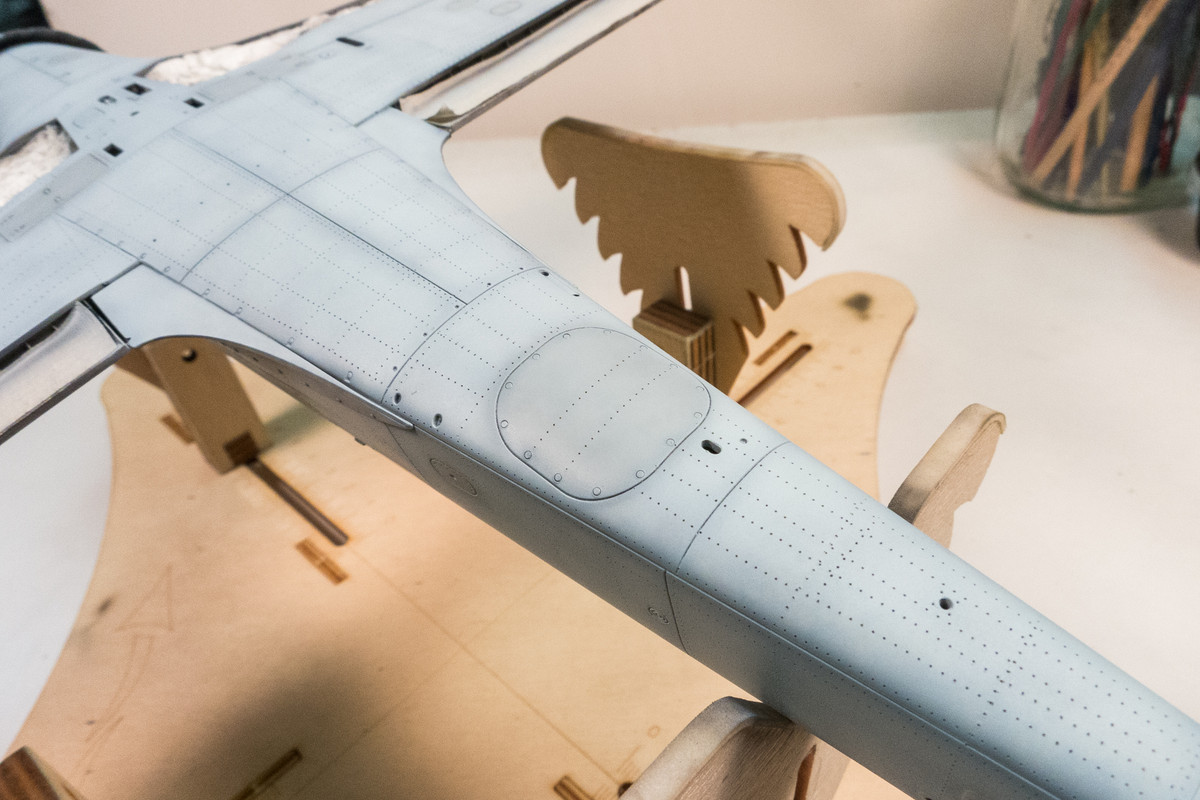
Panel by panel, I start covering the bottom. It's also a final check to see if my re-surfacing work turned out ok and the rivet holes register under this coat of paint. I'm pretty happy with how this troublesome area looks under a coat of paint.

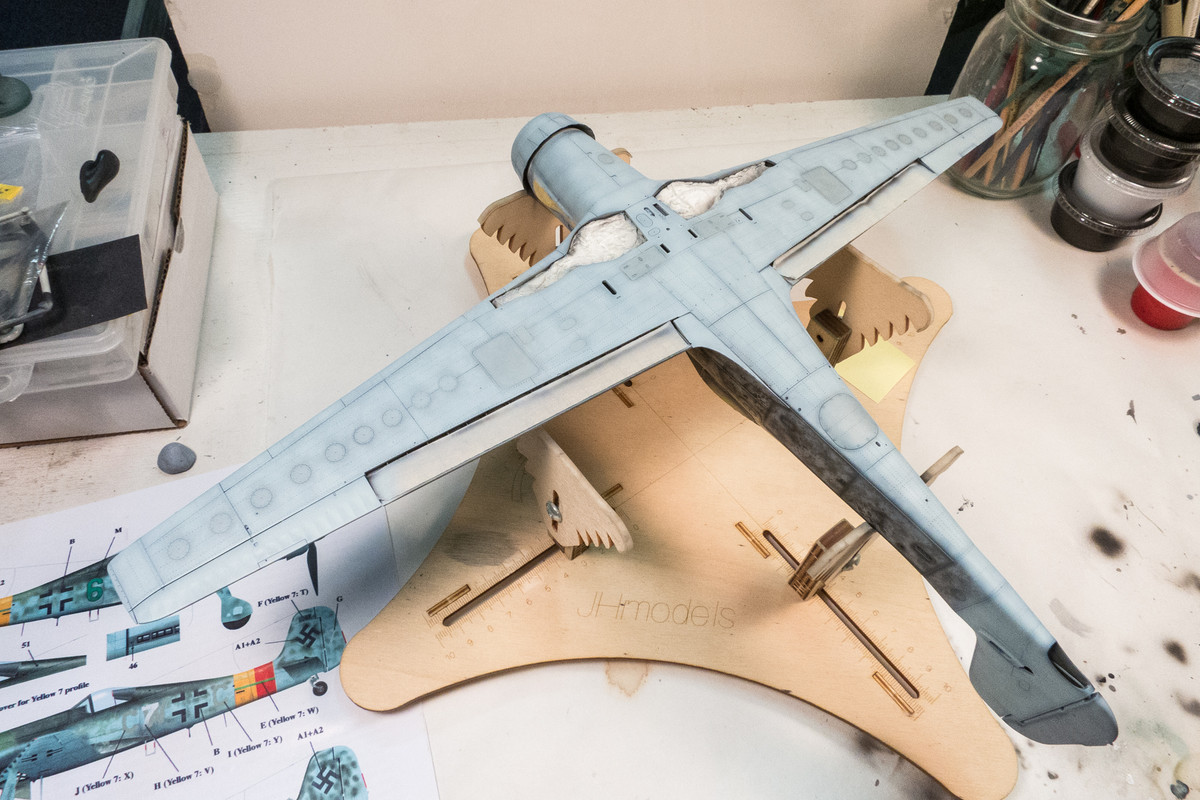
Ok... the bottom is done. The pre-shade effect is very subtle and usually doesn't register visually until you get closer to the model. There will other layers of weathering that will add some depth to the model later so we don't have to accomplish everything with the pre-shade. It's also important to go back to an area that you think you've finished as the Tamiya Lacquer Thinner can "bite" into the darker mottle and bring it to the surface as the paint dries.

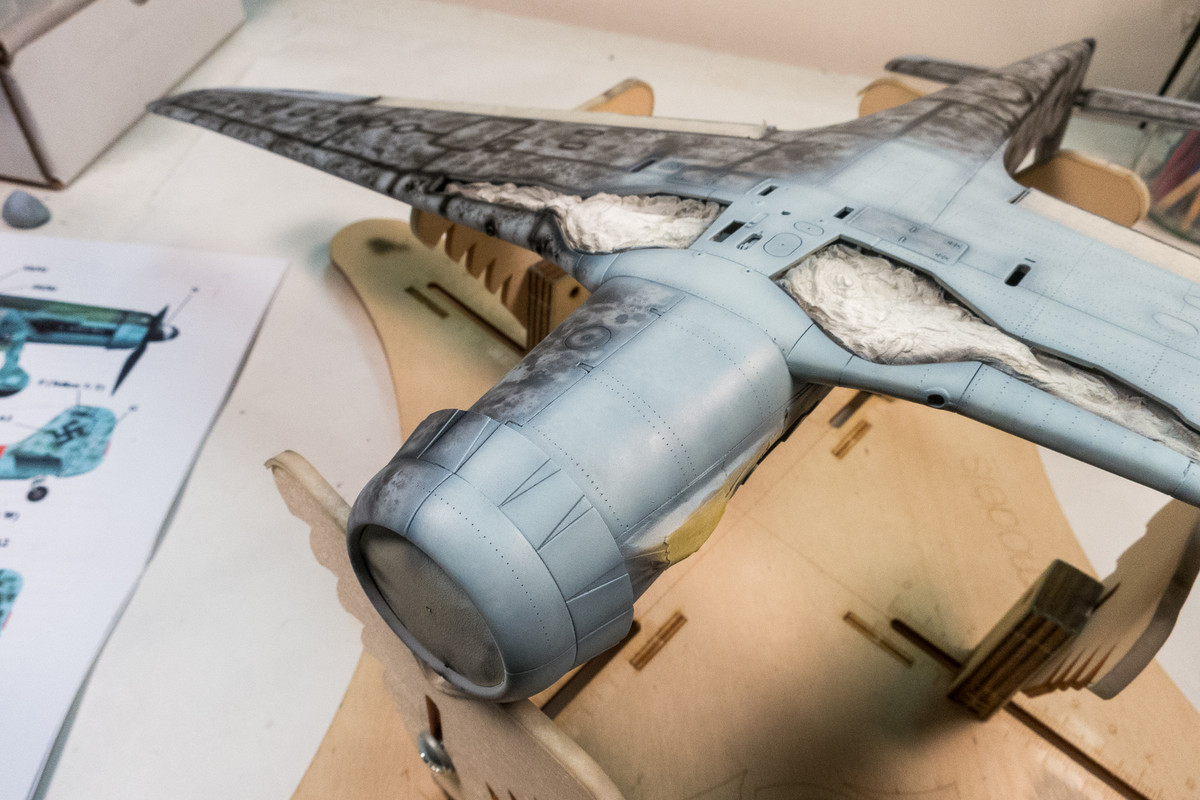
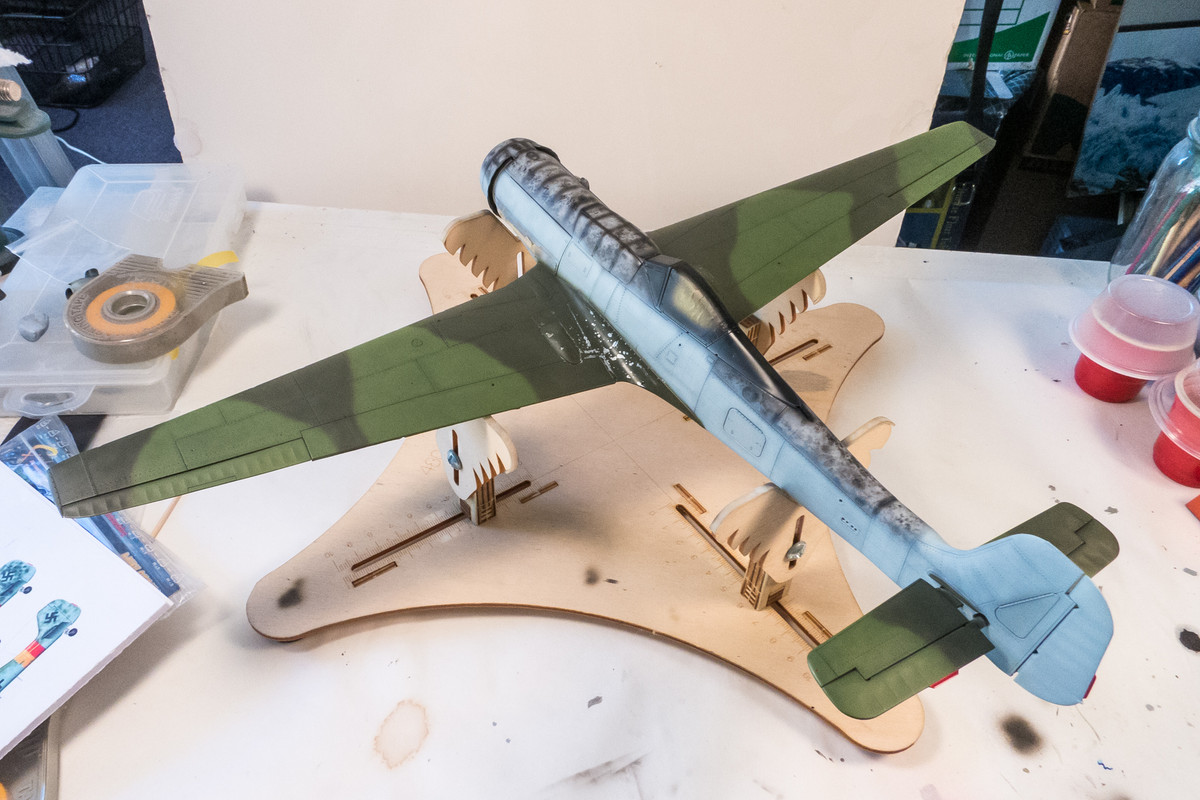
We continue the RLM 76 up the sides of the fuselage.


Compared to the pre-shading, the application of the RLM 76, even with the highly-thinned mix, goes pretty quickly. For whatever reason, I don't like the contrast between the two RLM 76 shades on the topside. I think it'll get knocked back quite a bit by the application of the topside green colors but it is bugging me.


I like how the bottom turned out. The contrast here seems to work better and adds a bit of visual interest to an otherwise boring landscape.


First stage of painting is complete. I now must gather my references as there are some things I need to note about the topside camo like how high the demarcation line is, the mottle pattern and how to go about doing that sawtooth pattern on the leading wing edge.


I had the bright idea of using Mr Hobby Aqueous RLM 76 to provide a slight contrast to some panels.

To fully utilize the pre-shading, I paint panel by panel, trying to build up the most paint in the middle of the panel and to leave the edges just a little bit darker. It's ok to be inconsistent and not too uniform so as not create an obvious grid pattern with the panel lines.

Panel by panel, I start covering the bottom. It's also a final check to see if my re-surfacing work turned out ok and the rivet holes register under this coat of paint. I'm pretty happy with how this troublesome area looks under a coat of paint.

Ok... the bottom is done. The pre-shade effect is very subtle and usually doesn't register visually until you get closer to the model. There will other layers of weathering that will add some depth to the model later so we don't have to accomplish everything with the pre-shade. It's also important to go back to an area that you think you've finished as the Tamiya Lacquer Thinner can "bite" into the darker mottle and bring it to the surface as the paint dries.

We continue the RLM 76 up the sides of the fuselage.


Compared to the pre-shading, the application of the RLM 76, even with the highly-thinned mix, goes pretty quickly. For whatever reason, I don't like the contrast between the two RLM 76 shades on the topside. I think it'll get knocked back quite a bit by the application of the topside green colors but it is bugging me.


I like how the bottom turned out. The contrast here seems to work better and adds a bit of visual interest to an otherwise boring landscape.


First stage of painting is complete. I now must gather my references as there are some things I need to note about the topside camo like how high the demarcation line is, the mottle pattern and how to go about doing that sawtooth pattern on the leading wing edge.

John aka JKim
-----------<><

-----------<><

- Stikpusher
- Moderator
- Posts: 21188
- Joined: Sat Apr 05, 2014 8:37 pm
- Location: Ceti Alpha 5
Re: 1/32 Zoukei-Mura Ta152H-0 White 7
"Surely I have made my meaning plain? I intend to avenge myself upon you, Admiral. I have deprived your ship of power, and when I swing 'round, I intend to deprive you of your life."
FLSM
FLSM
Re: 1/32 Zoukei-Mura Ta152H-0 White 7
Looking really good. The Mr. Hobby 76 looks really good underneath but appears too be to grey on the sides. I'm sure you'll get it to bend in with more weathering.
Last edited by Floki on Wed May 13, 2020 2:06 pm, edited 1 time in total.
March as one, Don't look back
Odin's sons... Attack!
Unleash hell! Do not repent! Warfare grants us no lament
Let your weapons slash and tear This is no place for fear
Hold the lines! Move as one! In unity our victory's won
Our shields will form a mighty wall
United we shall never fall
Odin's sons... Attack!
Unleash hell! Do not repent! Warfare grants us no lament
Let your weapons slash and tear This is no place for fear
Hold the lines! Move as one! In unity our victory's won
Our shields will form a mighty wall
United we shall never fall
- BlackSheep214
- Elite Member
- Posts: 13417
- Joined: Sun Apr 06, 2014 8:47 pm
Re: 1/32 Zoukei-Mura Ta152H-0 White 7
Wow... using scrubbing pads. Ingenious idea!!!!

“Who controls the skies, controls the fate of this Earth”
Author unknown- 352nd Fighter Group, Blue-Nosed Bastards of Bodney
“Send one plane it’s a sortie; send two planes it’s a flight; send four planes it’s a test of airpower. - Richard Kohn
Author unknown- 352nd Fighter Group, Blue-Nosed Bastards of Bodney
“Send one plane it’s a sortie; send two planes it’s a flight; send four planes it’s a test of airpower. - Richard Kohn
- jeaton01
- Elite Member
- Posts: 2374
- Joined: Thu Apr 23, 2020 9:20 am
- Location: Northern California
- Contact:
Re: 1/32 Zoukei-Mura Ta152H-0 White 7
New to the thread. What dedication! It would kill me to stay on one model that long, but your results show the worth of it.
Re: 1/32 Zoukei-Mura Ta152H-0 White 7
Awesome painting skills John - that preshading worked really well!
Stuart Templeton 'I may not be good but I'm slow...'
Re: 1/32 Zoukei-Mura Ta152H-0 White 7
Thanks fellas! Yes, it has been a long ride but probably typical for me. Hopefully it turns out ok.
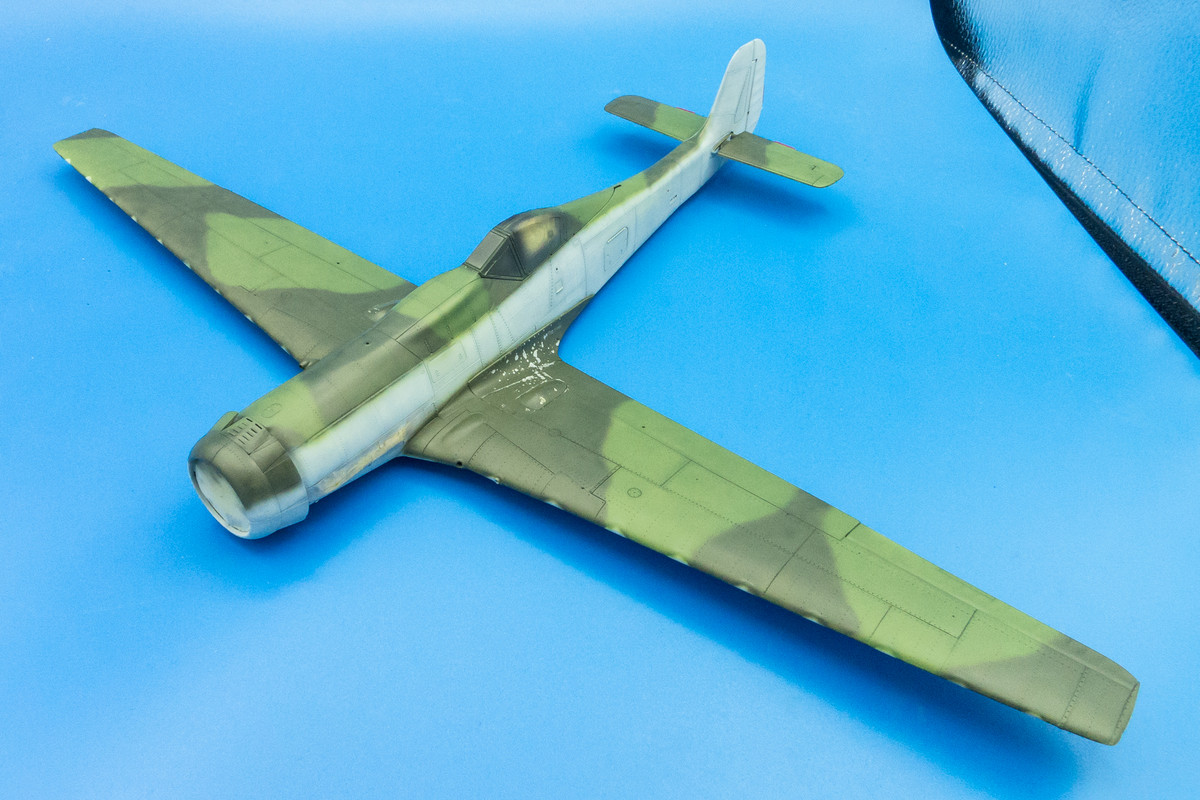
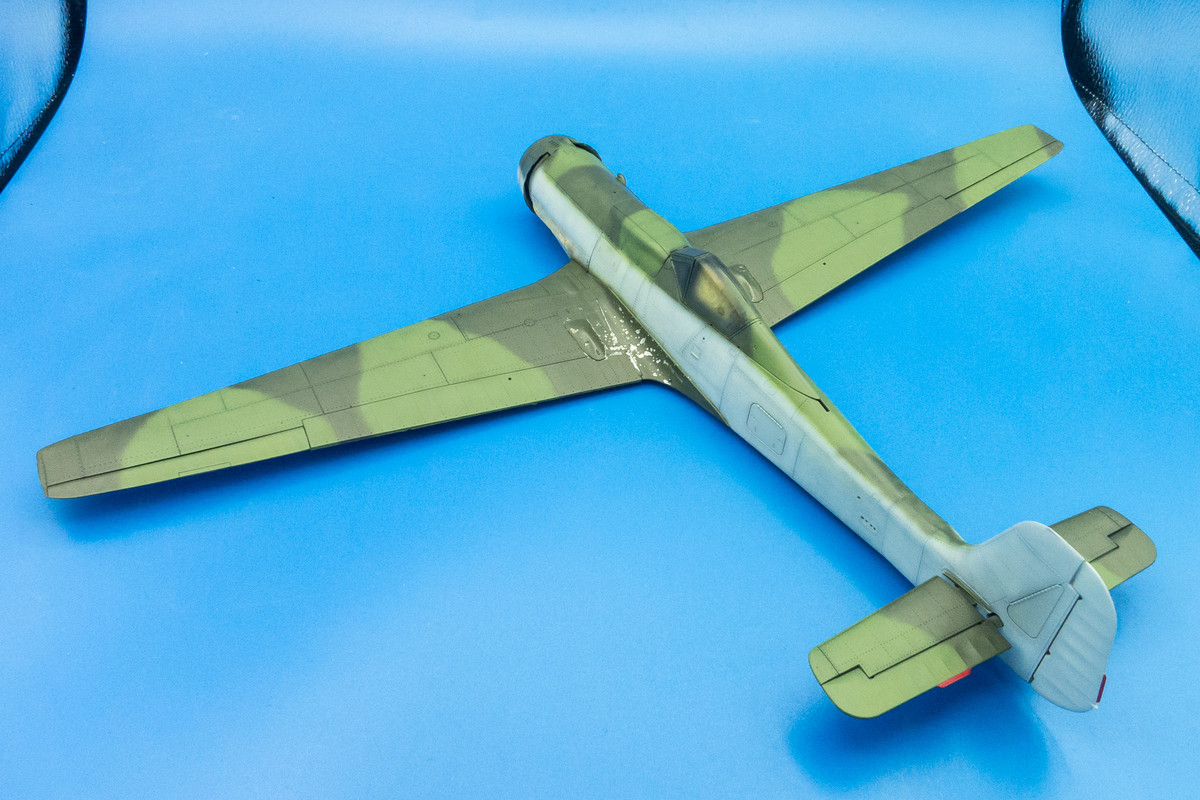
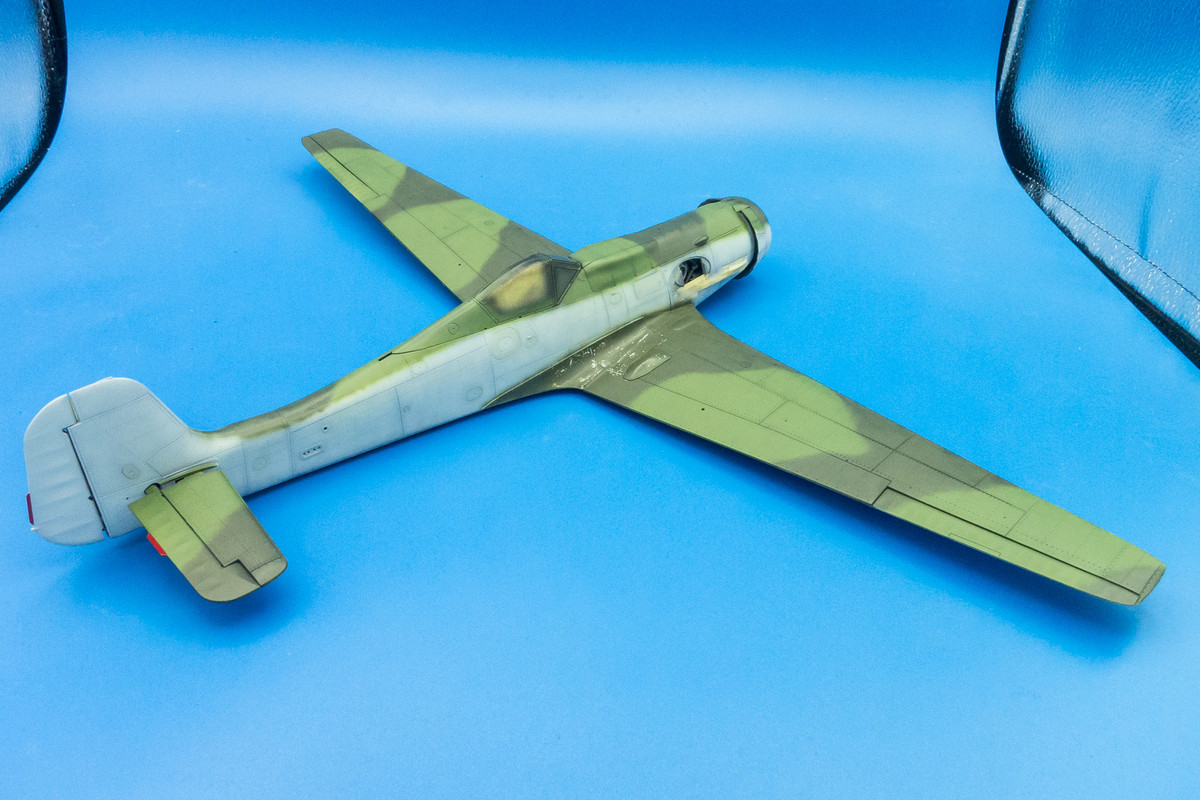
The RLM 76 has been established and so it time to put the top colors on. I am going with Bright Green (RLM 82) and Dark Green (RLM 83) for the upper colors. I've seen some variations with RLM 81 but I just wasn't feeling the Brown-Violet on this build. I don't really like AK Real Colors RLM 82 and their RLM 83 is actually a BLUE shade (long story there..) so I'm reverting to Mr Hobby Aqueous versions of these two colors, which I've used before.
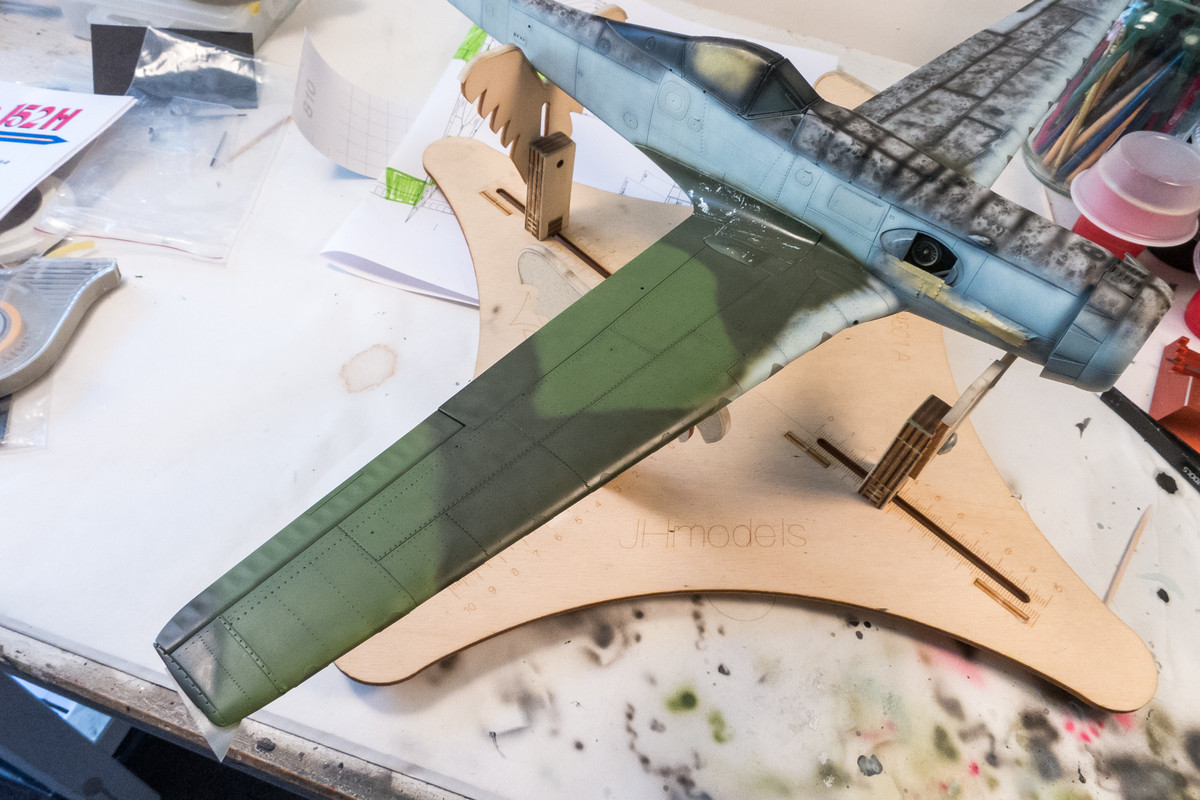
I broke traditional order (lighter colors first) and did the Dark Green on both wing roots first so that I could get the hairspray chipping out of the way. After that was done, I did the Bright Green on the starboard wing. Instead of spraying the Bright Green areas on the other wing, I decided to complete the starboard wing and sprayed the Dark Green.

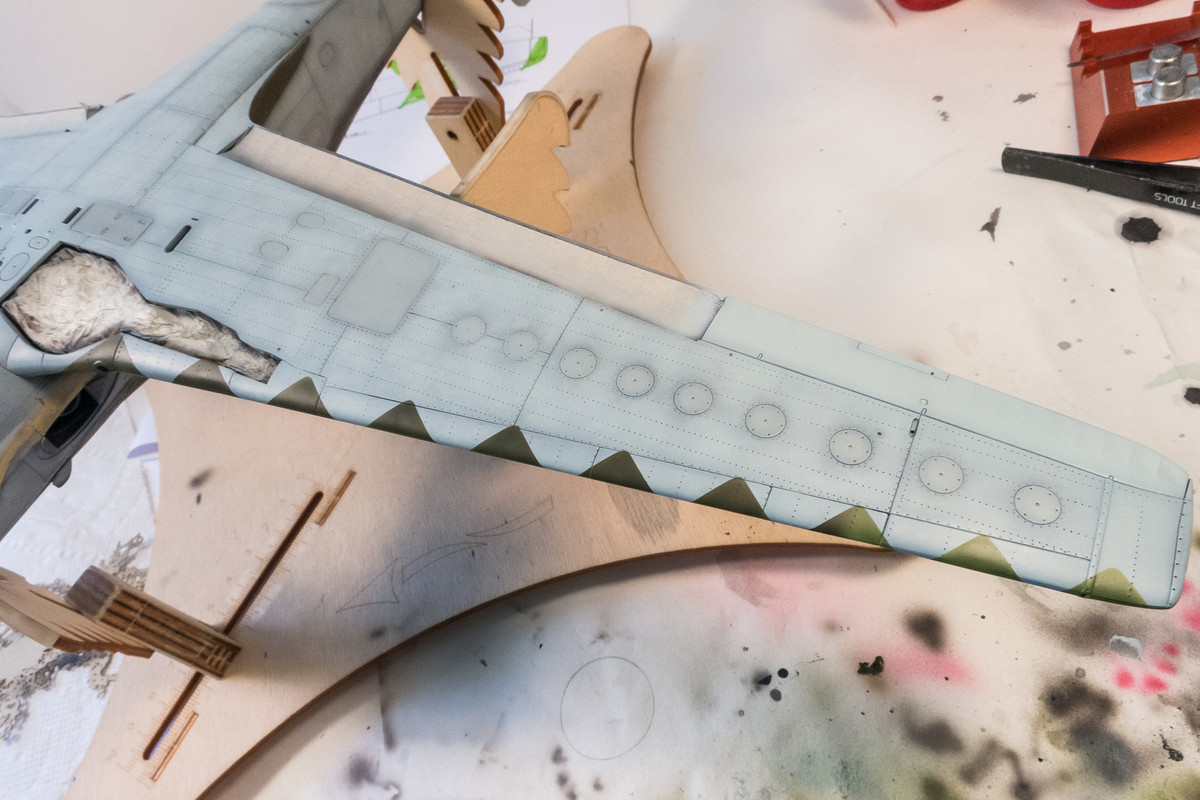
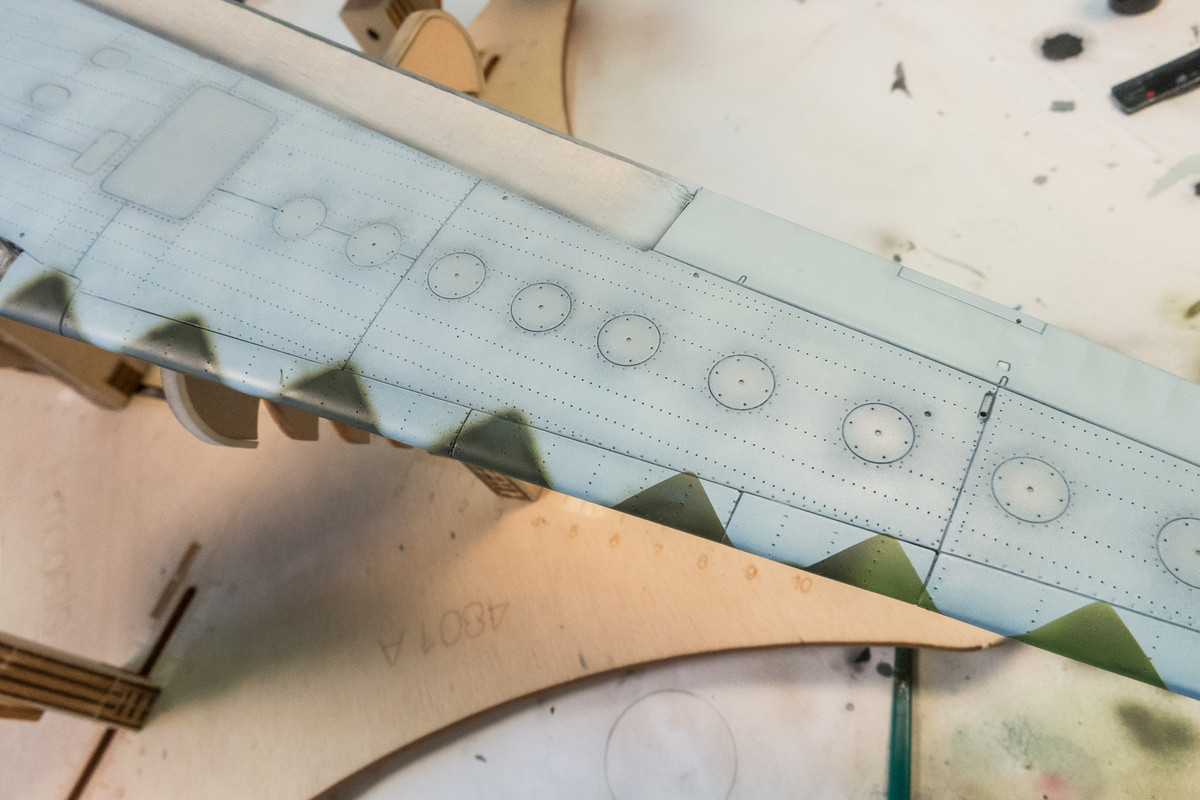
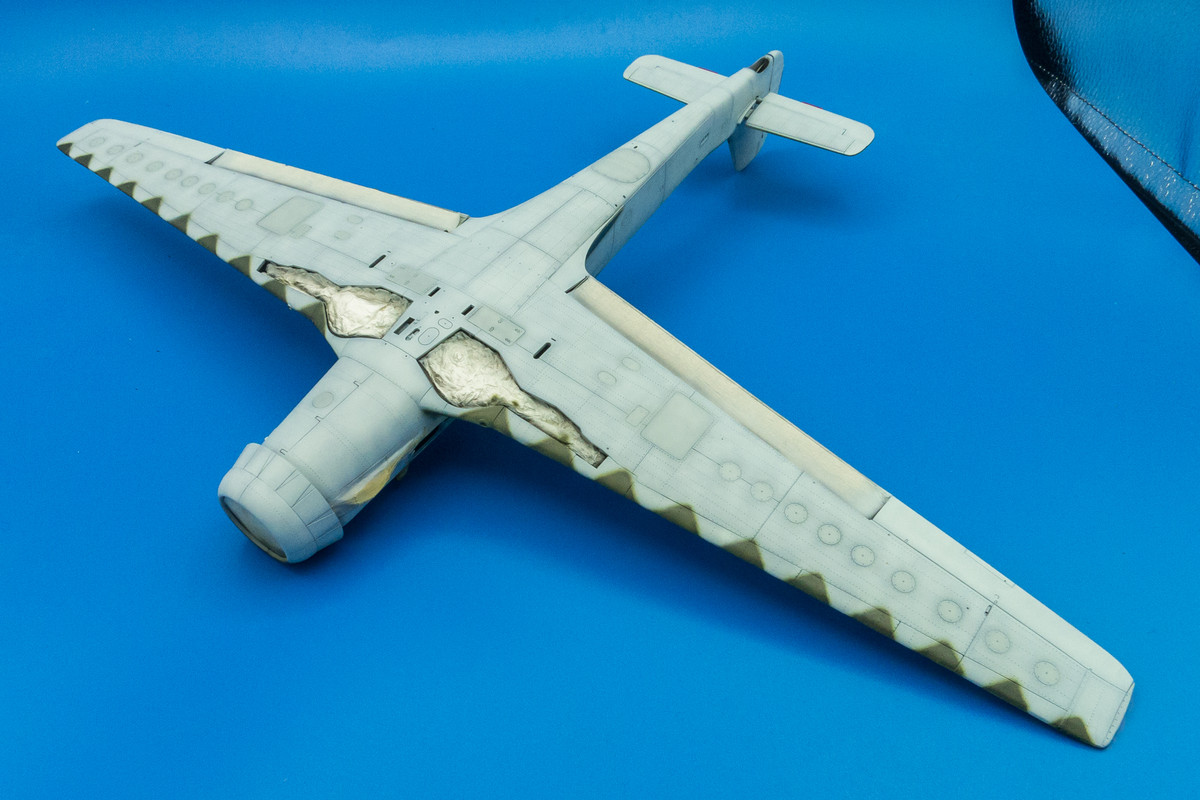
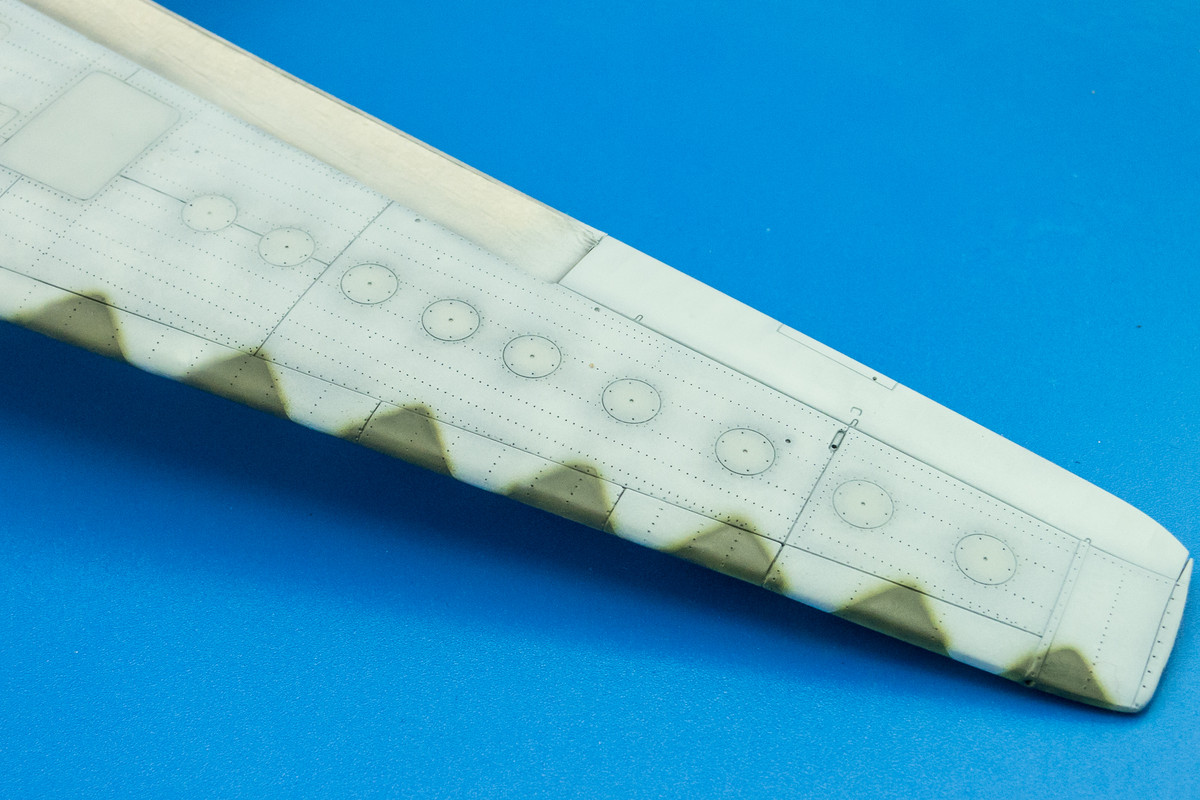
White 7 is known to have a distinctive sawtooth pattern that wrapped the upper camo colors onto the bottoms of the wings. I used the Silhouette Portrait to cut a custom mask to make things easier.

After both wings were done, I decided to soften the demarcation on the sawtooth pattern.


I wasn't getting a fine enough spray out of my Iwata HP-C Plus so I busted out the Badger SOTAR and used that instead.

I painted the 82/83 on the fuselage as well but I stopped short of the actual demarcation line as I want to study my references first.


Next, I will lower the demarcation line and do some mottle work.
The RLM 76 has been established and so it time to put the top colors on. I am going with Bright Green (RLM 82) and Dark Green (RLM 83) for the upper colors. I've seen some variations with RLM 81 but I just wasn't feeling the Brown-Violet on this build. I don't really like AK Real Colors RLM 82 and their RLM 83 is actually a BLUE shade (long story there..) so I'm reverting to Mr Hobby Aqueous versions of these two colors, which I've used before.
I broke traditional order (lighter colors first) and did the Dark Green on both wing roots first so that I could get the hairspray chipping out of the way. After that was done, I did the Bright Green on the starboard wing. Instead of spraying the Bright Green areas on the other wing, I decided to complete the starboard wing and sprayed the Dark Green.

White 7 is known to have a distinctive sawtooth pattern that wrapped the upper camo colors onto the bottoms of the wings. I used the Silhouette Portrait to cut a custom mask to make things easier.

After both wings were done, I decided to soften the demarcation on the sawtooth pattern.


I wasn't getting a fine enough spray out of my Iwata HP-C Plus so I busted out the Badger SOTAR and used that instead.

I painted the 82/83 on the fuselage as well but I stopped short of the actual demarcation line as I want to study my references first.


Next, I will lower the demarcation line and do some mottle work.
John aka JKim
-----------<><

-----------<><