I needed a rest from “Marga”. Holy cow the engine work I put I to that model last week, immediately following the cockpit really wiped me out. And I’m only about half done with the engine- exhausts still need to be painted, and I need to get the mounting arms off the sprue and cleaned up, and I need to add the plumbing which runs along them and plugs into various areas. So I paused to study some references, and also cogitate about how best to affix all that stuff without ruining the fit of the subassembly which depicts the open cowling. See here, those arms, the gun deck, and the top of the motor (which is actually the bottom I guess because it’s inverted) doesn’t get glued on! It’s so cool. You can display the cowling open or closed and there’s different sub assemblies for each, and you can switch any time you wish. Anyhow, to display it with the cowling closed you remove the top of the subassembly comprised of the top of the motor, mounting arms, and gun deck, and pop the closed cowling on there and magnets hold it in place. Pretty neat-O if you ask me,
But also tiring. Very tiring. So I’m taking a break from building Marga to map some things out and do some research, and I started Horst Tietzen’s E3 yesterday! And going into it, I made the decision to back off on all the aftermarket stuff I usually add (though I did install PE seatbelts and I’m installing a PE lever but that’s IT), and try to actually do some new things I don’t normally do... like the instrument panel for example! I had great luck with the kit decals on the IP’s for all three of my Zeros, but boy oh boy did the IP decals with this kit give me a rough time! I could not for the life of me position them correctly...
....SO, I said “Aw screw the decals and paint the damn thing myself!”
I’ve only ever tried that once, and it wasn’t really very good. But I gave it another go with this here model and here’s what I ended up with:
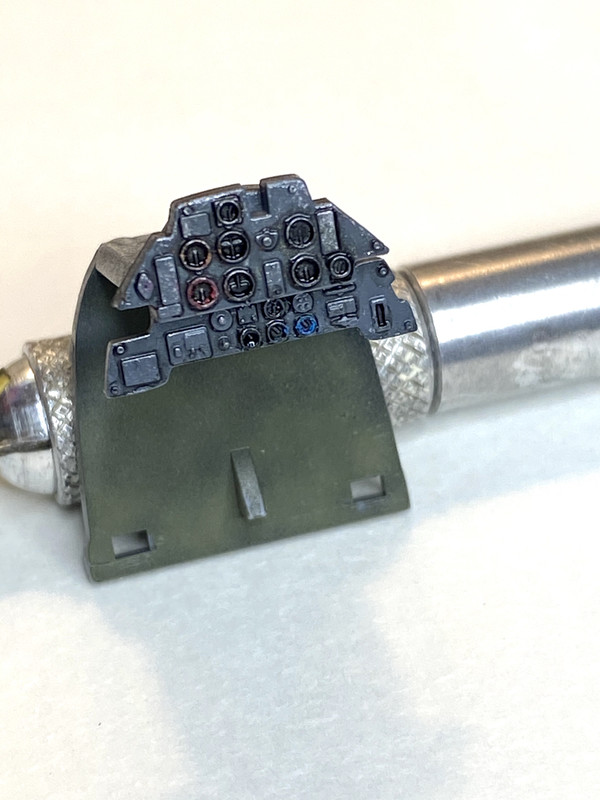
That ain’t too bad if you ask me! Still needs a couple details picked out, and maybe I didn’t choose the best order in terms of painting/marking it- like maybe I should’ve waiting to dry brush it And get after it with the Prismacolor pencils until after I had put the black wash into the dials, but whatever, I’m delighted with it and more importantly than that- I feel great about not using the kit decals and painting the IP instead when it comes time to do “Marga’s”. So that in and of its self was a worthwhile activity for me. And hey! It even got me feeling a little bit like a real modeler, taking the time to paint and detail the IP.
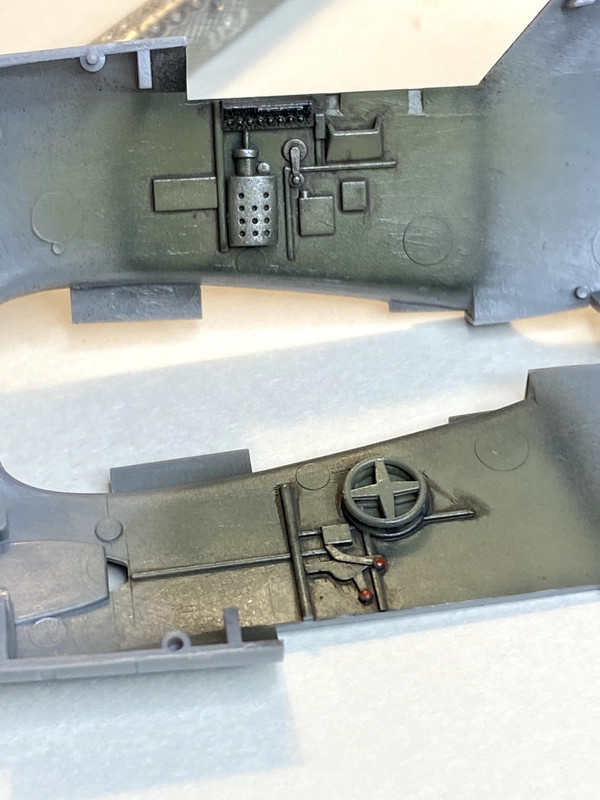
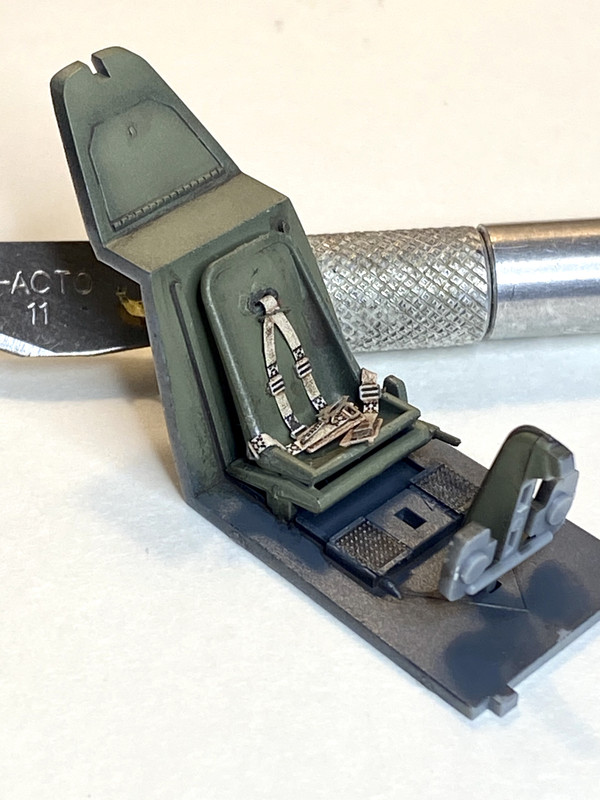
I also am close to wrapping up the cockpit. I opted to actually follow Tamiya’s paint call outs and do the seat, sidewalls, and rear RLM 02, and put the prescribed grey on the floor. I did it because I have heard tell of the office in old Emils painted that way and I thought the contrast would be nice. In terms of weathering, this is the same old same old, SSDD cockpit work you always see me do. Just another basic “Kenny X Special”: black based, lightened in certain areas, neutral brown wash, dry brushing with Dunklegrau and Aluminum, y’all know the drill and you know my mentality: keep it in balance, make it look used but not abused. It needs a stick and a tad more dry brushing and then I’m calling it.
No need for more than that. No need for wiring either. The canopy will be displayed closed (the G6 is my planned “open canopy” offering. This one here just needed the basics, executed well, and I believe I hit that mark.
Okay! That about wraps it up for updates. I’ll have some good stuff on the Eddie VanHalen-Dora front at the next one! Meanwhile I want to catch up on everybody else’s builds.
Have a good day!





 So, if you're crazy for doing so many at one time, then I'm terminally certifiable!
 Besides, you may not be a show or competition guy; but you certainly have the mad skills to contend at one. Ask me how I know....

