1/32 Hasegawa N1K2-J Shiden Kai

Post your work in progress of your aircraft builds in here.
User avatar
jkim
Elite Member
Posts: 4073
Joined: Mon Apr 10, 2017 4:03 pm

Re: 1/32 Hasegawa N1K2-J Shiden Kai

Post by jkim »

Thanks guys! I'm really starting to make good progress on this build as you will see below!
Stikpusher wrote:Looking real good on the undersides. Just curious, but why did you go with IJA Gray instead of IJN Gray for the doped fabric?
I dunno... just thought this shade of grey-green looked ok for this application. I have a couple shades of IJN Grey that came with the AK Real Color IJN set that I'm using the Green from but I chose to use this Tamiya color instead. FWIW, the color call-outs on the instructions show a mix of IJN and IJA shades. And the instructions state Flat Silver for the bottom fabric surfaces so I'm kinda winging it here!

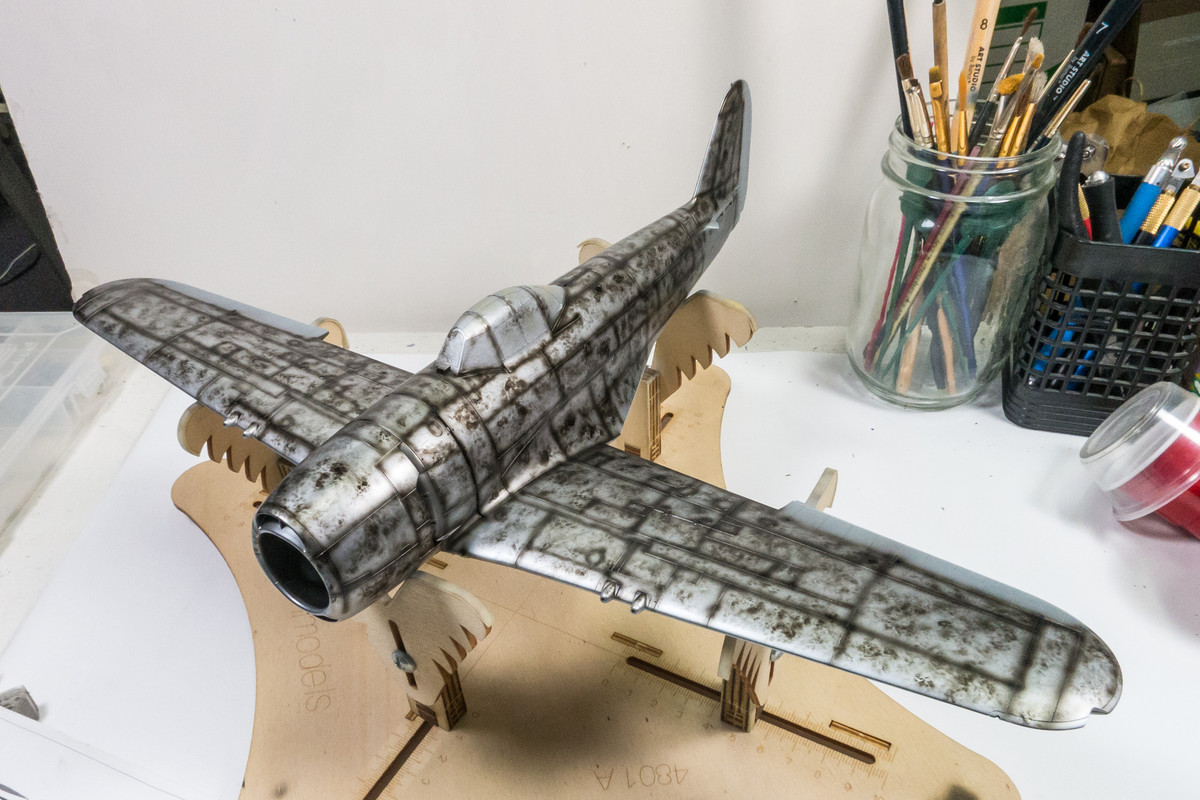
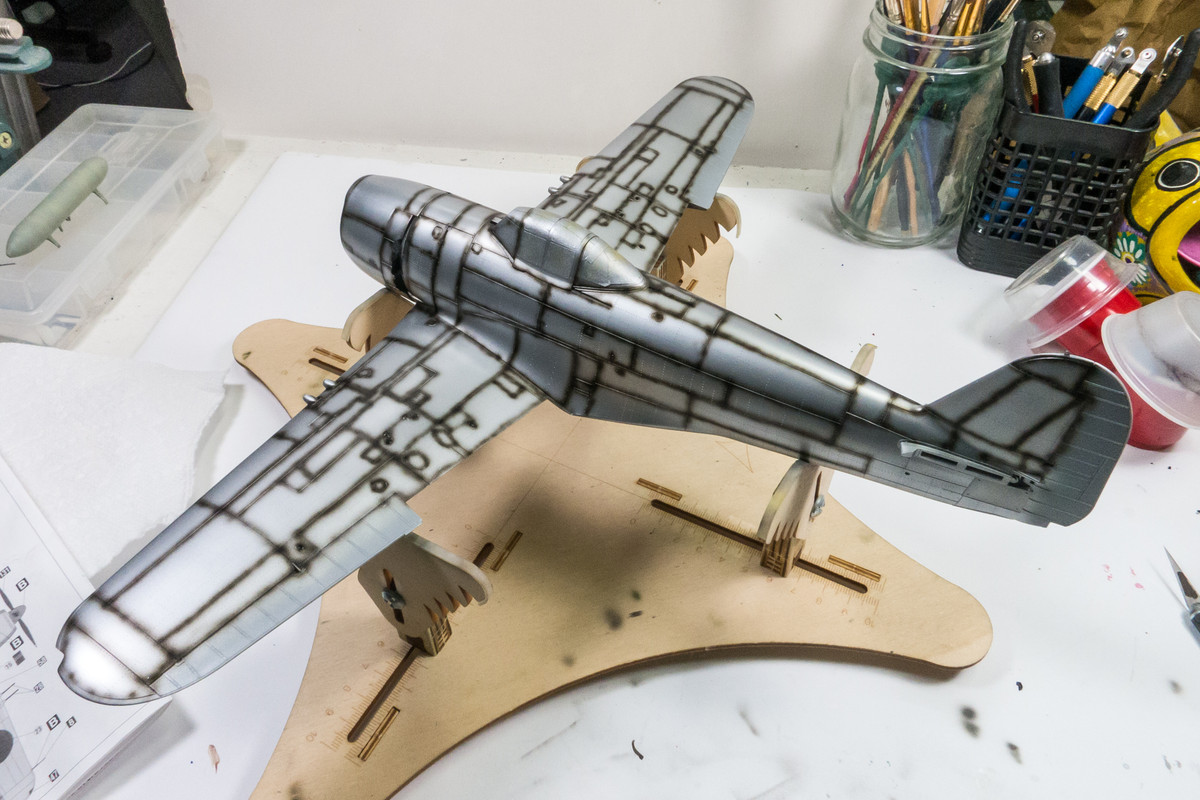
Yesterday, the upper silver surfaces were given a coat of hairspray, which was left to dry for a few hours prior to application of my preshading last night. Same deal as I did previously on the undersides except the order.
Image
Image

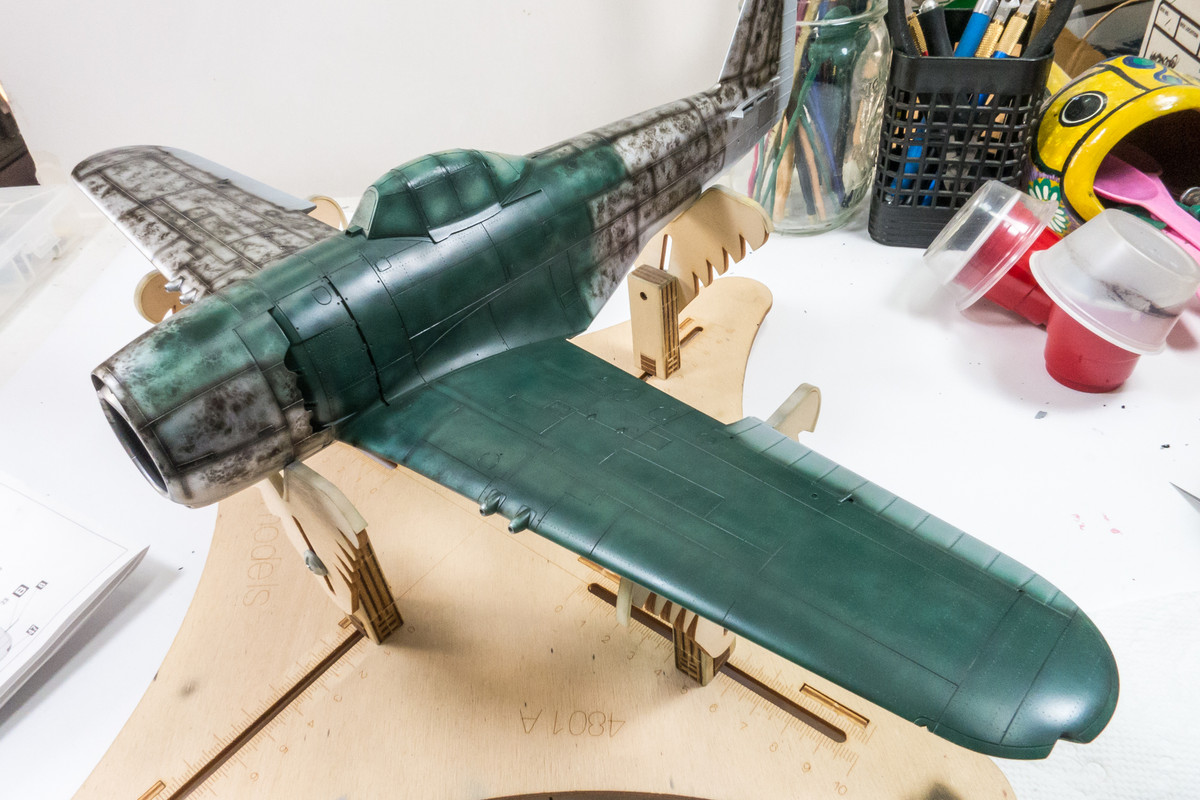
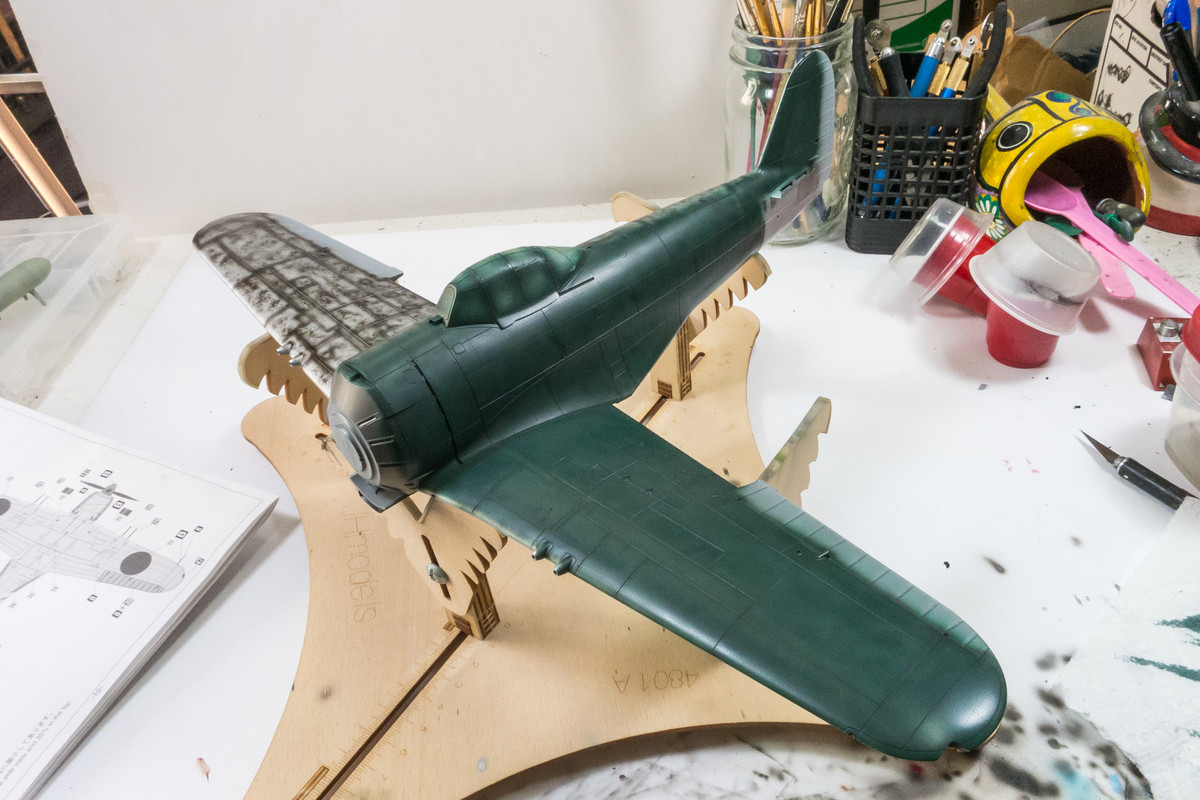
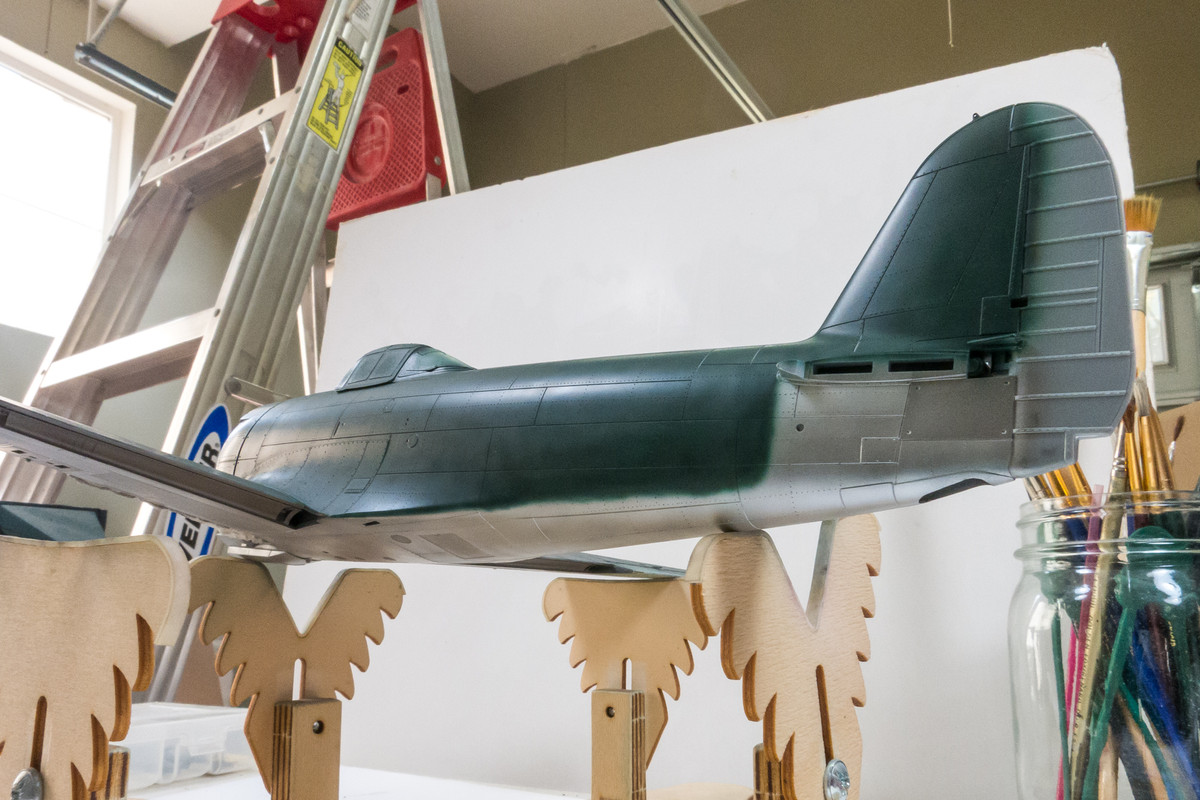
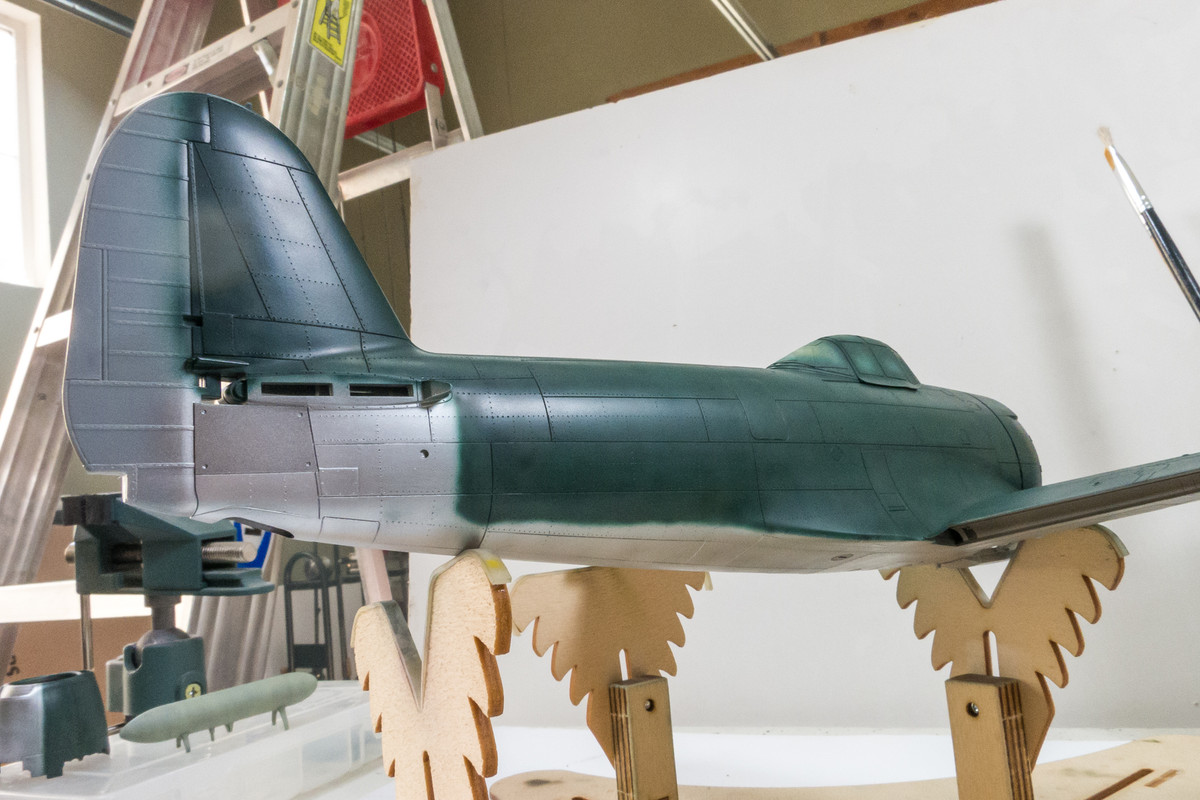
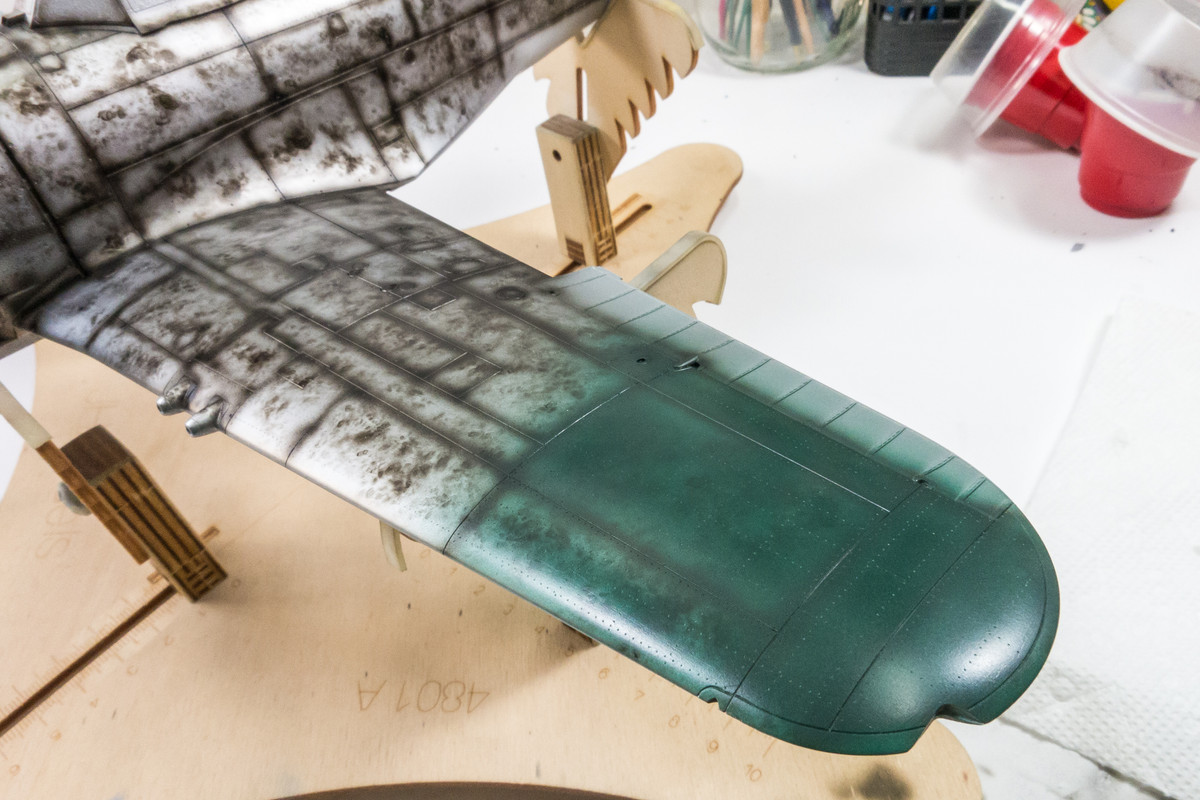
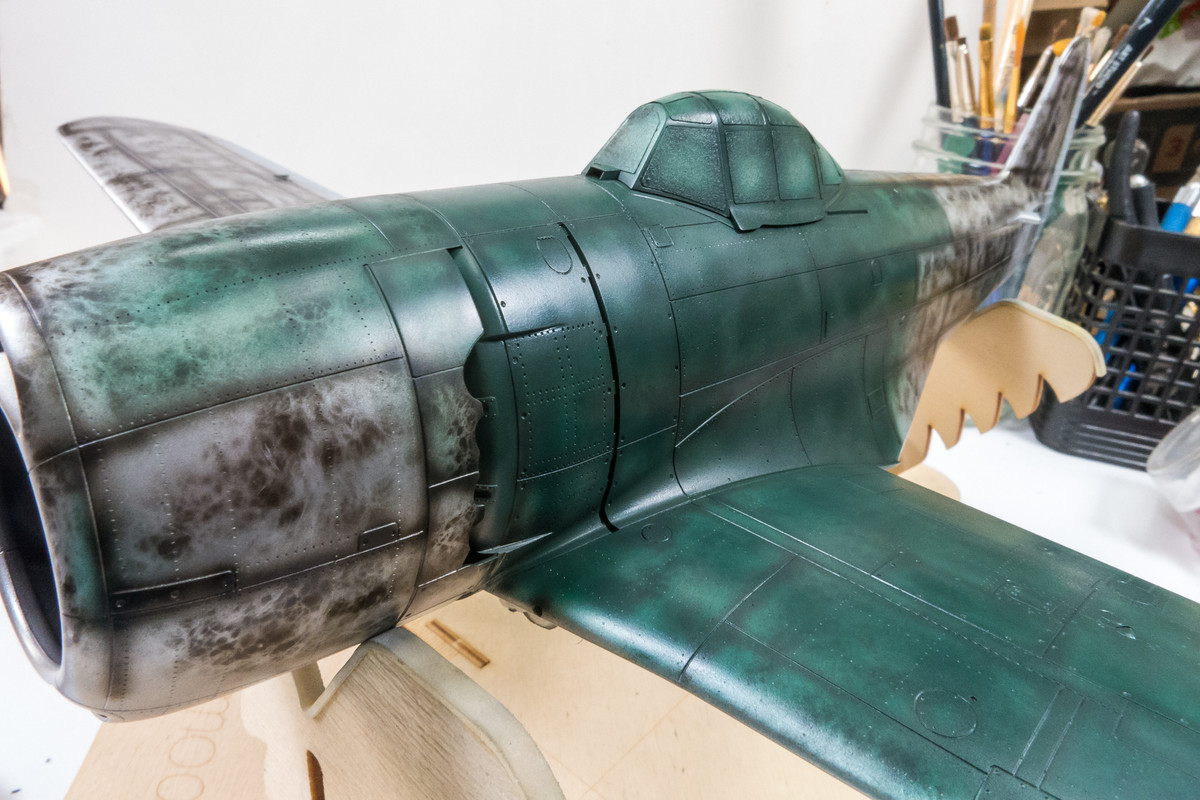
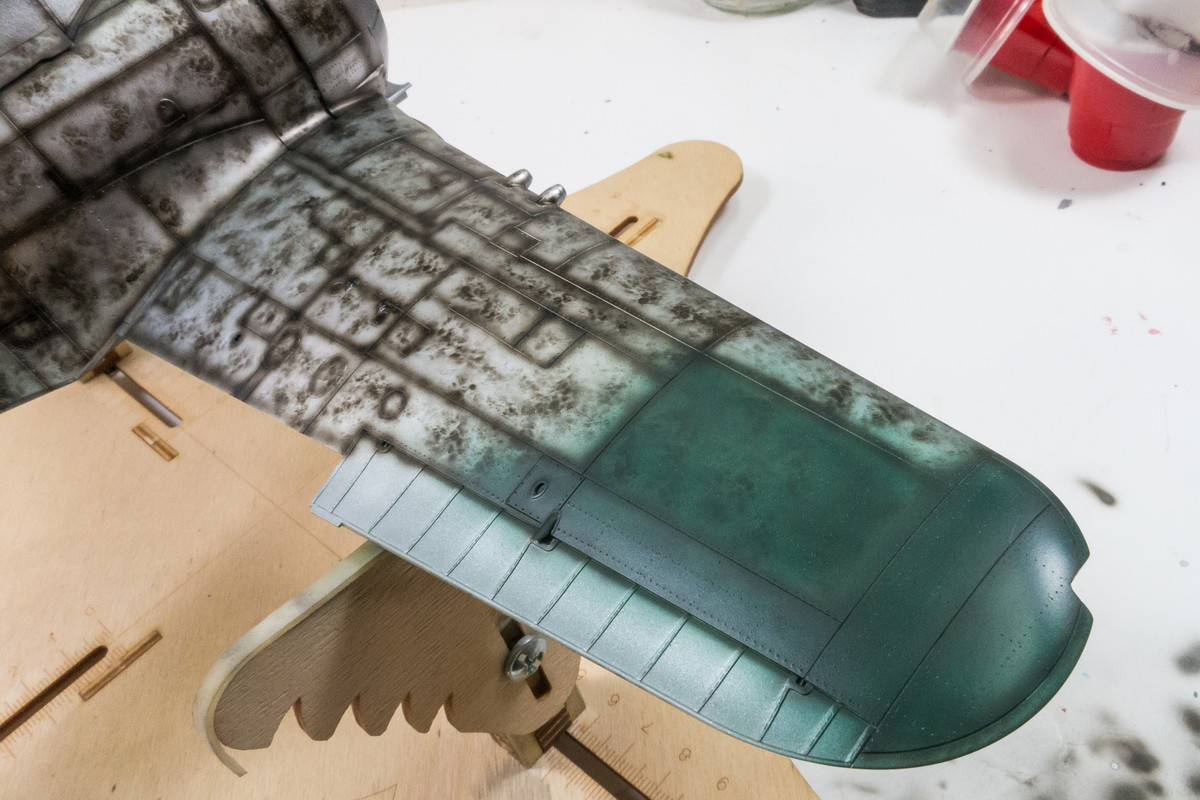
This morning I started on the Green upper surfaces, which is a mixture of AK Real Color IJN D2 Green Black and AK Real Color RLM 83 Blue (3:1 ratio). In order to modulate the pre-shade effects, I thinned the paint at a 2:1 Tamiya Lacquer Thinner:paint ratio. The green color is built up slowly with multiple passes of the airbrush, generally working from panel to panel.
Image
Image

The nice thing about pre-shading is that you can dial in the effect from 0-100. I like a very subtle effect so I'll be filling in the green until the pre-shading is almost imperceptible. The AK Real Colors spray beautifully and are very easy to work with. I like the satin finish versus a matte or high gloss.
Image
Image

When using this technique, it is important to shift perspective occasionally to see the finish from different angles. It's also important to account for the highly-thinned paint to cut into pre-shade layer over time as it dries. The finish may look different a couple of minutes after spraying.
Image
Image

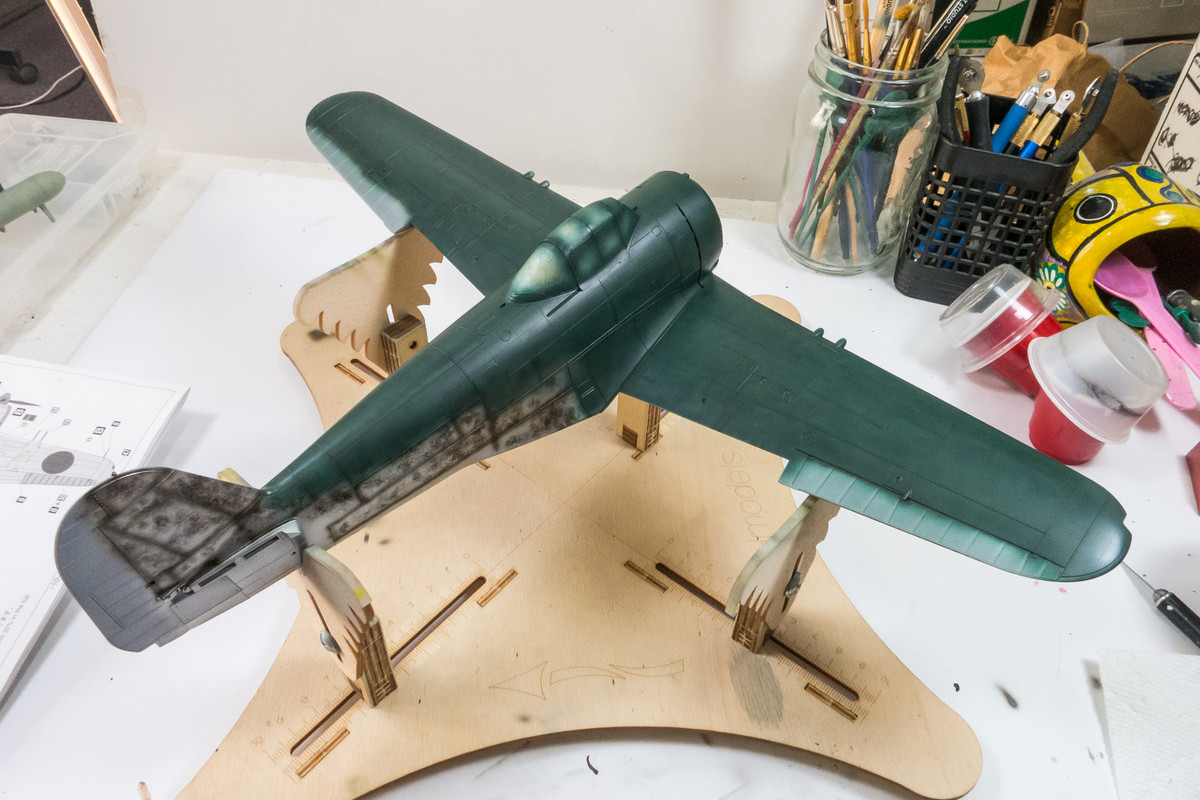
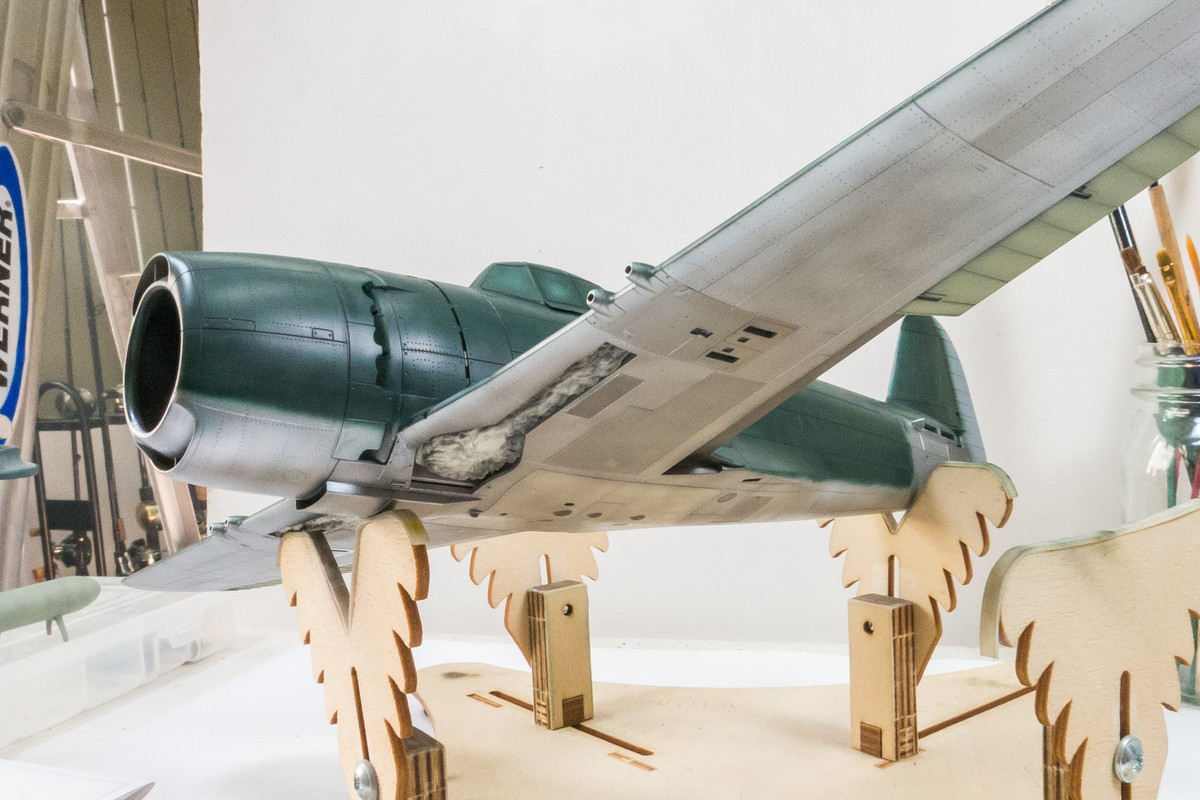
I decided to spray the demarcation line without the use of any masks, just freehand.
Image

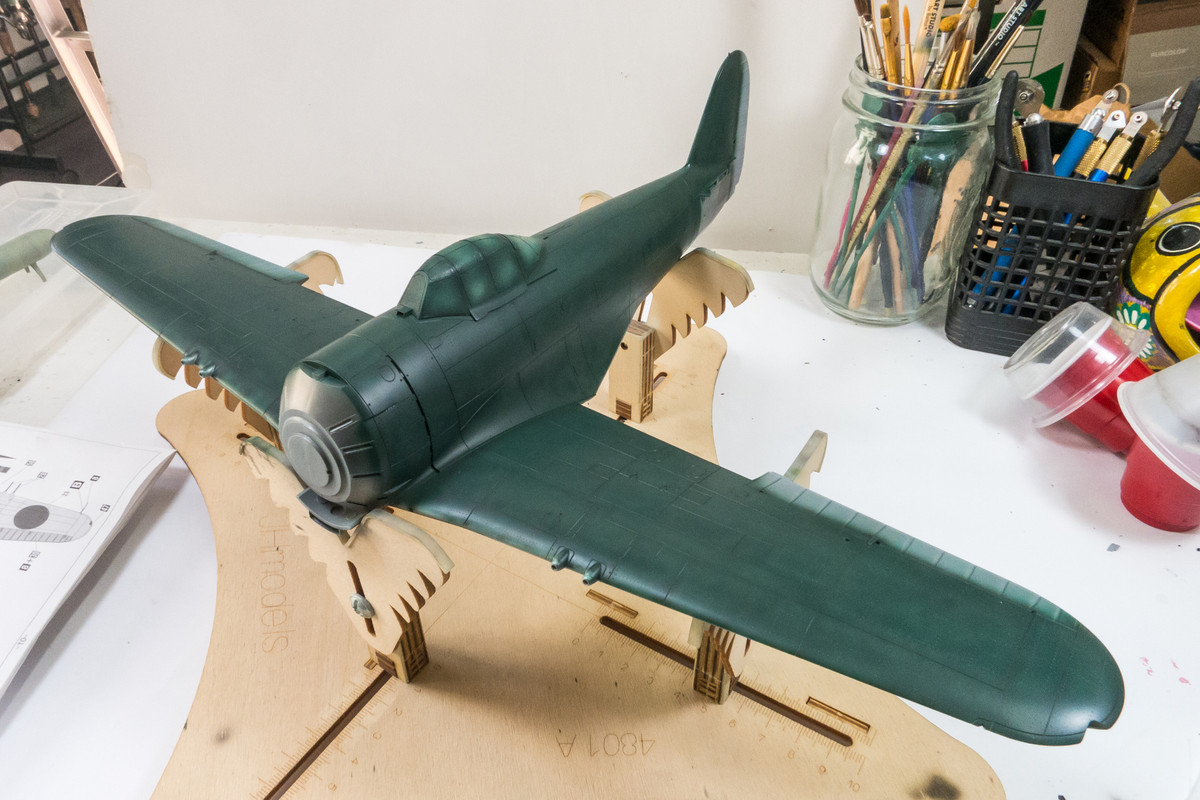
The green is finished and I'll allow it to dry but not completely cure before I start the chipping. The fabric ailerons and rudder will be painted in a slightly different shade of green and after the chipping process.
Image
Image
Image
John aka JKim
-----------<><
Image
User avatar
KennyX
Elite Member
Posts: 2631
Joined: Sun Dec 24, 2017 11:19 am

Re: 1/32 Hasegawa N1K2-J Shiden Kai

Post by KennyX »

John,

Thank you for posting this! I recall painting the green on my first Zero, I tried a very similar procedure to the one you outlined here with your last post, and I wasn’t 100% happy with my results. And I can pinpoint why, after seeing you get fantastic results from a similar method. I omitted the preshading step and went straight to the mottling step and in doing so lost any available contrast between panels to play with. So I appreciate that lesson, and just the walk-through in-general. She’s looking great! And furthermore, I like the green you picked to work with as opposed to Tamiya’s. Tamiya’s, to my eye, is too dark and not satin enough. This make/shade Of green you used looks the goods AND has that particular smoothness and sheen which I wanted to get but couldn’t. Very nice!

Image
OH GLORY THAT’S BEAUTIFUL.
Kenny X
Head Mother Trucker In-Charge @ Kenny X’s Reichs Winzigkleines Flugzeugewerks *and now* Airboat Records, too!
User avatar
jkim
Elite Member
Posts: 4073
Joined: Mon Apr 10, 2017 4:03 pm

Re: 1/32 Hasegawa N1K2-J Shiden Kai

Post by jkim »

Thanks Kenny! Both AK Real Colors and Mr Hobby Aqueous feature that nice satin finish on their WW2 paints but otherwise behave very similarly to Tamiya Acrylics. I recommend both!

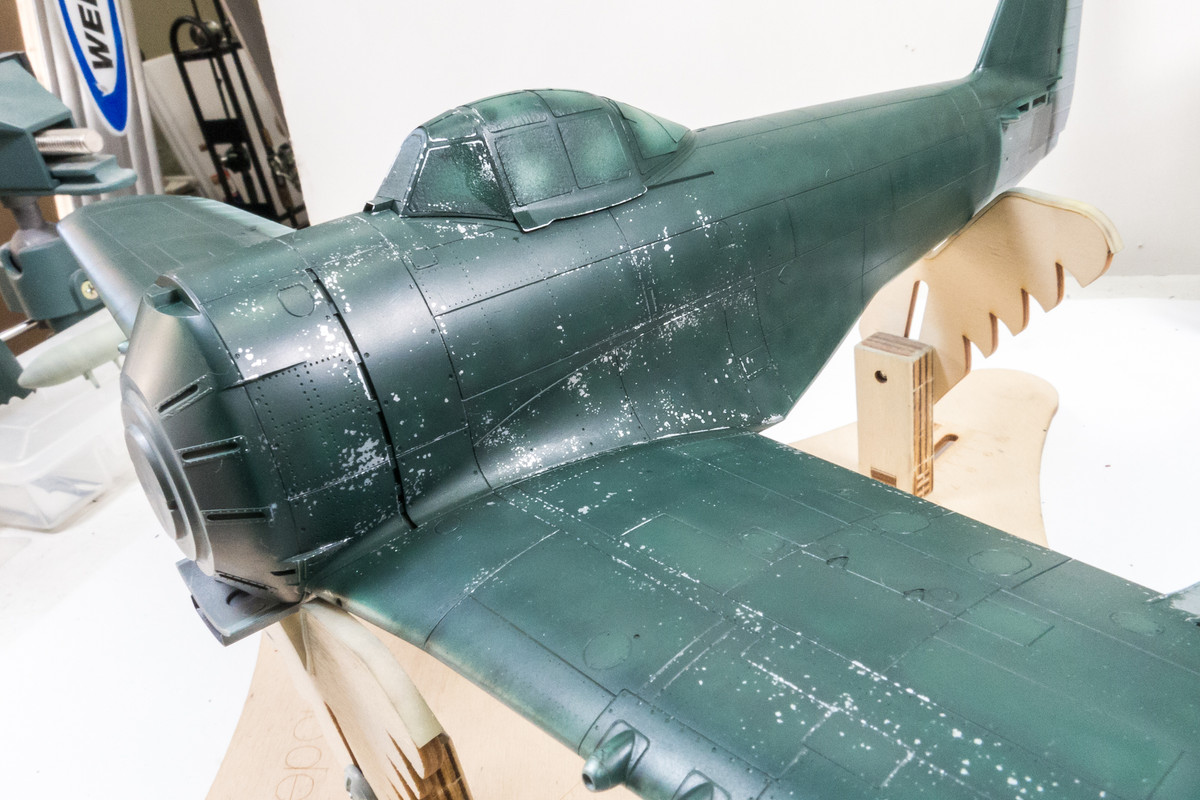
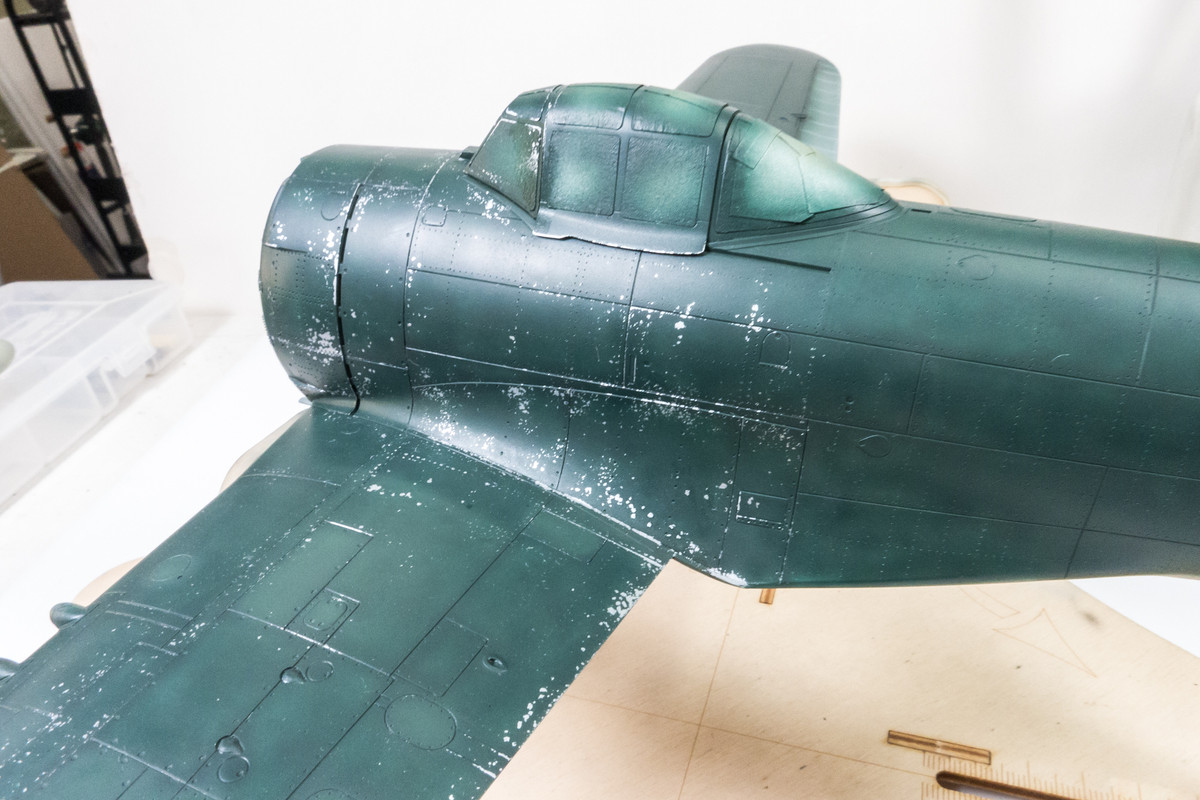
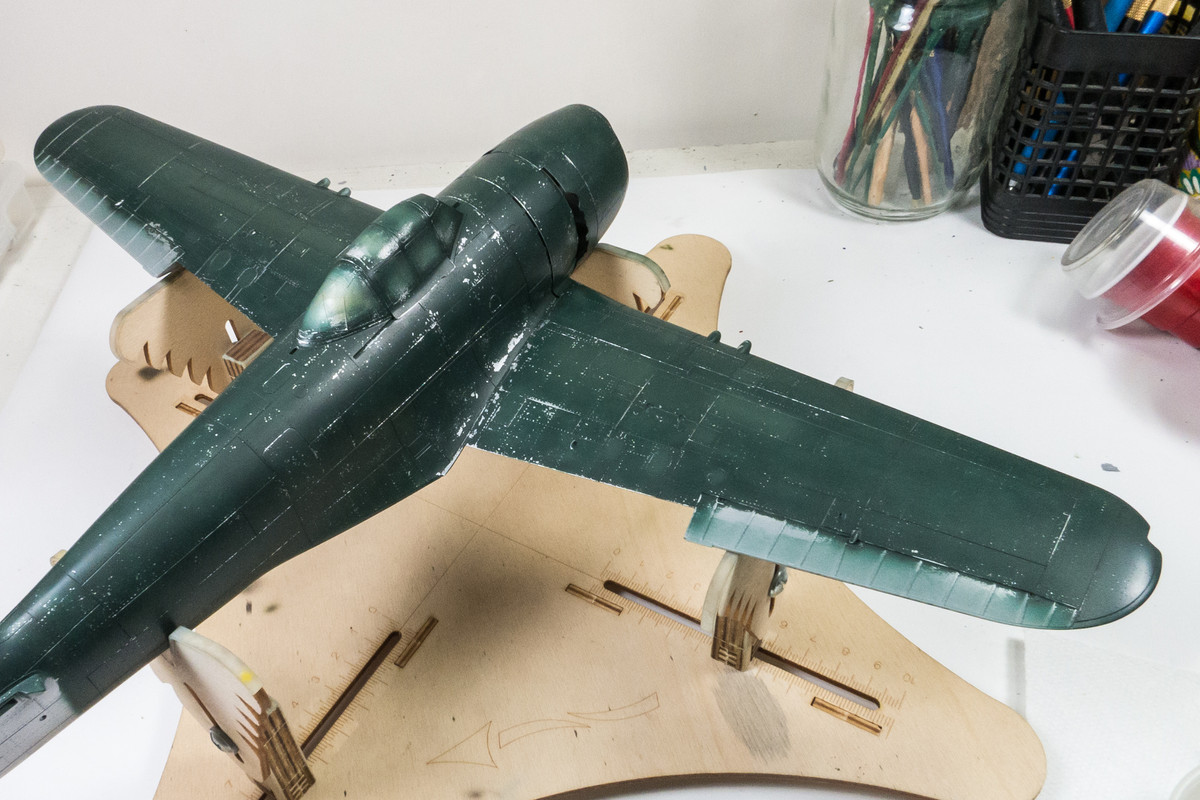
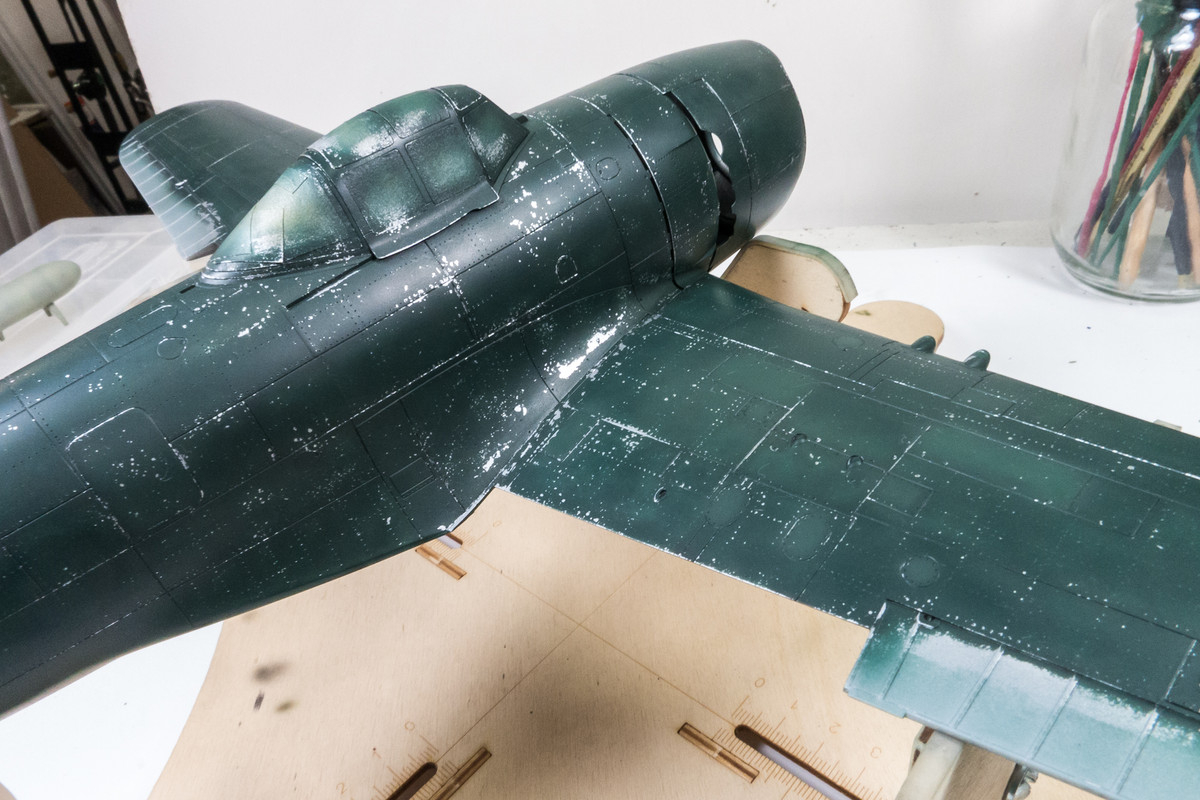
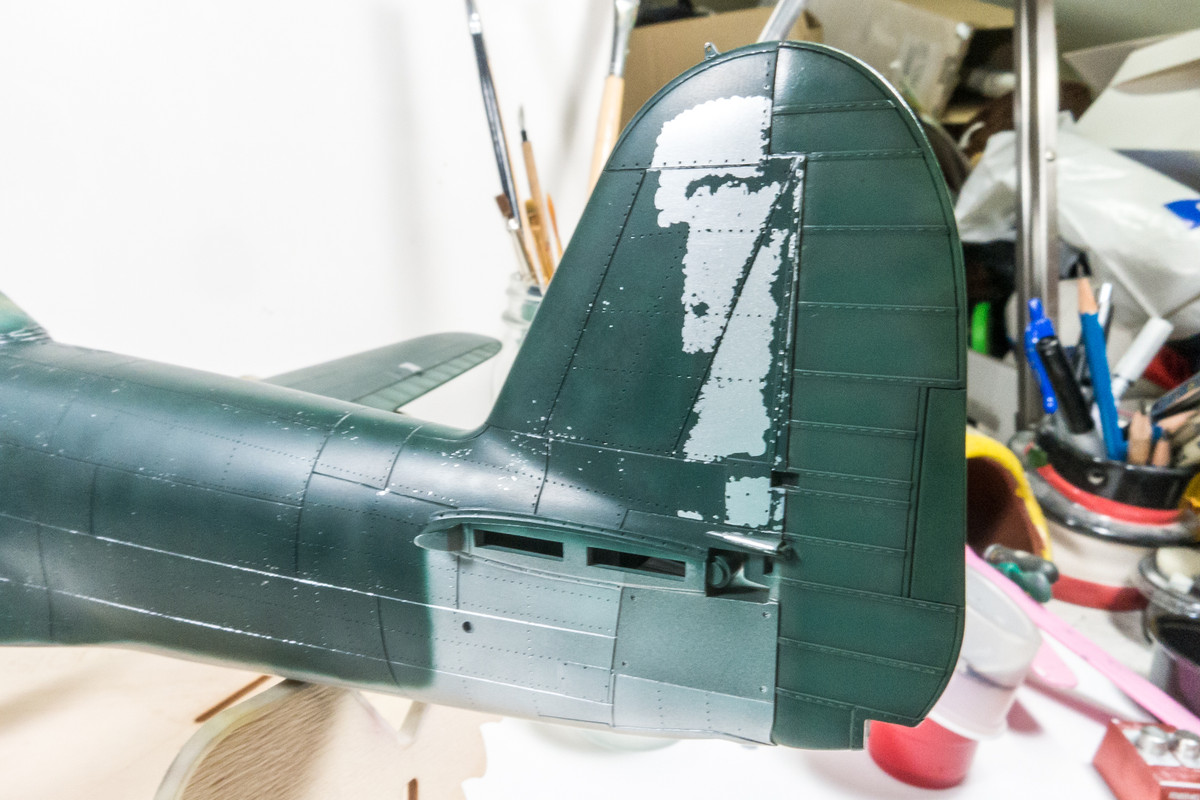
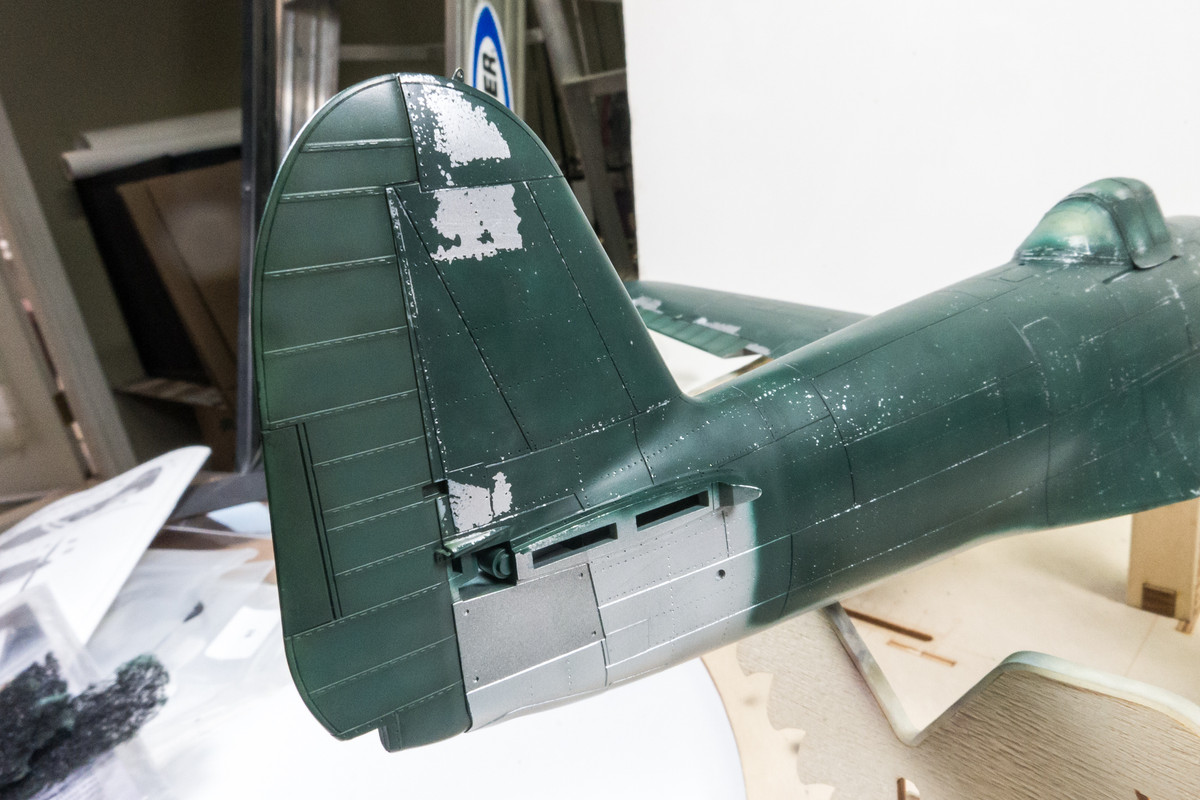
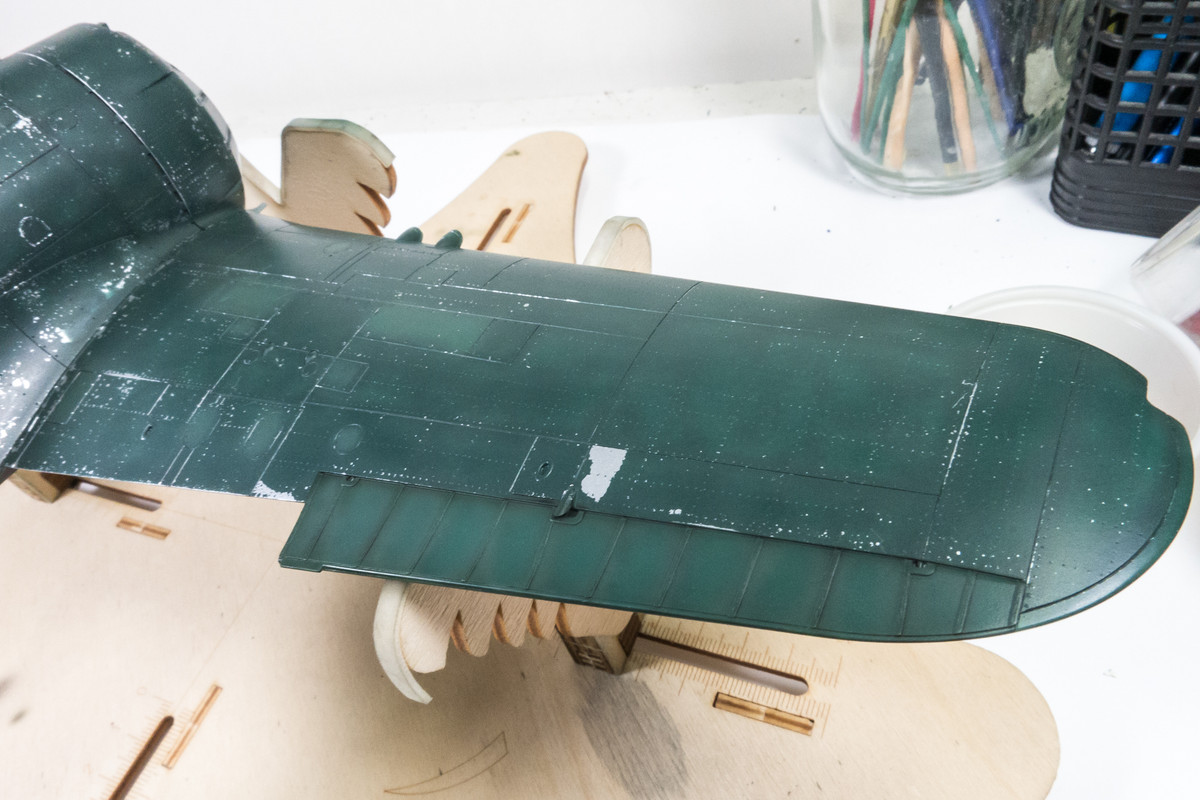
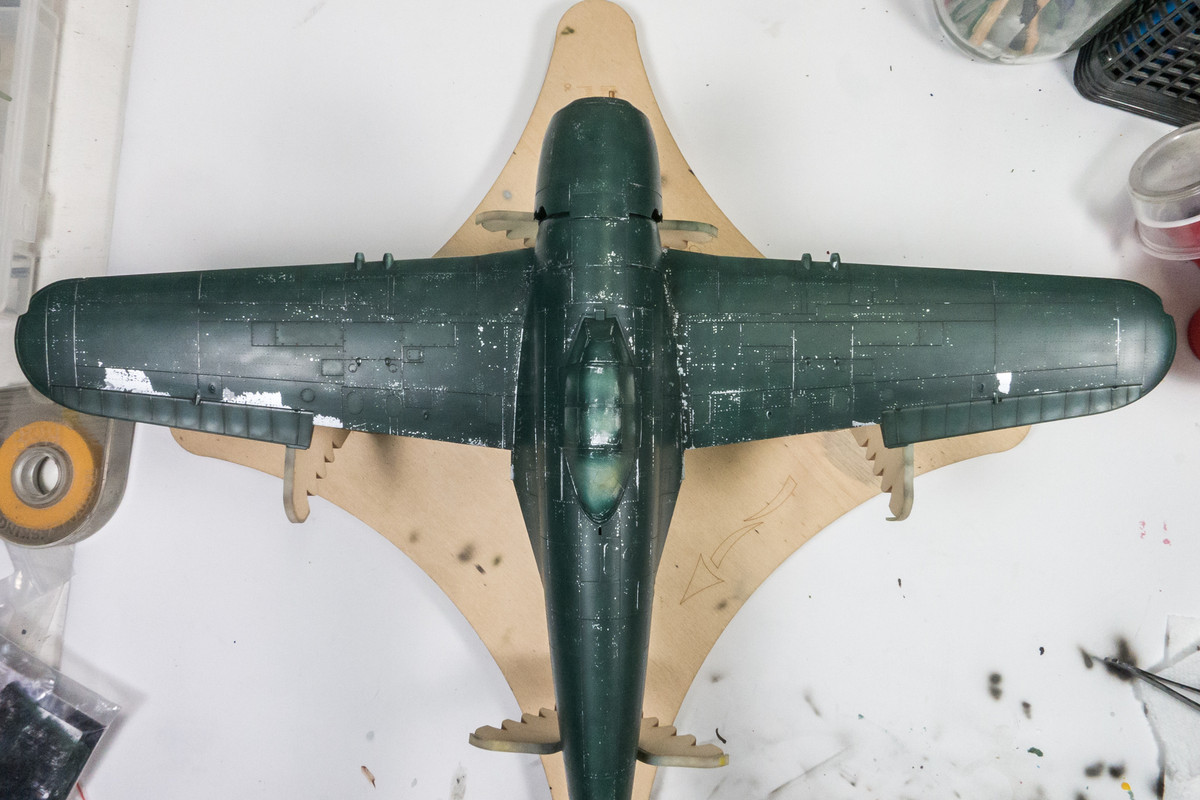
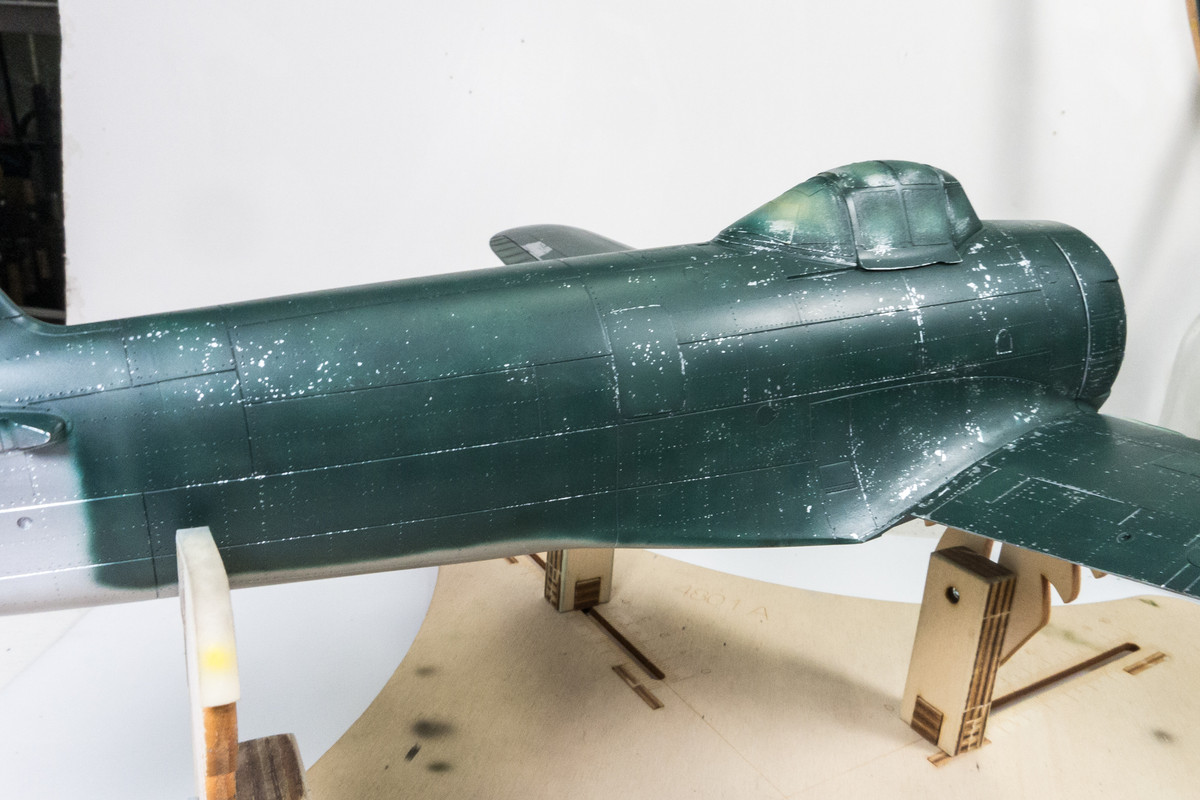
Didn't want the Green layer to completely cure so I attacked the chipping a few hours after spraying. I found it best to work in small areas at a time and to not let the water pool too long the paint or the chips would get uncontrollably large.
Image
Image

Japanese aircraft have been documented to experience very heavy paint chipping so I wanted to be fairly extensive with this without going overboard, keeping in mind that I can also add chipping later.
Image
Image

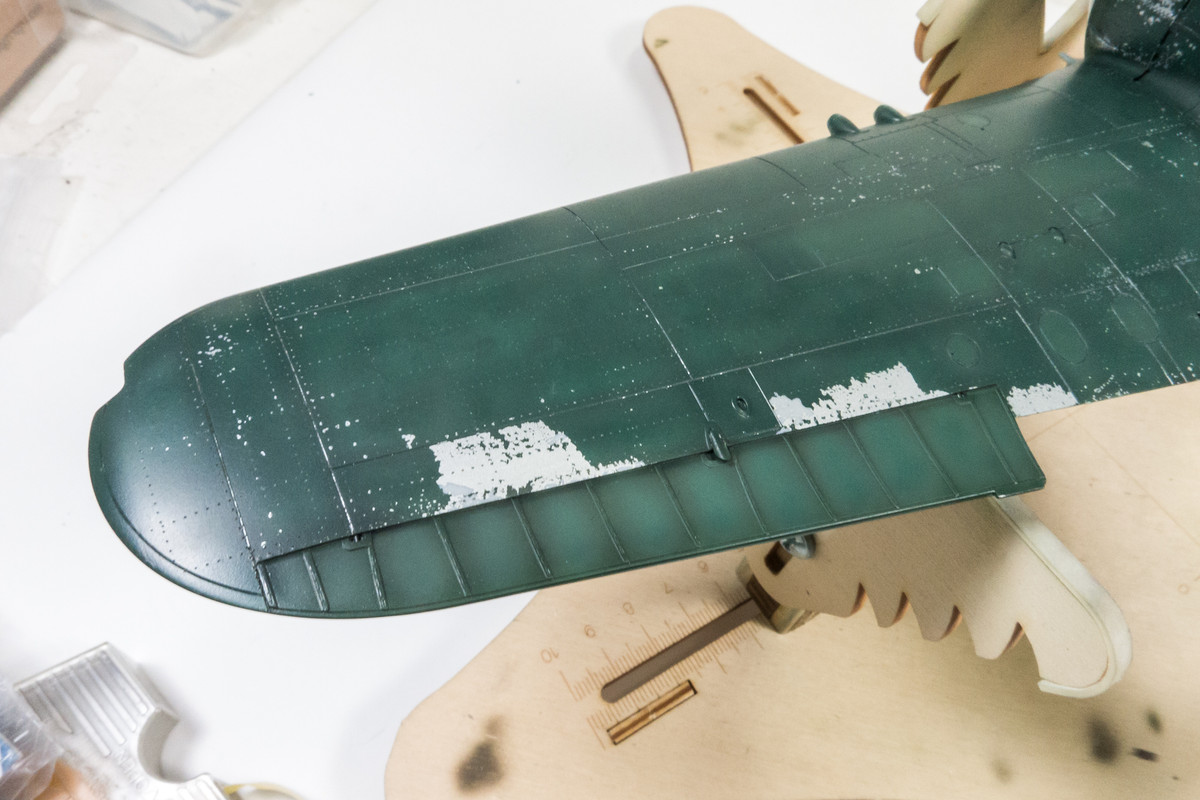
Since water disrupts the green paint layer at its base, I waited a couple of hours to move on to the next step, which was to paint the fabric-covered ailerons and rudder in a slightly lighter green shade. Unfortunately, the green paint lifted in many areas. The effect is quite interesting... almost usable. After a similar experience on the combat flaps, I have to figure out a different way to repair these areas while trying to leave some chippings effects behind... salt chipping?
Image
Image
Image
Image

Outside of those paint lift areas, I'm fairly satisfied with the chipping effects at this stage. My main worry now is the integrity of the green finish. I've got some large adhesive masks coming up.
Image
Image
John aka JKim
-----------<><
Image
User avatar
KennyX
Elite Member
Posts: 2631
Joined: Sun Dec 24, 2017 11:19 am

Re: 1/32 Hasegawa N1K2-J Shiden Kai

Post by KennyX »

I wish I had the discipline it takes to get results like these with the hairspray method. They look fantastic!

I am sorry to see the paint pullaways, that always disappoints me, but I’m certain you can fix it! As for keeping some of the chipping, you’re probably good to go with using salt but maybe one of the other guys could weigh-in in that, the only thing that gives me pause about the salt chipping fix -and this is just theoretical- is: does salt in any way interact with the paint or thinner in such a way as to discolor the paint around it or shift it, even slightly? That’d be my main concern.

Anyhow, this is great stuff!
Kenny X
Head Mother Trucker In-Charge @ Kenny X’s Reichs Winzigkleines Flugzeugewerks *and now* Airboat Records, too!
User avatar
Floki
Elite Member
Posts: 3548
Joined: Wed Dec 12, 2018 2:23 am
Location: Muncie, Indiana

Re: 1/32 Hasegawa N1K2-J Shiden Kai

Post by Floki »

Beautiful results! Have you tried putting down a clear coat before masking? I've had the same thing happen before and find that a clear coat over the chipped paint kind of locks it in and keeps more from lifting.
March as one, Don't look back
Odin's sons... Attack!
Unleash hell! Do not repent! Warfare grants us no lament
Let your weapons slash and tear This is no place for fear
Hold the lines! Move as one! In unity our victory's won
Our shields will form a mighty wall
United we shall never fall
User avatar
tempestjohnny
Elite Member
Posts: 3804
Joined: Sat Oct 15, 2016 4:51 am
Location: Naples. FL

Re: 1/32 Hasegawa N1K2-J Shiden Kai

Post by tempestjohnny »

I would almost keep it the,way it is. Some photos to show massive flaking of paint. Who is to say otherwise on your particular subject. Plus it adds a bit of contrast from the chipping on the rest of the airframe. I would figure out how to seal what's there for the masks you mentioned.
User avatar
jkim
Elite Member
Posts: 4073
Joined: Mon Apr 10, 2017 4:03 pm

Re: 1/32 Hasegawa N1K2-J Shiden Kai

Post by jkim »

Thanks guys! One of the pitfalls of the hairspray method is that it creates instability in the paint layer. Good for chipping but bad for almost everything else. I tried salt chipping on a few areas to save some of the chipping prior to spraying the green but that it didn't turn out that great as water + hairspray created some issues. I ended up just spraying another coat of green over the paint lifted areas and will try to add chipping later. I did attempt to seal the green paint with a clear coat but I'll give it some more time before using the masks topside.

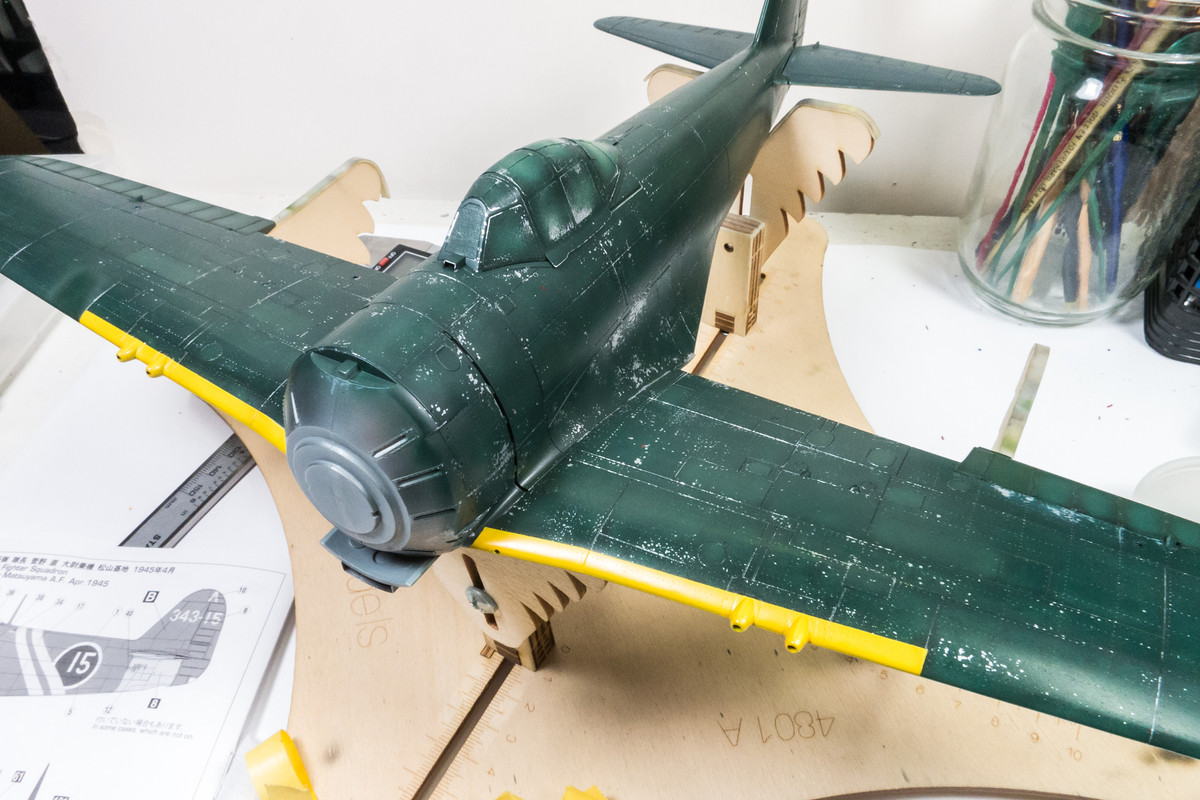
I did mask and paint the yellow leading edges on the wings. Some more paint lift occurred on the starboard wing, which is not a good sign for things to come.
Image

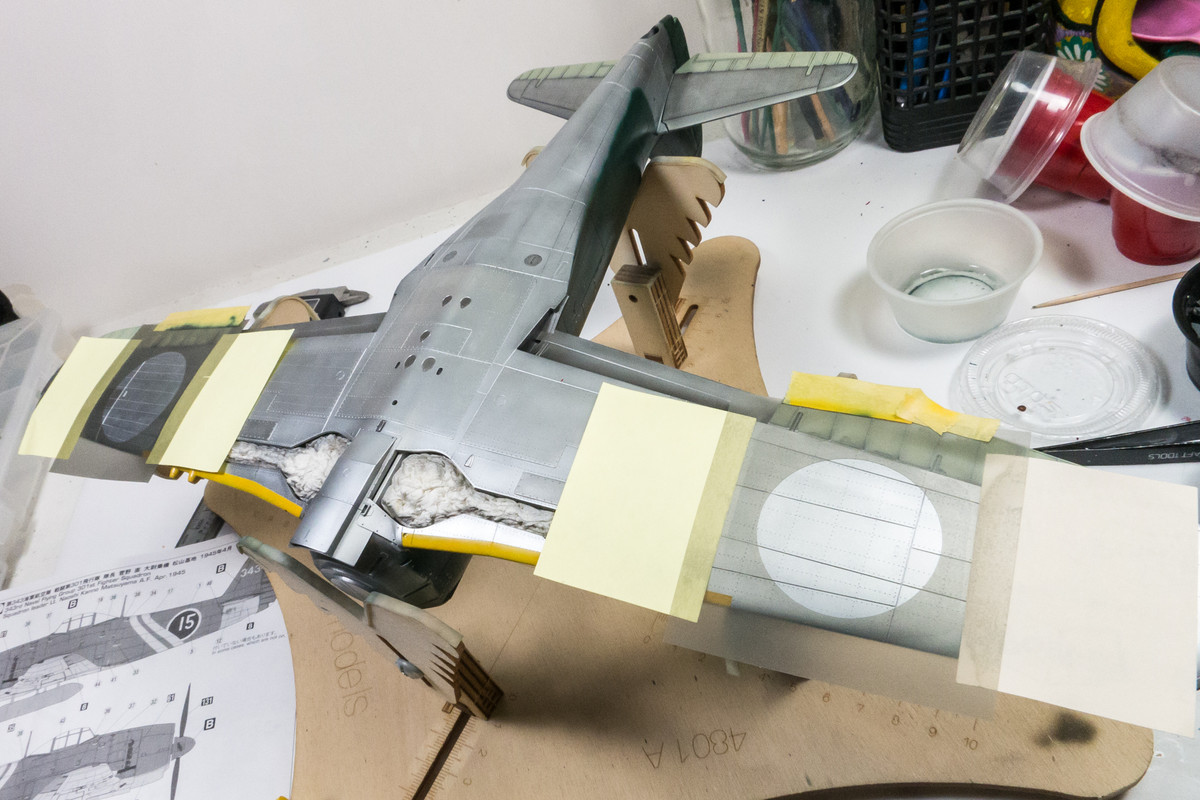
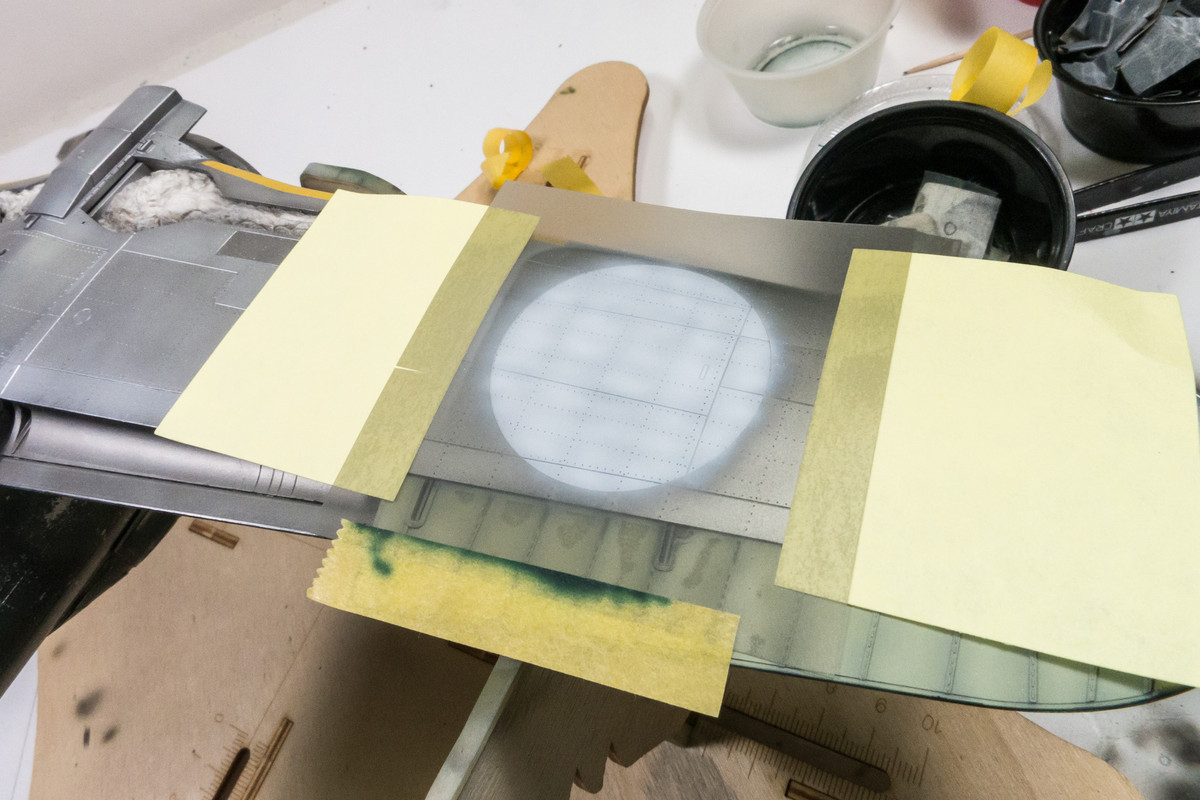
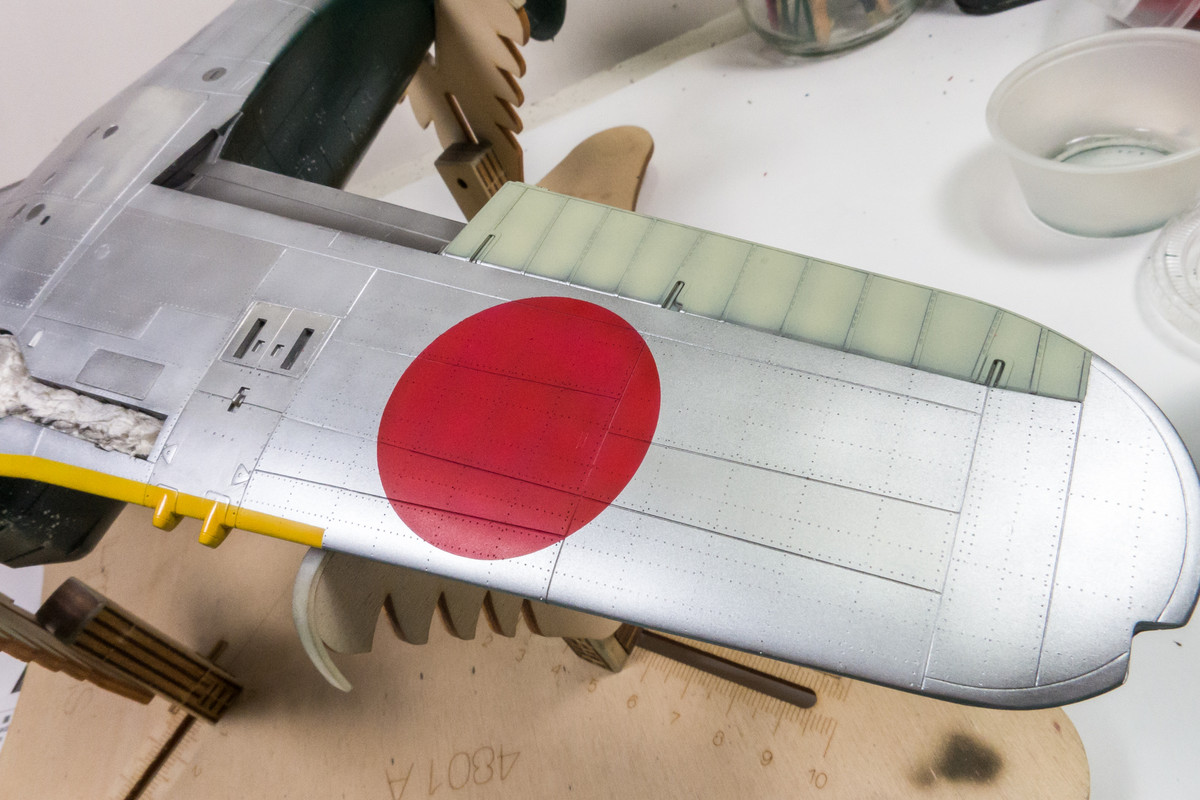
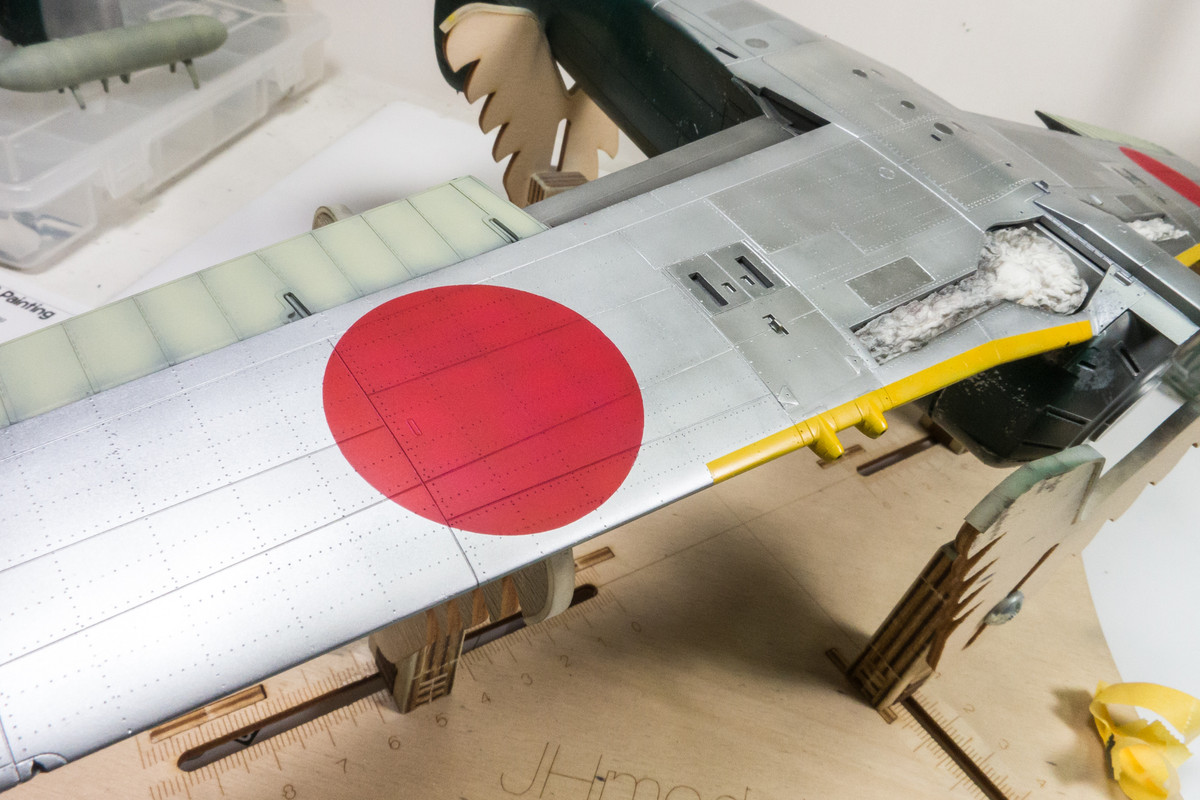
The underwing hinomarus were applied at this stage using custom-cut masks from the Silhouette Portrait cutter. One of the keys to a good result is to make sure that mask is burnished perfectly flat and that there are no raised edges on mask.
Image

White was used to form a base coat for the red and I applied it an uneven manner to serve as pre-shading.
Image

Image
Image
John aka JKim
-----------<><
Image
User avatar
LyleW
Admin
Posts: 15035
Joined: Fri Dec 13, 2013 7:25 am
Location: Mt. Washington KY

Re: 1/32 Hasegawa N1K2-J Shiden Kai

Post by LyleW »

Aces, John. Just aces! Magnificent.
To make each build less crappy than the last one. Or, put another way, "Better than the last one, not as good as the next one!"..
User avatar
Medicman71
Elite Member
Posts: 11299
Joined: Mon Apr 07, 2014 9:32 am
Location: Houston, Tx

Re: 1/32 Hasegawa N1K2-J Shiden Kai

Post by Medicman71 »

Wow! Those turned out perfect!
Mike

Sponsored by Boeing, Lockheed Martin, Northrop Grumman, Saab, BAE, and Dassault
User avatar
Floki
Elite Member
Posts: 3548
Joined: Wed Dec 12, 2018 2:23 am
Location: Muncie, Indiana

Re: 1/32 Hasegawa N1K2-J Shiden Kai

Post by Floki »

Nice! I've said it before but painted on markings just look so much better than decal.
March as one, Don't look back
Odin's sons... Attack!
Unleash hell! Do not repent! Warfare grants us no lament
Let your weapons slash and tear This is no place for fear
Hold the lines! Move as one! In unity our victory's won
Our shields will form a mighty wall
United we shall never fall
Post Reply

Return to “Aircraft Work in Progress”