1/32 Revell Me262B-1/U1 Nachtjager







Re: 1/32 Revell Me262B-1/U1 Nachtjager
Thanks guys! Cockpit is almost done but it won't be complete until the fuselage halves are stuck together and that isn't for a while yet.
The cockpit side walls aka "tube" have been glued into place. The fit wasn't the greatest here and I had to force some light contact areas together with CA glue. The important thing is to not overlay force it into a shape that will throw off the fit of the fuselage halves.

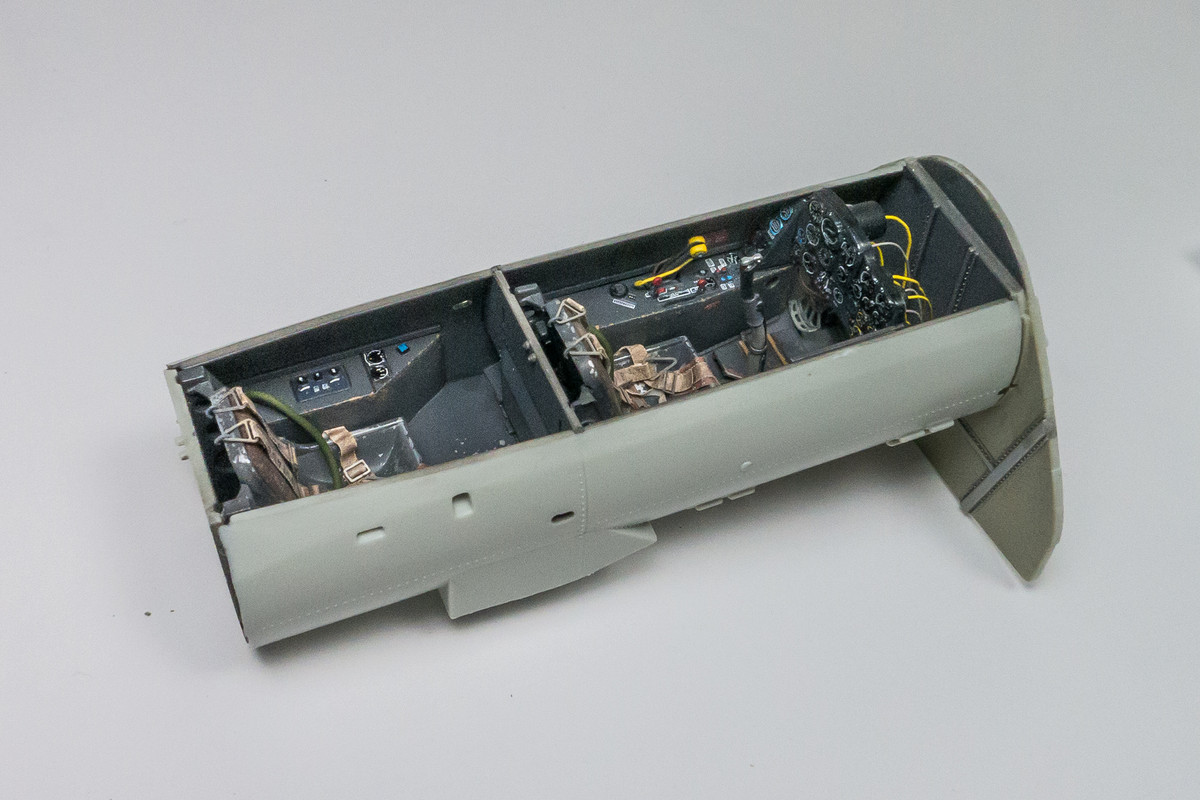
The undersides of this assembly will be visible through the wheel wells. I'm going to be painting the wheel wells in a combination of metal and RLM 02 Gray Green, some of which is already painted.
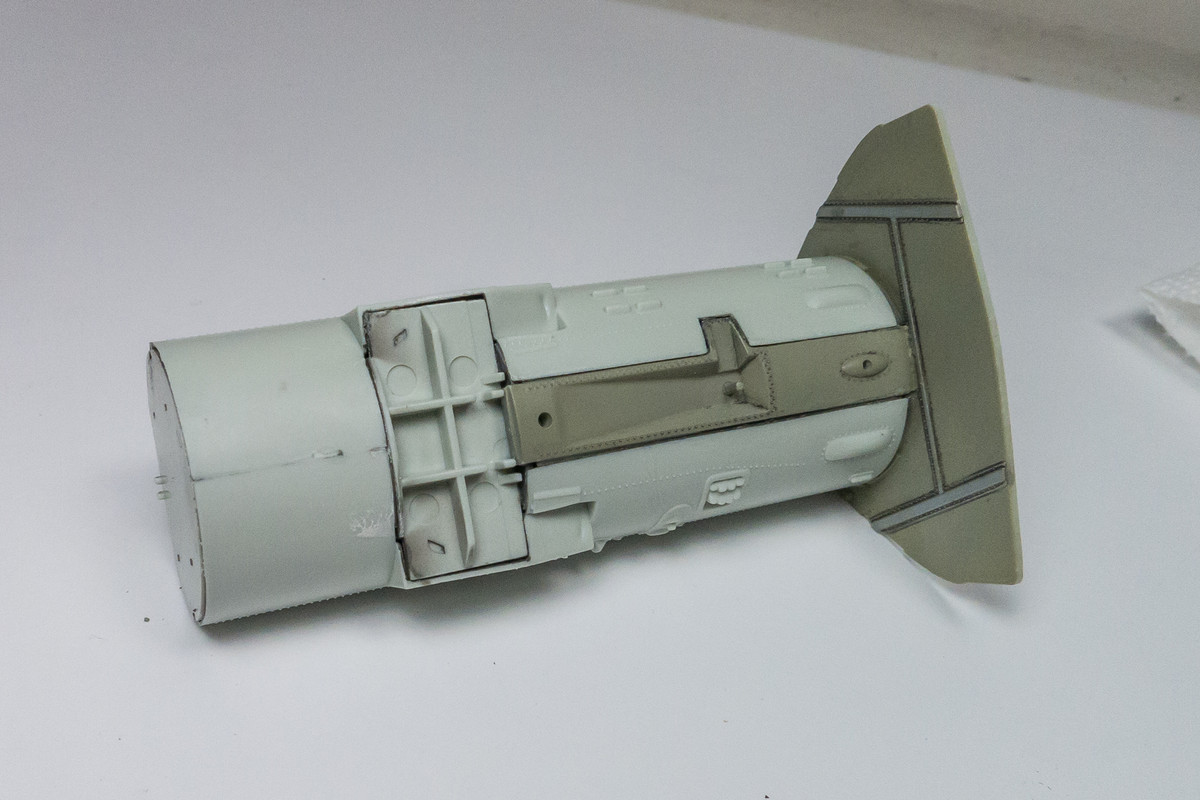
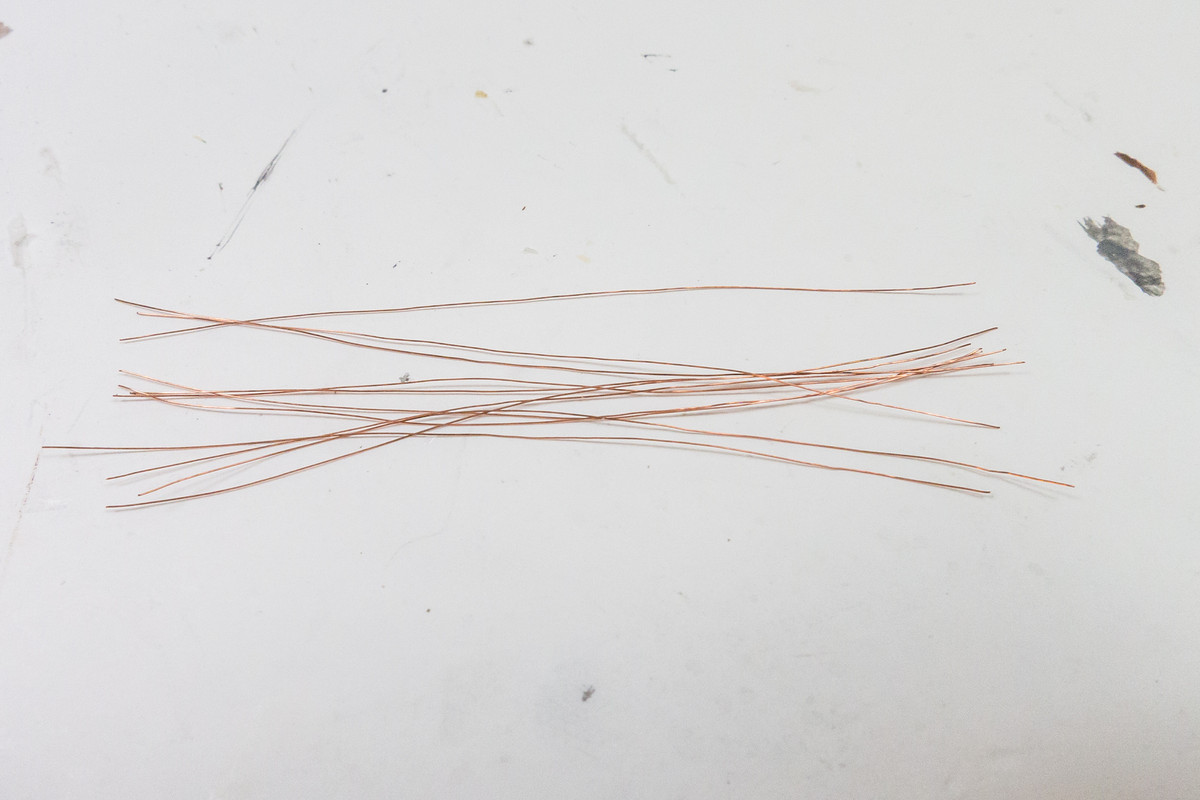
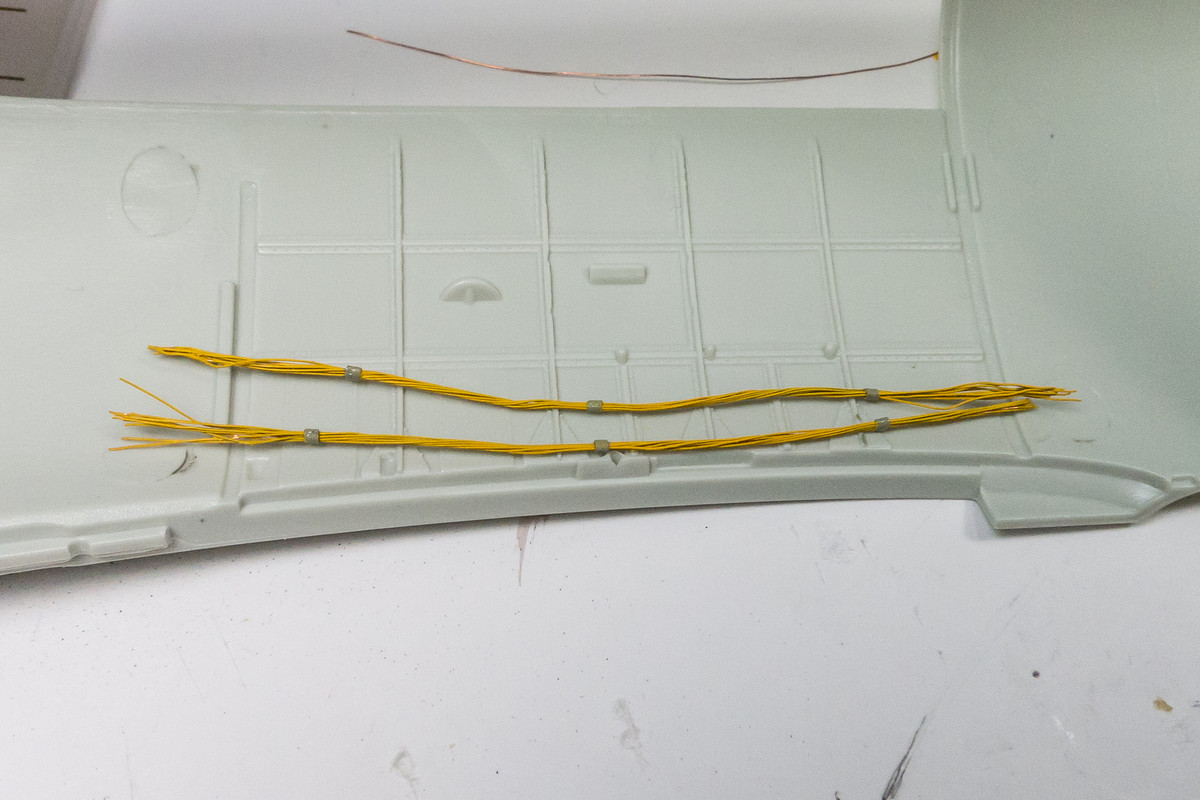
There is going to be some wiring work in this area so in preparation of that, I thought I'd try to create some lengths of bundled wiring. I did this on my Trumpeter 262 build and since I used the Aires resin wheel well set, I'm going to use those details and photos of preserved 262's as references. This upcoming work is not meant to be exact and complete... just want to add some complexity/business to the wheel well area. I'm going to test a 10-strand wiring bundle for starters. I can add or delete if I need to but I want to see how it looks. The wire is fine gauge copper wire that I stripped from a short length of Monster speaker cables.
The wiring is bundled using thin strips of aluminum tape.
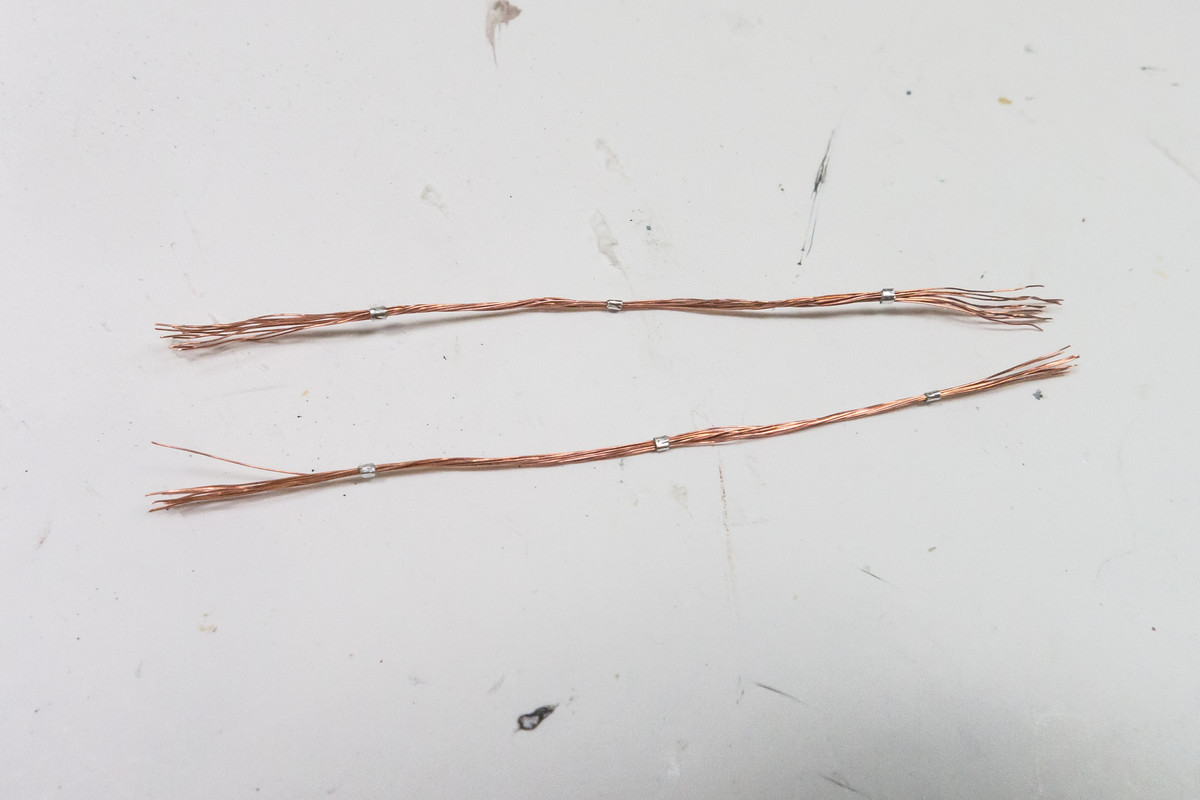
The nice thing about making pre-bundled sets of wiring is that I can paint them separately with an airbrush and place them where needed.
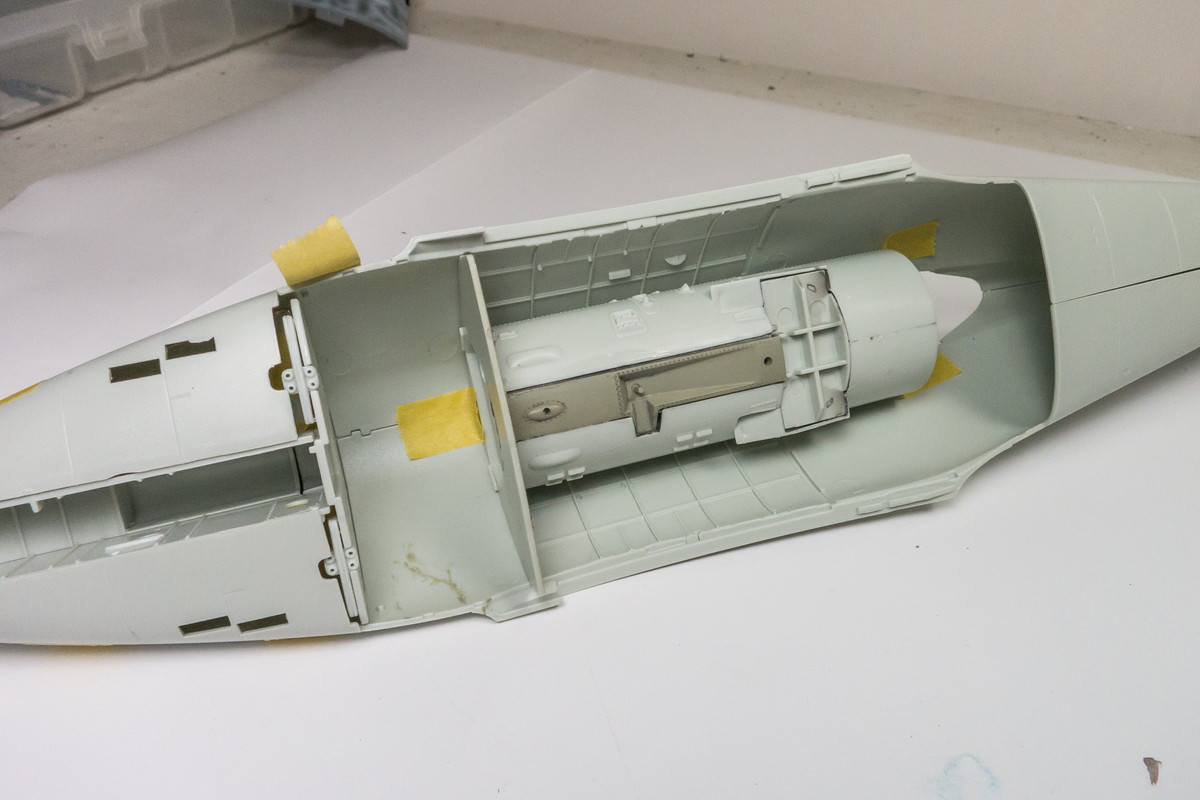
This is the area where most of the wiring work will be done. So I'm going to double check the fit of the cockpit tub and make sure I can do the wiring work on the fuselage sides without getting in the way of the fit of the cockpit tub. Note the empty space between the cockpit and gun station bulkheads. This is where a large fuel tank resides and could be a good place to add weights.
With the cockpit tub taped into place, the wing bottoms are attached and we can see that it all looks pretty good from up top.
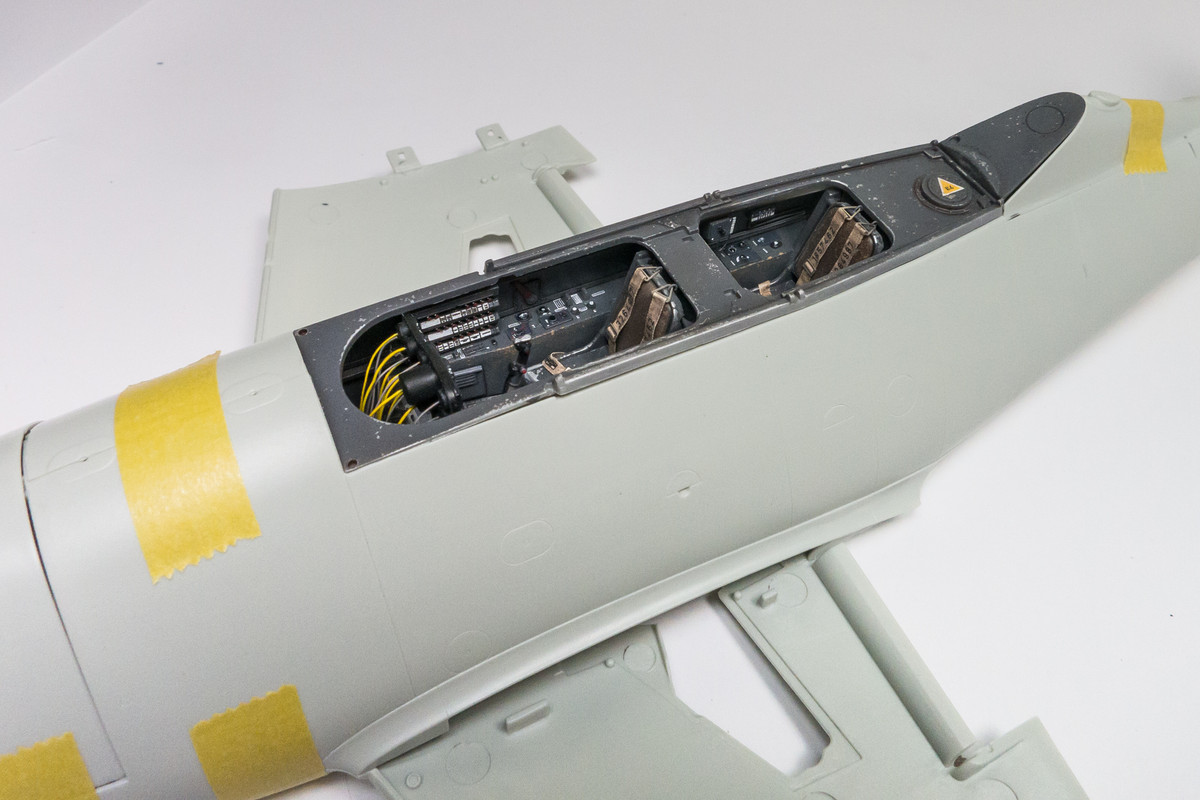
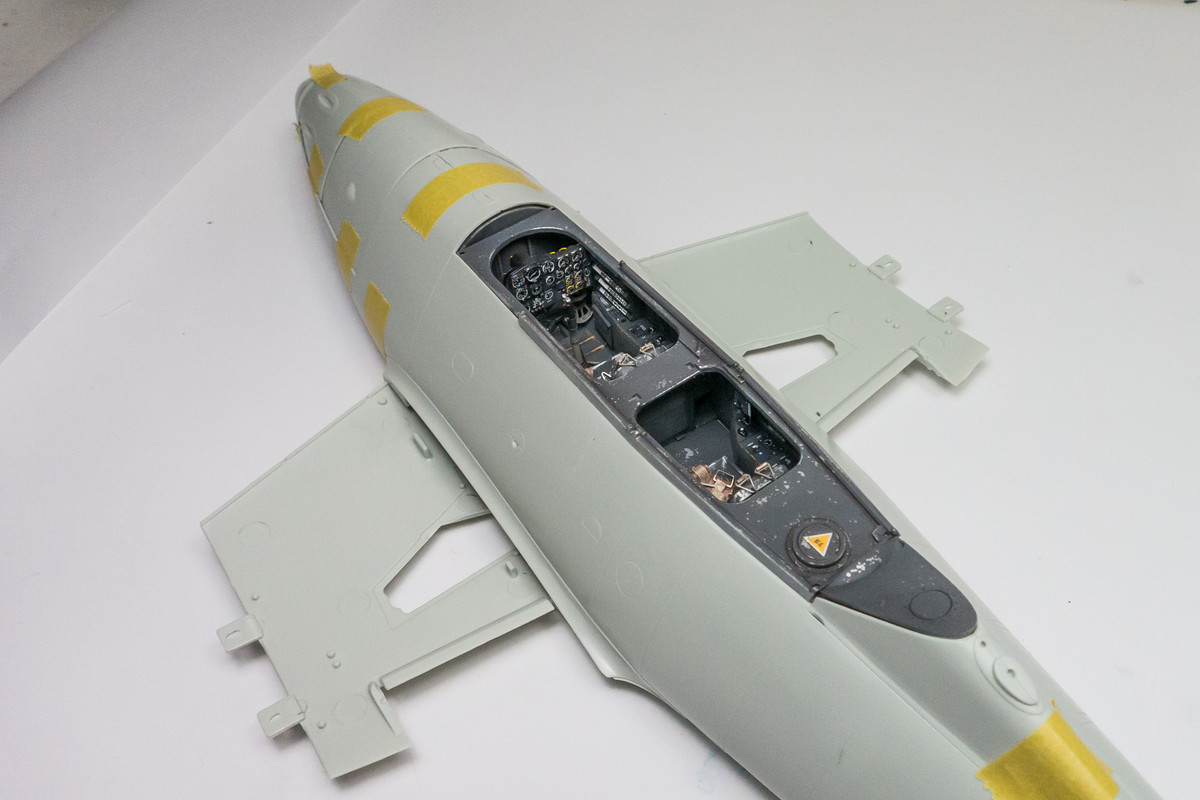
Let's add the radar operator's instrument panel and radar box and check out the view into the cockpit from the light box.
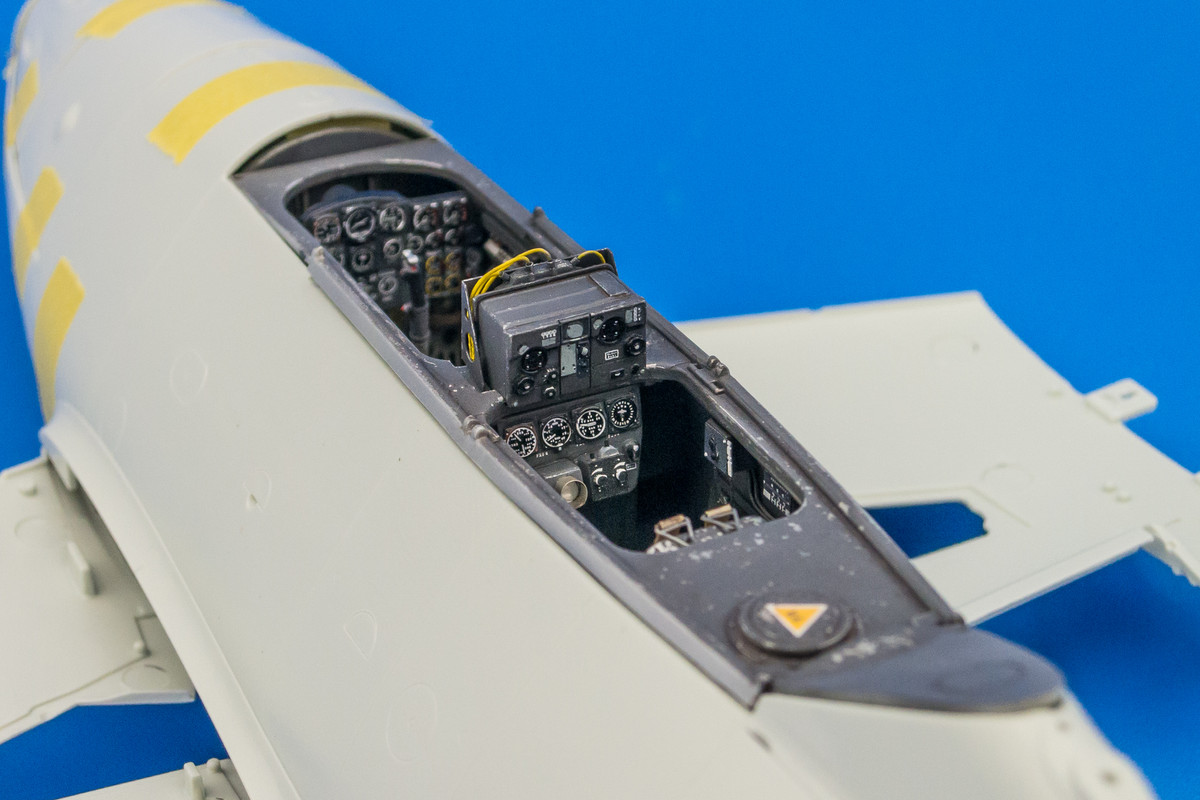
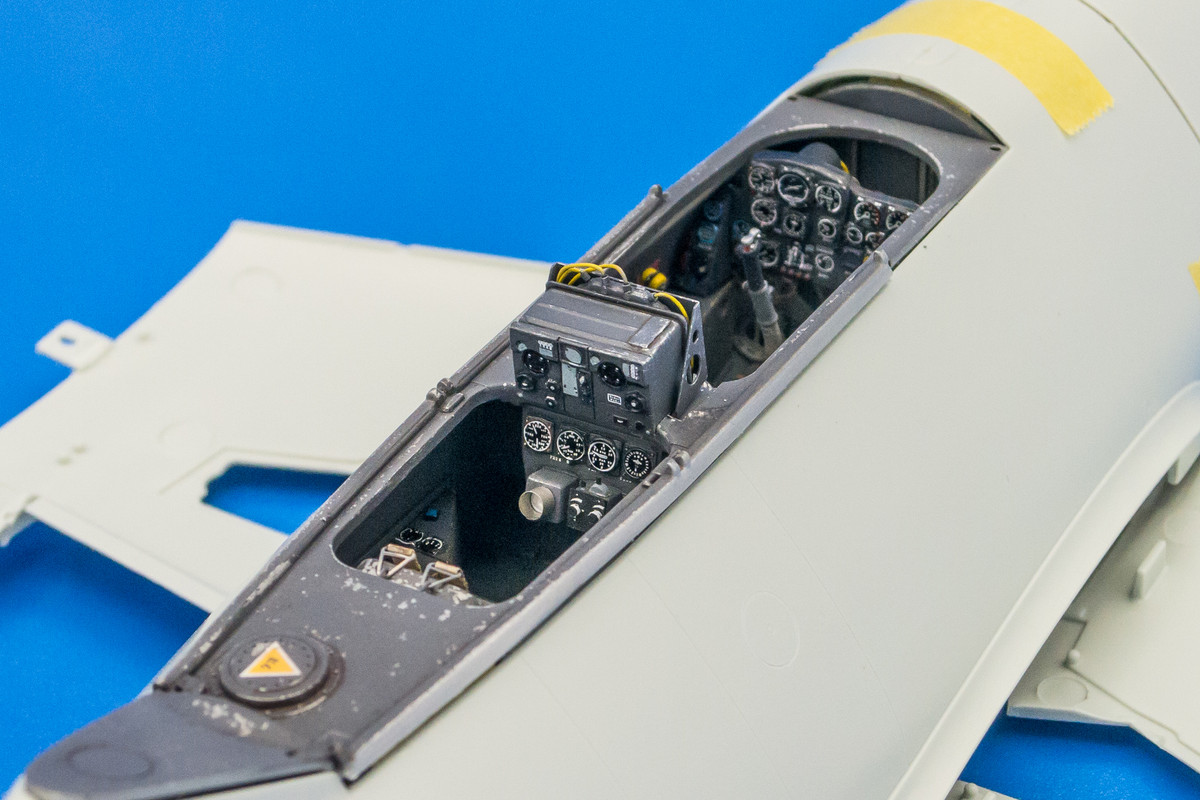
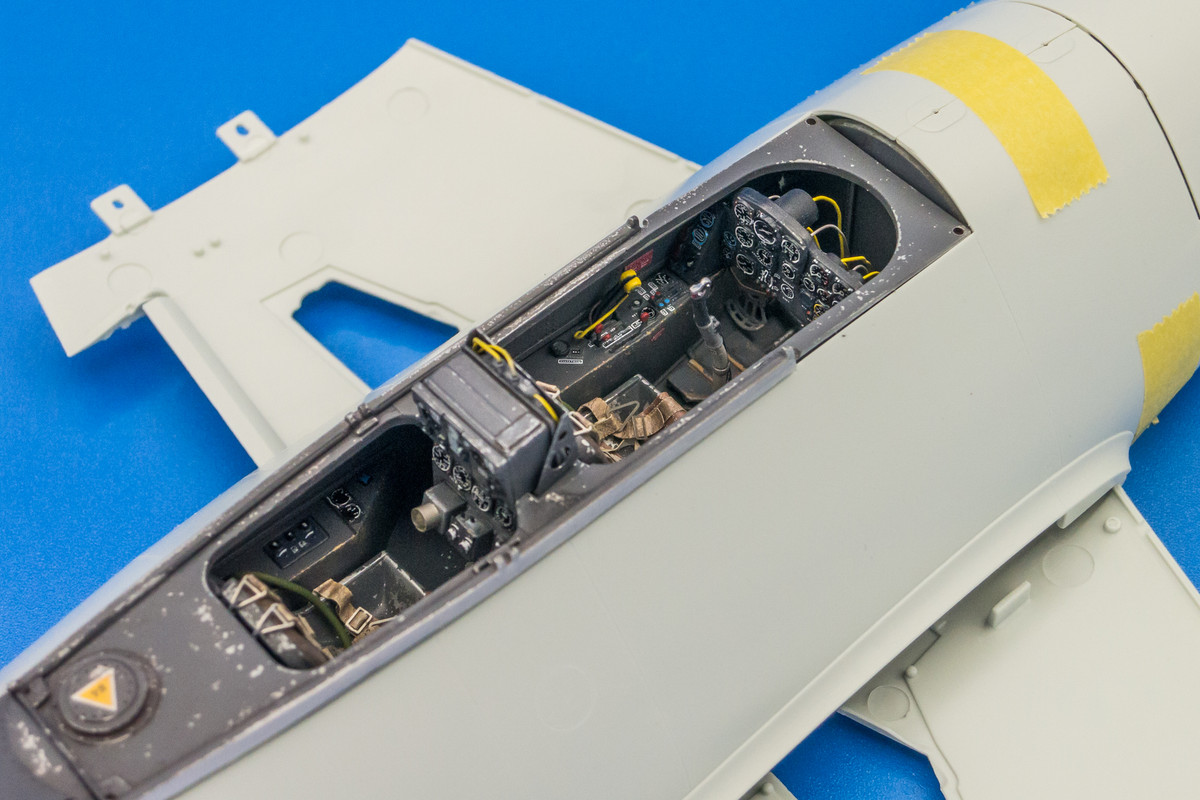
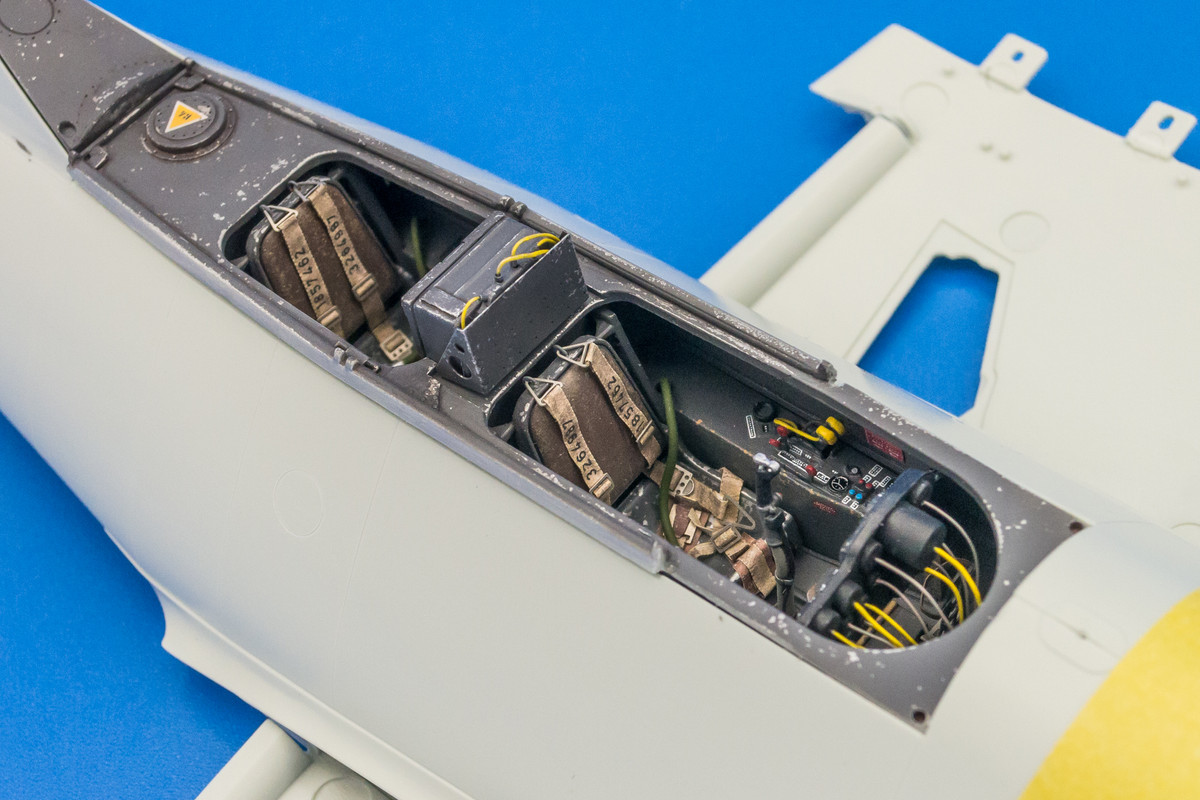
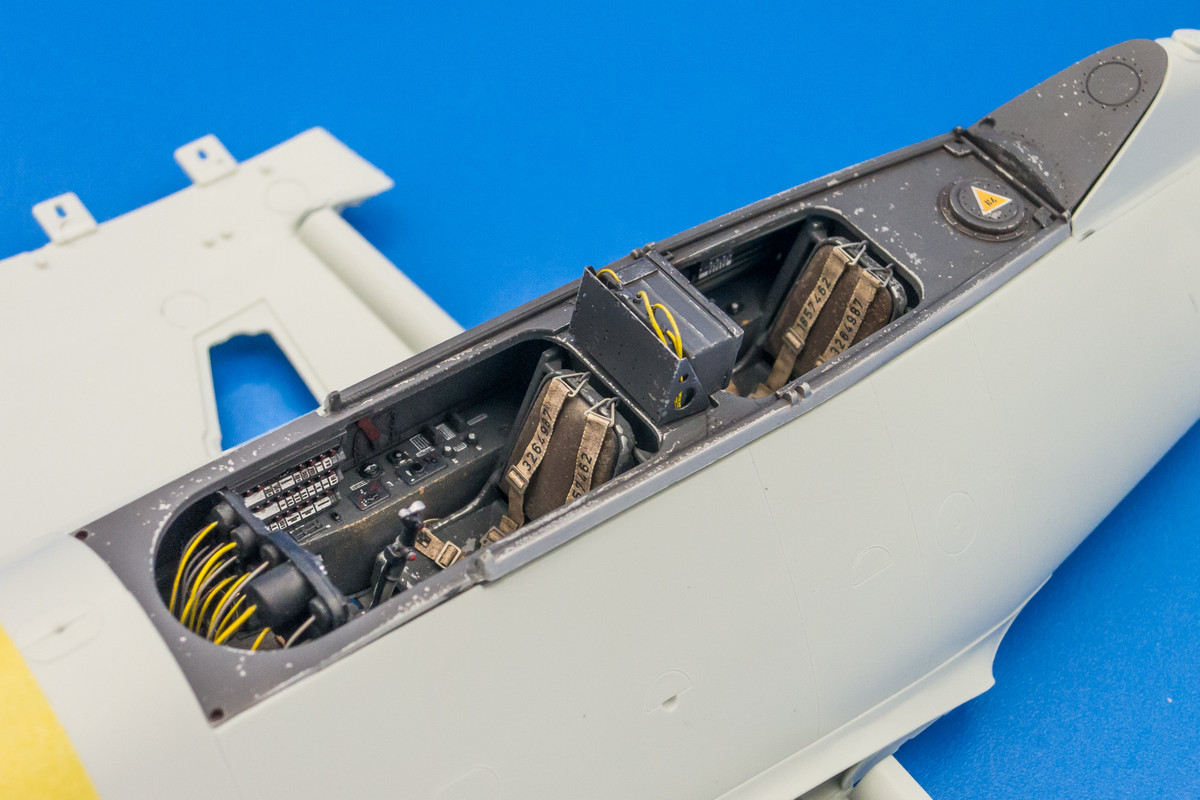
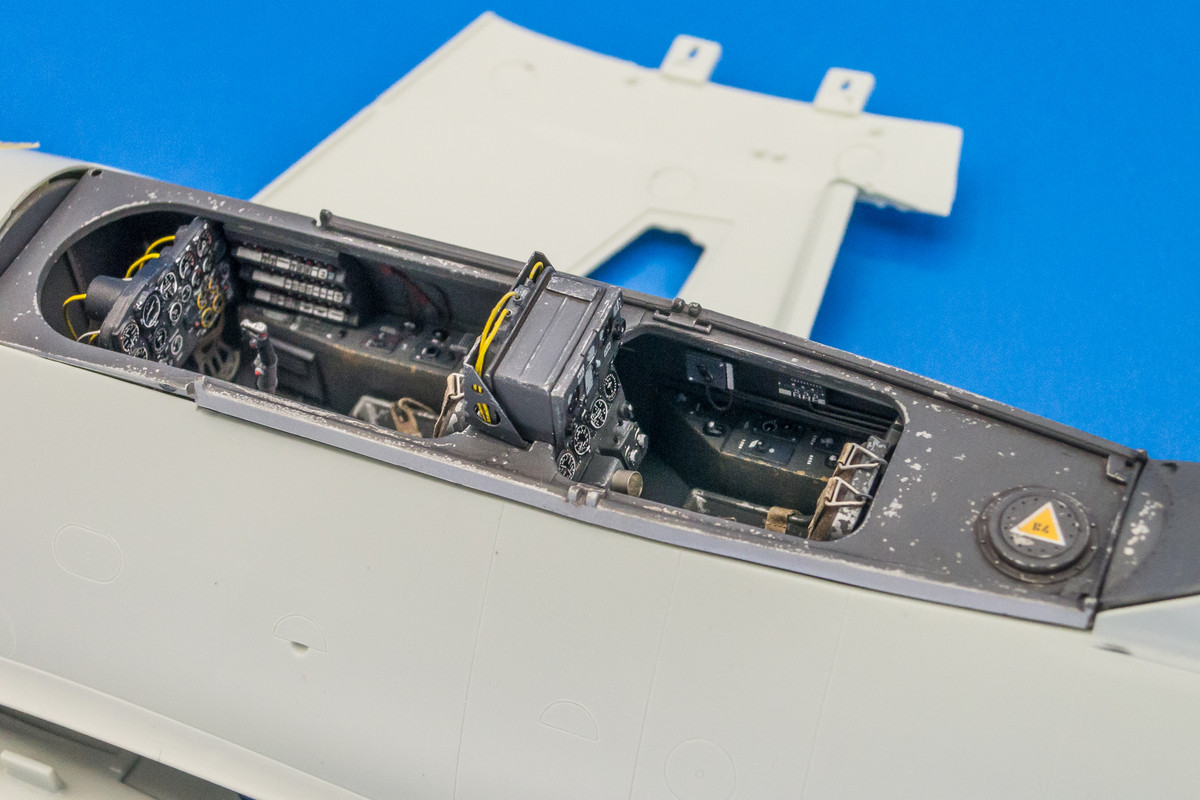
Since I am going to rivet the model, this might be my next step since I don't want to damage any wiring work on the fuselage sides.
The cockpit side walls aka "tube" have been glued into place. The fit wasn't the greatest here and I had to force some light contact areas together with CA glue. The important thing is to not overlay force it into a shape that will throw off the fit of the fuselage halves.
The undersides of this assembly will be visible through the wheel wells. I'm going to be painting the wheel wells in a combination of metal and RLM 02 Gray Green, some of which is already painted.
There is going to be some wiring work in this area so in preparation of that, I thought I'd try to create some lengths of bundled wiring. I did this on my Trumpeter 262 build and since I used the Aires resin wheel well set, I'm going to use those details and photos of preserved 262's as references. This upcoming work is not meant to be exact and complete... just want to add some complexity/business to the wheel well area. I'm going to test a 10-strand wiring bundle for starters. I can add or delete if I need to but I want to see how it looks. The wire is fine gauge copper wire that I stripped from a short length of Monster speaker cables.
The wiring is bundled using thin strips of aluminum tape.
The nice thing about making pre-bundled sets of wiring is that I can paint them separately with an airbrush and place them where needed.
This is the area where most of the wiring work will be done. So I'm going to double check the fit of the cockpit tub and make sure I can do the wiring work on the fuselage sides without getting in the way of the fit of the cockpit tub. Note the empty space between the cockpit and gun station bulkheads. This is where a large fuel tank resides and could be a good place to add weights.
With the cockpit tub taped into place, the wing bottoms are attached and we can see that it all looks pretty good from up top.
Let's add the radar operator's instrument panel and radar box and check out the view into the cockpit from the light box.
Since I am going to rivet the model, this might be my next step since I don't want to damage any wiring work on the fuselage sides.
John aka JKim
-----------<><

-----------<><

Re: 1/32 Revell Me262B-1/U1 Nachtjager
Great idea with the premade wire bundles. I'm excited to see what you do with the gear bay. Have you thought about depicting some of the panel line putty cracked are falling off? Or are you going to leave all the panel lines open? I know from a modeling standpoint showing panel lines is more interesting than putty but worn putty could also be a good compromise with visual and historic. I personally would show all the panel lines open to have more surface detail.
March as one, Don't look back
Odin's sons... Attack!
Unleash hell! Do not repent! Warfare grants us no lament
Let your weapons slash and tear This is no place for fear
Hold the lines! Move as one! In unity our victory's won
Our shields will form a mighty wall
United we shall never fall
Odin's sons... Attack!
Unleash hell! Do not repent! Warfare grants us no lament
Let your weapons slash and tear This is no place for fear
Hold the lines! Move as one! In unity our victory's won
Our shields will form a mighty wall
United we shall never fall
-
speedgraflex

- Moderator
- Posts: 11535
- Joined: Fri Feb 10, 2017 11:08 pm
- Contact:
Re: 1/32 Revell Me262B-1/U1 Nachtjager
John—are you thinking the nose area will have visible rivets? That seems possible, at least. The rest of the aircraft seems smooth with fine yet visible layers of putty and a thin, patchy paint job...
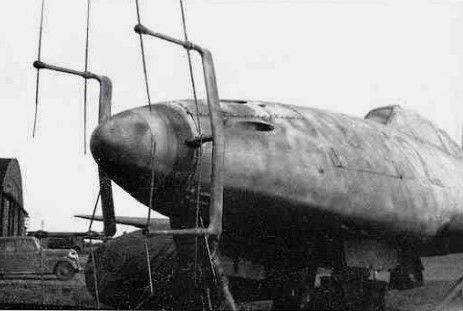
Make more models!
-
Medicman71

- Elite Member
- Posts: 11396
- Joined: Mon Apr 07, 2014 9:32 am
- Location: Houston, Tx
Re: 1/32 Revell Me262B-1/U1 Nachtjager
Man that cockpit looks awesome! Can't wait to see you do the riveting. I may have to do some on the Super Hornets so I'd like to see how you do them.
Mike
Sponsored by Boeing, Lockheed Martin, Northrop Grumman, Saab, BAE, and Dassault
Sponsored by Boeing, Lockheed Martin, Northrop Grumman, Saab, BAE, and Dassault

Re: 1/32 Revell Me262B-1/U1 Nachtjager
Stunning detailing added there, great work.
'I am a Norfolk man and i glory in being so'
On the bench: Revell 1/72nd Type VIIc U-Boat
On the bench: Revell 1/72nd Type VIIc U-Boat
-
Stikpusher

- Moderator
- Posts: 21386
- Joined: Sat Apr 05, 2014 8:37 pm
- Location: Ceti Alpha 5
Re: 1/32 Revell Me262B-1/U1 Nachtjager

That is one sharp looking cockpit John (as usual for you!
)!"Surely I have made my meaning plain? I intend to avenge myself upon you, Admiral. I have deprived your ship of power, and when I swing 'round, I intend to deprive you of your life."
FLSM
FLSM
Re: 1/32 Revell Me262B-1/U1 Nachtjager
Thanks guys! I will be depicting all panel lines and rivets. It would be very difficult to depict uneven putty application and I'm afraid it would simply result in what would look like sloppy modeling. Plus you probably would be hard to see such effects on a mottled camo. The reason I am adding panel lines and rivets is not necessarily to reflect real world conditions but as a concession to the visual impact of a scale model. I want to convey size/weight/complexity and one of the ways I can do that is to add surface detail to the model.
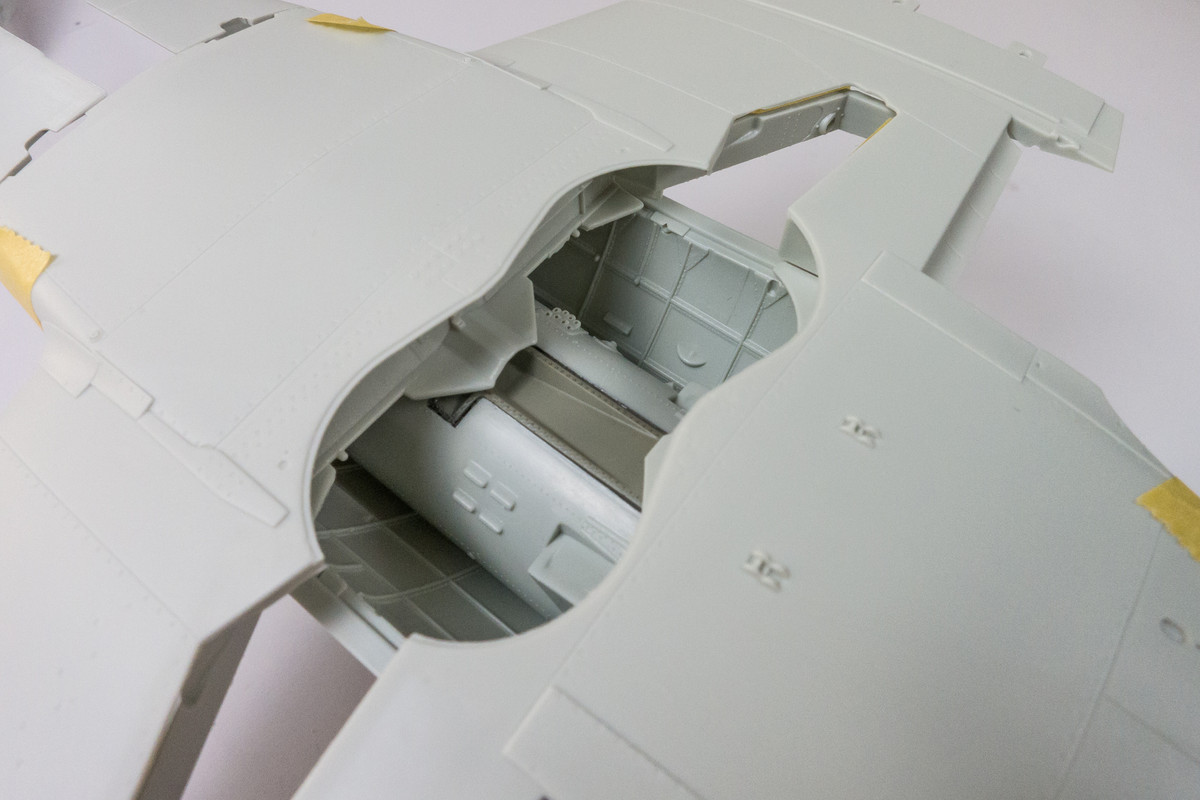
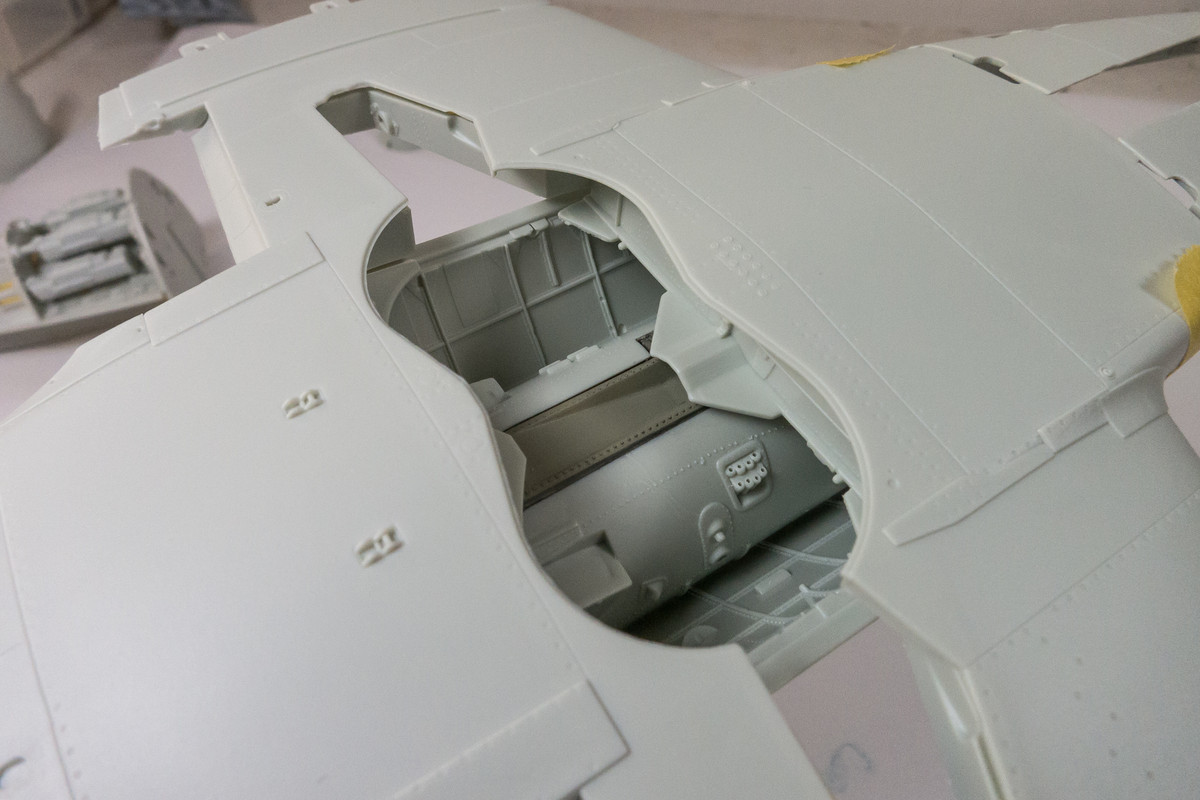
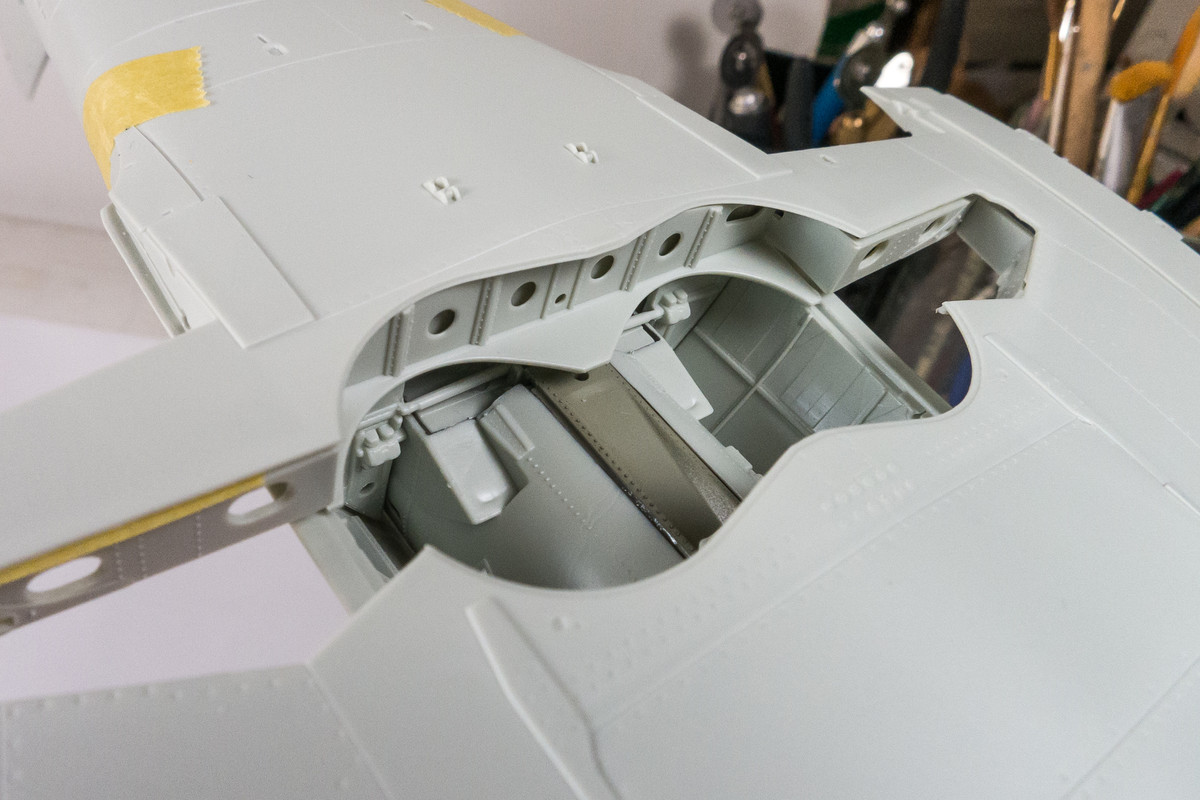
I am starting to map out the visual limits of the wheel well area so that I can think about how to add the wiring details. Luckily, there are some overhanging structure at both the front and rear ends of the wheel well opening that I can use to hide my wiring behind.
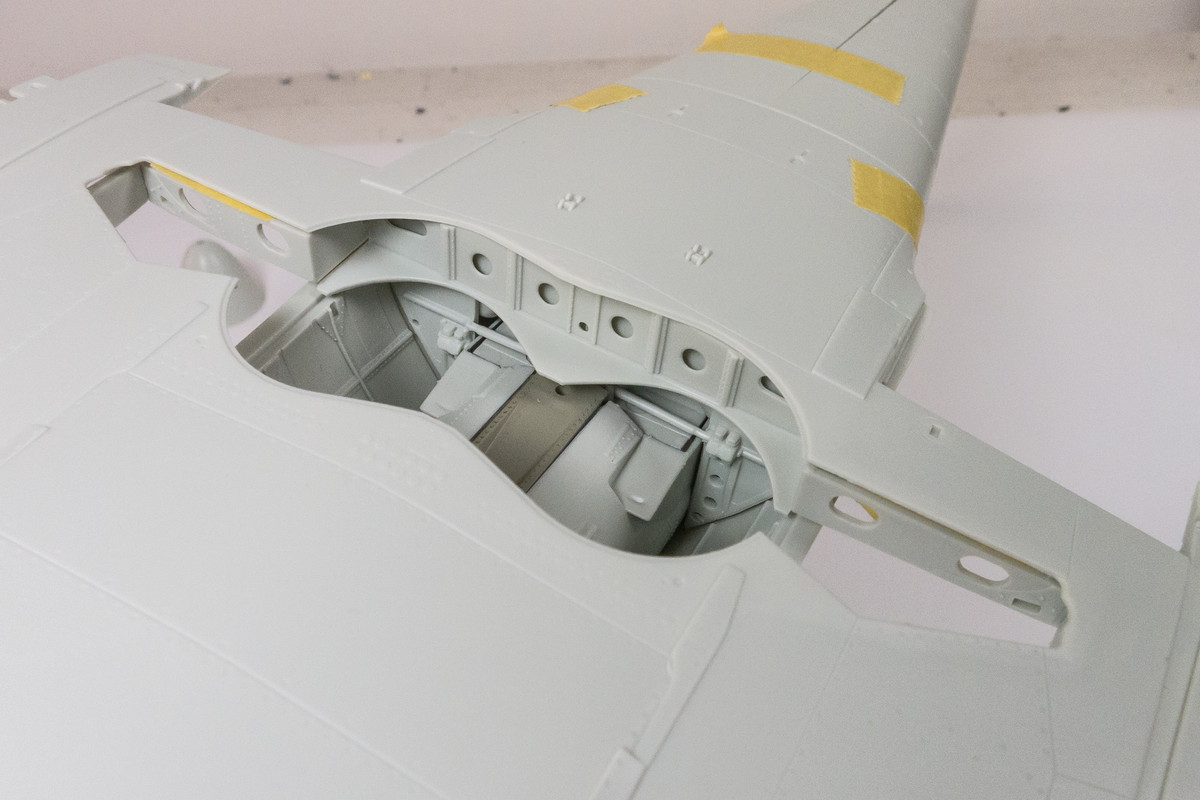
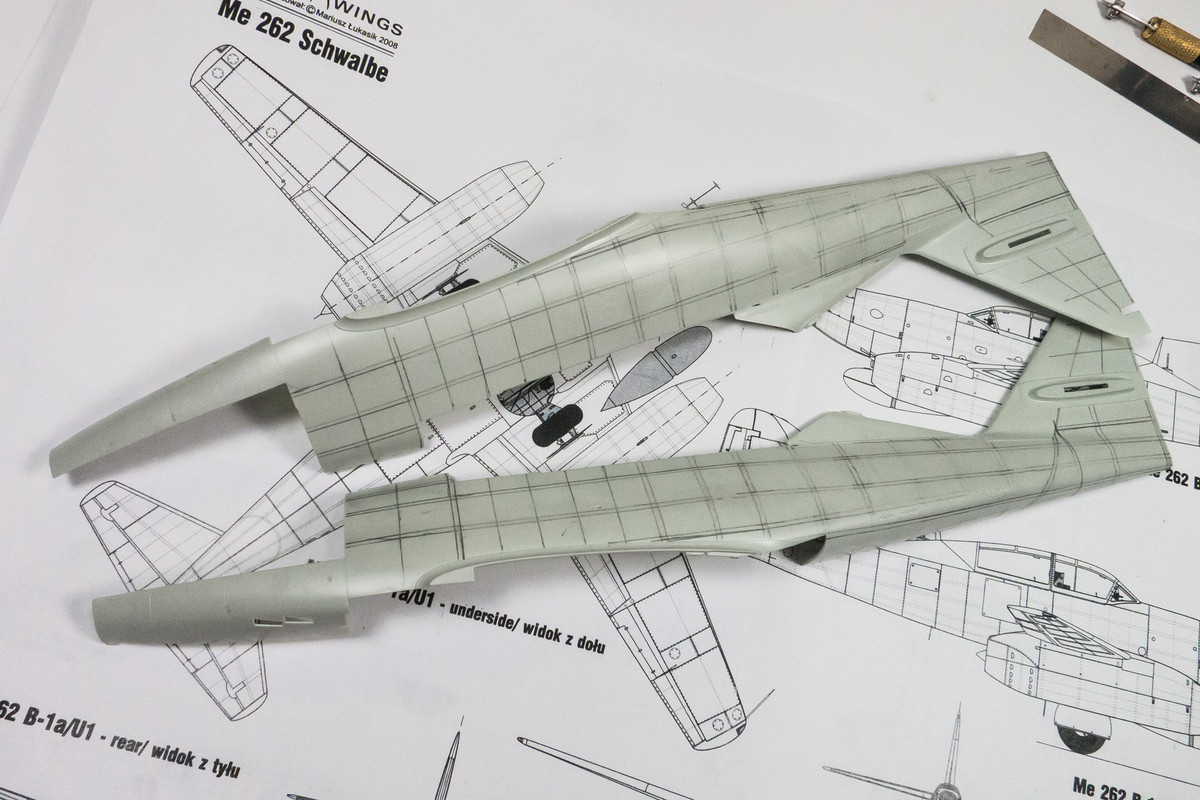
Before I work on the wheel well details, I need to rivet the fuselage so that's what I spent the majority of the day doing. The first step is to draw the rivet lines onto the fuselage surface. I use a soft-leaded pencil to draw and flexible rulers and flexible white Tamiya tape as line guides. For reference, I am using Kagero Top Drawings. I have not established the accuracy of the drawings but it should be good enough to establish the visual interest (and not complete accuracy) that I am trying to achieve with the riveting.
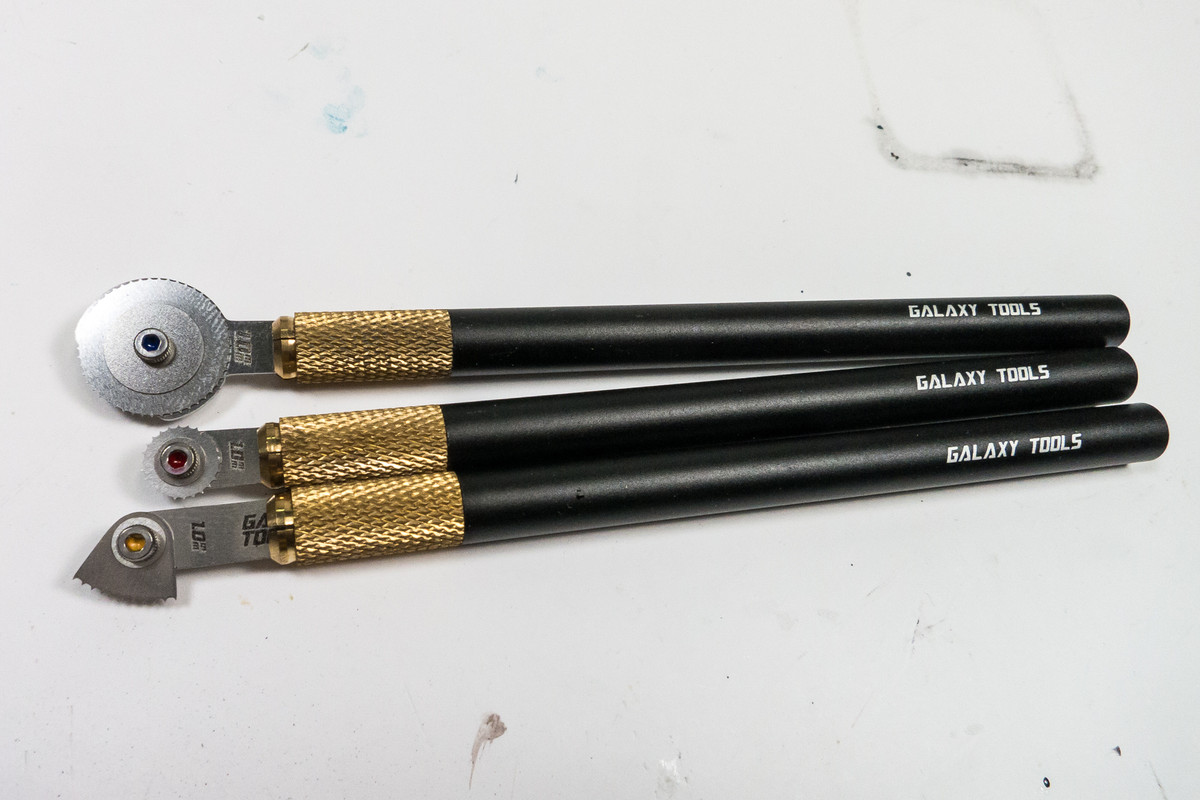
I use a rivet wheel to make my rivets. There are a number of different manufacturers (RB Productions, Rosie the Riveter, Trumpeter for example) but they are essentially modeling versions of the ponce wheel. I have a set from Galaxy tools that covers all of my riveting needs: the big wheel for the majority of my runs, the small wheel for tighter spaces and the corner tool when I need to run the riveter right up to a raised feature. I am using a 1.00mm pitch for this model.
Riveting is just a matter of running the rivet wheel over the lines that have been drawn. Sounds simple enough but there are some nuances involved. It is a good idea to map out each individual run of the rivet wheel in terms of how you are holding the part and the wheel and also how you are supporting the plastic part as you run the rivet wheel over it. It does take some pressure to push the spikes of the wheel into the plastic and sometimes, if you are not prepared, your wheel can take an unexpected dive, especially at the end of a long run or around a curved surface. I like to place flat pieces like wings and stabilizers on my table top but for curved parts, like the fuselage, I hold in my left hand while running the riveter with my right.
After riveting, each hole has a mound of raised plastic around it. I find the effect much more pleasing when those raised mounds are removed.
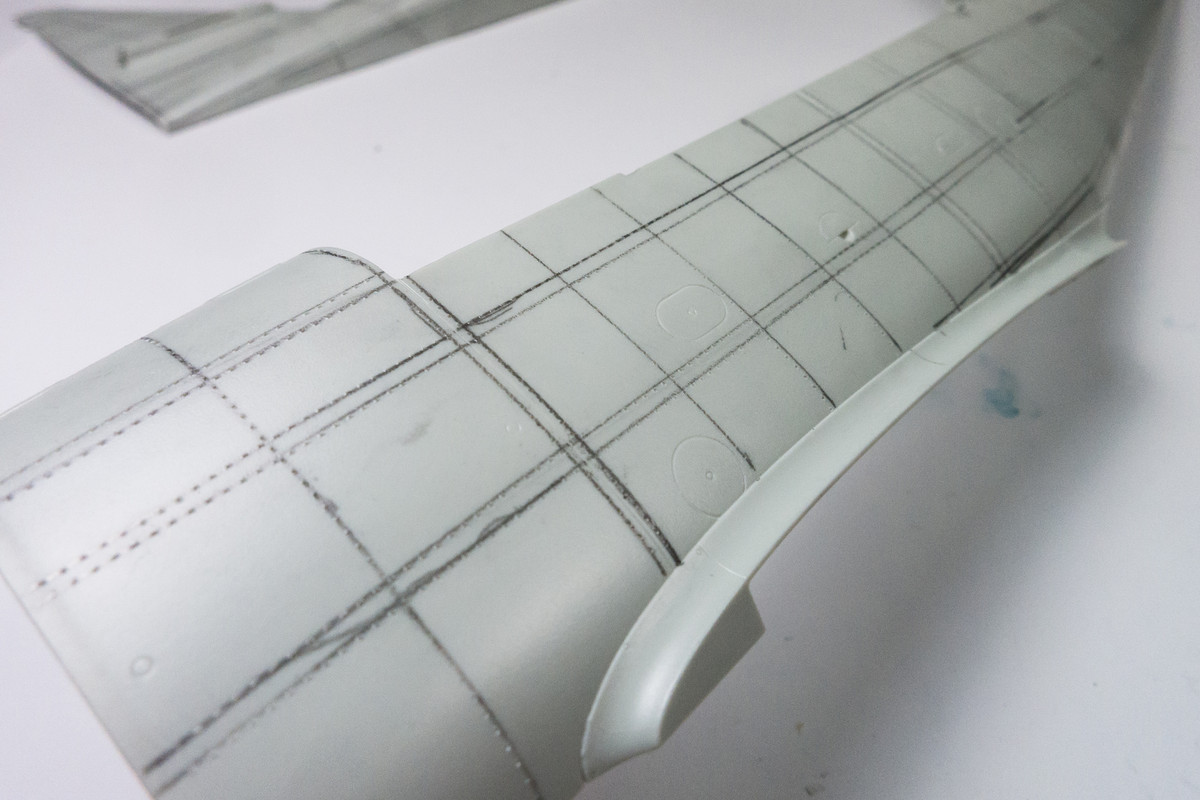
The left over lead eventually works itself into the rivets and panel lines during the sanding process, which makes the work easier to see.
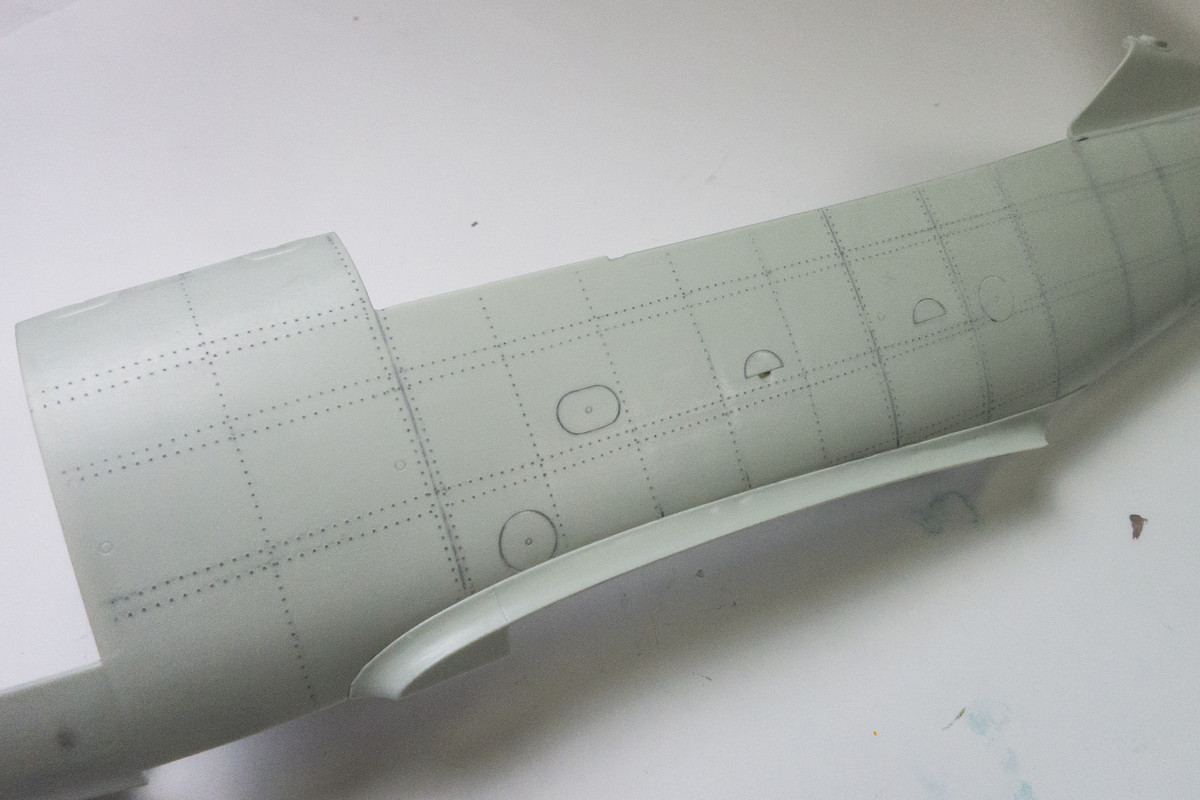
Since I am running the the rivet wheel freely over each drawn line, the rivet lines are not completely straight. They really don't have to be perfectly straight to be effective but I want to address the obviously distracting errors.
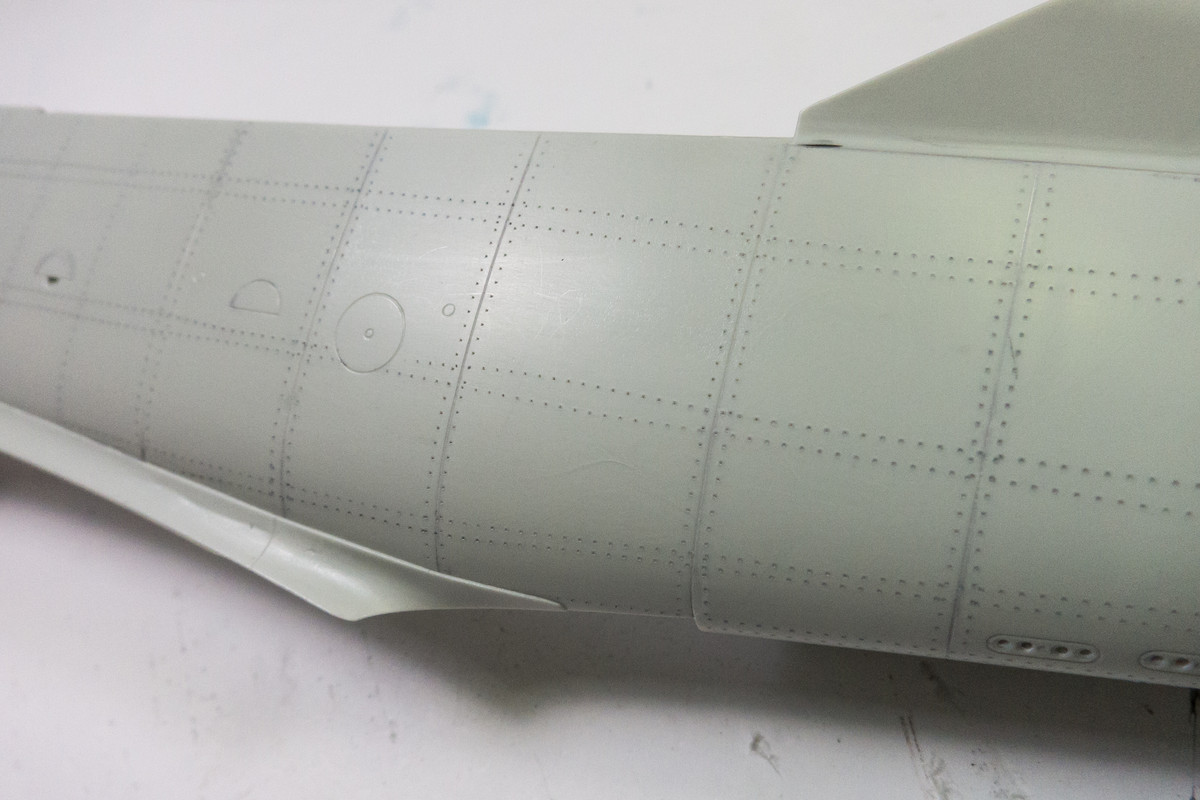
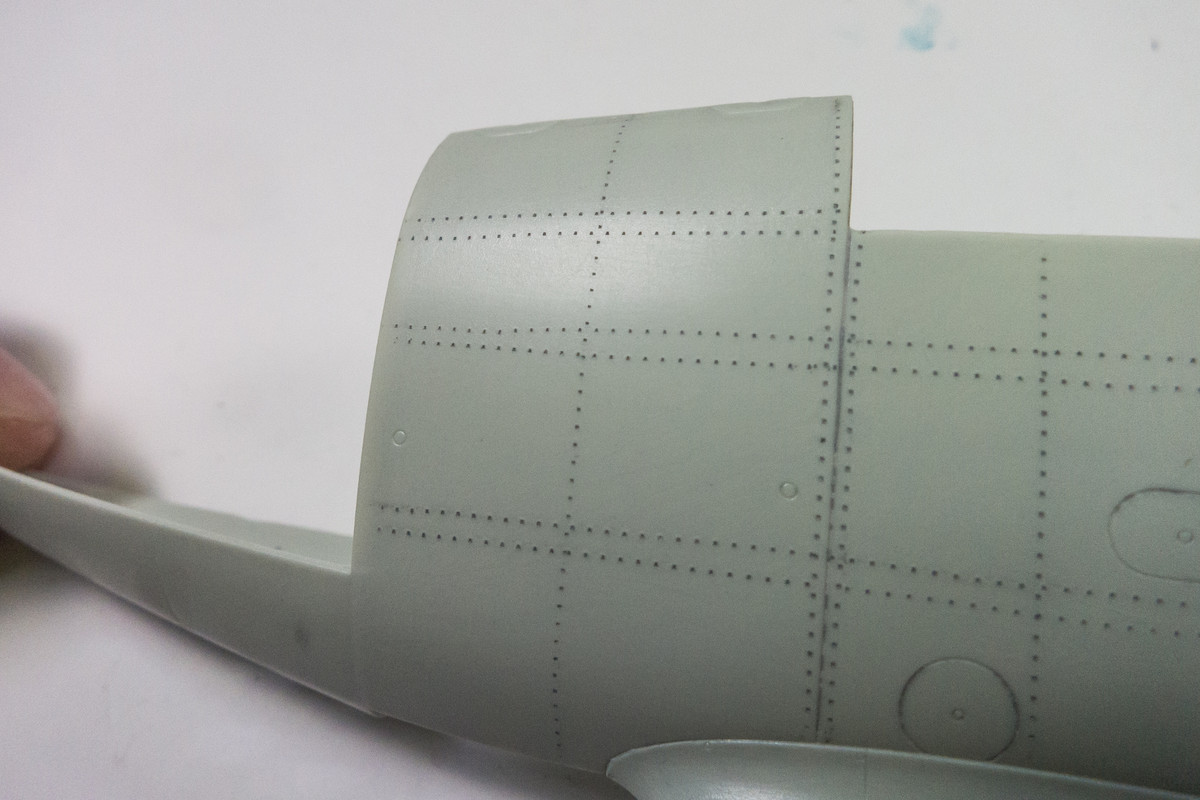
These errant lines are filled with black CA glue and re-riveted. Since holes filled with black CA are impossible to distinguish from open holes, covering the repair with primer helps you see the work more clearly.
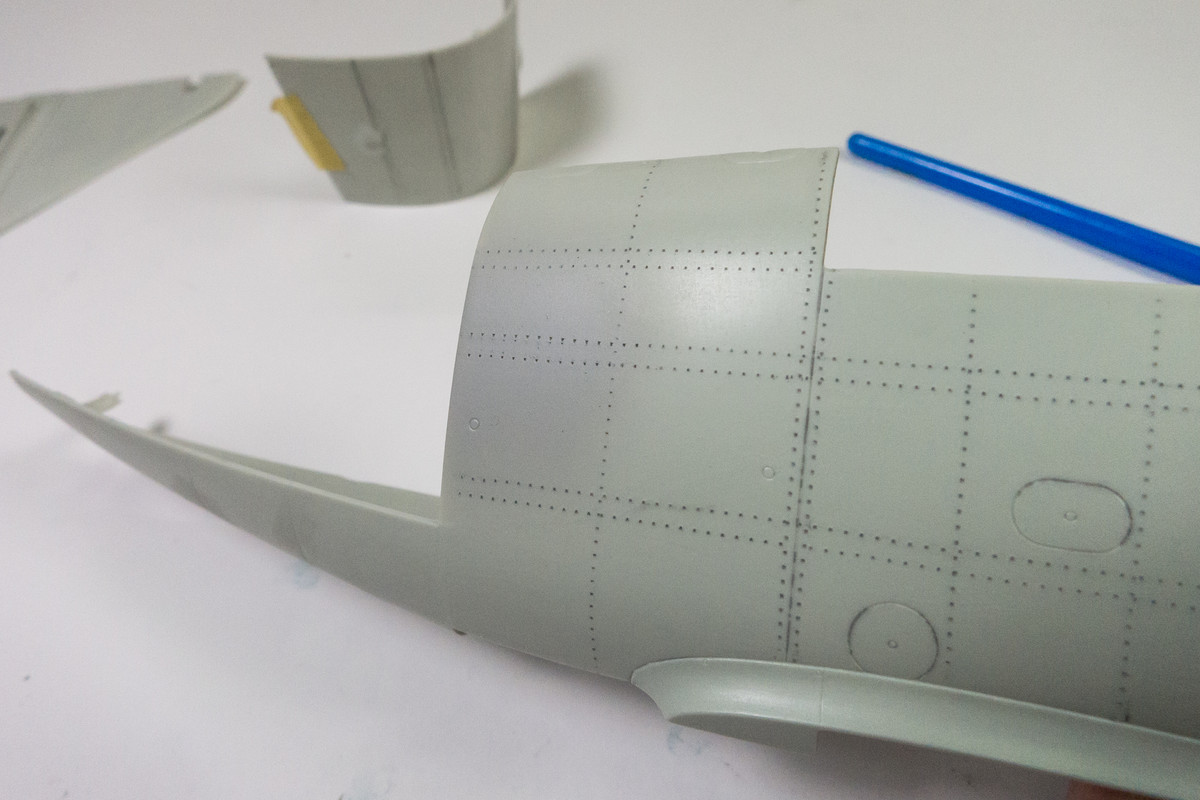
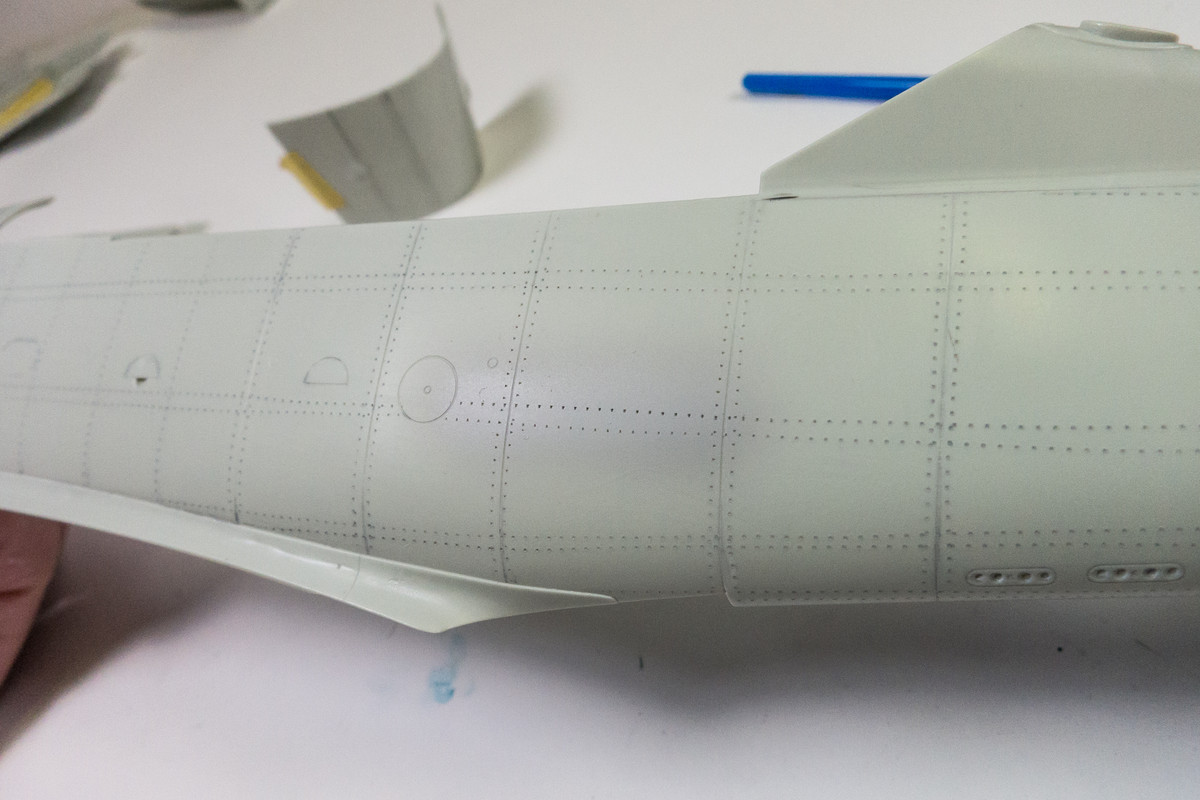
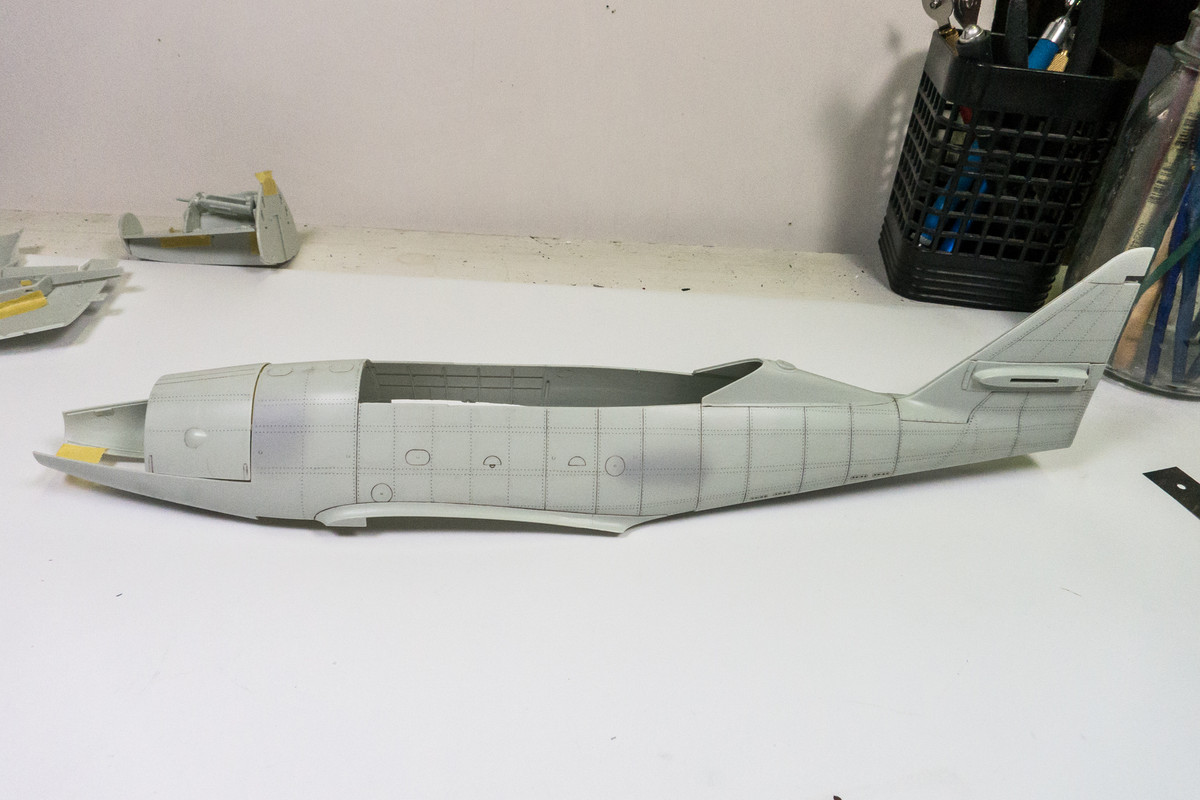
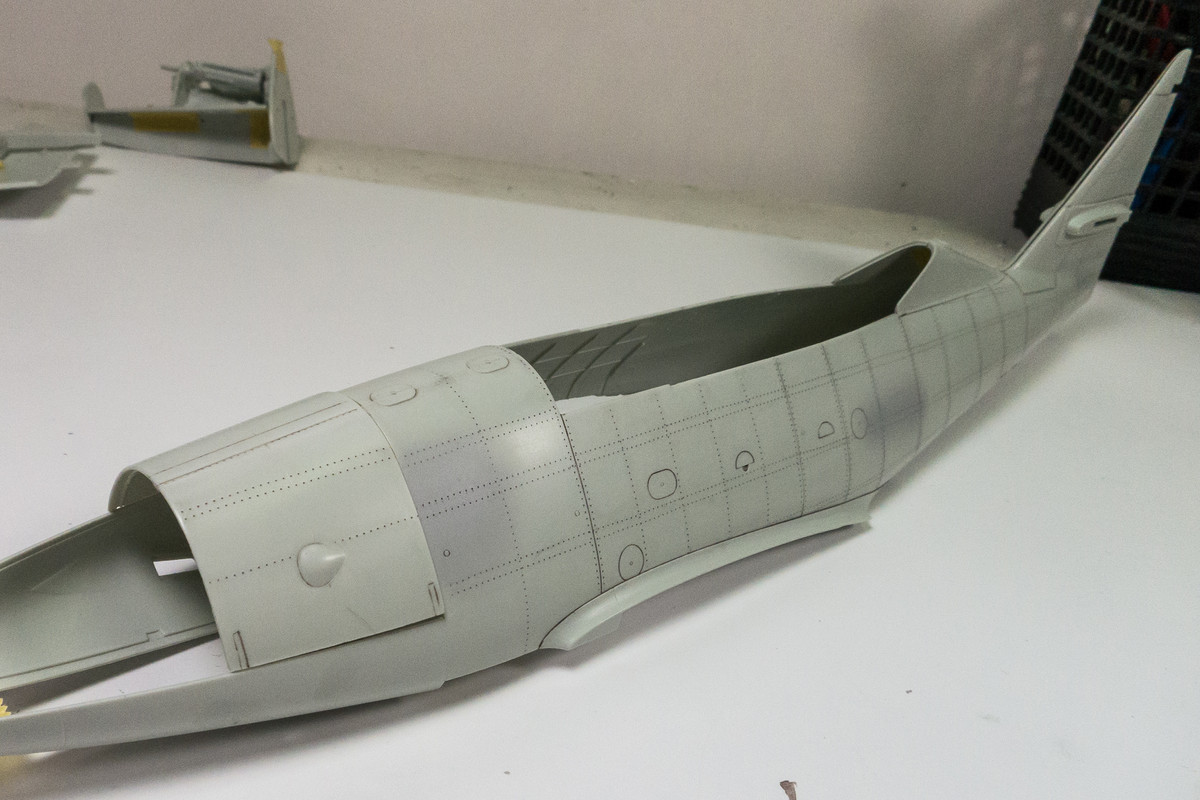
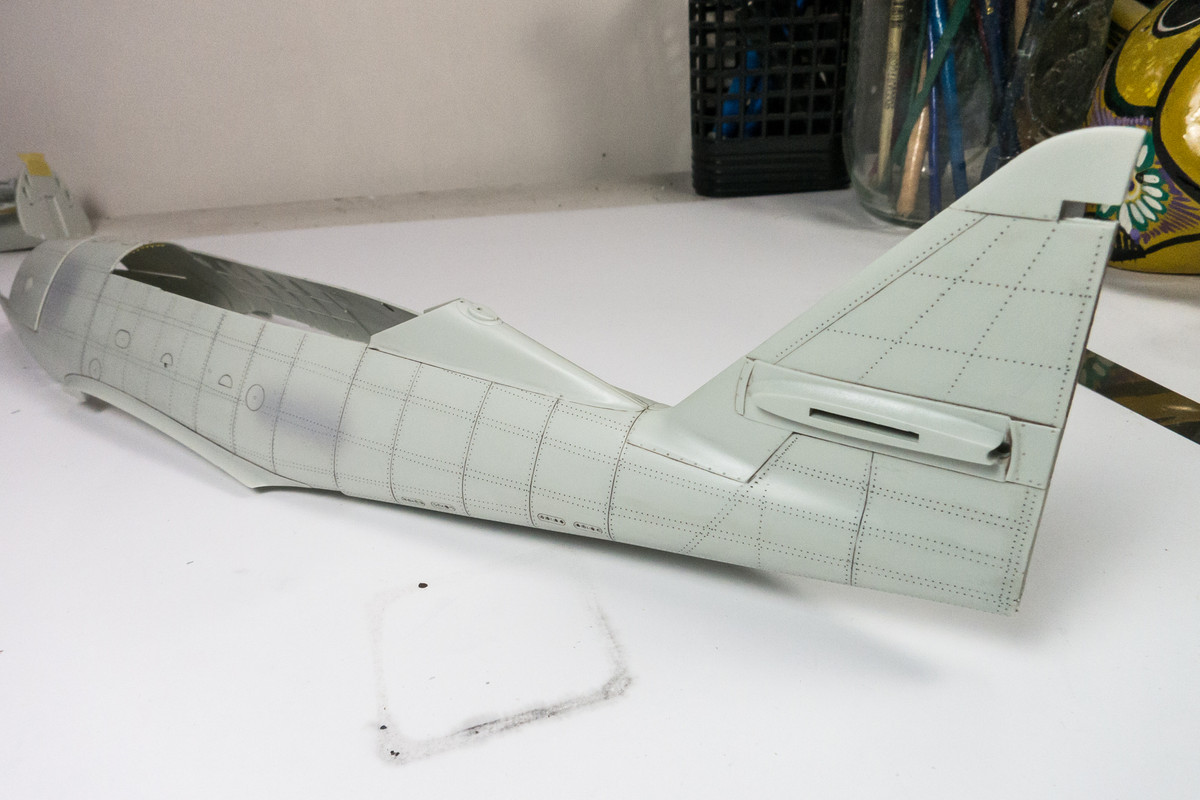
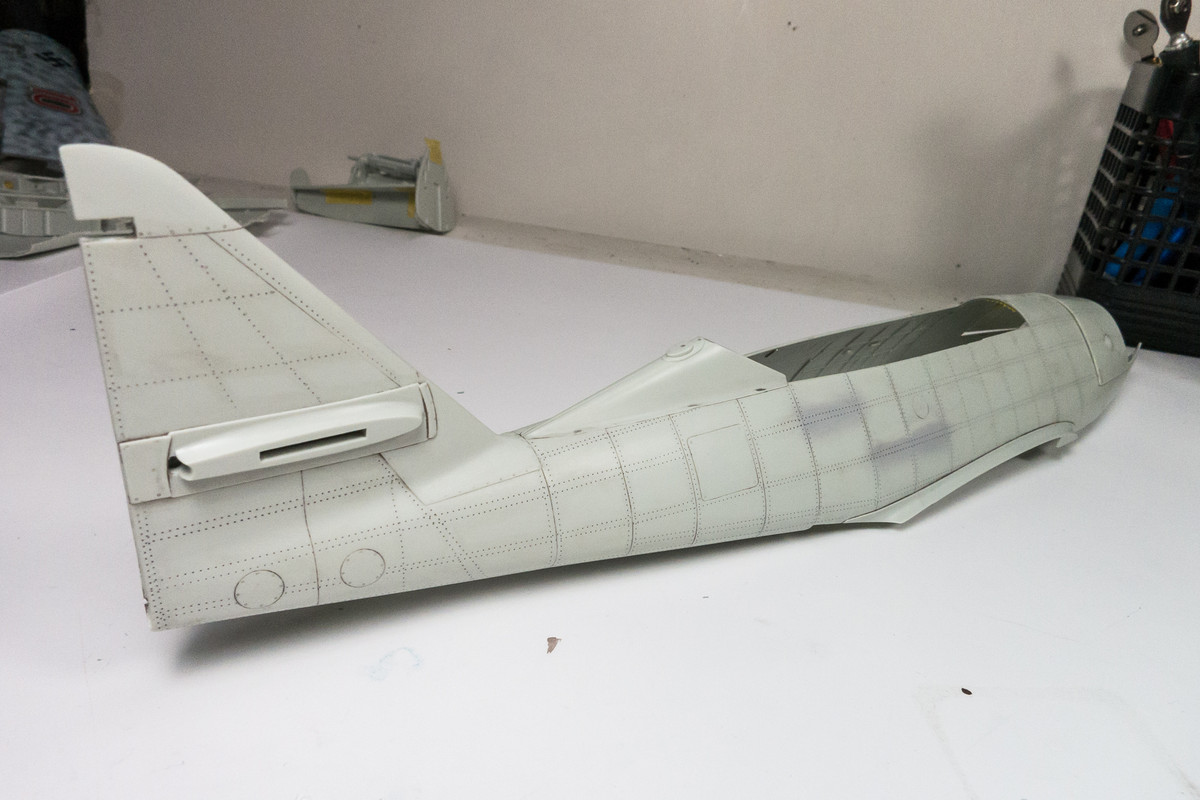
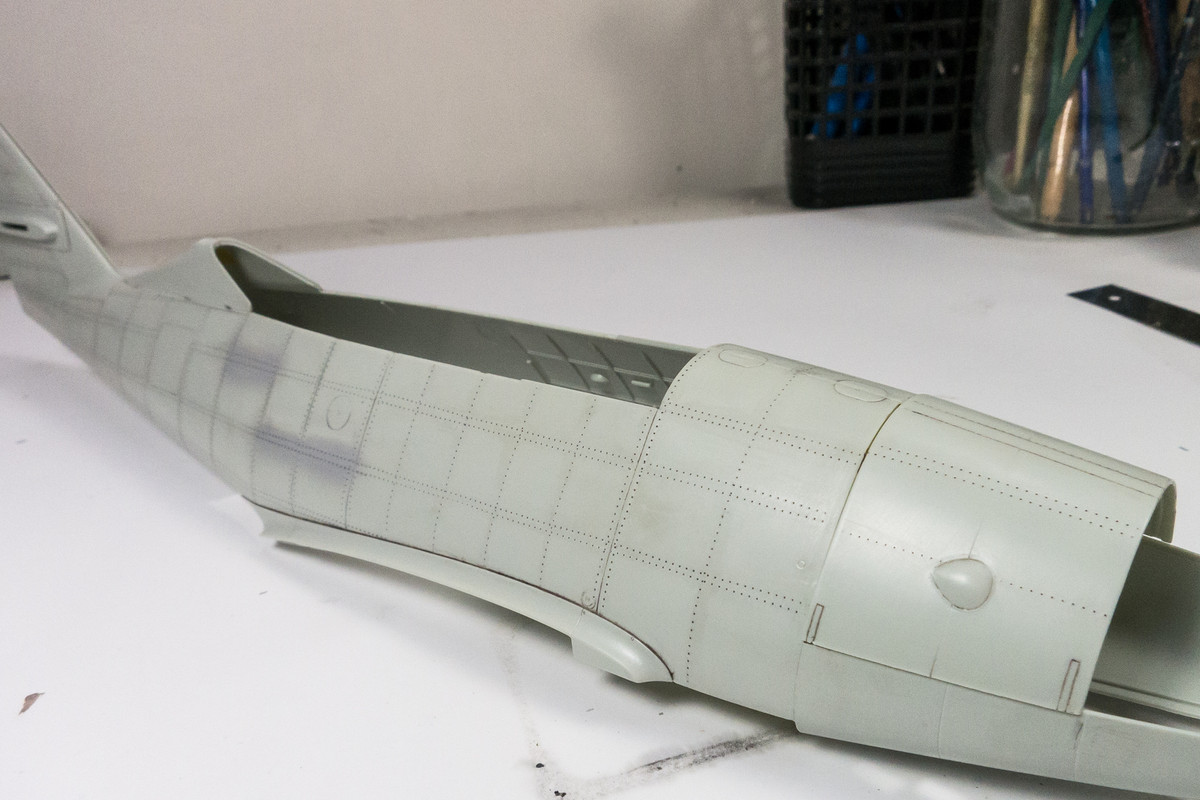
After the clean-up work, I've given the fuselage parts a light pastel wash to check my work. In addition to minor rivet repair, this is also a good time to check the panel lines and re-scribe as appropriate.
I am starting to map out the visual limits of the wheel well area so that I can think about how to add the wiring details. Luckily, there are some overhanging structure at both the front and rear ends of the wheel well opening that I can use to hide my wiring behind.
Before I work on the wheel well details, I need to rivet the fuselage so that's what I spent the majority of the day doing. The first step is to draw the rivet lines onto the fuselage surface. I use a soft-leaded pencil to draw and flexible rulers and flexible white Tamiya tape as line guides. For reference, I am using Kagero Top Drawings. I have not established the accuracy of the drawings but it should be good enough to establish the visual interest (and not complete accuracy) that I am trying to achieve with the riveting.
I use a rivet wheel to make my rivets. There are a number of different manufacturers (RB Productions, Rosie the Riveter, Trumpeter for example) but they are essentially modeling versions of the ponce wheel. I have a set from Galaxy tools that covers all of my riveting needs: the big wheel for the majority of my runs, the small wheel for tighter spaces and the corner tool when I need to run the riveter right up to a raised feature. I am using a 1.00mm pitch for this model.
Riveting is just a matter of running the rivet wheel over the lines that have been drawn. Sounds simple enough but there are some nuances involved. It is a good idea to map out each individual run of the rivet wheel in terms of how you are holding the part and the wheel and also how you are supporting the plastic part as you run the rivet wheel over it. It does take some pressure to push the spikes of the wheel into the plastic and sometimes, if you are not prepared, your wheel can take an unexpected dive, especially at the end of a long run or around a curved surface. I like to place flat pieces like wings and stabilizers on my table top but for curved parts, like the fuselage, I hold in my left hand while running the riveter with my right.
After riveting, each hole has a mound of raised plastic around it. I find the effect much more pleasing when those raised mounds are removed.
The left over lead eventually works itself into the rivets and panel lines during the sanding process, which makes the work easier to see.
Since I am running the the rivet wheel freely over each drawn line, the rivet lines are not completely straight. They really don't have to be perfectly straight to be effective but I want to address the obviously distracting errors.
These errant lines are filled with black CA glue and re-riveted. Since holes filled with black CA are impossible to distinguish from open holes, covering the repair with primer helps you see the work more clearly.
After the clean-up work, I've given the fuselage parts a light pastel wash to check my work. In addition to minor rivet repair, this is also a good time to check the panel lines and re-scribe as appropriate.
John aka JKim
-----------<><
-----------<><
Re: 1/32 Revell Me262B-1/U1 Nachtjager
That looks fantastic John!
March as one, Don't look back
Odin's sons... Attack!
Unleash hell! Do not repent! Warfare grants us no lament
Let your weapons slash and tear This is no place for fear
Hold the lines! Move as one! In unity our victory's won
Our shields will form a mighty wall
United we shall never fall
Odin's sons... Attack!
Unleash hell! Do not repent! Warfare grants us no lament
Let your weapons slash and tear This is no place for fear
Hold the lines! Move as one! In unity our victory's won
Our shields will form a mighty wall
United we shall never fall
-
Medicman71
- Elite Member
- Posts: 11396
- Joined: Mon Apr 07, 2014 9:32 am
- Location: Houston, Tx
Re: 1/32 Revell Me262B-1/U1 Nachtjager
That's awesome! Thanks for the tutorial!
Mike
Sponsored by Boeing, Lockheed Martin, Northrop Grumman, Saab, BAE, and Dassault
Sponsored by Boeing, Lockheed Martin, Northrop Grumman, Saab, BAE, and Dassault