1/32 Revell Me262B-1/U1 Nachtjager

Re: 1/32 Revell Me262B-1/U1 Nachtjager
Just wonderful to watch you bring this together! As always I am in awe. That chrome work looks great.
To make each build less crappy than the last one. Or, put another way, "Better than the last one, not as good as the next one!"..

Re: 1/32 Revell Me262B-1/U1 Nachtjager
That's a neat idea for mounting the antenna 
Stuart Templeton 'I may not be good but I'm slow...'

Re: 1/32 Revell Me262B-1/U1 Nachtjager
Thanks for the comments! Good ideas are sometimes born out of necessity. That's a famous quote isn't it? Truth in this case.
While I'm working on the cowling joints (which will be a long and iterative process), I'm adding a few details to the wheel well.
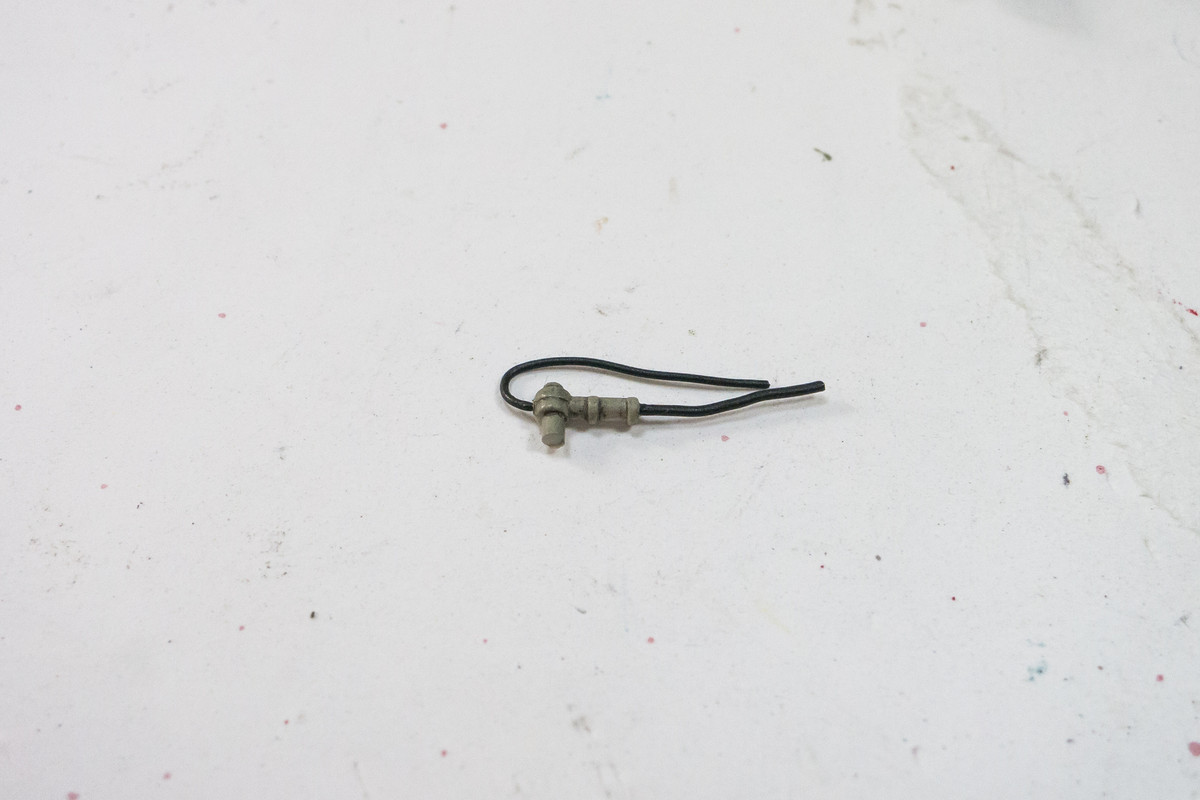
I cut this piece off of the Trumpeter kit fuel tank connection and added some wiring for hydraulic lines.
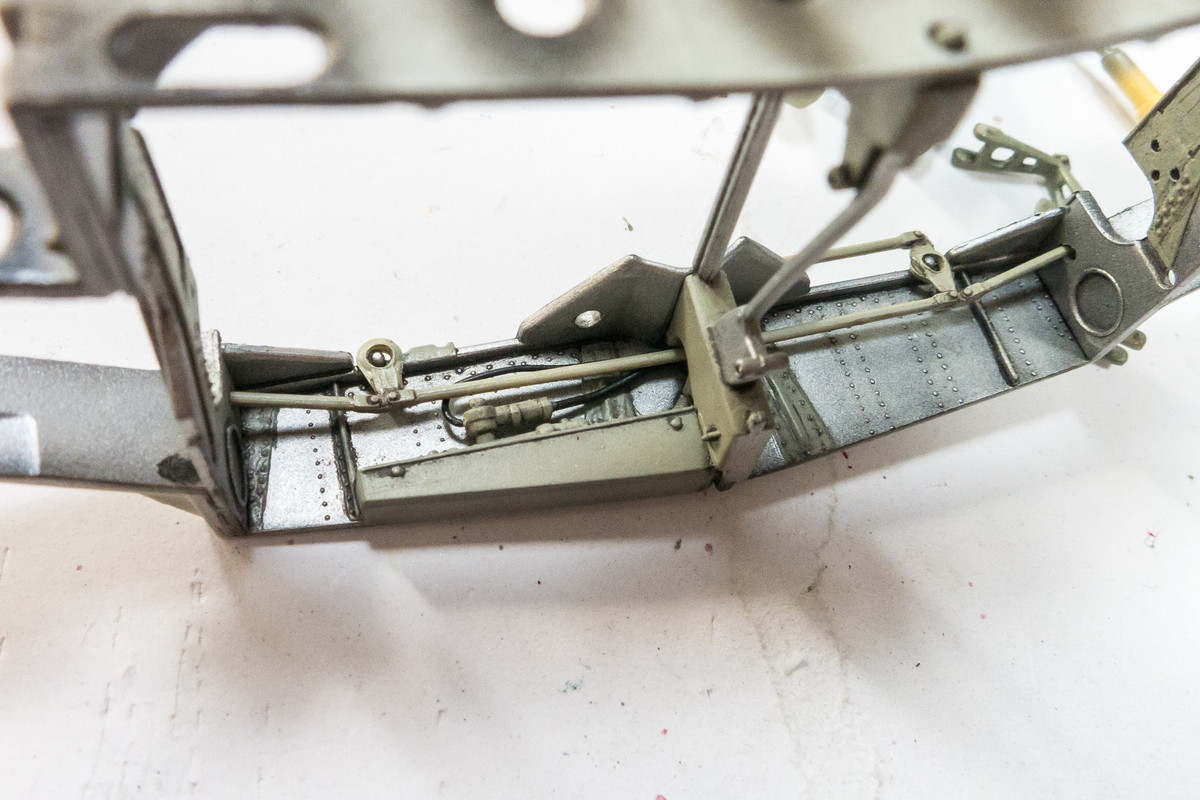
Stuck it in place on on forward bay spar.
With the landing gear temporarily in place, I mounted some hydraulic lines from those three holes on the wheel bay bulkhead that I noted previously. The terminals on the landing gear side are free-hanging for now and will be locked down after the wings are assembled.
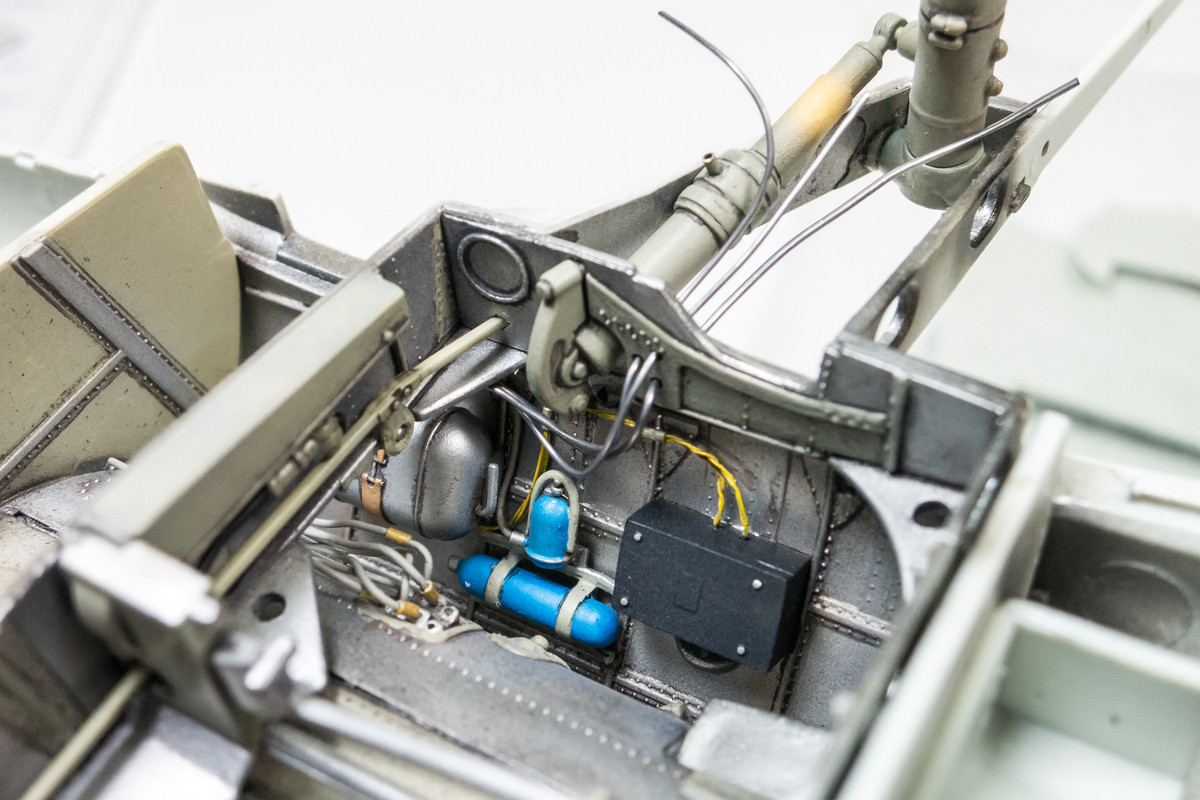
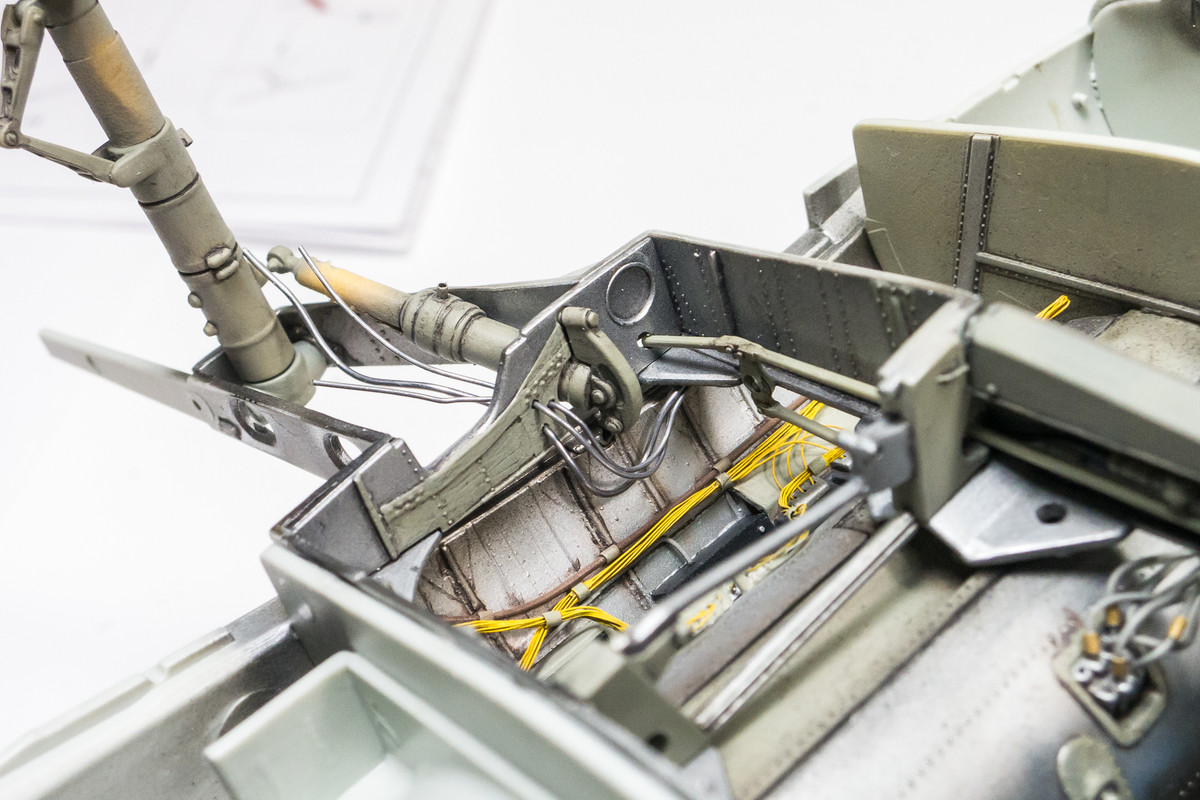
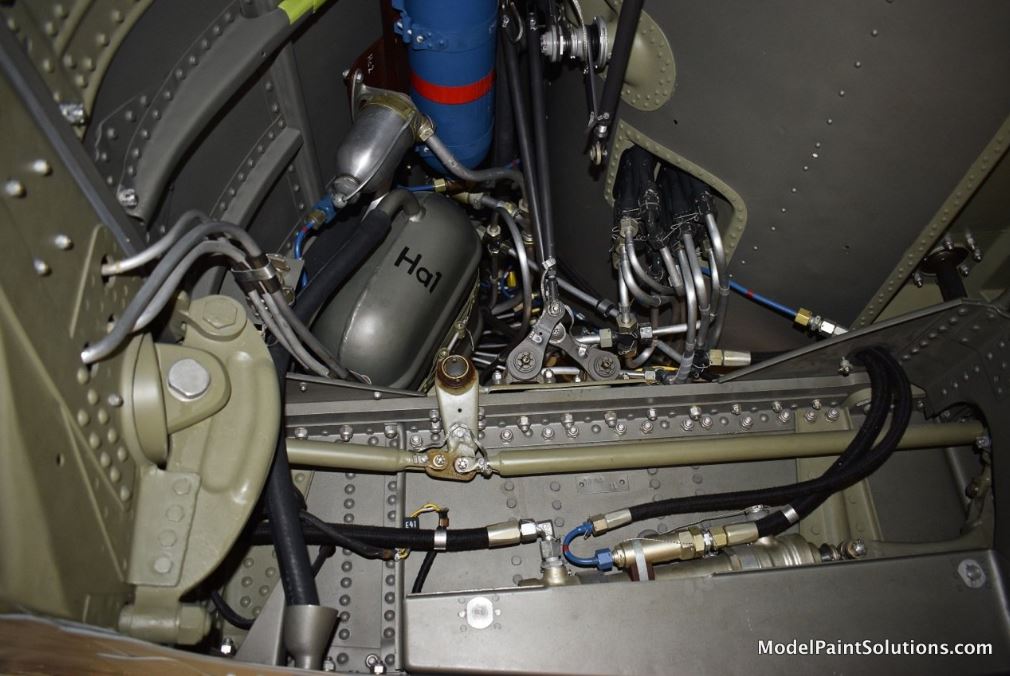
While I don't claim full accuracy with these details, they are not totally random either. You can see the inspiration for these added details in this pic from the restored 262 at The Flying Heritage and Combat Armor Museum.
While I'm working on the cowling joints (which will be a long and iterative process), I'm adding a few details to the wheel well.
I cut this piece off of the Trumpeter kit fuel tank connection and added some wiring for hydraulic lines.
Stuck it in place on on forward bay spar.
With the landing gear temporarily in place, I mounted some hydraulic lines from those three holes on the wheel bay bulkhead that I noted previously. The terminals on the landing gear side are free-hanging for now and will be locked down after the wings are assembled.
While I don't claim full accuracy with these details, they are not totally random either. You can see the inspiration for these added details in this pic from the restored 262 at The Flying Heritage and Combat Armor Museum.
John aka JKim
-----------<><

-----------<><
Re: 1/32 Revell Me262B-1/U1 Nachtjager
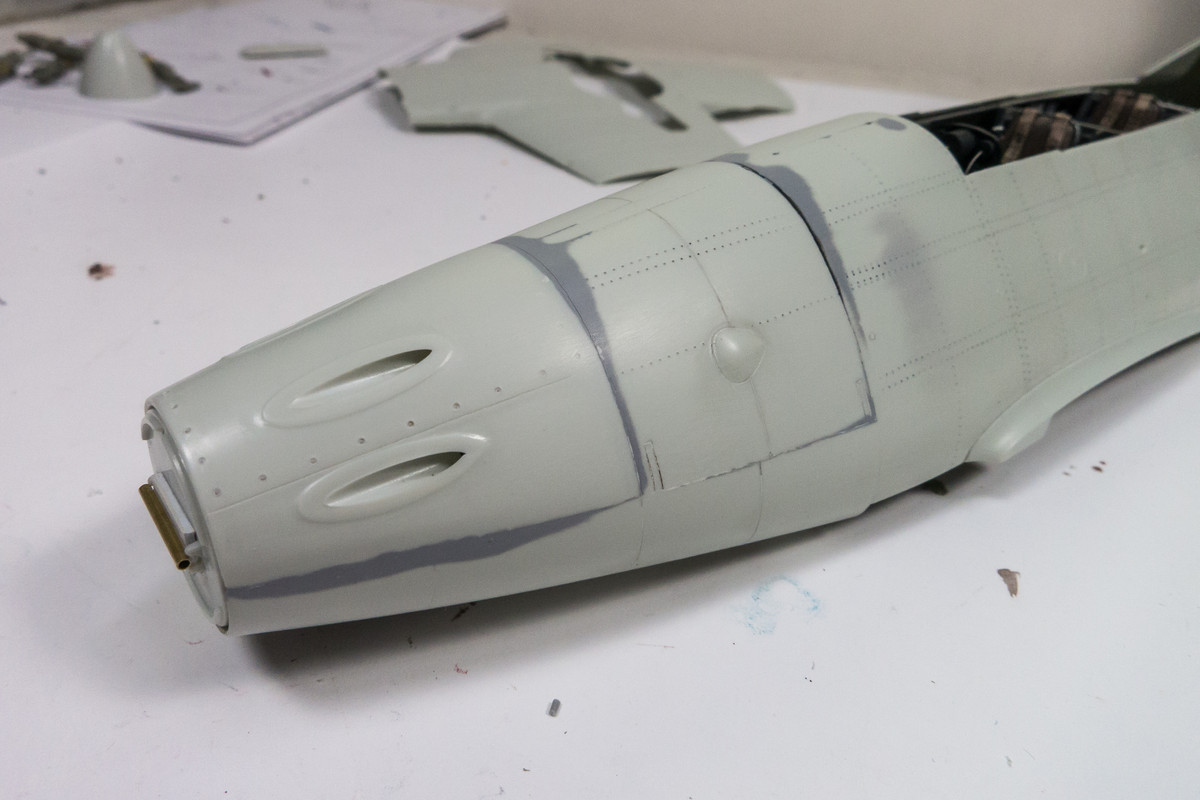
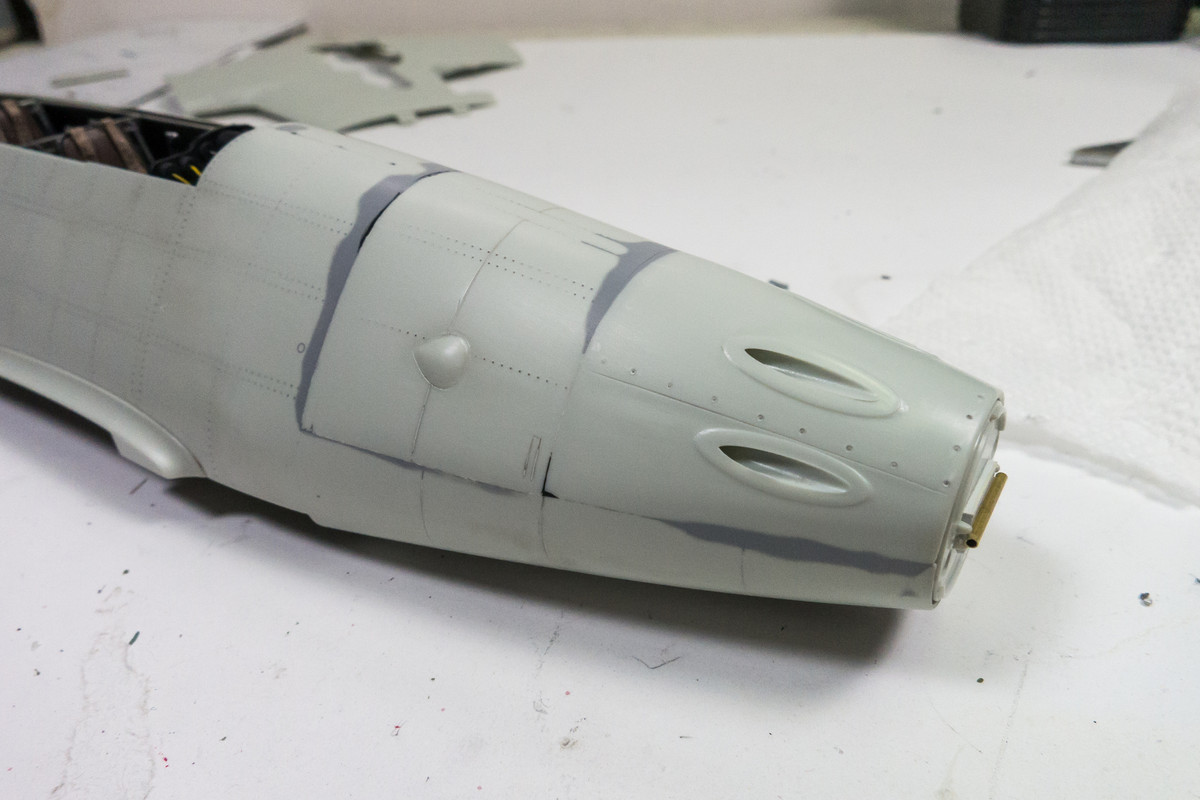
Here's what the nose looks like after a couple of rounds of filing and sanding. The primary filler has been Mr Surfacer 1000. On some of the deeper gaps, I used black CA glue first to provide some structural stiffness and then Mr Surfacer over that to blend into the plastic. A few more rounds and I should be ready to re-scribe.
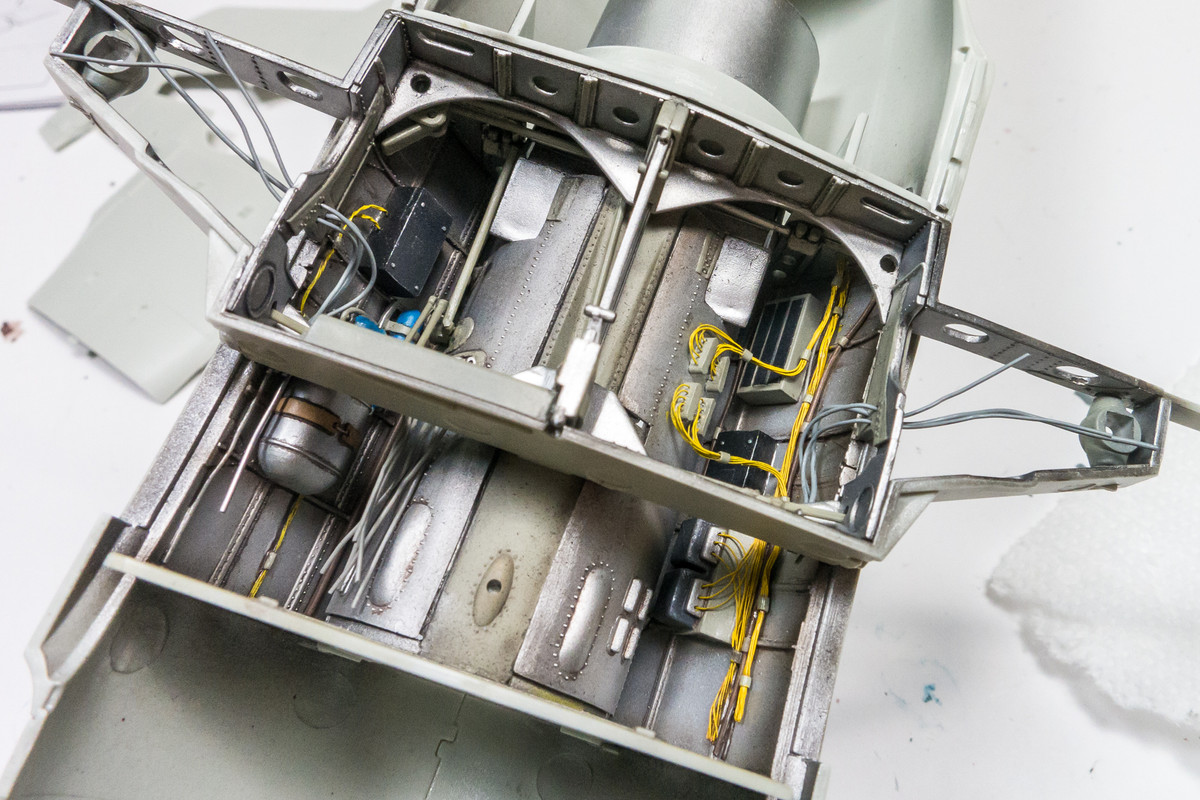
While working on the nose, I thought I should go ahead and glue the cockpit tub into place. It should be protected from the fuselage sides and would provide some stiffness to the fuselage assembly which might prevent some of the seam work in the nose from cracking. Since the wheel well bay is now permanent, I can secure the ends of the yellow electrical wiring bundles and also add some of the actuator pieces.
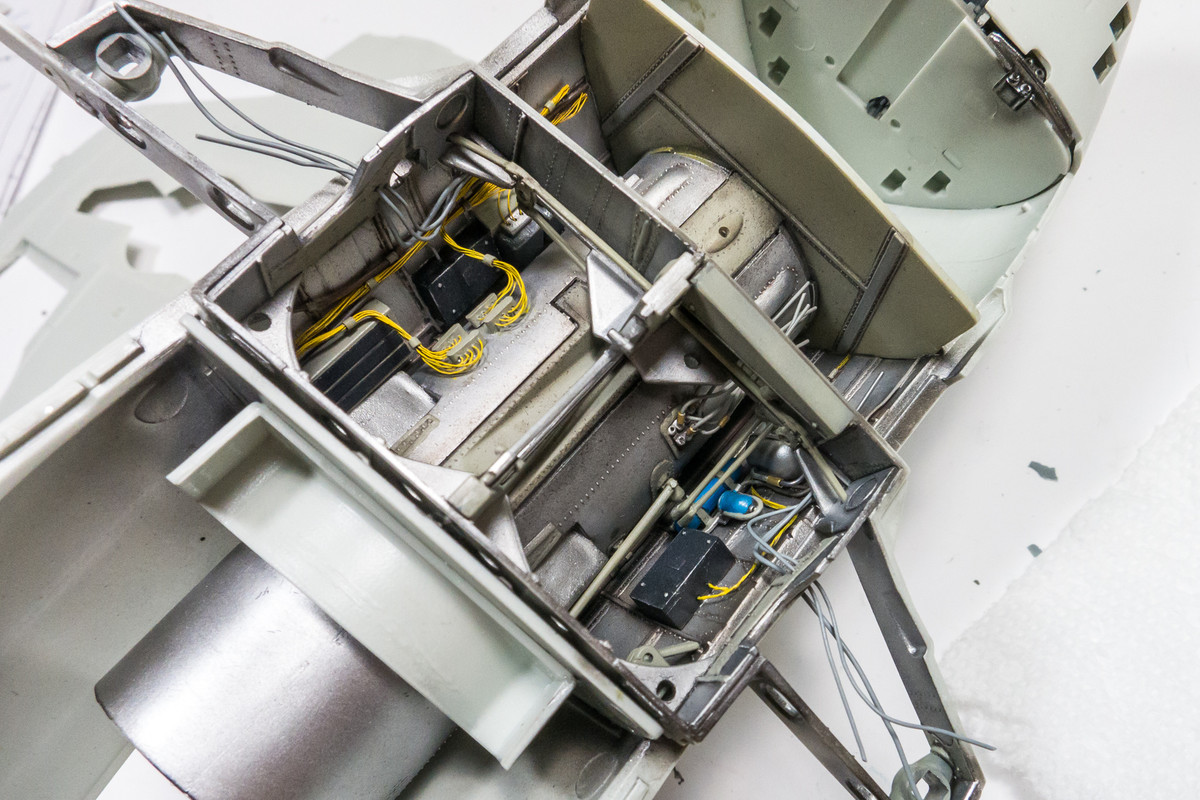
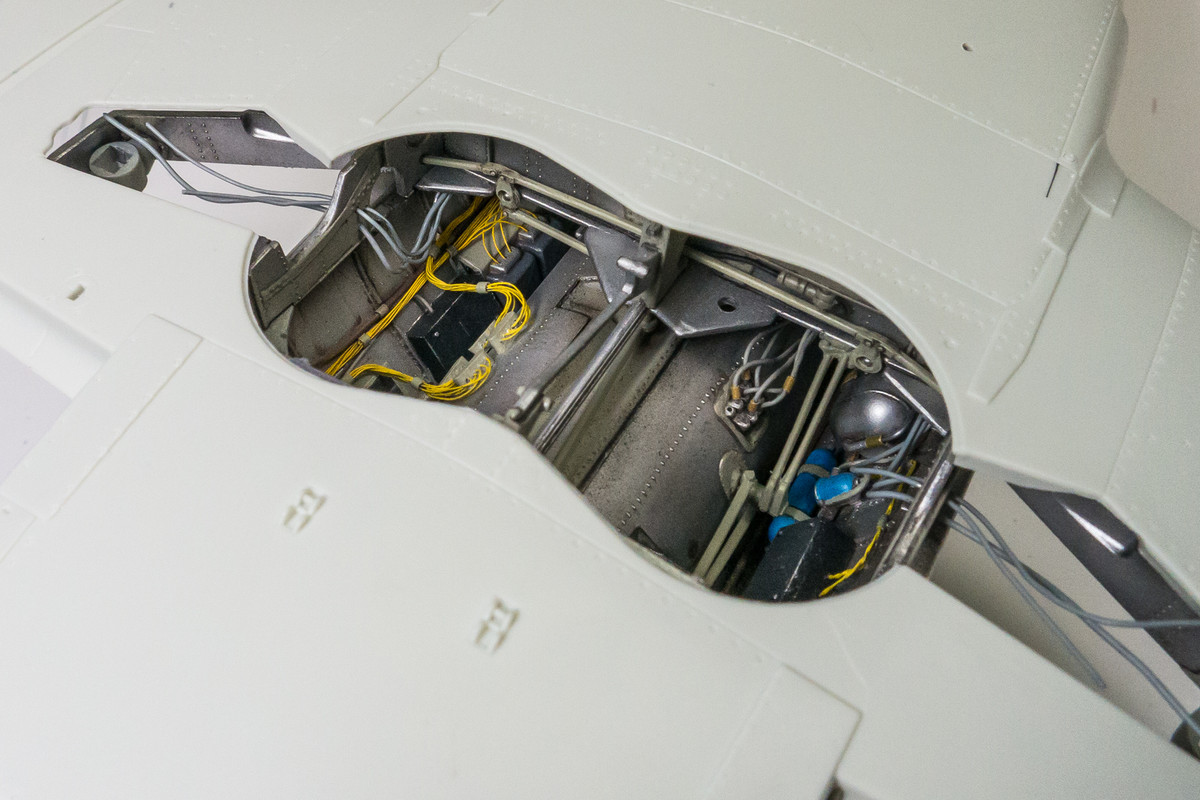
With the wing temporarily in place, you can see how the view into the wheel bay is limited and hopefully no dangling wiring ends are now visible.
While working on the nose, I thought I should go ahead and glue the cockpit tub into place. It should be protected from the fuselage sides and would provide some stiffness to the fuselage assembly which might prevent some of the seam work in the nose from cracking. Since the wheel well bay is now permanent, I can secure the ends of the yellow electrical wiring bundles and also add some of the actuator pieces.
With the wing temporarily in place, you can see how the view into the wheel bay is limited and hopefully no dangling wiring ends are now visible.
John aka JKim
-----------<><
-----------<><

Re: 1/32 Revell Me262B-1/U1 Nachtjager
Great building John! Your detail in the wheel well is excellent as well as your seam work.
March as one, Don't look back
Odin's sons... Attack!
Unleash hell! Do not repent! Warfare grants us no lament
Let your weapons slash and tear This is no place for fear
Hold the lines! Move as one! In unity our victory's won
Our shields will form a mighty wall
United we shall never fall
Odin's sons... Attack!
Unleash hell! Do not repent! Warfare grants us no lament
Let your weapons slash and tear This is no place for fear
Hold the lines! Move as one! In unity our victory's won
Our shields will form a mighty wall
United we shall never fall

Re: 1/32 Revell Me262B-1/U1 Nachtjager
Astonishing, absolutely amazingly a-s-t-o-n-i-s-h-i-n-g work John !!jkim wrote: With the wing temporarily in place, you can see how the view into the wheel bay is limited and hopefully no dangling wiring ends are now visible.
- Kari
---
On the bench:
Eduard 1:48 - Fokker D.VII OAW
https://www.facebook.com/GrundAsk-Scale ... 721218708/
On the bench:
Eduard 1:48 - Fokker D.VII OAW
https://www.facebook.com/GrundAsk-Scale ... 721218708/
-
mustang1989

- Moderator
- Posts: 5044
- Joined: Tue Mar 18, 2014 8:35 pm
Re: 1/32 Revell Me262B-1/U1 Nachtjager
My thoughts on that landing gear bay: Ummmm......I don't think you forgot a single detail.  Just short of being entirely operational.
Just short of being entirely operational.-
BlackSheep214

- Elite Member
- Posts: 13598
- Joined: Sun Apr 06, 2014 8:47 pm
Re: 1/32 Revell Me262B-1/U1 Nachtjager
I’ve just about ran out of words to describe your incredible work. I am at awe. 
“Who controls the skies, controls the fate of this Earth”
Author unknown- 352nd Fighter Group, Blue-Nosed Bastards of Bodney
“Send one plane it’s a sortie; send two planes it’s a flight; send four planes it’s a test of airpower. - Richard Kohn
Author unknown- 352nd Fighter Group, Blue-Nosed Bastards of Bodney
“Send one plane it’s a sortie; send two planes it’s a flight; send four planes it’s a test of airpower. - Richard Kohn
-
Stikpusher

- Moderator
- Posts: 21386
- Joined: Sat Apr 05, 2014 8:37 pm
- Location: Ceti Alpha 5
Re: 1/32 Revell Me262B-1/U1 Nachtjager
That wheel well photo with everything in place is sweet! That is a excellent level of detailing with all of the wiring and plumbing!
That is a excellent level of detailing with all of the wiring and plumbing!"Surely I have made my meaning plain? I intend to avenge myself upon you, Admiral. I have deprived your ship of power, and when I swing 'round, I intend to deprive you of your life."
FLSM
FLSM
Re: 1/32 Revell Me262B-1/U1 Nachtjager
Thanks guys! The wheel wells are NOT complete... just ask anyone over at LSP and you could get a long list of what's missing! 
I started looking at the engine nacelle assembly to determine which components are necessary to portray the cowlings in the closed position. It looks like you could manage to do that without the included engines but there are some mounting attachments on the engine itself and including them may result in a more solid nacelle assembly. While I was playing around the engine parts, I decided to replace the pull ring thing from the jet nose cone with the PE replacement from Eduard.
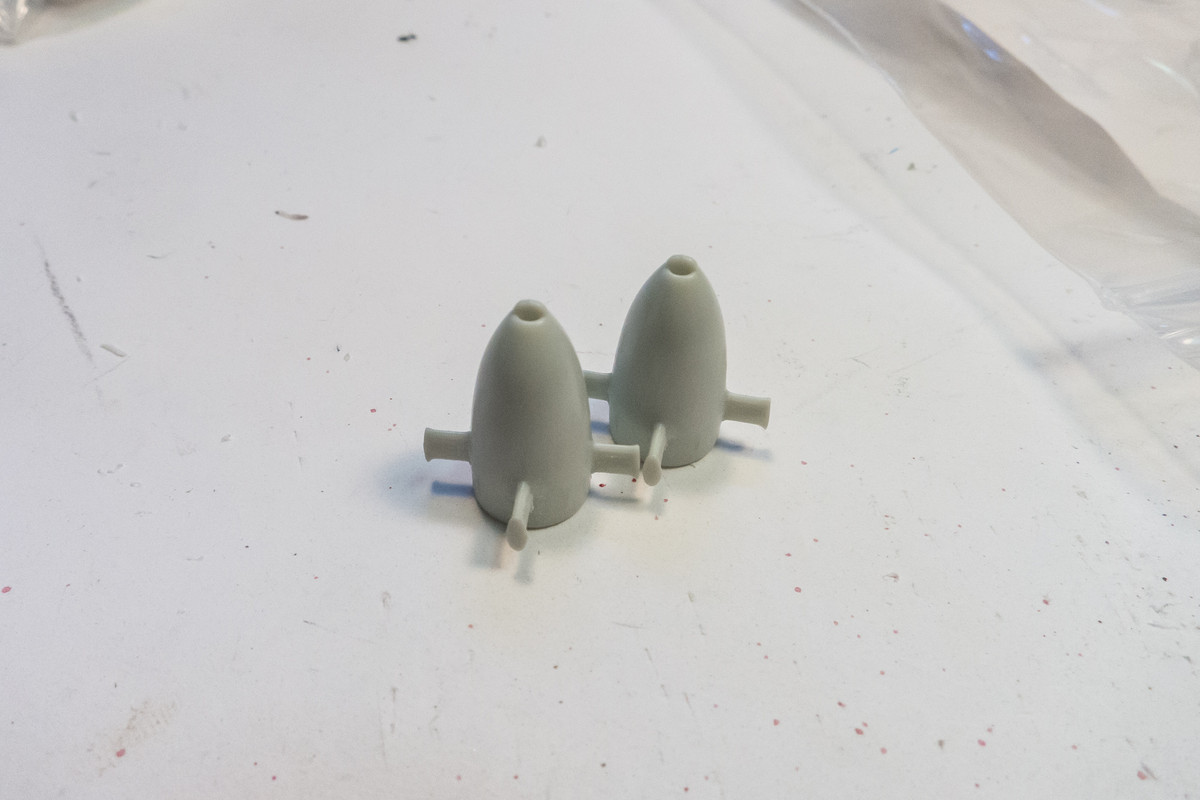
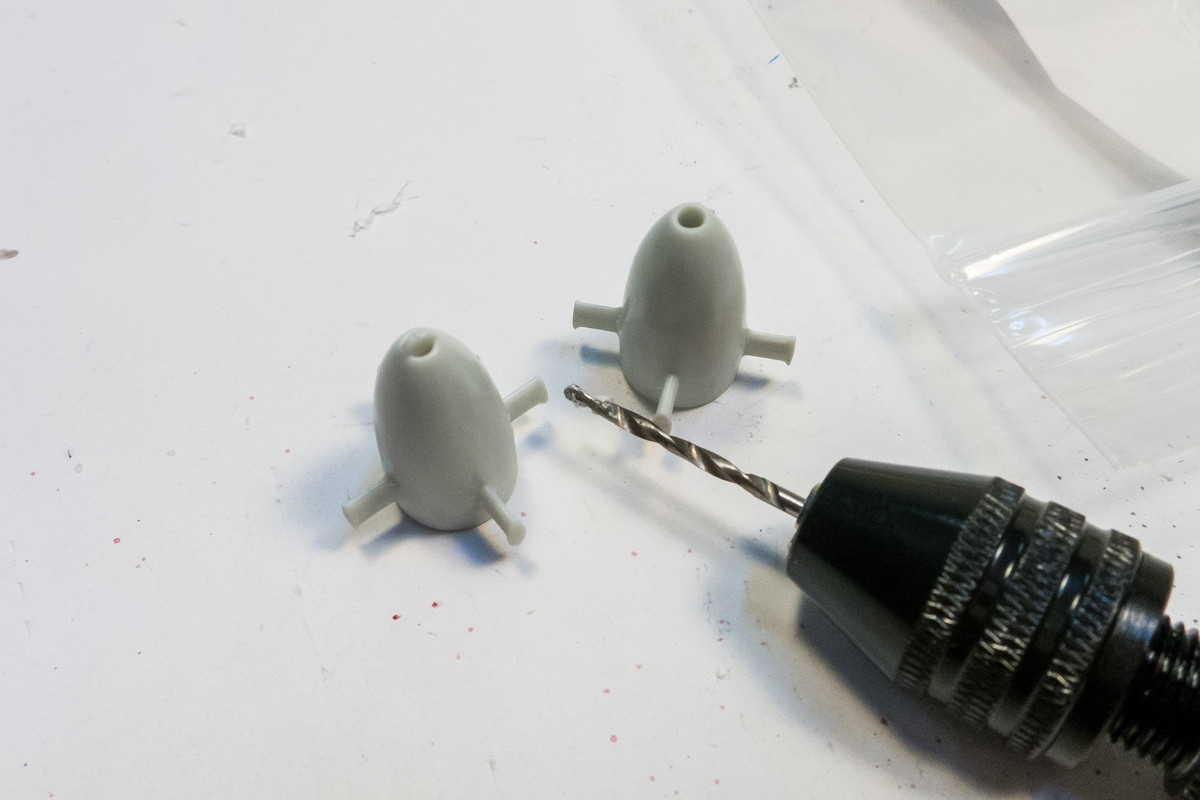

I also wanted to address a couple of things on the clear windscreen part. One was a spot scratch that resulted from the part being loose in the bag. The other was to remove the wiper assembly, which was not present on Red 10.

First, the wiper was carefully scraped off with a curved x-acto blade.
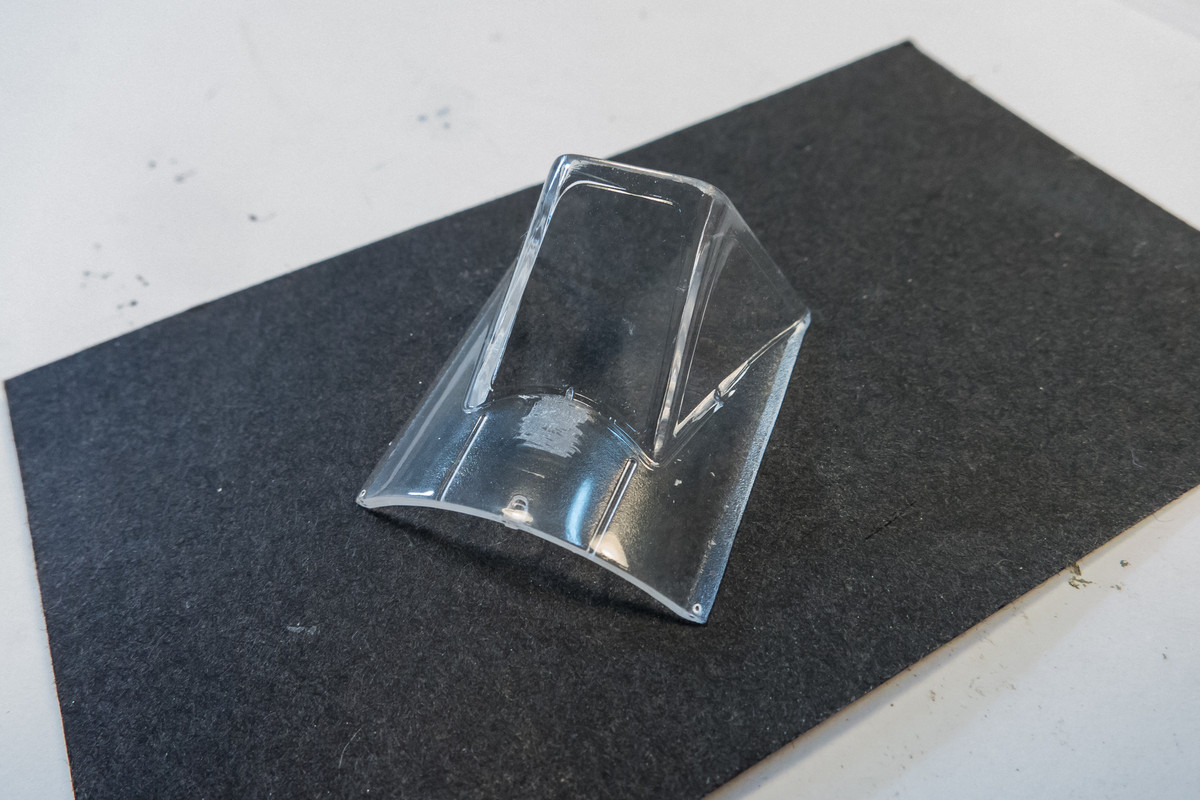
Both areas were then wet-sanded with 400-grit and 600-grit 3M sandpaper.
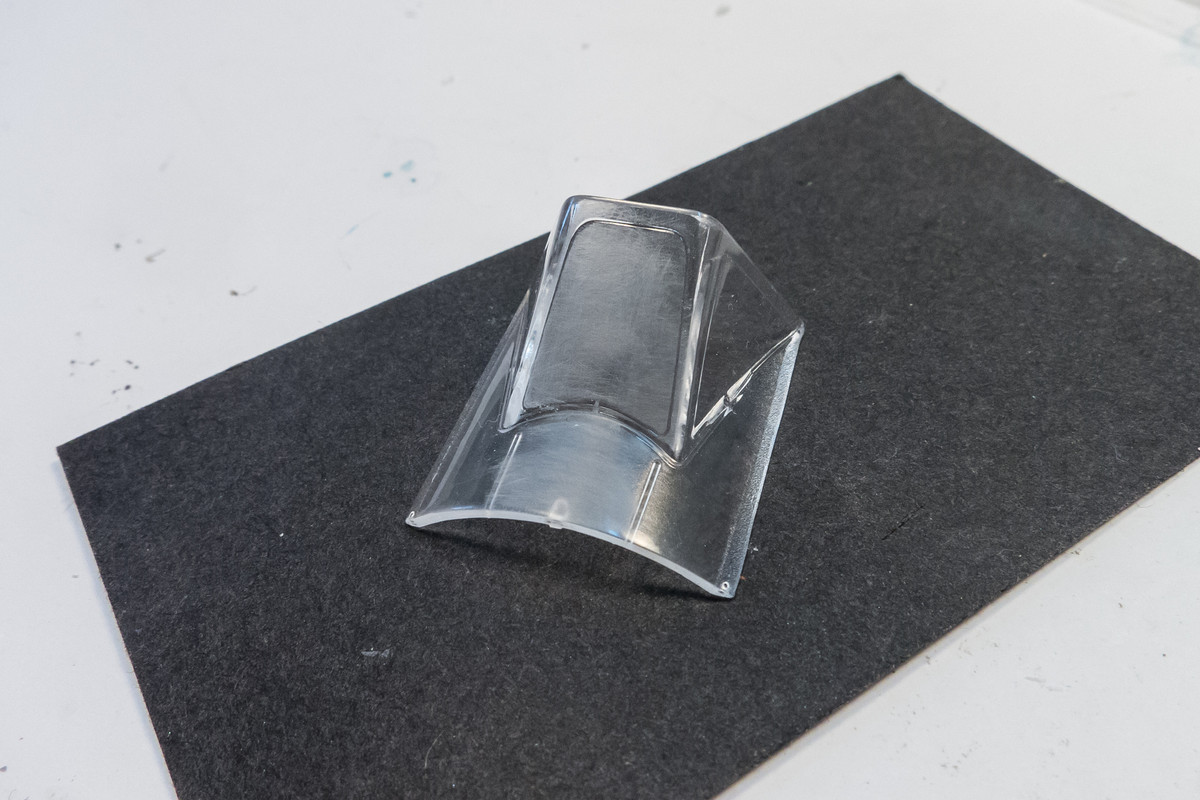
A full range of Micromesh from 3200 to 12000 grade was used to further polish the part.
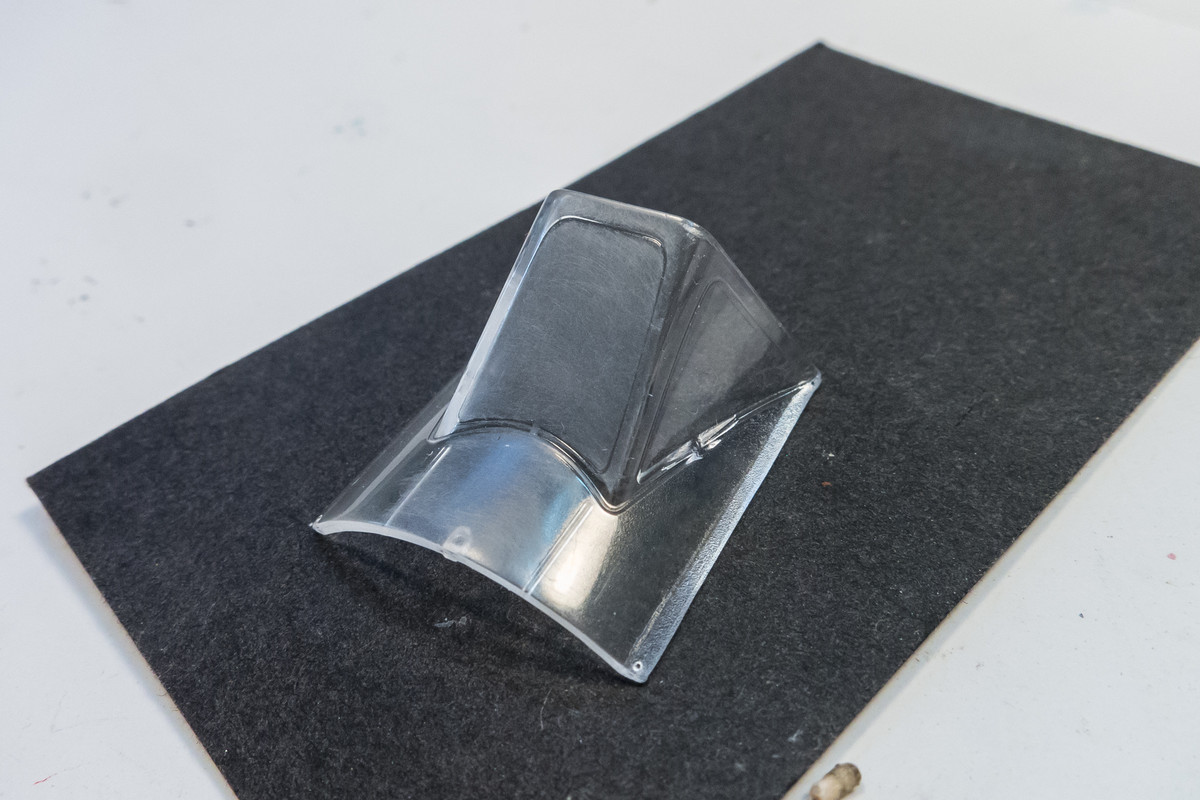
After the 1200 Micromesh treatment, the windscreen is now clear again but some visible scratches remain. To achieve even more clarity, you can use some liquid polish.
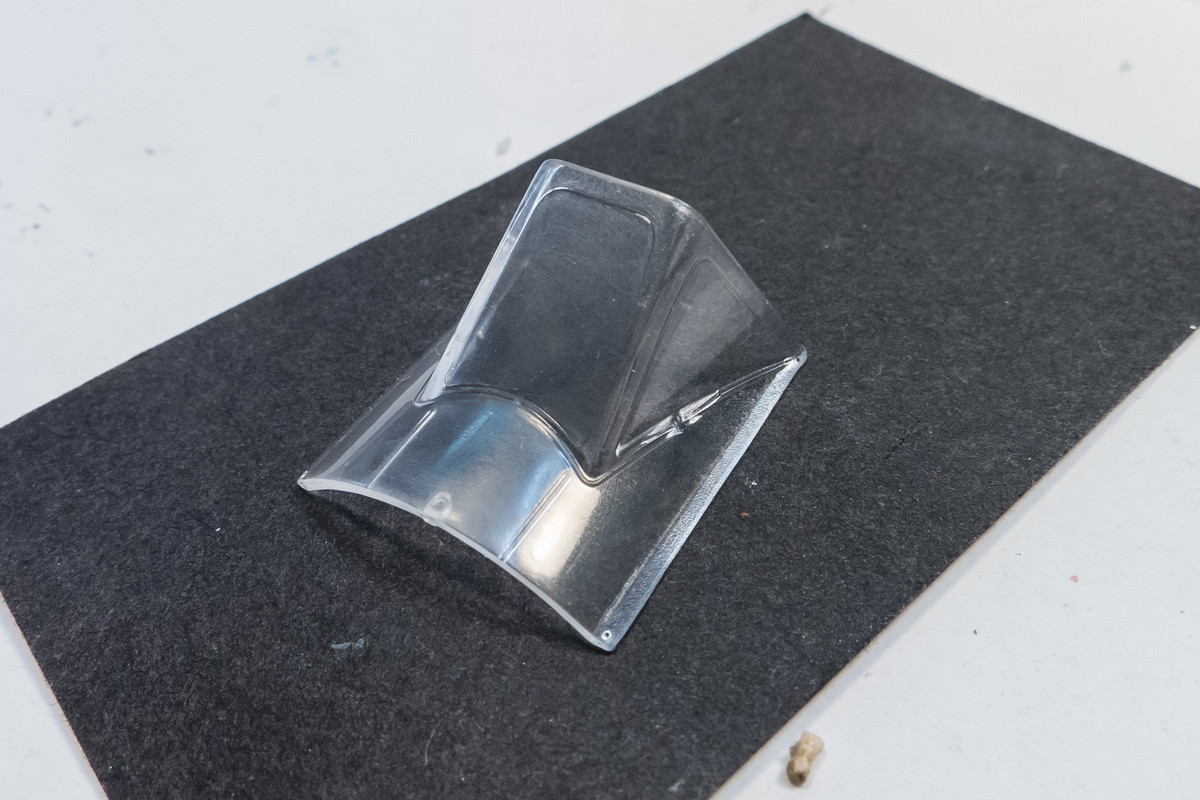
I use the Novus products, which are specifically made for plastics.
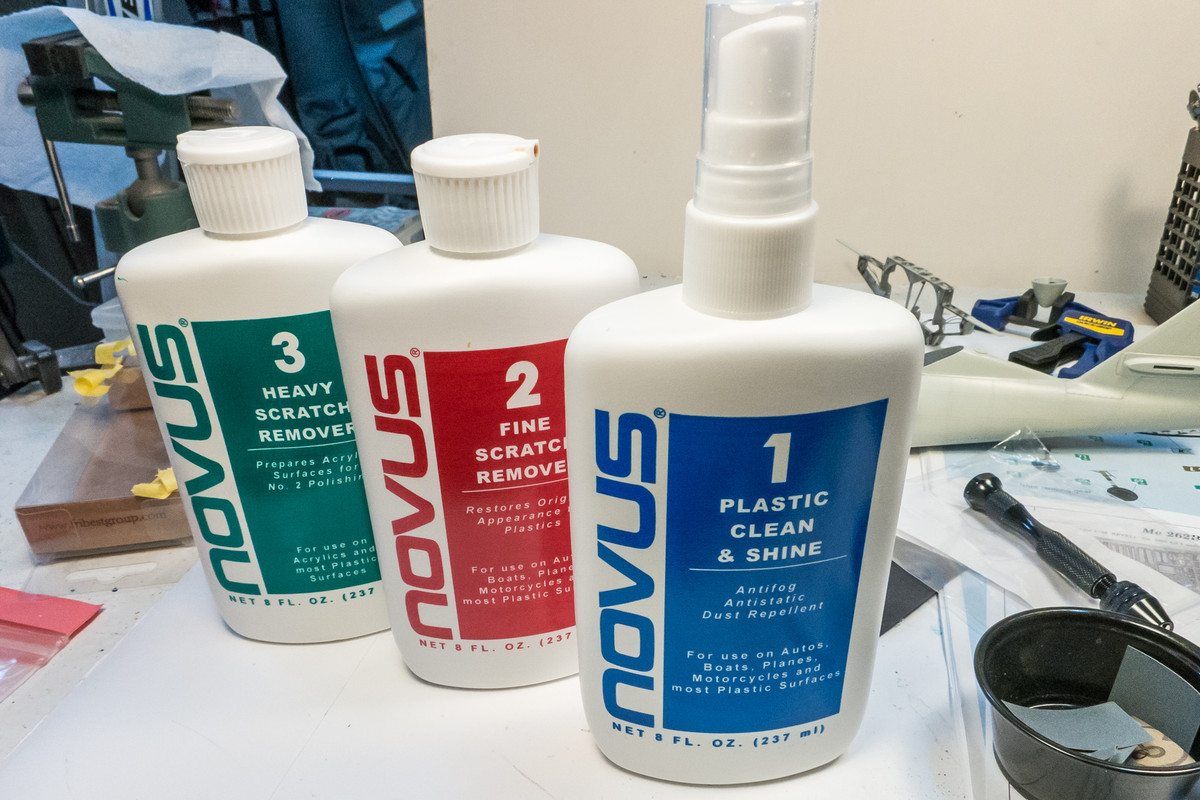
After using the Novus polishes, the windscreen is indeed clearer but there still remains lots of tiny scratches, apparent when looking at it from different angles. I've never managed to get these micro-scratches out with just polish alone.
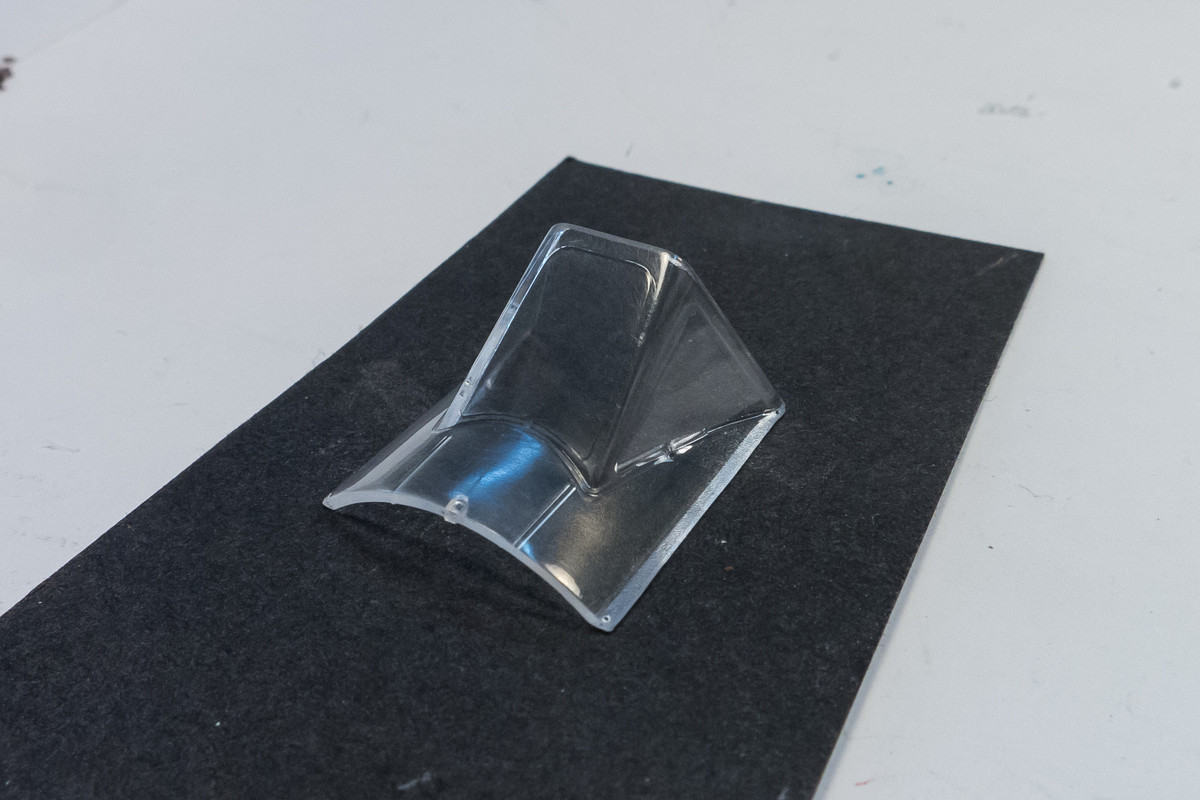
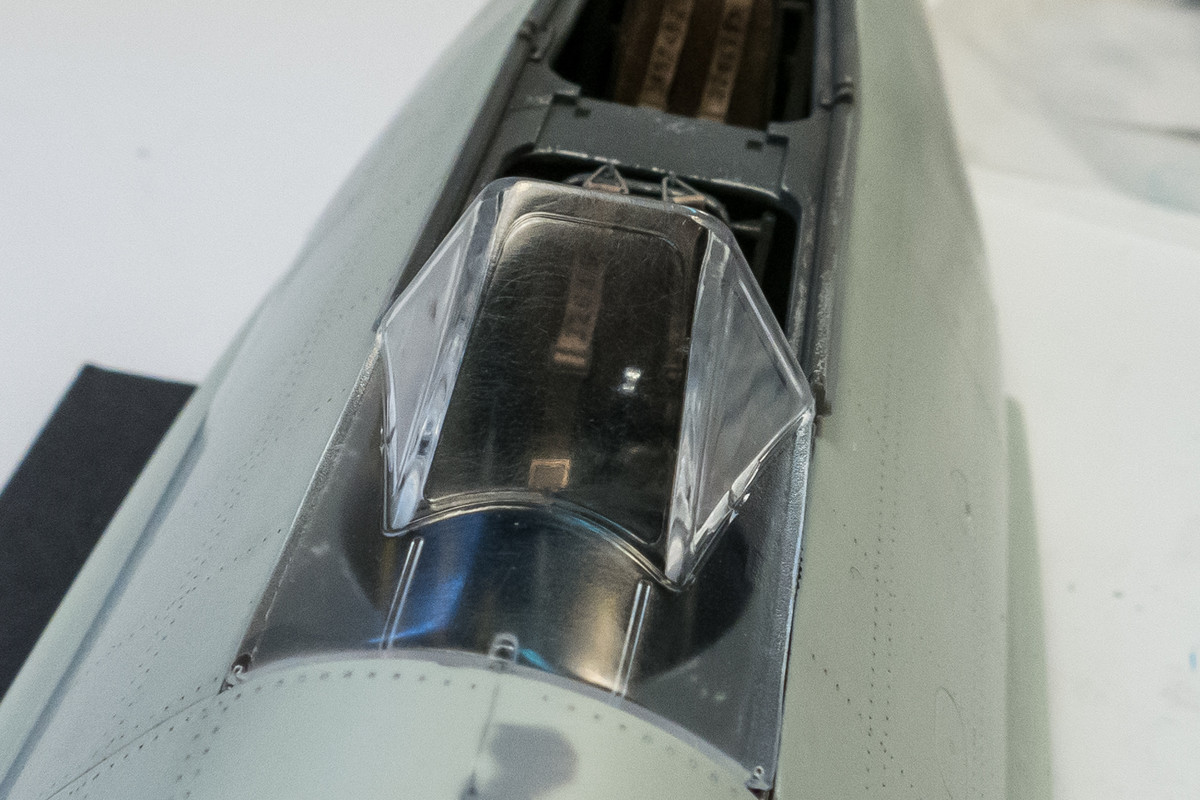
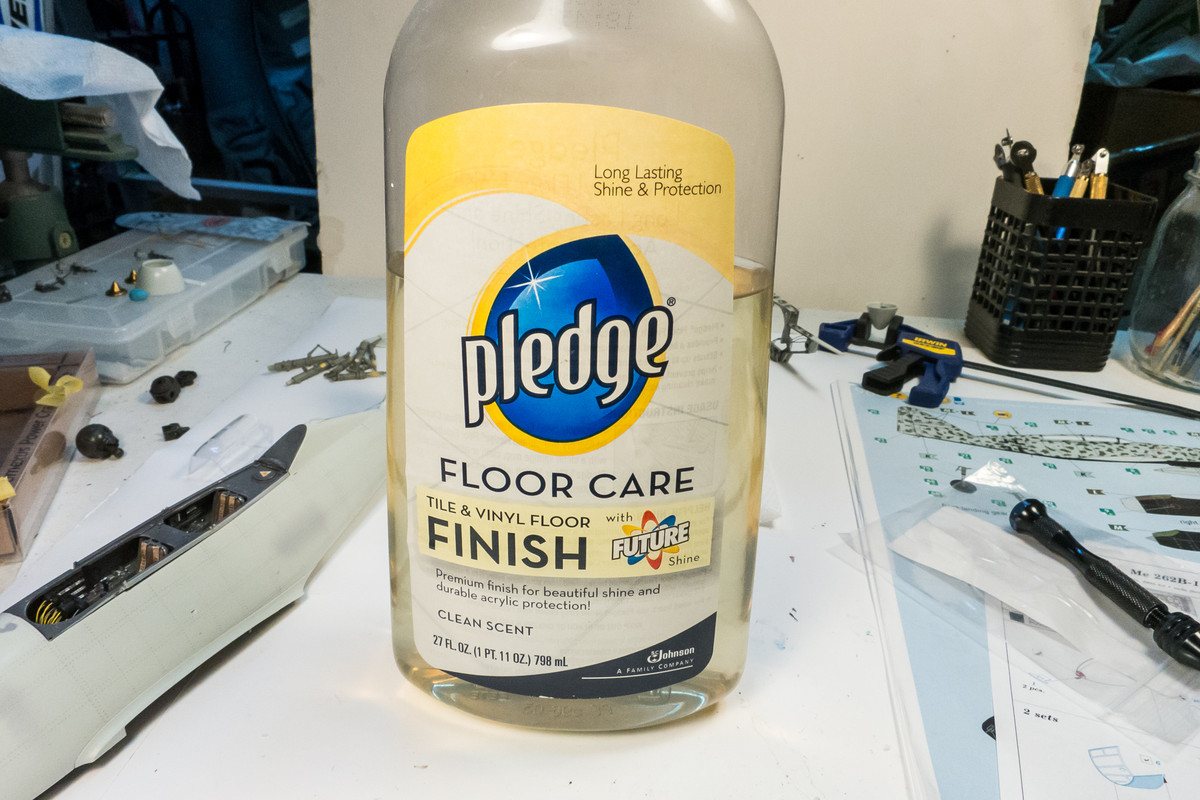
For the last step, I use Future which is very good at filling in even the smallest micro scratches and imperfections. Simply dip the clear part in Future, wick away and excess and then let dry. I like to set the wet piece on a piece of paper towel to help wick away the excess and then cover the part with a plastic cup while drying to prevent dust particles from settling on the surface.
Here is the windscreen after the Future has dried. Future is self leveling and will usually dry in a uniformly even thickness if the obvious excess is removed. Even clearer and no more hairline scratches.
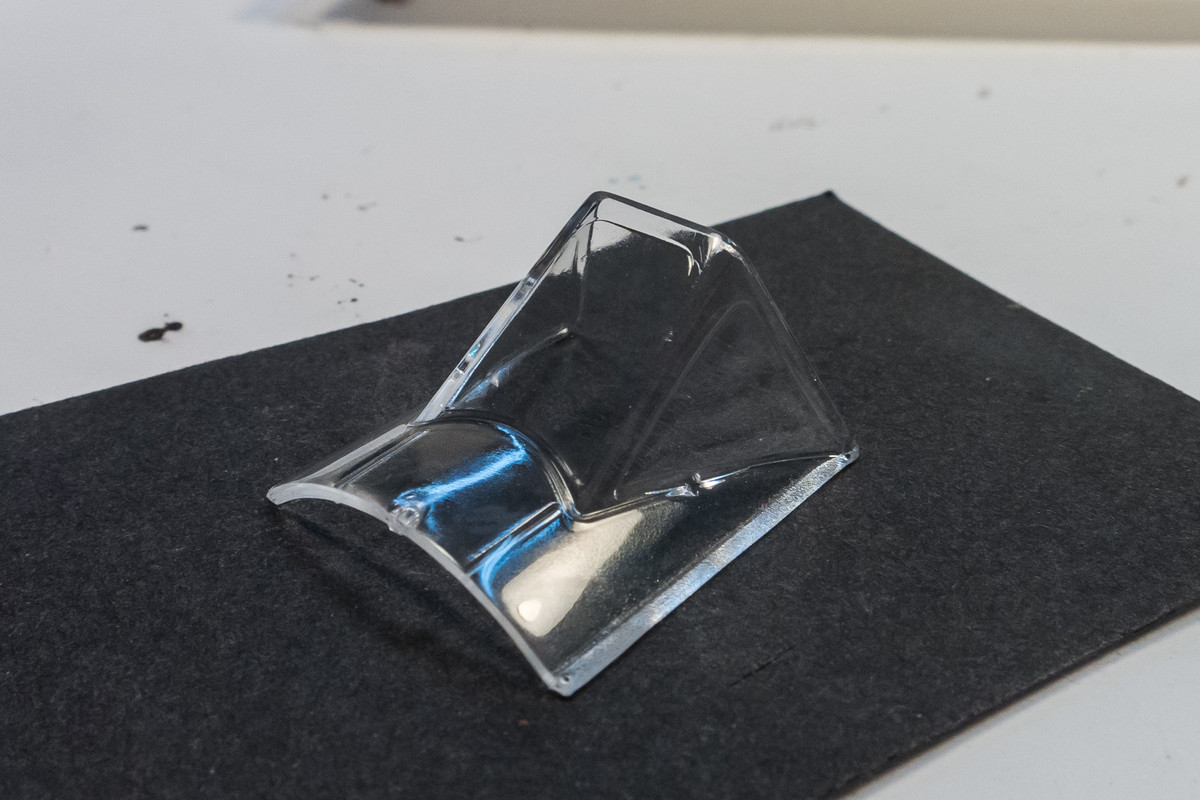
The nice thing about Future it can be wiped away completely with Windex. If you inadvertently put a thumbprint on it while drying or you get pieces of dust stuck in it, you spray it with Windex, wipe it away and do it again. The added clarity that Future gives to clear parts is enough for me to use it as standard practice on all of my clear parts. Another added benefit... Future-treated clear plastic is resistant to CA glue frosting.
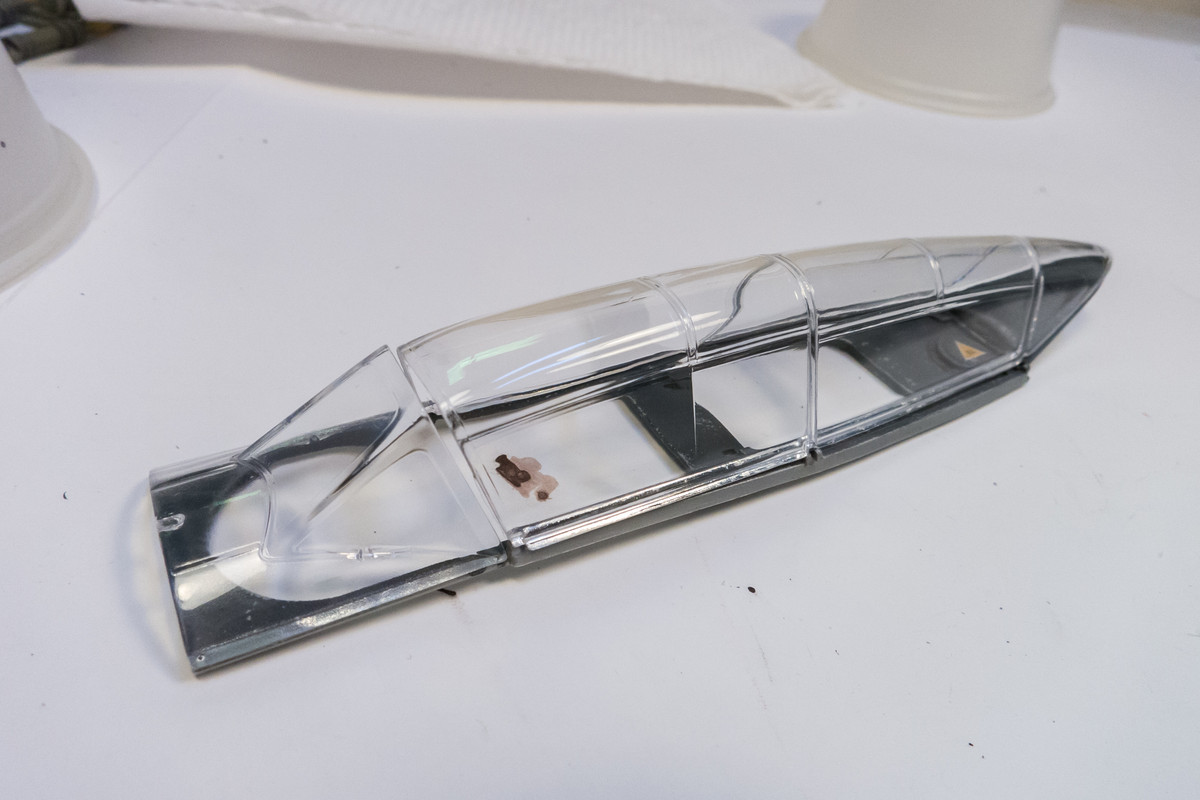
The putty work on the nose area has been refined over the past few days and I think I'm ready to start scribing. My main scribing tool for straight lines is the SCR-01 from UMM Models.
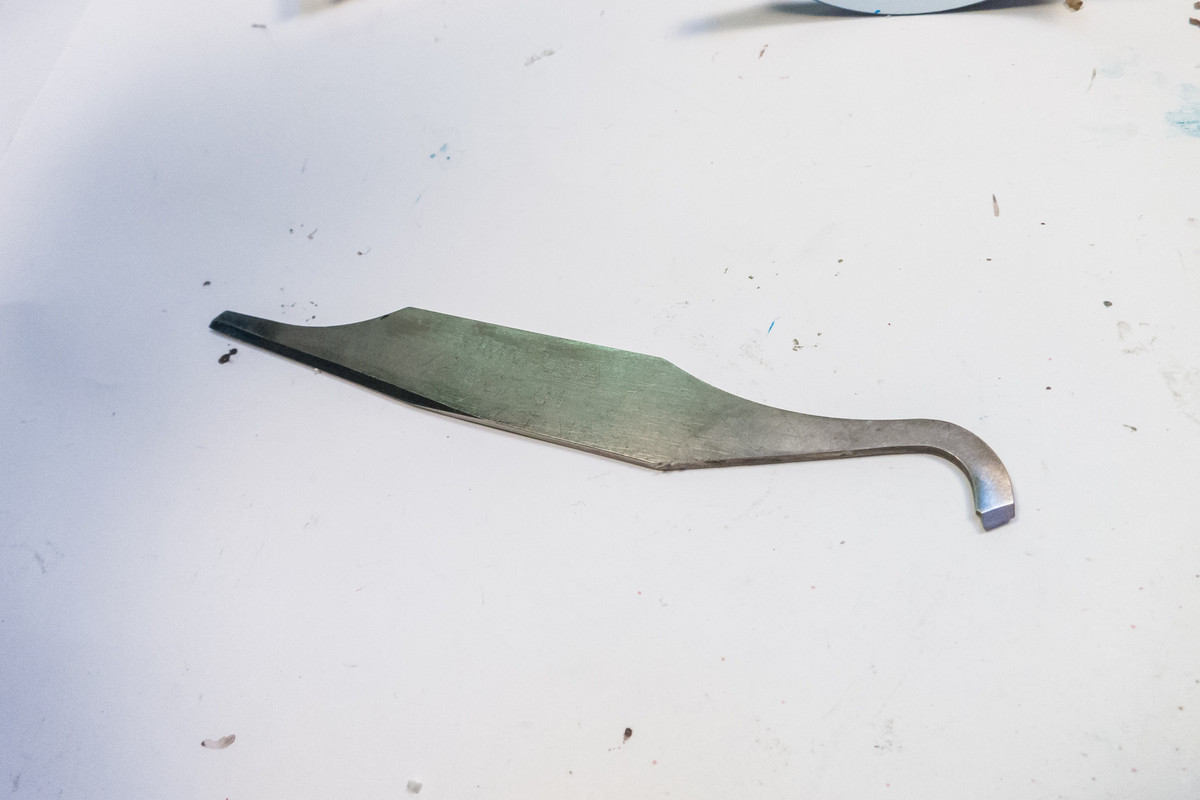
Dymo adhesive label tape is used to establish a straight edge to guide the scriber along. I find I get more consistent panel lines if I pull the hook-shaped end as opposed to trying to push the tool.
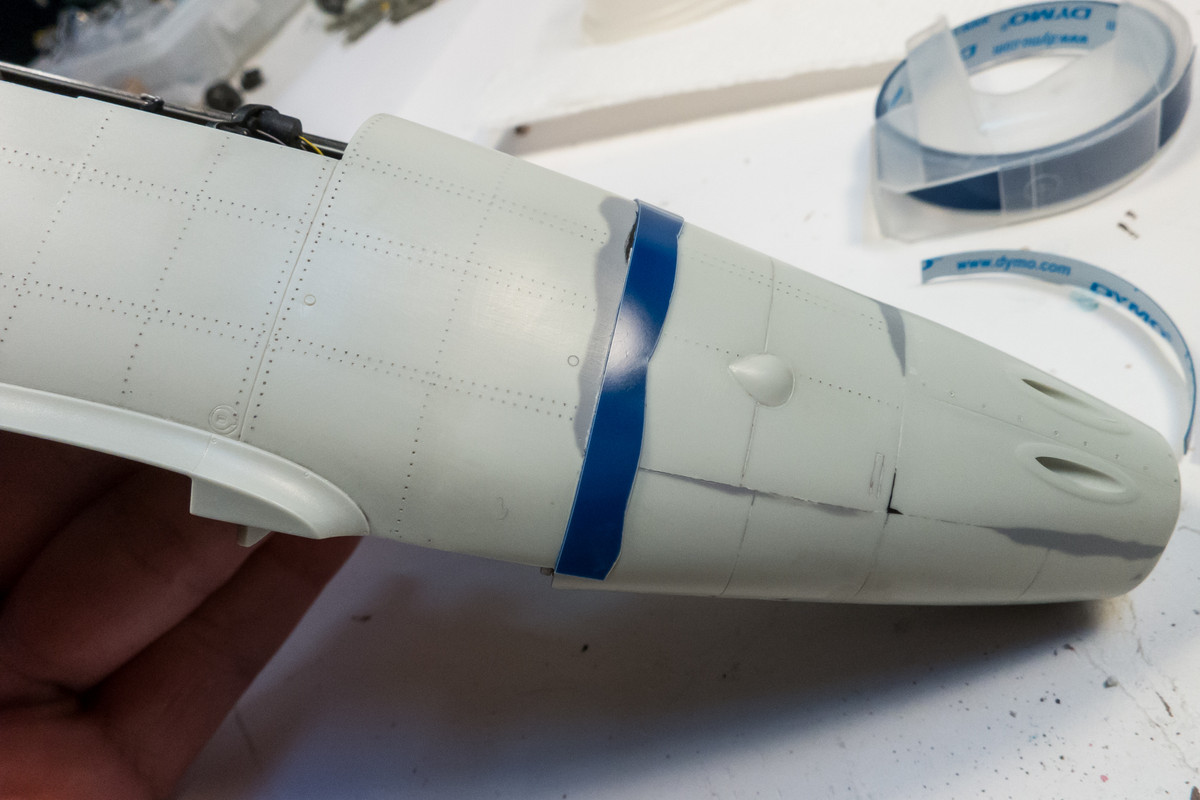
To be perfectly honest, I am a horrible scriber. Lots of things go wrong on my initial attempts as the photos after a primer coat shows.
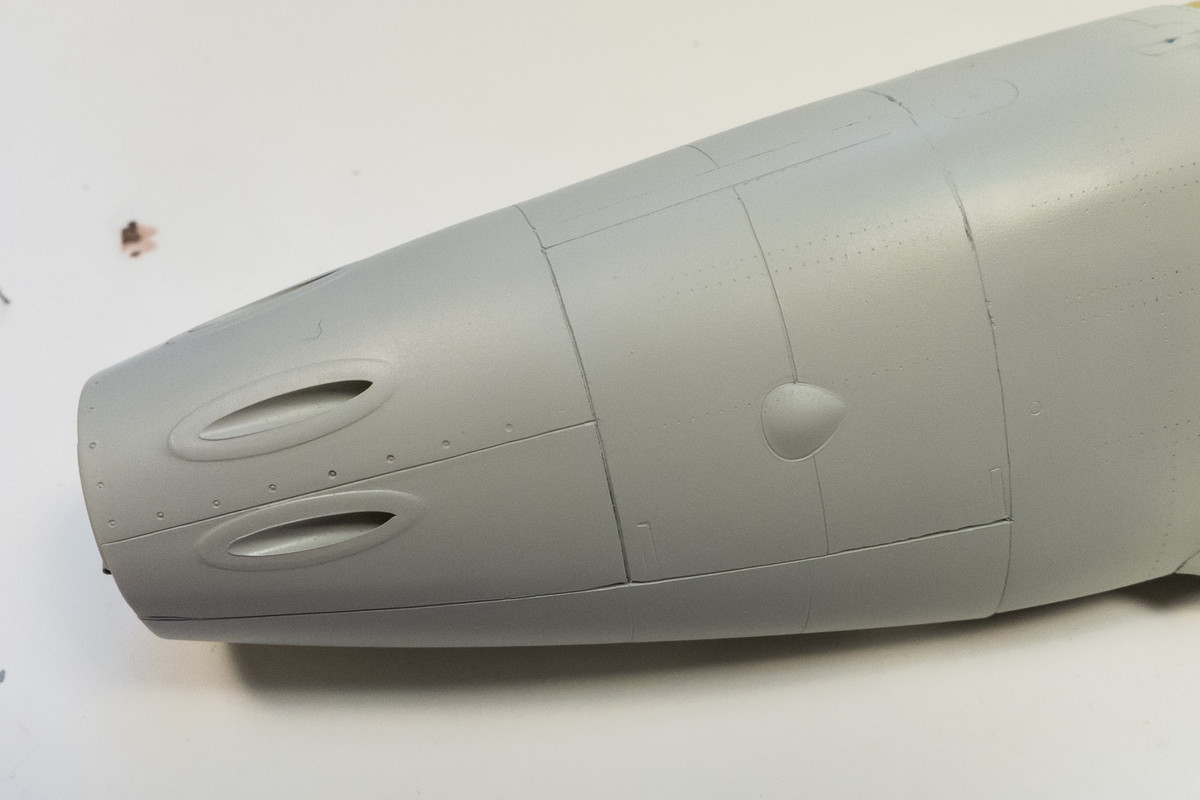
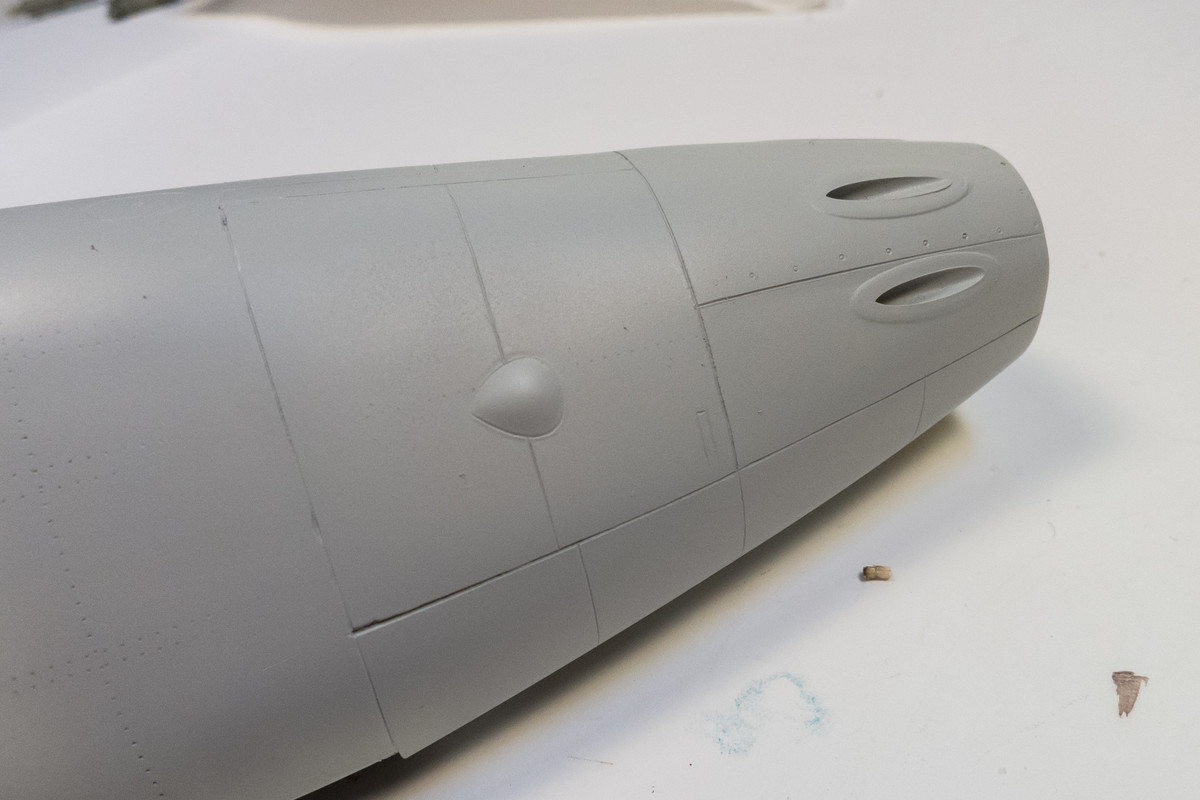
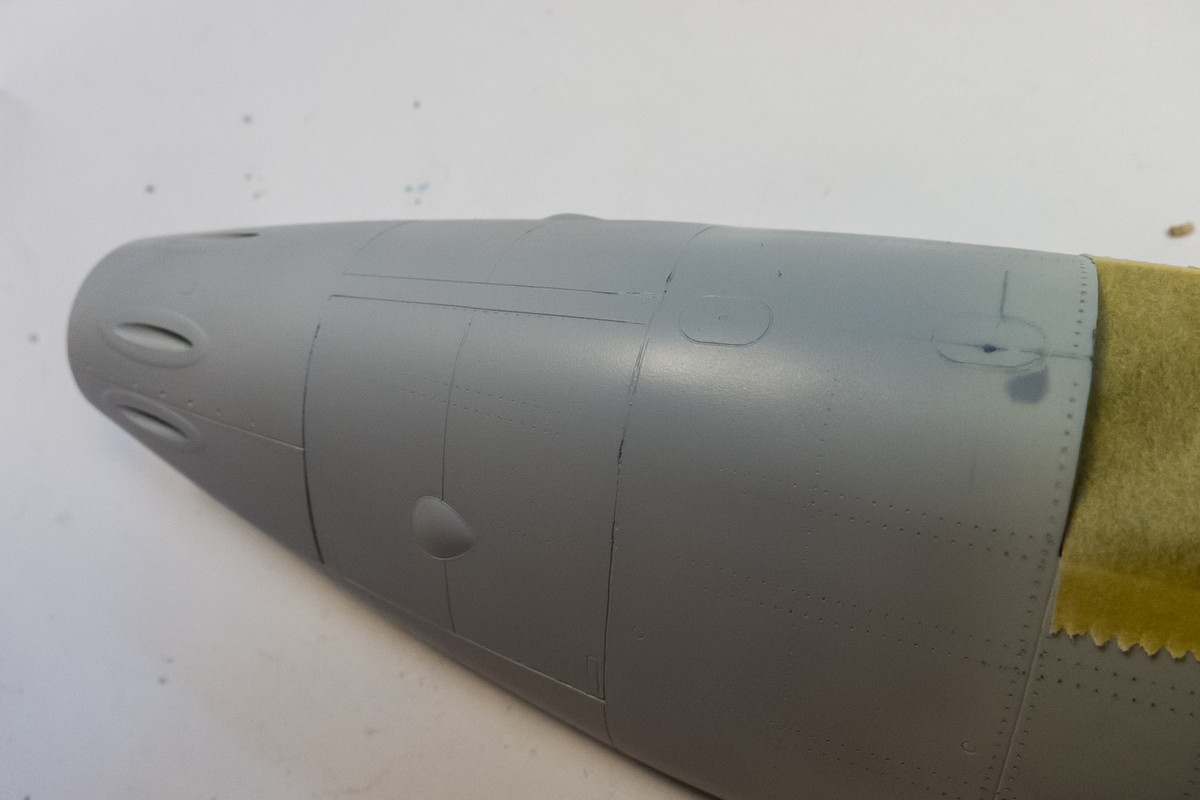
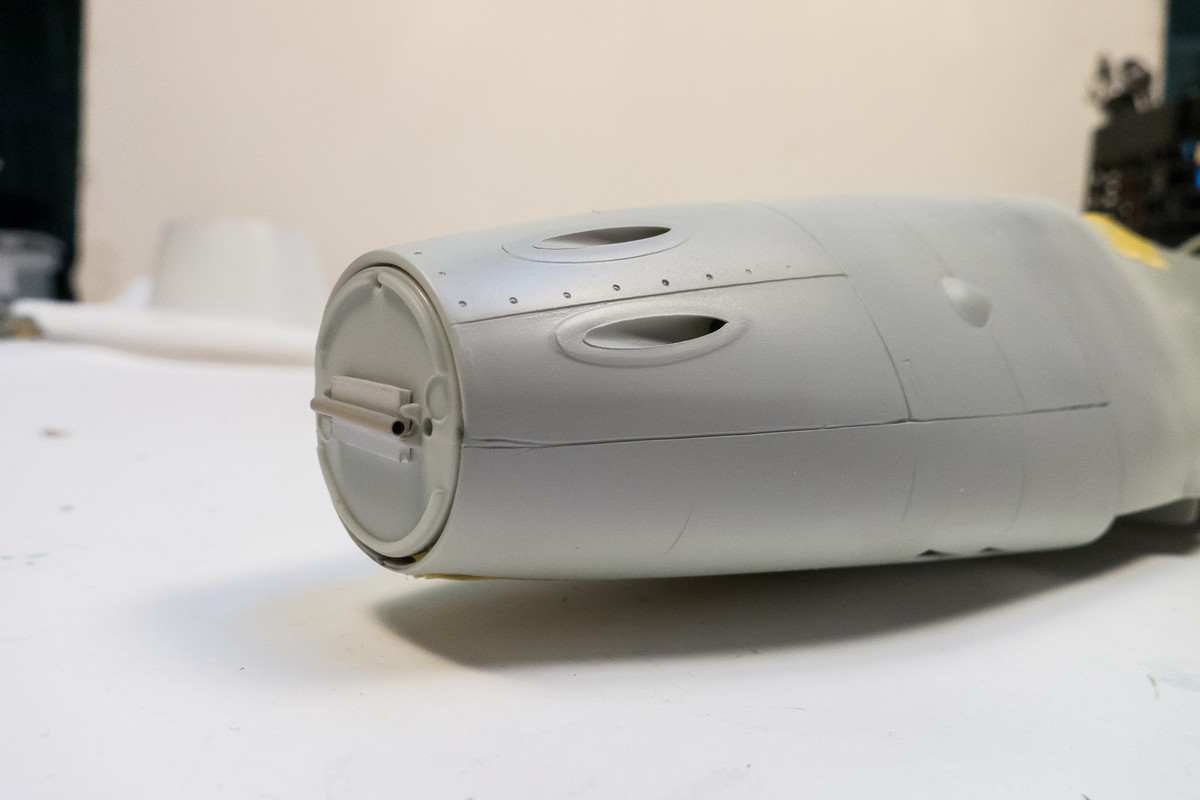
But even this messy scribing exercise is a step forward. Instead of thinking about the whole area forward of the cockpit, I now can focus on cleaning up some messy and errant lines. Also some sanding edges that need to be softened.
I started looking at the engine nacelle assembly to determine which components are necessary to portray the cowlings in the closed position. It looks like you could manage to do that without the included engines but there are some mounting attachments on the engine itself and including them may result in a more solid nacelle assembly. While I was playing around the engine parts, I decided to replace the pull ring thing from the jet nose cone with the PE replacement from Eduard.
I also wanted to address a couple of things on the clear windscreen part. One was a spot scratch that resulted from the part being loose in the bag. The other was to remove the wiper assembly, which was not present on Red 10.
First, the wiper was carefully scraped off with a curved x-acto blade.
Both areas were then wet-sanded with 400-grit and 600-grit 3M sandpaper.
A full range of Micromesh from 3200 to 12000 grade was used to further polish the part.
After the 1200 Micromesh treatment, the windscreen is now clear again but some visible scratches remain. To achieve even more clarity, you can use some liquid polish.
I use the Novus products, which are specifically made for plastics.
After using the Novus polishes, the windscreen is indeed clearer but there still remains lots of tiny scratches, apparent when looking at it from different angles. I've never managed to get these micro-scratches out with just polish alone.
For the last step, I use Future which is very good at filling in even the smallest micro scratches and imperfections. Simply dip the clear part in Future, wick away and excess and then let dry. I like to set the wet piece on a piece of paper towel to help wick away the excess and then cover the part with a plastic cup while drying to prevent dust particles from settling on the surface.
Here is the windscreen after the Future has dried. Future is self leveling and will usually dry in a uniformly even thickness if the obvious excess is removed. Even clearer and no more hairline scratches.
The nice thing about Future it can be wiped away completely with Windex. If you inadvertently put a thumbprint on it while drying or you get pieces of dust stuck in it, you spray it with Windex, wipe it away and do it again. The added clarity that Future gives to clear parts is enough for me to use it as standard practice on all of my clear parts. Another added benefit... Future-treated clear plastic is resistant to CA glue frosting.
The putty work on the nose area has been refined over the past few days and I think I'm ready to start scribing. My main scribing tool for straight lines is the SCR-01 from UMM Models.
Dymo adhesive label tape is used to establish a straight edge to guide the scriber along. I find I get more consistent panel lines if I pull the hook-shaped end as opposed to trying to push the tool.
To be perfectly honest, I am a horrible scriber. Lots of things go wrong on my initial attempts as the photos after a primer coat shows.
But even this messy scribing exercise is a step forward. Instead of thinking about the whole area forward of the cockpit, I now can focus on cleaning up some messy and errant lines. Also some sanding edges that need to be softened.
John aka JKim
-----------<><
-----------<><