1/32 Revell Me262B-1/U1 Nachtjager

Re: 1/32 Revell Me262B-1/U1 Nachtjager
Excellent work John the seams look great
March as one, Don't look back
Odin's sons... Attack!
Unleash hell! Do not repent! Warfare grants us no lament
Let your weapons slash and tear This is no place for fear
Hold the lines! Move as one! In unity our victory's won
Our shields will form a mighty wall
United we shall never fall
Odin's sons... Attack!
Unleash hell! Do not repent! Warfare grants us no lament
Let your weapons slash and tear This is no place for fear
Hold the lines! Move as one! In unity our victory's won
Our shields will form a mighty wall
United we shall never fall
-
mustang1989

- Moderator
- Posts: 5044
- Joined: Tue Mar 18, 2014 8:35 pm
Re: 1/32 Revell Me262B-1/U1 Nachtjager
Good turn out on that nose John. She's gonna look fabulous with a coat of paint on that. 

Re: 1/32 Revell Me262B-1/U1 Nachtjager
Thanks guys! Getting some good progress on the 262! The outer wings have been glued into place. Although the fit is pretty positive due to the tabs, I beefed up the contact surfaces by adding pieces of sheet styrene. It may not be necessary since the engine nacelles will probably add to the strength/stiffness of this area once they are glued into position.
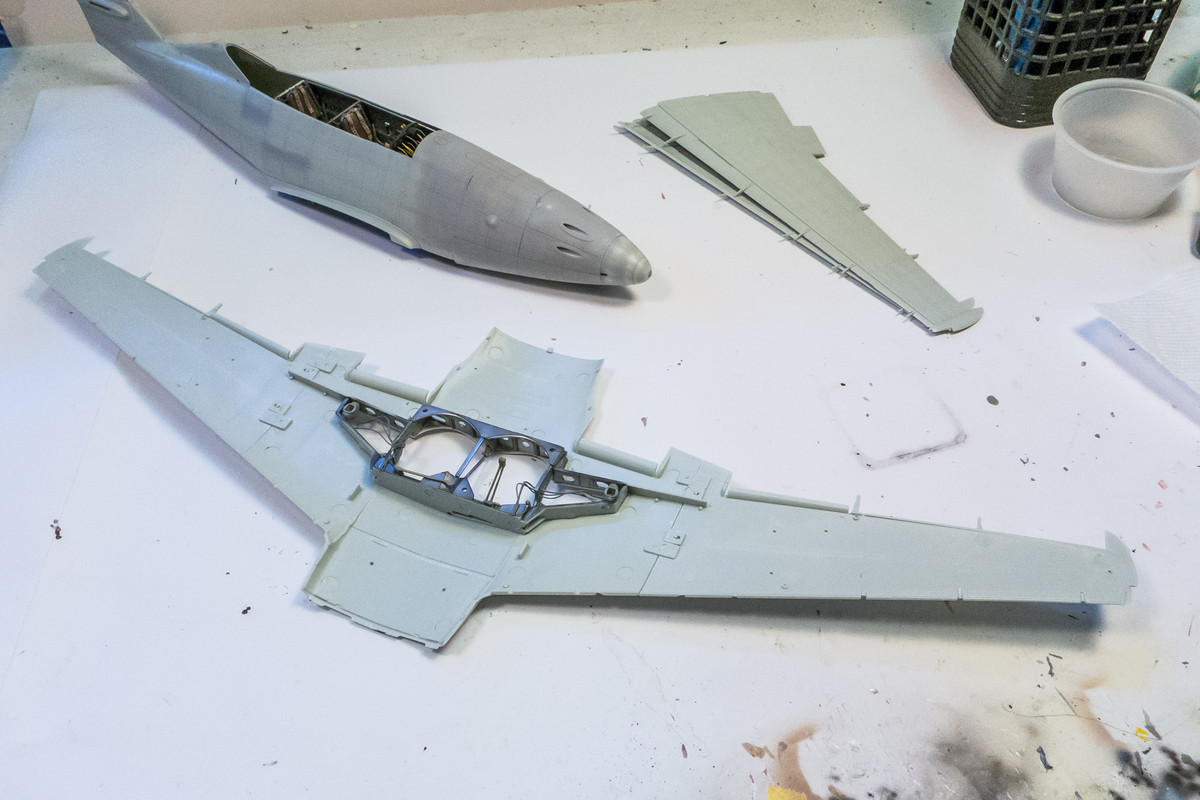
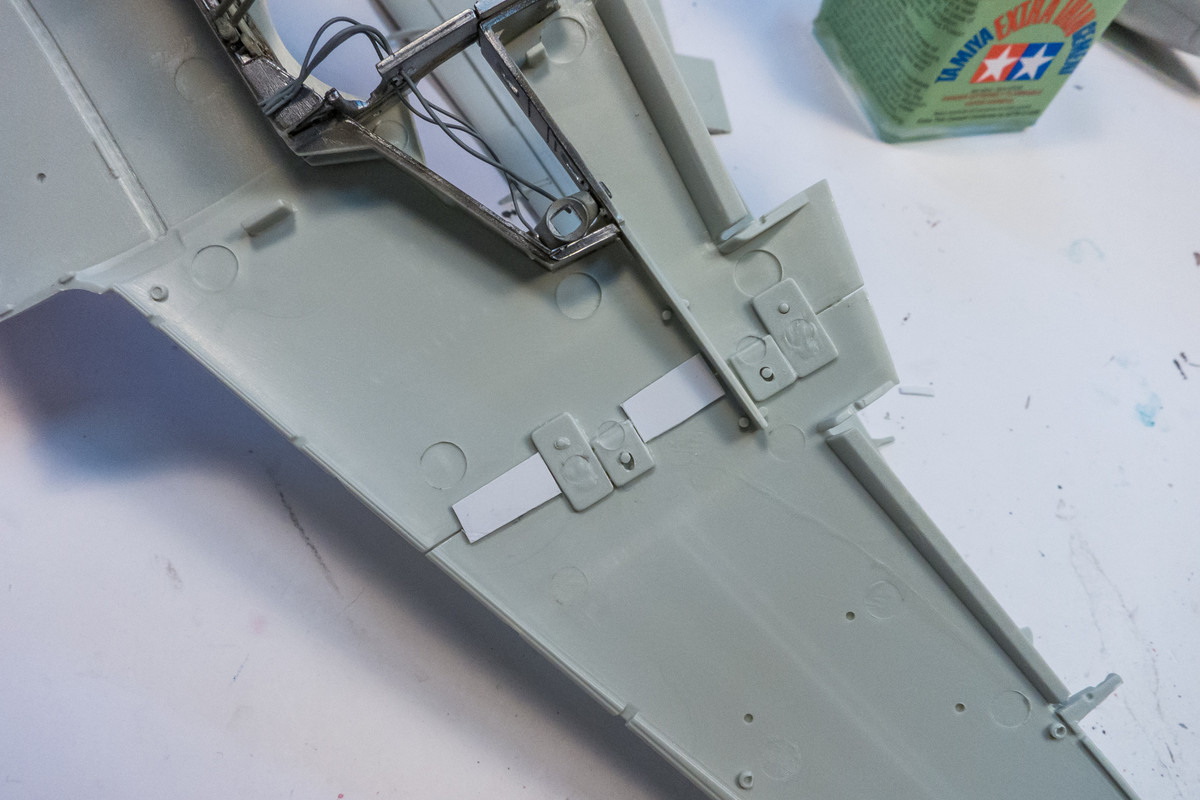
The upper wings can now be glued into place.
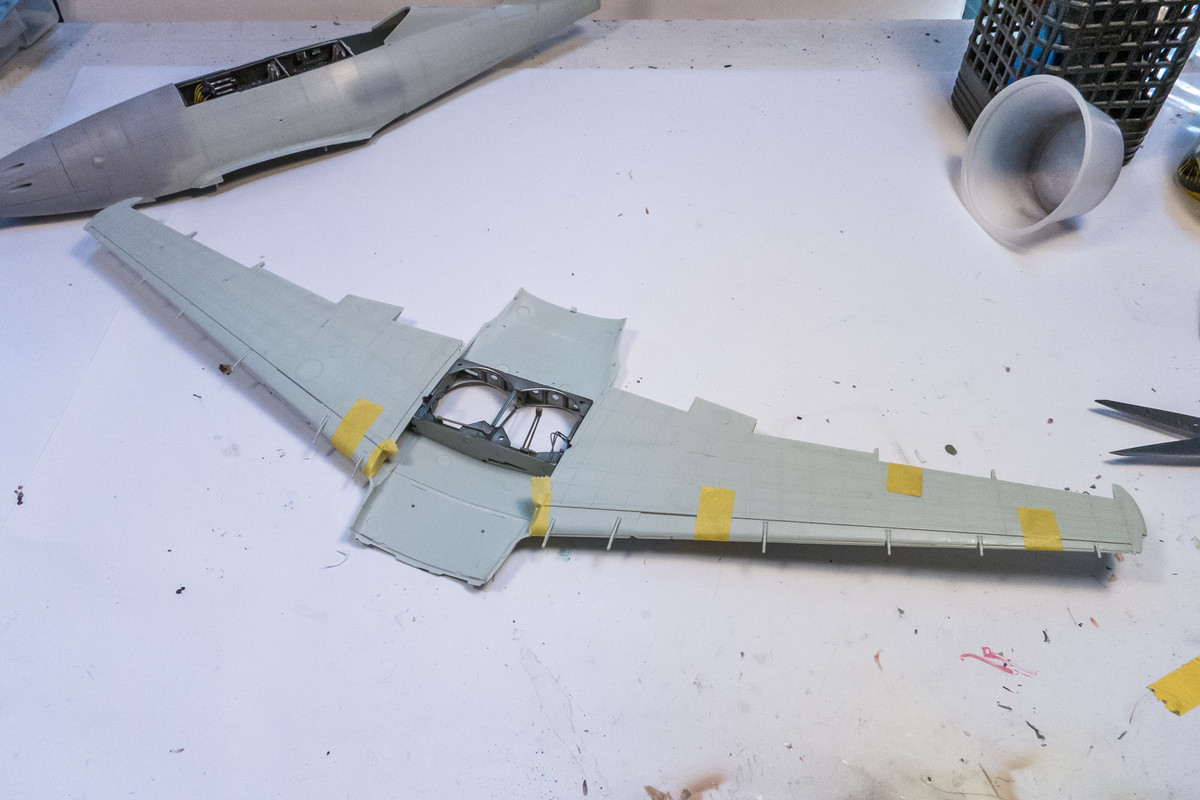
The ailerons have been glued into place but the flaps are still unattached.
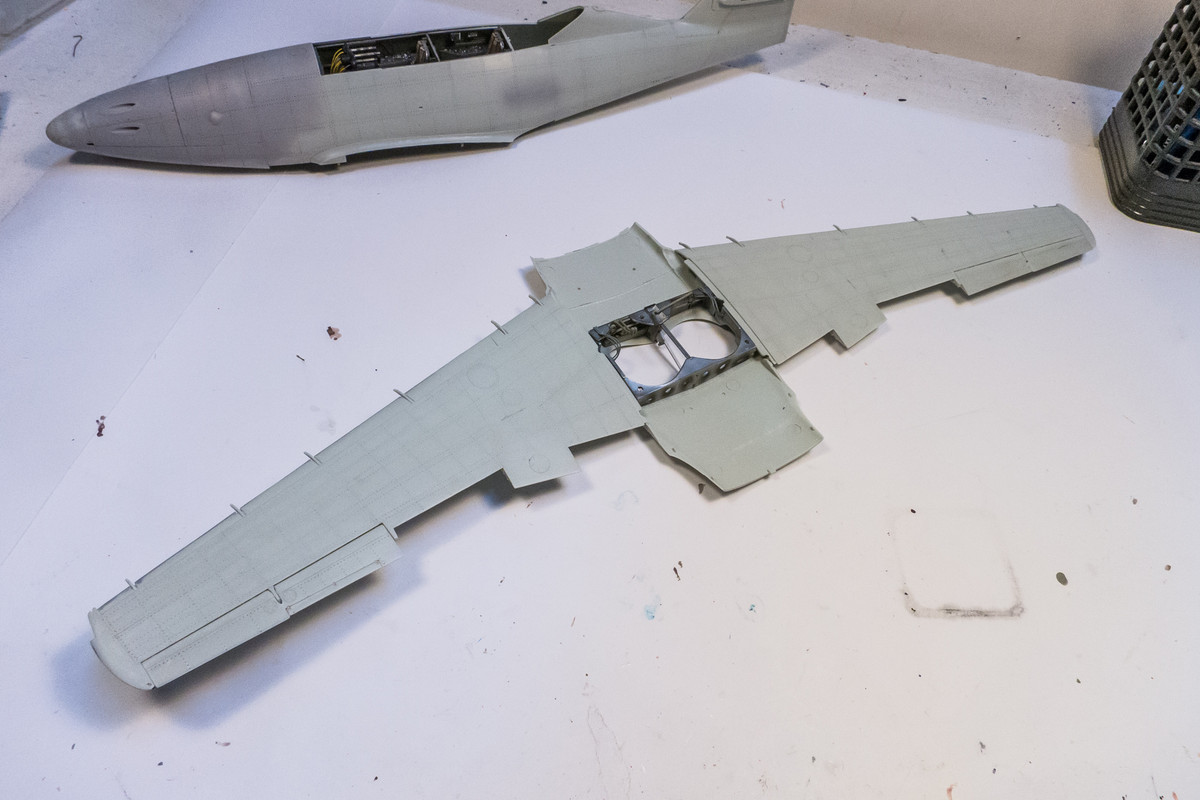
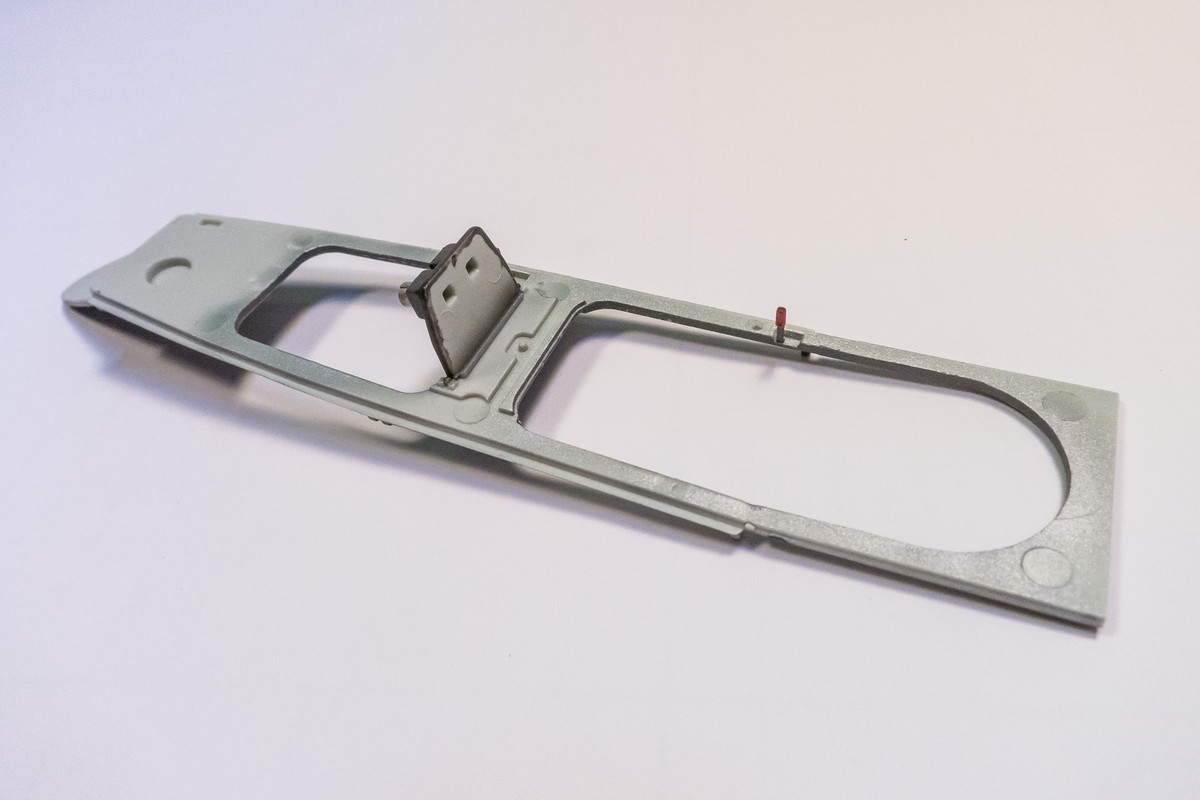
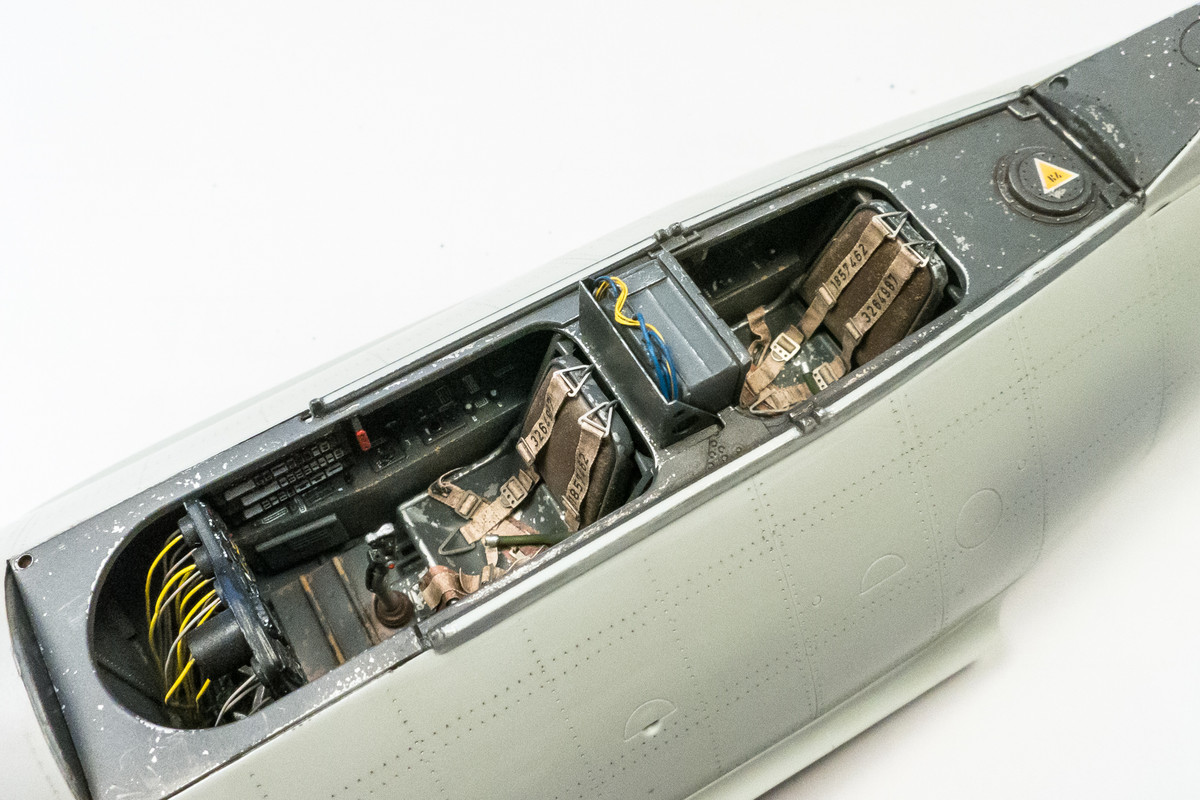
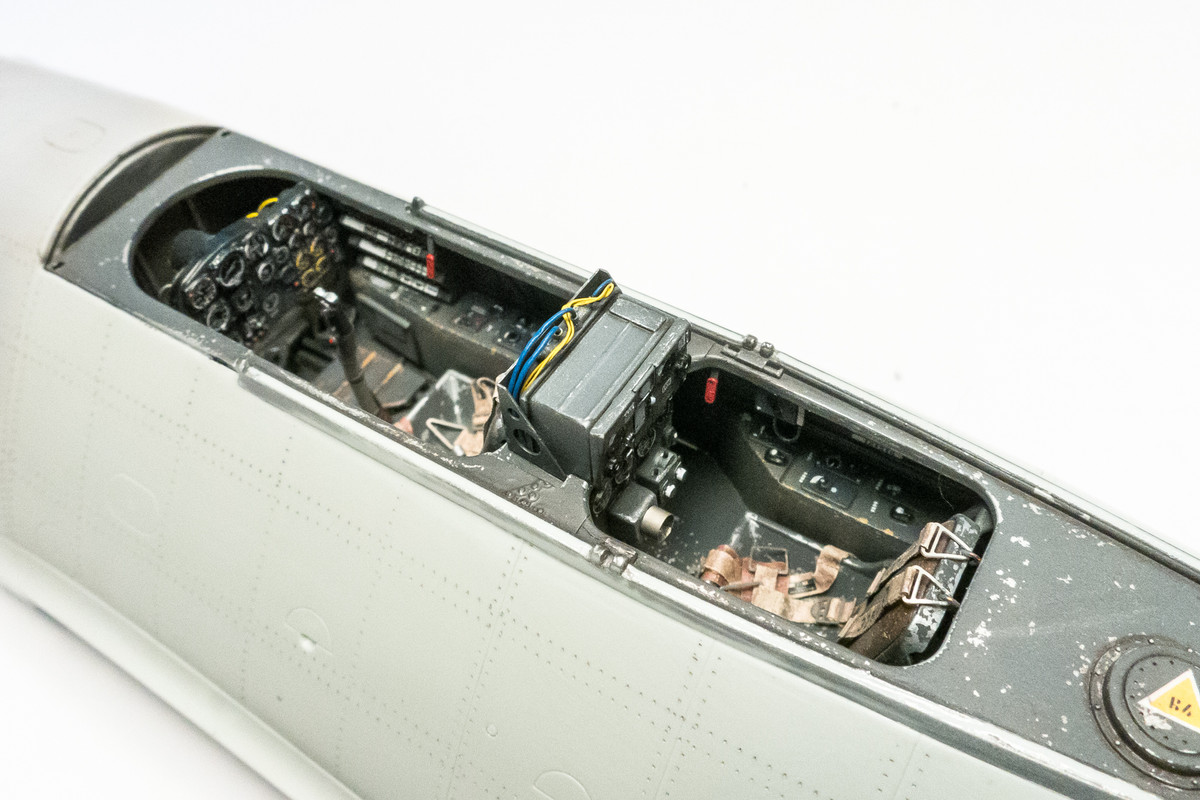
It's time to glue the cockpit sill in. The radio operator's instrument panel and the emergency canopy releases are glued in first. A piece of stretched sprue was glued to the back edge of the instrument panel to help it stay in place.
The radio has not yet been glued but we can take a look at the cockpit with all of the components finally in place.
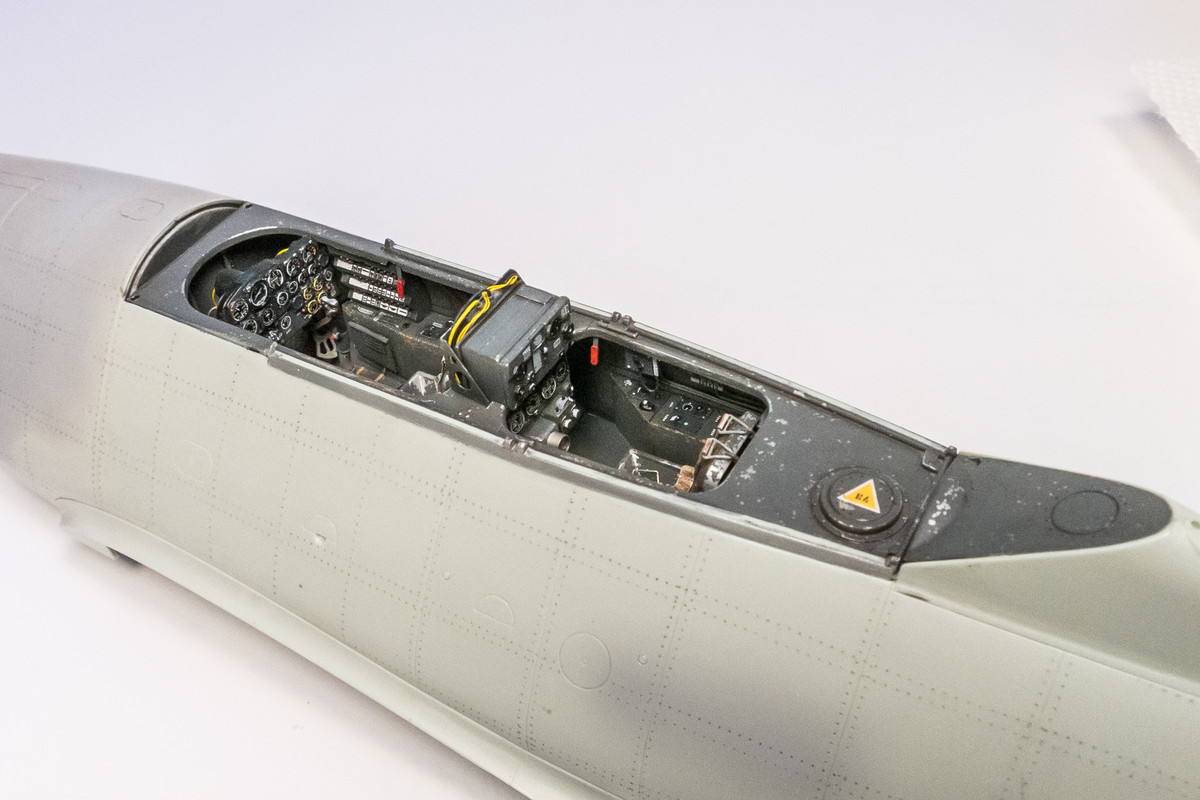
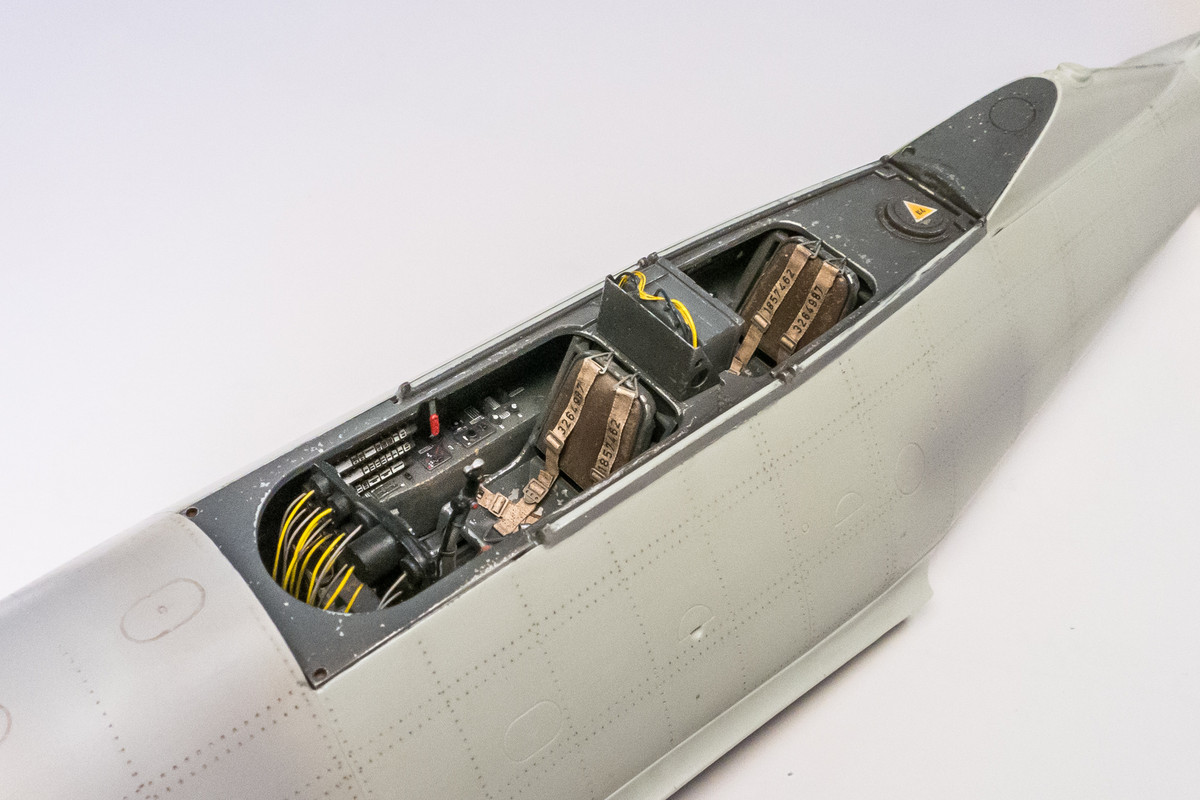
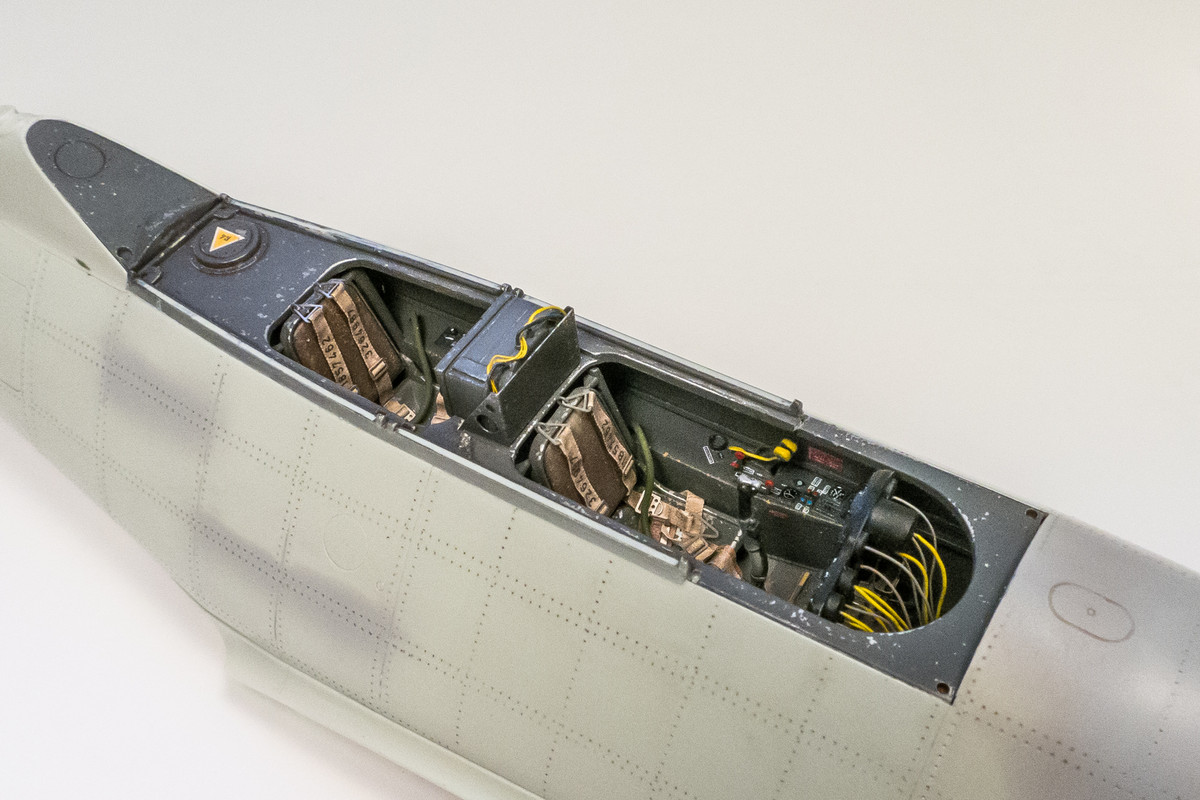
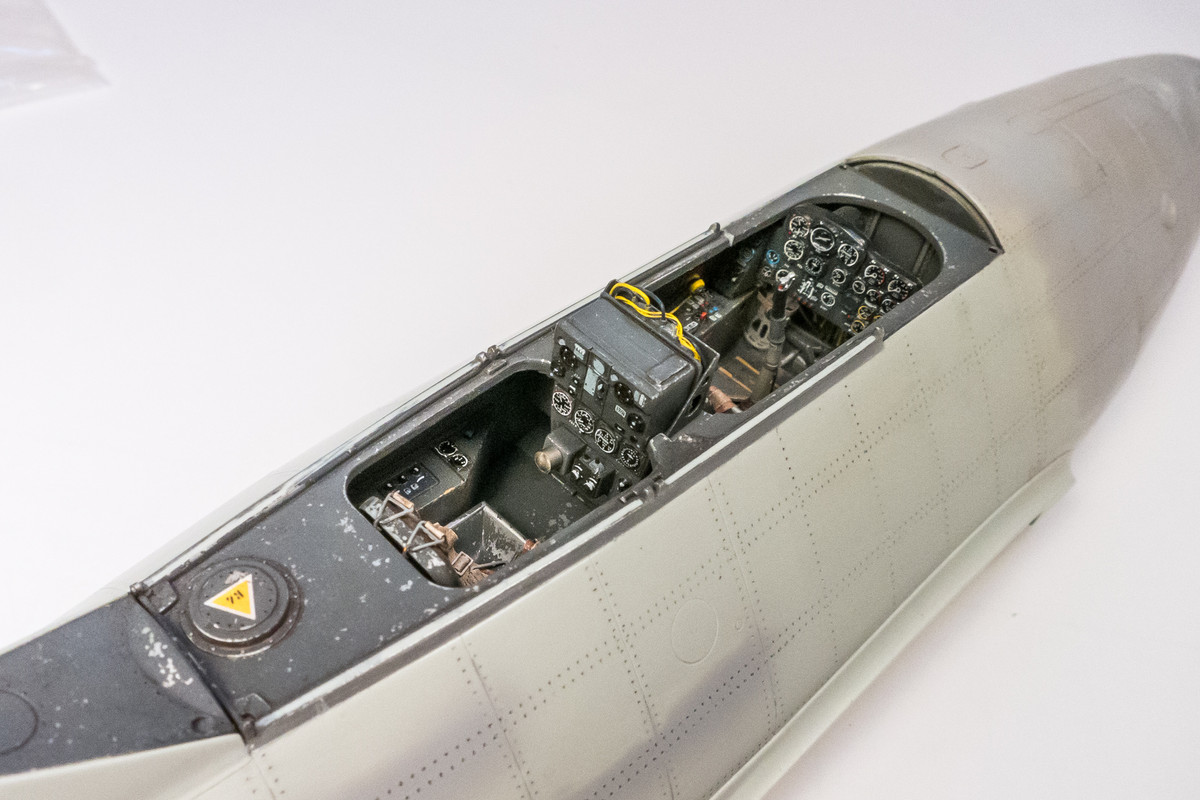
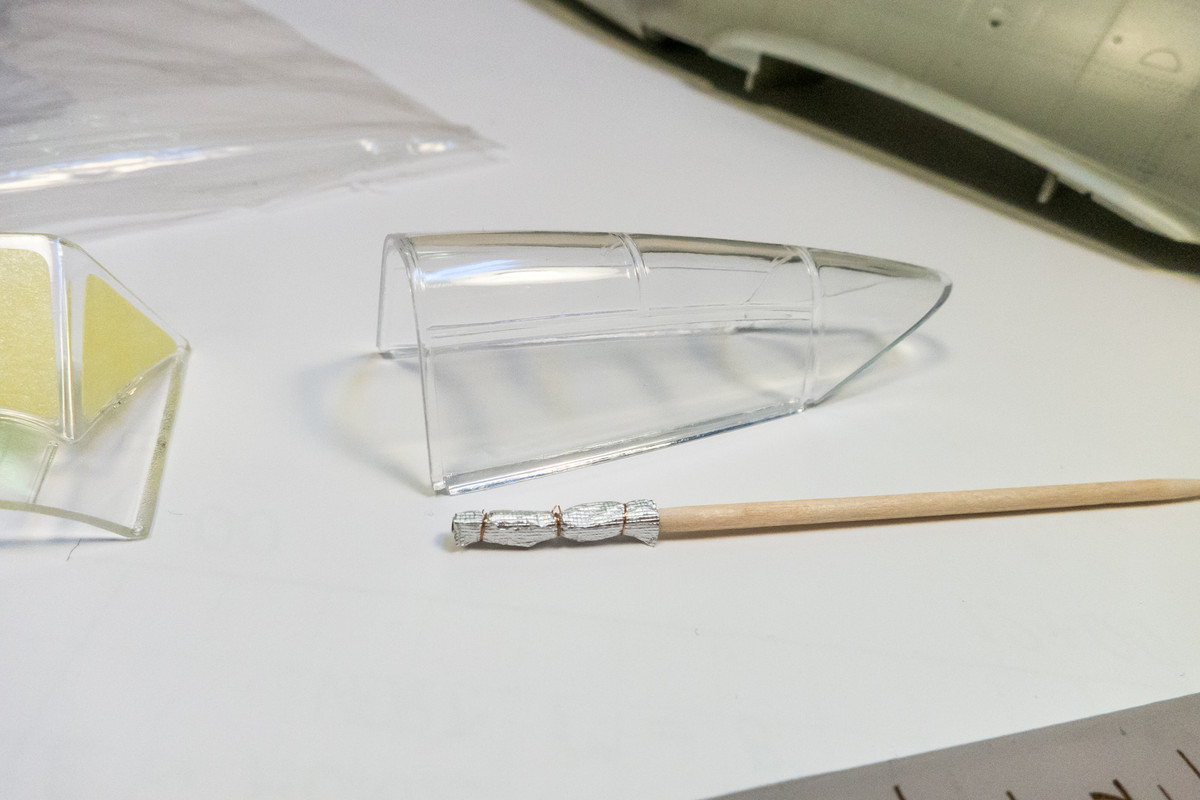
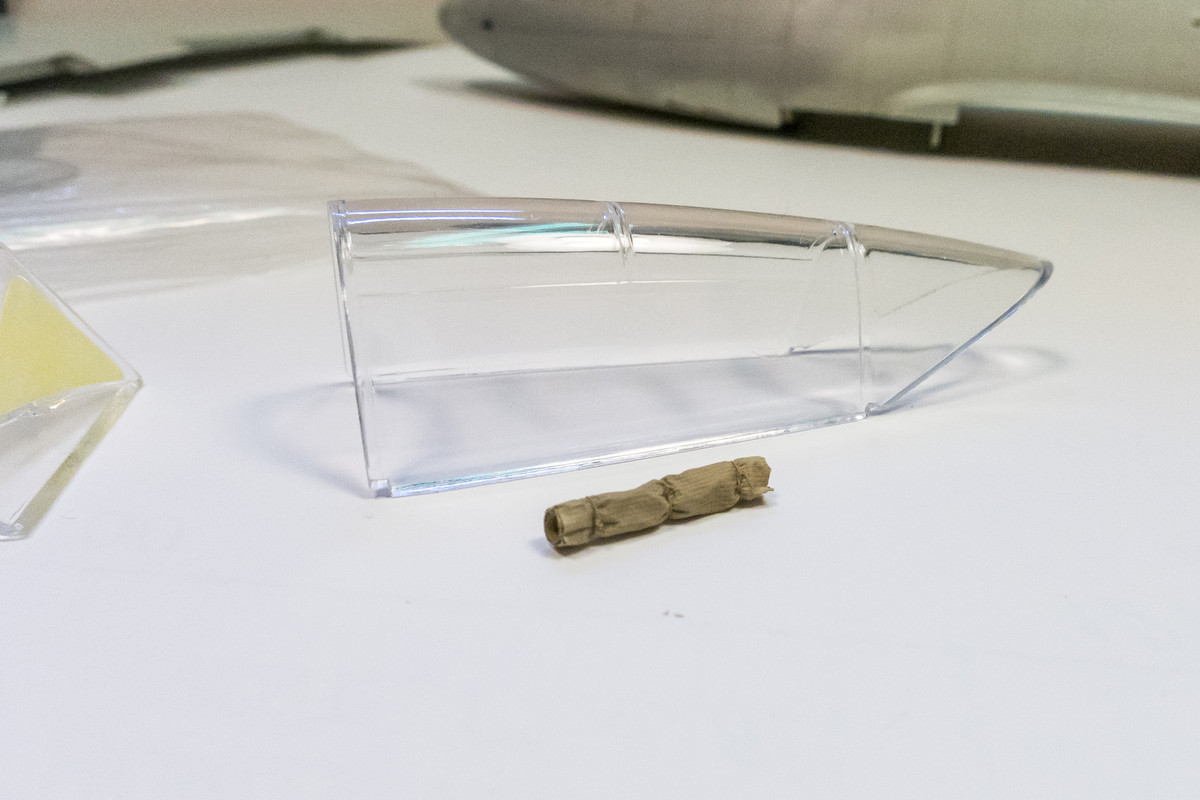
I'm thinking about adding the curtains that were used by the radio operator. The first attempt was not successful as the foil that I chose initially was too stiff. I settled on foil from a candy wrapper and got better results. Not sure what the color of the curtains were but I sprayed them with a light khaki just to see what they would look like painted.
The upper wings can now be glued into place.
The ailerons have been glued into place but the flaps are still unattached.
It's time to glue the cockpit sill in. The radio operator's instrument panel and the emergency canopy releases are glued in first. A piece of stretched sprue was glued to the back edge of the instrument panel to help it stay in place.
The radio has not yet been glued but we can take a look at the cockpit with all of the components finally in place.
I'm thinking about adding the curtains that were used by the radio operator. The first attempt was not successful as the foil that I chose initially was too stiff. I settled on foil from a candy wrapper and got better results. Not sure what the color of the curtains were but I sprayed them with a light khaki just to see what they would look like painted.
John aka JKim
-----------<><

-----------<><
Re: 1/32 Revell Me262B-1/U1 Nachtjager
I'm guessing the curtains was so the radio operator could keep his night vision? Riding back seat to a fighter pilot blind in the dark had to be one scary job. Probably along the lines of a EWO flying backseat to a wild weasel.
March as one, Don't look back
Odin's sons... Attack!
Unleash hell! Do not repent! Warfare grants us no lament
Let your weapons slash and tear This is no place for fear
Hold the lines! Move as one! In unity our victory's won
Our shields will form a mighty wall
United we shall never fall
Odin's sons... Attack!
Unleash hell! Do not repent! Warfare grants us no lament
Let your weapons slash and tear This is no place for fear
Hold the lines! Move as one! In unity our victory's won
Our shields will form a mighty wall
United we shall never fall
-
Stikpusher

- Moderator
- Posts: 21386
- Joined: Sat Apr 05, 2014 8:37 pm
- Location: Ceti Alpha 5
Re: 1/32 Revell Me262B-1/U1 Nachtjager
You’re making some major progress now. All the little things being put together into the main assemblies.
"Surely I have made my meaning plain? I intend to avenge myself upon you, Admiral. I have deprived your ship of power, and when I swing 'round, I intend to deprive you of your life."
FLSM
FLSM
-
jeaton01

- Elite Member
- Posts: 2374
- Joined: Thu Apr 23, 2020 9:20 am
- Location: Northern California
- Contact:
Re: 1/32 Revell Me262B-1/U1 Nachtjager
I really like the look of the cockpit!

Re: 1/32 Revell Me262B-1/U1 Nachtjager
Boing 
To make each build less crappy than the last one. Or, put another way, "Better than the last one, not as good as the next one!"..
Re: 1/32 Revell Me262B-1/U1 Nachtjager
Thanks guys! Hope you are all having a wonderful Holiday Season! Such a strange year for almost everyone I think.
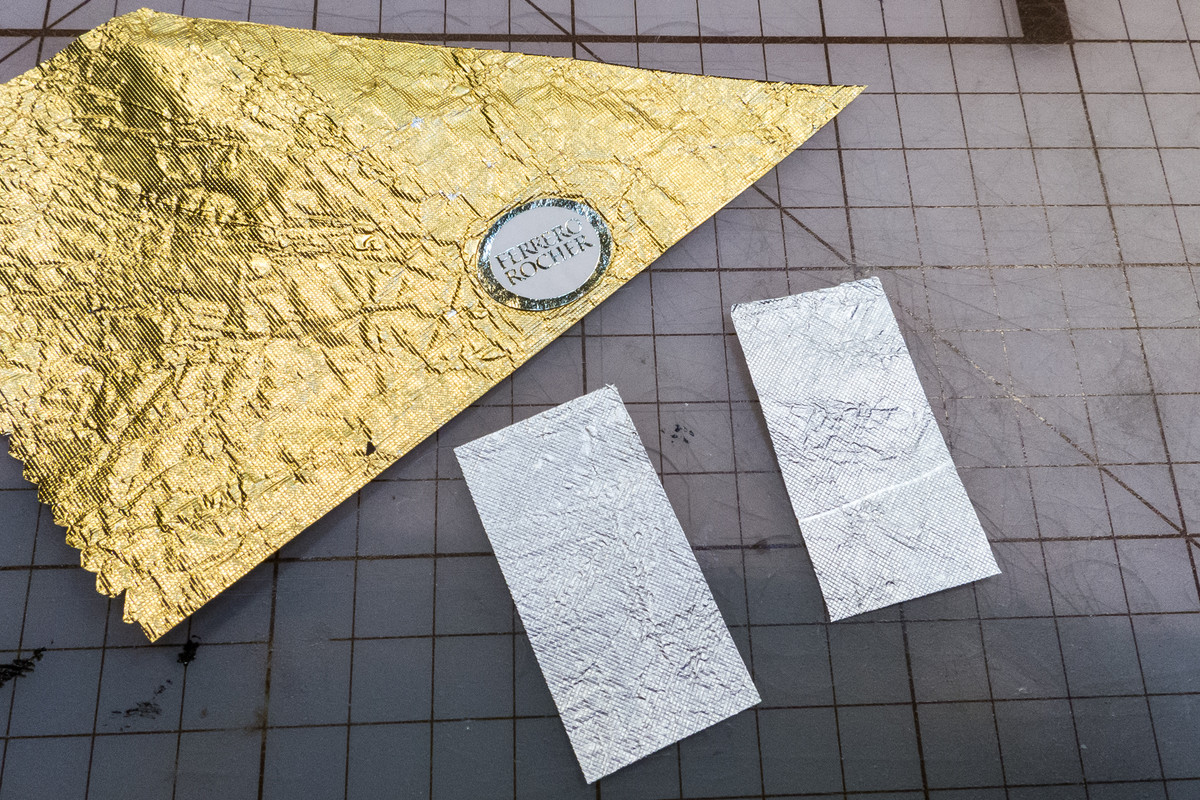
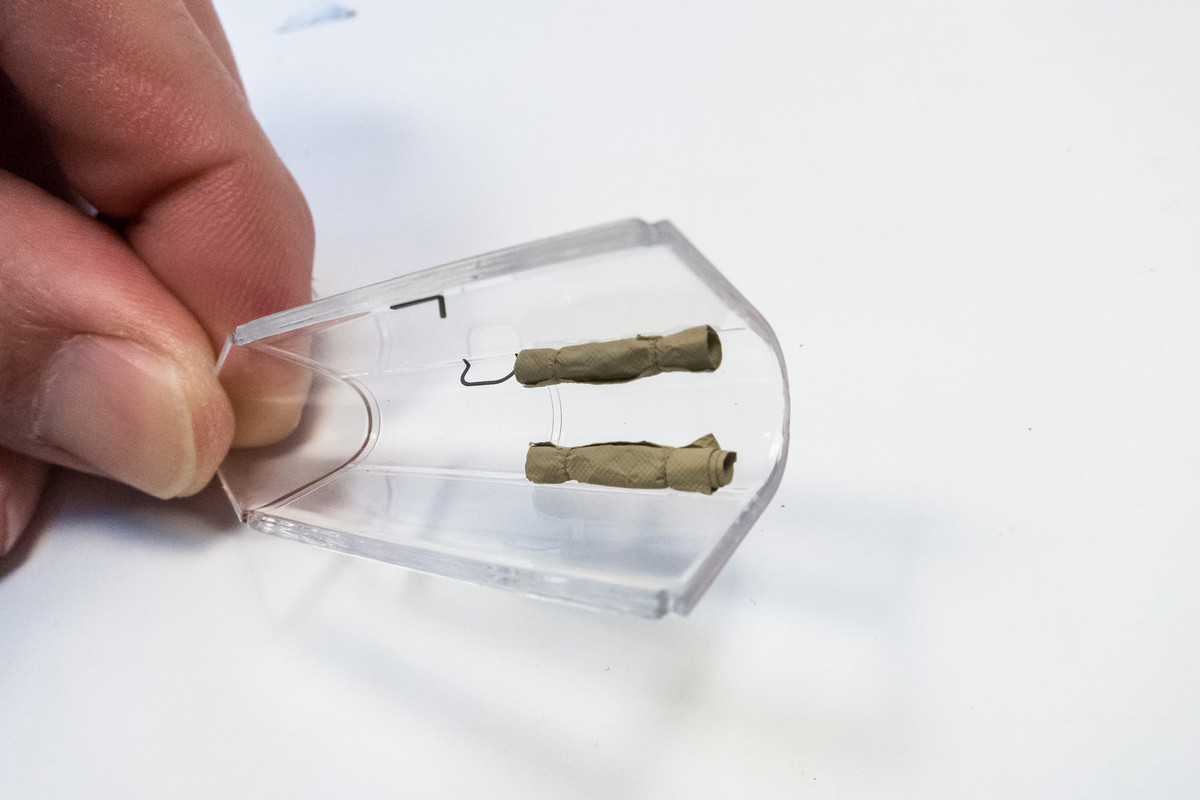
Using the same candy wrapper (Ferrero Rocher, if you must know), I re-cut the curtain pieces so that the crosshatch texture would be at an angle.
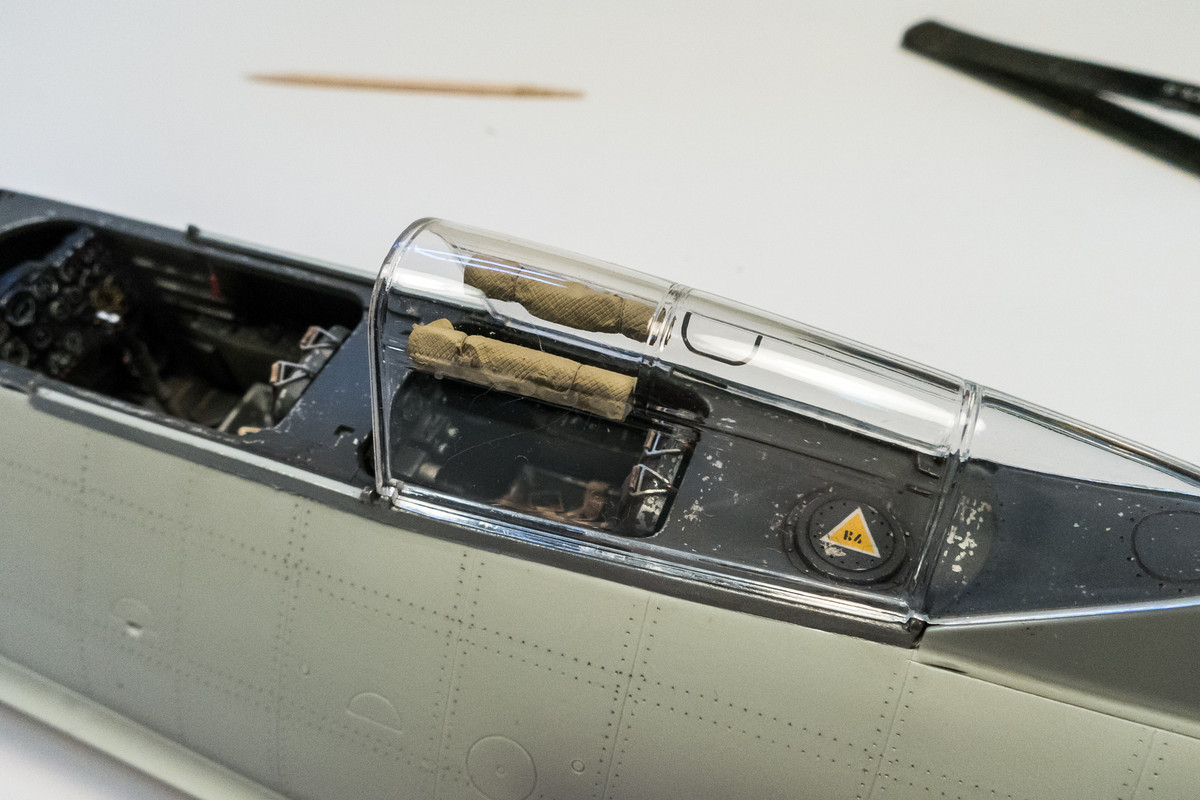
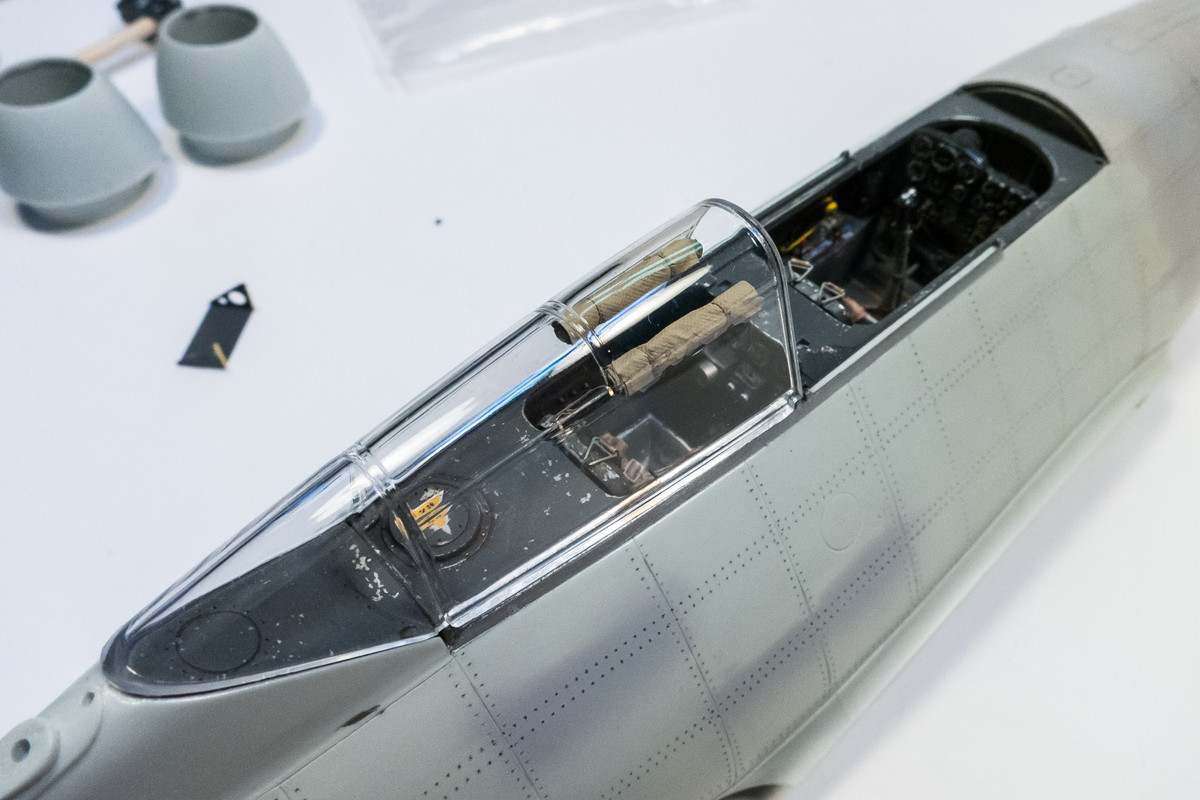
I used dabs of white glue along the canopy frames to attach the rolled-up curtains. Hopefully, I've avoided any visible glue marks.
I started masking the clear pieces using the wonderful Eduard masks. The armored glass was previously masked and painted in dark grey (RLM 66, Mr Hobby Aqueous) and was glued into position after the windscreen masks were applied. The Revi 16C gun sight was glued into position at this time.

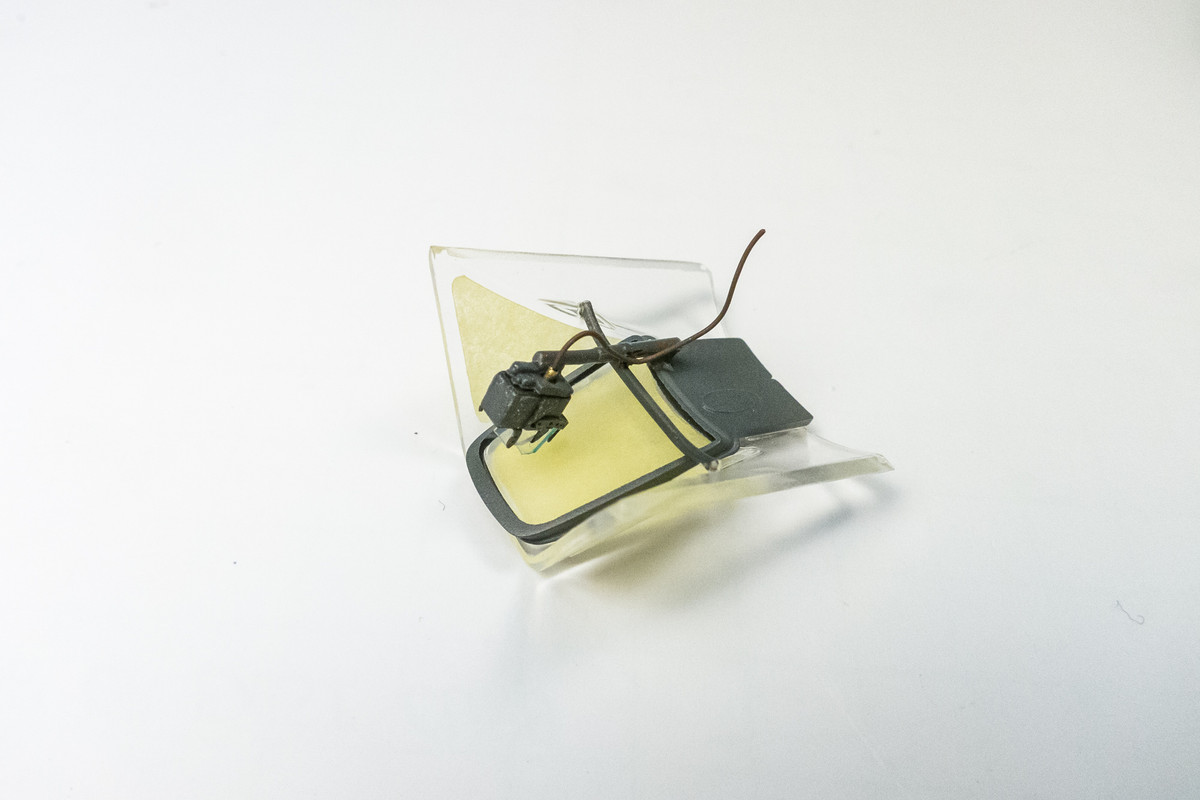
Before the clear pieces were glued into place, I made one last adjustment to the radio, which was finally glued in. The radio leads were painted dark blue, although I kept a random strand in yellow just for visibility.
I've decided to glue the clear parts into place before I mount the wings. I thought it would be easier to address any of the joint clean-up without the wings in the way. First the windscreen...
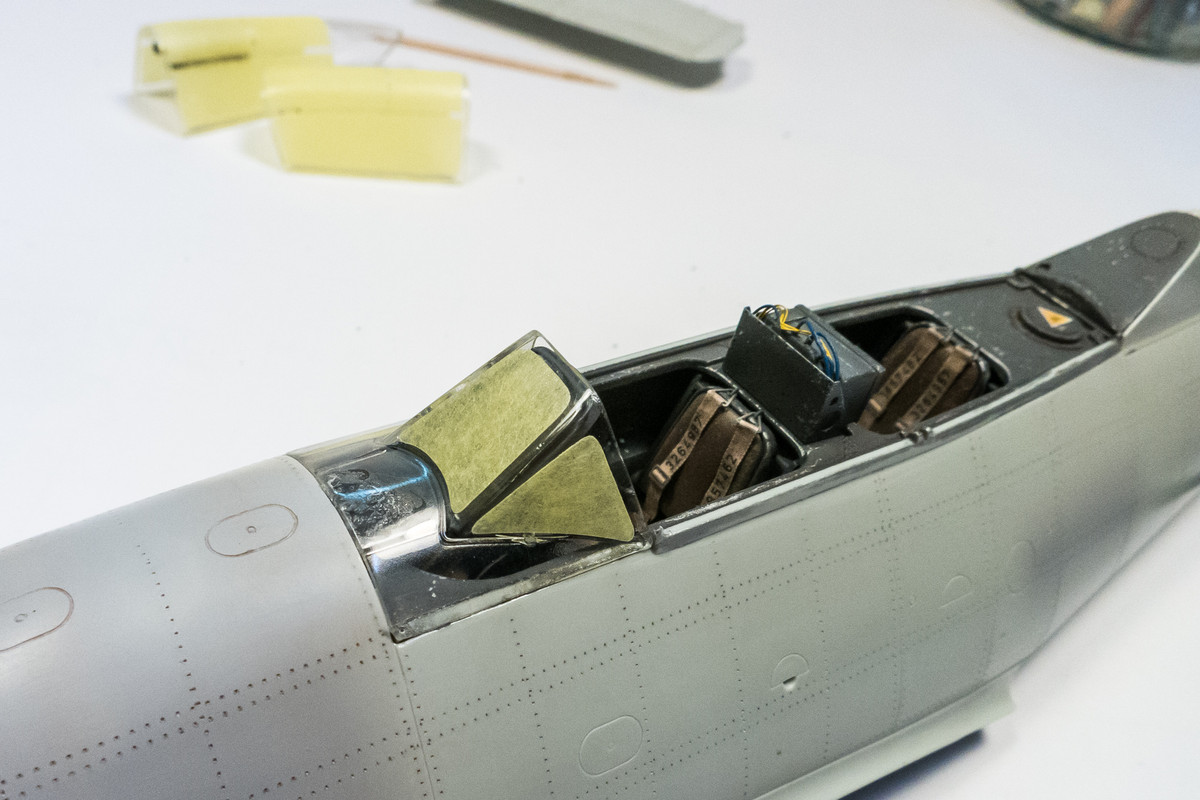
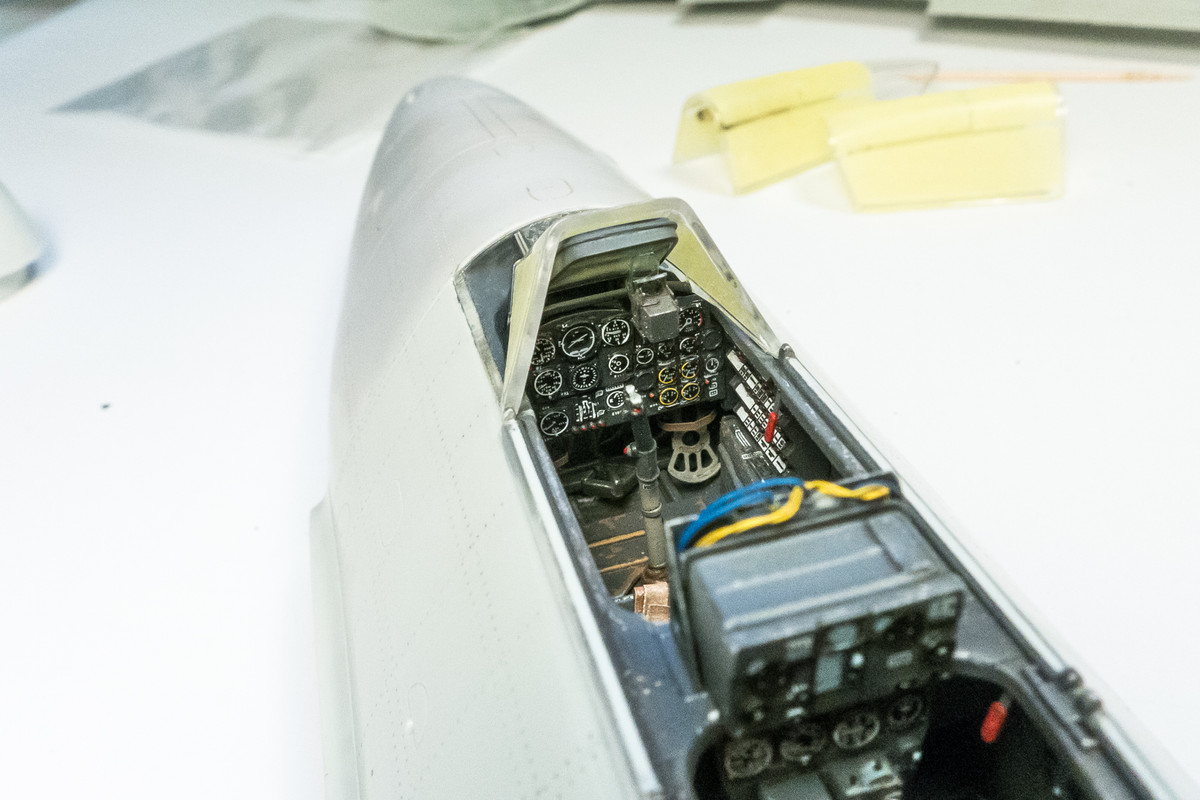
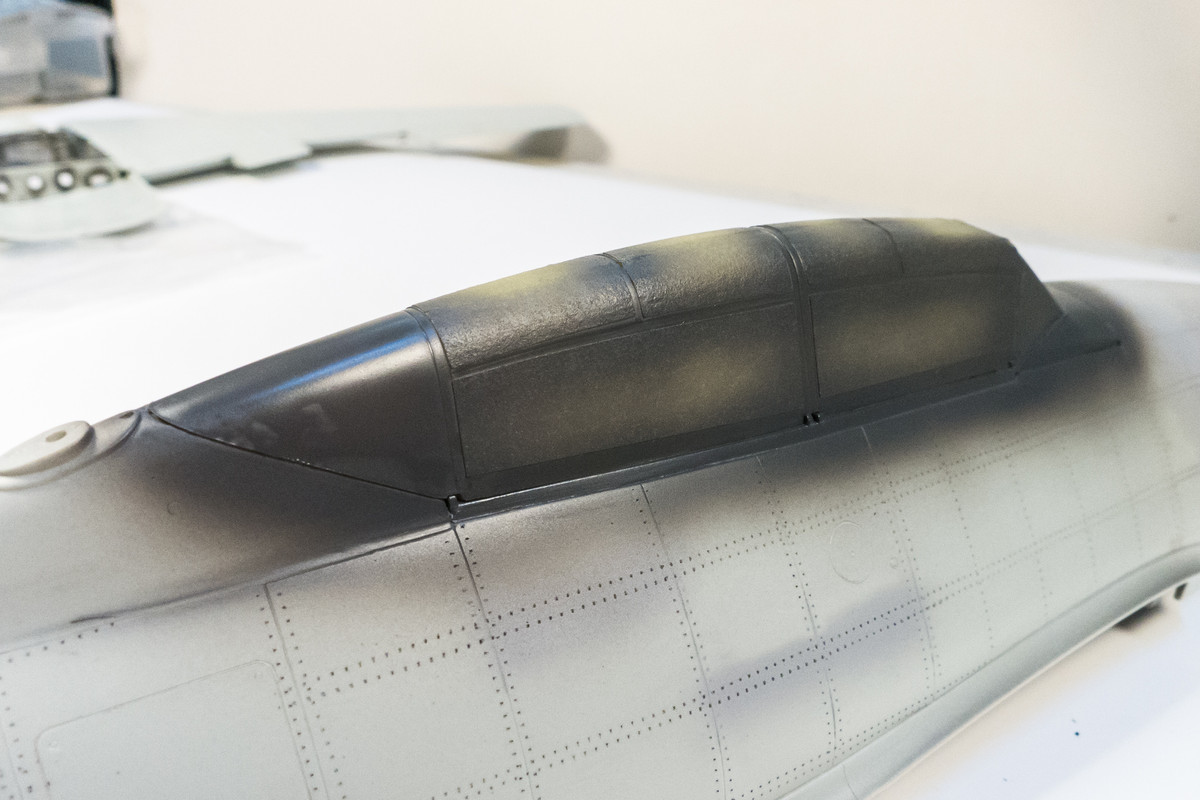
And then the two hinged canopies. All of the clear parts have been glued using Tamiya Extra Thin cement as a little bit of force was needed to get the parts to sit down.
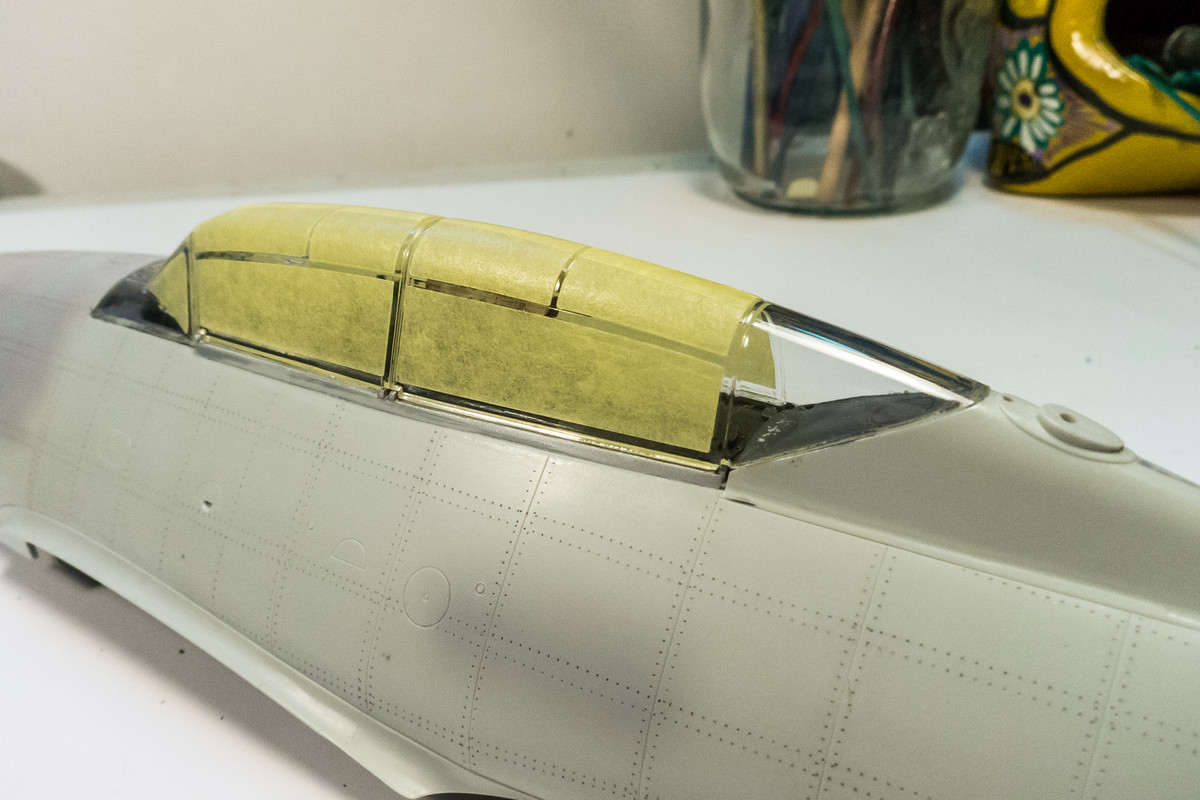
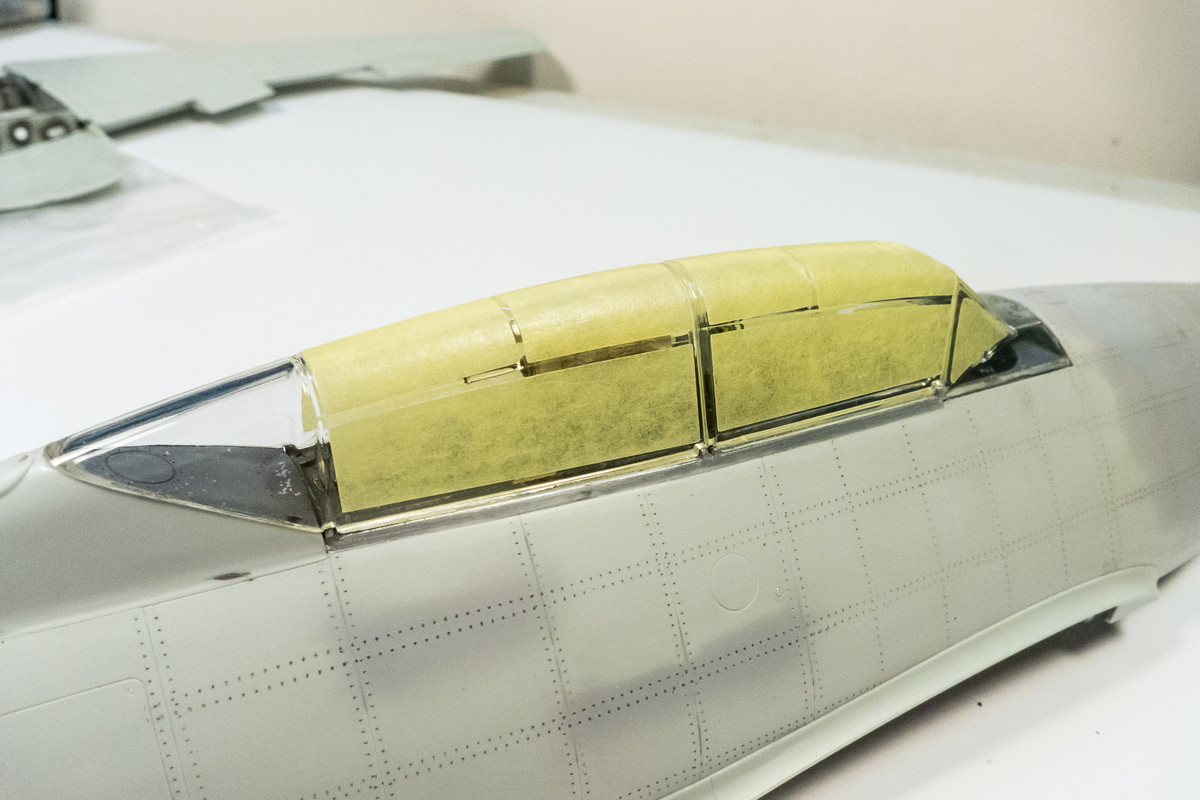
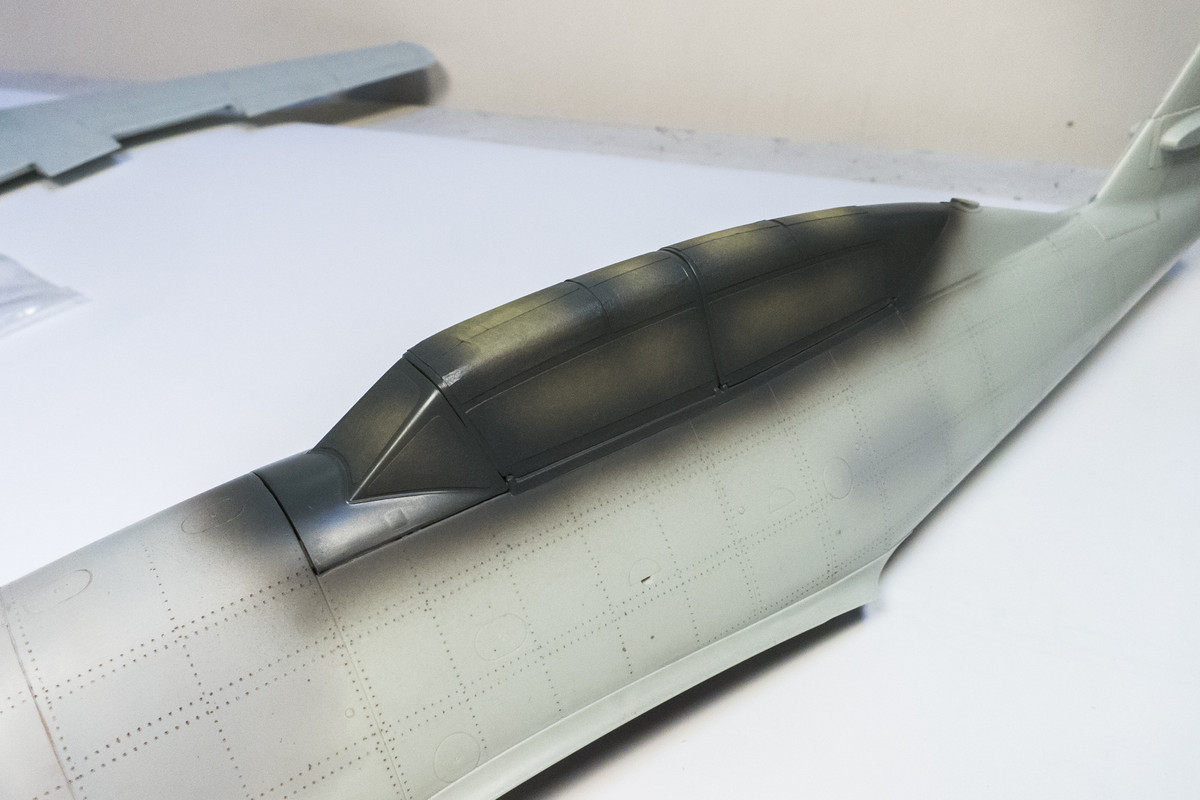
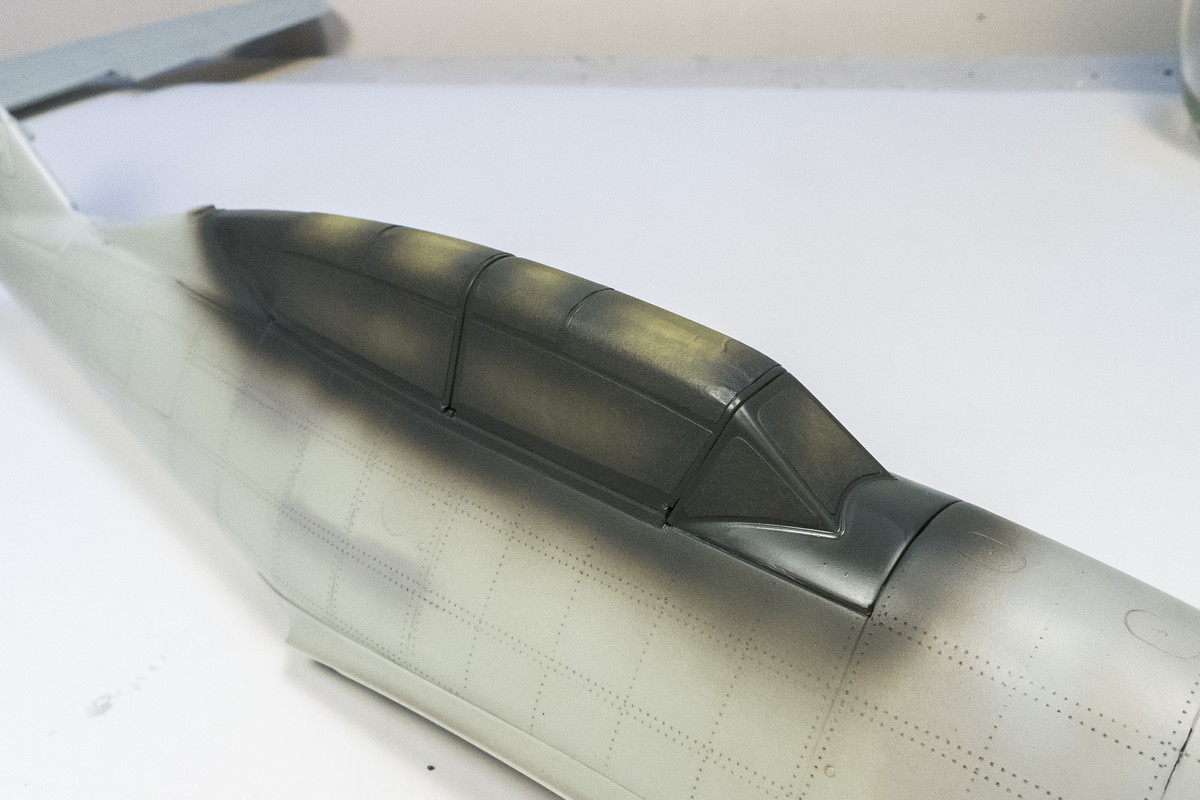
It's very difficult to judge any joint involving a clear part without any paint on it. So the interior color, dark grey, was sprayed onto the canopy frames and along the joints. As you can see, the fit is pretty good although there are some noticeable gaps that need to be closed, especially around the windscreen.
Using the same candy wrapper (Ferrero Rocher, if you must know), I re-cut the curtain pieces so that the crosshatch texture would be at an angle.
I used dabs of white glue along the canopy frames to attach the rolled-up curtains. Hopefully, I've avoided any visible glue marks.
I started masking the clear pieces using the wonderful Eduard masks. The armored glass was previously masked and painted in dark grey (RLM 66, Mr Hobby Aqueous) and was glued into position after the windscreen masks were applied. The Revi 16C gun sight was glued into position at this time.
Before the clear pieces were glued into place, I made one last adjustment to the radio, which was finally glued in. The radio leads were painted dark blue, although I kept a random strand in yellow just for visibility.
I've decided to glue the clear parts into place before I mount the wings. I thought it would be easier to address any of the joint clean-up without the wings in the way. First the windscreen...
And then the two hinged canopies. All of the clear parts have been glued using Tamiya Extra Thin cement as a little bit of force was needed to get the parts to sit down.
It's very difficult to judge any joint involving a clear part without any paint on it. So the interior color, dark grey, was sprayed onto the canopy frames and along the joints. As you can see, the fit is pretty good although there are some noticeable gaps that need to be closed, especially around the windscreen.
John aka JKim
-----------<><
-----------<><
-
BlackSheep214

- Elite Member
- Posts: 13598
- Joined: Sun Apr 06, 2014 8:47 pm
Re: 1/32 Revell Me262B-1/U1 Nachtjager
Wow...
“Who controls the skies, controls the fate of this Earth”
Author unknown- 352nd Fighter Group, Blue-Nosed Bastards of Bodney
“Send one plane it’s a sortie; send two planes it’s a flight; send four planes it’s a test of airpower. - Richard Kohn
Author unknown- 352nd Fighter Group, Blue-Nosed Bastards of Bodney
“Send one plane it’s a sortie; send two planes it’s a flight; send four planes it’s a test of airpower. - Richard Kohn
-
tempestjohnny

- Elite Member
- Posts: 3826
- Joined: Sat Oct 15, 2016 4:51 am
- Location: Naples. FL
Re: 1/32 Revell Me262B-1/U1 Nachtjager
Double wow