
1/32 Revell Me262B-1/U1 Nachtjager
-
mustang1989

- Moderator
- Posts: 5044
- Joined: Tue Mar 18, 2014 8:35 pm
Re: 1/32 Revell Me262B-1/U1 Nachtjager
As frustrating as this hobby can be sometimes I find myself going back for more. It's just too gratifying of a hobby to leave. lol . You're diligence and patience are to be commended John.

Re: 1/32 Revell Me262B-1/U1 Nachtjager
Great job on that light! Your clean up work is excellent, it looks like it was always a part of the tail now.
March as one, Don't look back
Odin's sons... Attack!
Unleash hell! Do not repent! Warfare grants us no lament
Let your weapons slash and tear This is no place for fear
Hold the lines! Move as one! In unity our victory's won
Our shields will form a mighty wall
United we shall never fall
Odin's sons... Attack!
Unleash hell! Do not repent! Warfare grants us no lament
Let your weapons slash and tear This is no place for fear
Hold the lines! Move as one! In unity our victory's won
Our shields will form a mighty wall
United we shall never fall

Re: 1/32 Revell Me262B-1/U1 Nachtjager
Positive mindset is definitely a plus when in cleanup mode. Otherwise, you just settle for good enough. Which is never good enough as Roy likes to say.
The popped seams on the nacelles have been addressed and the temporary pastel wash shows the rivet and re-scribing work. The wash will be scrubbed off with wet toothbrush prior to attachment to the wings.
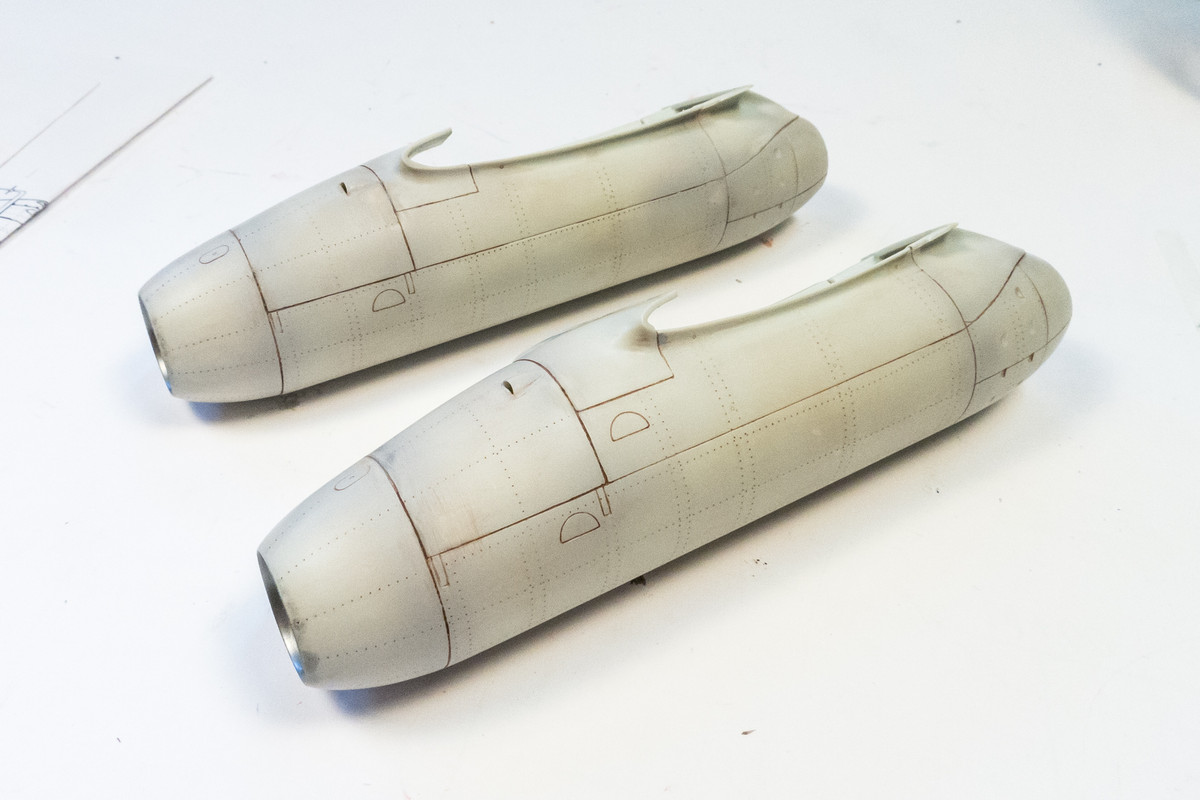

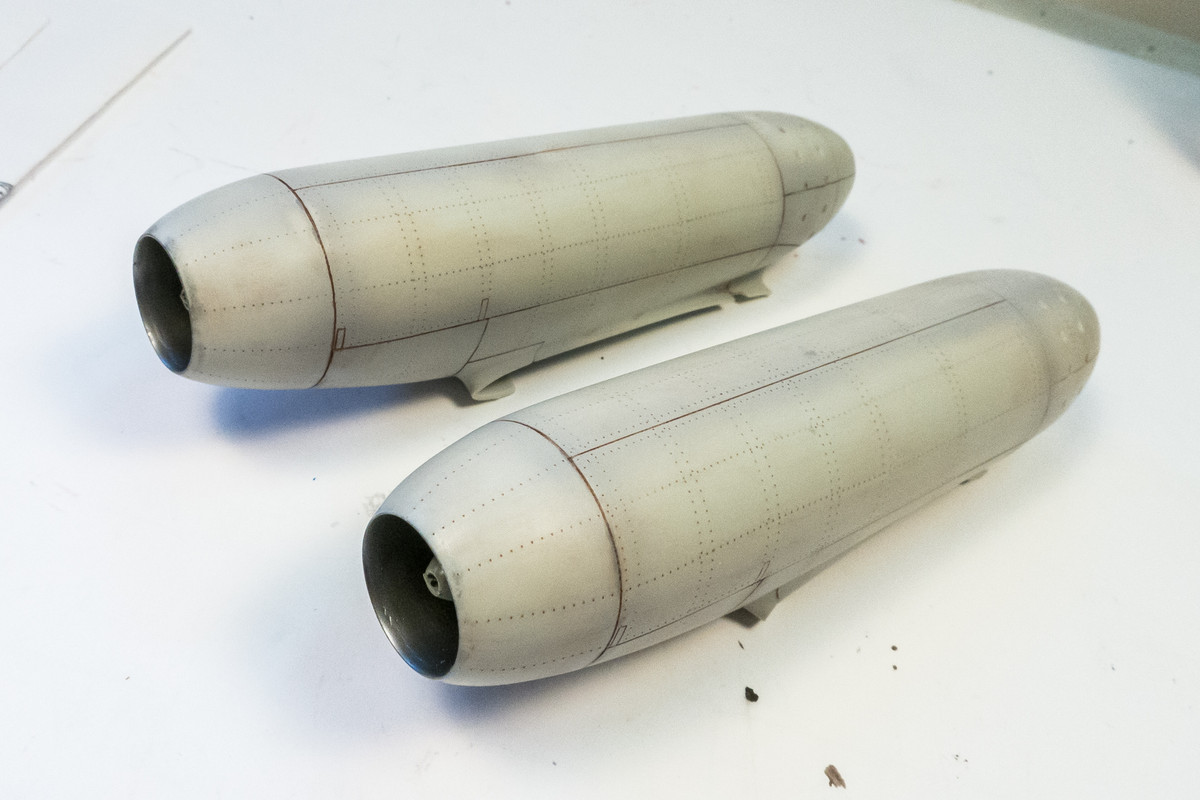
The popped seams on the nacelles have been addressed and the temporary pastel wash shows the rivet and re-scribing work. The wash will be scrubbed off with wet toothbrush prior to attachment to the wings.
John aka JKim
-----------<><

-----------<><

Re: 1/32 Revell Me262B-1/U1 Nachtjager
I love the color you picked for the pastel wash. It goes beautifully with the paint color, and looks fantastic. Excellent choice.
Kenny X
Head Mother Trucker In-Charge @ Kenny X’s Reichs Winzigkleines Flugzeugewerks *and now* Airboat Records, too!
Head Mother Trucker In-Charge @ Kenny X’s Reichs Winzigkleines Flugzeugewerks *and now* Airboat Records, too!
Re: 1/32 Revell Me262B-1/U1 Nachtjager
Thanks Kenny! The wash at this point is temporary but I will probably use a shade of brown after the camo painting. Still quite a ways down the road.
Prior to gluing the engine nacelles into place, I wanted to work out how the flaps were going to fit. Revell designed them with pins orienting them in the UP position. I'm going to pose them DOWN so I've cut off all of the locating pins and have added the photoetch end caps that came with the Eduard Exterior set.
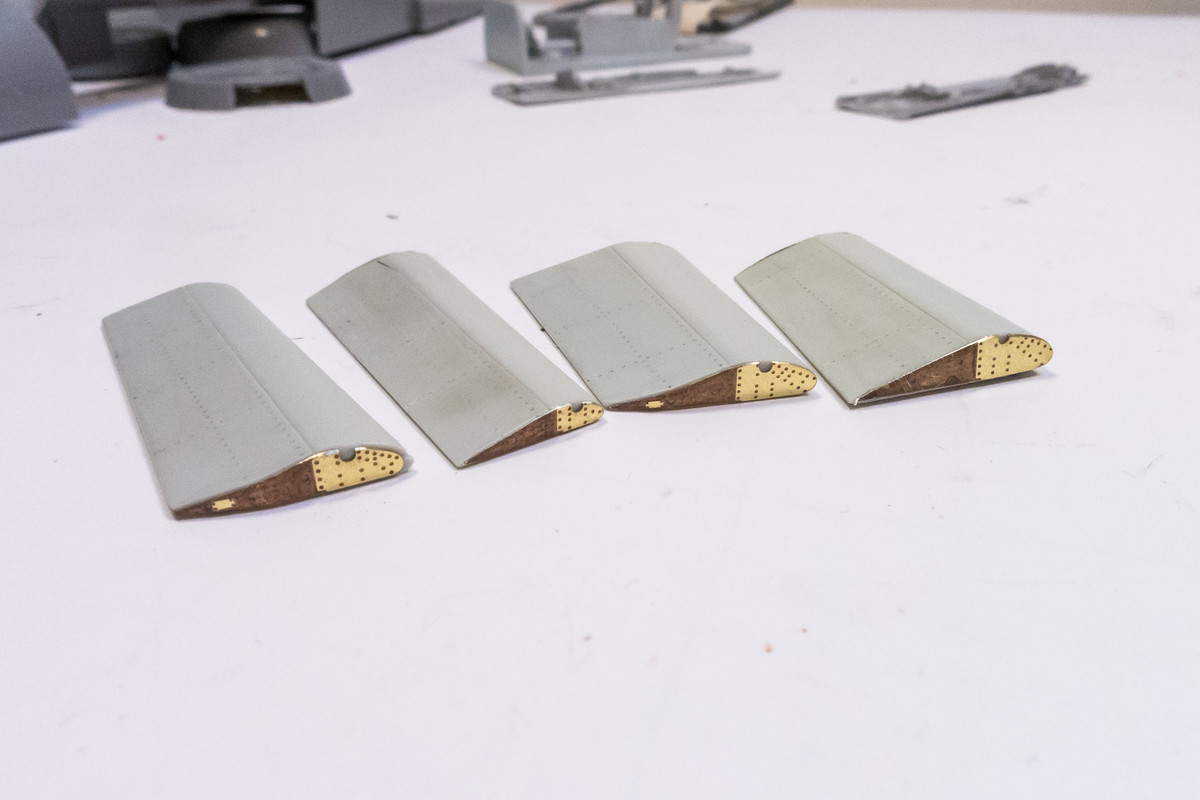
Prior to gluing the engine nacelles into place, I wanted to work out how the flaps were going to fit. Revell designed them with pins orienting them in the UP position. I'm going to pose them DOWN so I've cut off all of the locating pins and have added the photoetch end caps that came with the Eduard Exterior set.
John aka JKim
-----------<><
-----------<><
-
Stikpusher

- Moderator
- Posts: 21388
- Joined: Sat Apr 05, 2014 8:37 pm
- Location: Ceti Alpha 5
Re: 1/32 Revell Me262B-1/U1 Nachtjager
Those end pieces for the flaps are a very nice touch! One more small addition that will contribute to the final appearance of this project.
"Surely I have made my meaning plain? I intend to avenge myself upon you, Admiral. I have deprived your ship of power, and when I swing 'round, I intend to deprive you of your life."
FLSM
FLSM
-
BlackSheep214

- Elite Member
- Posts: 13600
- Joined: Sun Apr 06, 2014 8:47 pm
Re: 1/32 Revell Me262B-1/U1 Nachtjager
Incredible work. This never gets old watching your builds come together.
“Who controls the skies, controls the fate of this Earth”
Author unknown- 352nd Fighter Group, Blue-Nosed Bastards of Bodney
“Send one plane it’s a sortie; send two planes it’s a flight; send four planes it’s a test of airpower. - Richard Kohn
Author unknown- 352nd Fighter Group, Blue-Nosed Bastards of Bodney
“Send one plane it’s a sortie; send two planes it’s a flight; send four planes it’s a test of airpower. - Richard Kohn
Re: 1/32 Revell Me262B-1/U1 Nachtjager
Due to the lack of clarity in the instructions, I had cut off the hinge pins and and leading edge pins from the flap parts. After a lengthy explanation by none other than the kit designer, Radu Brinzan, I was made aware that those pins were designed to help mount the flaps in the open AND closed positions. In order to accommodate the complex out-and-down movement of the flaps going from raised to lower position, Radu had incorporated holes for the hinge pins in the closed position and different recesses for the hinge pins in the open position.
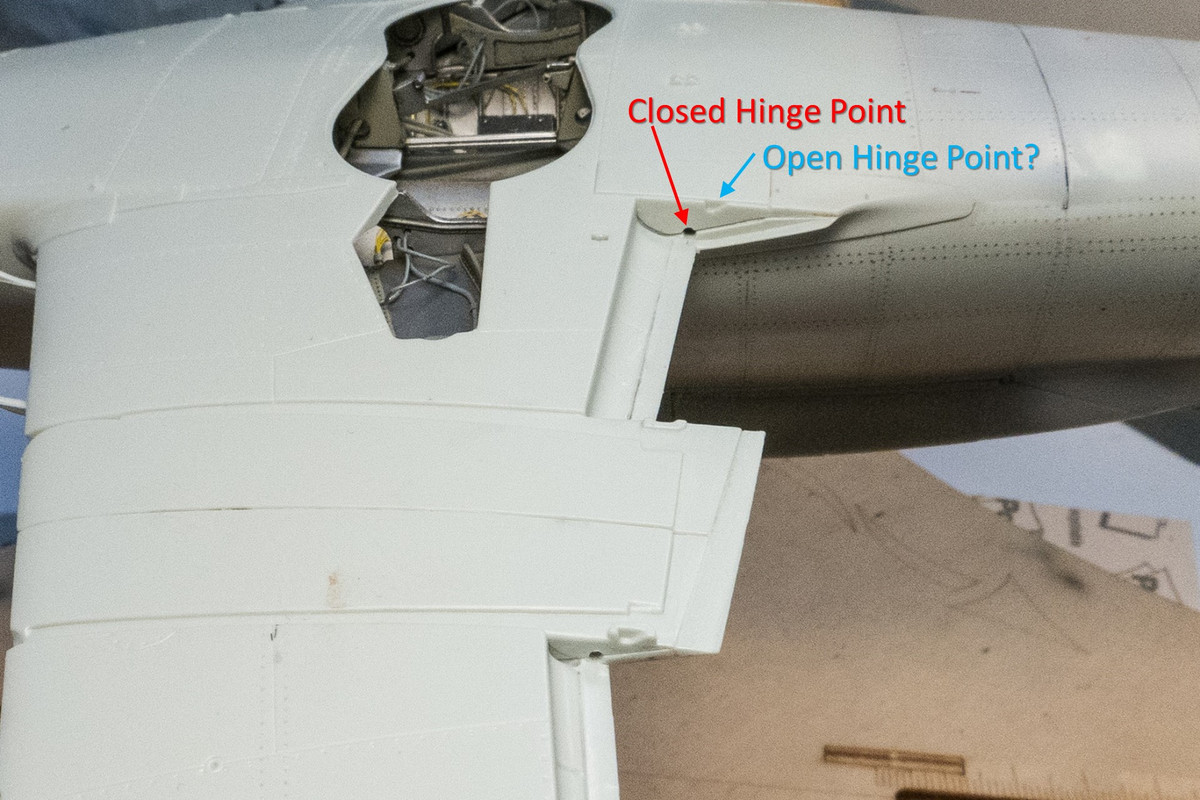
After this realization, I restored the hinge pins and also the leading edge pins, which were very delicate and prone to breakage anway.
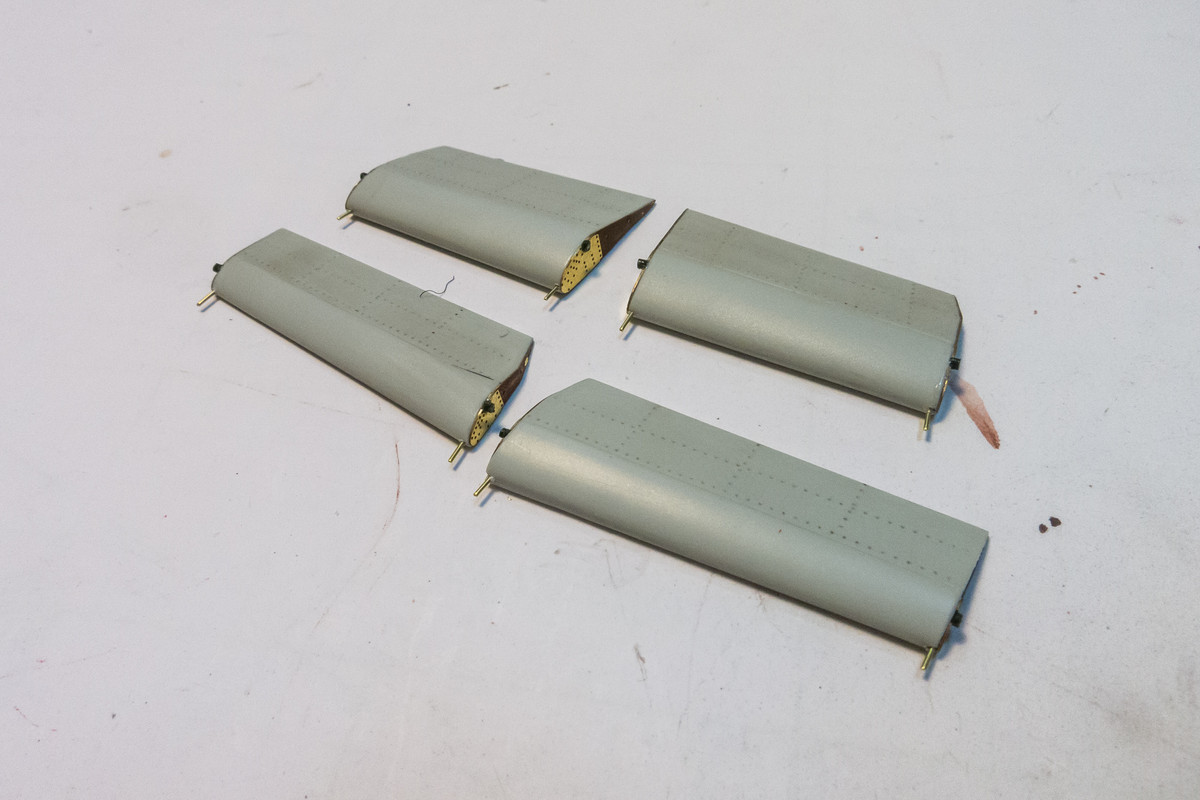
Now the flaps can be installed in the lowered position correctly per Radu's original design.
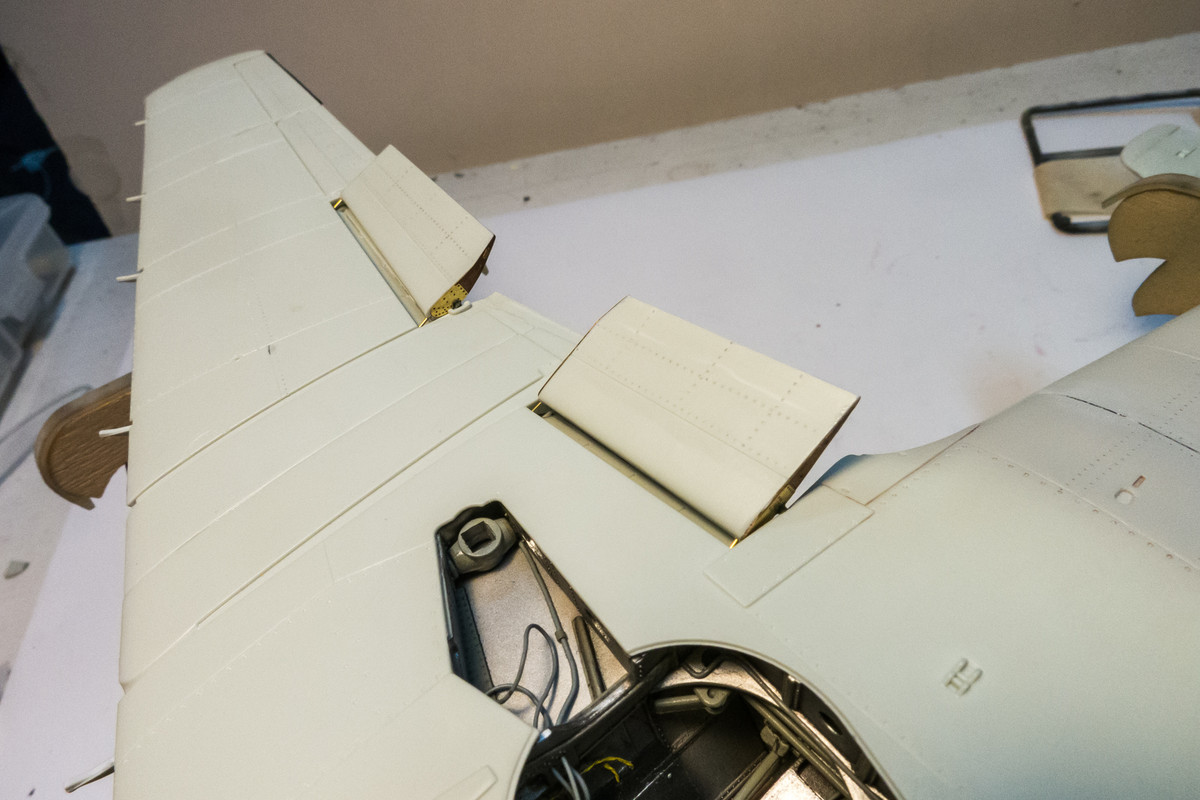
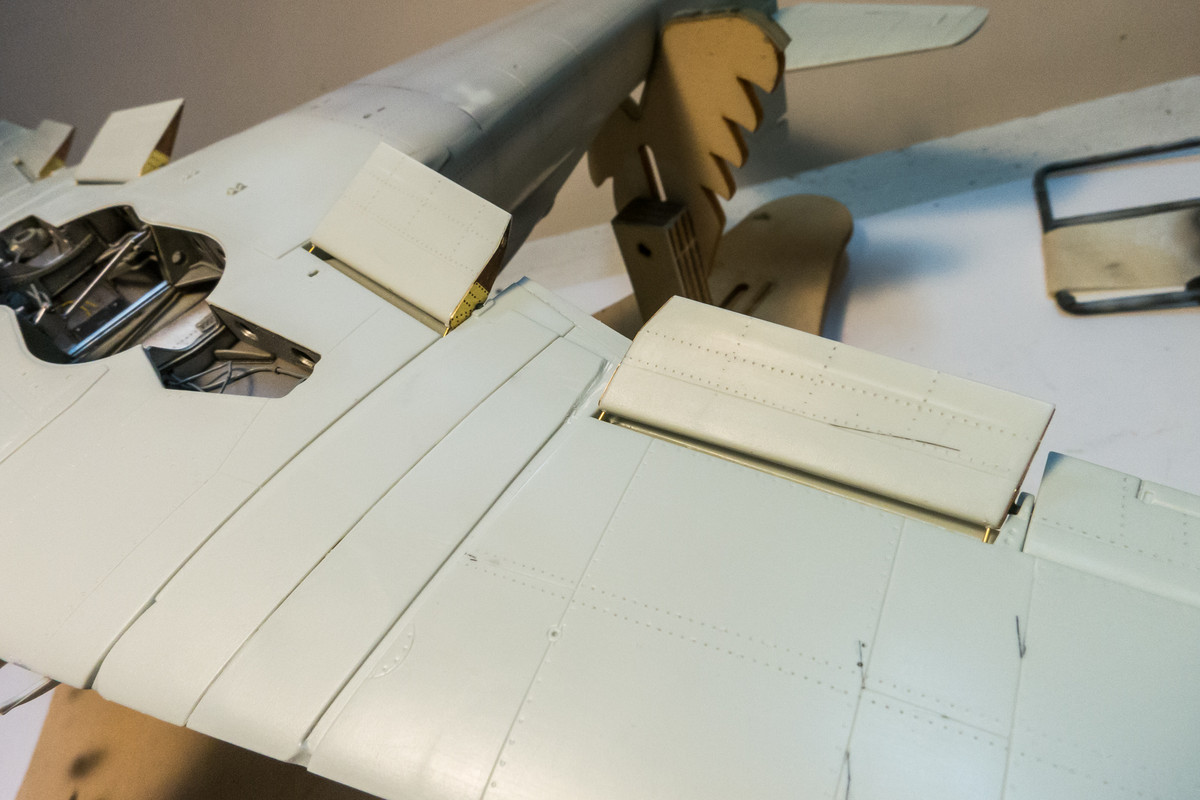
After this realization, I restored the hinge pins and also the leading edge pins, which were very delicate and prone to breakage anway.
Now the flaps can be installed in the lowered position correctly per Radu's original design.
John aka JKim
-----------<><
-----------<><

Re: 1/32 Revell Me262B-1/U1 Nachtjager
Excellent work on those flaps John!
Stuart Templeton 'I may not be good but I'm slow...'

Re: 1/32 Revell Me262B-1/U1 Nachtjager
Always good to be able to work with the designer! I can’t imagine the cut pieces werev useable, but that looks great.
To make each build less crappy than the last one. Or, put another way, "Better than the last one, not as good as the next one!"..