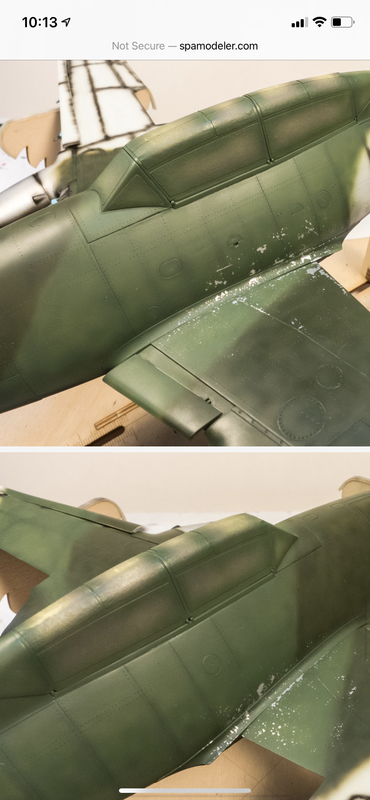
Oh Hell yes!!!!
1/32 Revell Me262B-1/U1 Nachtjager
- Stikpusher
- Moderator
- Posts: 21188
- Joined: Sat Apr 05, 2014 8:37 pm
- Location: Ceti Alpha 5
Re: 1/32 Revell Me262B-1/U1 Nachtjager
Oh Hell yes!!!!
"Surely I have made my meaning plain? I intend to avenge myself upon you, Admiral. I have deprived your ship of power, and when I swing 'round, I intend to deprive you of your life."
FLSM
FLSM
- speedgraflex
- Moderator
- Posts: 11358
- Joined: Fri Feb 10, 2017 11:08 pm
- Contact:
Re: 1/32 Revell Me262B-1/U1 Nachtjager
What they said again!
To make each build less crappy than the last one. Or, put another way, "Better than the last one, not as good as the next one!"..
Re: 1/32 Revell Me262B-1/U1 Nachtjager
Looks excellent! Can't wait to see the upcoming mottle
March as one, Don't look back
Odin's sons... Attack!
Unleash hell! Do not repent! Warfare grants us no lament
Let your weapons slash and tear This is no place for fear
Hold the lines! Move as one! In unity our victory's won
Our shields will form a mighty wall
United we shall never fall
Odin's sons... Attack!
Unleash hell! Do not repent! Warfare grants us no lament
Let your weapons slash and tear This is no place for fear
Hold the lines! Move as one! In unity our victory's won
Our shields will form a mighty wall
United we shall never fall
Re: 1/32 Revell Me262B-1/U1 Nachtjager

One of the things which I enjoy most about observing your work is how it re-enforces the idea that there is more than one way to accomplish most goals effectively. This helps remove a nasty tendency which can arise toward blind marriage and absolute loyalty to one specific idea. Case in point, the manner in which you paint. I get the sense that like me, you enjoy a depth and modulation in your paint work. But while I Black Base, you do the opposite, with a lighter base and pre-shading. Then we meet in the middle. And I very much enjoy seeing how you’ve brought a nice finish to life using this method of yours. Great tonal variation in the darker shades of the paint, and the lighter shades pop in a very nice, very pleasing, “scale” way. All while achieving and maintaining harmony. I like that very much.
Also, the edges on your splinter camo are diffused in a lovely way. I can’t seem to pull that off myself. Never could get that effect laid-down in such a way as I didn’t hate my final result.
She’s looking great, John.
Kenny X
Head Mother Trucker In-Charge @ Kenny X’s Reichs Winzigkleines Flugzeugewerks *and now* Airboat Records, too!
- BlackSheep214
- Elite Member
- Posts: 13418
- Joined: Sun Apr 06, 2014 8:47 pm
Re: 1/32 Revell Me262B-1/U1 Nachtjager
Incredible...

“Who controls the skies, controls the fate of this Earth”
Author unknown- 352nd Fighter Group, Blue-Nosed Bastards of Bodney
“Send one plane it’s a sortie; send two planes it’s a flight; send four planes it’s a test of airpower. - Richard Kohn
Author unknown- 352nd Fighter Group, Blue-Nosed Bastards of Bodney
“Send one plane it’s a sortie; send two planes it’s a flight; send four planes it’s a test of airpower. - Richard Kohn
- speedgraflex
- Moderator
- Posts: 11358
- Joined: Fri Feb 10, 2017 11:08 pm
- Contact:
Re: 1/32 Revell Me262B-1/U1 Nachtjager
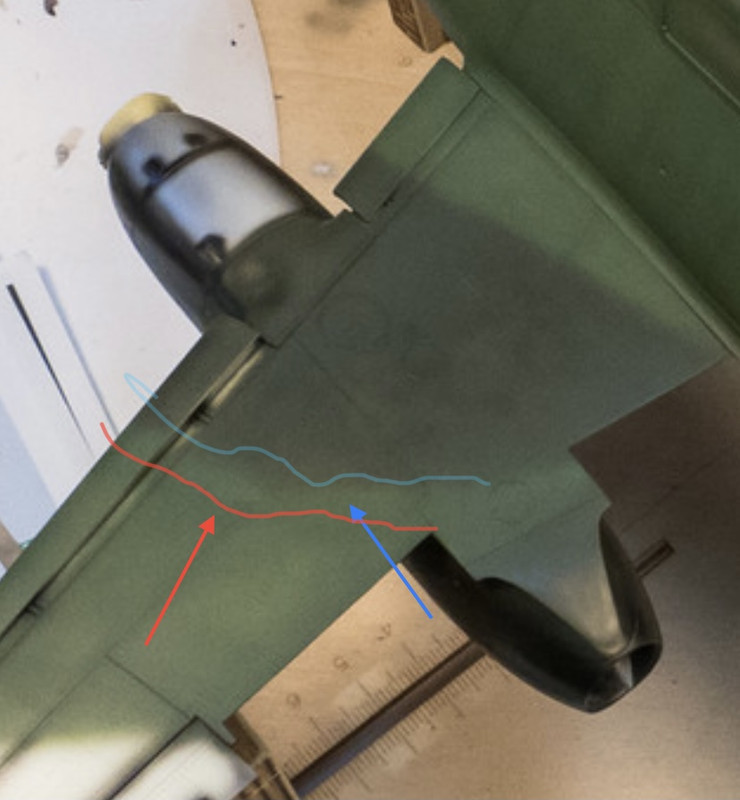
I think the key to soft edge camo is extension of the fade itself. Here with this top down view there appears to be the initial camo demarcation line at the red squiggle I added and the fade extends outward to the blue line before stopping.

I think both dark and light colors then blend with a bit of the color beneath them... or maybe it is simply pixie dust? So, John, how is this done?

I think both dark and light colors then blend with a bit of the color beneath them... or maybe it is simply pixie dust? So, John, how is this done?
Make more models!
Re: 1/32 Revell Me262B-1/U1 Nachtjager
Thanks guys! To be honest, I wasn't paying too much attention to the upper camo scheme. Due to the upcoming lighter mottle, the RLM 81/82 combo will pretty much be obliterated and you will not be able to distinguish the 81 from the 82, much less make out any of the transitions between the two. So I was just trying to separate the two colors as neatly as possible without dwelling too much on the results besides uniform coverage. That's why some demarcations are softer than others. If this was the final scheme, I would've paid much more attention to the consistency of the demarcations.
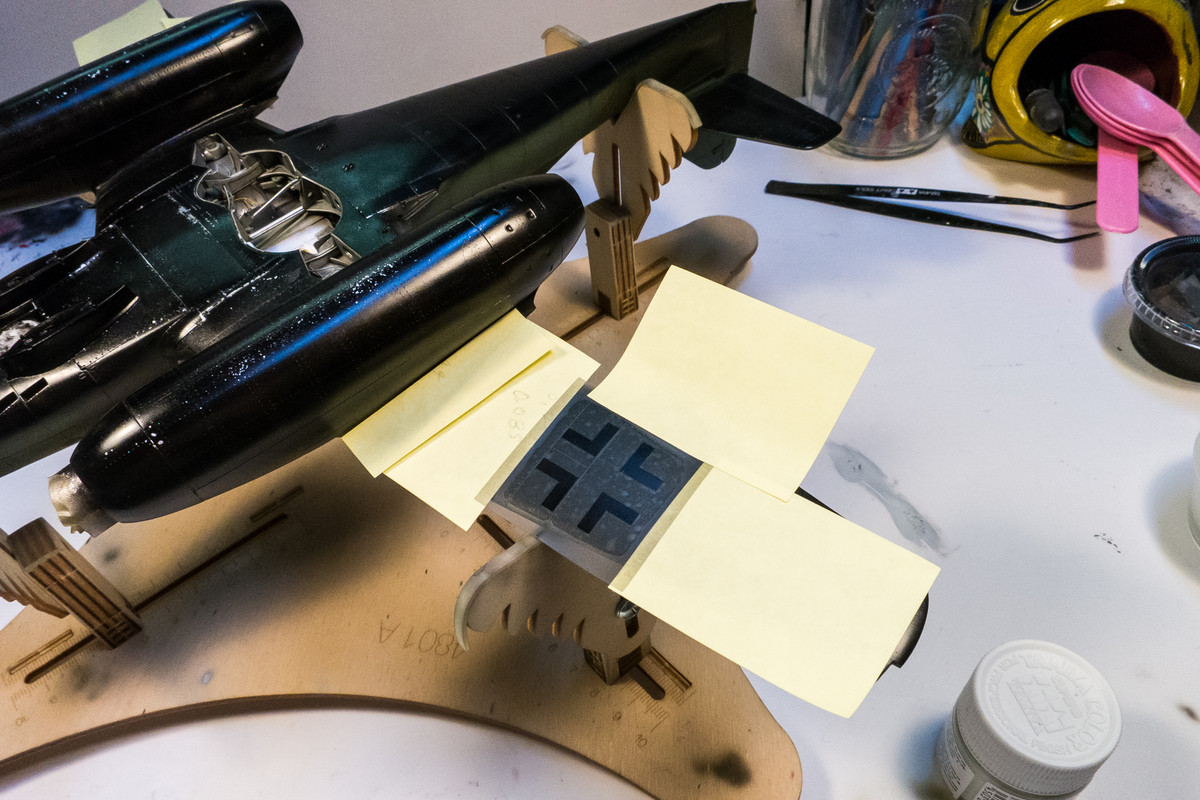
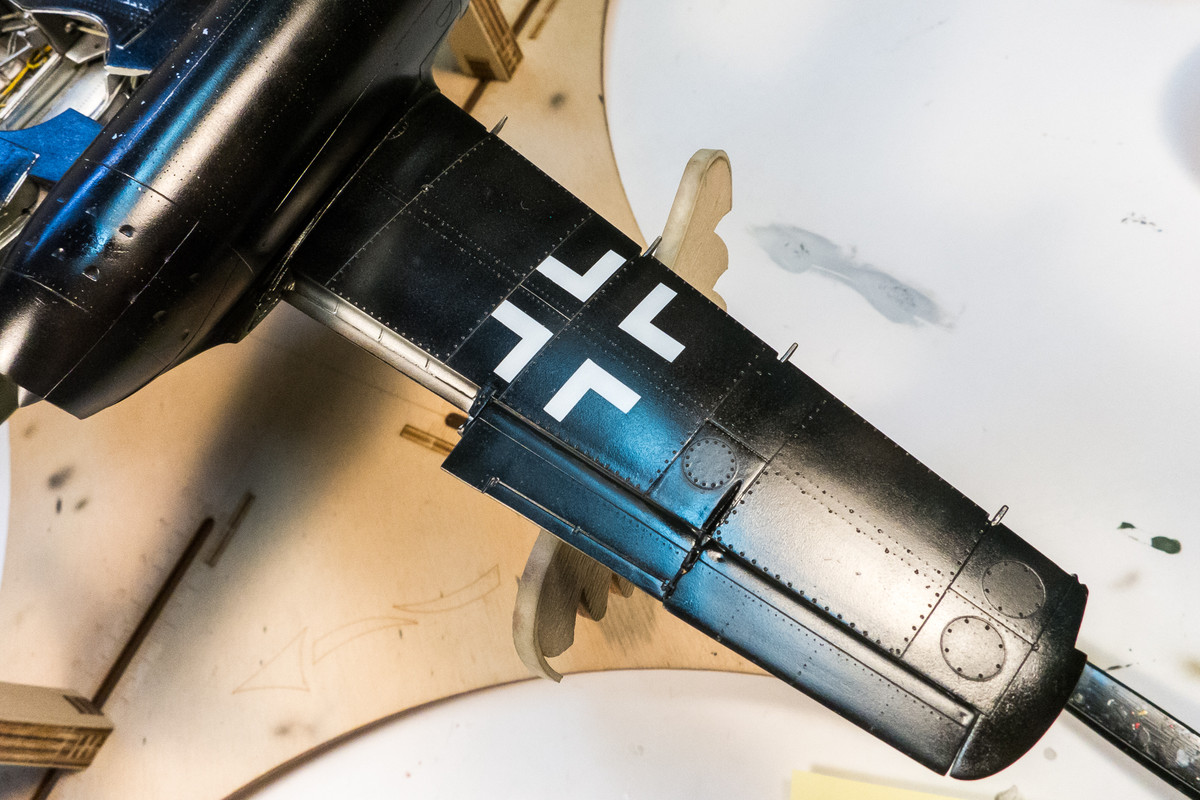
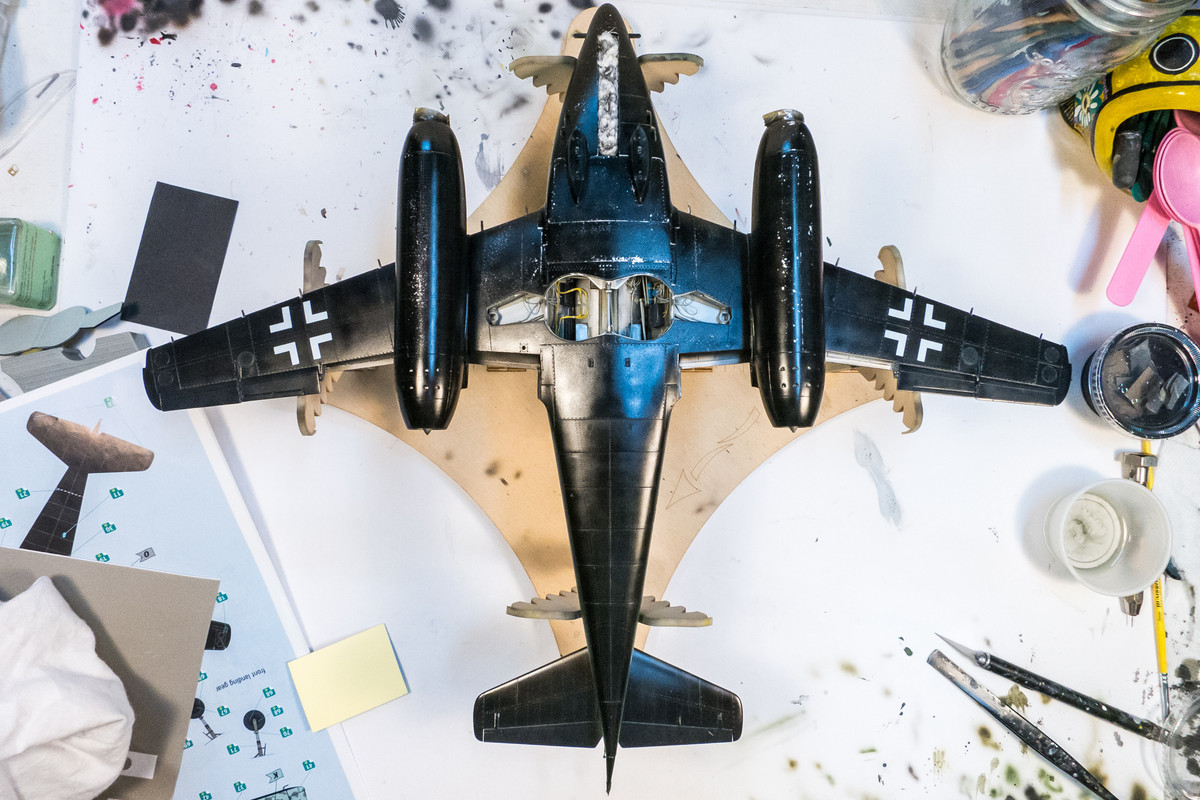
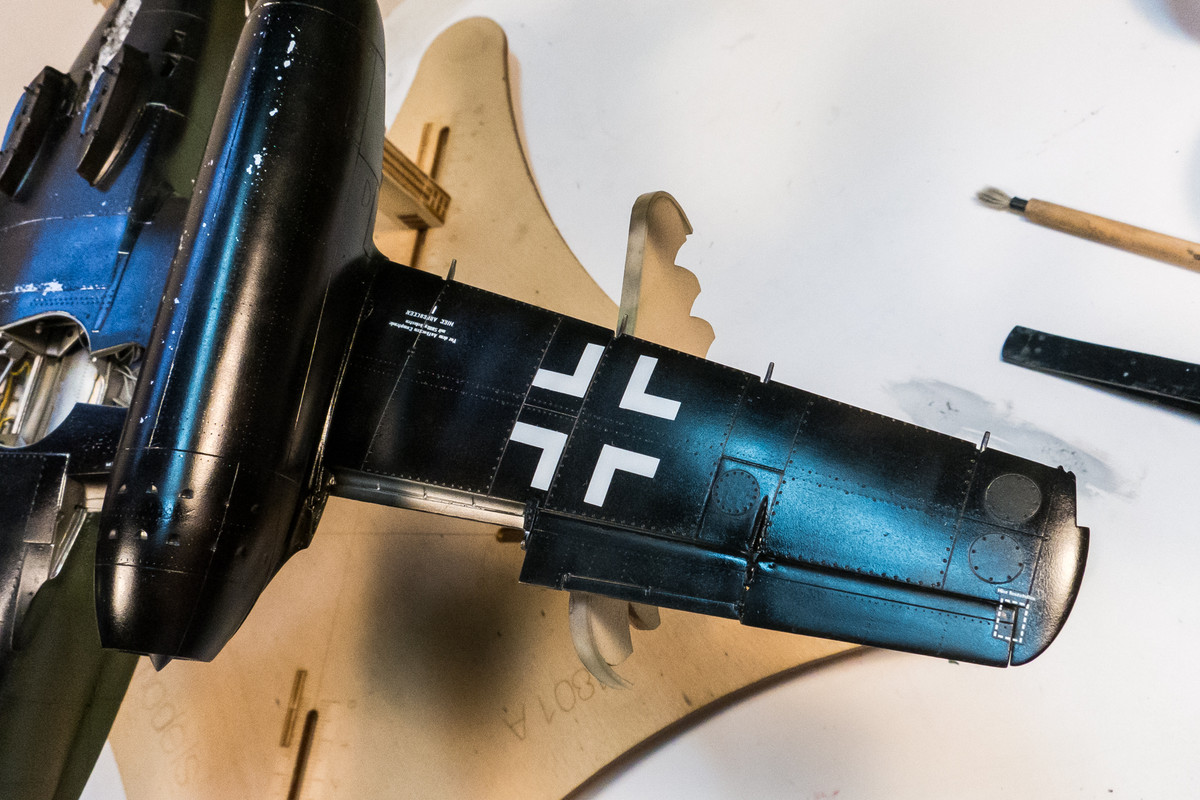
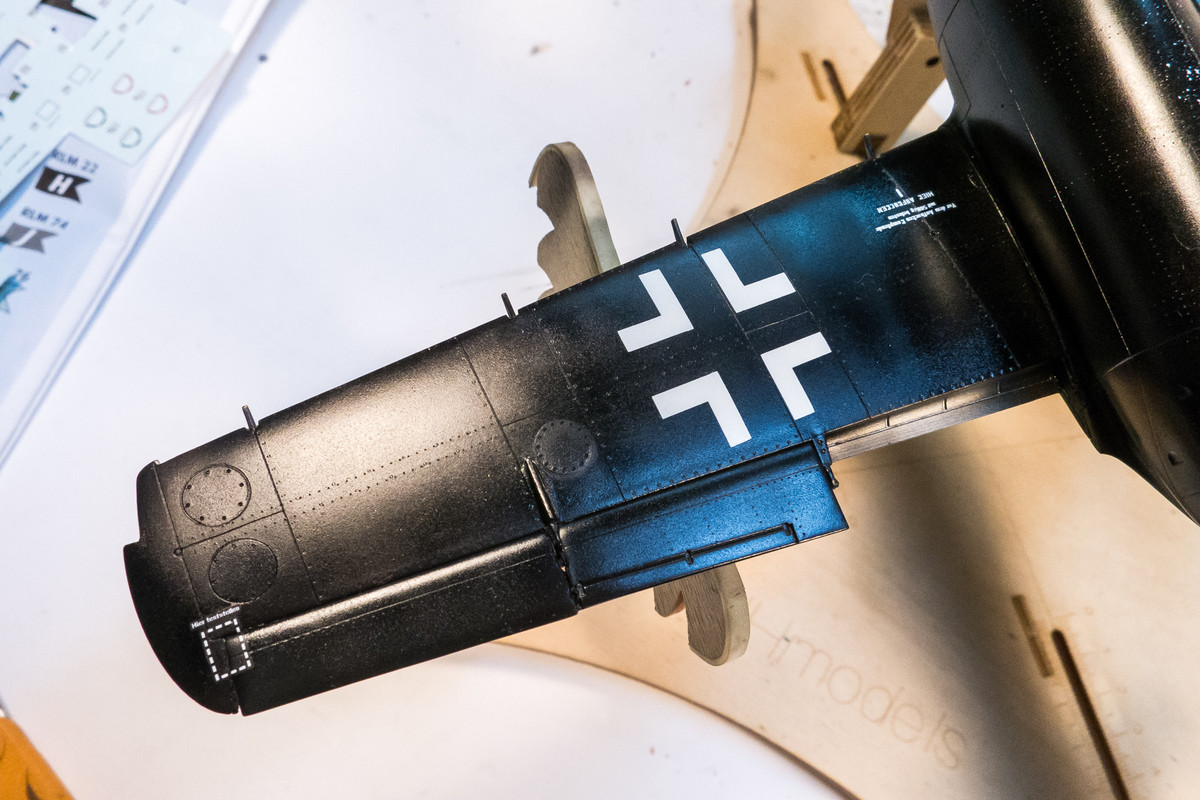
The top and bottom are progressing at different rates, which I think is ok until I get to the transitions like the sides of the engine nacelles. I've decided to do the majority of the markings and decal work on the bottom at this stage. The wing crosses are masks from the Silhouette Portrait based on scans of the kit decals.


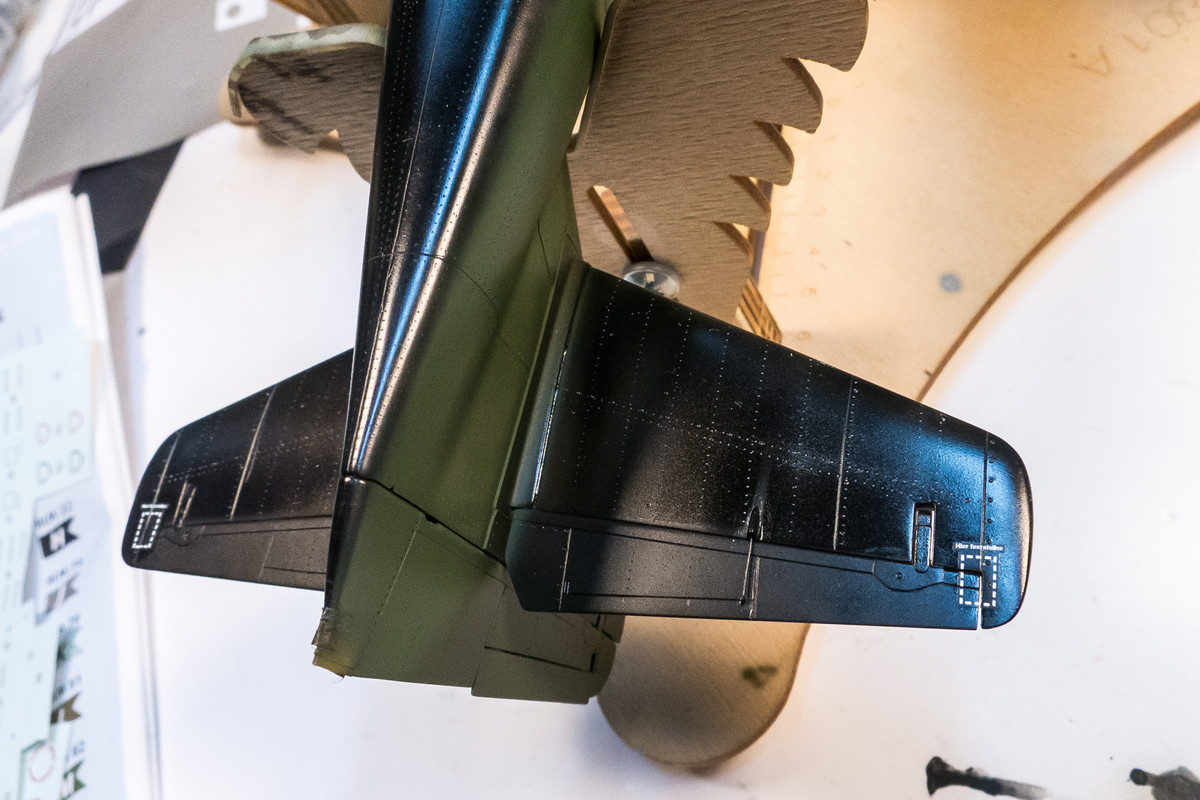
The stencil decals from the kit are used. They are very fine and feature legible text, even for the very small decals. The only thing I don't like about the decals is the flat finish... I prefer gloss or satin. I used Microset to dampen the area of application and once position was finalized, I rolled a clean cotton swab over the decal. Instead of Microsol, I used Walters Solvaset to soften the decal and help it conform into place. Some of the stencils are at the corners of control surfaces, so multiple applications of Solvaset were used and finally a sharp knife run along all of the depressions.


I'll give this a few hours to dry and then shoot the decals with a light gloss coat to seal them.
The top and bottom are progressing at different rates, which I think is ok until I get to the transitions like the sides of the engine nacelles. I've decided to do the majority of the markings and decal work on the bottom at this stage. The wing crosses are masks from the Silhouette Portrait based on scans of the kit decals.


The stencil decals from the kit are used. They are very fine and feature legible text, even for the very small decals. The only thing I don't like about the decals is the flat finish... I prefer gloss or satin. I used Microset to dampen the area of application and once position was finalized, I rolled a clean cotton swab over the decal. Instead of Microsol, I used Walters Solvaset to soften the decal and help it conform into place. Some of the stencils are at the corners of control surfaces, so multiple applications of Solvaset were used and finally a sharp knife run along all of the depressions.


I'll give this a few hours to dry and then shoot the decals with a light gloss coat to seal them.
John aka JKim
-----------<><

-----------<><

- Stikpusher
- Moderator
- Posts: 21188
- Joined: Sat Apr 05, 2014 8:37 pm
- Location: Ceti Alpha 5
Re: 1/32 Revell Me262B-1/U1 Nachtjager
That is looking super sharp now John. The underside looks absolutely wicked in black!
"Surely I have made my meaning plain? I intend to avenge myself upon you, Admiral. I have deprived your ship of power, and when I swing 'round, I intend to deprive you of your life."
FLSM
FLSM
Re: 1/32 Revell Me262B-1/U1 Nachtjager
Thanks Carlos! The black will get dirtied up in time but I am trying to prepare for the mottle camo painting first and then do the weathering in one step.
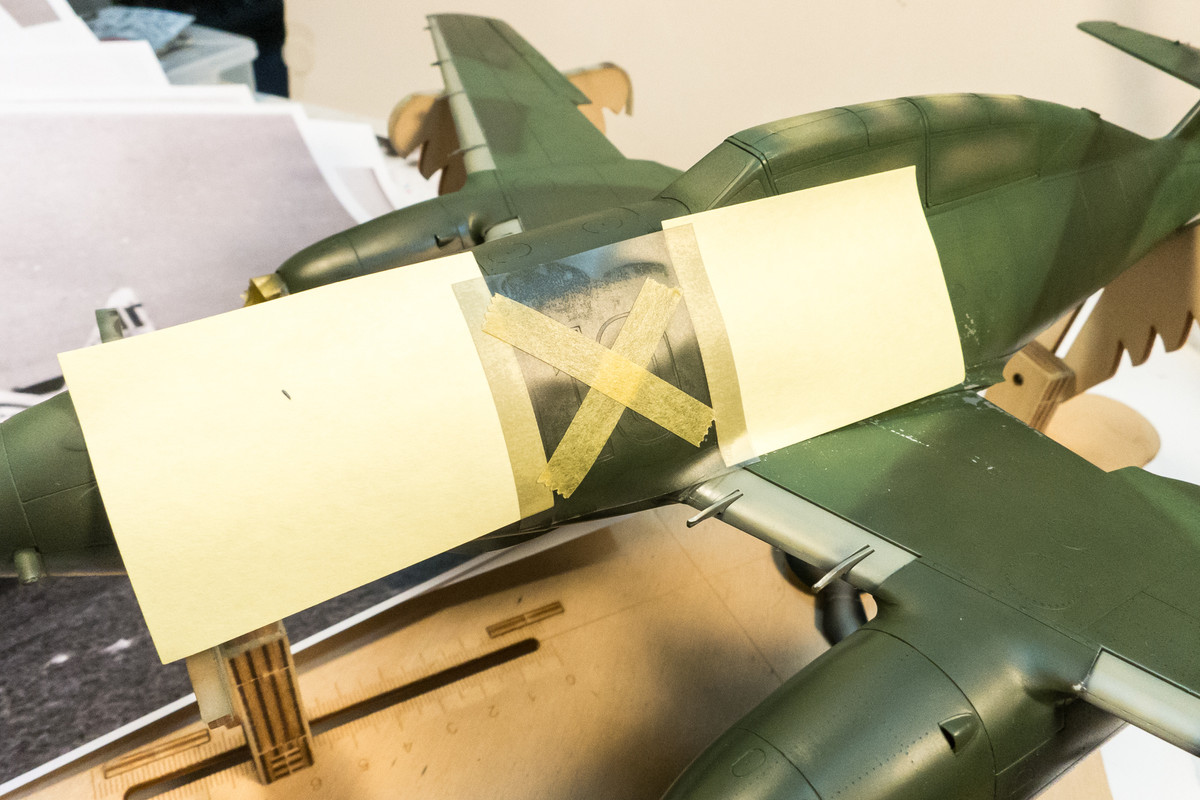
So... let's do the red "10" markings! One of the first things that I do when I get a new kit is to scan the decal sheet. The decal sheet for this build was used to create custom masks for the major markings including the "10". Since the numbers have a thin white border, masking is a little bit trickier than single color markings. First, I transfer the entire mask onto the model using tape to hold the different components together. This is necessary since there is a free-floating oval within the "0". The Oramask 810 material is translucent and really helps facilitate the proper positioning and alignment of the marking.
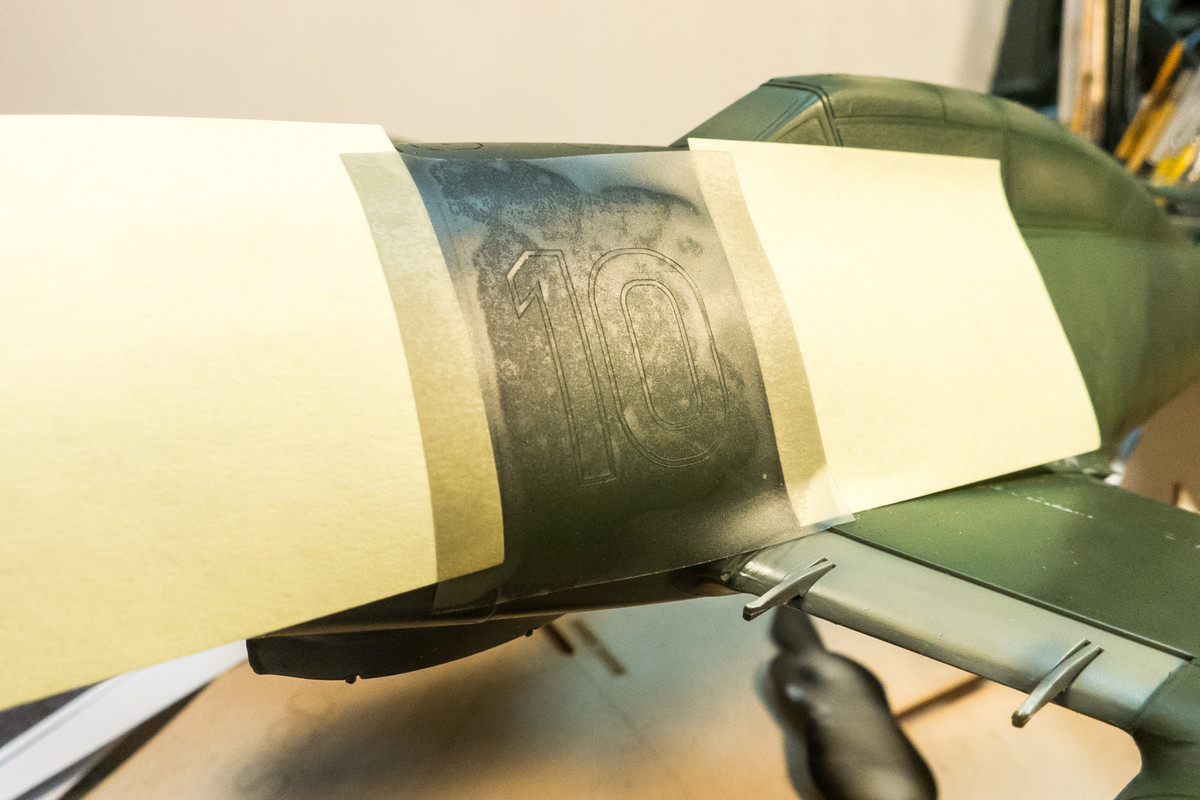
Leaving the oval in place, the other components of the mask are carefully removed and saved for later use.
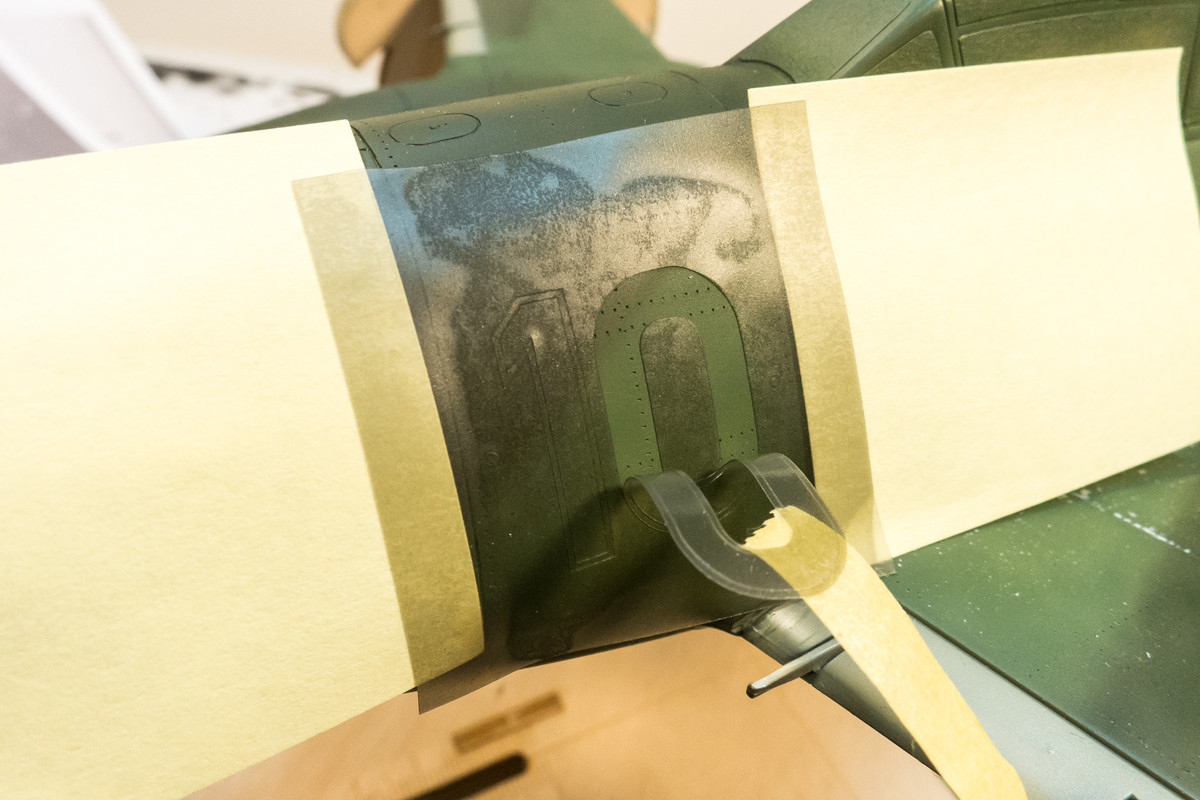
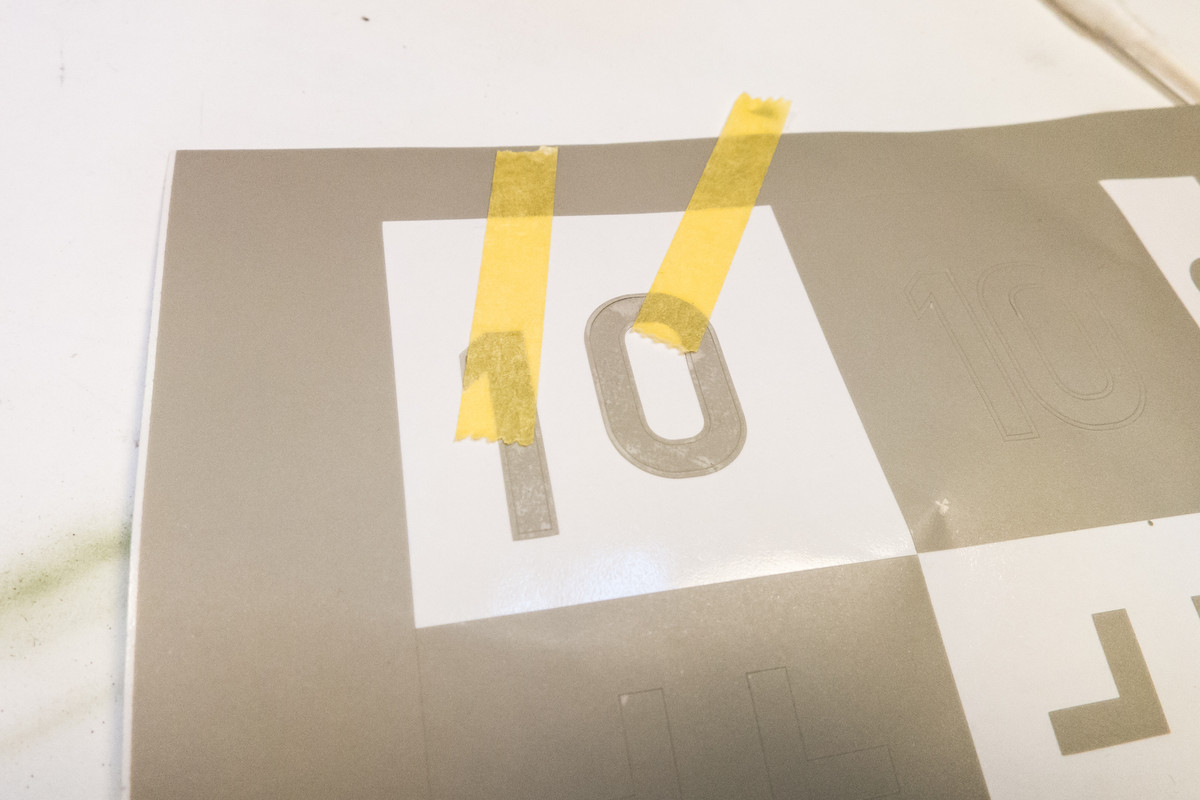
The first color, which will be the white for the outline, is now ready to be sprayed. Make sure that the edges of the mask are uniformly flat on the surface.
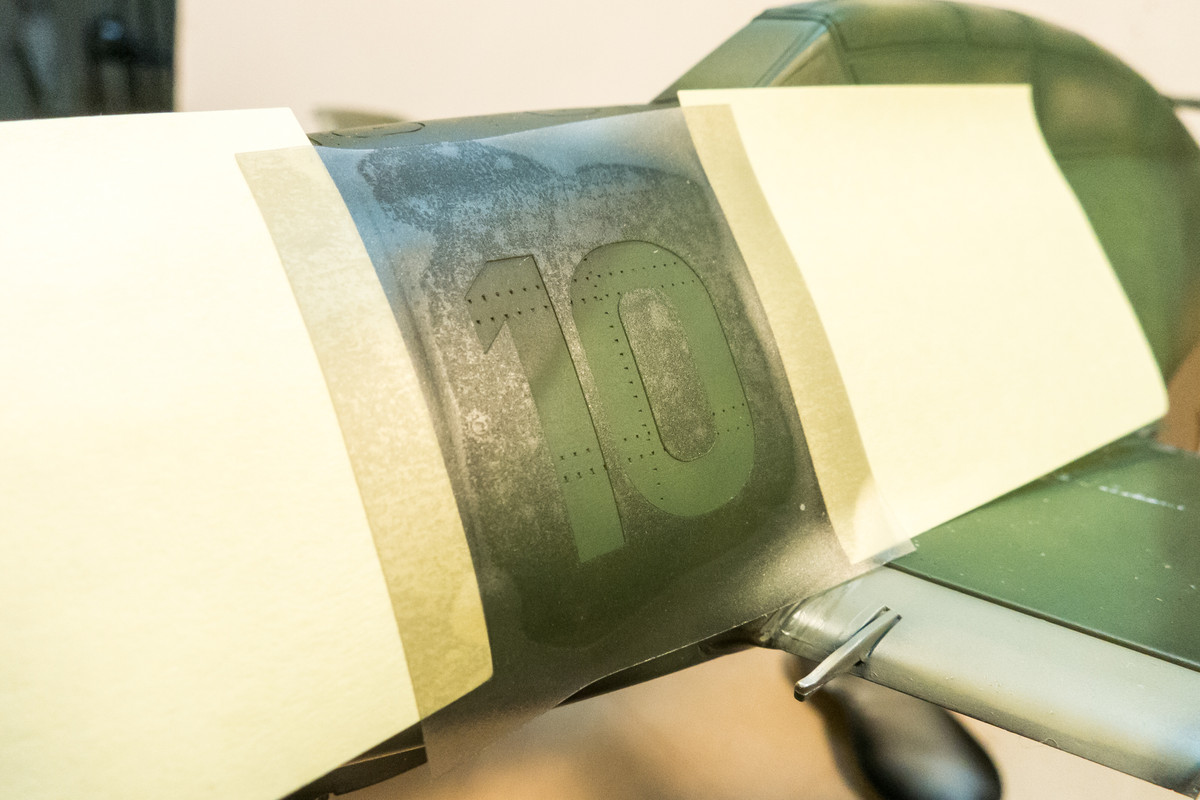
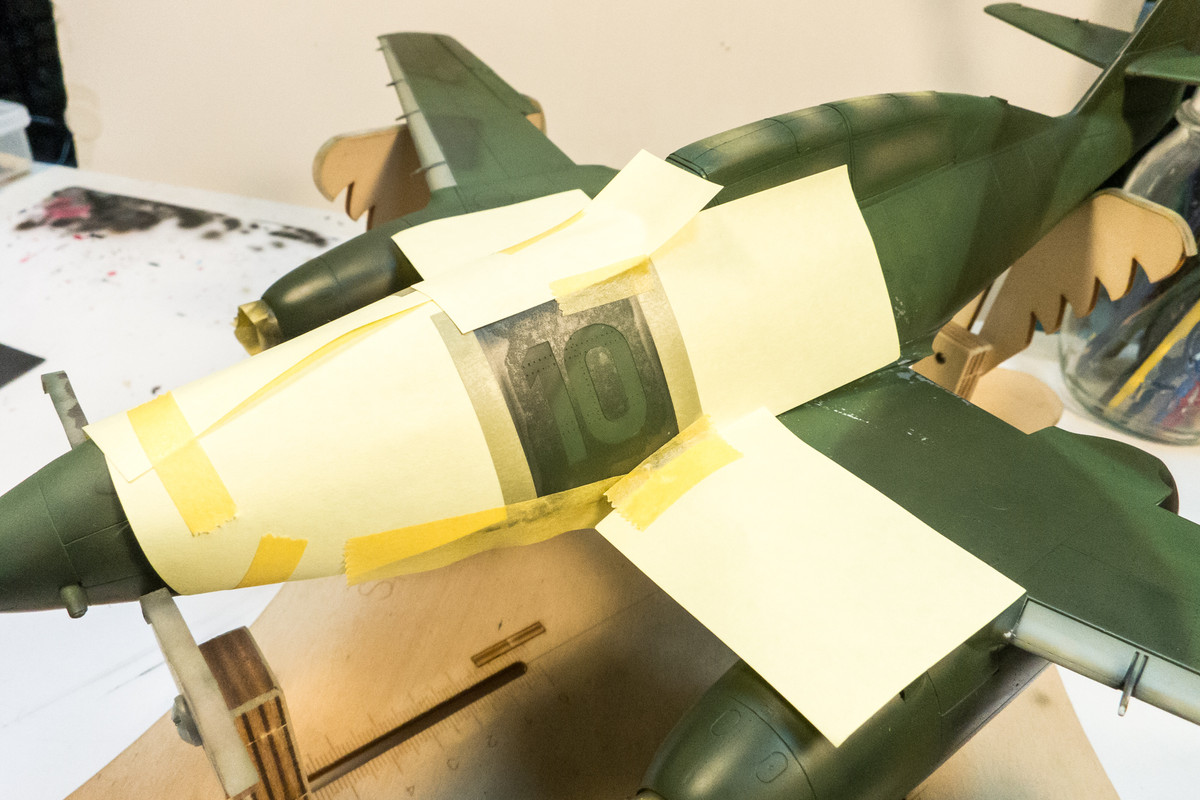
Before I spray the white, I repeat these steps for the starboard side. Upon removal of the inner mask components for that side, a tiny sliver of backing paper got caught on the mask's adhesive. Poking it out stretched the skinny part of the mask a bit... you can see the kink on top of the "0". I could possibly make this work but I thought it would be prudent to cut an identical mask just to avoid any potential issues.
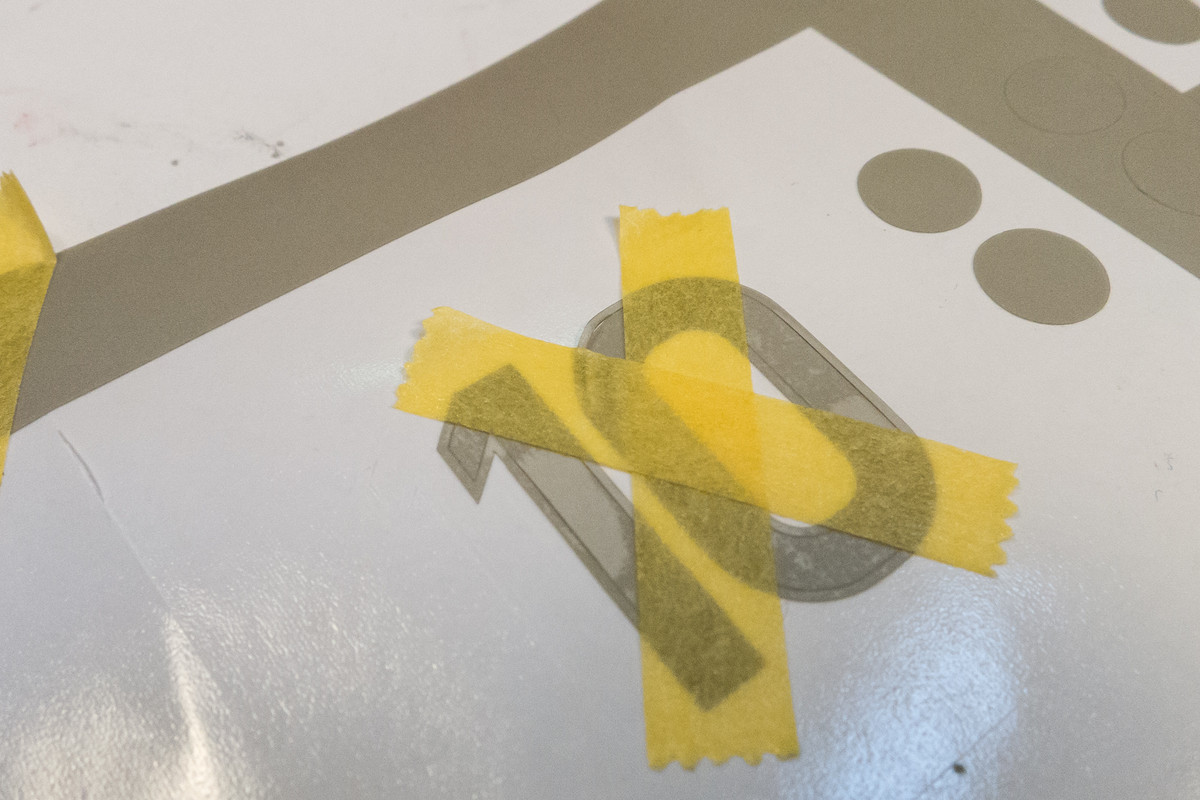
The white is sprayed and allowed to dry for a few hours before moving on.
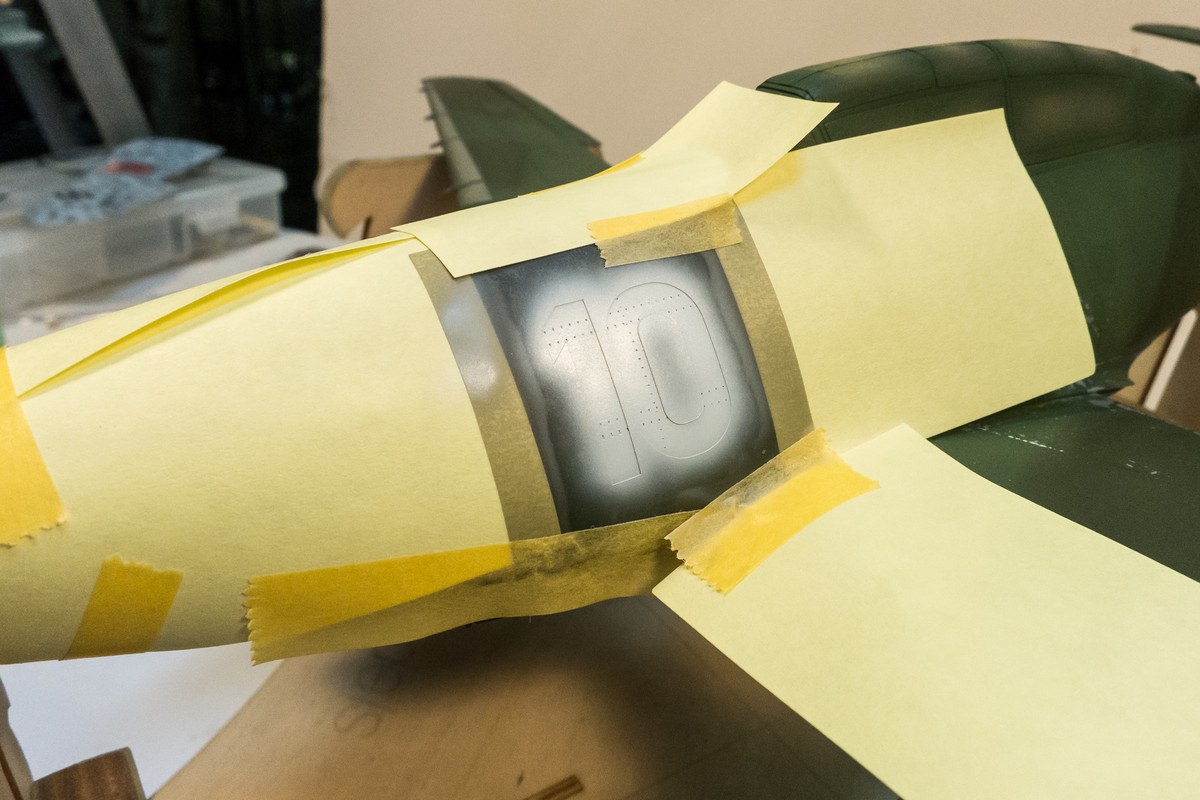
The thin border masks are then carefully put into place. This is the most fiddly part of this operation and it pays to make sure that these thin masks butt up nice and tight to the masks that are already in place.

Even with magnification, it is difficult to see the fine gaps that might allow some paint to seep through. To prevent this, additional masking is recommended. You can used bits of tape but for this example, I chose to use a liquid mask.
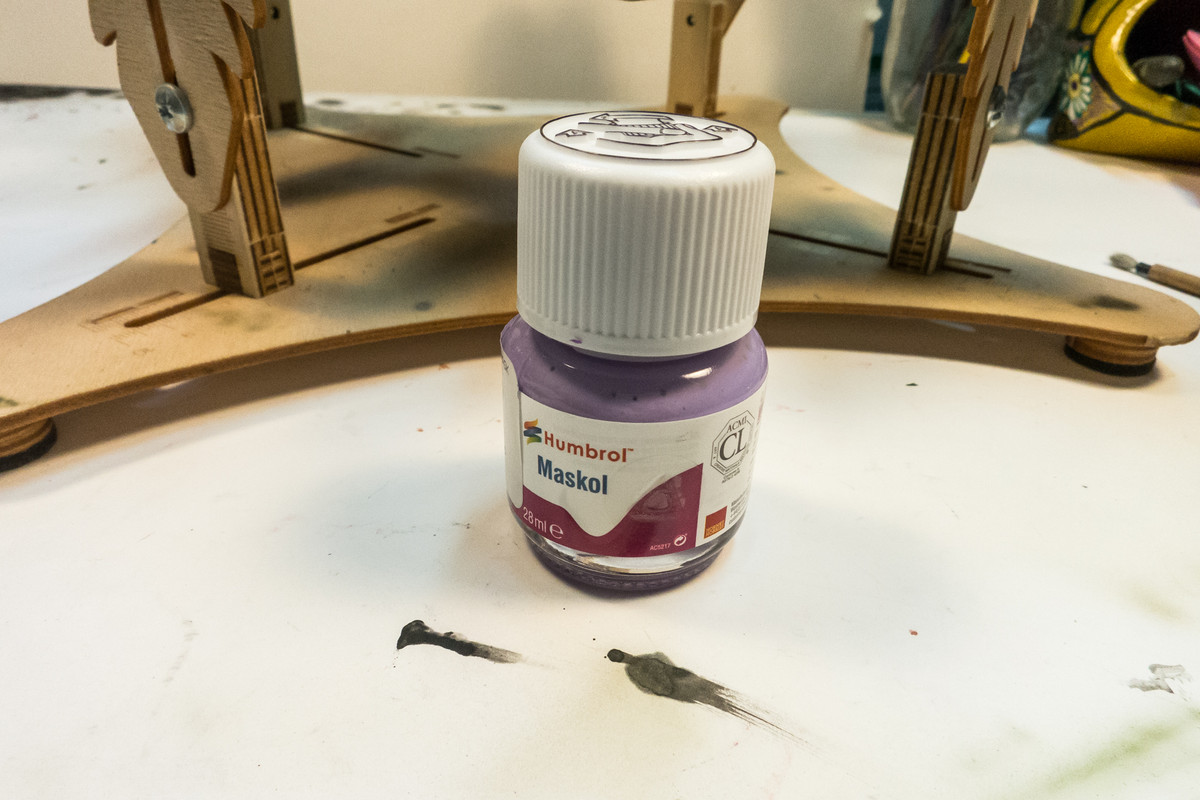
It looks sloppy but I've been careful to make sure that the liquid mask stays away from the mask edges.
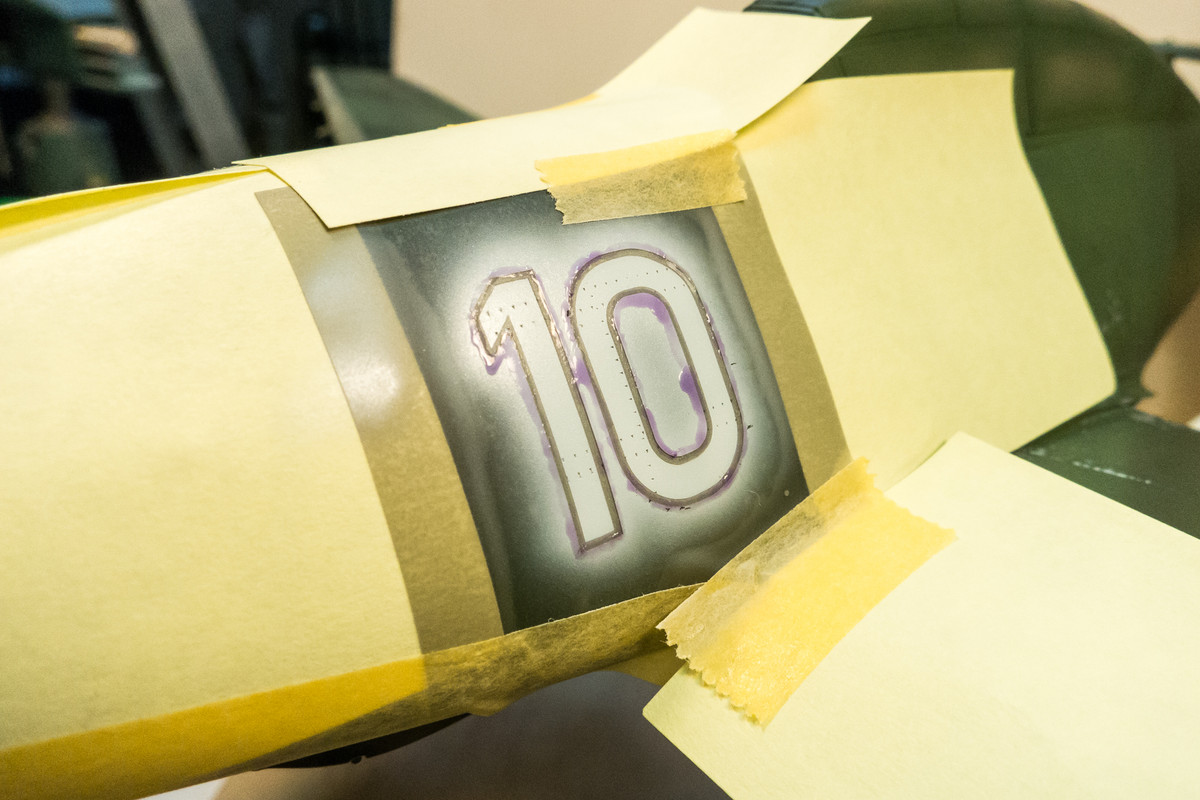
The red is sprayed on. I like to use thin mixes to minimize the paint build-up and resultant edge that might develop with thicker paint.
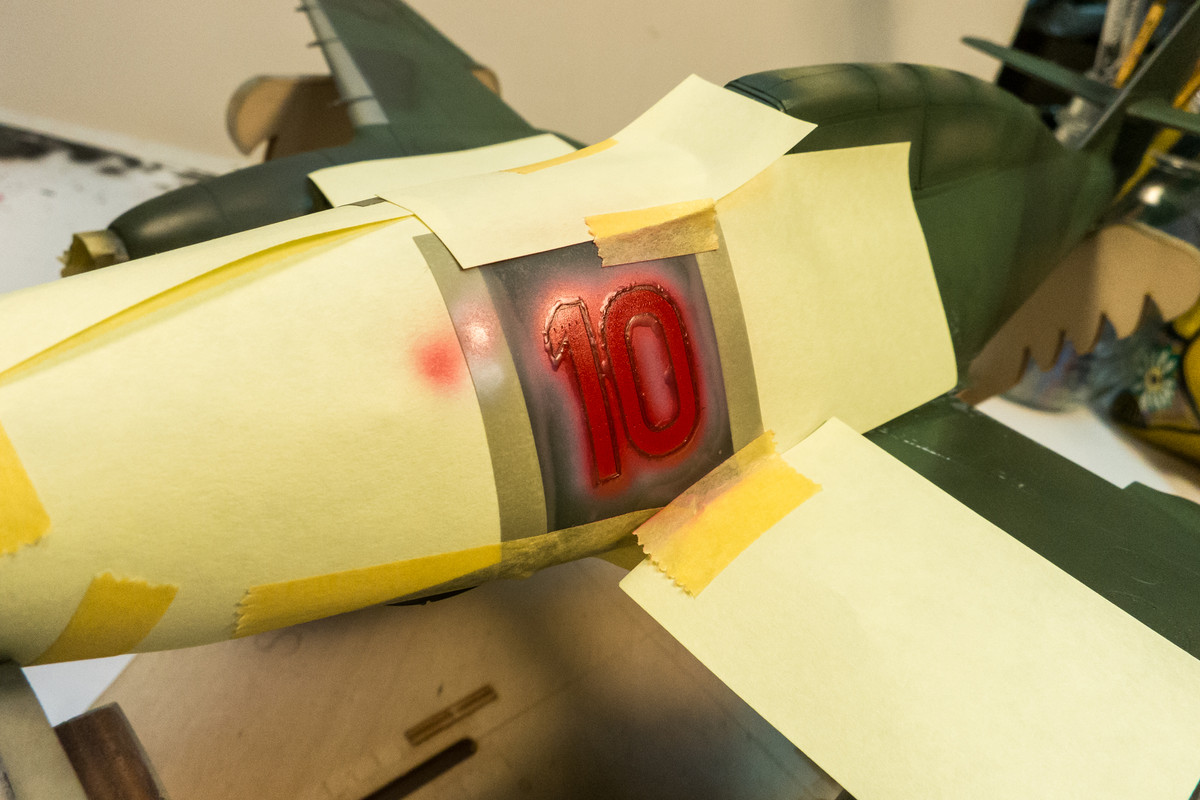
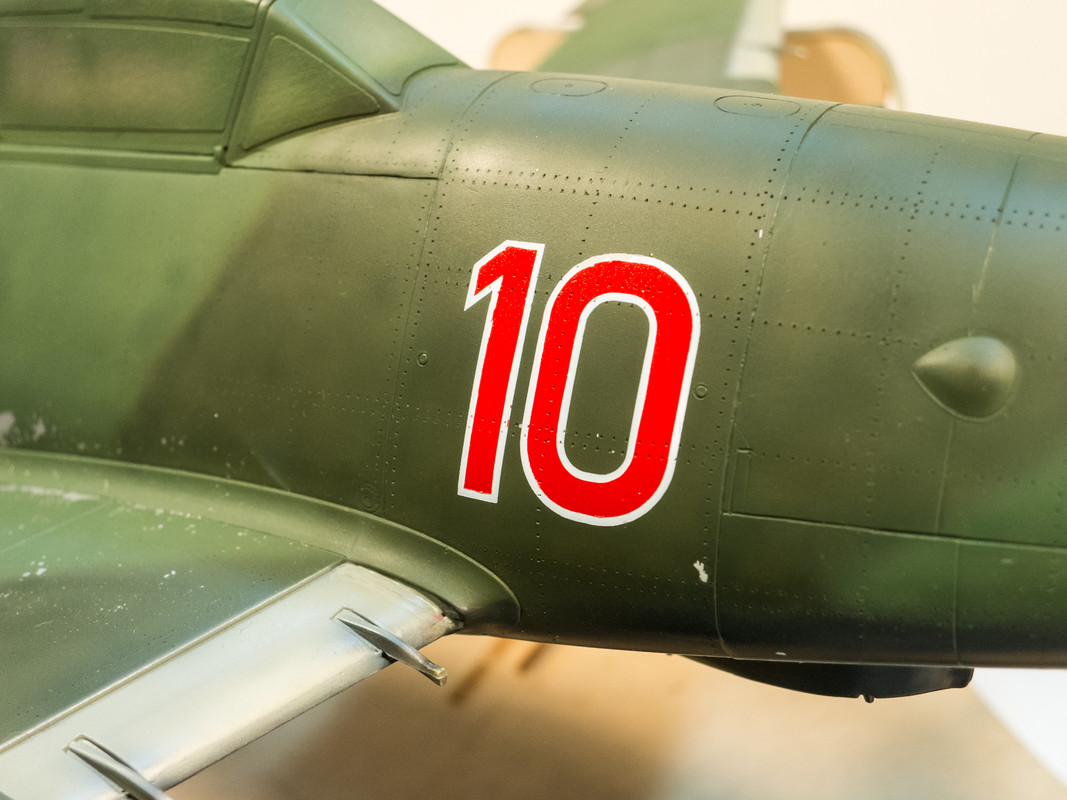
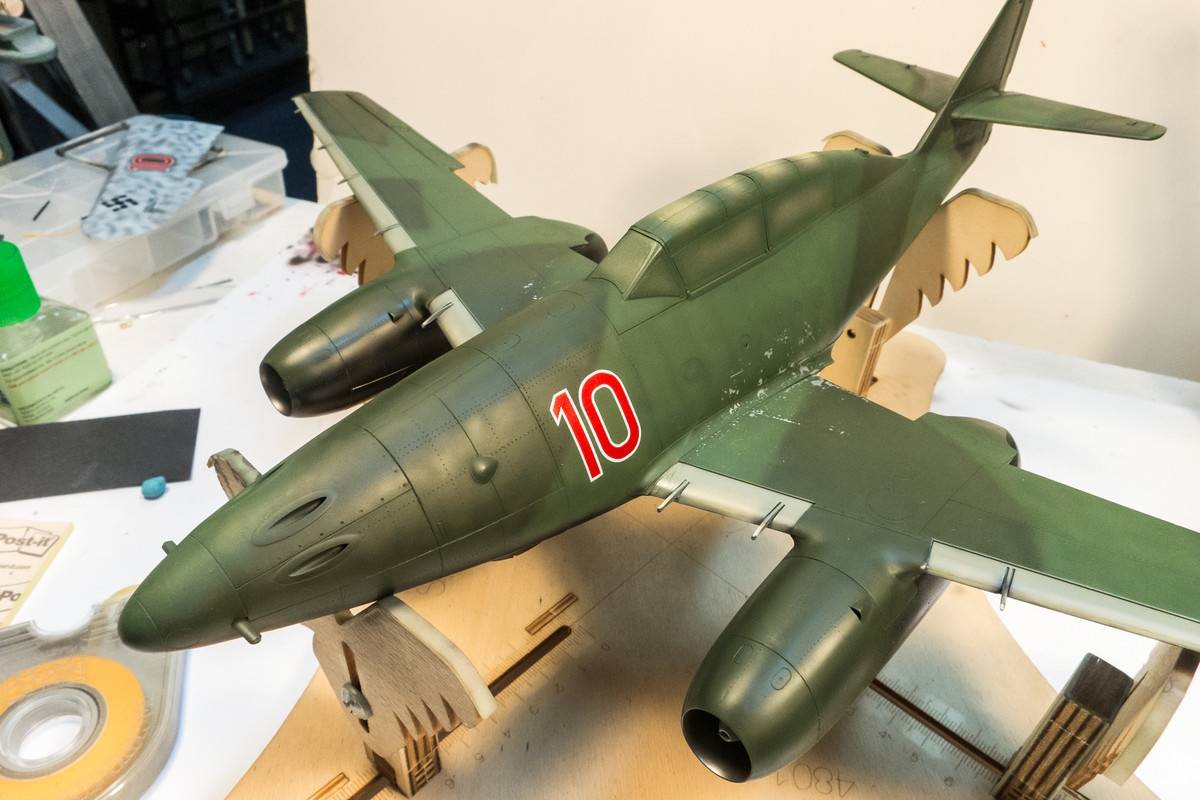
The masks are pulled off to reveal the completed red "10" markings. There were a couple of small spots of paint lift but very minor... a very acceptable result.
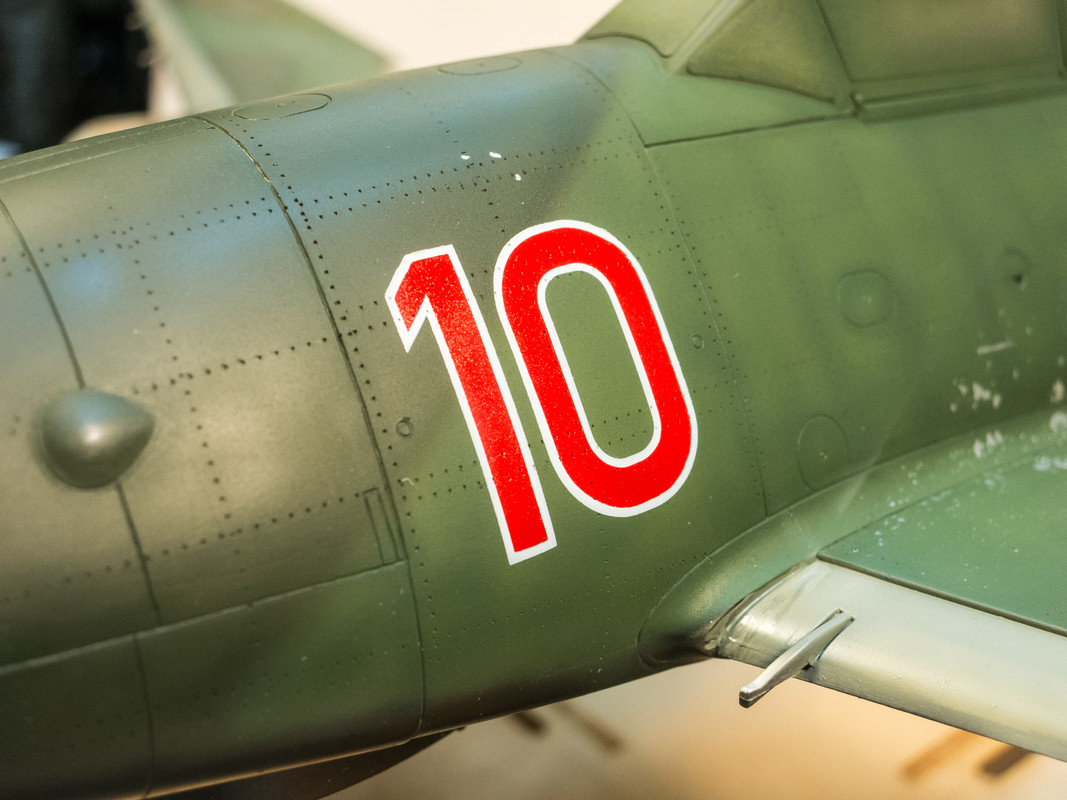
The lifted paint spots are sprayed with Neutral Grey first, which helps blend in the repair, and then sprayed with the camo color.

So... let's do the red "10" markings! One of the first things that I do when I get a new kit is to scan the decal sheet. The decal sheet for this build was used to create custom masks for the major markings including the "10". Since the numbers have a thin white border, masking is a little bit trickier than single color markings. First, I transfer the entire mask onto the model using tape to hold the different components together. This is necessary since there is a free-floating oval within the "0". The Oramask 810 material is translucent and really helps facilitate the proper positioning and alignment of the marking.


Leaving the oval in place, the other components of the mask are carefully removed and saved for later use.


The first color, which will be the white for the outline, is now ready to be sprayed. Make sure that the edges of the mask are uniformly flat on the surface.


Before I spray the white, I repeat these steps for the starboard side. Upon removal of the inner mask components for that side, a tiny sliver of backing paper got caught on the mask's adhesive. Poking it out stretched the skinny part of the mask a bit... you can see the kink on top of the "0". I could possibly make this work but I thought it would be prudent to cut an identical mask just to avoid any potential issues.

The white is sprayed and allowed to dry for a few hours before moving on.

The thin border masks are then carefully put into place. This is the most fiddly part of this operation and it pays to make sure that these thin masks butt up nice and tight to the masks that are already in place.

Even with magnification, it is difficult to see the fine gaps that might allow some paint to seep through. To prevent this, additional masking is recommended. You can used bits of tape but for this example, I chose to use a liquid mask.

It looks sloppy but I've been careful to make sure that the liquid mask stays away from the mask edges.

The red is sprayed on. I like to use thin mixes to minimize the paint build-up and resultant edge that might develop with thicker paint.

The masks are pulled off to reveal the completed red "10" markings. There were a couple of small spots of paint lift but very minor... a very acceptable result.


The lifted paint spots are sprayed with Neutral Grey first, which helps blend in the repair, and then sprayed with the camo color.


John aka JKim
-----------<><

-----------<><