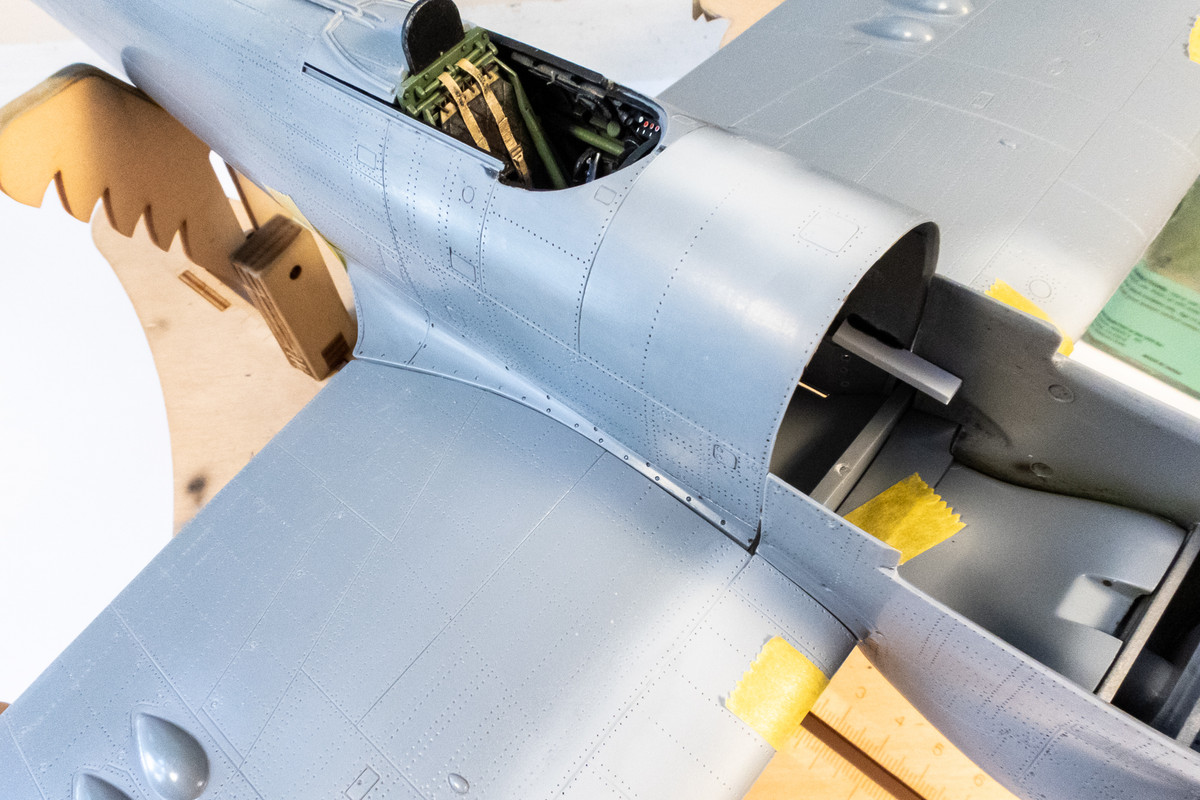
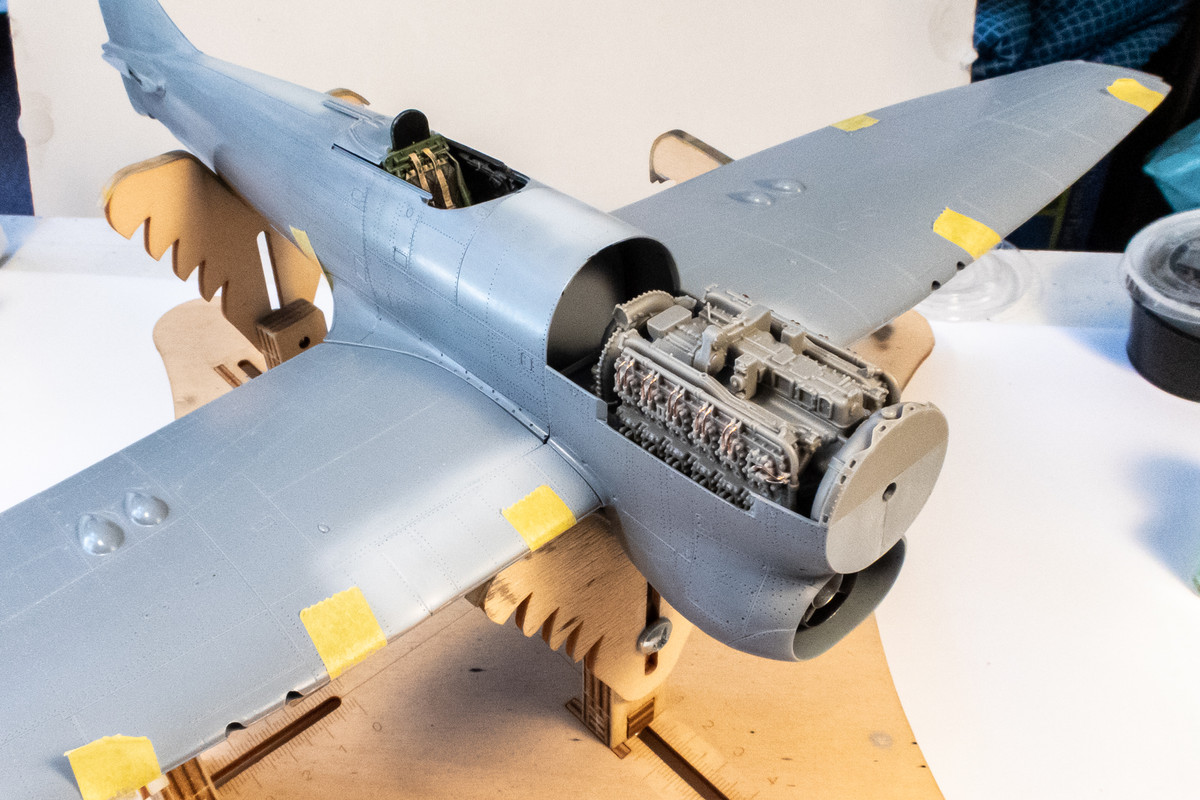
1/32 Special Hobby Hawker Tempest Mk V
- Medicman71
- Elite Member
- Posts: 11292
- Joined: Mon Apr 07, 2014 9:32 am
- Location: Houston, Tx
Re: 1/32 Special Hobby Hawker Tempest Mk V
Man those flaps look awesome!

Mike
Sponsored by Boeing, Lockheed Martin, Northrop Grumman, Saab, BAE, and Dassault
Re: 1/32 Special Hobby Hawker Tempest Mk V
Thanks Mike, I appreciate it!
Do you ever feel like you added just one too man aftermarket items to a build? Lots of issues have started to pop up. Nothing huge but they're starting to take their toll!
I took a big step and cut off the kit lower flaps to make way for the brass replacements. Surprisingly, I was able to do it and keep the existing flaps intact!
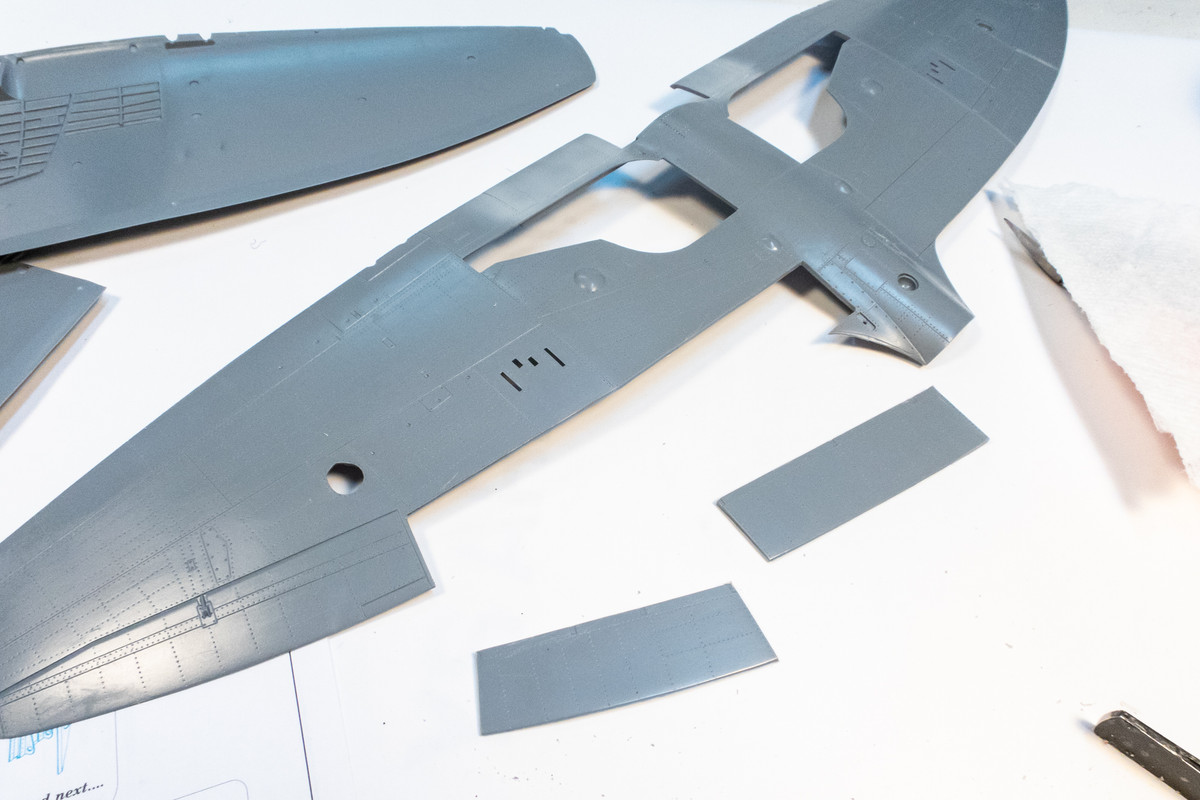
After cutting the starboard side flaps off, I wanted to test the fit of the brass upper wing section and found I cut off a wee bit too much plastic. Not really fault because I simply followed the panel lines.
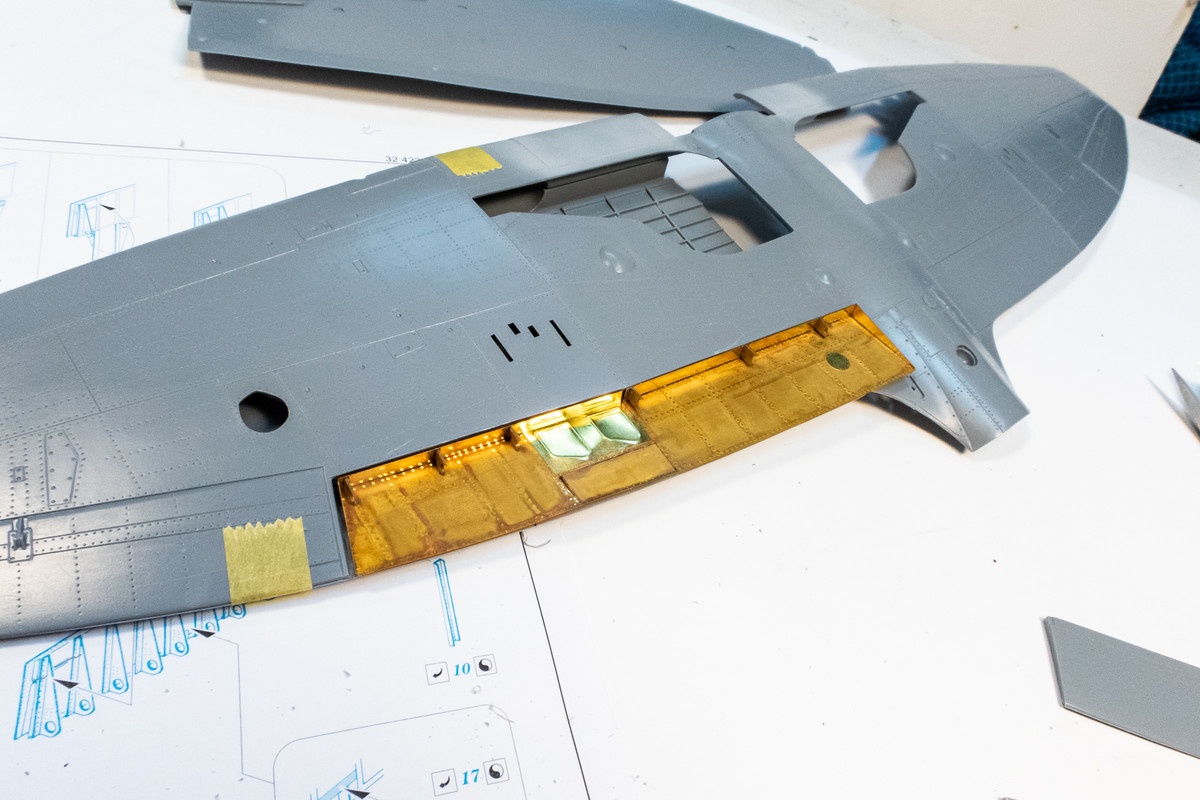
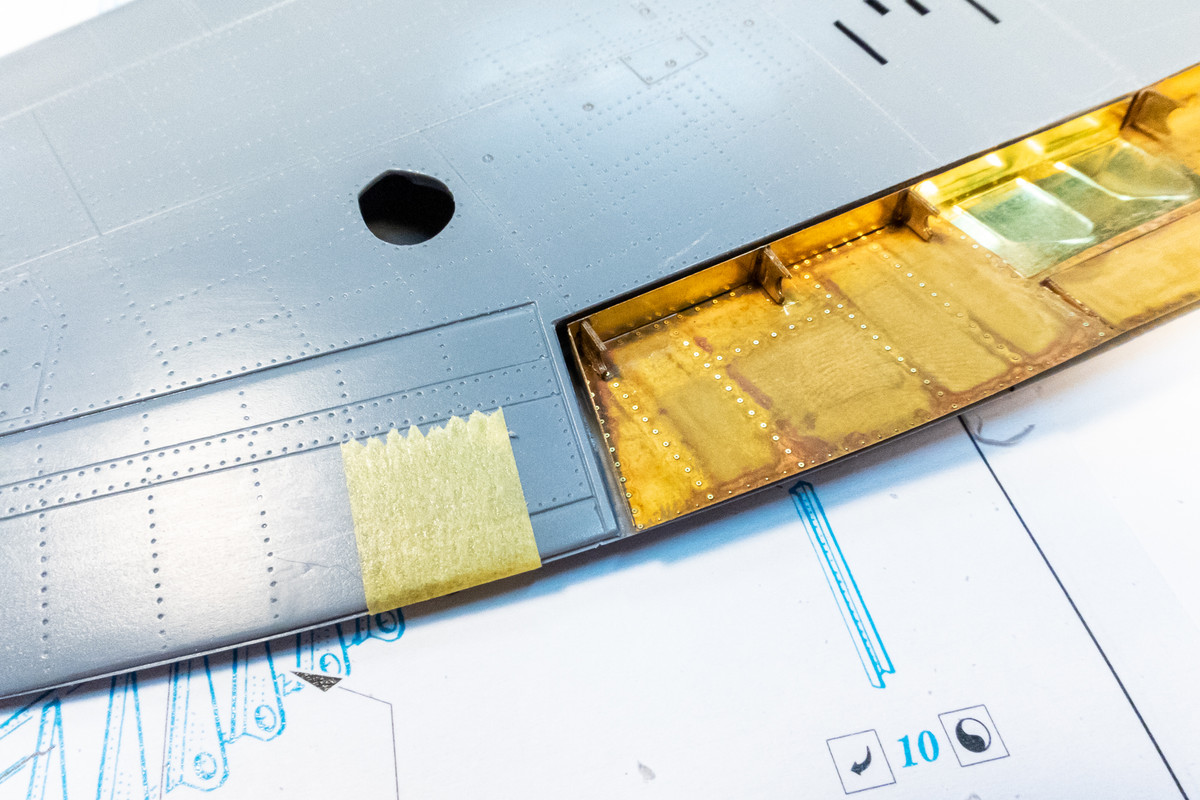
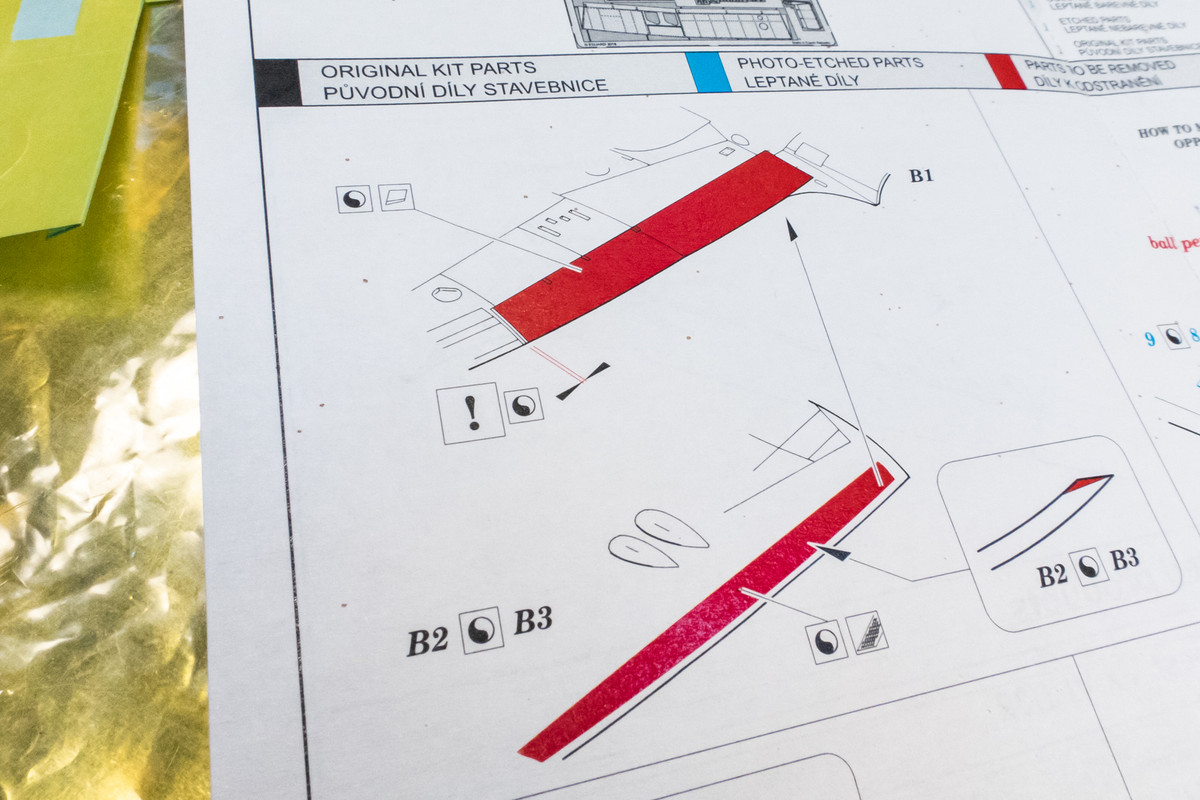
Well, maybe my fault... I think the Eduard instructions were warning me to leave a bit more plastic but I wasn't paying attention.
So I added a shim of sheet plastic and that seemed to work ok.
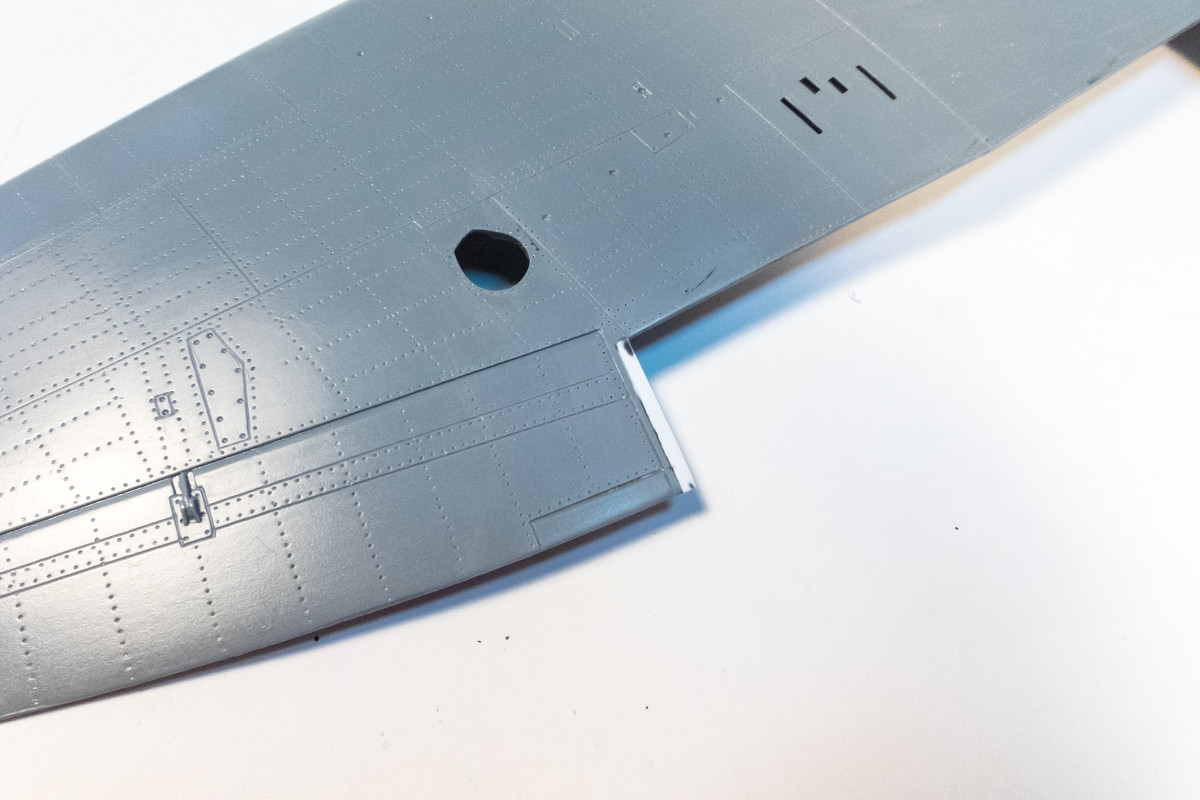
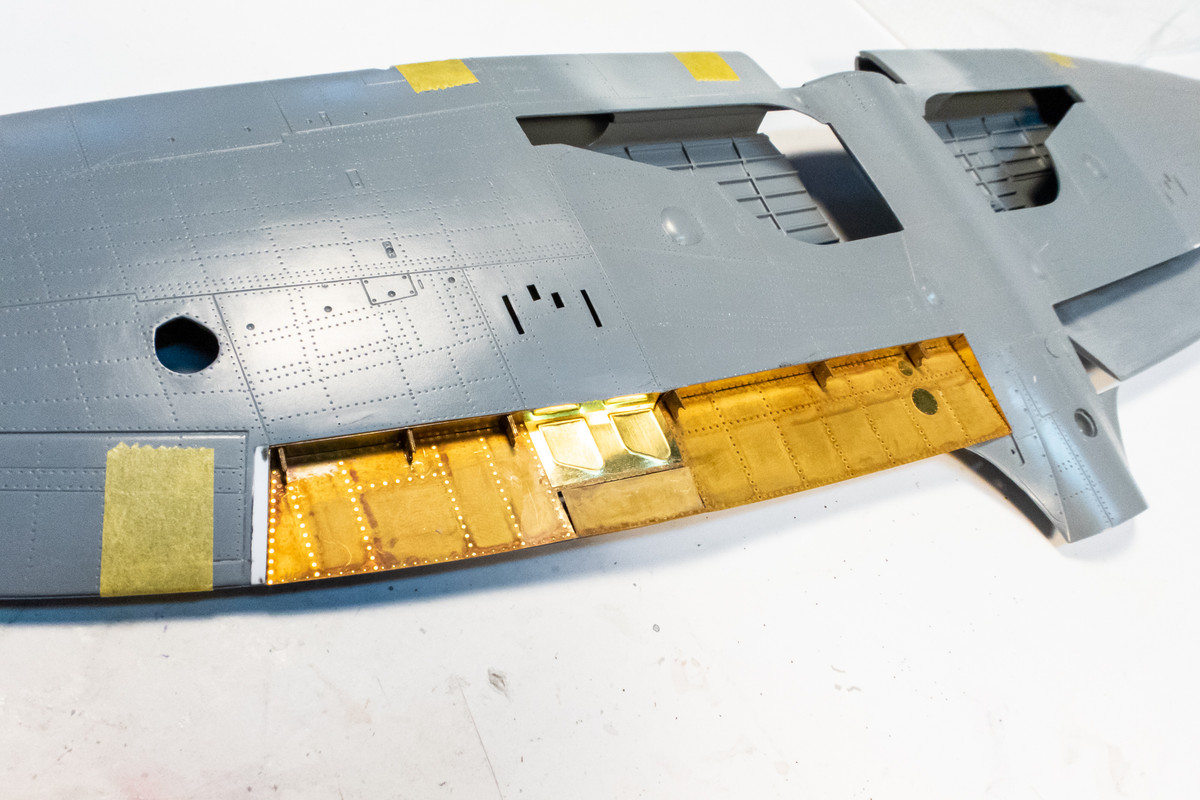
I made the correct cut on the port side.
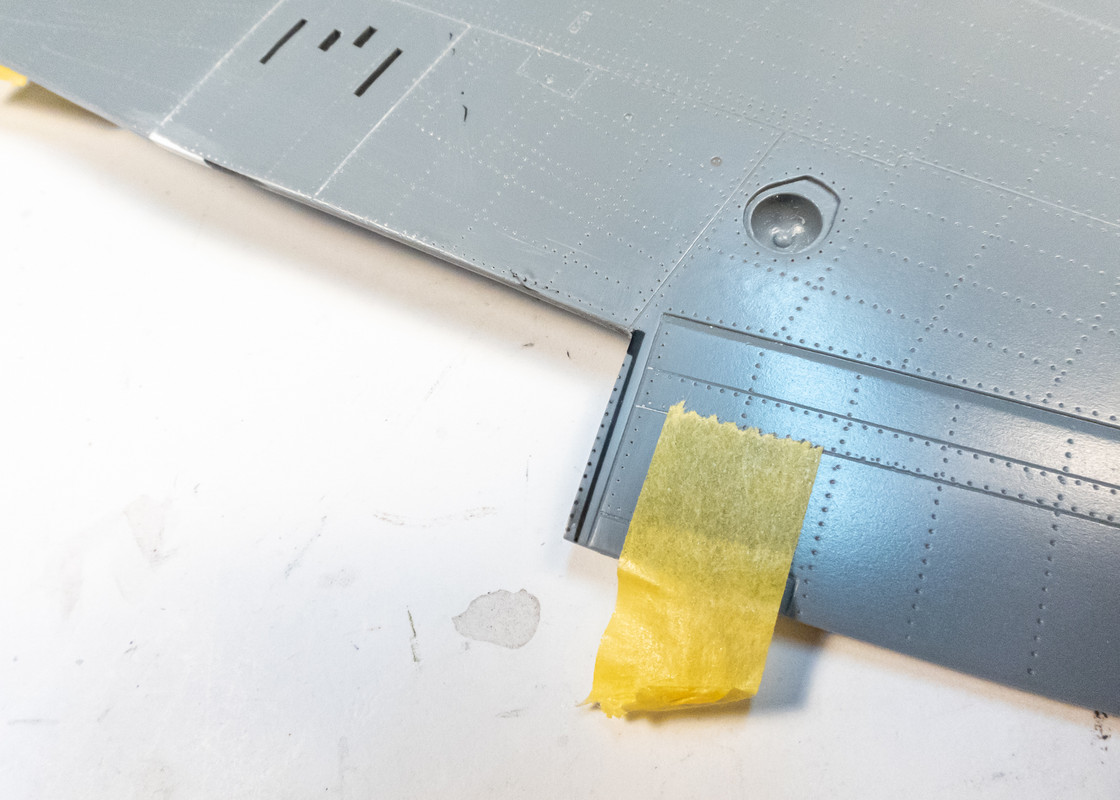
However, it was difficult to get the port upper flap into place without a slight kink. See how the middle section droops a little lower than the ends?
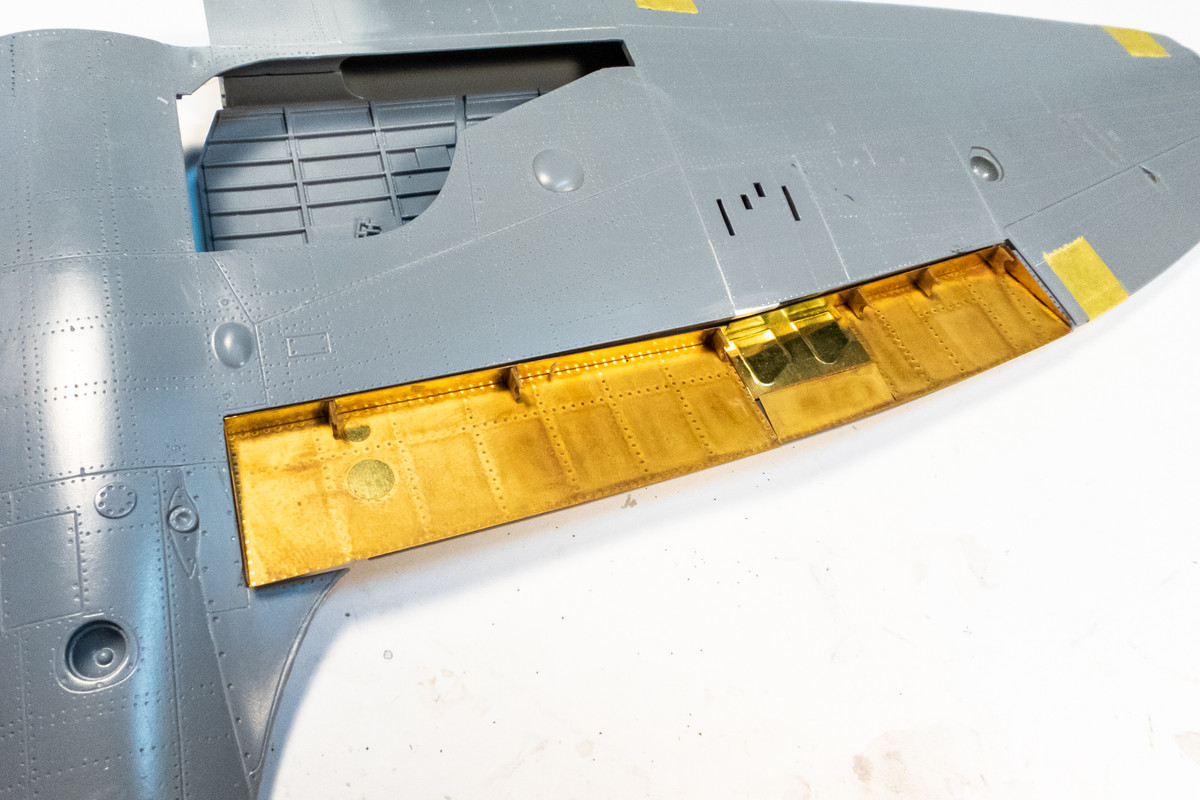
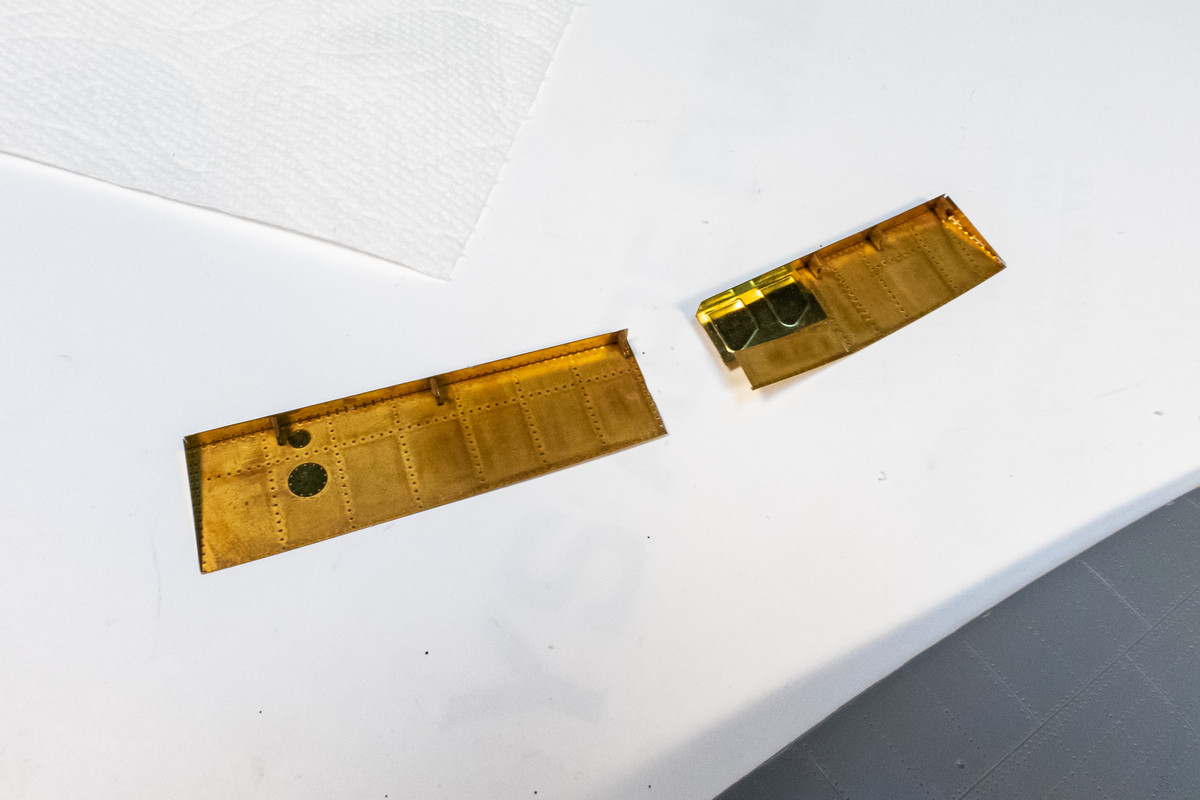
I decided to separate the upper flaps into two sections like the lower flaps.
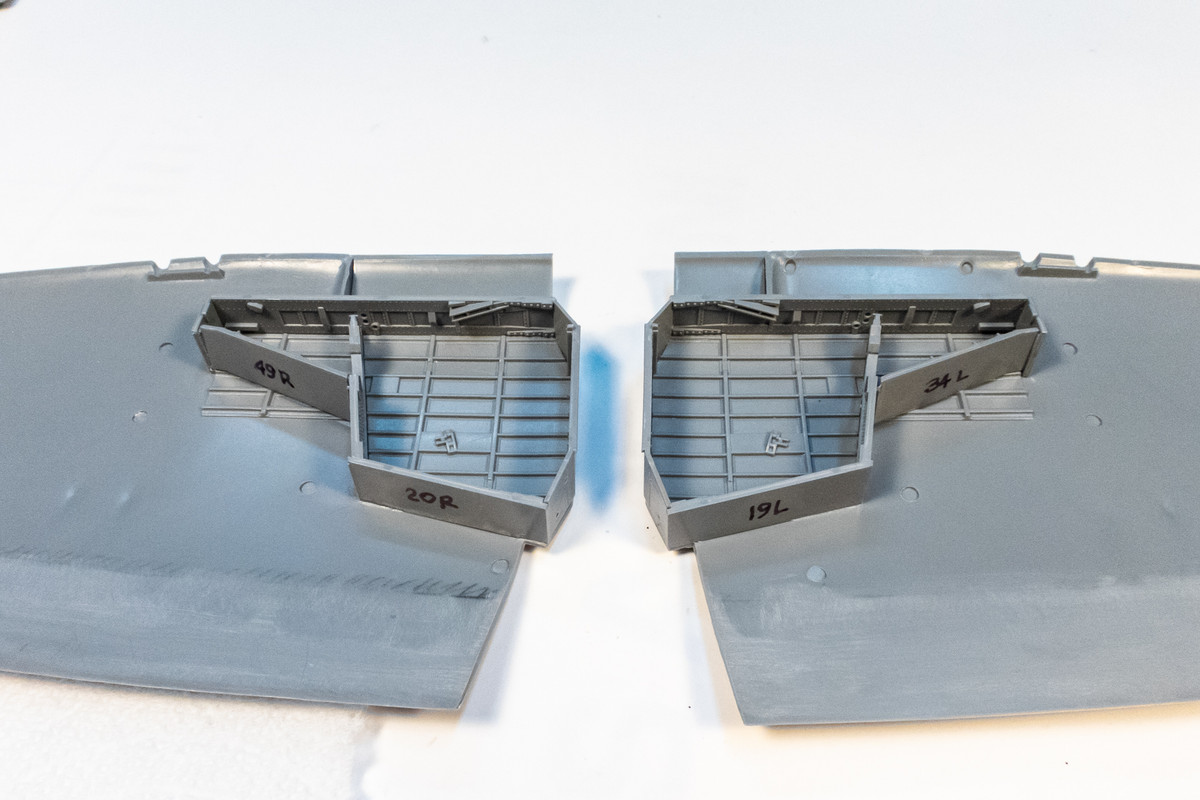
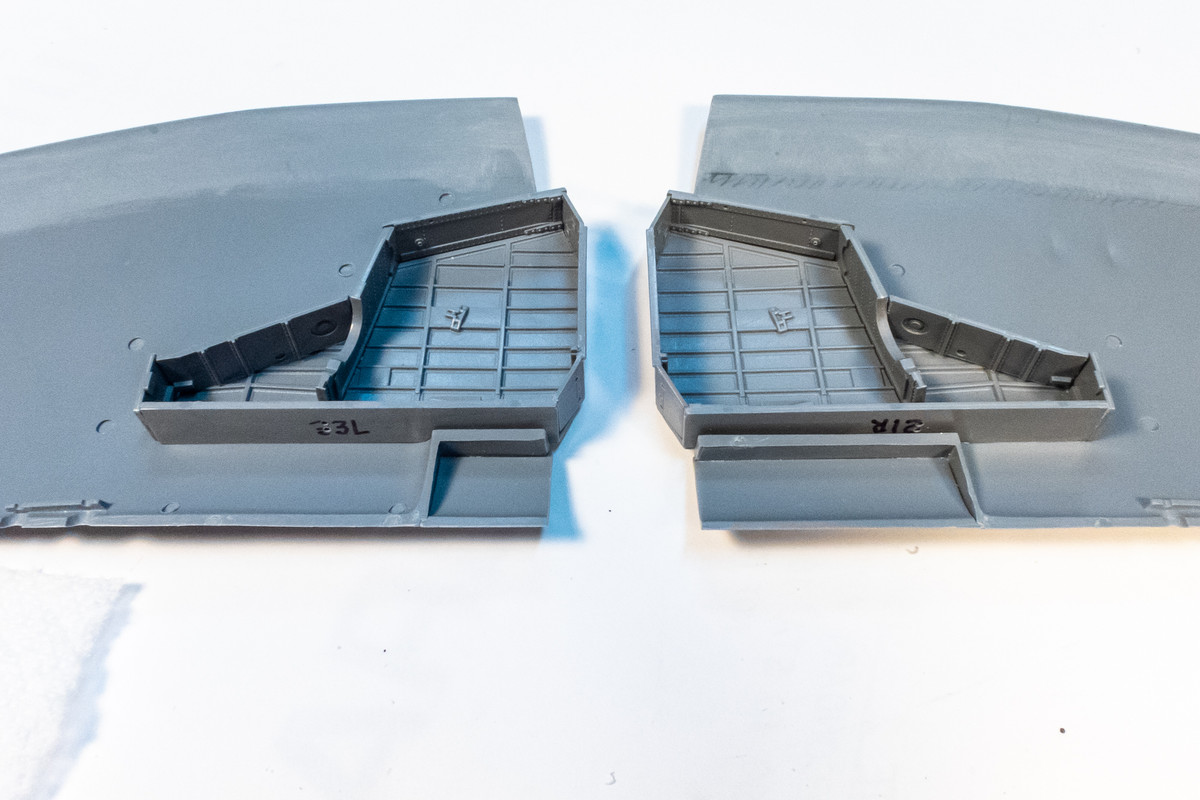
Once I was satisfied that the upper flaps would fit, I decided to glue the wheel walls into place. As Chuck540Z3 and others have pointed out, it is much easier to glue the walls into the upper wing instead of the lower wing. My copy of the instructions have already been corrected and the long front walls (H21 and H33) are correctly labelled (I think!).

The parts have been pre-drilled for wiring and numbered so I could keep track of them after cutting them off the sprue.
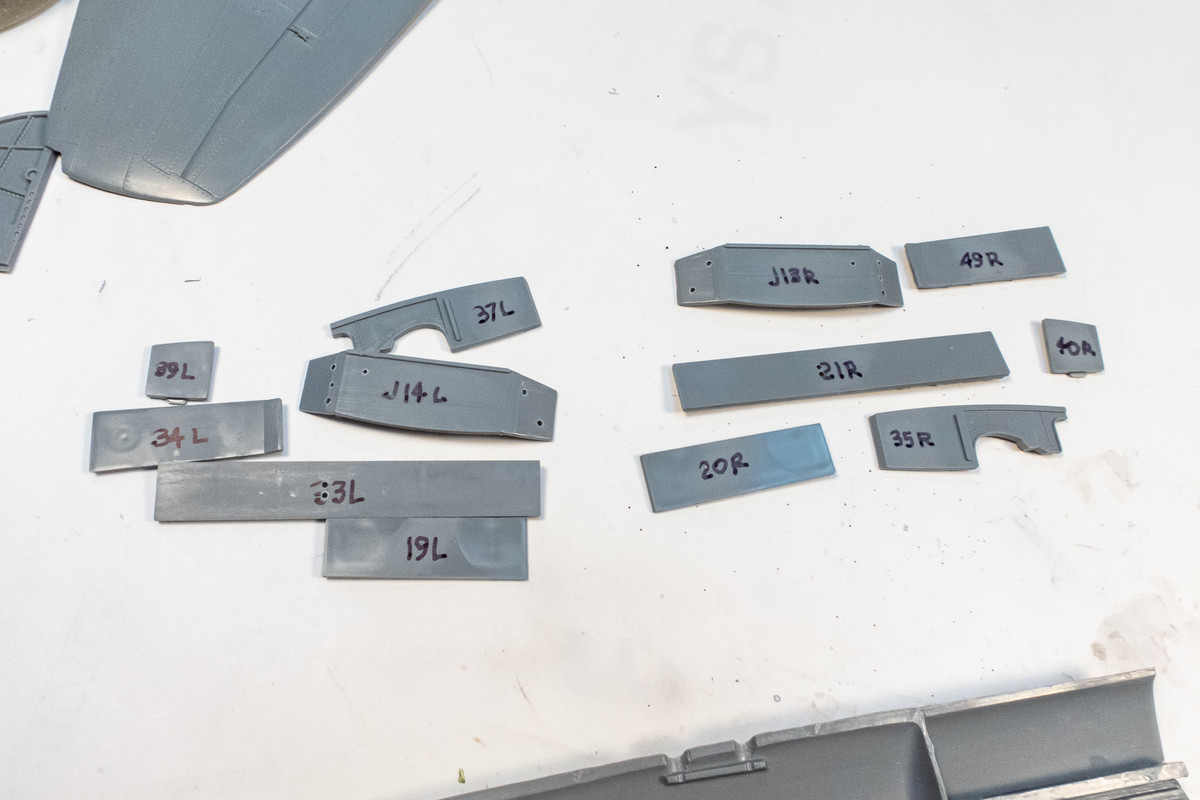
Like Chuck540Z3, I glued a couple of parts first and checked the fit by putting on the lower wings and made sure the walls fell into the correct grooves. I started with H21+J13 and H33+J14 since they seemed to have the most positive location aids. While the glue dried, I was able to slightly push and adjust the pieces so that the lower wing fit onto the upper wings.
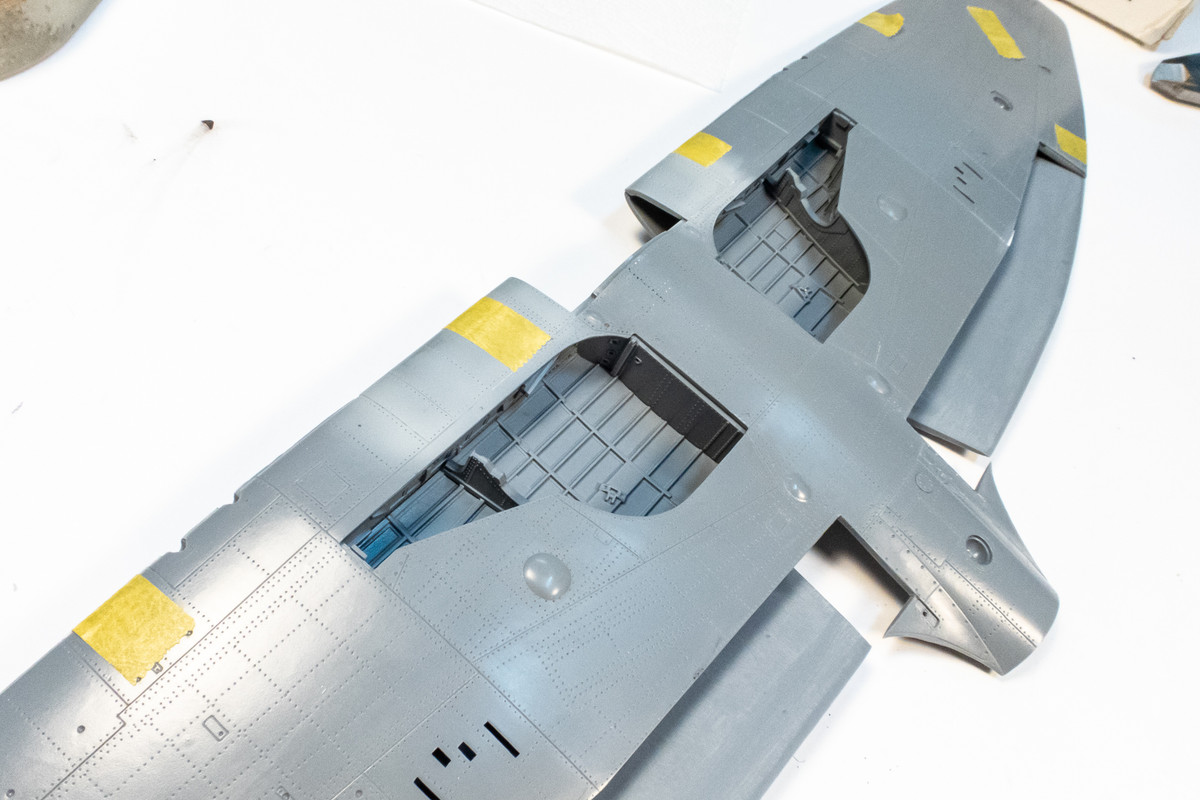
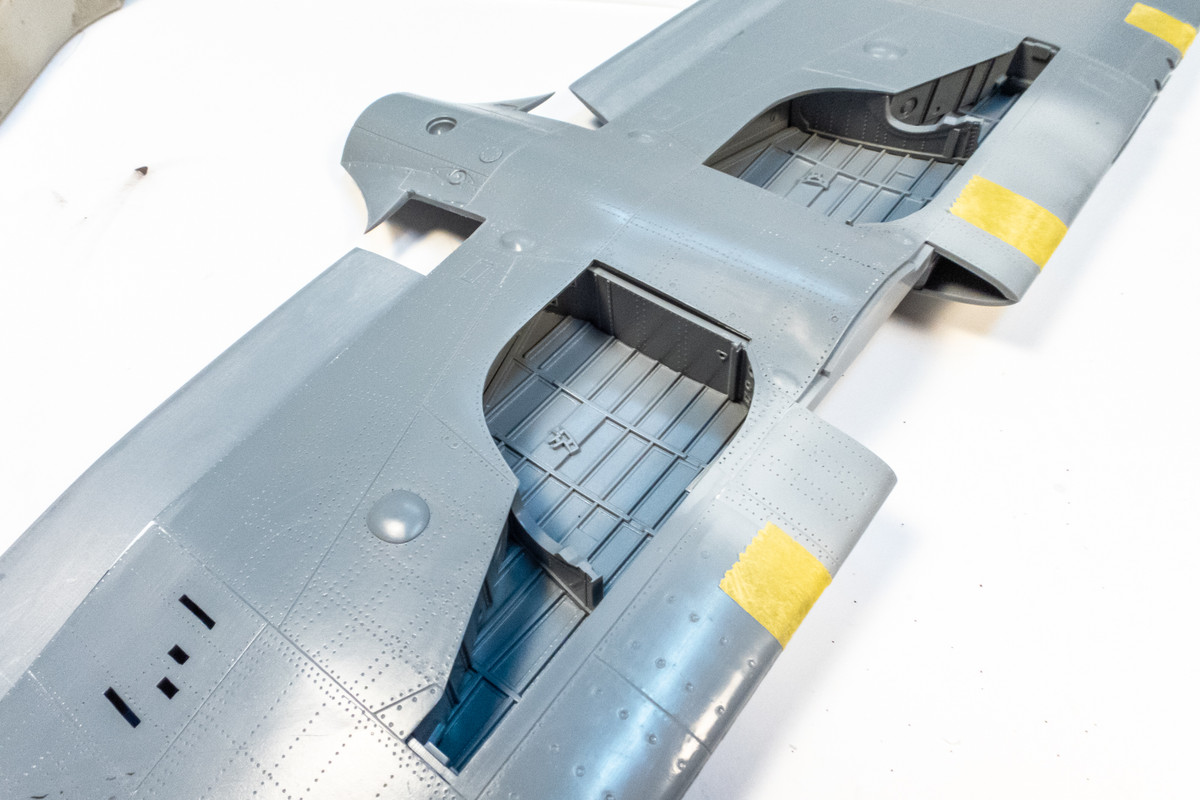
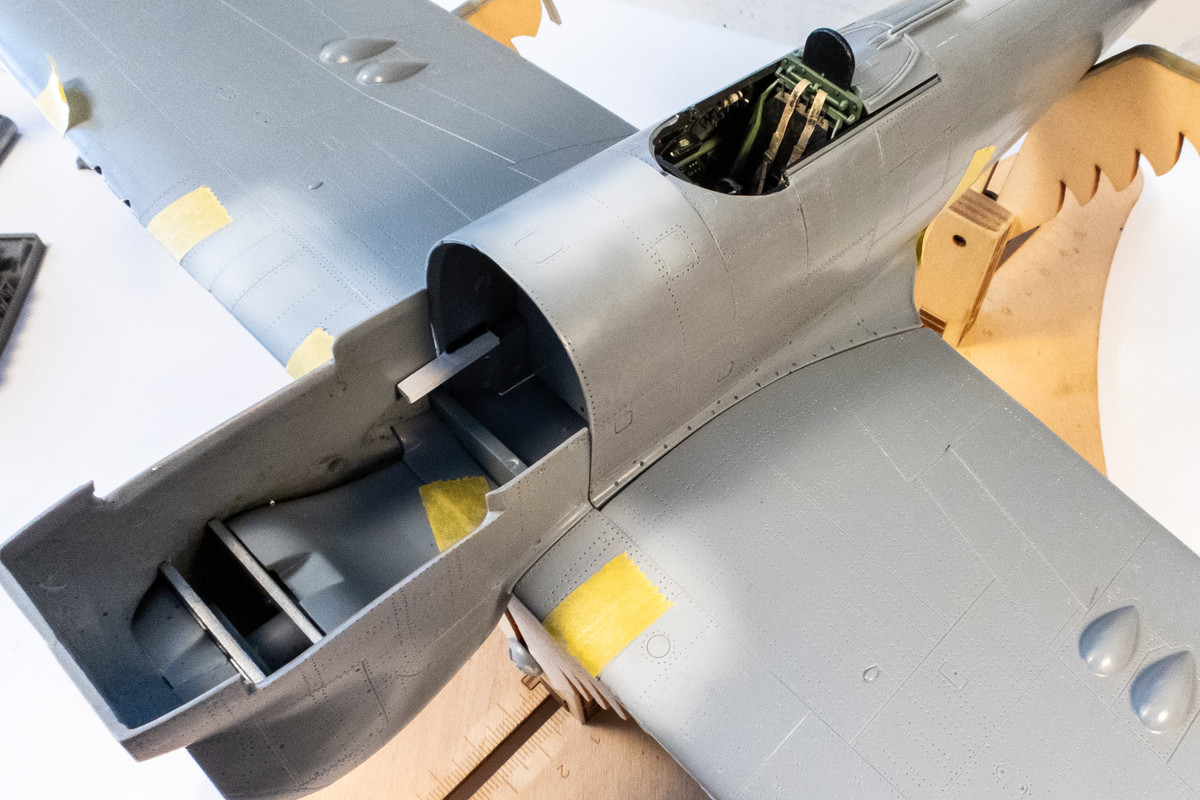
Curiously, I was able to fit the fuselage into place without having to sand either the cockpit cage or the wheel wells. However, that positive result may have come at the cost of issues elsewhere. One is the starboard wing. Snapping the upper wing into the lower wing and positively engaging the top walls of the wheels into all of the recesses of the upper wing shifts that upper wing slightly outward. The weird thing is that the wing root joint is pretty good despite this shift. But the wing cannon openings are now offset. The port side upper and lower wing fit ok but the wing root gap is bigger on this side. I'll have to take a closer look to see if I can rectify this situation without ripping the starboard wheel well apart.
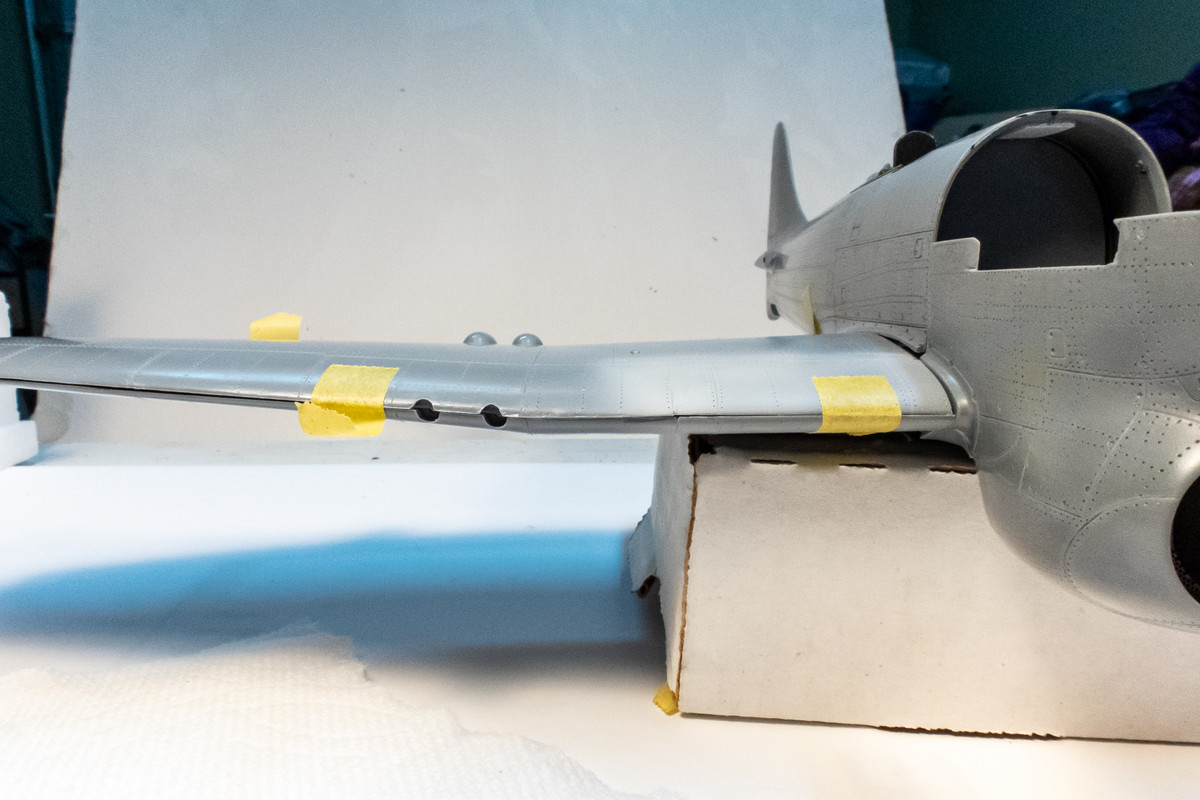
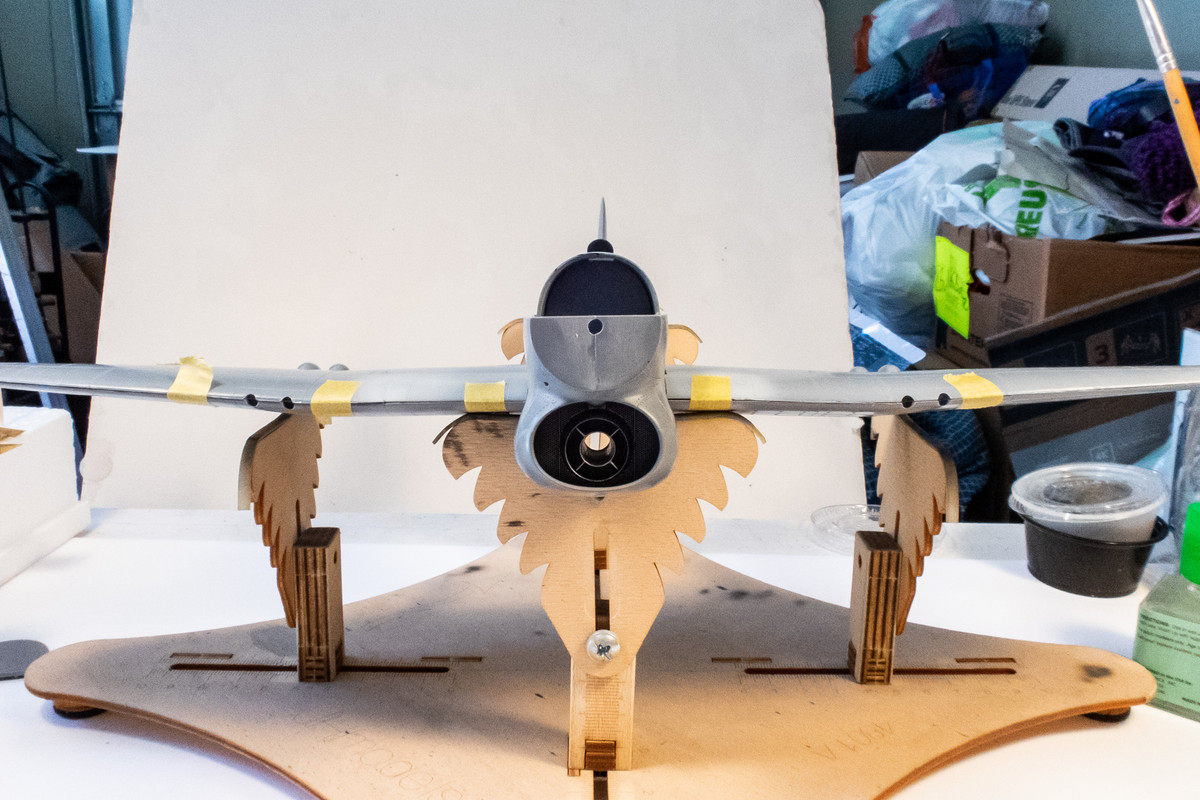
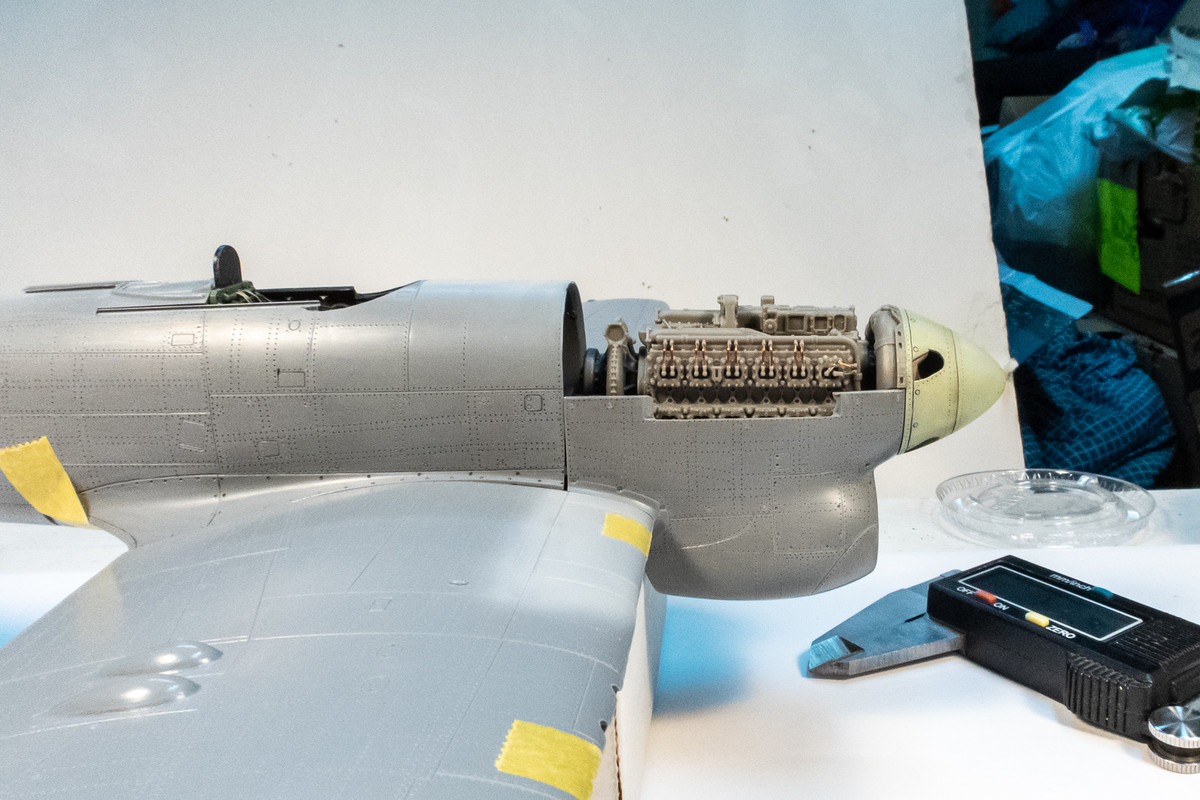
I slide the nose on just for kicks. Like I said, the fuselage slide into place onto the wings without having to make any sanding adjustments. It looks like the neutral dihedral of the bottom of the wing has been preserved and I don't see any indication that the cockpit is forcing the wings apart. Yes, the nose is a bit askew but it is just resting there without any tape. If this is an issue later on, I may be binning this one!
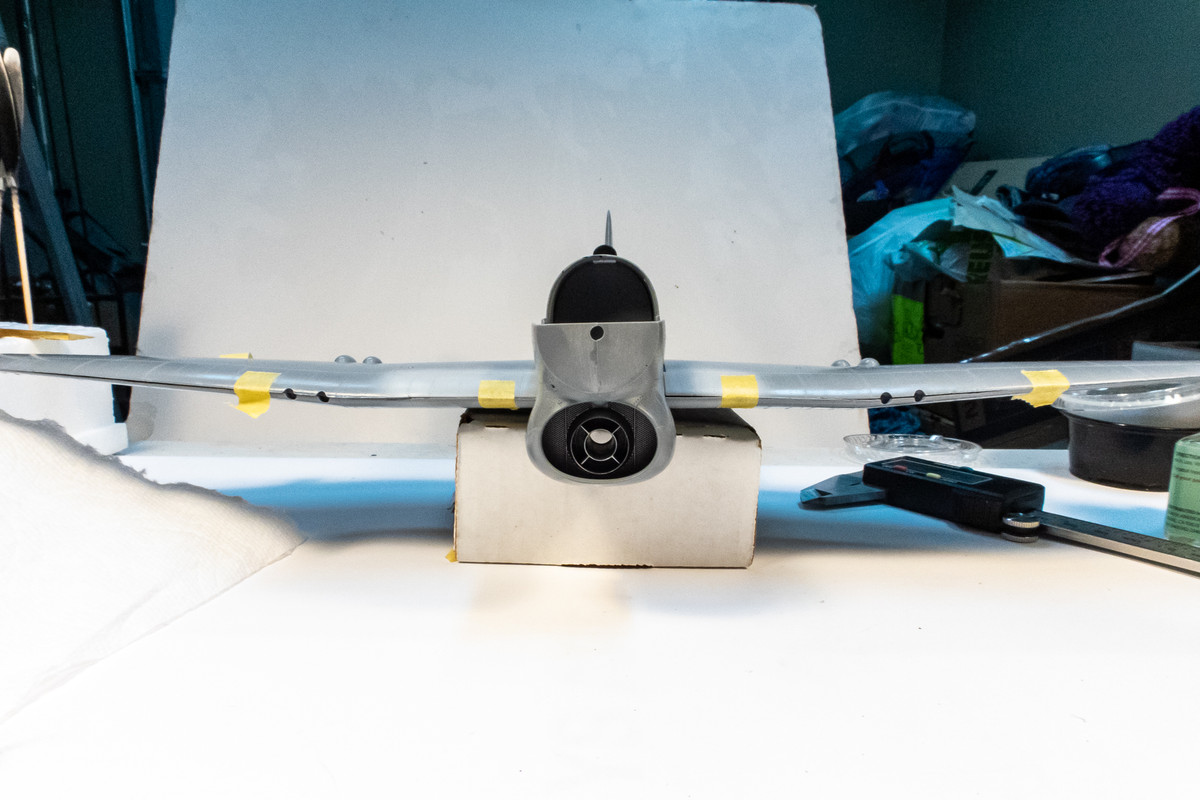
The shims that I added to the fuselage, which also serve as a rest for the engine block, maybe a tad too high but that's an easy adjustment to make.
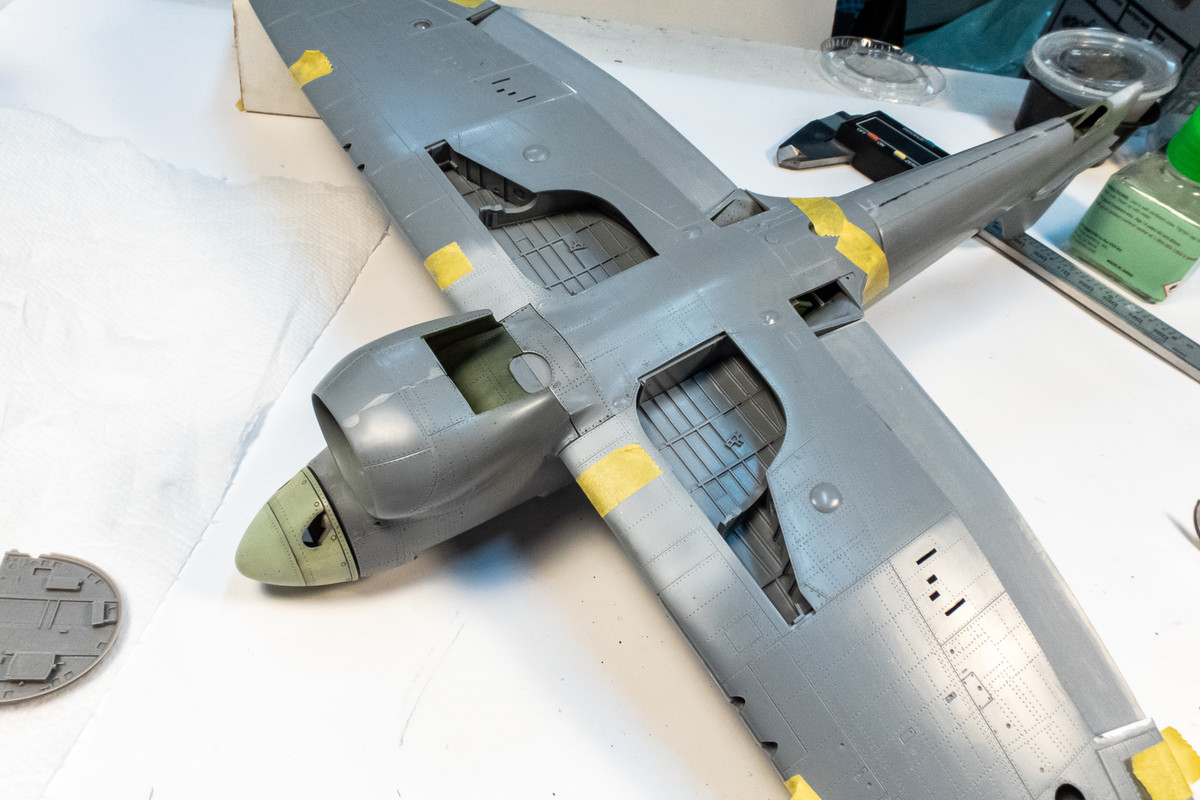
The fit on the bottom looks serviceable.


Do you ever feel like you added just one too man aftermarket items to a build? Lots of issues have started to pop up. Nothing huge but they're starting to take their toll!
I took a big step and cut off the kit lower flaps to make way for the brass replacements. Surprisingly, I was able to do it and keep the existing flaps intact!

After cutting the starboard side flaps off, I wanted to test the fit of the brass upper wing section and found I cut off a wee bit too much plastic. Not really fault because I simply followed the panel lines.


Well, maybe my fault... I think the Eduard instructions were warning me to leave a bit more plastic but I wasn't paying attention.

So I added a shim of sheet plastic and that seemed to work ok.


I made the correct cut on the port side.

However, it was difficult to get the port upper flap into place without a slight kink. See how the middle section droops a little lower than the ends?

I decided to separate the upper flaps into two sections like the lower flaps.

Once I was satisfied that the upper flaps would fit, I decided to glue the wheel walls into place. As Chuck540Z3 and others have pointed out, it is much easier to glue the walls into the upper wing instead of the lower wing. My copy of the instructions have already been corrected and the long front walls (H21 and H33) are correctly labelled (I think!).

The parts have been pre-drilled for wiring and numbered so I could keep track of them after cutting them off the sprue.

Like Chuck540Z3, I glued a couple of parts first and checked the fit by putting on the lower wings and made sure the walls fell into the correct grooves. I started with H21+J13 and H33+J14 since they seemed to have the most positive location aids. While the glue dried, I was able to slightly push and adjust the pieces so that the lower wing fit onto the upper wings.


Curiously, I was able to fit the fuselage into place without having to sand either the cockpit cage or the wheel wells. However, that positive result may have come at the cost of issues elsewhere. One is the starboard wing. Snapping the upper wing into the lower wing and positively engaging the top walls of the wheels into all of the recesses of the upper wing shifts that upper wing slightly outward. The weird thing is that the wing root joint is pretty good despite this shift. But the wing cannon openings are now offset. The port side upper and lower wing fit ok but the wing root gap is bigger on this side. I'll have to take a closer look to see if I can rectify this situation without ripping the starboard wheel well apart.

I slide the nose on just for kicks. Like I said, the fuselage slide into place onto the wings without having to make any sanding adjustments. It looks like the neutral dihedral of the bottom of the wing has been preserved and I don't see any indication that the cockpit is forcing the wings apart. Yes, the nose is a bit askew but it is just resting there without any tape. If this is an issue later on, I may be binning this one!

The shims that I added to the fuselage, which also serve as a rest for the engine block, maybe a tad too high but that's an easy adjustment to make.


The fit on the bottom looks serviceable.

Last edited by jkim on Wed Apr 20, 2022 2:15 pm, edited 1 time in total.
John aka JKim
-----------<><

-----------<><

Re: 1/32 Special Hobby Hawker Tempest Mk V
It's looking really good all dry fitted. Glad the shims you added took care of the flaps
March as one, Don't look back
Odin's sons... Attack!
Unleash hell! Do not repent! Warfare grants us no lament
Let your weapons slash and tear This is no place for fear
Hold the lines! Move as one! In unity our victory's won
Our shields will form a mighty wall
United we shall never fall
Odin's sons... Attack!
Unleash hell! Do not repent! Warfare grants us no lament
Let your weapons slash and tear This is no place for fear
Hold the lines! Move as one! In unity our victory's won
Our shields will form a mighty wall
United we shall never fall
Re: 1/32 Special Hobby Hawker Tempest Mk V
Wow, John! That’s a great job of “flaperating”! Gear bats look amazing so far....
This is fun, to watch!
To make each build less crappy than the last one. Or, put another way, "Better than the last one, not as good as the next one!"..
Re: 1/32 Special Hobby Hawker Tempest Mk V
Thanks guys! I'll be honest... thoughts of shelving this project did enter my mind. The wheel well issue, having to cut one of the flaps in two to make it fit, questions of how I'm going to attach the nose to the fuselage, wing root gaps, etc started taking its toll on my psyche. So last night before going to bed, I started trying to physically push the wheel well assembly into a position that allowed the wing halves to go together correctly. Kept pushing and pushing until.... yep... snap! Glue bond broke on one of the pieces. So... I wriggled loose ALL of the starboard wheel well parts, cleaned them up a tad and glued them in again, keeping in mind that I needed to slightly shift everything towards the wing tips. And ya know what... it worked. I think I can now get the starboard wing together without having that offset. It was late and I couldn't verify but I feel much better about things.
John aka JKim
-----------<><

-----------<><

Re: 1/32 Special Hobby Hawker Tempest Mk V
Here's what the wheel wells look like now... no visible change but starboard well has been dismantled and reassembled.


And a look at the front showing the cannon openings lining up much better now.

With the nose attached, there are some probable gaps that will need to be addressed but look fairly manageable.


It's still a ways off but I'm thinking about the resin engine. It is supposed to be attached to a bulkhead first but I am thinking about possibly gluing the bulkhead into the fuselage and plopping in the engine afterwards. This could possible ease painting but I would need to figure out a way that the engine can be securely attached in the right position.


And a look at the front showing the cannon openings lining up much better now.

With the nose attached, there are some probable gaps that will need to be addressed but look fairly manageable.


It's still a ways off but I'm thinking about the resin engine. It is supposed to be attached to a bulkhead first but I am thinking about possibly gluing the bulkhead into the fuselage and plopping in the engine afterwards. This could possible ease painting but I would need to figure out a way that the engine can be securely attached in the right position.

John aka JKim
-----------<><

-----------<><

- Medicman71
- Elite Member
- Posts: 11292
- Joined: Mon Apr 07, 2014 9:32 am
- Location: Houston, Tx
Re: 1/32 Special Hobby Hawker Tempest Mk V
Wow! Nice save on the wing!
Mike
Sponsored by Boeing, Lockheed Martin, Northrop Grumman, Saab, BAE, and Dassault
- BlackSheep214
- Elite Member
- Posts: 13409
- Joined: Sun Apr 06, 2014 8:47 pm
Re: 1/32 Special Hobby Hawker Tempest Mk V
When there’s a will, there’s a way. And you found the solution to everything that’s thrown at you. Well done!

“Who controls the skies, controls the fate of this Earth”
Author unknown- 352nd Fighter Group, Blue-Nosed Bastards of Bodney
“Send one plane it’s a sortie; send two planes it’s a flight; send four planes it’s a test of airpower. - Richard Kohn
Author unknown- 352nd Fighter Group, Blue-Nosed Bastards of Bodney
“Send one plane it’s a sortie; send two planes it’s a flight; send four planes it’s a test of airpower. - Richard Kohn
Re: 1/32 Special Hobby Hawker Tempest Mk V
Awesome you found a solution. I don't see any gaps that are bad enough to really worry about with your skill.
March as one, Don't look back
Odin's sons... Attack!
Unleash hell! Do not repent! Warfare grants us no lament
Let your weapons slash and tear This is no place for fear
Hold the lines! Move as one! In unity our victory's won
Our shields will form a mighty wall
United we shall never fall
Odin's sons... Attack!
Unleash hell! Do not repent! Warfare grants us no lament
Let your weapons slash and tear This is no place for fear
Hold the lines! Move as one! In unity our victory's won
Our shields will form a mighty wall
United we shall never fall
Re: 1/32 Special Hobby Hawker Tempest Mk V
Nice work. Special Hobby kits have always been a challenge for me.
Thanks,
John
John