
Hasegawa 1/32 Fw 190D-9 Brown 4
-
Stikpusher

- Moderator
- Posts: 21386
- Joined: Sat Apr 05, 2014 8:37 pm
- Location: Ceti Alpha 5
Re: Hasegawa 1/32 Fw 190D-9 Brown 4
Beautifully busy up above the wheel well!
"Surely I have made my meaning plain? I intend to avenge myself upon you, Admiral. I have deprived your ship of power, and when I swing 'round, I intend to deprive you of your life."
FLSM
FLSM

Re: Hasegawa 1/32 Fw 190D-9 Brown 4
Thanks guys! Just easing back into the model building slowly. Here is the wing join after an initial going over with the a rotary tool to reduce the lip.
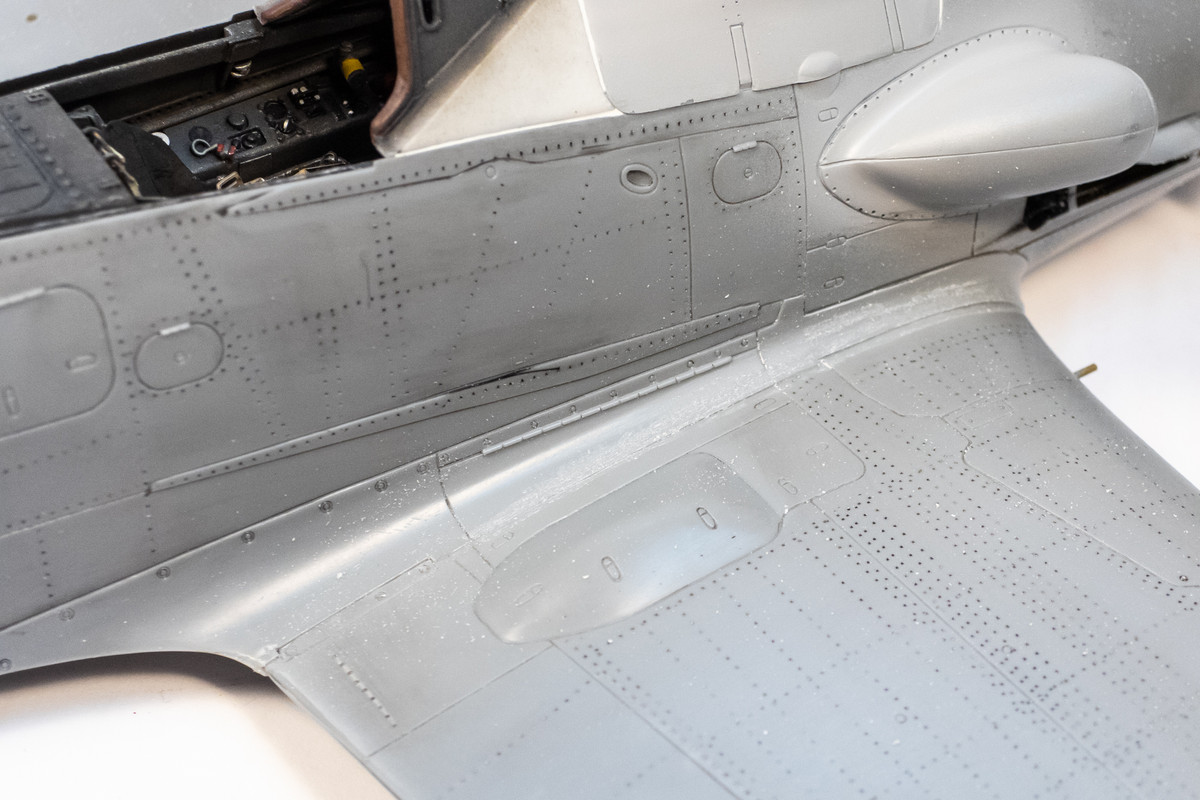
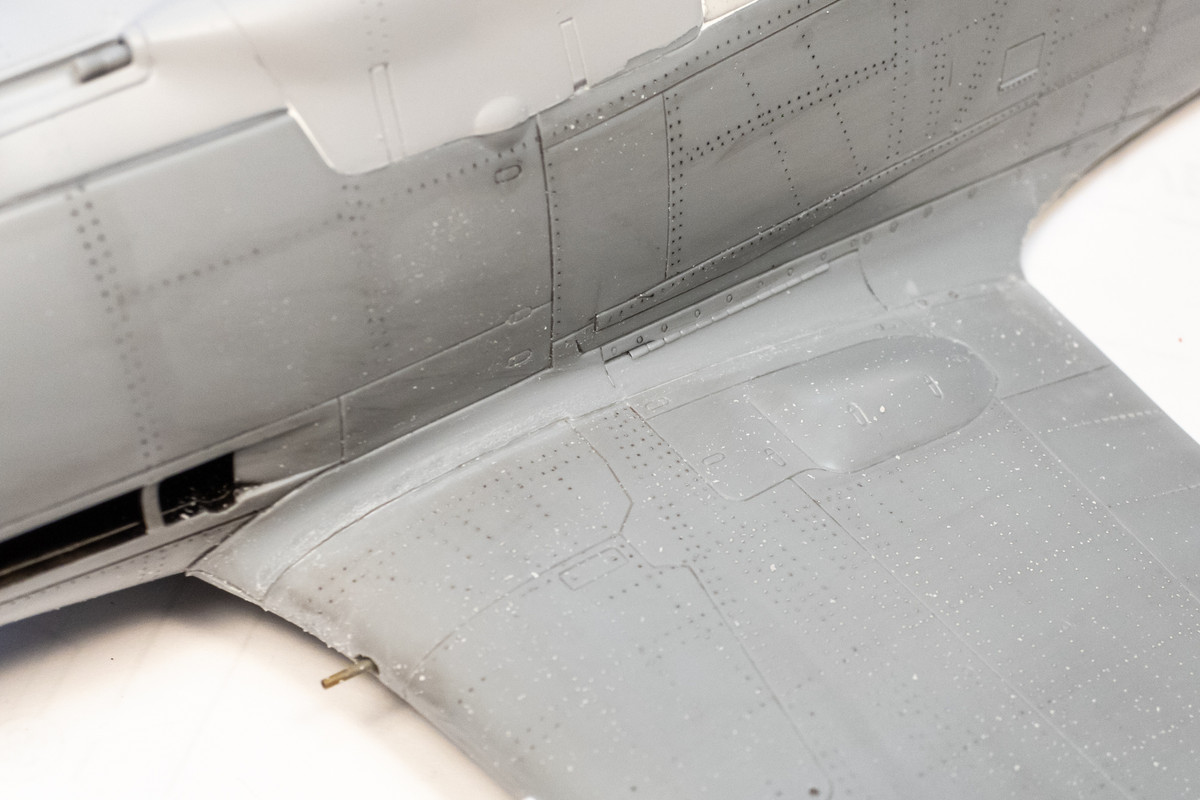
White Milliput is used for the initial putty application. Instead of smoothing it out with water like I normally do, I elected to use the tip of a toothpick like a spatula to apply. Smoothing it out with water tends to push the putty down into the gap even below the surface level of the plastic and I didn't want to push the putty that deep here.
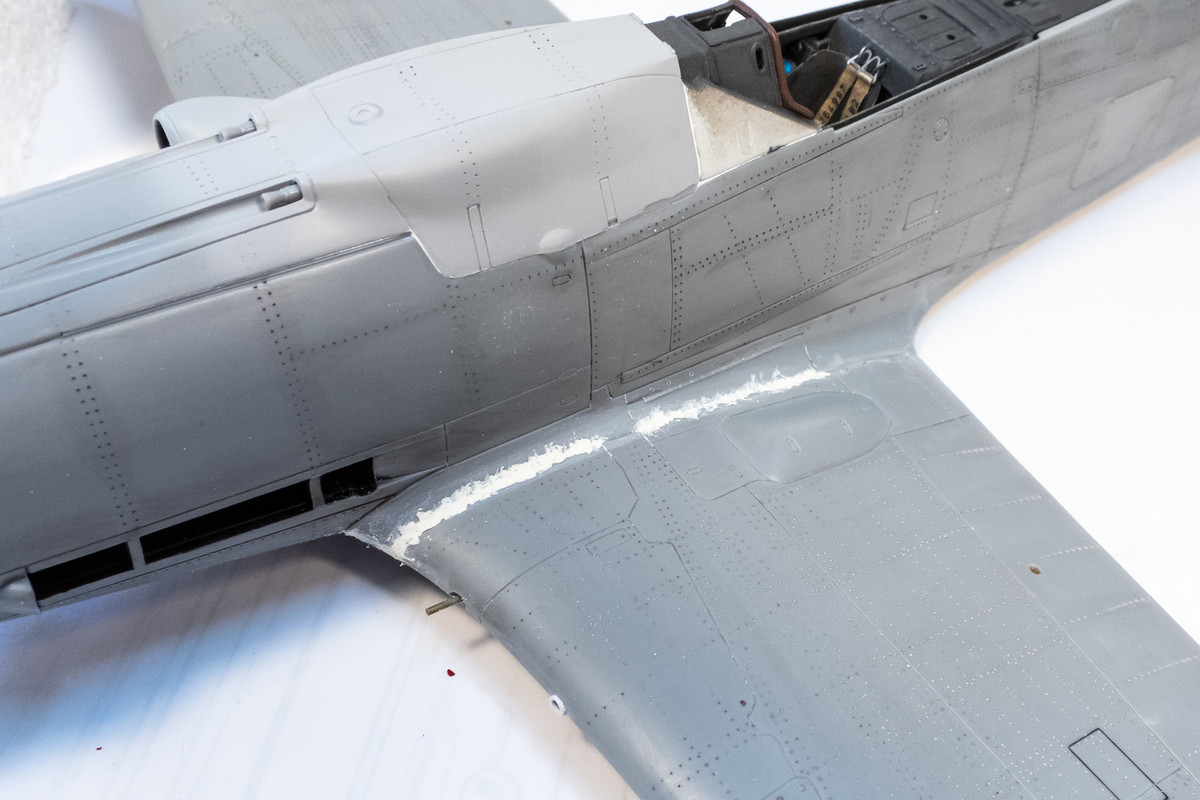
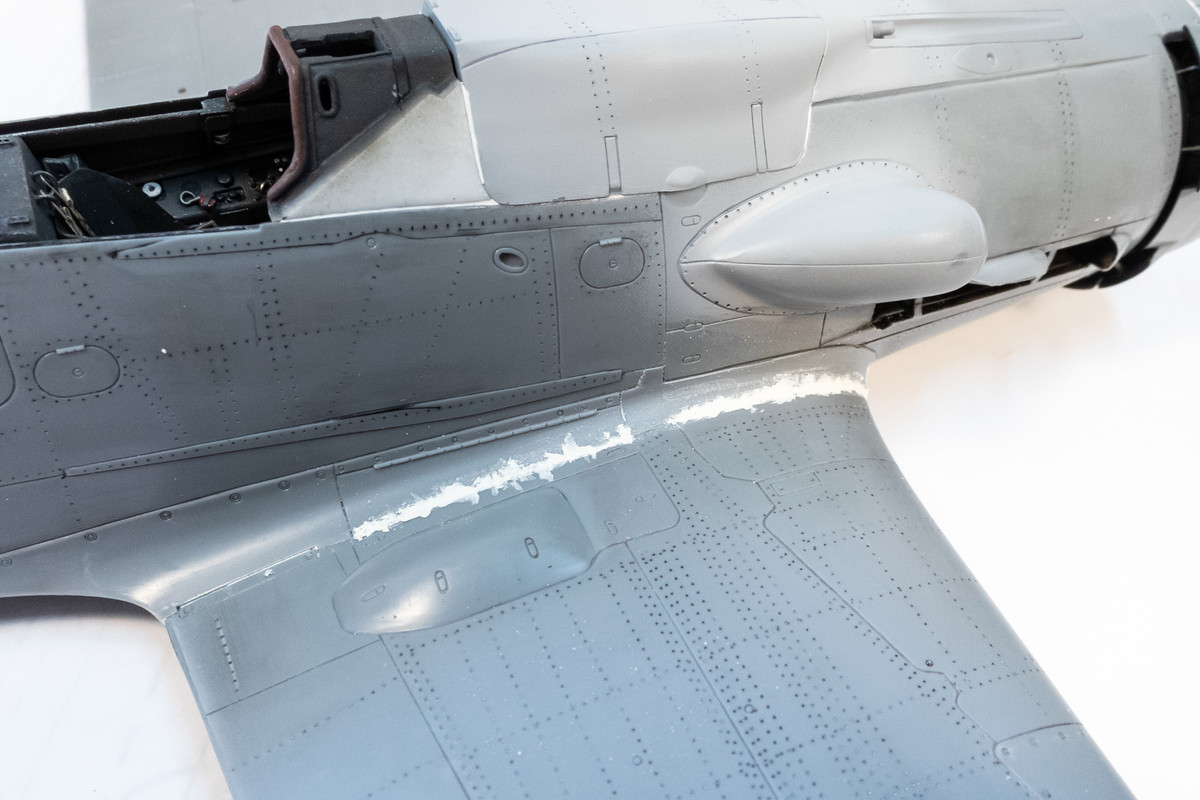
Milliput takes a long time to do dry so I futzed around with the Henri Daehne prop in the meantime. I've decided to glue together the hub components first for painting and then attach the prop blades last.
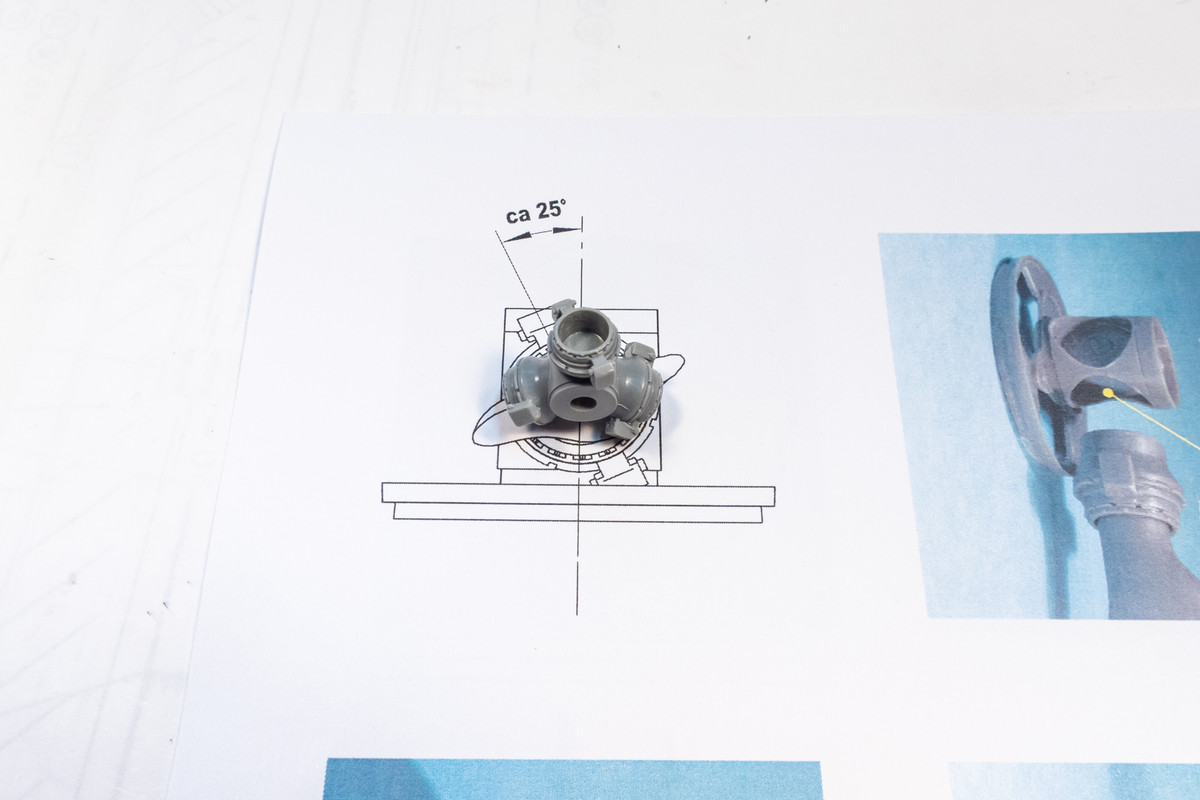
Here is the hub all glued together. Remember... there is a small magnet hiding under the front tip of the hub to hold the spinner cap in place.

I wanted to mask off the glue contact area on the backplate. The donut-shaped mask can be fashioned in a number of ways but I chose to use the Silhouette Portrait cutter for this.
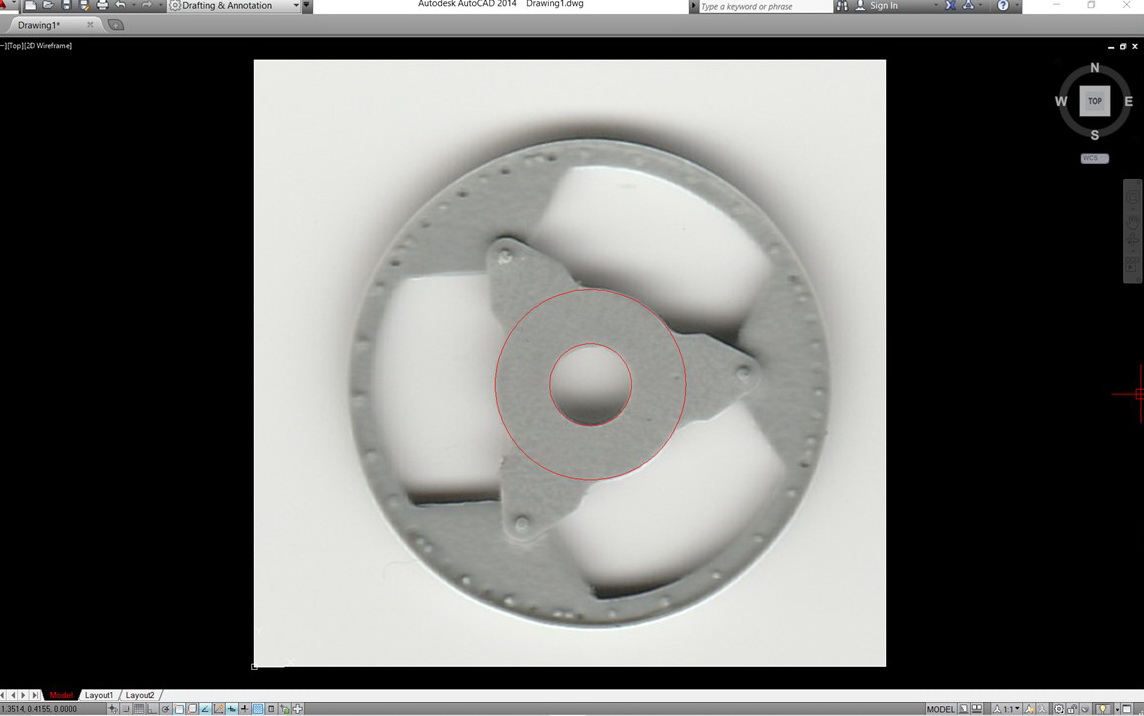
I scanned the backplate part and imported the photo into AutoCAD. I've found that scanned photos import into AutoCAD at a 1:1 scale. So I don't have to measure the part and scale it accordingly in CAD... one less scaling exercise to deal with. Once it is imported, it's very easy to draw shapes onto the photo. The red circles represent the mask that I want to produce. A box is drawn around the mask using 1" or 0.5" increments. You need to do this because the mask will need to be re-sized correctly after it is imported into the Silhouette Software.
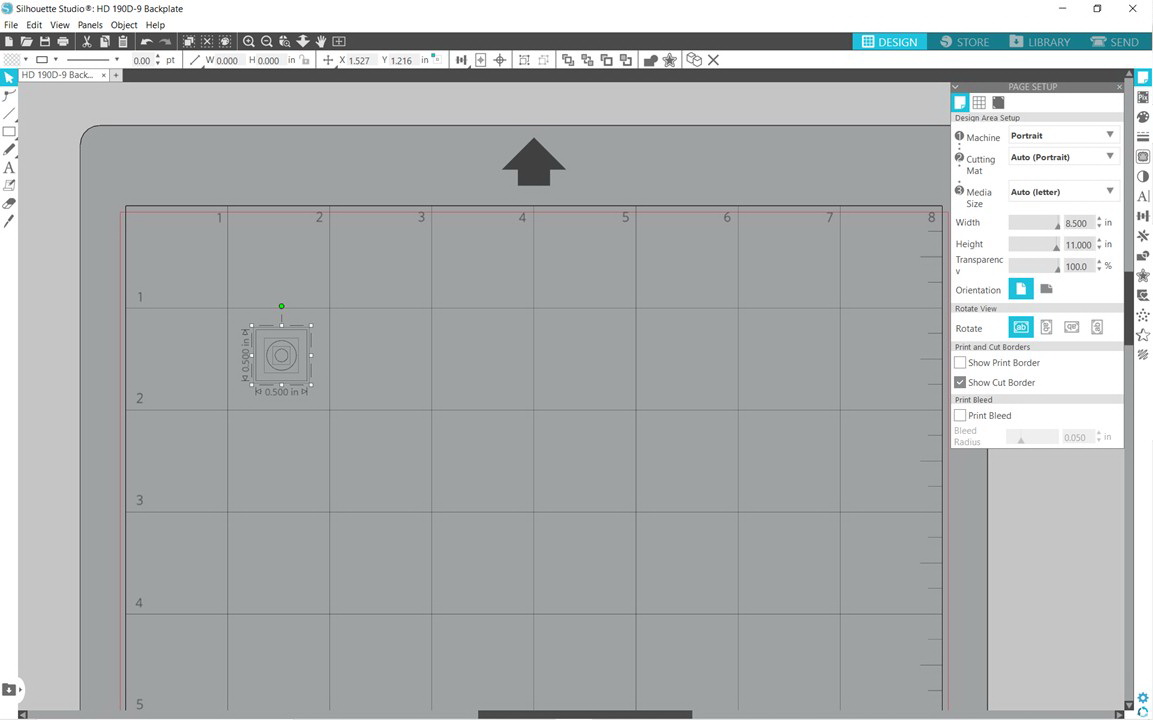
The scanned photo is removed and the drawing is saved as a DXF file and then opened in the Silhouette software. I drew a 0.5" x 0.5" box around the mask so it is re-sized to that dimension in the Silhouette software. Now you just put a piece of masking material onto the cutting board and send the job to the Portrait cutter.
I used a sheet of yellow Tamiya masking material for this particular mask.
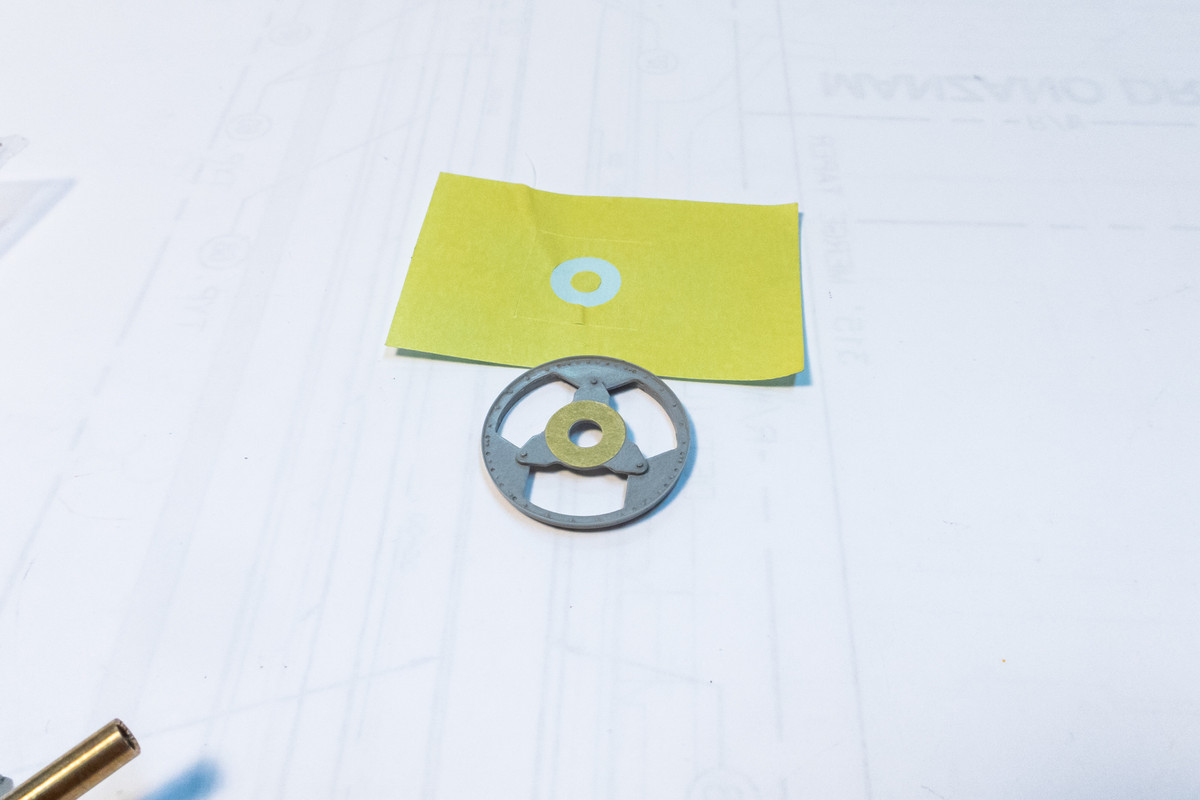
There are different ways to produce masks using a craft cutter like the Portrait. I know that not everyone has access or is familiar with a CAD program but since I am, producing custom cut masks is relatively easy.
White Milliput is used for the initial putty application. Instead of smoothing it out with water like I normally do, I elected to use the tip of a toothpick like a spatula to apply. Smoothing it out with water tends to push the putty down into the gap even below the surface level of the plastic and I didn't want to push the putty that deep here.
Milliput takes a long time to do dry so I futzed around with the Henri Daehne prop in the meantime. I've decided to glue together the hub components first for painting and then attach the prop blades last.
Here is the hub all glued together. Remember... there is a small magnet hiding under the front tip of the hub to hold the spinner cap in place.
I wanted to mask off the glue contact area on the backplate. The donut-shaped mask can be fashioned in a number of ways but I chose to use the Silhouette Portrait cutter for this.
I scanned the backplate part and imported the photo into AutoCAD. I've found that scanned photos import into AutoCAD at a 1:1 scale. So I don't have to measure the part and scale it accordingly in CAD... one less scaling exercise to deal with. Once it is imported, it's very easy to draw shapes onto the photo. The red circles represent the mask that I want to produce. A box is drawn around the mask using 1" or 0.5" increments. You need to do this because the mask will need to be re-sized correctly after it is imported into the Silhouette Software.
The scanned photo is removed and the drawing is saved as a DXF file and then opened in the Silhouette software. I drew a 0.5" x 0.5" box around the mask so it is re-sized to that dimension in the Silhouette software. Now you just put a piece of masking material onto the cutting board and send the job to the Portrait cutter.
I used a sheet of yellow Tamiya masking material for this particular mask.
There are different ways to produce masks using a craft cutter like the Portrait. I know that not everyone has access or is familiar with a CAD program but since I am, producing custom cut masks is relatively easy.
John aka JKim
-----------<><

-----------<><
-
jeaton01

- Elite Member
- Posts: 2374
- Joined: Thu Apr 23, 2020 9:20 am
- Location: Northern California
- Contact:
Re: Hasegawa 1/32 Fw 190D-9 Brown 4
John, there are settings in the Silhouette software, at least the version I use, that imports a dxf file at actual size. Go to preferences, then import settings, select as is.

Re: Hasegawa 1/32 Fw 190D-9 Brown 4
It’s good to be back, and it’s doubly-good to see you working on another FW. The time, dedication, and attention to detail you put into these is inspiring. I was looking over the thread earlier and admiring the work you put into the gear bays, and the visible wiring. Beautiful effect you’ve achieved. Great stuff, truly.
Kenny X
Head Mother Trucker In-Charge @ Kenny X’s Reichs Winzigkleines Flugzeugewerks *and now* Airboat Records, too!
Head Mother Trucker In-Charge @ Kenny X’s Reichs Winzigkleines Flugzeugewerks *and now* Airboat Records, too!

Re: Hasegawa 1/32 Fw 190D-9 Brown 4
If there'd be water in your wheel bay one could dive for pearls in it.
Cheers,
Torben
Torben
Re: Hasegawa 1/32 Fw 190D-9 Brown 4
Thanks guys! Appreciate the feedback!
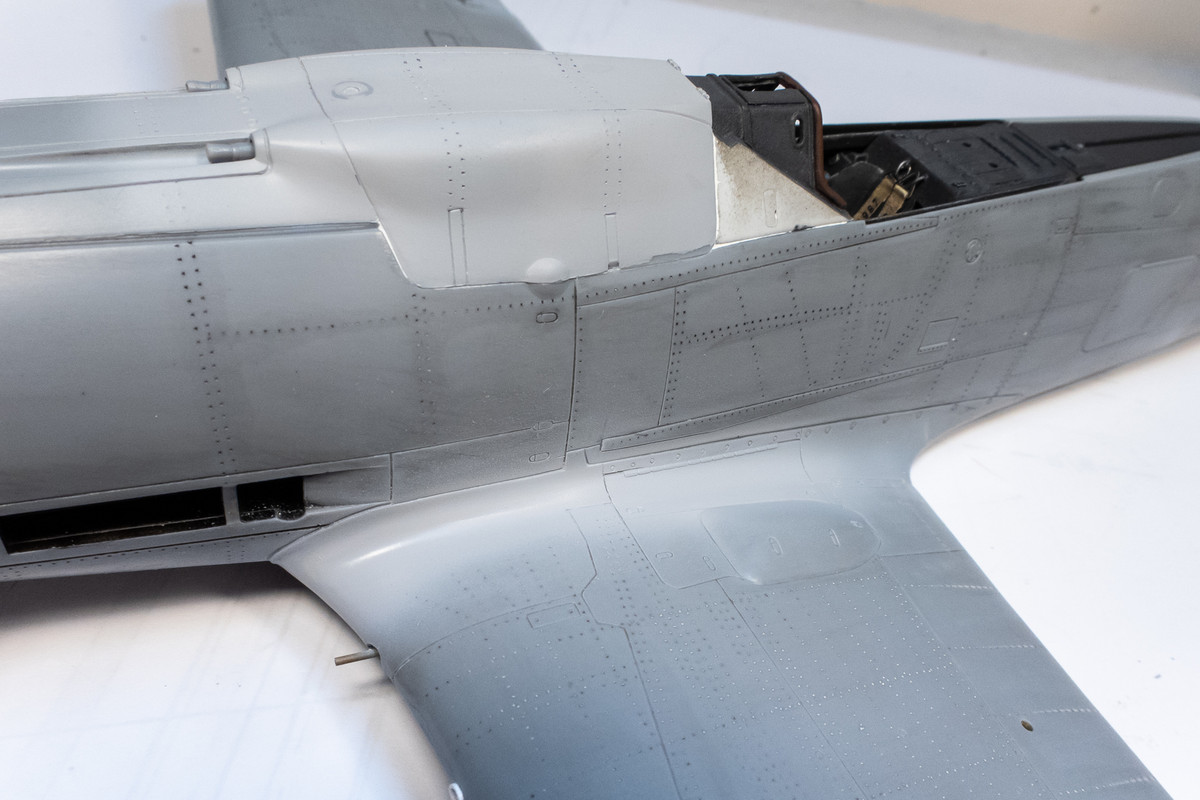
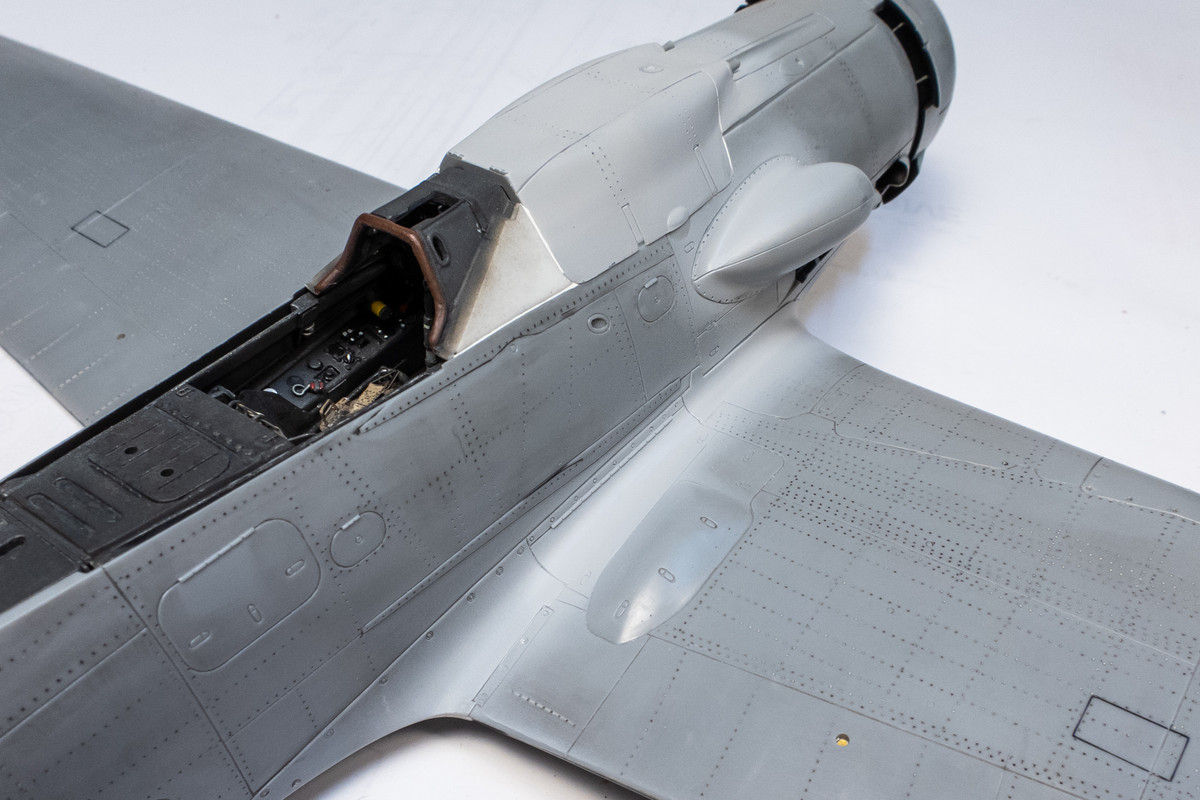
Slowly addressing the wing root gaps. After the White Milliput, I applied and sanded progressively thinner coats of Mr Surfacer 1000 (three applications total). I'm restricting my primer coats to the joints only because the primer tends to clog the rivet holes.
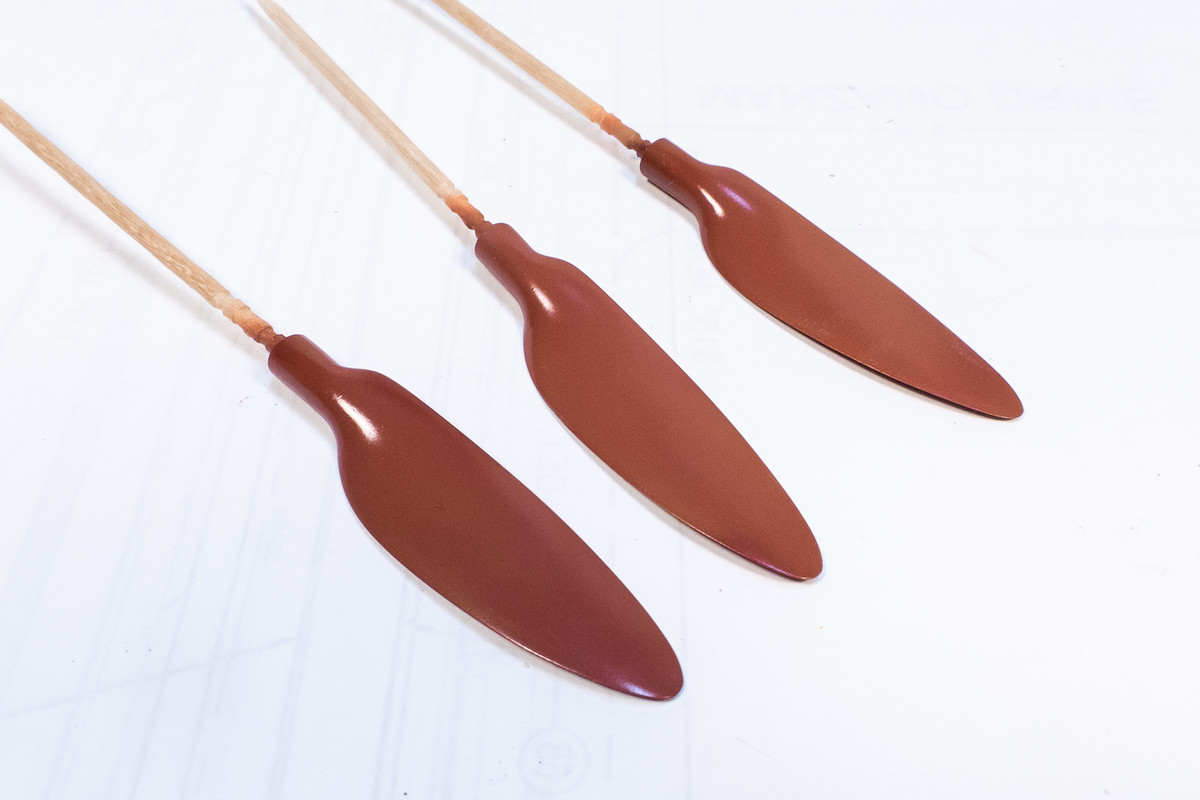
Here is my stab as establishing the wood base for the prop blades. Reddish brown base streaked with darker oils to simulate wood grain.

The wood grain is applied to the backs only as the tips will be weathered enough to make out the grain (hopefully). The fronts will feature very light spot chipping only.
Oh man... I got really excited about this when I read it. It would simplify the Silhouette workflow even more but... it didn't work for me. For whatever reason the units that I work in AutoCAD when I import my photos does not correspond to 1:1 when I import the DXF into the Silhouette software. It comes in REALLY REALLY small. There may be scale factor involved, which I'll investigate. Hopefully something easy like 12:1 conversion from inches to feet???jeaton01 wrote:John, there are settings in the Silhouette software, at least the version I use, that imports a dxf file at actual size. Go to preferences, then import settings, select as is.
Slowly addressing the wing root gaps. After the White Milliput, I applied and sanded progressively thinner coats of Mr Surfacer 1000 (three applications total). I'm restricting my primer coats to the joints only because the primer tends to clog the rivet holes.
Here is my stab as establishing the wood base for the prop blades. Reddish brown base streaked with darker oils to simulate wood grain.
The wood grain is applied to the backs only as the tips will be weathered enough to make out the grain (hopefully). The fronts will feature very light spot chipping only.
John aka JKim
-----------<><
-----------<><

Re: Hasegawa 1/32 Fw 190D-9 Brown 4
Those prop blades look really good!
- Kari
- Kari
---
On the bench:
Eduard 1:48 - Fokker D.VII OAW
https://www.facebook.com/GrundAsk-Scale ... 721218708/
On the bench:
Eduard 1:48 - Fokker D.VII OAW
https://www.facebook.com/GrundAsk-Scale ... 721218708/
Re: Hasegawa 1/32 Fw 190D-9 Brown 4
Thank you Kari!
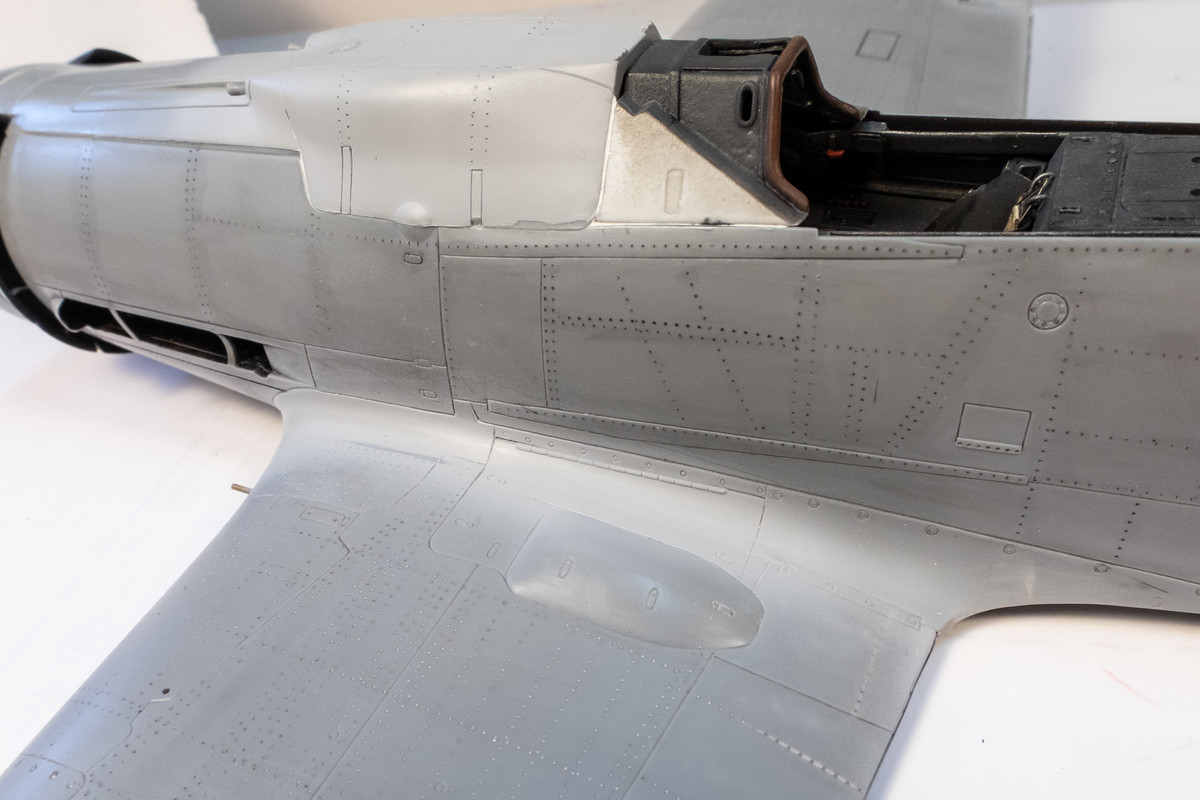
The primer revealed some ghost seams along the wing root that needed to be addressed with finer grit sandpaper.
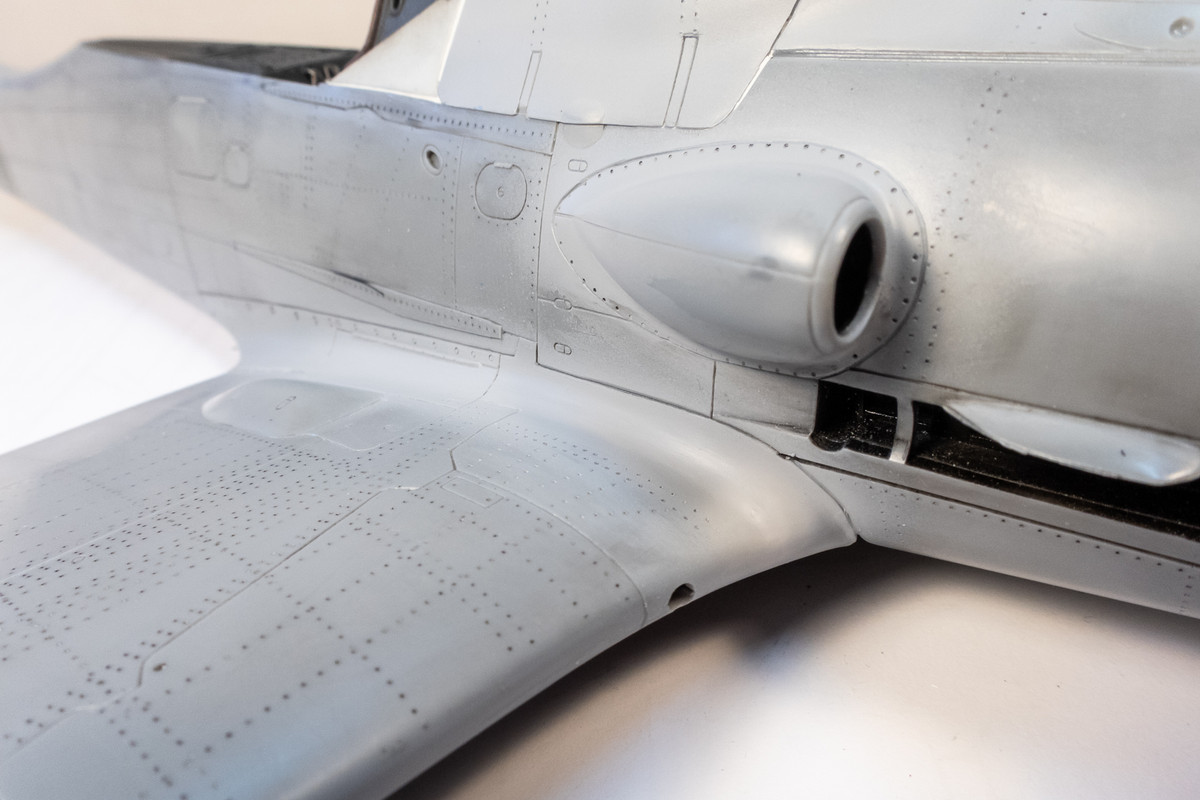
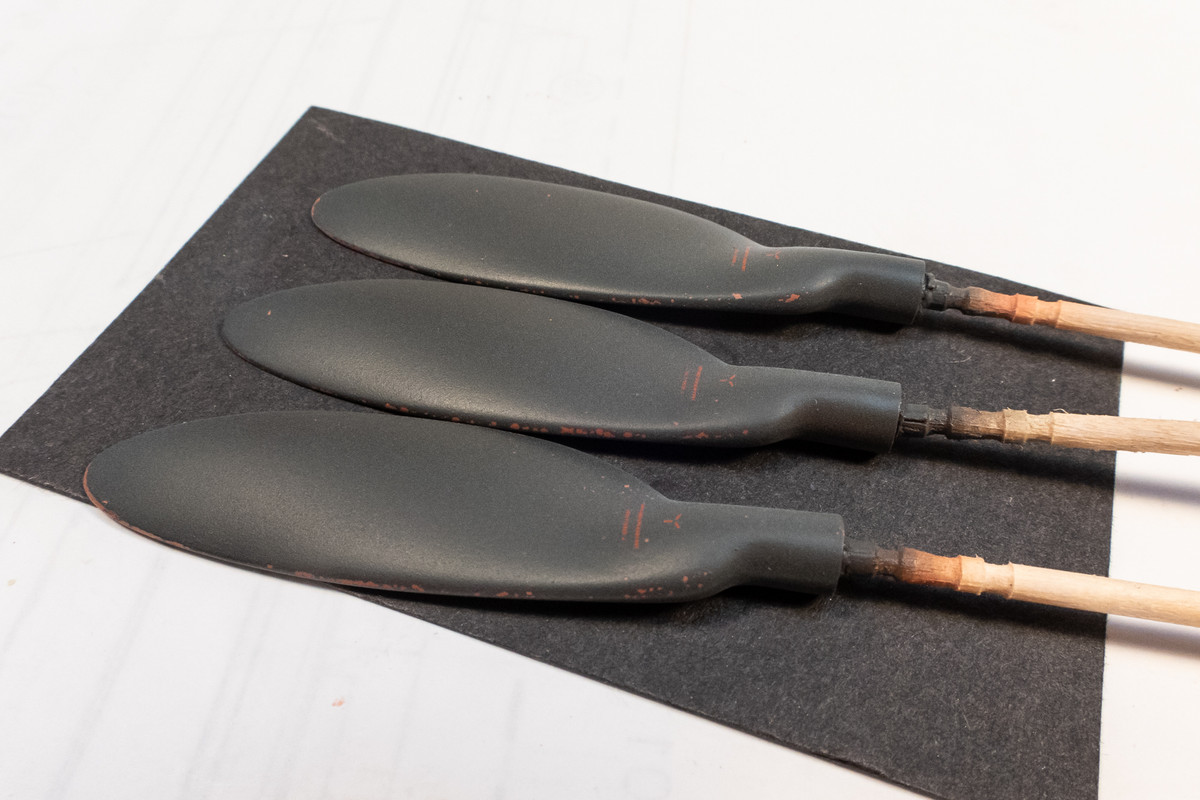
Hairspray was applied only on the front of the blades before they were painted RLM 70 Black Green (Mr Hobby Aqueous). Some minor chipping was created on the leading edges. The data stencils were from an EagleCal D-9 sheet.
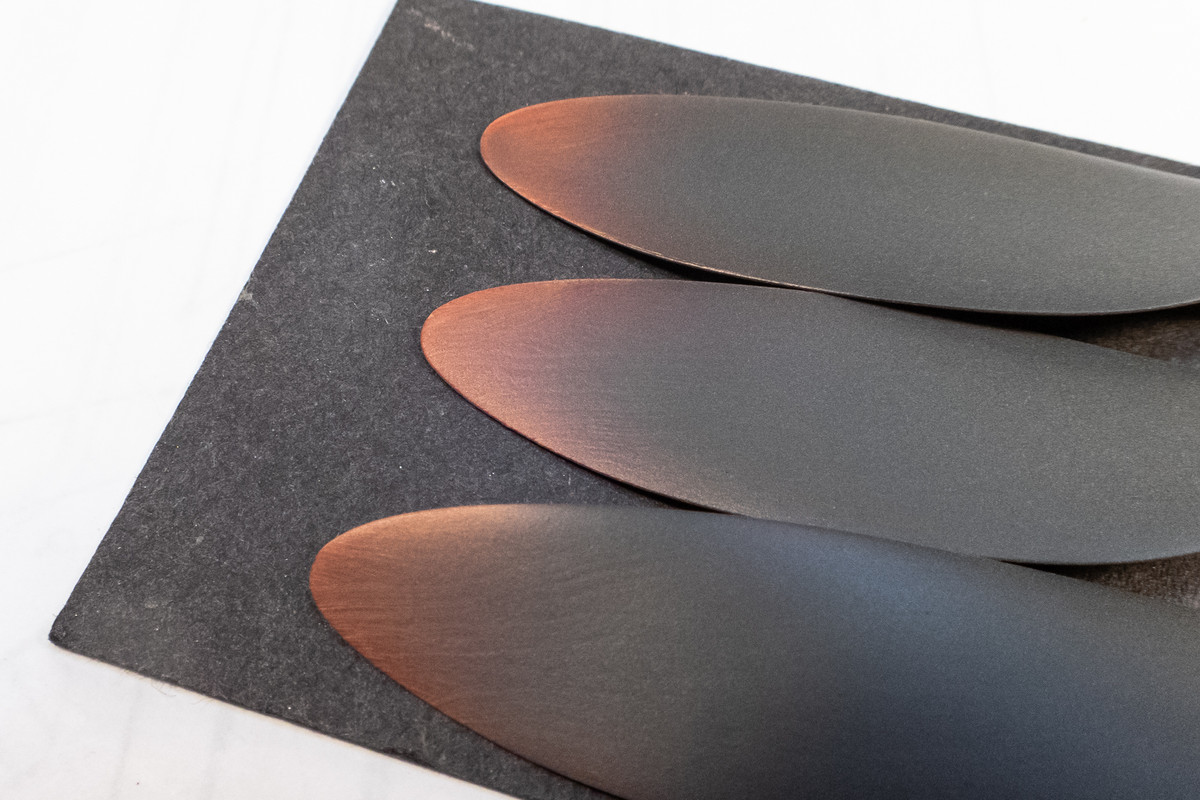
The tips of the back of the prop blades are worn to show the wood beneath. Grain is subtle but it's there. These blades are going to be even further weathered so they are not finished.

As I start to approach the paint phase, I've cleaned up the clear parts and gave them a dip in Future for that extra bit of clarity.
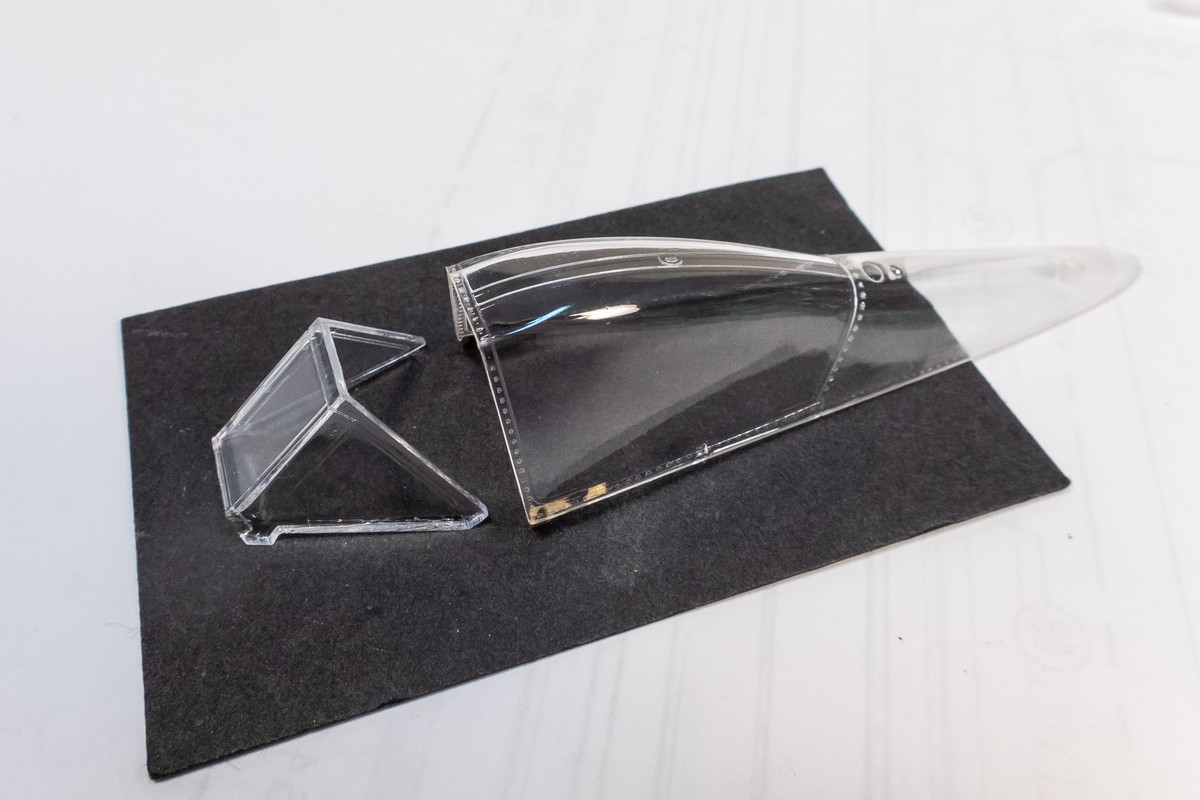
The always excellent Eduard masks were applied to the windscreen Since I'm planning on leaving the canopy open on this Dora, I'm going to paint the interior of the rear edge of the windscreen so it has been masked off as well.

The small bottom part between the two wheel wells has been glued into place.
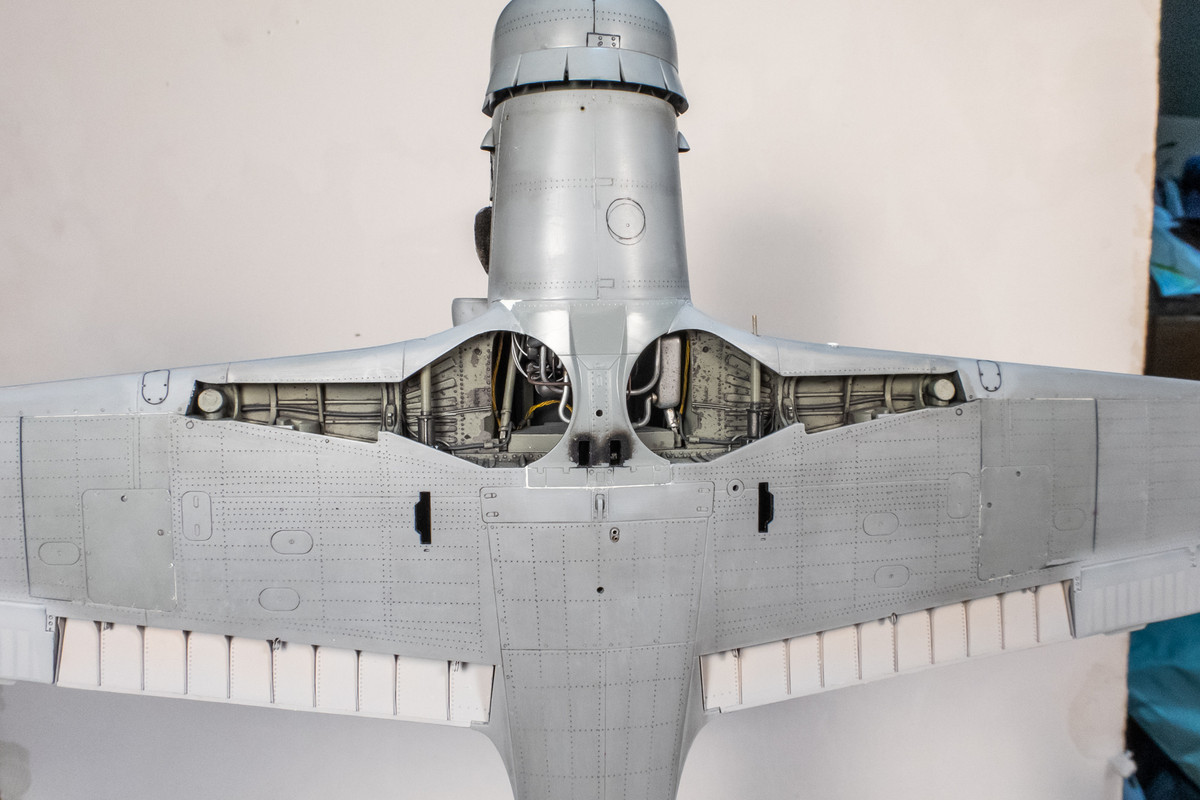
A good portion of the wiring work is still visible so the effort to spruce up this area is not wasted.
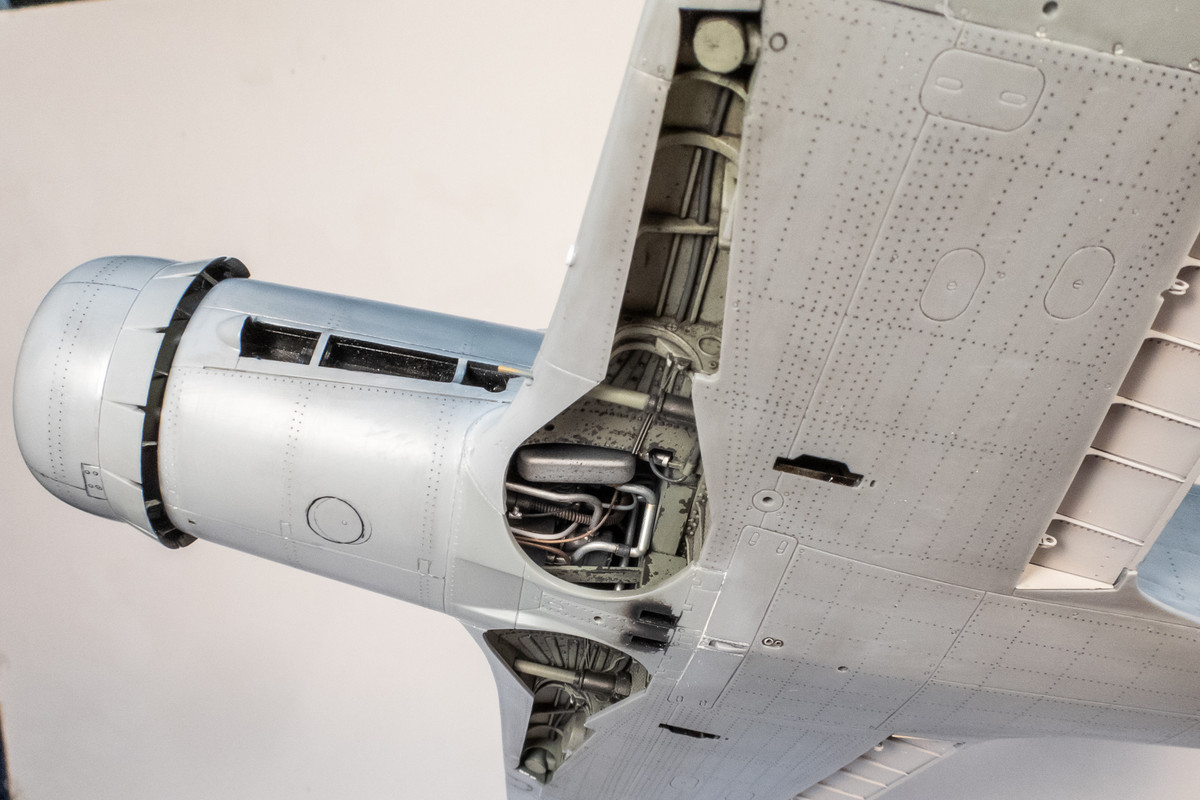
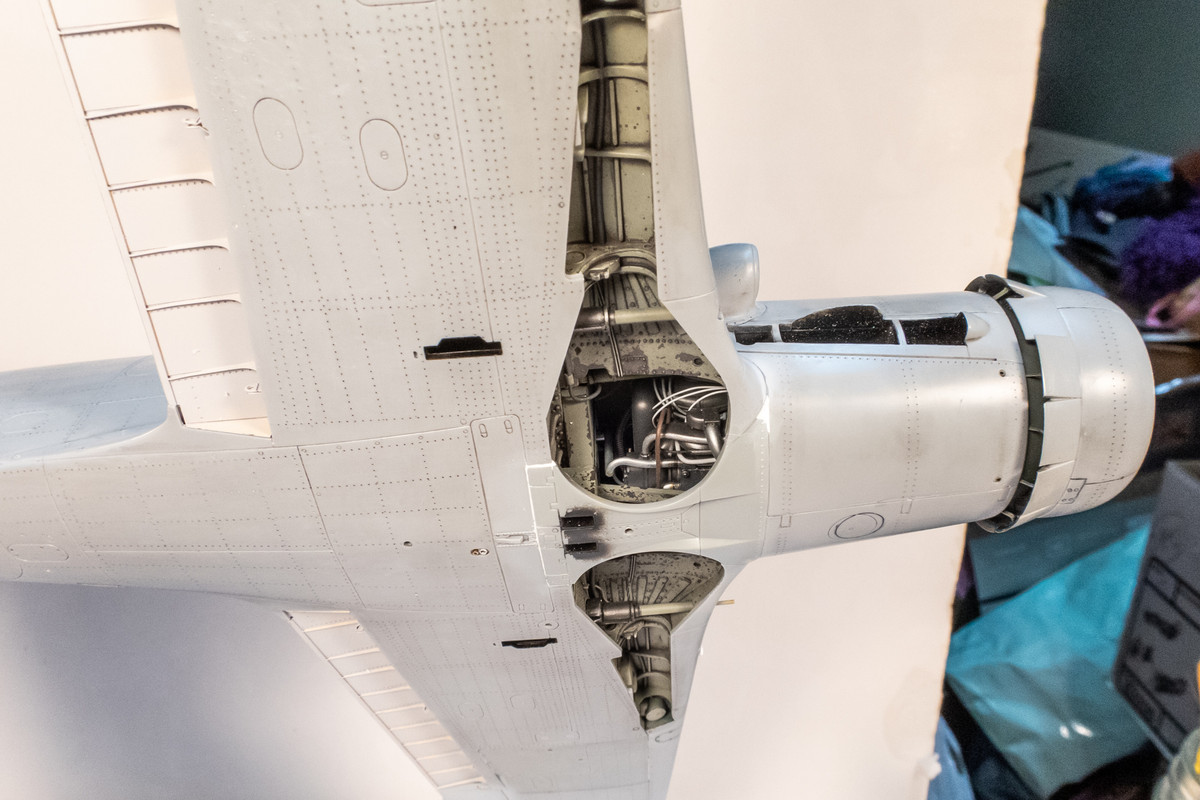
The primer revealed some ghost seams along the wing root that needed to be addressed with finer grit sandpaper.
Hairspray was applied only on the front of the blades before they were painted RLM 70 Black Green (Mr Hobby Aqueous). Some minor chipping was created on the leading edges. The data stencils were from an EagleCal D-9 sheet.
The tips of the back of the prop blades are worn to show the wood beneath. Grain is subtle but it's there. These blades are going to be even further weathered so they are not finished.
As I start to approach the paint phase, I've cleaned up the clear parts and gave them a dip in Future for that extra bit of clarity.
The always excellent Eduard masks were applied to the windscreen Since I'm planning on leaving the canopy open on this Dora, I'm going to paint the interior of the rear edge of the windscreen so it has been masked off as well.
The small bottom part between the two wheel wells has been glued into place.
A good portion of the wiring work is still visible so the effort to spruce up this area is not wasted.
John aka JKim
-----------<><
-----------<><

Re: Hasegawa 1/32 Fw 190D-9 Brown 4
Everything is looking so good John! The props are just beautiful.
March as one, Don't look back
Odin's sons... Attack!
Unleash hell! Do not repent! Warfare grants us no lament
Let your weapons slash and tear This is no place for fear
Hold the lines! Move as one! In unity our victory's won
Our shields will form a mighty wall
United we shall never fall
Odin's sons... Attack!
Unleash hell! Do not repent! Warfare grants us no lament
Let your weapons slash and tear This is no place for fear
Hold the lines! Move as one! In unity our victory's won
Our shields will form a mighty wall
United we shall never fall
-
mustang1989

- Moderator
- Posts: 5044
- Joined: Tue Mar 18, 2014 8:35 pm
Re: Hasegawa 1/32 Fw 190D-9 Brown 4
I like that trick that you did with the props and I might use that on my next D-9 build. Progress is looking good man.