Hasegawa 1/32 Fw 190D-9 Brown 4
-
BlackSheep214

- Elite Member
- Posts: 13598
- Joined: Sun Apr 06, 2014 8:47 pm
Re: Hasegawa 1/32 Fw 190D-9 Brown 4
The reason I haven’t posted a response is because I’m literally out of words & speechless on the progress made everyday. Incredible work.
“Who controls the skies, controls the fate of this Earth”
Author unknown- 352nd Fighter Group, Blue-Nosed Bastards of Bodney
“Send one plane it’s a sortie; send two planes it’s a flight; send four planes it’s a test of airpower. - Richard Kohn
Author unknown- 352nd Fighter Group, Blue-Nosed Bastards of Bodney
“Send one plane it’s a sortie; send two planes it’s a flight; send four planes it’s a test of airpower. - Richard Kohn

Re: Hasegawa 1/32 Fw 190D-9 Brown 4
Thanks guys!
Work on the prop blades continues. Next up is salt fading. This is method that is sometimes used for chipping effects but I like it to get a weathered effect on exposed surfaces. After the blades have been given a flat coat, a thin coat of water is brushed on and then salt crystals are sprinkled onto the wetted surfaces.
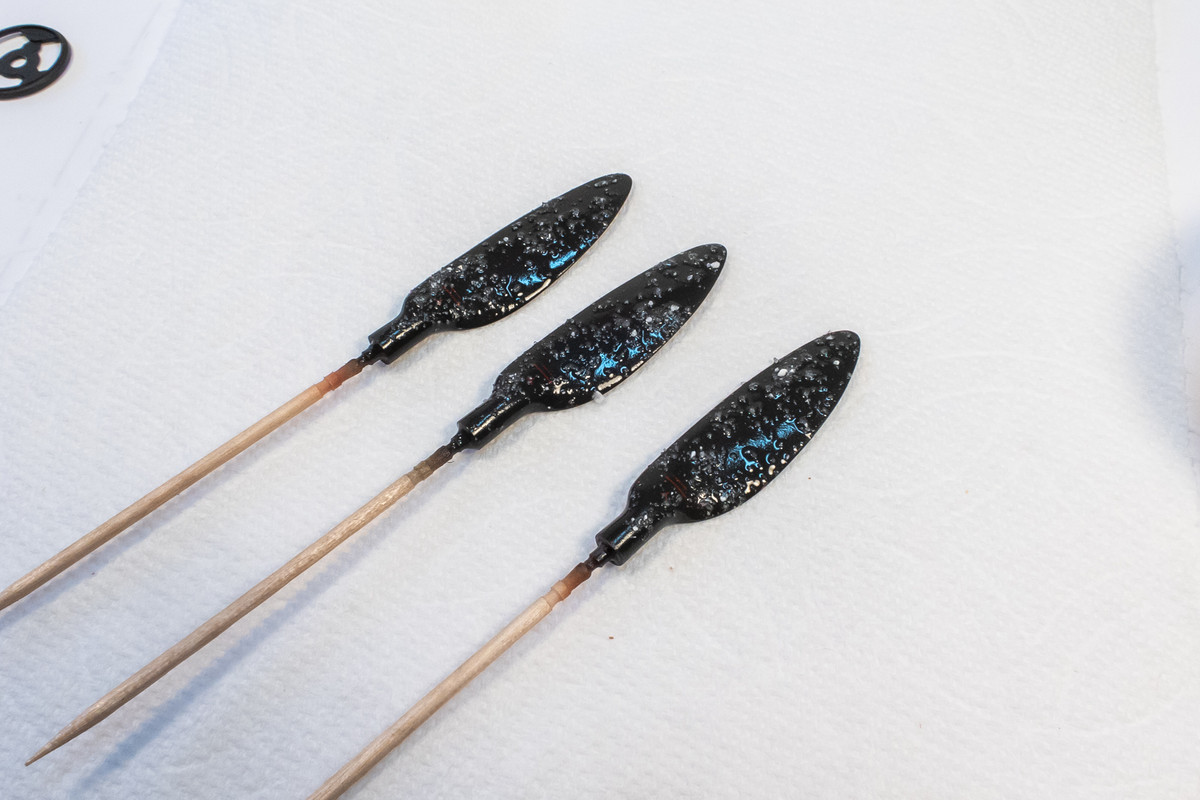
As this dries, the salt crystals will temporarily fuse onto the model surface creating a random patterned mask.
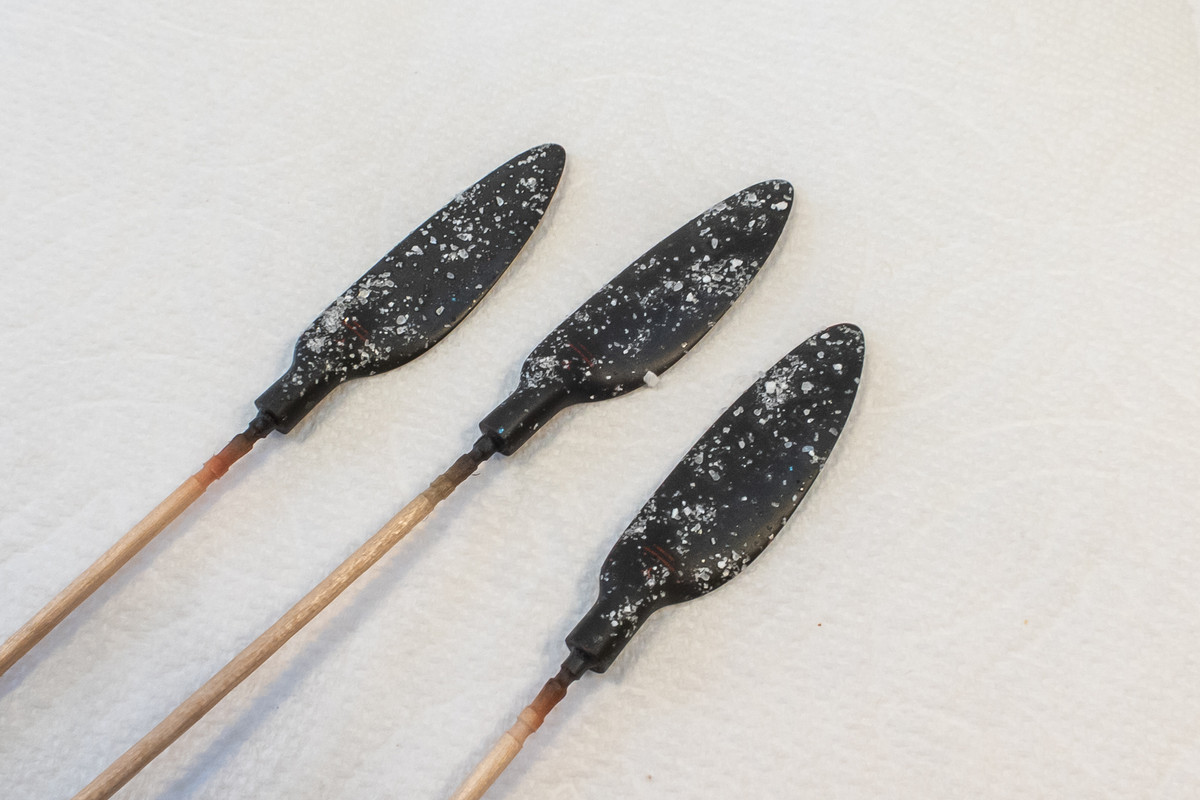
I use a very diluted mix of a light color (grey or beige) and spray it over the dried salt. This is the tricky part. It's REALLY difficult to tell, upon application, what you've just done so you have to spray and pray and check the results afterwards. As you can see, I tried to streak the light color across the blades, creating a very noticeable and unrealistic effect.
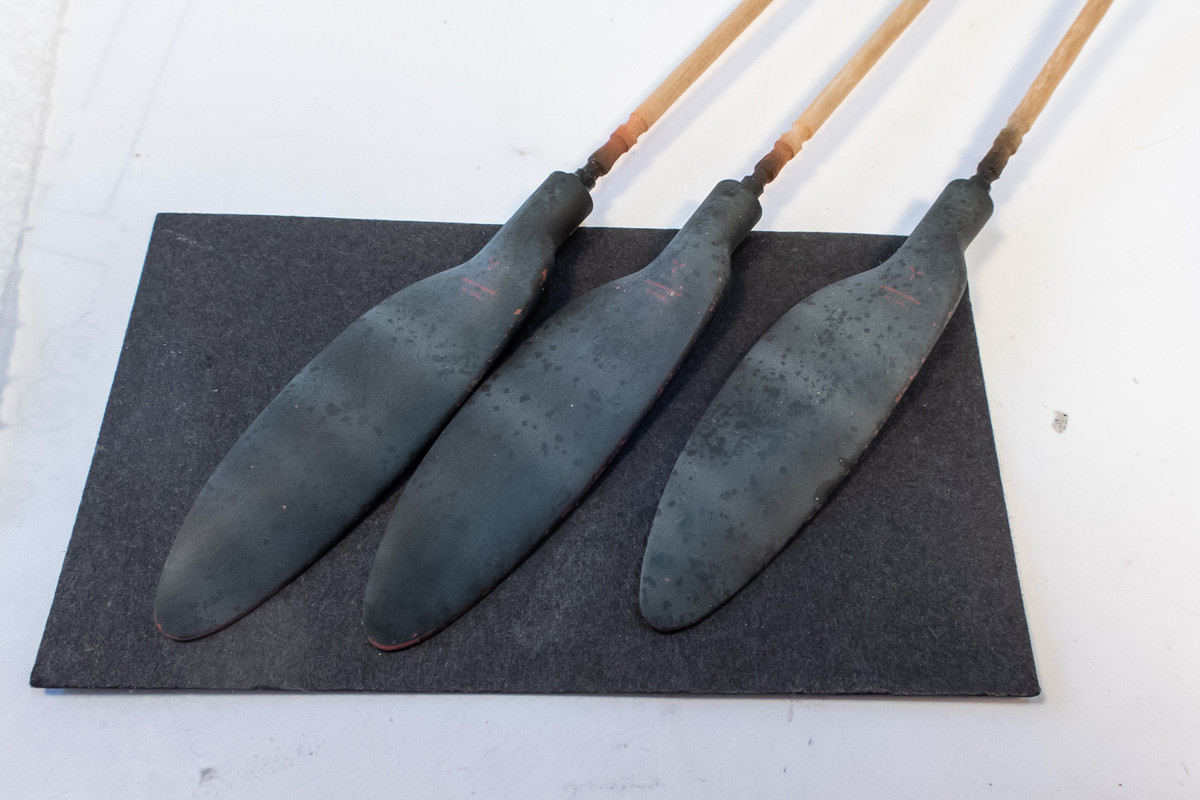
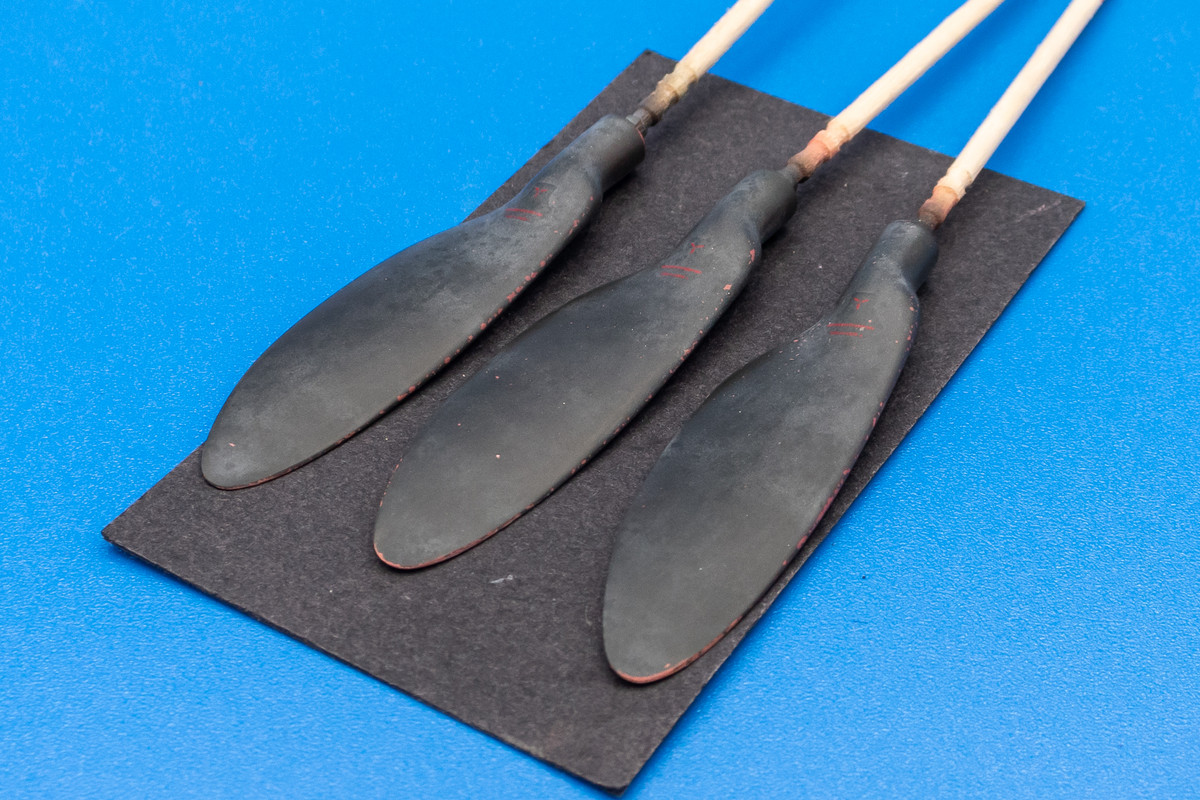
Salt fading is an iterative process. I use Micromesh to tone down any overdone effect and repeat the salt process until I get the desired result. Here are the prop blades after two rounds of salt.
The prop hub has been painted as well. It was given a base coat of Alclad Steel, hairsprayed and covered with RLM 70 Black Green (My Hobby Aqueous). The RLM 70 was scrubbed away significantly but since the Steel is very dark, the low contrast lessens the effect. The attachment rings were brush painted in a lighter metallic color and then the hub was given a pastel wash and flat coat.
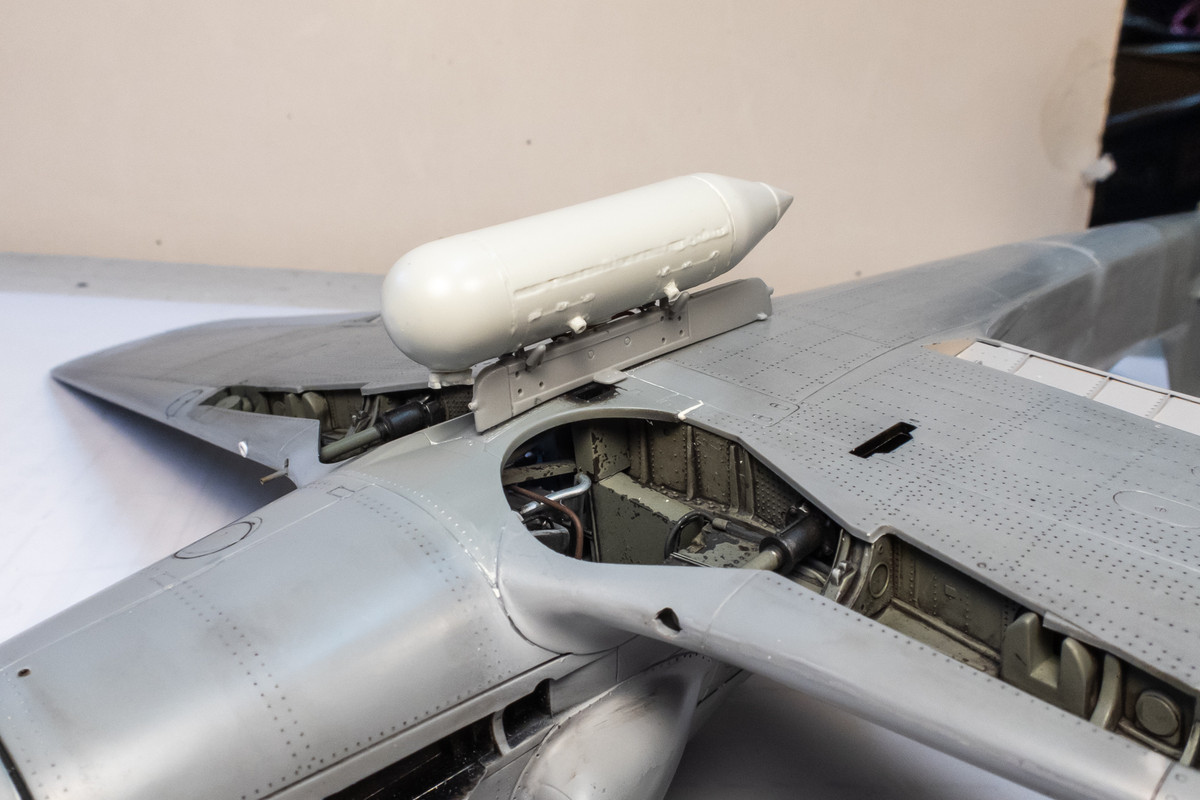
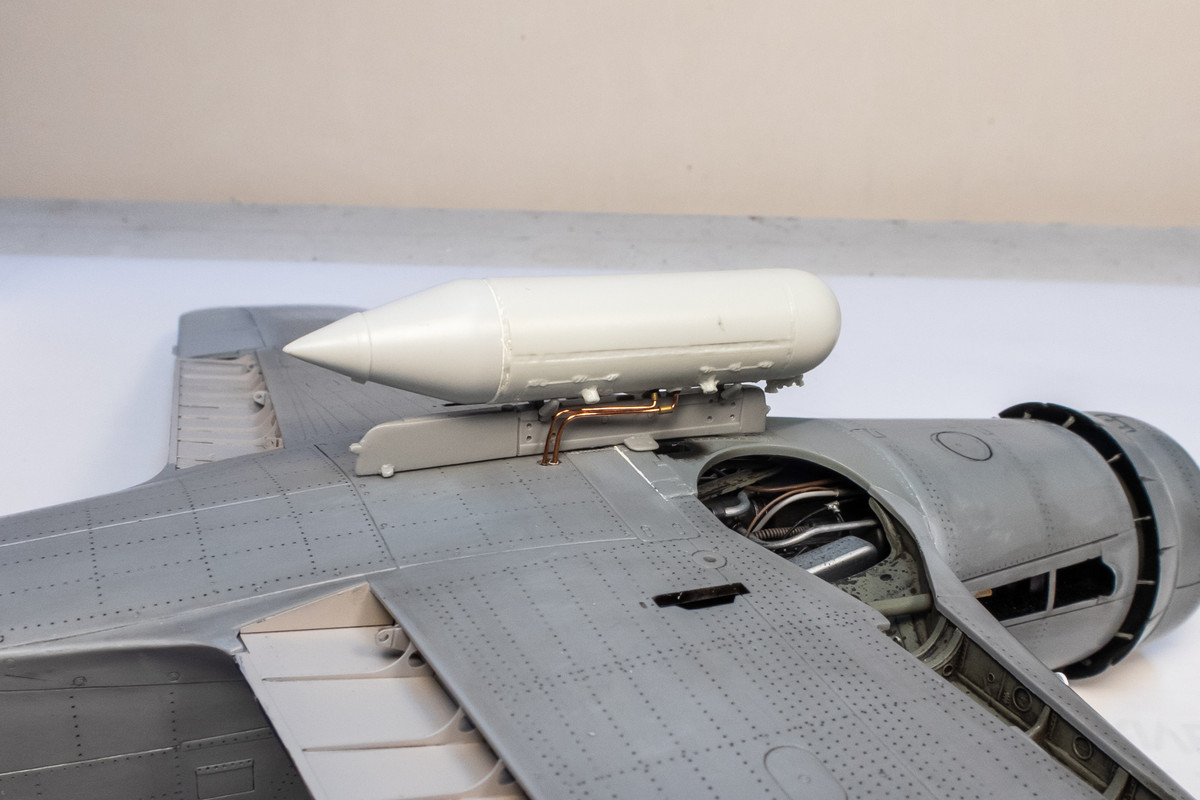
Getting closer to the painting stage... after attachment of the central wing bottom part, I check the position of the Eagle Editions resin drop tank, making sure that the fuel lines connect to the openings in the wing bottom.
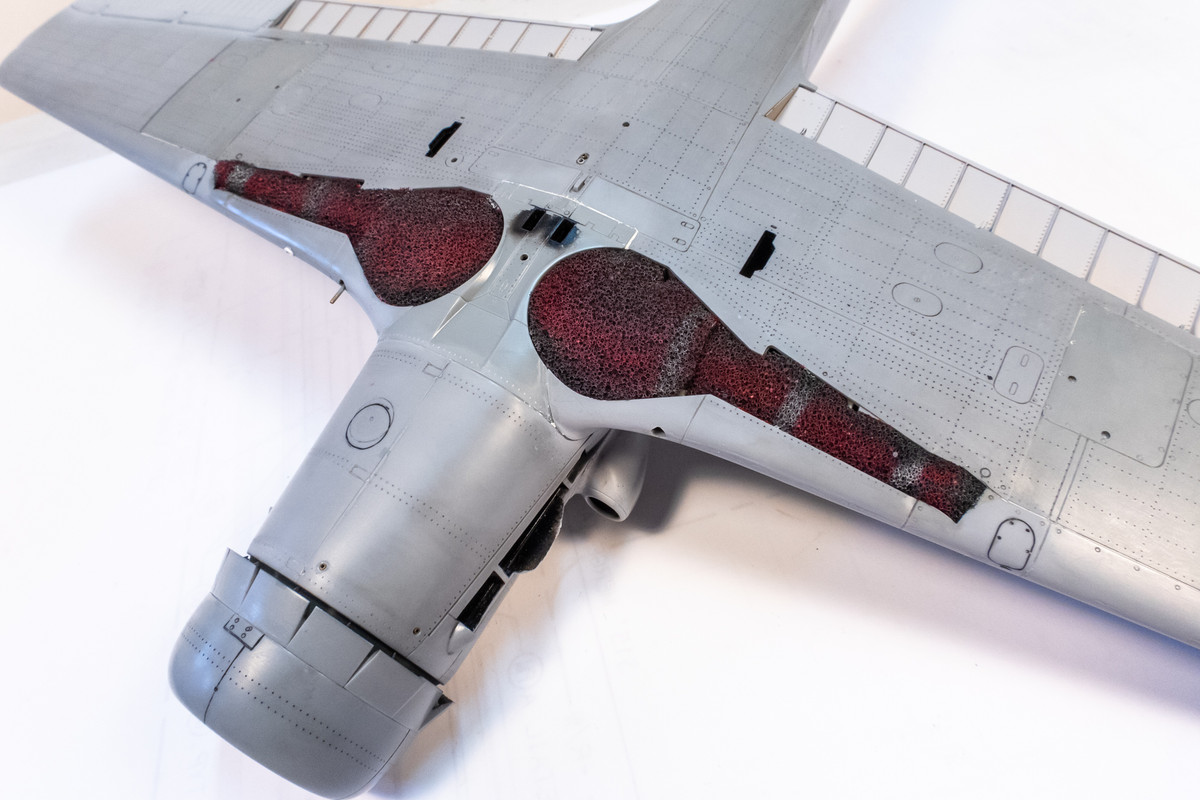
I stumbled onto these foam paint masks that I cut from a previous Dora build and pressed them back into service. You can tell that these were for a JV44 build.
I can't say enough good things about Eduard paint masks. They are usually spot-on in terms of fit and the yellow tape material has that perfect ability to hold a straight line and also be coaxed off that line ever so slightly if necessary and still lay down flat.
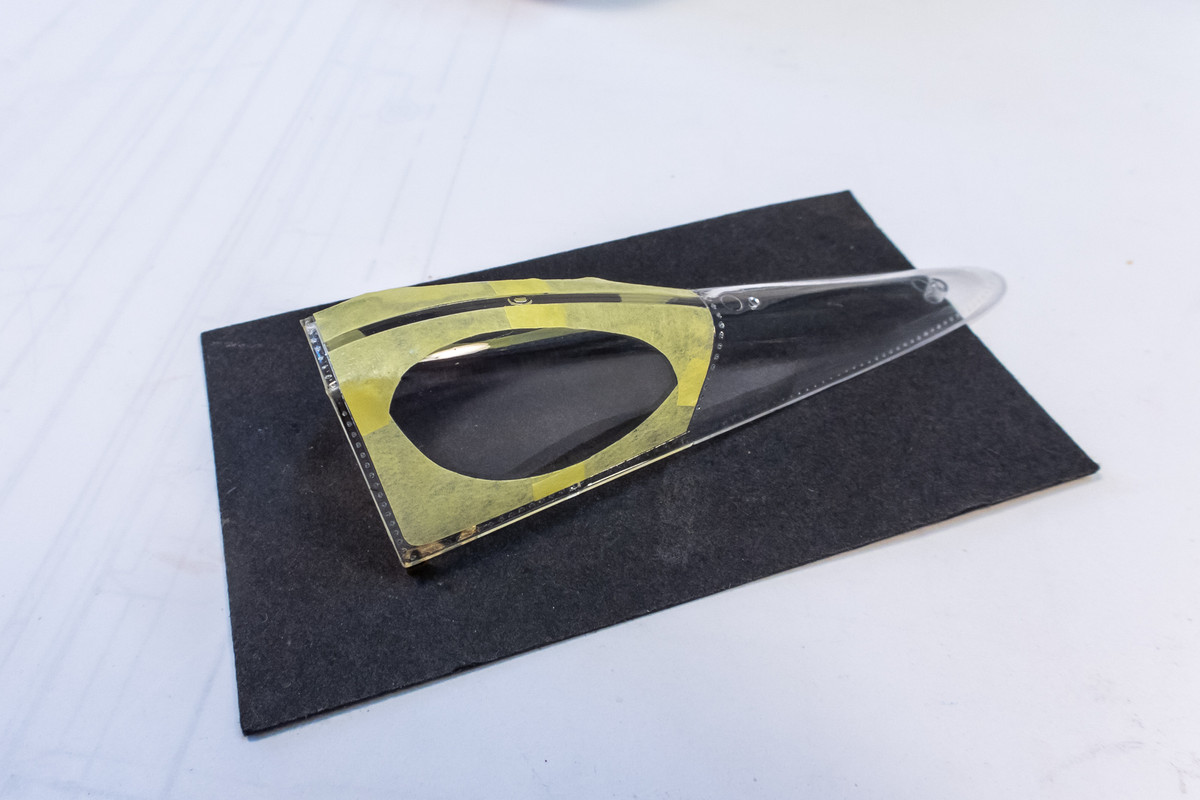
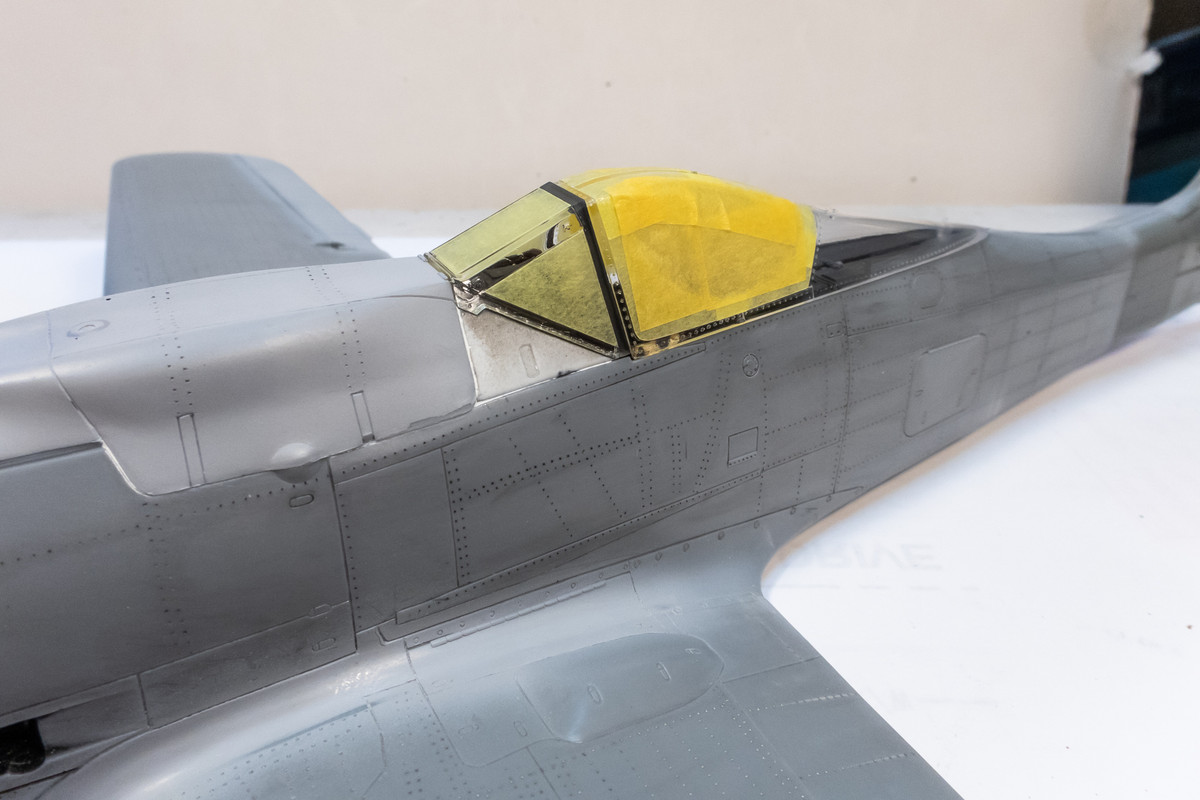
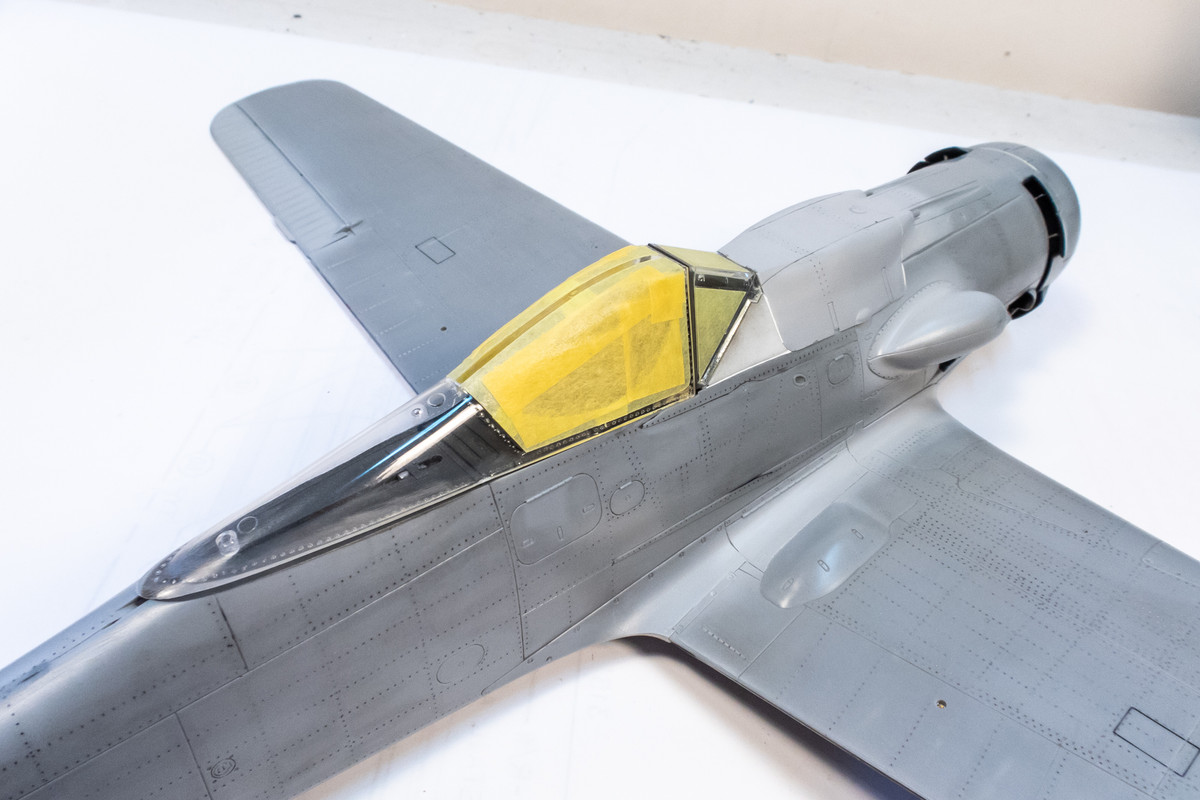
A test of the fit of the clear parts. The windscreen still have a minute overhang above the sliding canopy and I think I've experienced this every time I use the Eagle Editions resin cockpit. Since I'm planning to pose the canopy open, this is not an issue for me.
Work on the prop blades continues. Next up is salt fading. This is method that is sometimes used for chipping effects but I like it to get a weathered effect on exposed surfaces. After the blades have been given a flat coat, a thin coat of water is brushed on and then salt crystals are sprinkled onto the wetted surfaces.
As this dries, the salt crystals will temporarily fuse onto the model surface creating a random patterned mask.
I use a very diluted mix of a light color (grey or beige) and spray it over the dried salt. This is the tricky part. It's REALLY difficult to tell, upon application, what you've just done so you have to spray and pray and check the results afterwards. As you can see, I tried to streak the light color across the blades, creating a very noticeable and unrealistic effect.
Salt fading is an iterative process. I use Micromesh to tone down any overdone effect and repeat the salt process until I get the desired result. Here are the prop blades after two rounds of salt.
The prop hub has been painted as well. It was given a base coat of Alclad Steel, hairsprayed and covered with RLM 70 Black Green (My Hobby Aqueous). The RLM 70 was scrubbed away significantly but since the Steel is very dark, the low contrast lessens the effect. The attachment rings were brush painted in a lighter metallic color and then the hub was given a pastel wash and flat coat.
Getting closer to the painting stage... after attachment of the central wing bottom part, I check the position of the Eagle Editions resin drop tank, making sure that the fuel lines connect to the openings in the wing bottom.
I stumbled onto these foam paint masks that I cut from a previous Dora build and pressed them back into service. You can tell that these were for a JV44 build.
I can't say enough good things about Eduard paint masks. They are usually spot-on in terms of fit and the yellow tape material has that perfect ability to hold a straight line and also be coaxed off that line ever so slightly if necessary and still lay down flat.
A test of the fit of the clear parts. The windscreen still have a minute overhang above the sliding canopy and I think I've experienced this every time I use the Eagle Editions resin cockpit. Since I'm planning to pose the canopy open, this is not an issue for me.
John aka JKim
-----------<><

-----------<><

Re: Hasegawa 1/32 Fw 190D-9 Brown 4
This is all great stuff. And that works you did on the prop and especially the spinner is awesome.
Kenny X
Head Mother Trucker In-Charge @ Kenny X’s Reichs Winzigkleines Flugzeugewerks *and now* Airboat Records, too!
Head Mother Trucker In-Charge @ Kenny X’s Reichs Winzigkleines Flugzeugewerks *and now* Airboat Records, too!
Re: Hasegawa 1/32 Fw 190D-9 Brown 4
The prop blades are done. I've mounted them onto the hub. It's a tight friction fit, with no need for glue. I may ease a drop of CA glue into the joints for security.
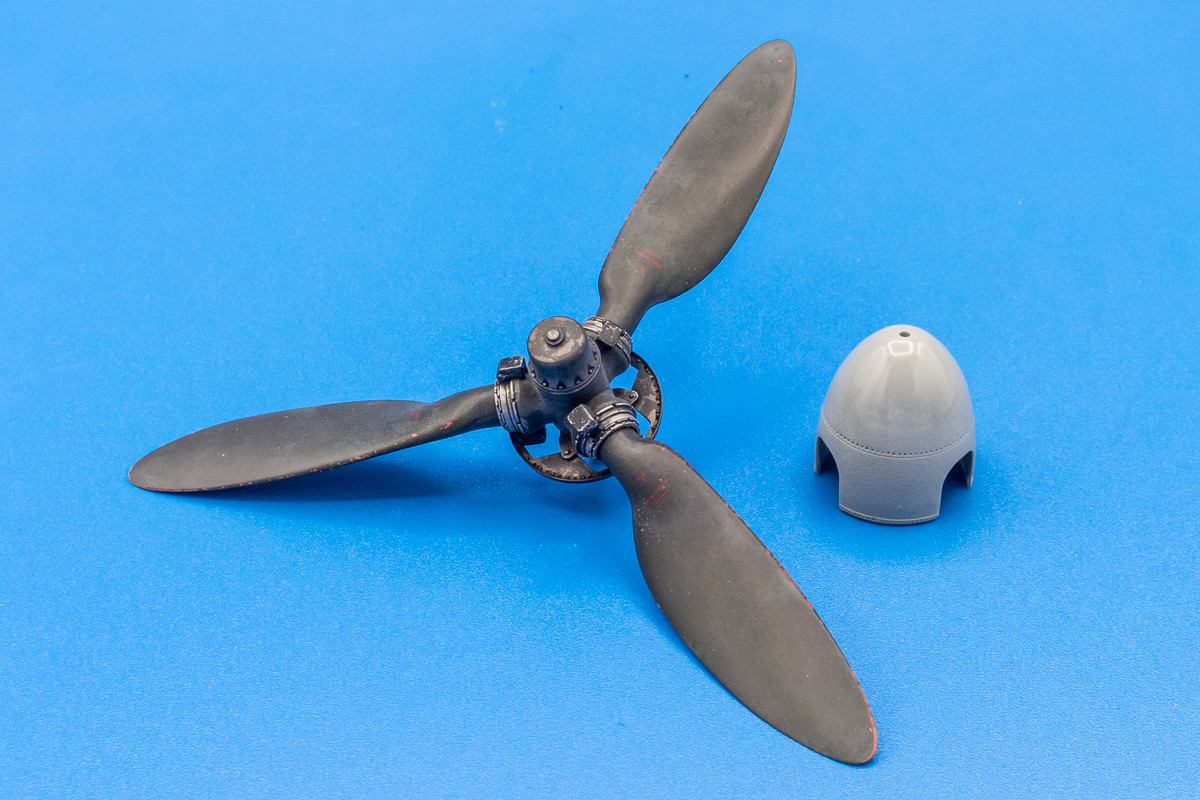
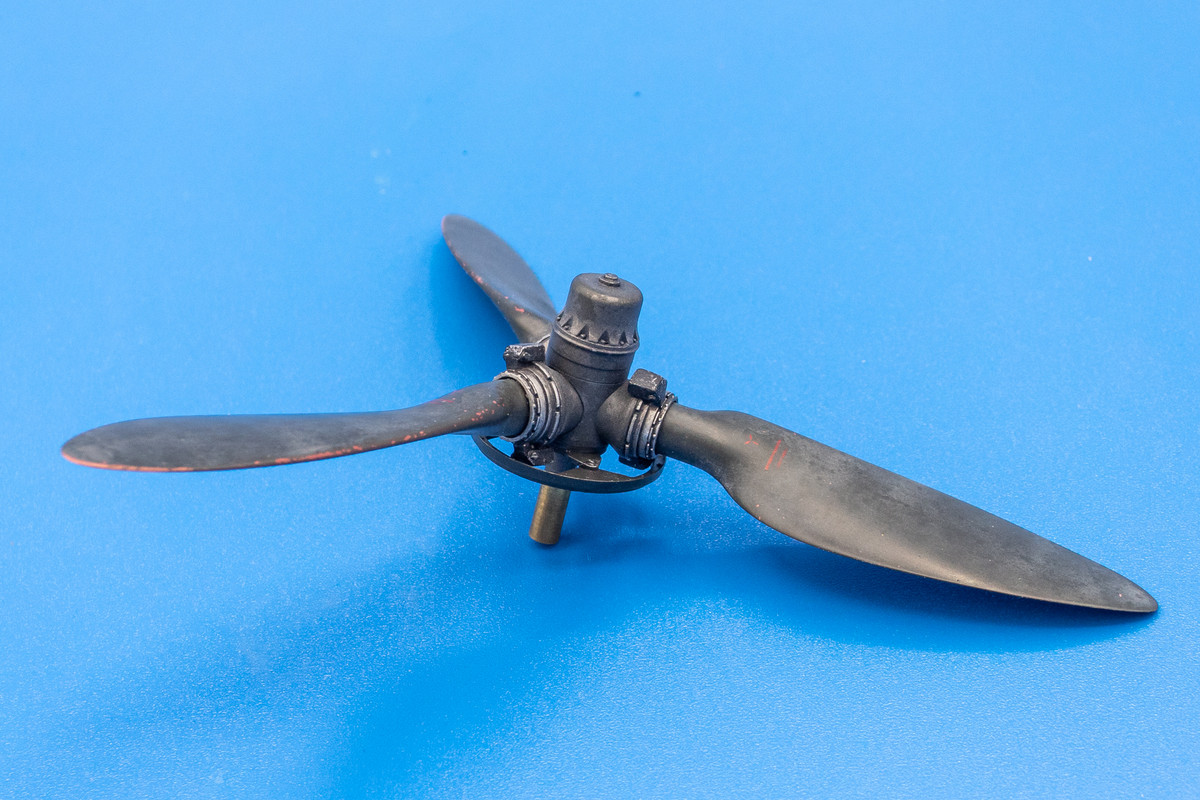
The backs of the blades were given a single dose of salt without any post-Micromeshing so this gives a good example of what an unaltered salt fading application looks like.
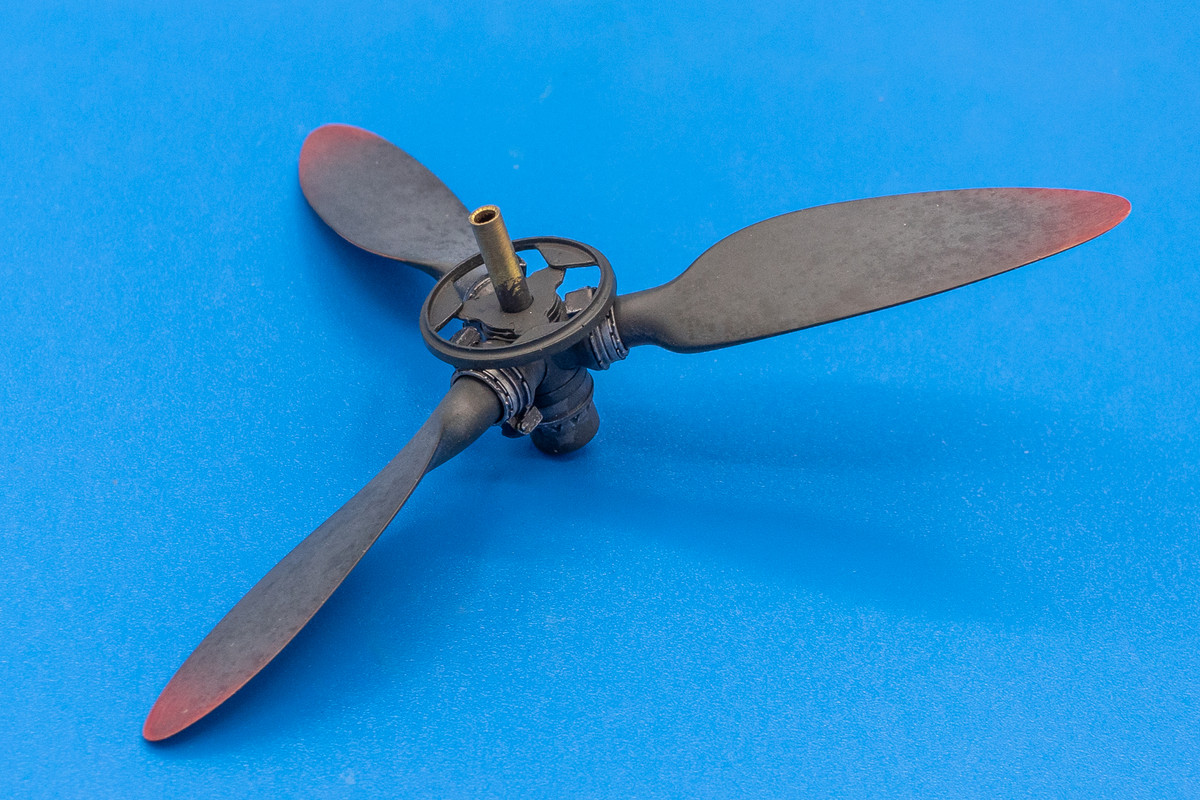
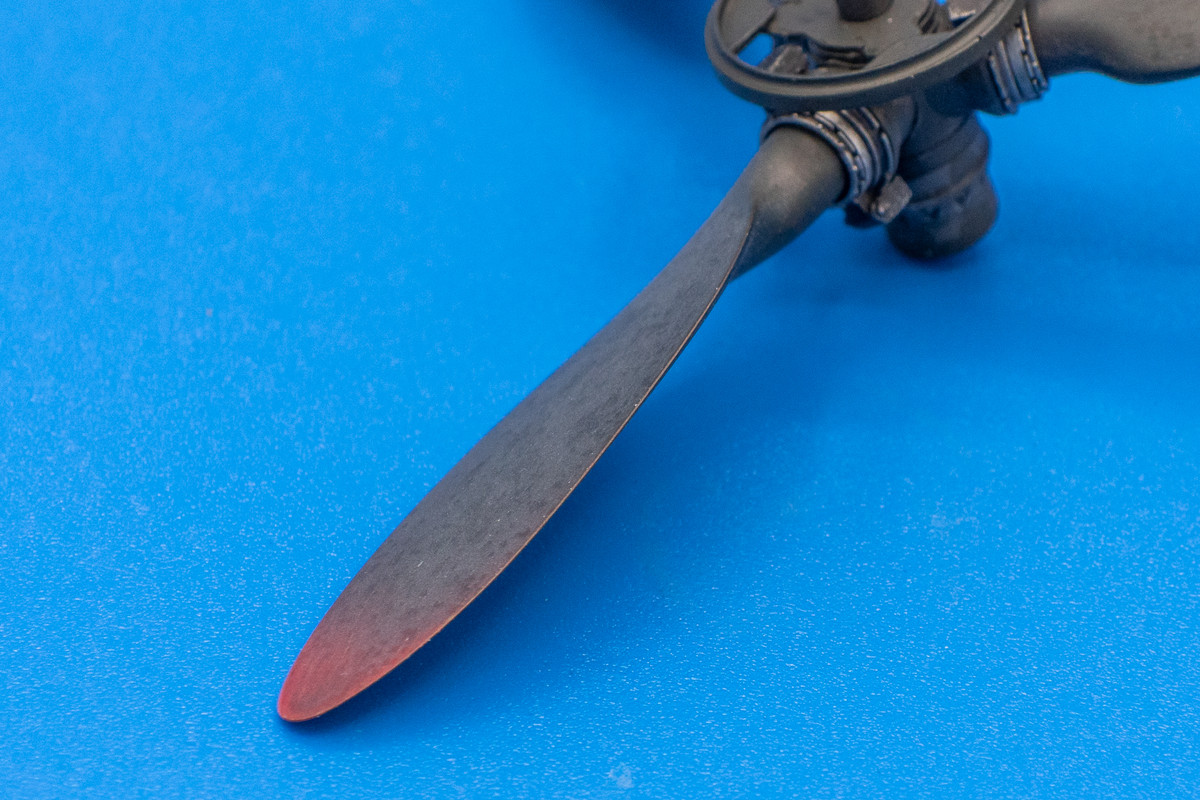
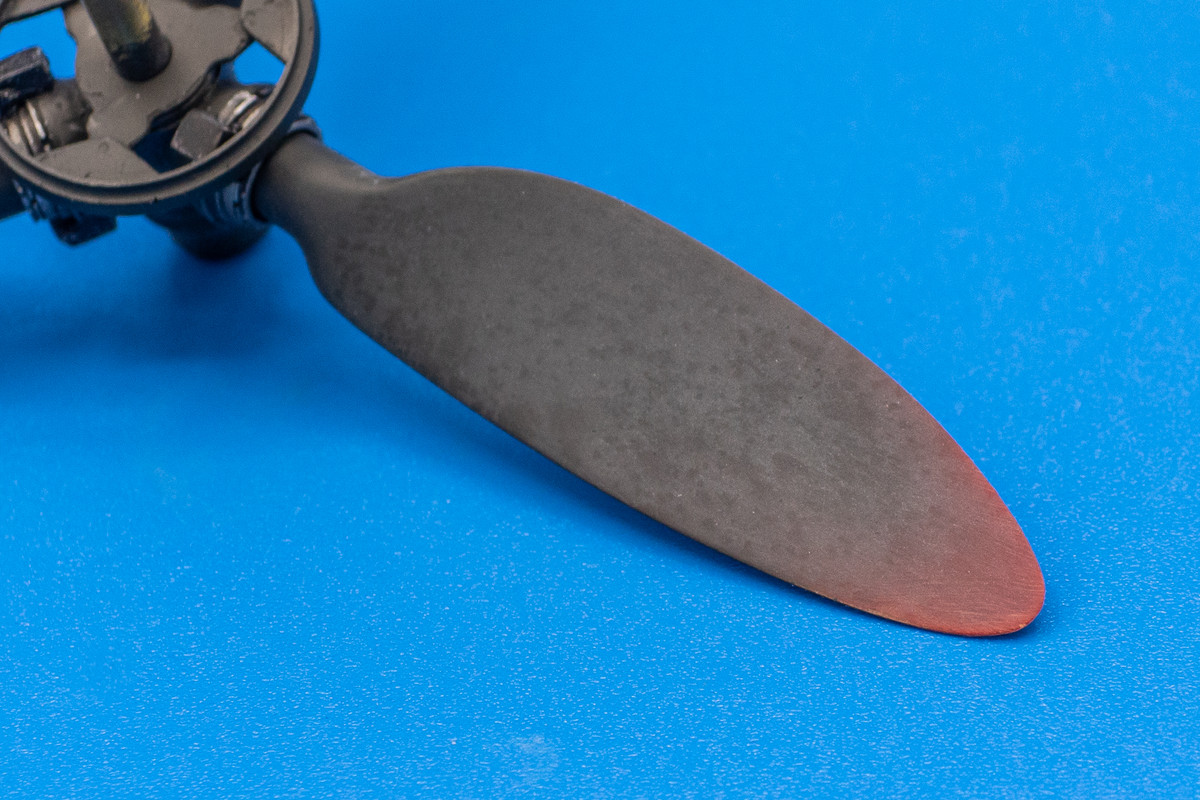
A closer view of the back of the blades.
With the help of the two hidden magnets, the spinner snaps into place nicely.
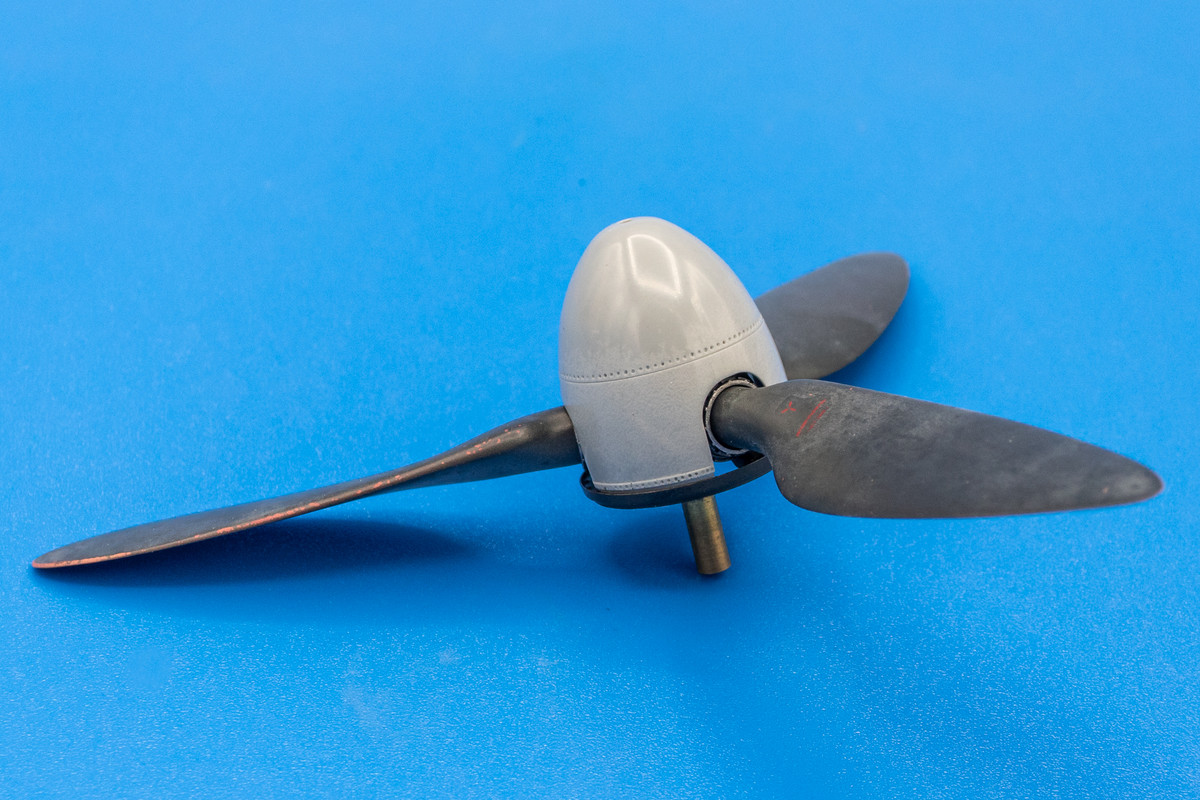
The backs of the blades were given a single dose of salt without any post-Micromeshing so this gives a good example of what an unaltered salt fading application looks like.
A closer view of the back of the blades.
With the help of the two hidden magnets, the spinner snaps into place nicely.
John aka JKim
-----------<><
-----------<><
Re: Hasegawa 1/32 Fw 190D-9 Brown 4
That’s splendid and inspiring. One of the things I admire about your work is how nothing is an afterthought. You put the same level of care and detail into the little things as you do the big things. I’m trying to emulate that.
Kenny X
Head Mother Trucker In-Charge @ Kenny X’s Reichs Winzigkleines Flugzeugewerks *and now* Airboat Records, too!
Head Mother Trucker In-Charge @ Kenny X’s Reichs Winzigkleines Flugzeugewerks *and now* Airboat Records, too!

Re: Hasegawa 1/32 Fw 190D-9 Brown 4
This is fantastic John!
If I would ever manage to build a prop looking like yours, I would be happy with my build and skip the rest of the plane !
It looks fantastic!
- Kari
If I would ever manage to build a prop looking like yours, I would be happy with my build and skip the rest of the plane !
It looks fantastic!
- Kari
---
On the bench:
Eduard 1:48 - Fokker D.VII OAW
https://www.facebook.com/GrundAsk-Scale ... 721218708/
On the bench:
Eduard 1:48 - Fokker D.VII OAW
https://www.facebook.com/GrundAsk-Scale ... 721218708/
-
Stikpusher

- Moderator
- Posts: 21386
- Joined: Sat Apr 05, 2014 8:37 pm
- Location: Ceti Alpha 5
Re: Hasegawa 1/32 Fw 190D-9 Brown 4
Every sub assembly has such attention to detail in creating your worn appearance. 
"Surely I have made my meaning plain? I intend to avenge myself upon you, Admiral. I have deprived your ship of power, and when I swing 'round, I intend to deprive you of your life."
FLSM
FLSM
-
mustang1989

- Moderator
- Posts: 5044
- Joined: Tue Mar 18, 2014 8:35 pm
Re: Hasegawa 1/32 Fw 190D-9 Brown 4
Such masterful building. I'm almost ashamed to show anything I've got anymore. 
I'm constantly learning new tricks of the trade from you bud.
I'm constantly learning new tricks of the trade from you bud.
Re: Hasegawa 1/32 Fw 190D-9 Brown 4
Thanks guys! I appreciate the comments. It's funny... the wood grain showing through got a bit discussion going on at the other site I post on. And I got a short lecture on how modelers treat propellers as a stage prop or mere accessories. I learned that they are essential to the flight of an airplane. Wow... the things we learn each day!
As the prop blades are finished, it's now time to paint the spinner. I normally don't do this but I thought I'd try to put a pre-shade pattern down on the spinner to give the white base a little bit of depth/texture. High contrast tends to kill this type of effect but I thought I'd give it try. The pattern is obtained by shooting the airbrush through a piece of scouring pad.
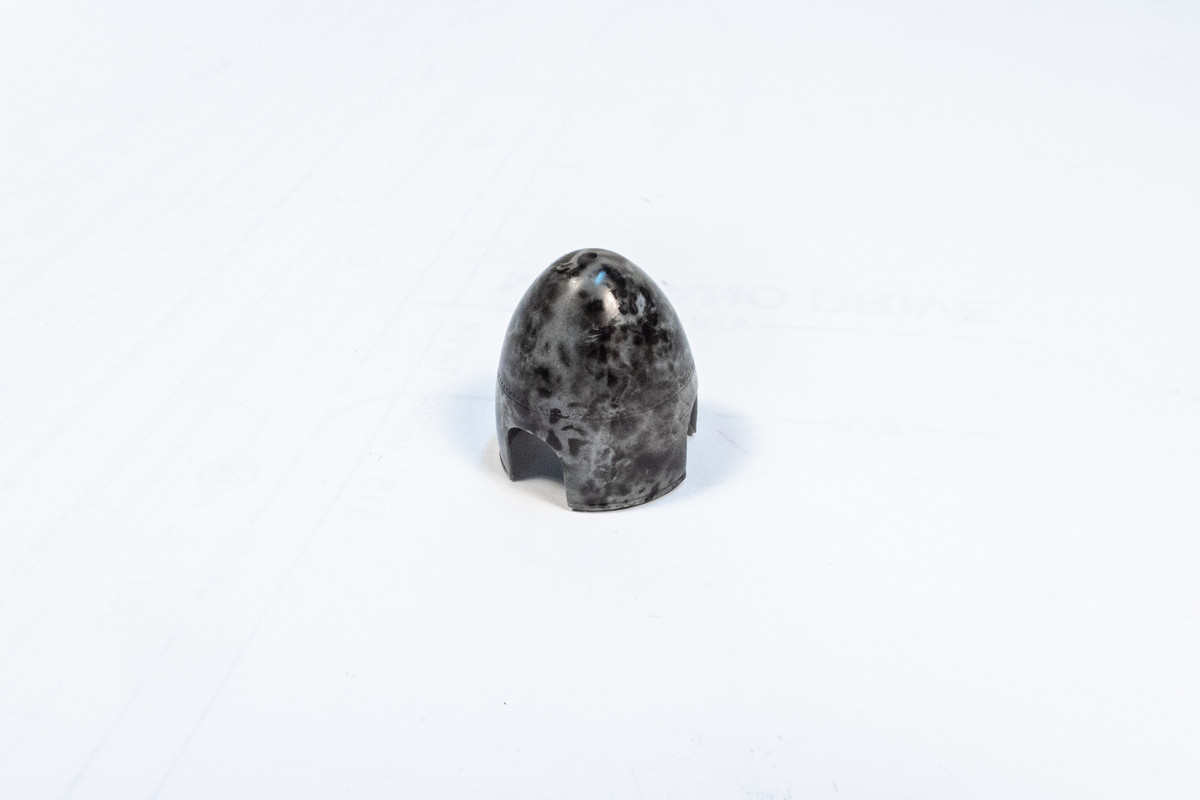
The pre-shade effect is modulated by applying thin coats of the final color. The white is built up slowly until almost all traces of the pre-shade mottle are gone.
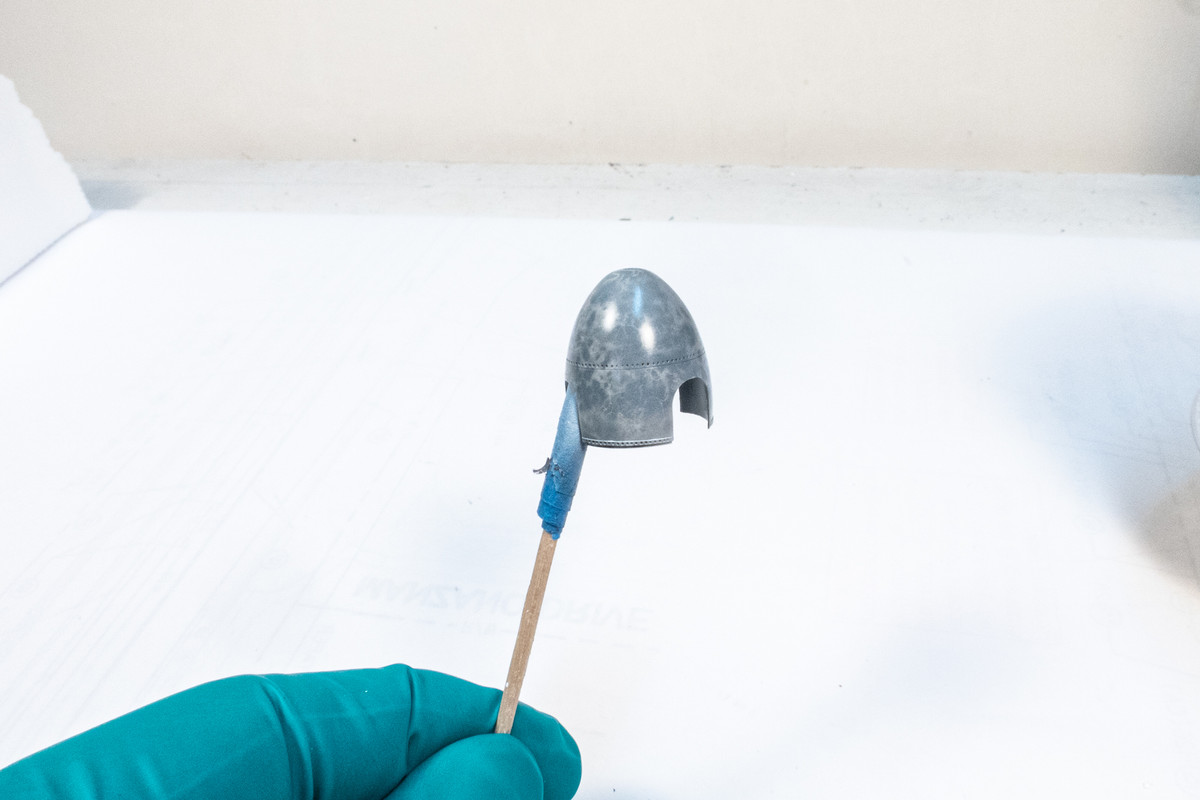
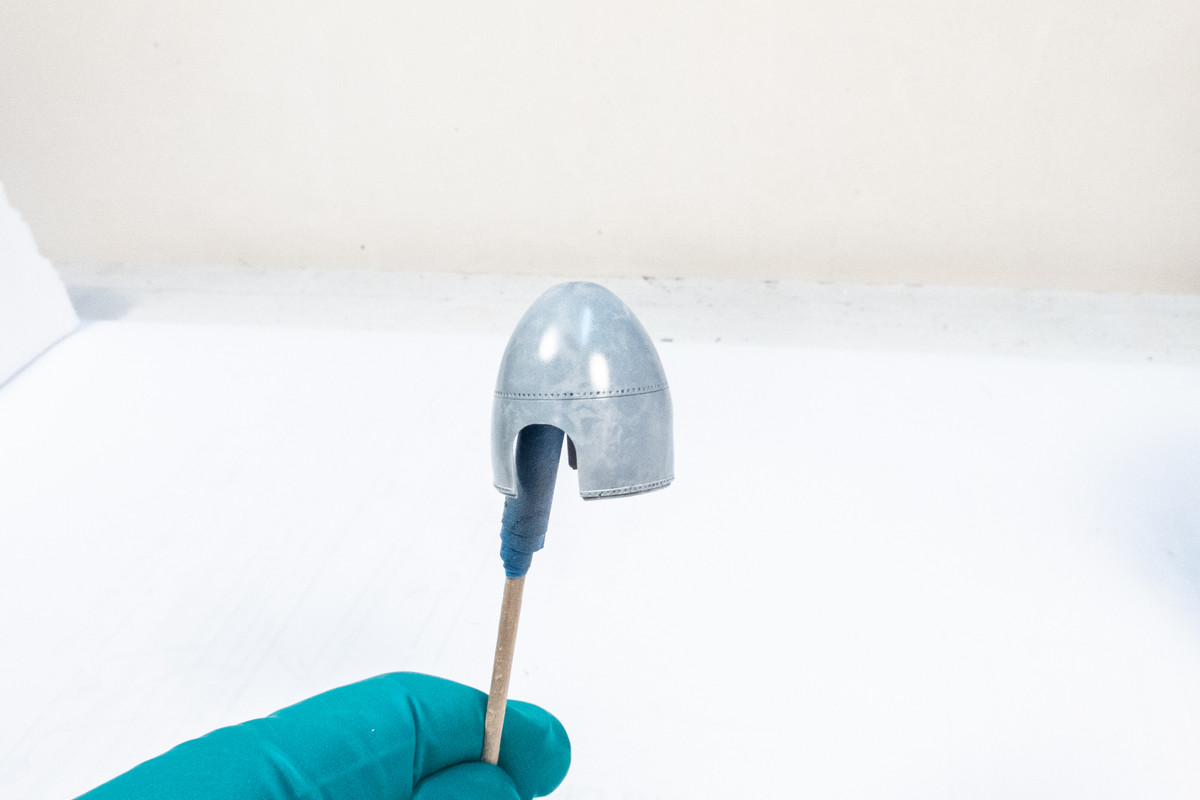
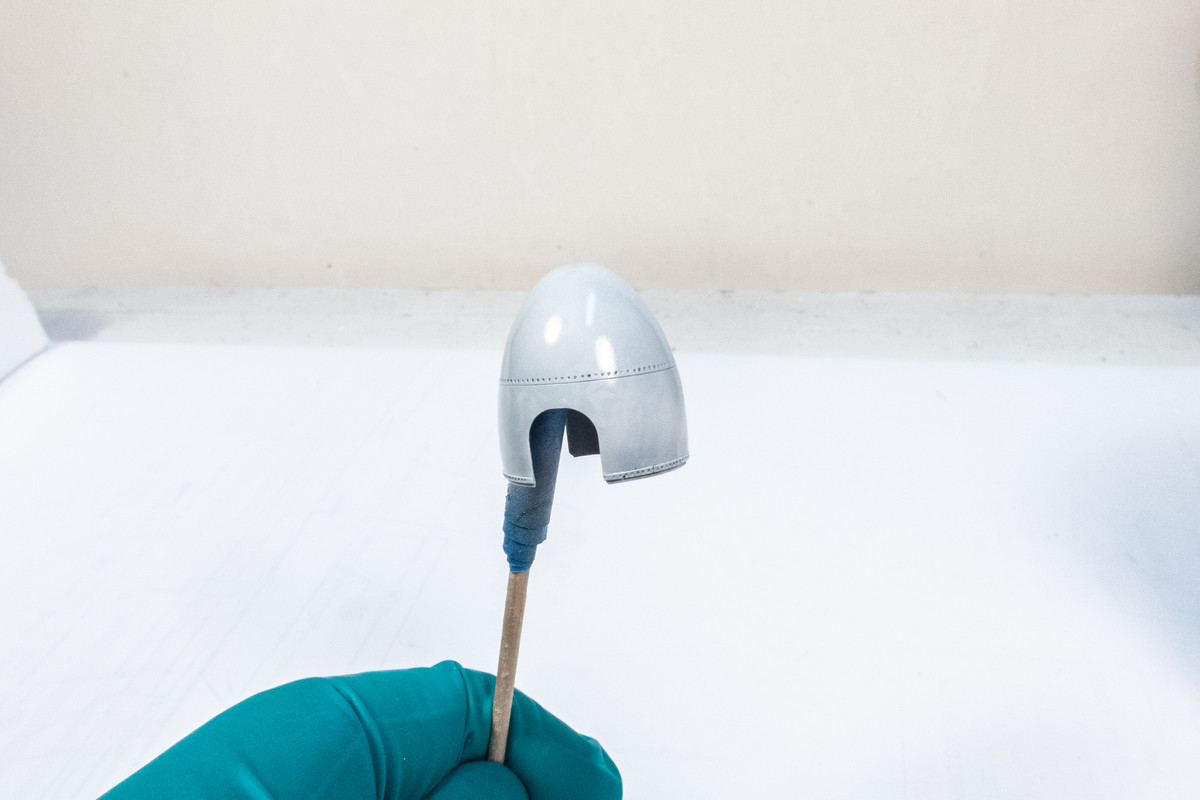
Digital photography has a hard time picking up the effect but hopefully you can just make out the pre-shade layer.
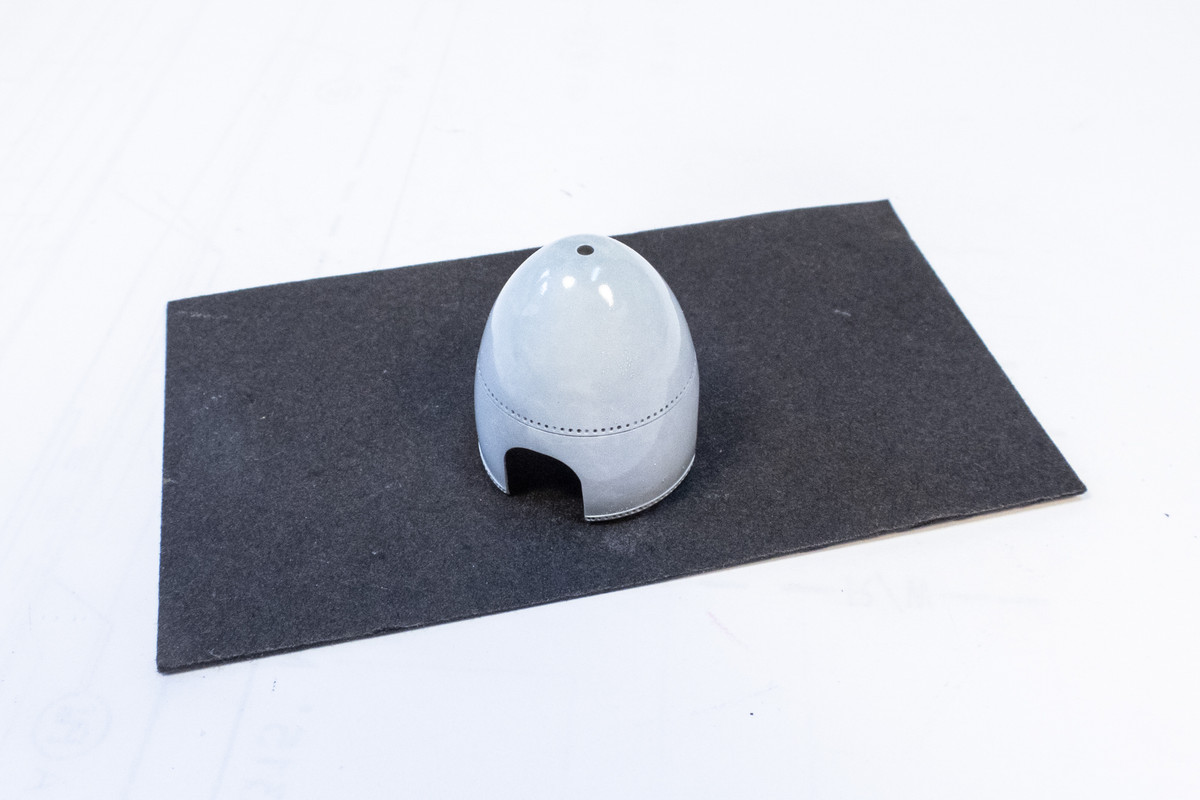
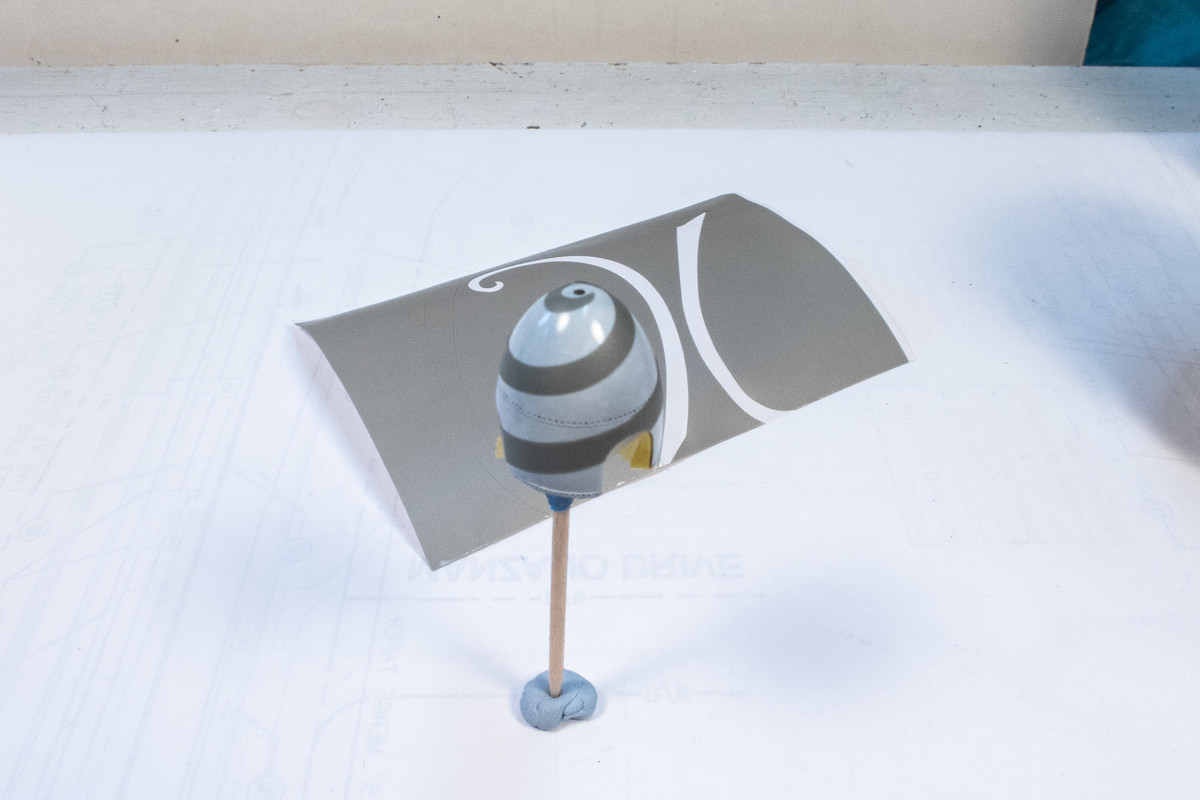
For the spiral, I use custom masks cut from Oramask 810. The shapes are traced from various EagleCal decal sheets in my spare box. The Oramask is great material for spirals because it holds it shapes well but also has a certain amount of stretch so you can usually force it into position without the mask lifting or kinking.
The spinner is then sprayed black.
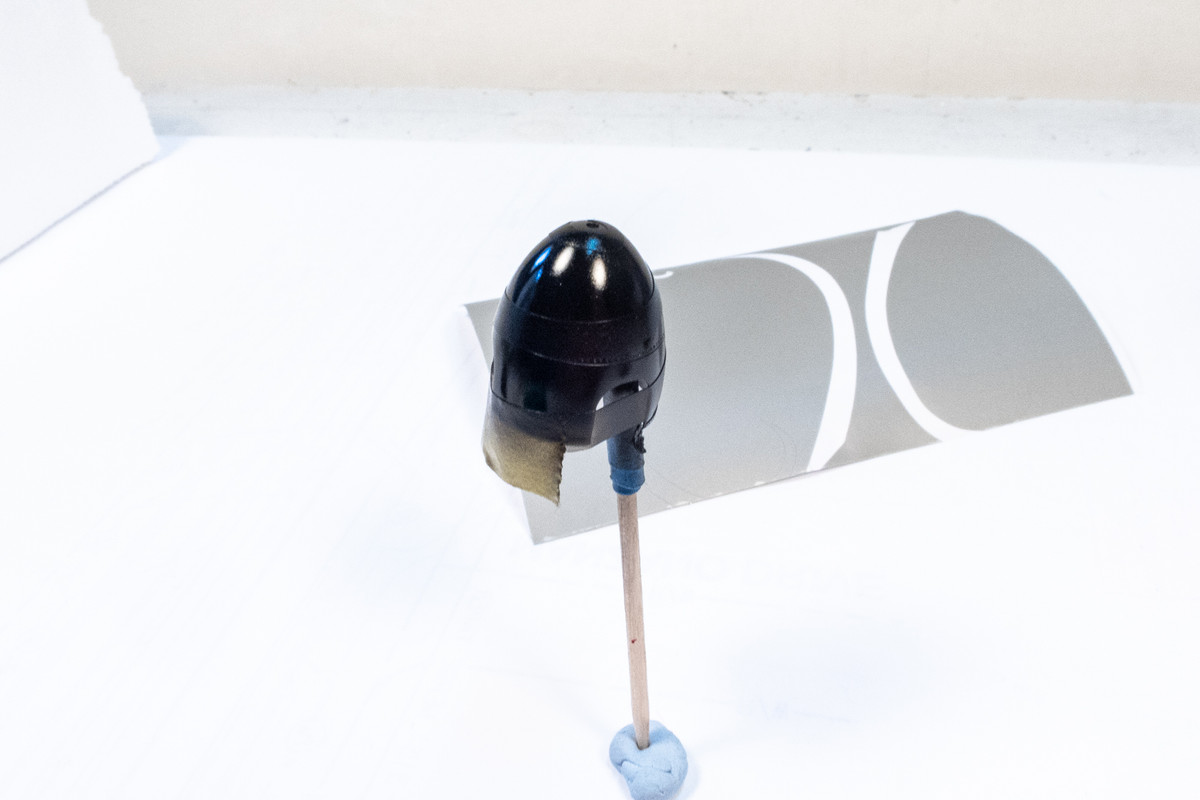
After drying, the mask is carefully peeled off.
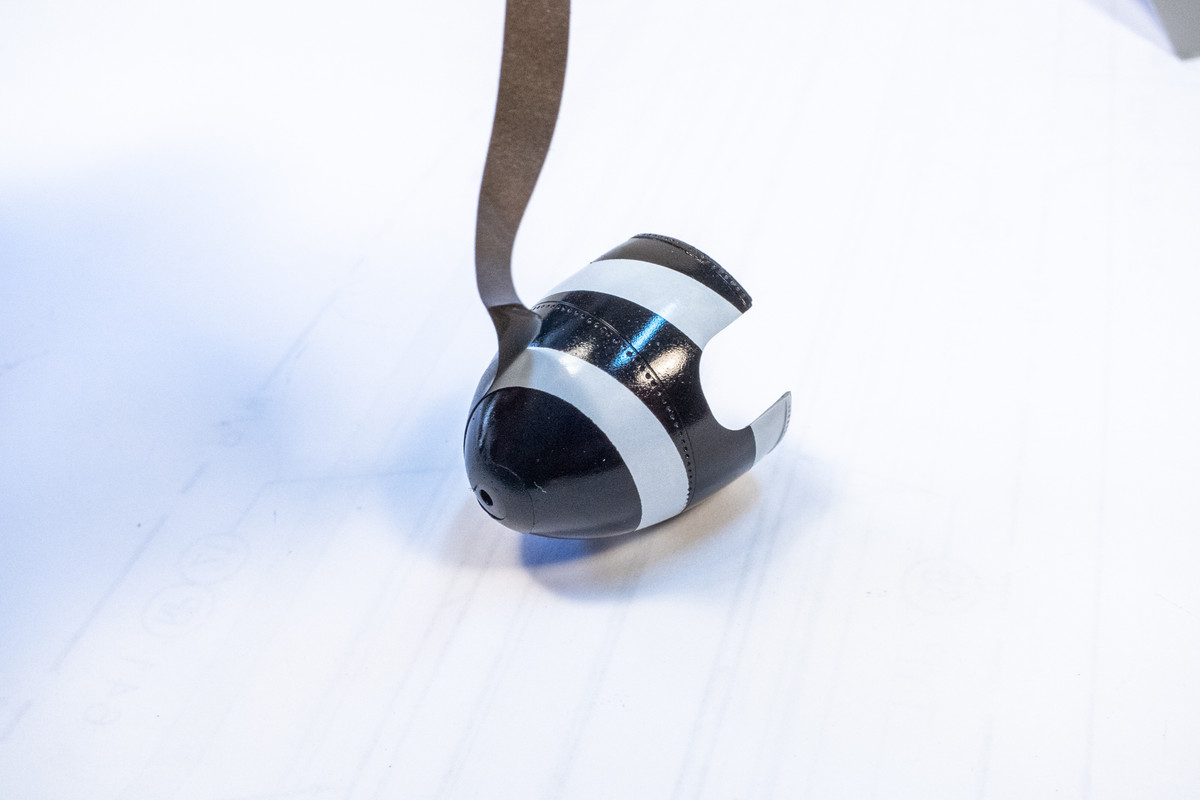
It looks like I got a pretty good spiral on the first attempt, which is often not the case!
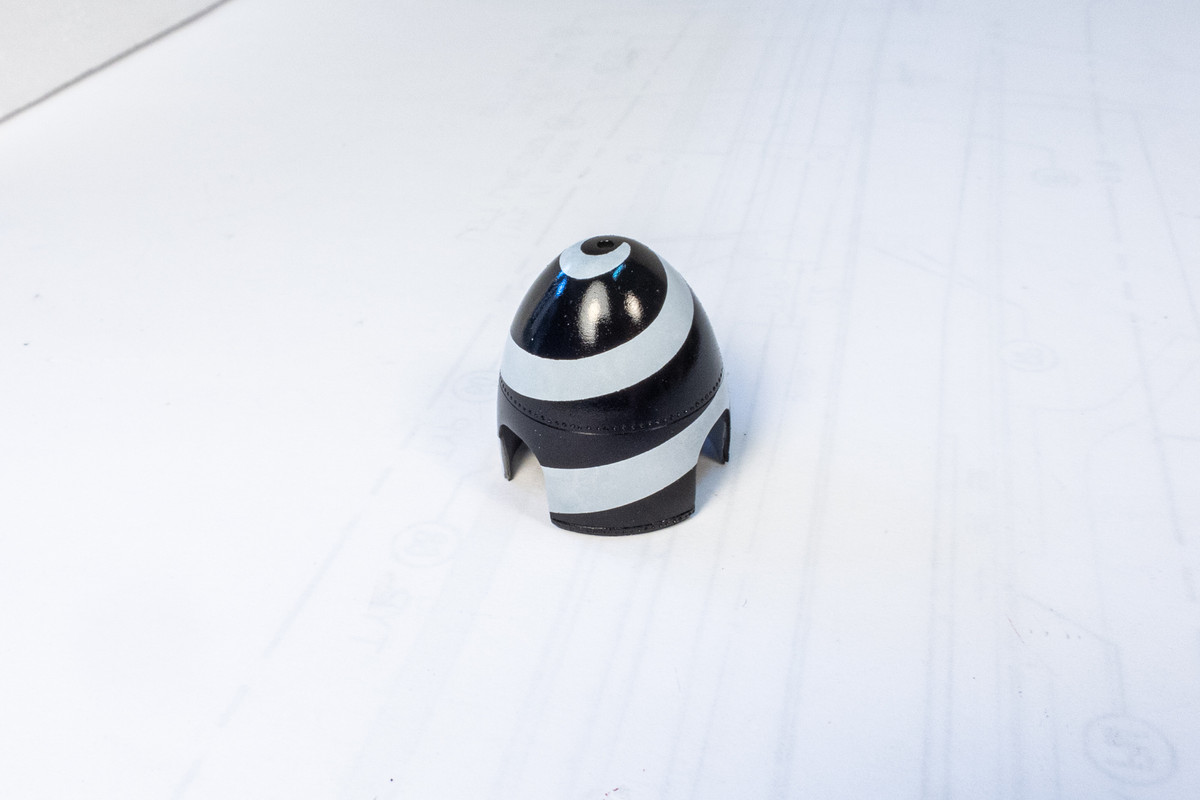
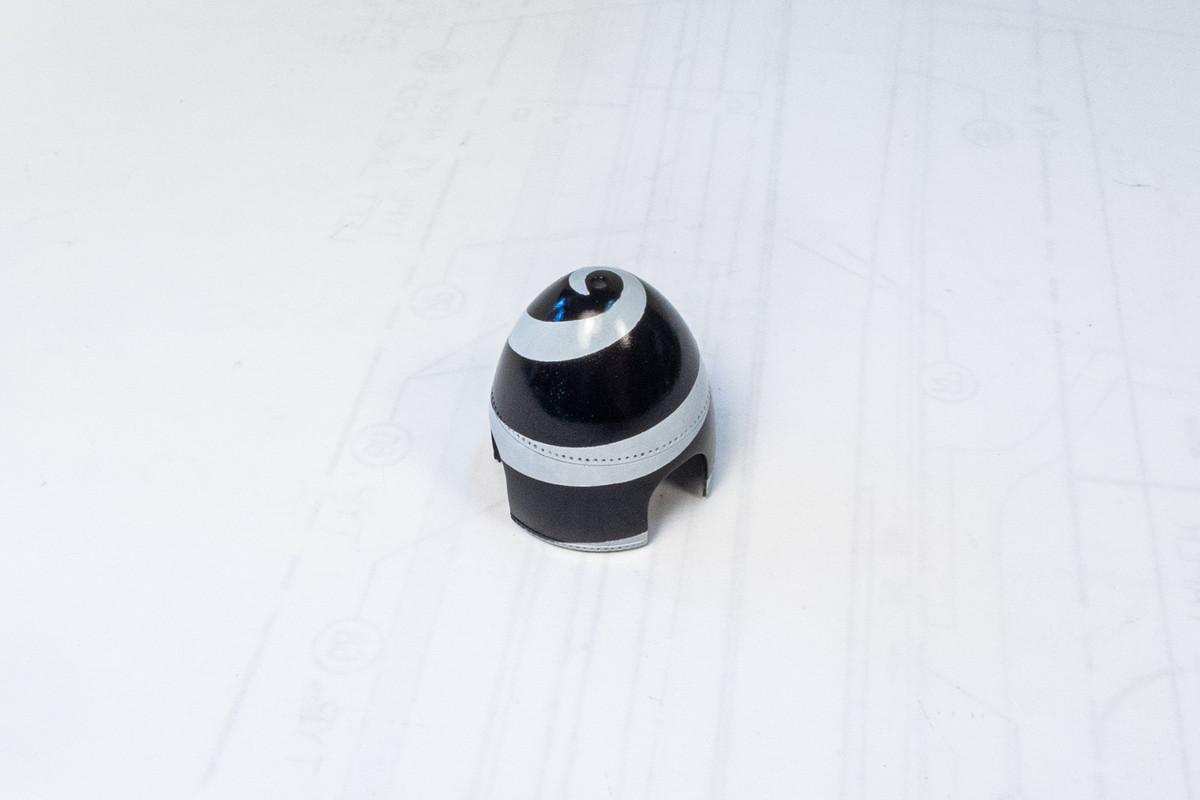
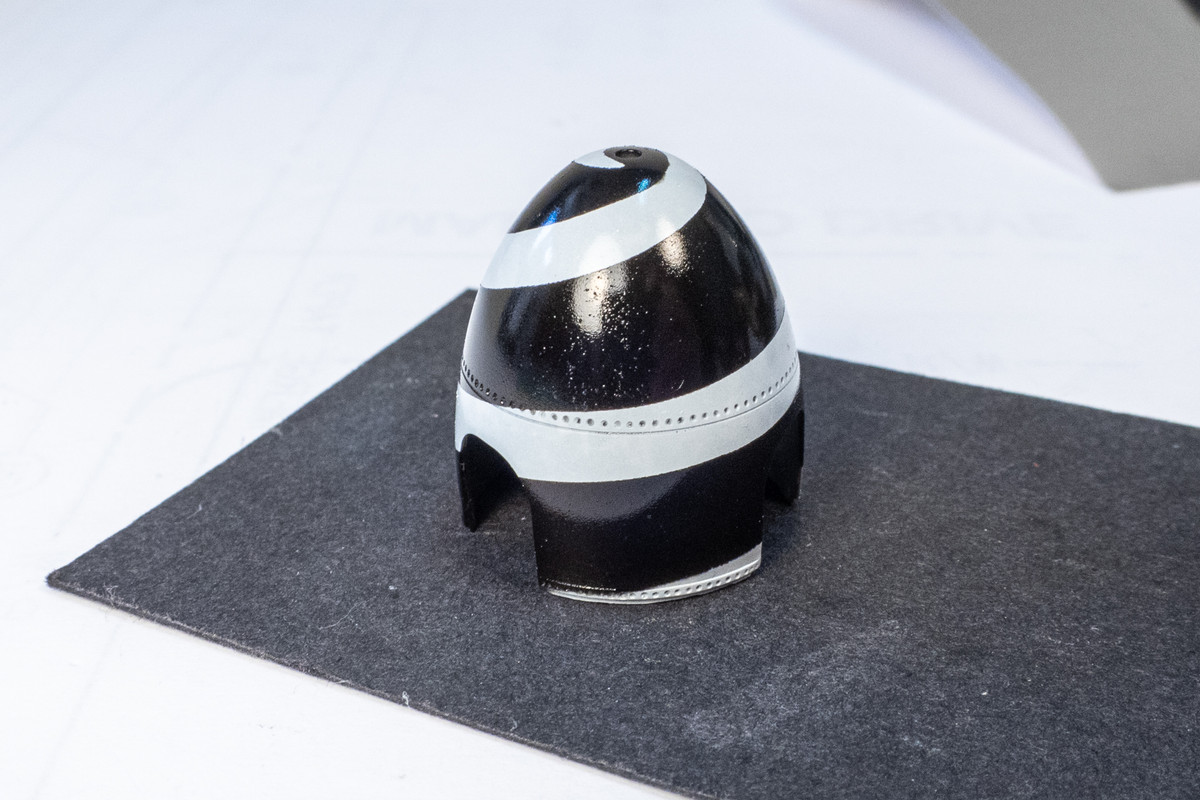
All is not perfect though as I got some unintended spray texture on the black that needs to be cleaned up. I'm going to let the paint fully cure because the last thing you want to do is sand or micomesh soft paint.
As the prop blades are finished, it's now time to paint the spinner. I normally don't do this but I thought I'd try to put a pre-shade pattern down on the spinner to give the white base a little bit of depth/texture. High contrast tends to kill this type of effect but I thought I'd give it try. The pattern is obtained by shooting the airbrush through a piece of scouring pad.
The pre-shade effect is modulated by applying thin coats of the final color. The white is built up slowly until almost all traces of the pre-shade mottle are gone.
Digital photography has a hard time picking up the effect but hopefully you can just make out the pre-shade layer.
For the spiral, I use custom masks cut from Oramask 810. The shapes are traced from various EagleCal decal sheets in my spare box. The Oramask is great material for spirals because it holds it shapes well but also has a certain amount of stretch so you can usually force it into position without the mask lifting or kinking.
The spinner is then sprayed black.
After drying, the mask is carefully peeled off.
It looks like I got a pretty good spiral on the first attempt, which is often not the case!
All is not perfect though as I got some unintended spray texture on the black that needs to be cleaned up. I'm going to let the paint fully cure because the last thing you want to do is sand or micomesh soft paint.
John aka JKim
-----------<><
-----------<><

Re: Hasegawa 1/32 Fw 190D-9 Brown 4
Fantastic spinner John, I'm always impressed by how well you do those. 
Stuart Templeton 'I may not be good but I'm slow...'