Trumpeter P-47D Razorback "Eileen"

Post your work in progress of your aircraft builds in here.
User avatar
jkim
Elite Member
Posts: 4073
Joined: Mon Apr 10, 2017 4:03 pm

Re: Trumpeter P-47D Razorback "Eileen"

Post by jkim »

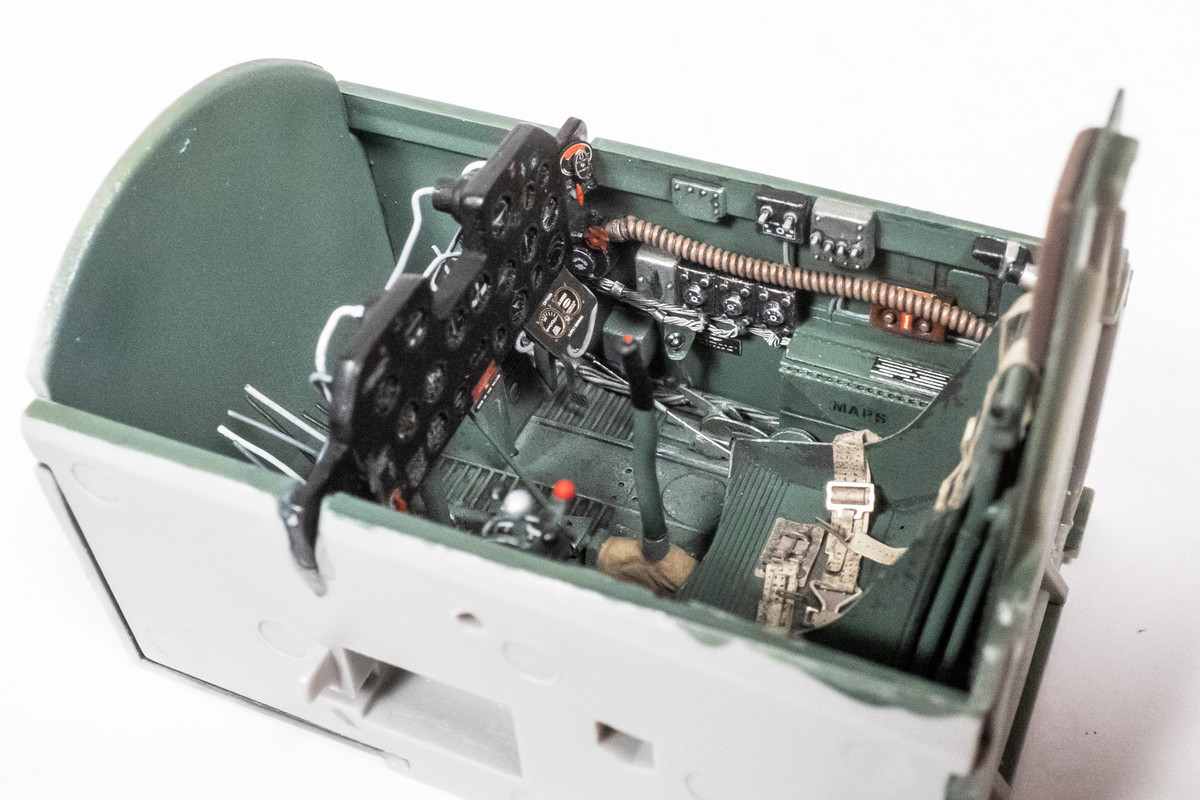
I painted the rudder cables silver to make them stand out more.
Image

After the rudder cables were situated, I could now add the seat.
Image

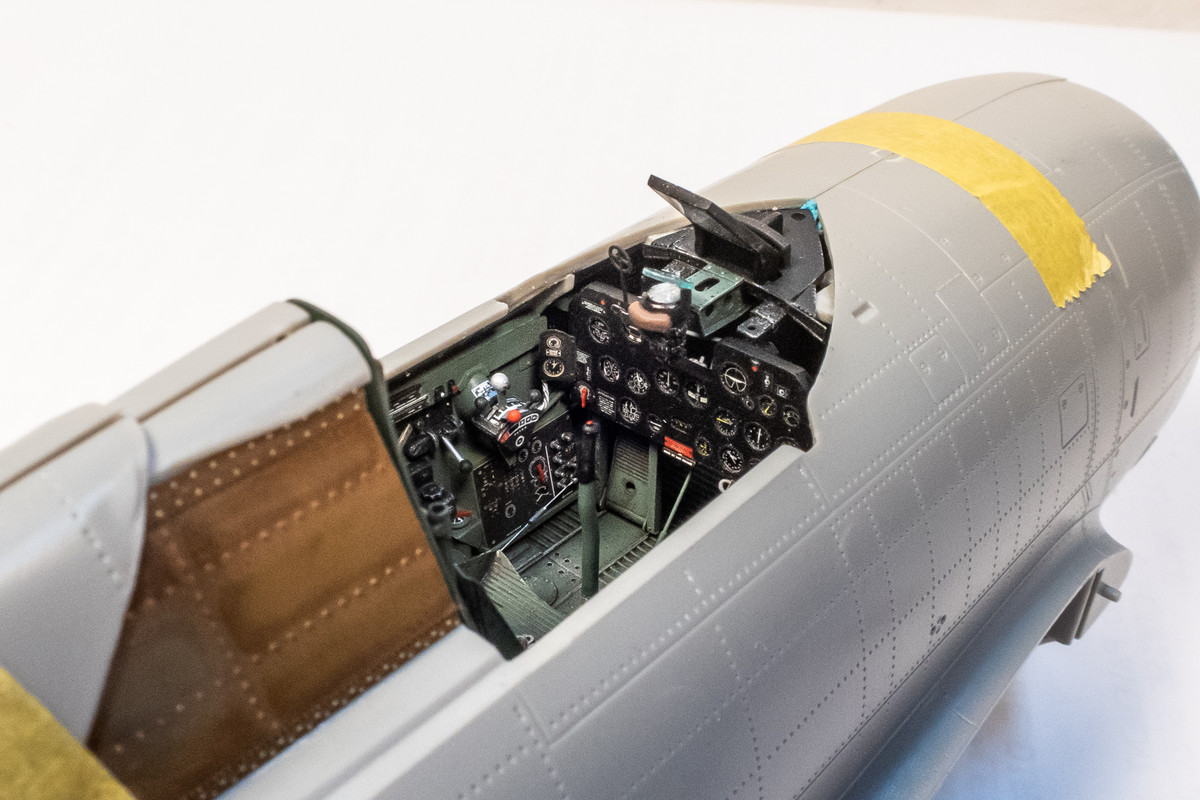
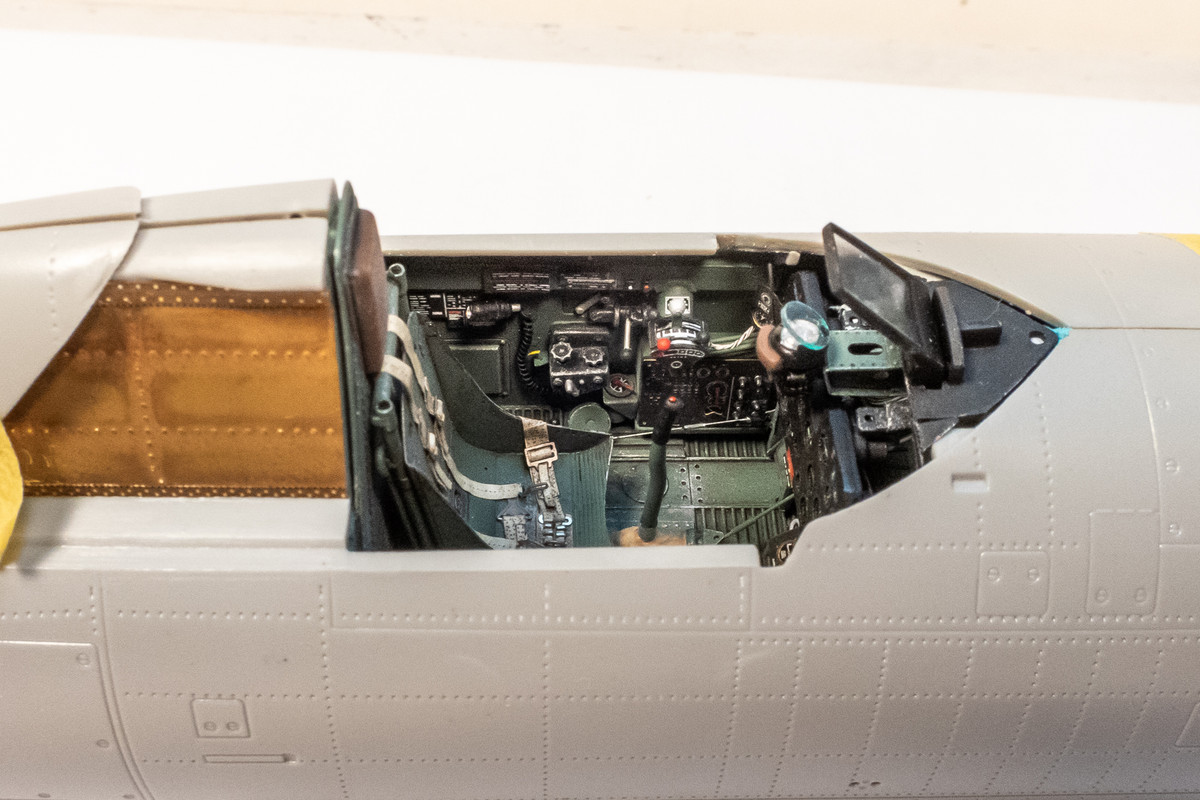
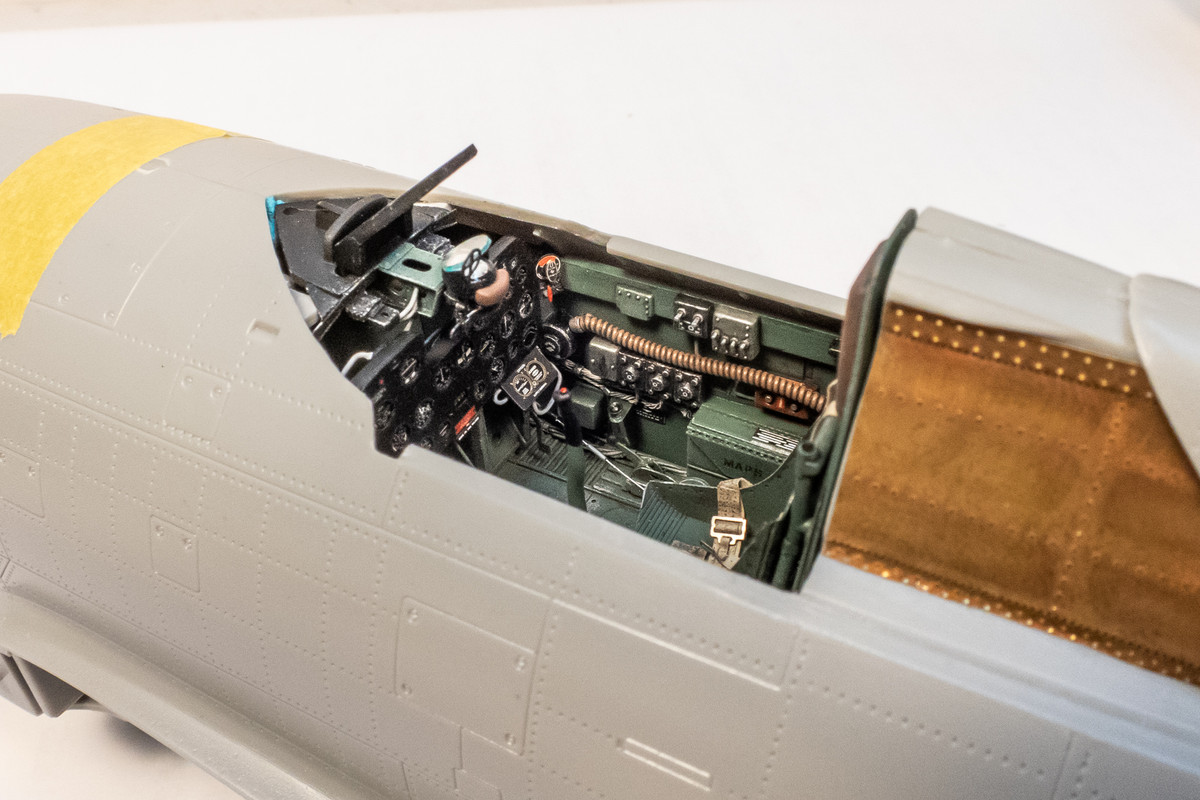
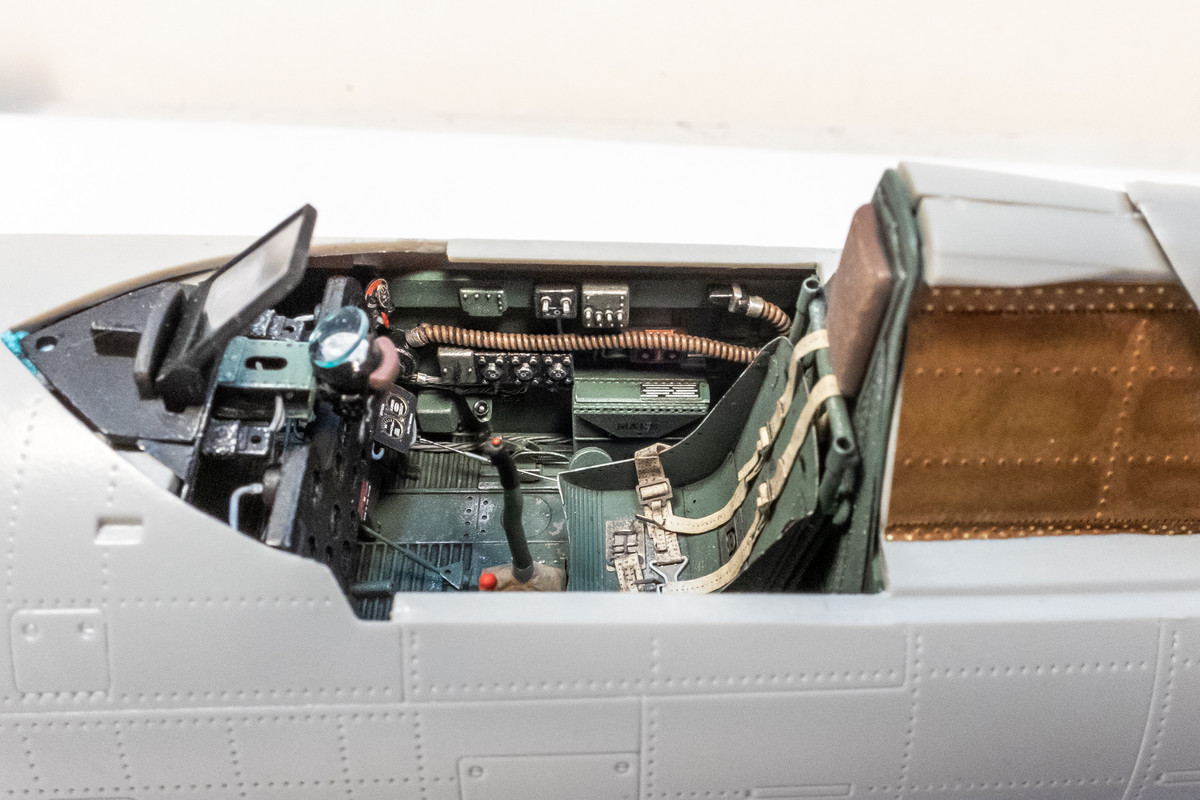
The rear bulkhead is then glued on and the cockpit is complete! Here is what the cockpit looks like in place with the previously completed gun sight.
Image
Image
Image
Image
John aka JKim
-----------<><
Image
User avatar
tempestjohnny
Elite Member
Posts: 3804
Joined: Sat Oct 15, 2016 4:51 am
Location: Naples. FL

Re: Trumpeter P-47D Razorback "Eileen"

Post by tempestjohnny »

In the right light setting it could pass off as 1:1 real.
User avatar
Floki
Elite Member
Posts: 3548
Joined: Wed Dec 12, 2018 2:23 am
Location: Muncie, Indiana

Re: Trumpeter P-47D Razorback "Eileen"

Post by Floki »

Excellent work as always!
March as one, Don't look back
Odin's sons... Attack!
Unleash hell! Do not repent! Warfare grants us no lament
Let your weapons slash and tear This is no place for fear
Hold the lines! Move as one! In unity our victory's won
Our shields will form a mighty wall
United we shall never fall
User avatar
KSaarni
Elite Member
Posts: 5621
Joined: Sun Apr 06, 2014 7:13 am
Location: Gent, Belgium
Contact:

Re: Trumpeter P-47D Razorback "Eileen"

Post by KSaarni »

F A N T A S T I C !!

- Kari
---
On the bench:

MiniArt 1:48 - Junkers F13 Float Plane


https://www.facebook.com/GrundAsk-Scale ... 721218708/
User avatar
jkim
Elite Member
Posts: 4073
Joined: Mon Apr 10, 2017 4:03 pm

Re: Trumpeter P-47D Razorback "Eileen"

Post by jkim »

Thanks everyone!

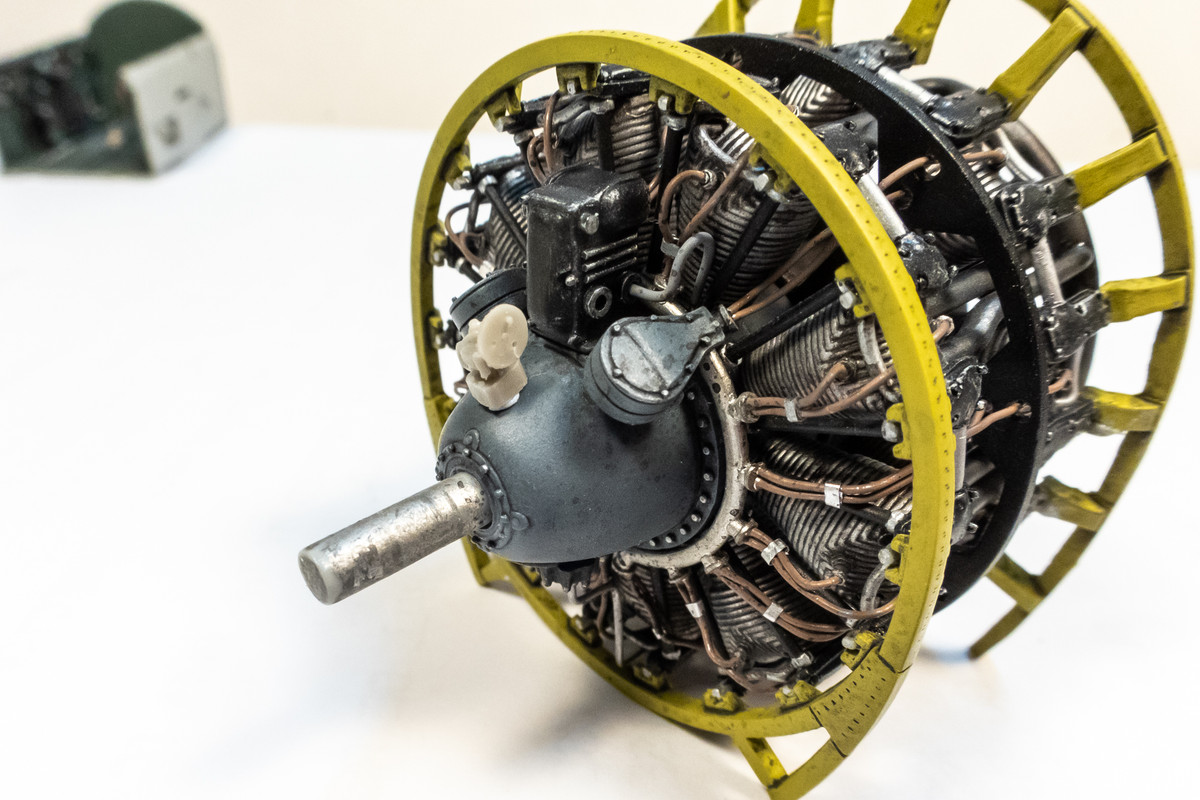
I've decided to add a few more details to the front of the engine. The propeller governor is missing. I have a spare resin governor but this one is for the Hamilton prop and my bird is running a Curtis prop. So I'll have to modify this one or scratch a new one.
Image

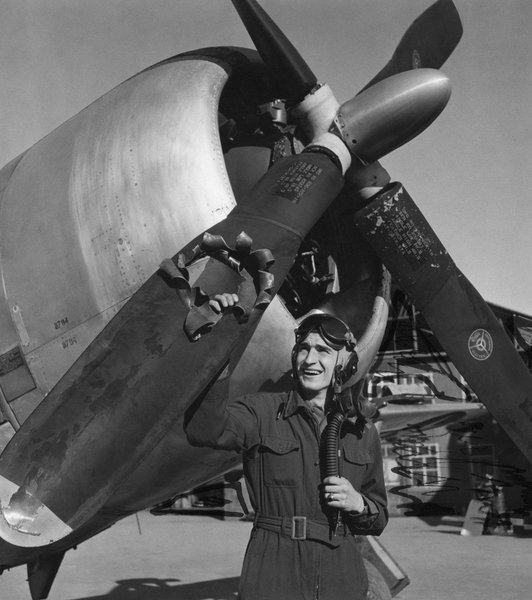
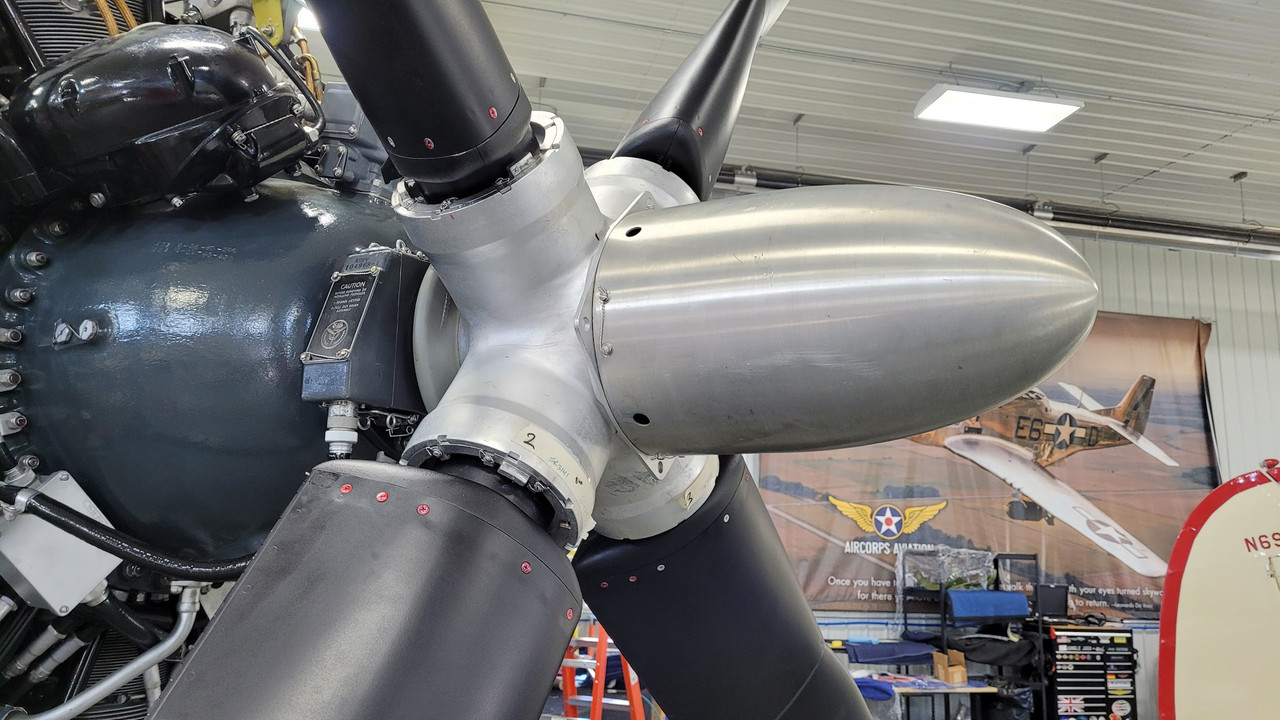
Also missing is the brush assembly that is located behind the prop. The brush assembly uses the rotation of the prop to power to electric motor which control the prop blade angle. You can see these components in the photos below.
Image
Image

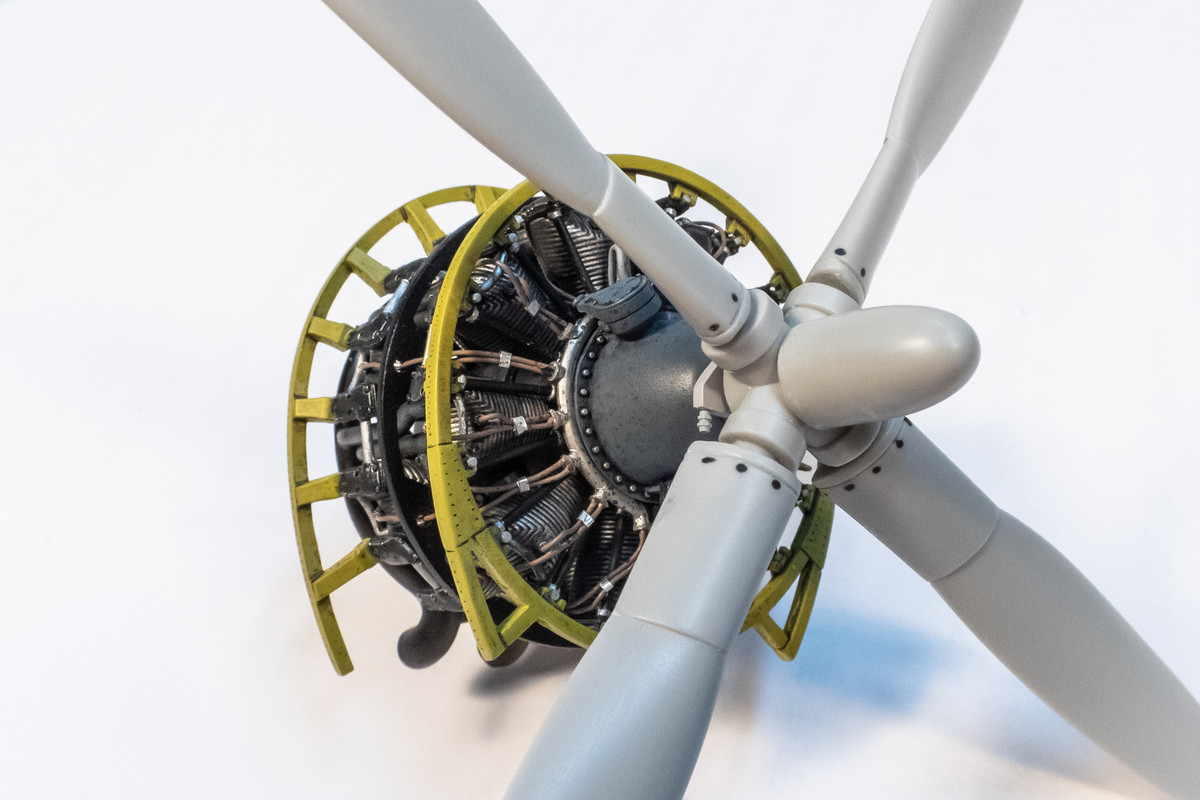
So I added the brush assembly to the prop shaft.
Image

Here is what it looks like behind the prop.
Image

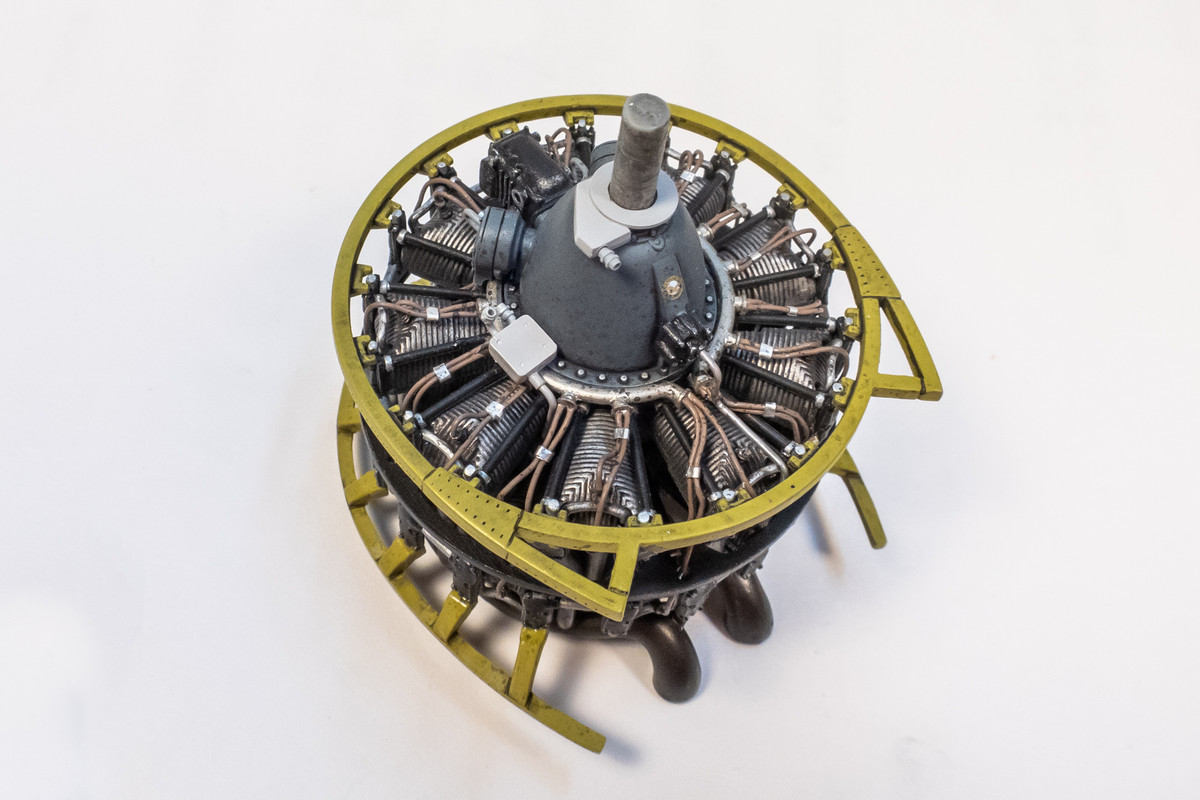
Also scratched up an electrical junction box. The electrical cables from the prop governor and brush assembly will connect to this.
Image

On the subject of small details, I've added a an emergency shut-off to the oxygen regulator. It's nestled just between the black regulator and the brown oxygen hose.
Image
John aka JKim
-----------<><
Image
User avatar
Duke Maddog
Elite Member
Posts: 7669
Joined: Tue Jun 03, 2014 11:22 am
Location: Rowland Heights, CA

Re: Trumpeter P-47D Razorback "Eileen"

Post by Duke Maddog »

Man you have so many details going I can't see where you put in new ones! This so looks like the real thing! Make sure you fire it up after you get done with that engine!

Along with the brushes, you should add that hole in the prop blade too!! :shocked: :tease:
The Duke
Virtuoso of Miniatures

"Do you know what the chain of command is? It's the chain I get and beat you with 'till you understand who's in ruttin' command!"
-Jayne Cobb, Firefly Episode 2 "The Train Job"

We are modelers - the same in spirit, in hunger to insanely buy newly released kits, hustlers in hiding our stash from our better halves and experts in using garbage as replacements for after-market parts.
User avatar
BlackSheep214
Elite Member
Posts: 13417
Joined: Sun Apr 06, 2014 8:47 pm

Re: Trumpeter P-47D Razorback "Eileen"

Post by BlackSheep214 »

Man... talk about a million to one lucky shot to put hole through one of the propeller blades. What’s the story on that photo?

As everyone else has mentioned.... incredible work!
“Who controls the skies, controls the fate of this Earth”

Author unknown- 352nd Fighter Group, Blue-Nosed Bastards of Bodney

“Send one plane it’s a sortie; send two planes it’s a flight; send four planes it’s a test of airpower. - Richard Kohn
User avatar
jkim
Elite Member
Posts: 4073
Joined: Mon Apr 10, 2017 4:03 pm

Re: Trumpeter P-47D Razorback "Eileen"

Post by jkim »

Thanks guys! I don't know the story of the hole in the prop but there must be quite a tale behind it. At least it ended in smiles!

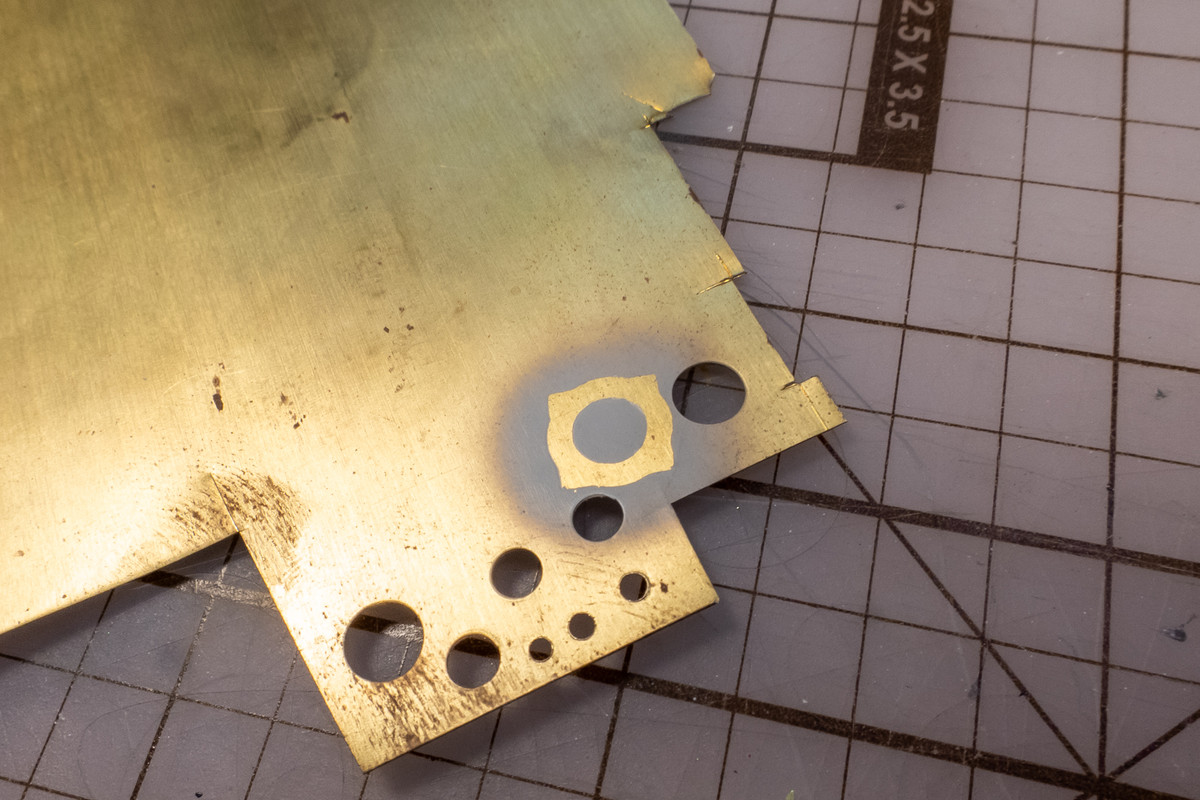
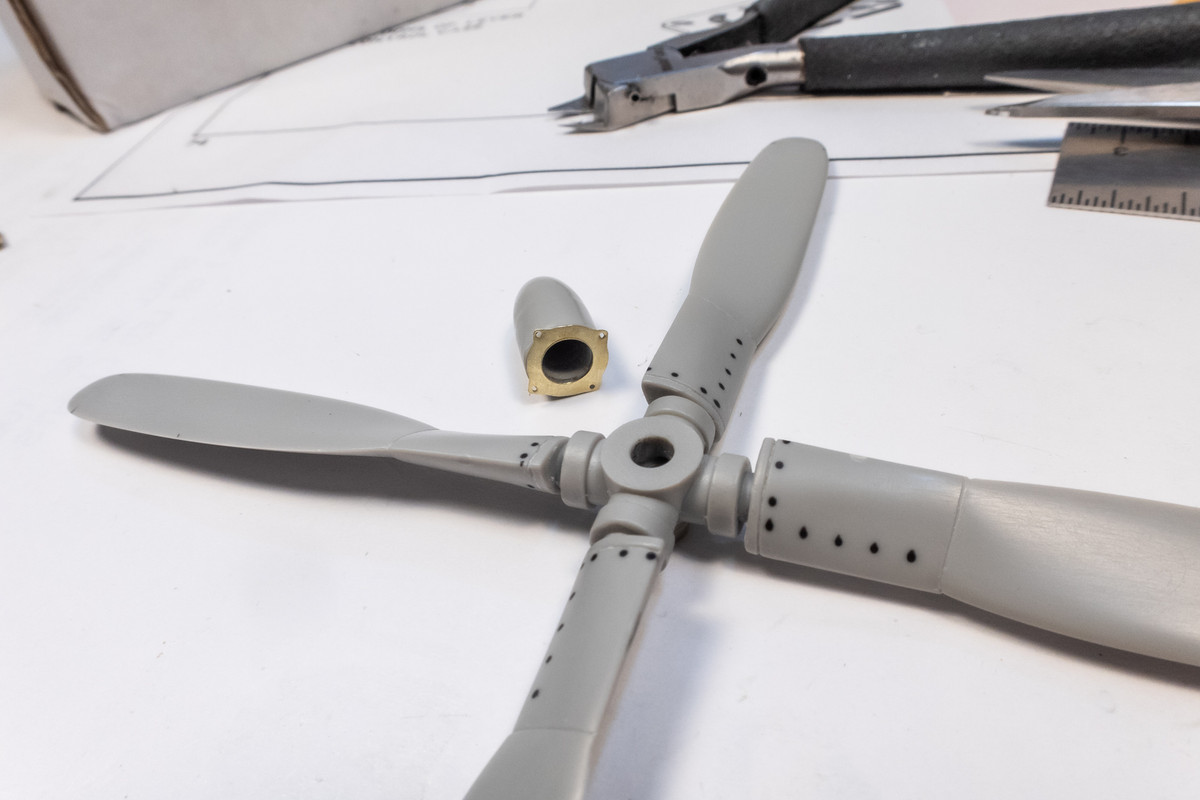
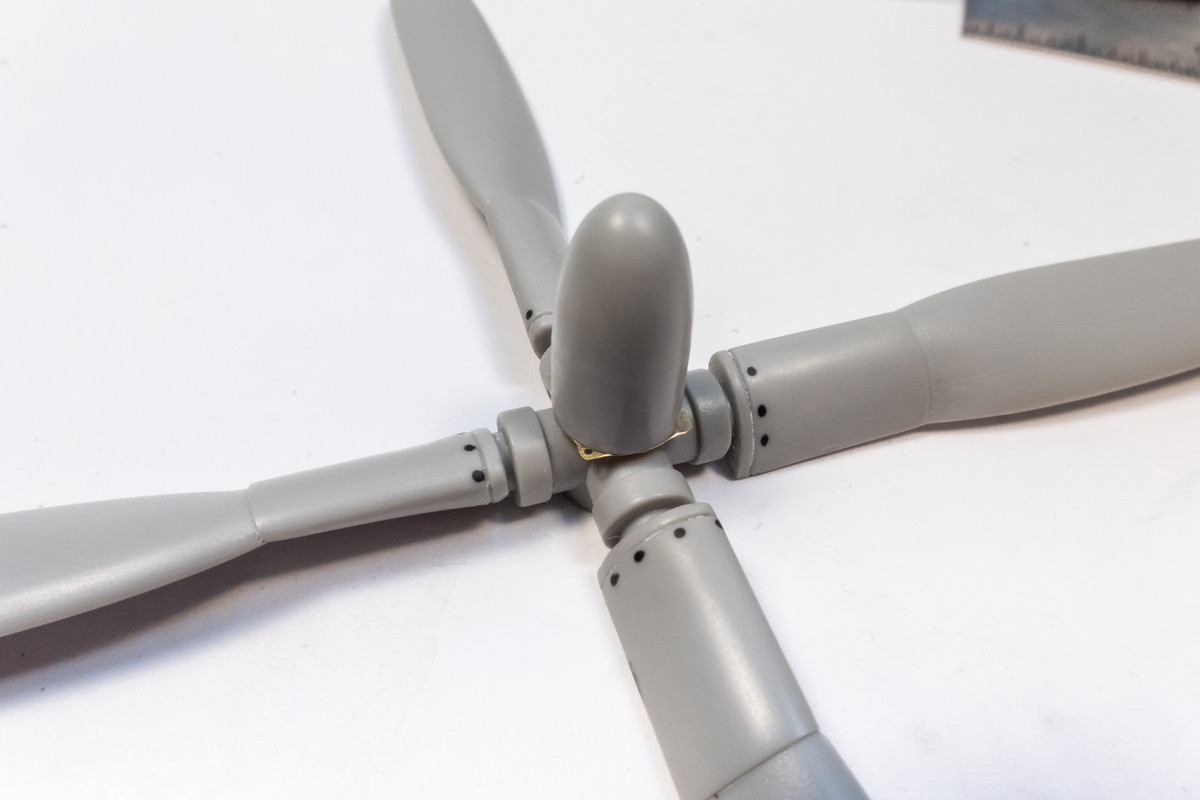
Working out some more details on the prop/engine area. Those photos I posted, in addition to showing the brush housing and prop governor, reveal a backing plate behind the prop nose cone. I drafted up a facsimile in AutoCAD and used a mask on brass sheet to cut out the pattern.
Image

A small detail but it was easy enough to implement.
Image
Image

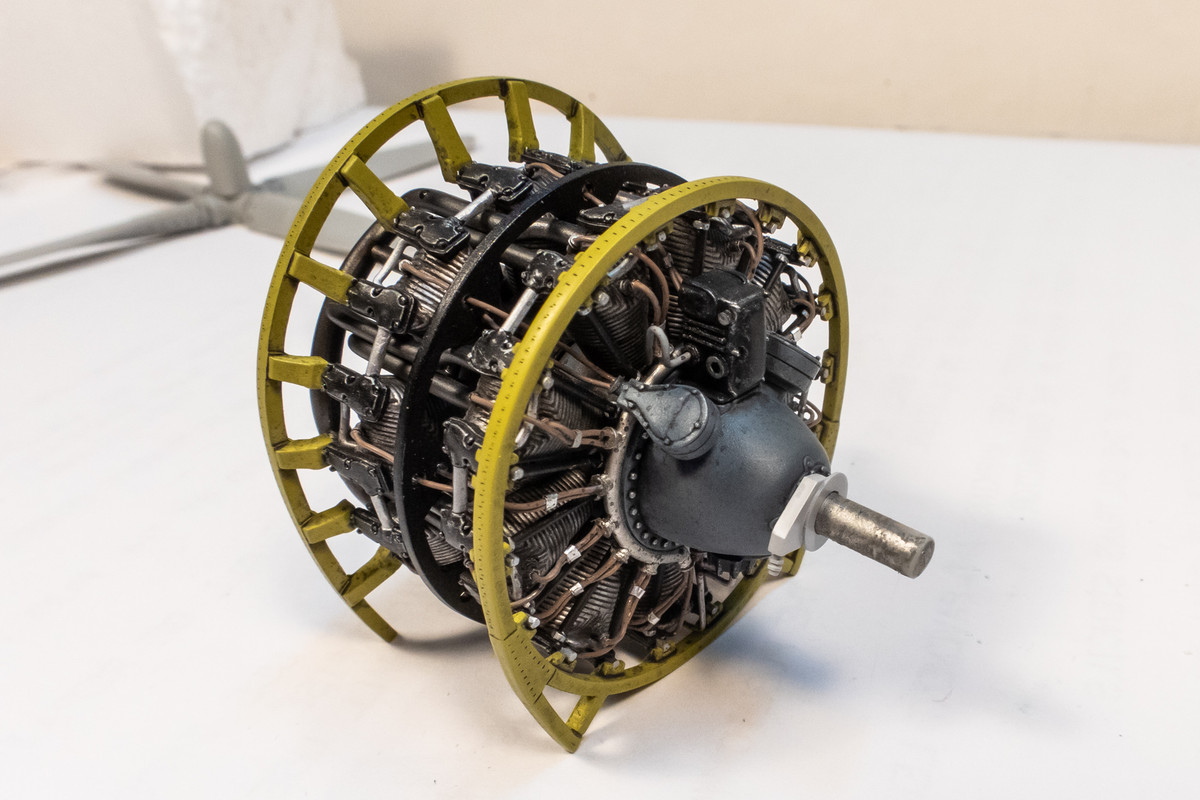
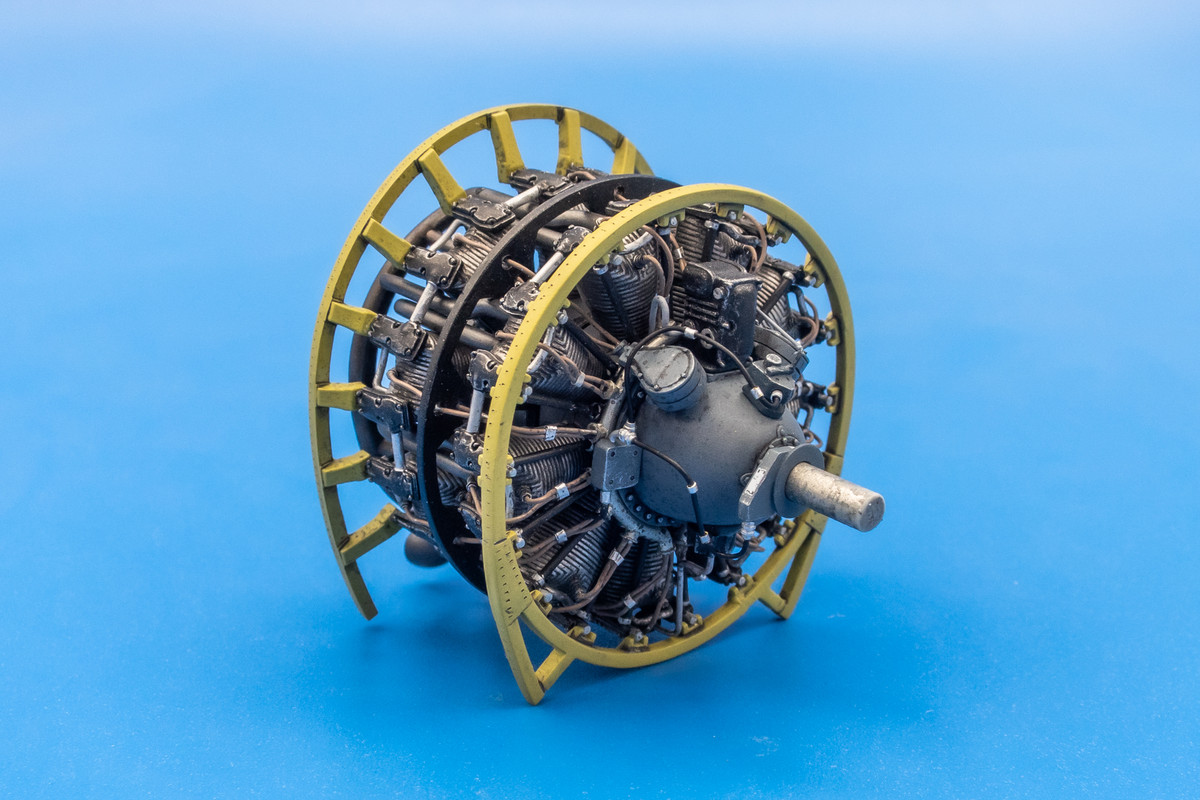
I scratched up a rough approximation of the Curtiss prop governor and connected the added components (governor, brush assembly and junction box) with lead wire. Here is the engine redux...
Image
Image

A side note and something that I didn't document but both the front and rear engine framing have broken during handling. Both have been repaired (the rear multiple times) and hopefully they'll hold up but I'm less confident about the engine being repeatedly removed from the cowling.
John aka JKim
-----------<><
Image
User avatar
jkim
Elite Member
Posts: 4073
Joined: Mon Apr 10, 2017 4:03 pm

Re: Trumpeter P-47D Razorback "Eileen"

Post by jkim »

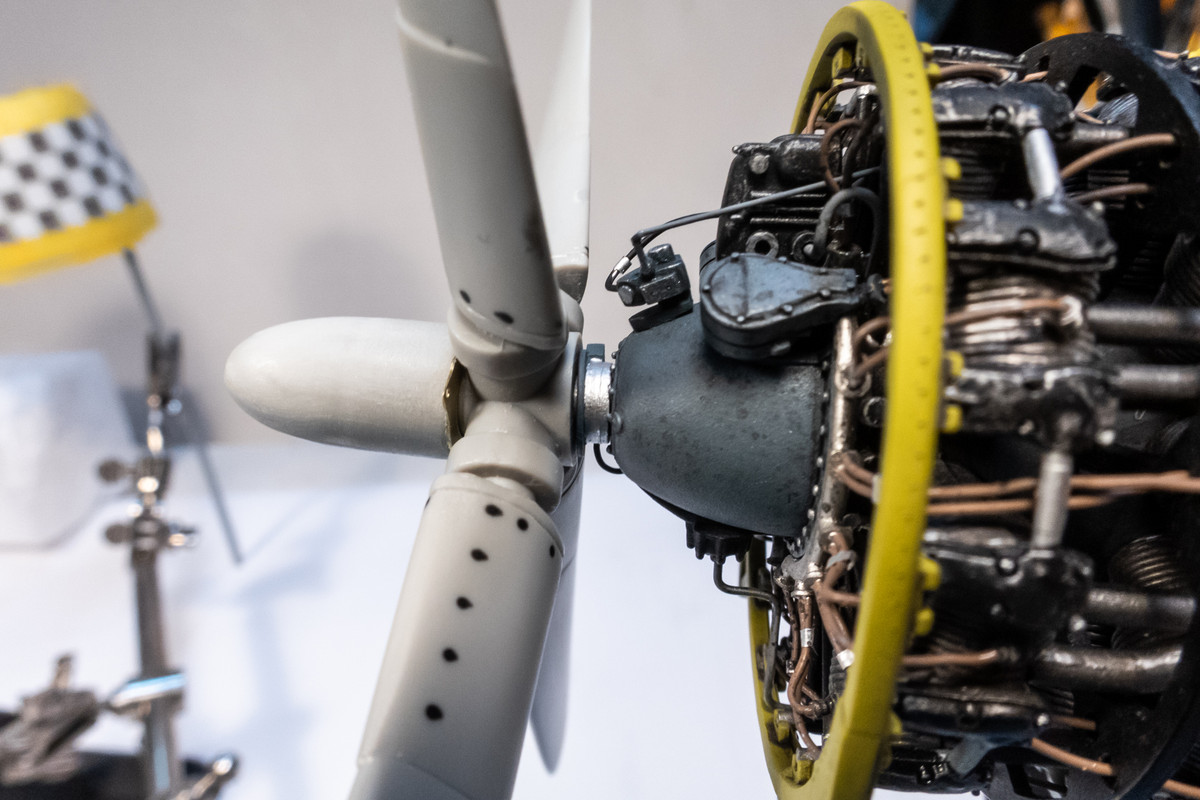
Here's the brush housing occupying what was once the bare space on the prop shaft between the hub and engine.
Image

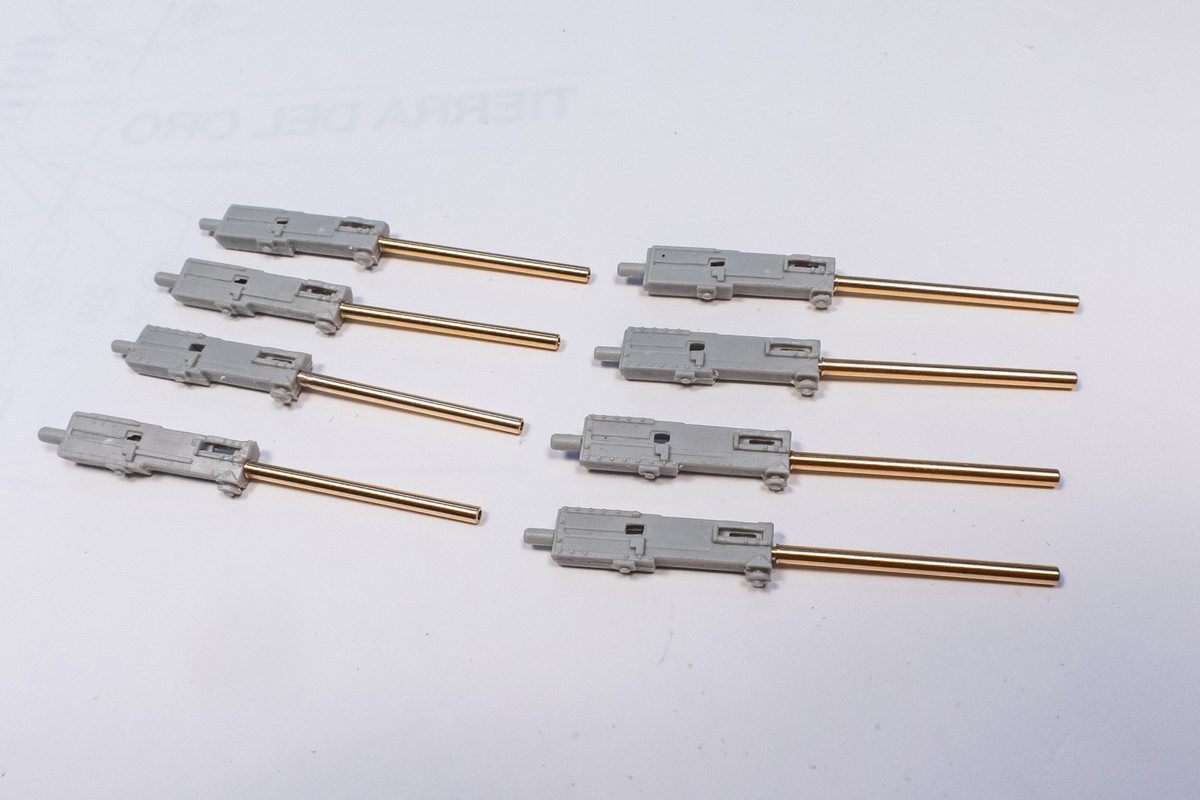
Ahhh... what to tackle next? Took a preliminary look at the brass blast tubes mounted onto the kit's gun bodies. I want to be able to mount the tubes AFTER assembly and that will take some modifications to accomplish. But not in the mood for that!
Image

I decided to tackle the nose cowling checkerboard pattern. The cowling has been sitting for a while with a nice coat of gloss white, waiting for the checker painting. There are different ways of establishing a checkerboard pattern but since I had the Montex mask set, I thought I'd give that approach at try. But first, I scanned the Montex checkerboard pattern and created a custom mask so that I could produce more masks if necessary.
Image

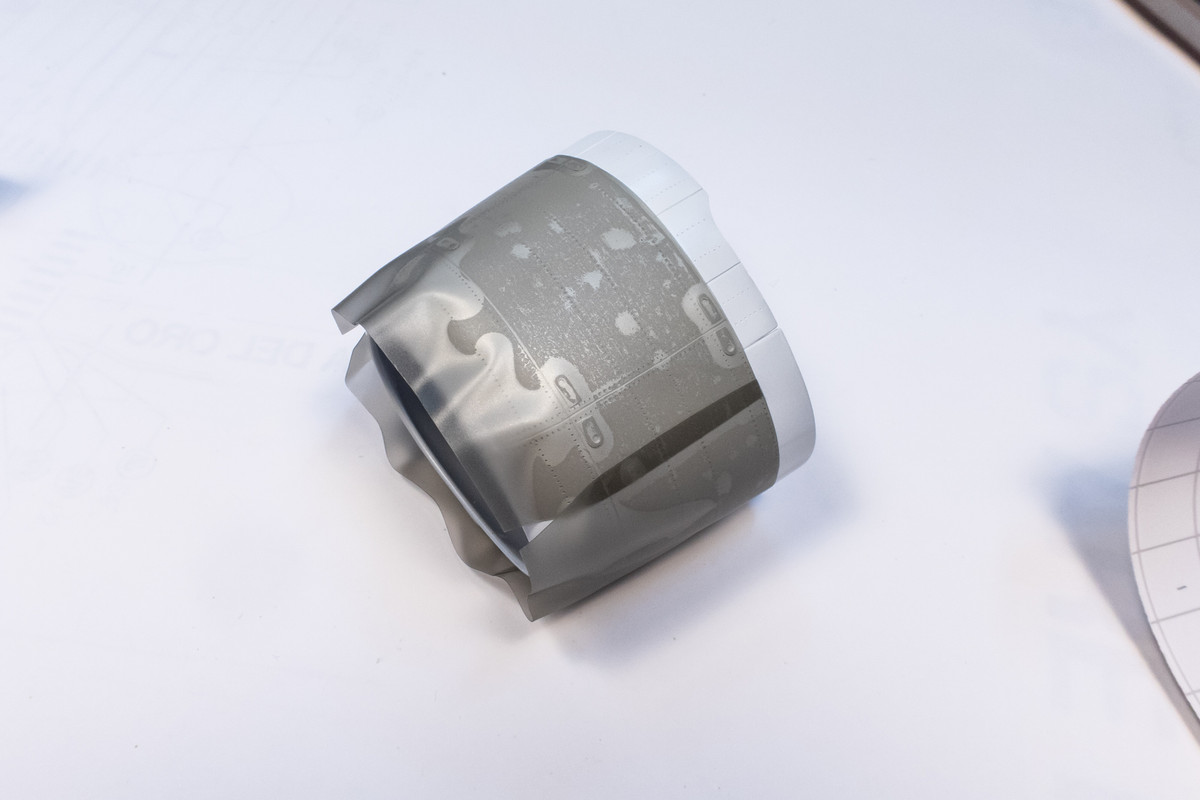
It appeared that the Montex checkers were designed in three components: left, right and bottom. To verify this and to check potential fit of the pattern to the cowling, I produced temporary masks of just the outlines of the three components and placed them on the cowling. Obviously, the vinyl mask material is not going to conform perfectly to the complex curvature of the cowling but it fit well enough to confirm the placement of the three components. I found that the bottom piece over-lapped the side pieces, indicating that the bottom pieces would not fit perfectly.
Image

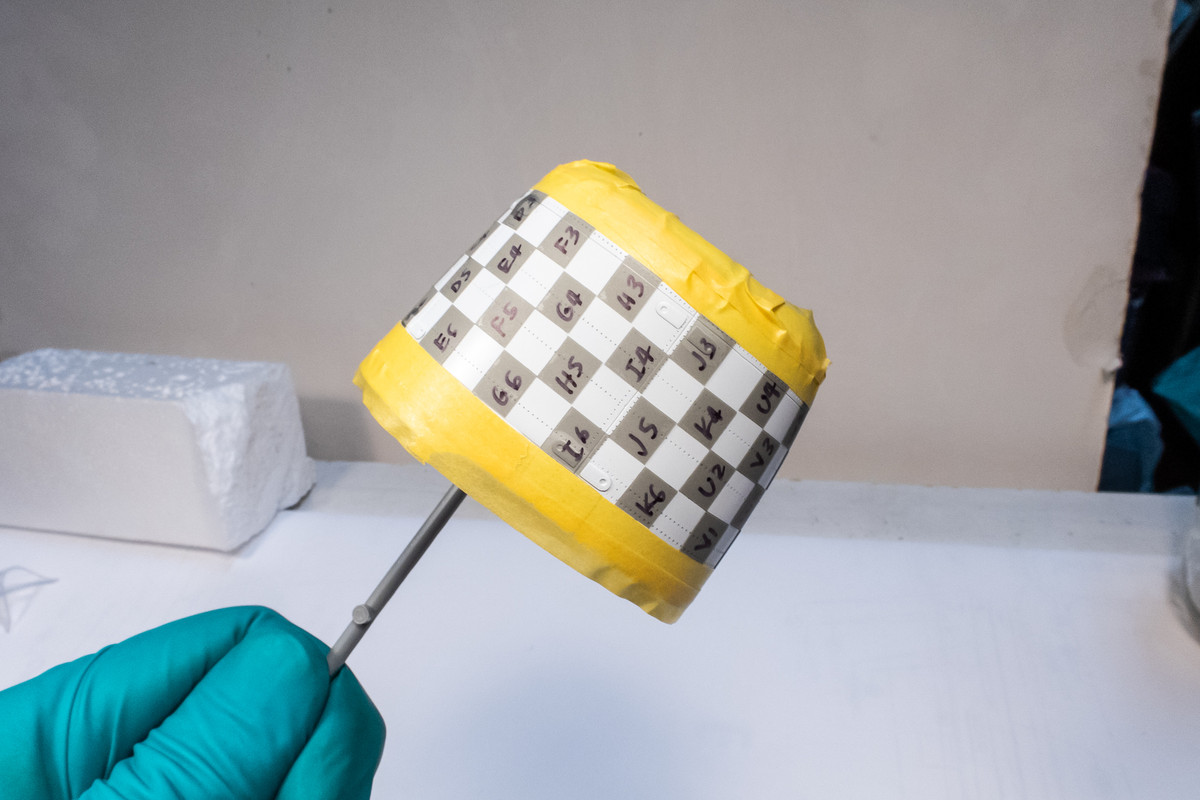
Using the top center of the cowling as the datum, marked by a piece of Tamiya masking tape and the joint at cowling flaps, I started placing the square pieces of the masks one by one. And yes, I labelled each piece of the mask for orientation and re-placement reference.
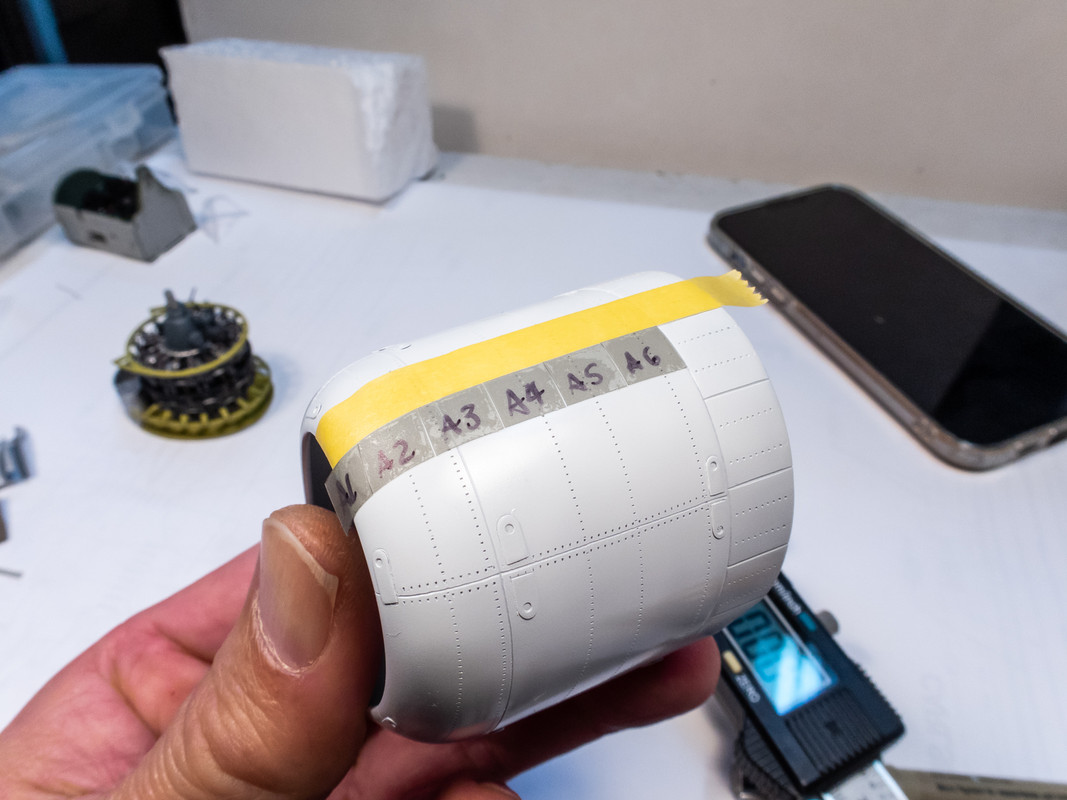
Image

After a few rows, it became apparent that the square pieces were not fitting well around nose edge of the cowling so I elected to stop short by two columns. After the top row on the port side was established, the datum tape was removed and I used the masks already in place as the new datum for the starboard side.
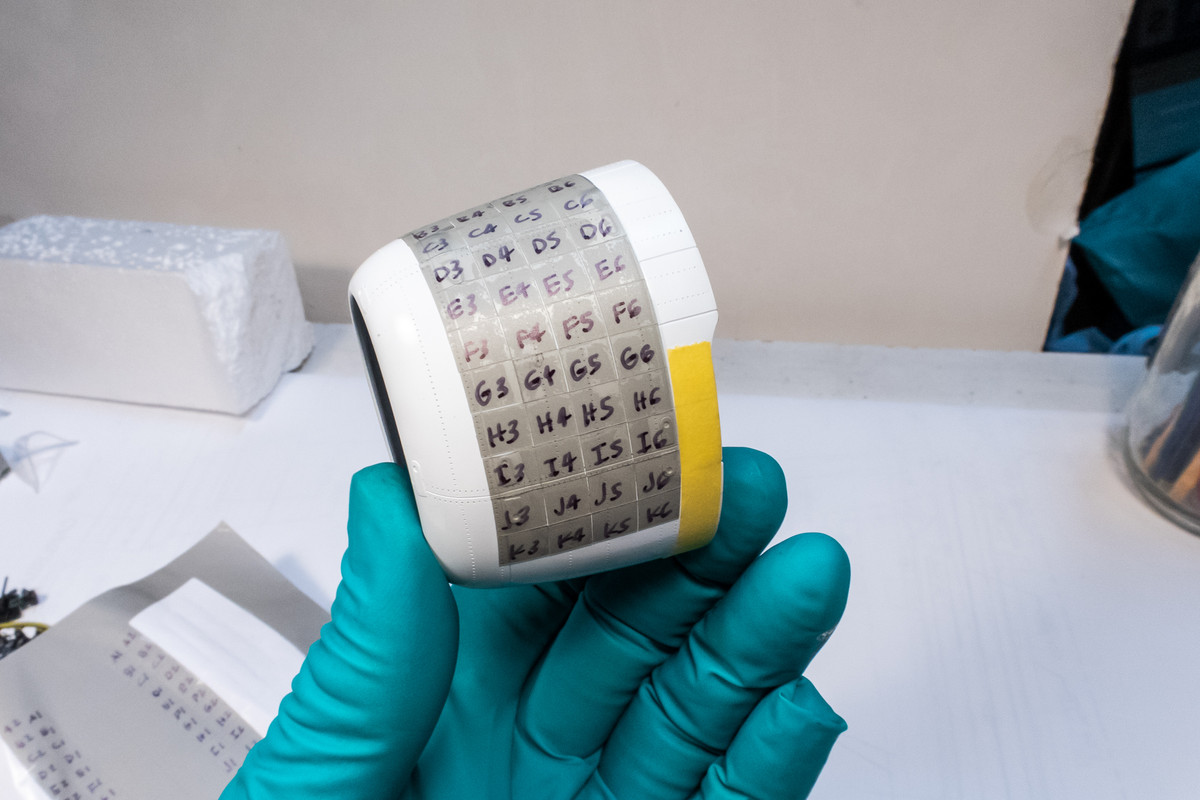
Image

Once I got to the bottom section, I verified that no, the pieces were not go going to fit as designed. Instead, I measured the remaining space and designed a new set of masks to fit that space. I had to do this twice since my original attempt had five rows and the alternating checkerboard pattern needed an even number of rows to work correctly so I made a new bottom section with six rows.
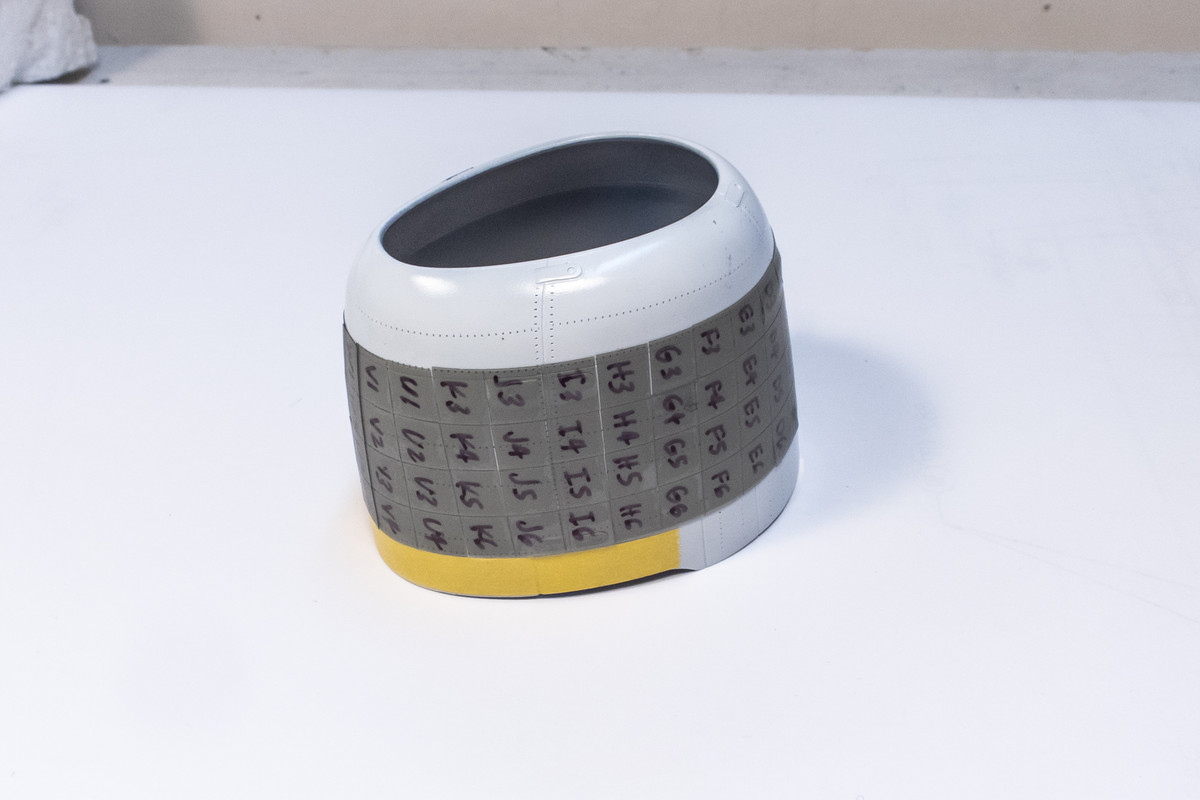
Image

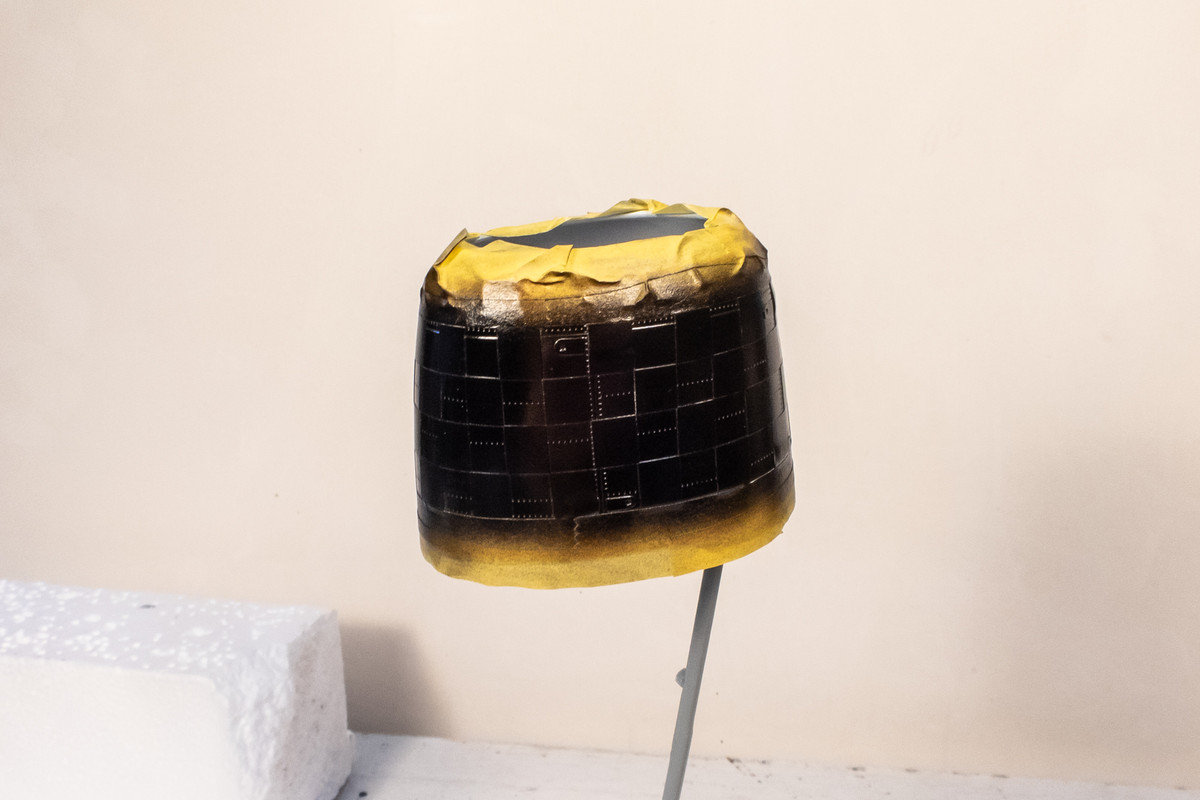
After all of the rows were in place, I started removing alternate squares to form the checkerboard pattern.
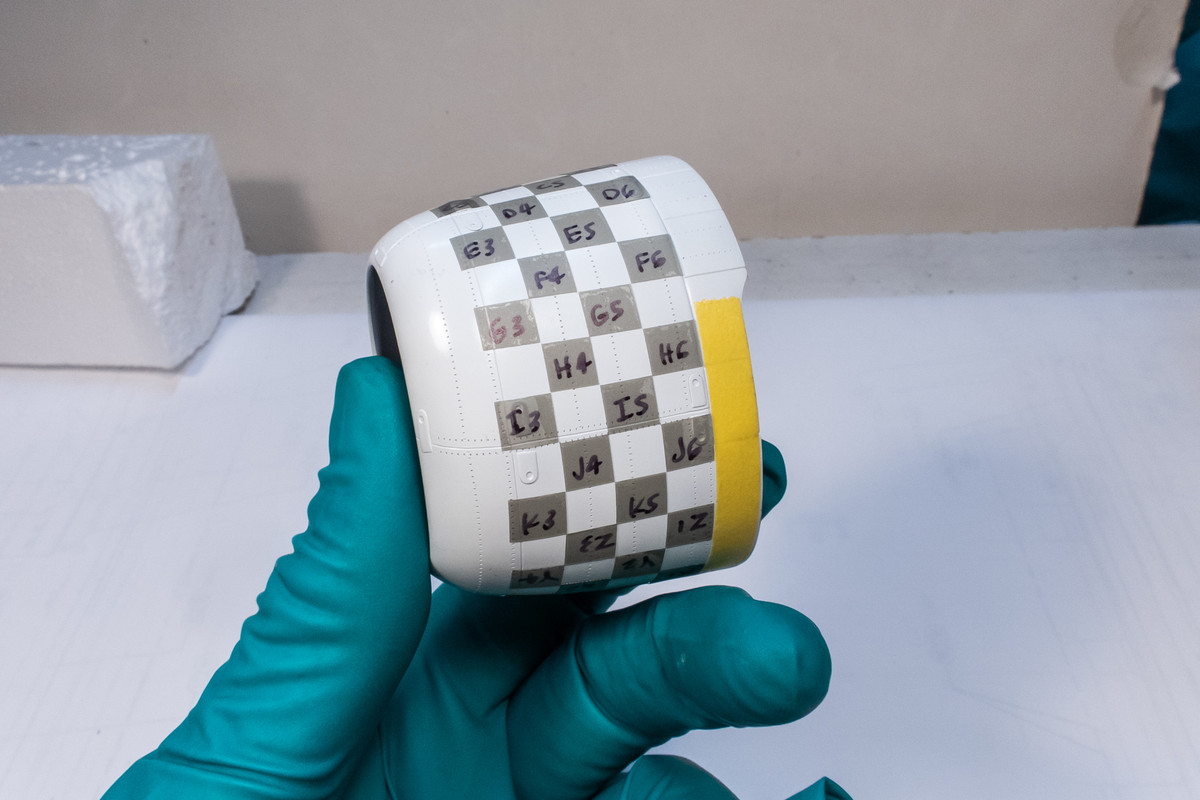
Image

The front and rear borders were masked and Tamiya Black was sprayed onto the cowling.
Image
Image

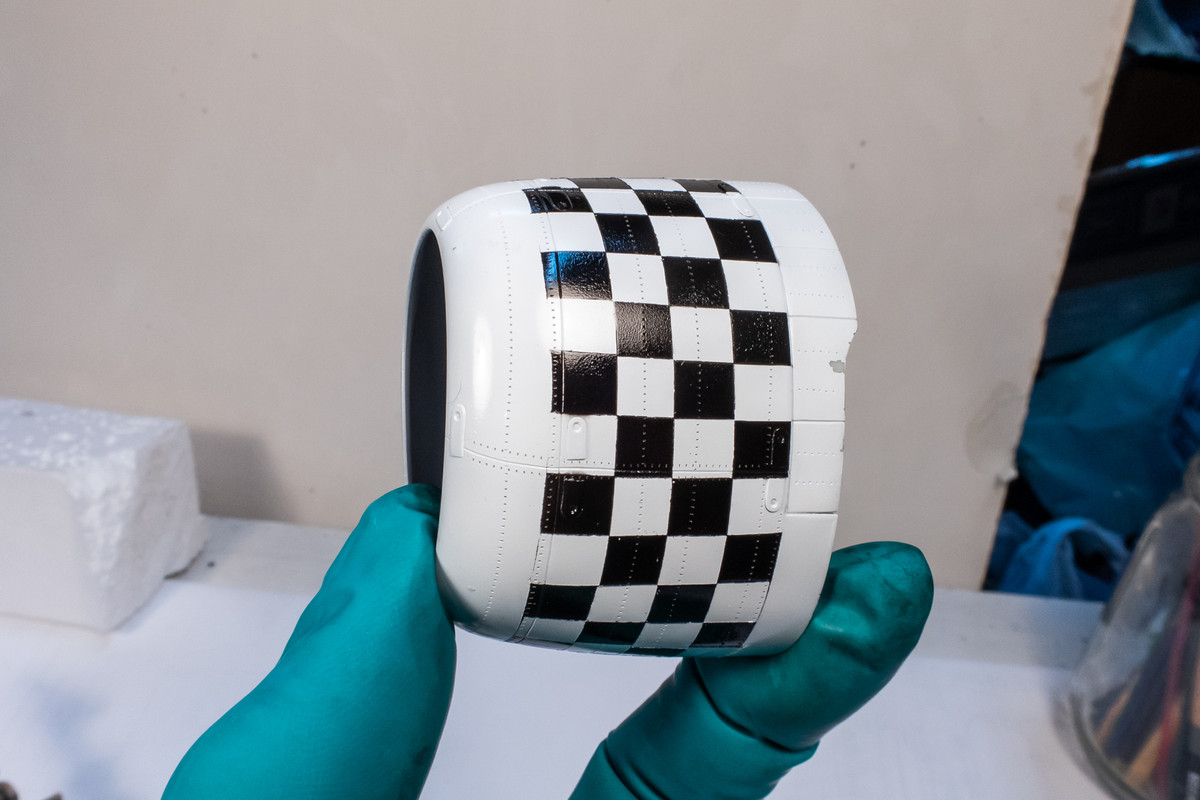
Here is the result after the first coat of black paint.
Image

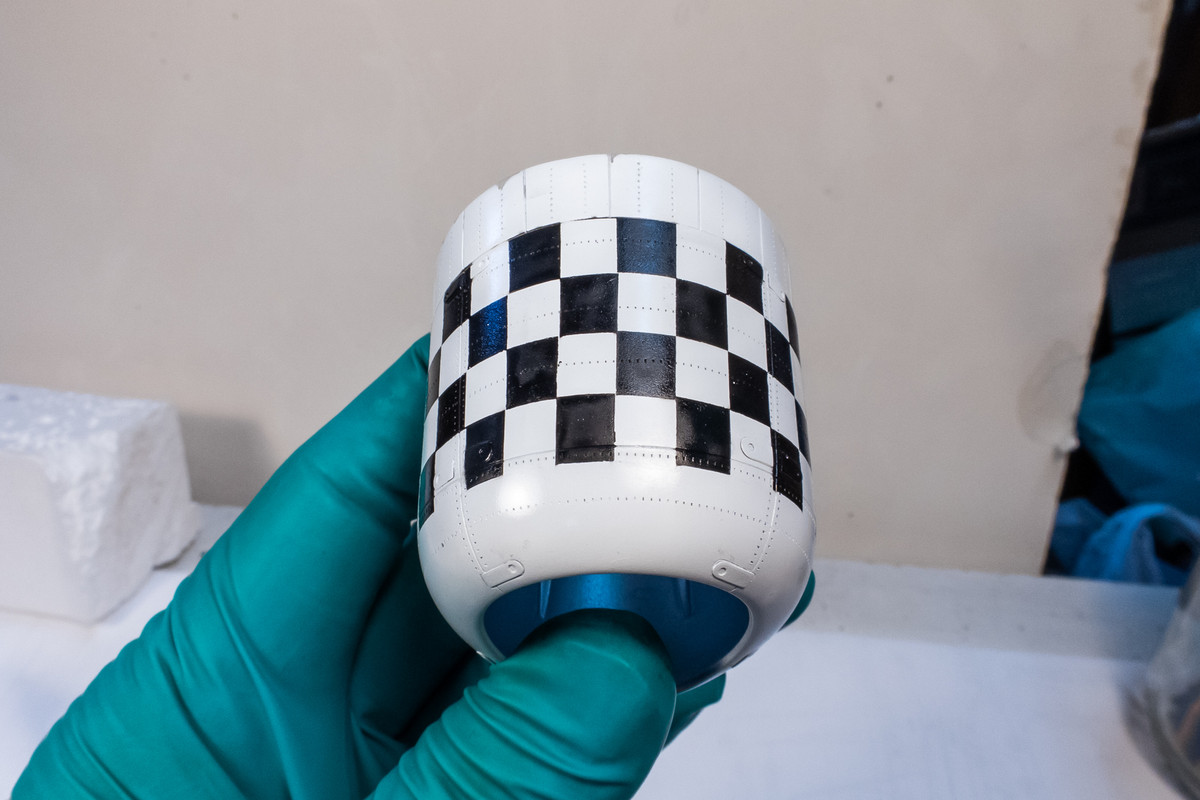
The top was the messiest.
Image

The top after some repair work. I think this approach is going to work!
Image
John aka JKim
-----------<><
Image
User avatar
jkim
Elite Member
Posts: 4073
Joined: Mon Apr 10, 2017 4:03 pm

Re: Trumpeter P-47D Razorback "Eileen"

Post by jkim »

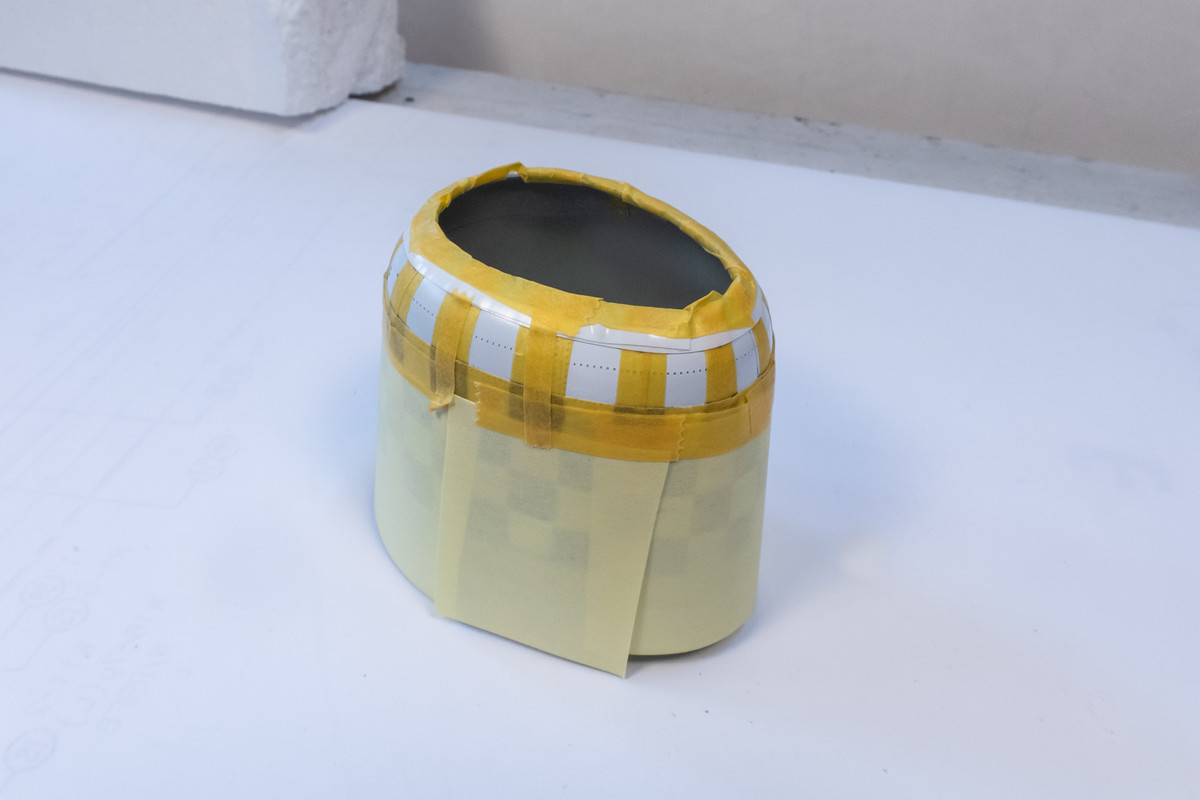
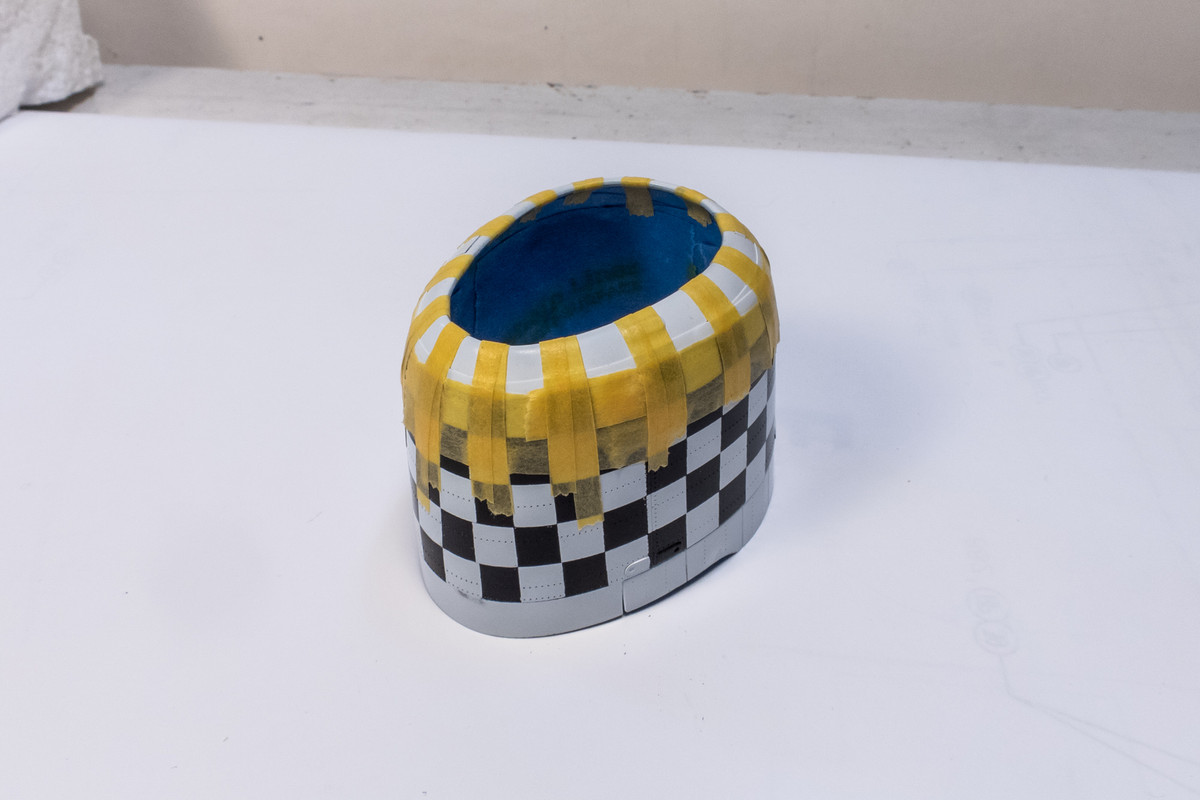
After touching up the checkerboard pattern that I had laid down, I let it all dry completely before moving on to the remaining checkers on the front part of the nose. I did this one row at a time and it was fairly simple to use the lines of the existing checkerboard pattern and extend them forward.
Image
Image

I masked off the interior of the cowling, which was previously painted with Tamiya AS-12 Silver, before finishing the last row of checkers.
Image
Image

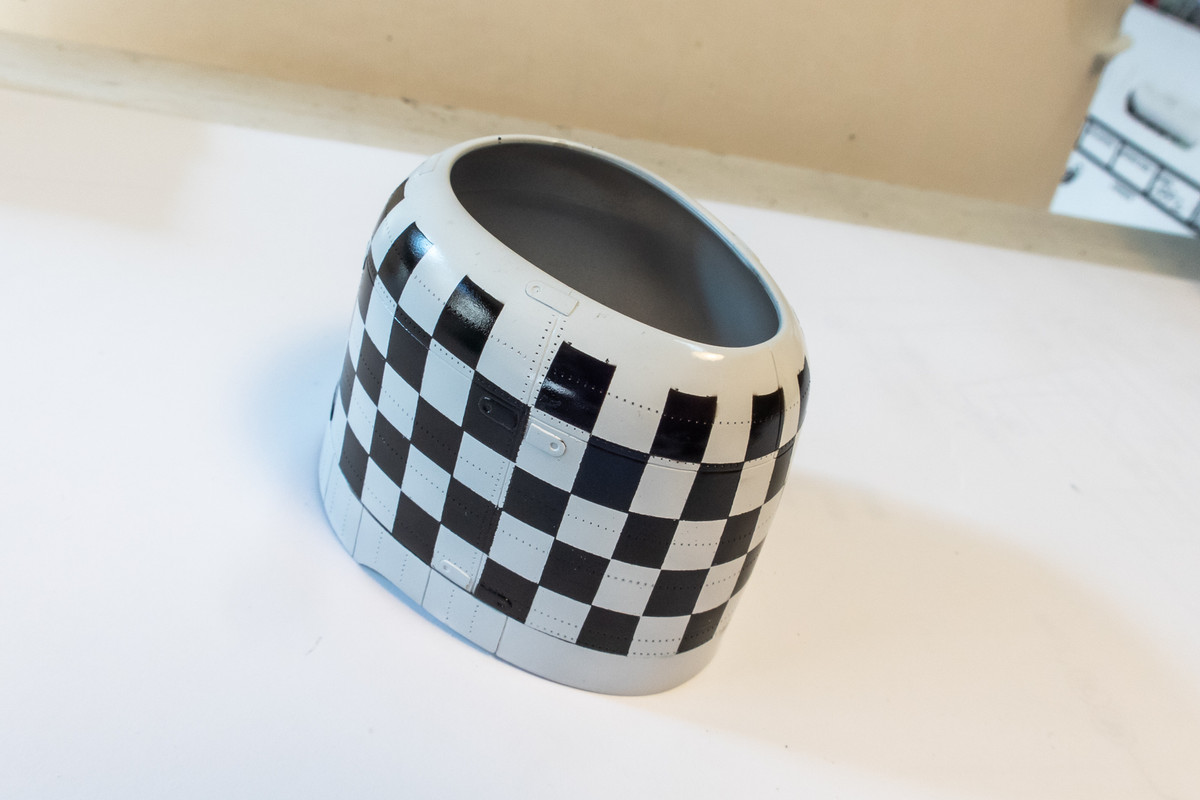
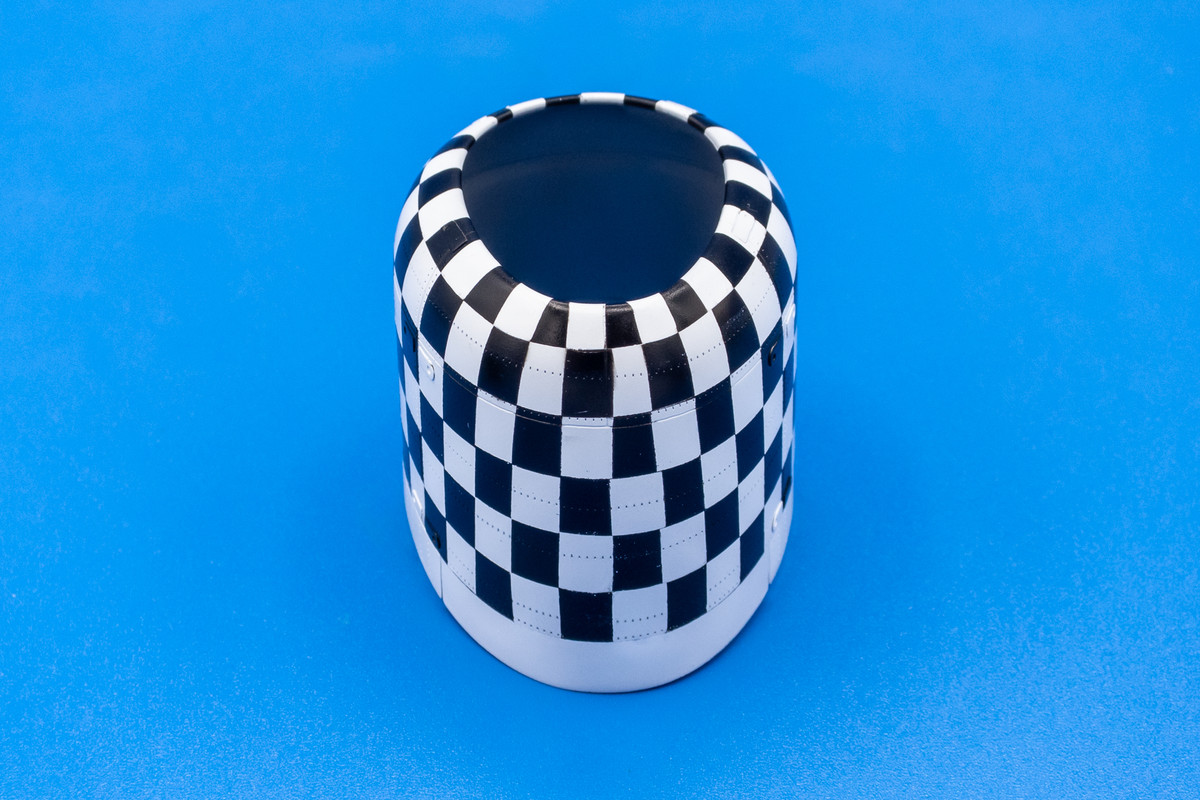
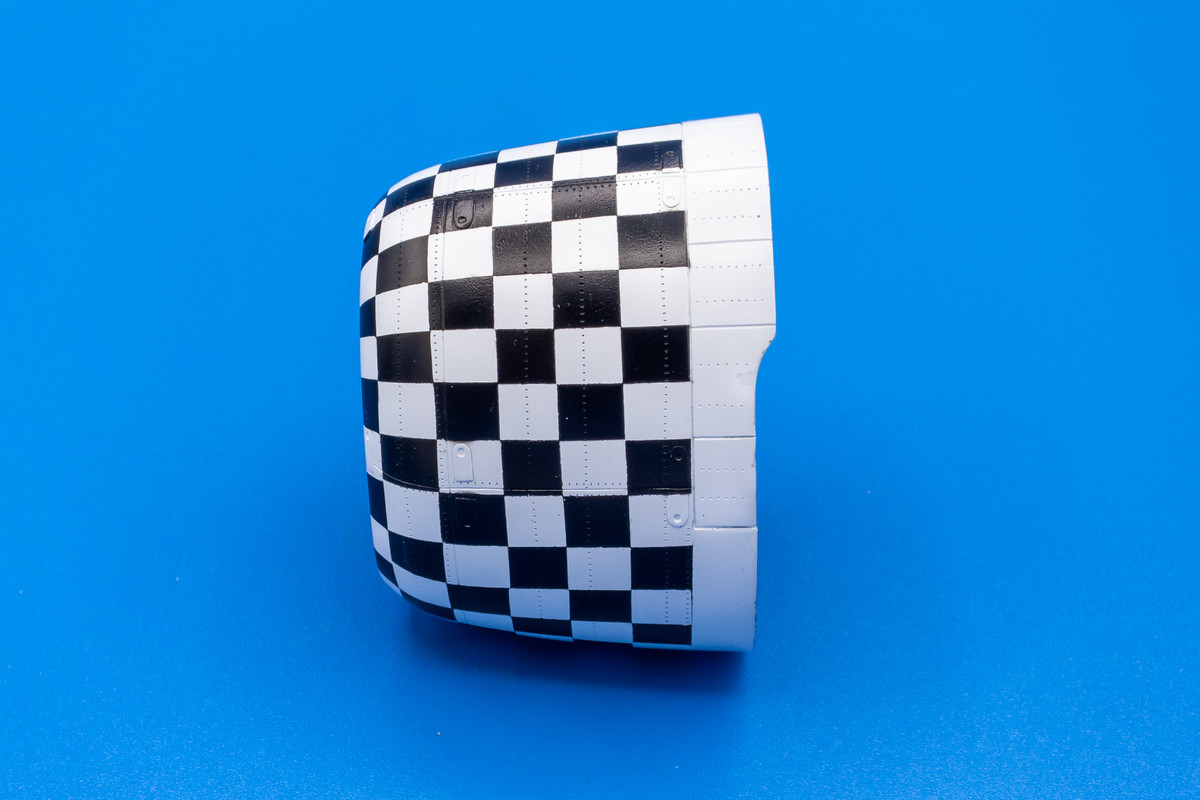
Here is cowling with the checkerboard pattern completed. This close-up photography is unforgiving so I can already see some spots where I need to touch up but overall, I am quite happy with how the checkers turned out. Especially the symmetry of the pattern as it is neatly mirrored from one side to the other. The transition of the pattern from the rear to the front is pretty smooth too and would've been difficult to achieve with the manual thin-strips-of-tape method.
Image
Image
Image
Image
Image
John aka JKim
-----------<><
Image
Post Reply

Return to “Aircraft Work in Progress”