Maddog Manufacturing Open for 2024

Re: Maddog Manufacturing Open for 2024
Great stuff as usual Mark. Liking the Bear and the Hustler!
Thanks,
John
John
-
Stikpusher

- Moderator
- Posts: 21383
- Joined: Sat Apr 05, 2014 8:37 pm
- Location: Ceti Alpha 5
Re: Maddog Manufacturing Open for 2024
Man you sure have a LOT going on here Mark! I never knew that Matchbox made a Yak-15, very cool!
"Surely I have made my meaning plain? I intend to avenge myself upon you, Admiral. I have deprived your ship of power, and when I swing 'round, I intend to deprive you of your life."
FLSM
FLSM
-
BlackSheep214

- Elite Member
- Posts: 13596
- Joined: Sun Apr 06, 2014 8:47 pm
Re: Maddog Manufacturing Open for 2024
You've been busy. That Hustler is gonna be a big one. The Bear is huge!
“Who controls the skies, controls the fate of this Earth”
Author unknown- 352nd Fighter Group, Blue-Nosed Bastards of Bodney
“Send one plane it’s a sortie; send two planes it’s a flight; send four planes it’s a test of airpower. - Richard Kohn
Author unknown- 352nd Fighter Group, Blue-Nosed Bastards of Bodney
“Send one plane it’s a sortie; send two planes it’s a flight; send four planes it’s a test of airpower. - Richard Kohn
-
Duke Maddog

- Elite Member
- Posts: 7700
- Joined: Tue Jun 03, 2014 11:22 am
- Location: Rowland Heights, CA
Re: Maddog Manufacturing Open for 2024
Thank you John! Yeah, those are some fun ones to build! Sometimes!
Thank you Carlos! Yeah, I was surprised to see that Yak kit in a Matchbox box. It goes together very well too, despite some seams.
Thank you Blacksheep! Yeah, in all honestly, I was surprised at how small the Hustler really is.Maybe I'd been spending too much time on the Bear and Badgers!
Thanks again guys! Stay tuned for more!
Thank you Carlos! Yeah, I was surprised to see that Yak kit in a Matchbox box. It goes together very well too, despite some seams.
Thank you Blacksheep! Yeah, in all honestly, I was surprised at how small the Hustler really is.Maybe I'd been spending too much time on the Bear and Badgers!
Thanks again guys! Stay tuned for more!
The Duke
Virtuoso of Miniatures
"Do you know what the chain of command is? It's the chain I get and beat you with 'till you understand who's in ruttin' command!"
-Jayne Cobb, Firefly Episode 2 "The Train Job"
We are modelers - the same in spirit, in hunger to insanely buy newly released kits, hustlers in hiding our stash from our better halves and experts in using garbage as replacements for after-market parts.
Virtuoso of Miniatures
"Do you know what the chain of command is? It's the chain I get and beat you with 'till you understand who's in ruttin' command!"
-Jayne Cobb, Firefly Episode 2 "The Train Job"
We are modelers - the same in spirit, in hunger to insanely buy newly released kits, hustlers in hiding our stash from our better halves and experts in using garbage as replacements for after-market parts.
-
Duke Maddog
- Elite Member
- Posts: 7700
- Joined: Tue Jun 03, 2014 11:22 am
- Location: Rowland Heights, CA
Re: Maddog Manufacturing Open for 2024
With a number of jobs coming up, my forum time will be extremely limited, so I figured it was time for another short tour of Maddog Manufacturing. All aboard the trams for this next tour!
Here in the Hangar, We have a number of things going on. After the huge planes were sent out for delivery to their respective air forces, I felt it was time to just work on a few smaller and easier kits. That brought me to these simple "Planes on a Stick". These are very old and have no interior to speak of, nor any landing gear; they were ideal for a simple start. Not to mention that they were both slightly started when I got them.
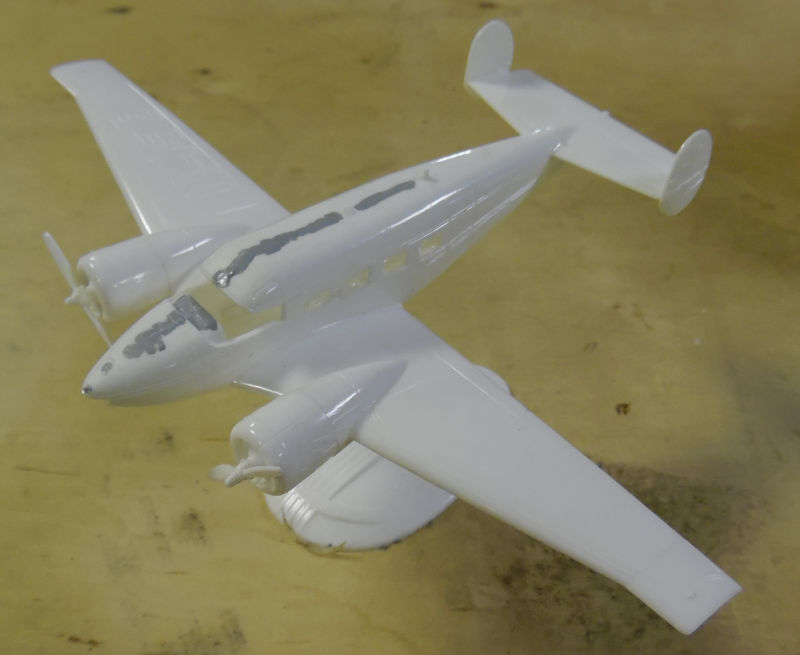
First is the Beechcraft Super 18. Assembly went fast, and some seams needed addressing:
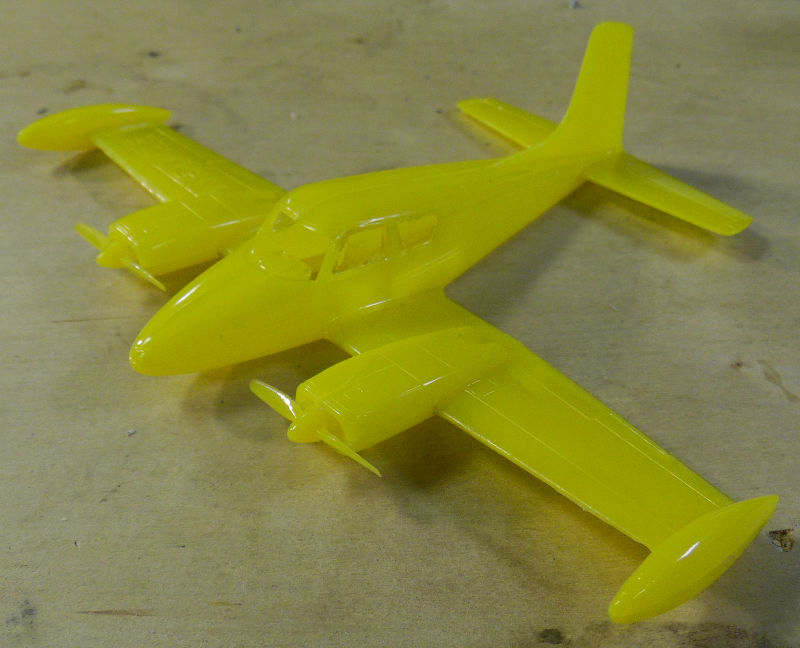
Next was the Cessna 310; another fast and easy kit with no interior or landing gear. Thjis was a bit tougher due to the horrid yellow plastic it was molded in. It almost glowed!
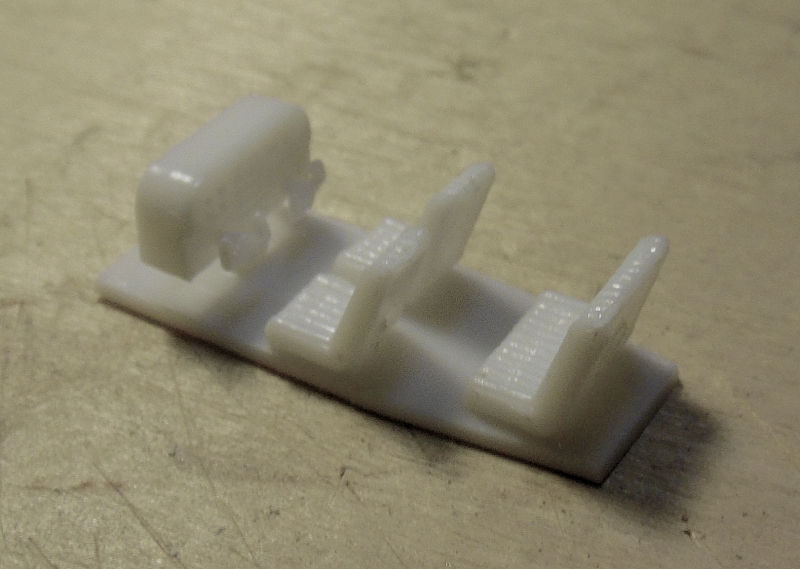
In the next bay, we also started the Cessna 172 but only got the interior done:
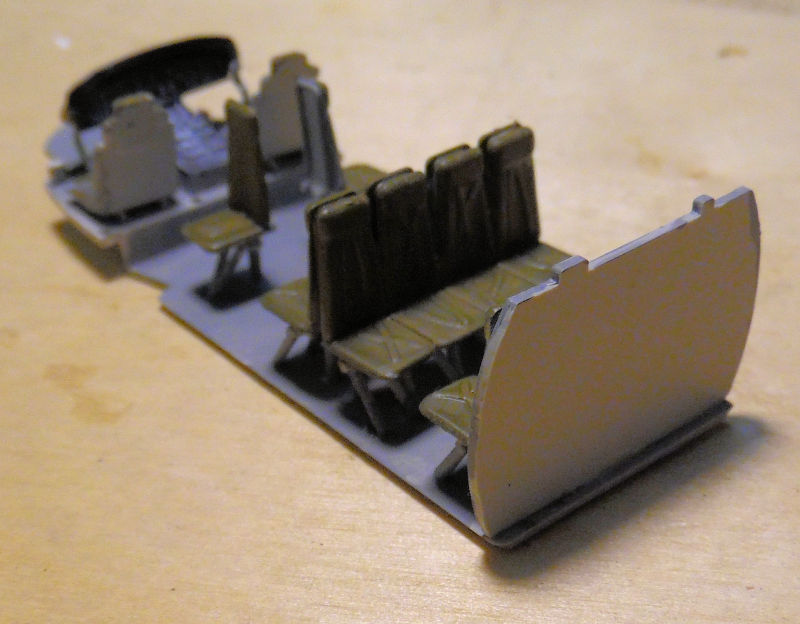
For something different, we continued to work on this Australian UH60 Blackhawk, first painting the interior:
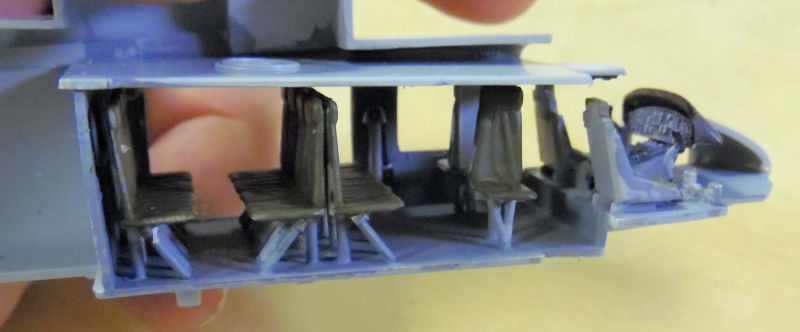
A quick test fit showed where attention was needed:
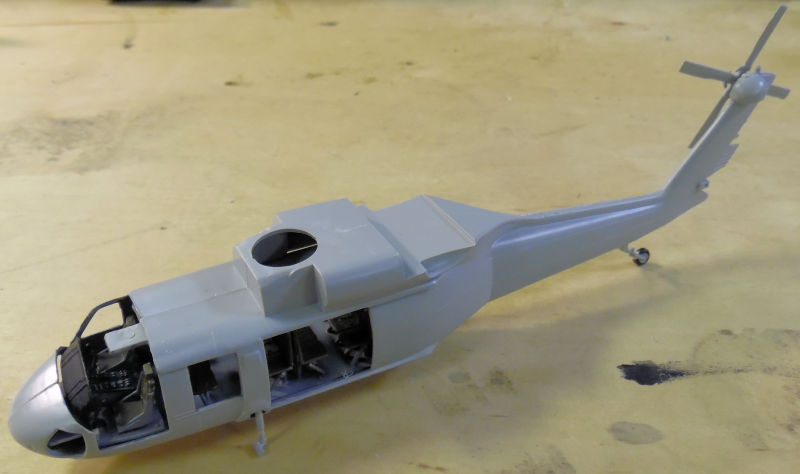
Once that was done, the fuselage was closed up:
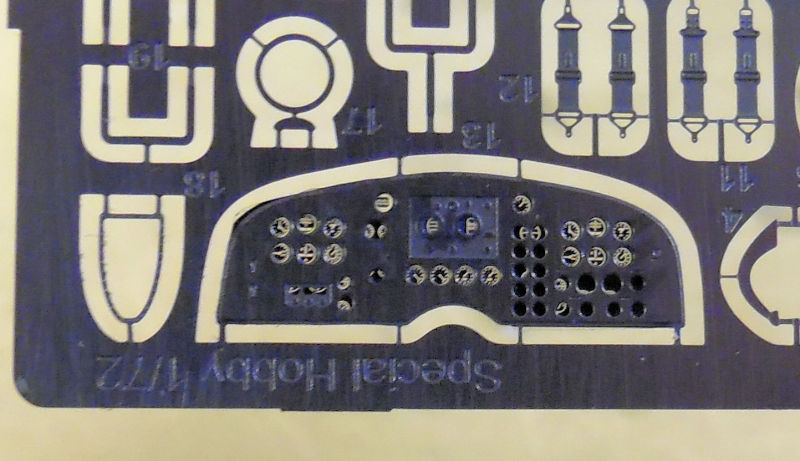
Finally we opened this next bay again because the JRS-1 was calling, so we got started on the cockpit. This kit gave a photo-etch instrument panel and a film that goes behind it for the dials. It looks fantastic, but after this photo, it will never be seen again:
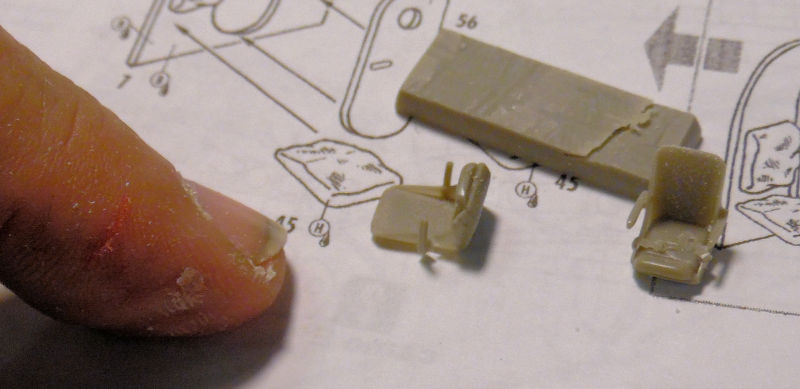
The kit also came with resin seats for the interior and naturally, I cut myself yet again trying to remove these from the pour blocks. You can see the faint red line on my finger, after I got the blood to stop flowing:
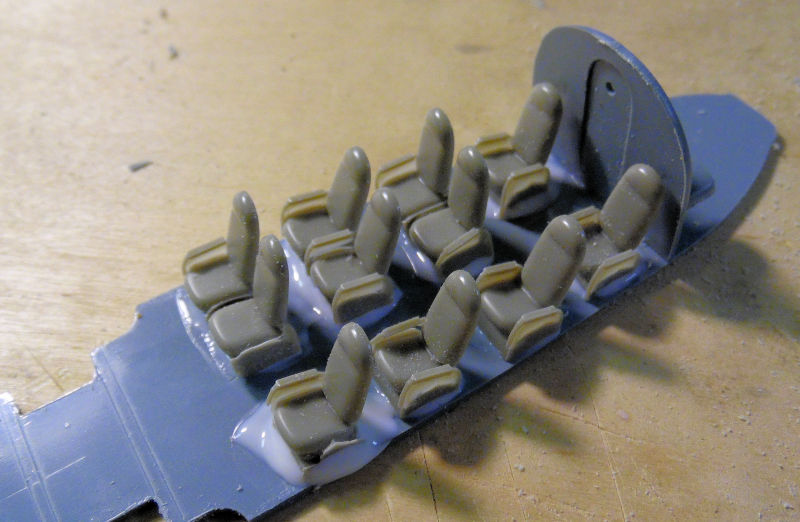
More sawing later and the rest of the seats in the main cabin were installed:
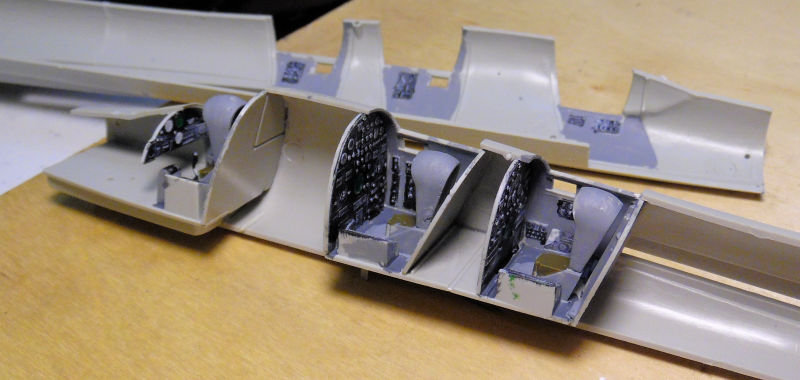
Finally, in this last bay, we got the interior of the B-58 Hustler painted up and installed inside one side of the fuselage. This later got closed up:
That concludes the Hangar portion of our tour. Not enough was done in the shipyards to justify touring them, so on to the Motor Pool:
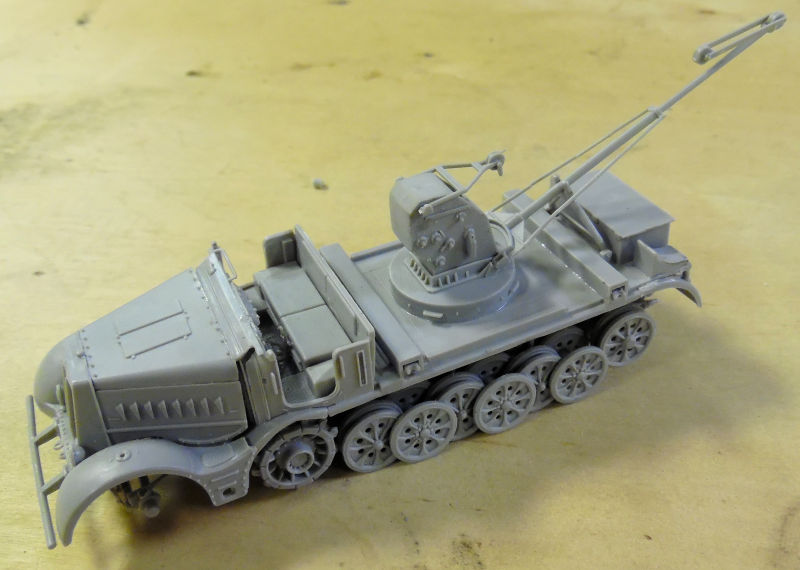
Here in the Motor Pool, we finished u the construction of the German SdKfz-9 with the crane and now it is ready for paint:
In the next bay, we spent a lot of time on this next project. It has always been a dream to complete the T26-E4 Super Pershing with all the hydraulics and additional armor. So, I found the kit and some white styrene tubes and strips and went to work.
First, the lower hull and suspension was built:

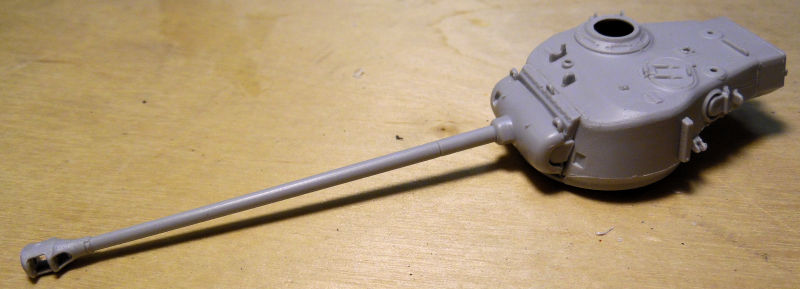
Then we built the basic turret:
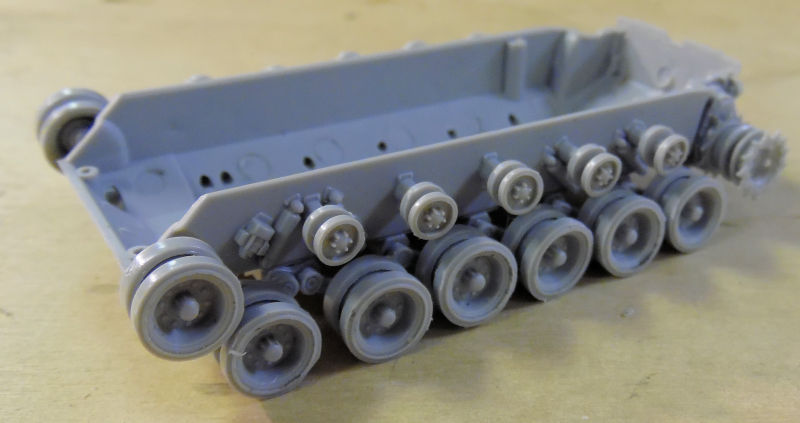
All the wheels and sprockets were then added and allowed to dry:
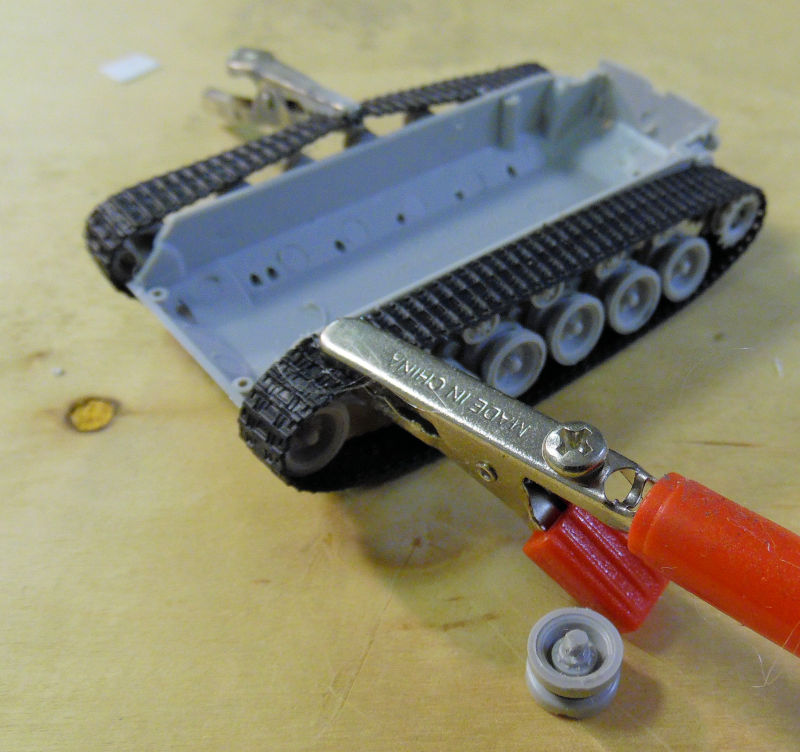
Next were the tracks and naturally one of the roadwheels had to be a pain and not cooperate:
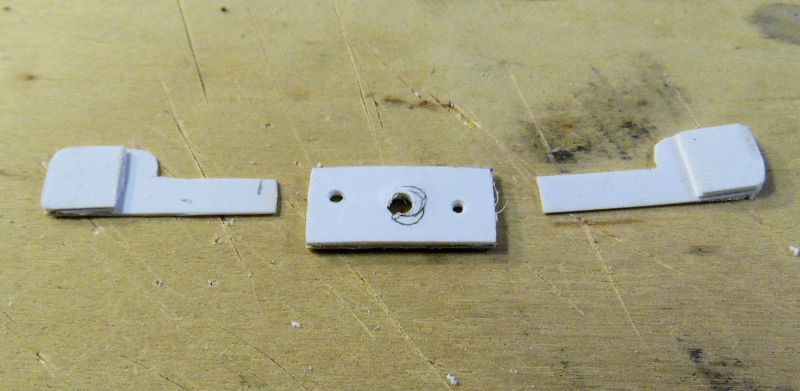
While all that was drying, we returned to the turret to work on all the added equipment that was installed on this tank. First, the added mantlet armor and 'ears' were cut out and built; I had to layer some of these since I had no thicker sheets or strips of styrene:
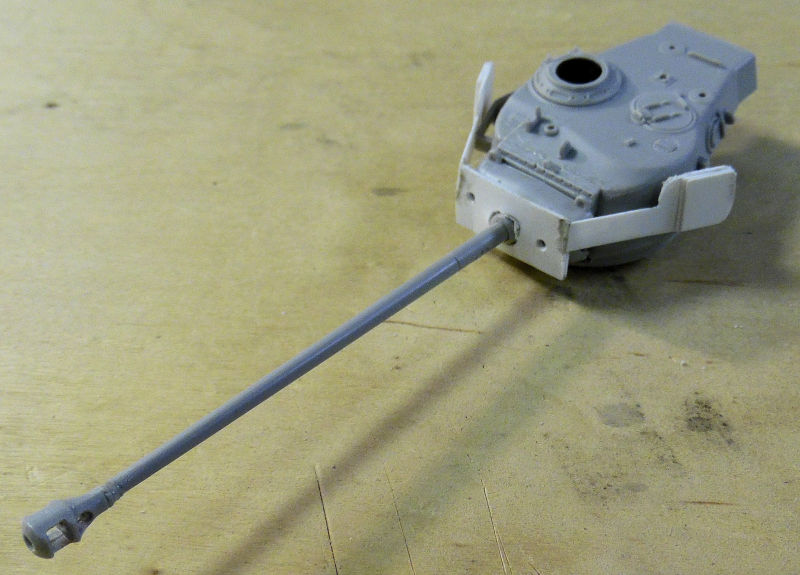
Next these were added to the front of the turret. I had to cut off and replace the muzzle brake in order to install the main plate because it was too big to fit through that center hole:
Later we started the mounts on the mantlet for the hydraulics:
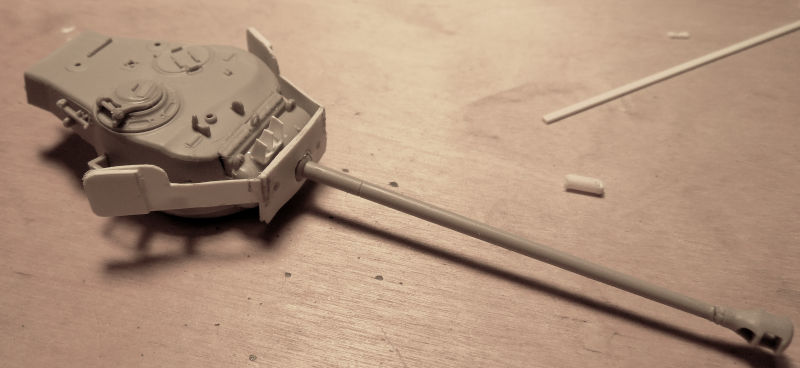
I didn't have exact measurements here so al this was done by eye; flying by the seat of my pants. I had some photos that helped a little as I was building these, but eventually, I came up with this for the hydraulics:
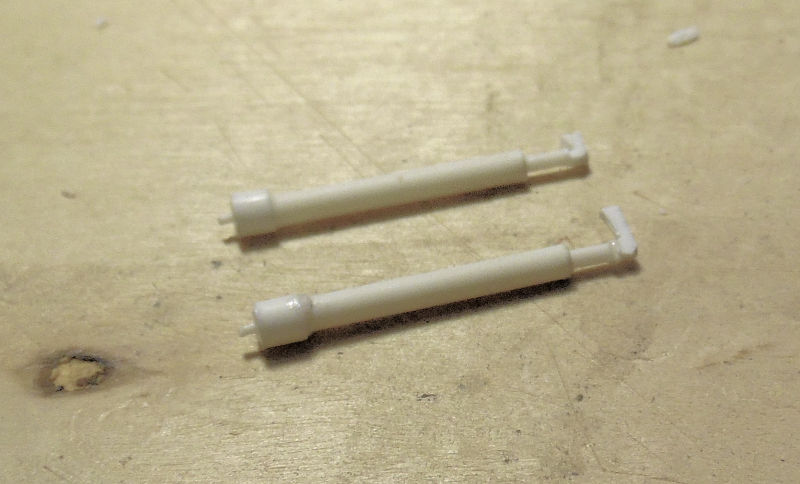
Sometime later I got them installed and the cover added. It is all quite crude, but it is done. I will be trying to refine this a bit later:
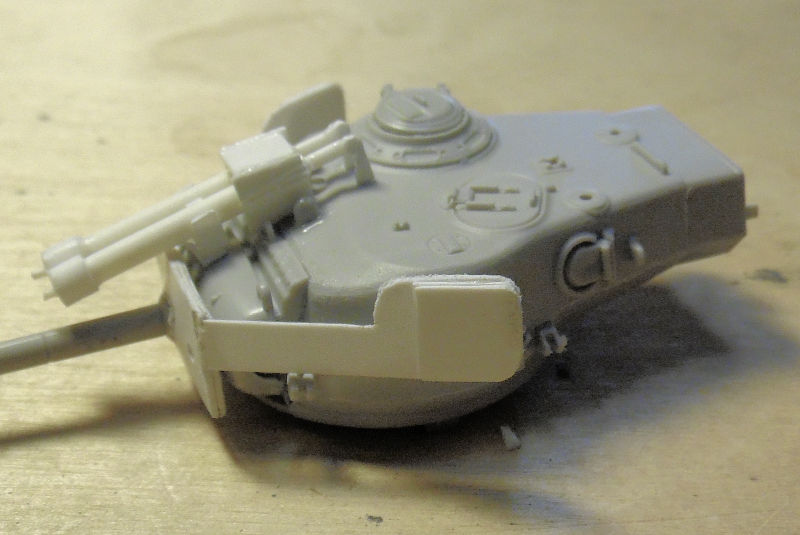
The last mod to the turret is the counterweight at the back that I built up:

Now except for refinements, this turret is done. Once I get the tracks and roadwheels to cooperate, I'll close up the hull and then start on the spaced armor on the front and other mods on the fuselage.
That concludes our short tour of the facilities for today. Thank you all for looking in comments are welcome. That being said, it might be quite a few days, or even a week or more to reply, due to the upcoming tight schedule I will be starting.
Thanks again to all.
Here in the Hangar, We have a number of things going on. After the huge planes were sent out for delivery to their respective air forces, I felt it was time to just work on a few smaller and easier kits. That brought me to these simple "Planes on a Stick". These are very old and have no interior to speak of, nor any landing gear; they were ideal for a simple start. Not to mention that they were both slightly started when I got them.
First is the Beechcraft Super 18. Assembly went fast, and some seams needed addressing:
Next was the Cessna 310; another fast and easy kit with no interior or landing gear. Thjis was a bit tougher due to the horrid yellow plastic it was molded in. It almost glowed!
In the next bay, we also started the Cessna 172 but only got the interior done:
For something different, we continued to work on this Australian UH60 Blackhawk, first painting the interior:
A quick test fit showed where attention was needed:
Once that was done, the fuselage was closed up:
Finally we opened this next bay again because the JRS-1 was calling, so we got started on the cockpit. This kit gave a photo-etch instrument panel and a film that goes behind it for the dials. It looks fantastic, but after this photo, it will never be seen again:
The kit also came with resin seats for the interior and naturally, I cut myself yet again trying to remove these from the pour blocks. You can see the faint red line on my finger, after I got the blood to stop flowing:
More sawing later and the rest of the seats in the main cabin were installed:
Finally, in this last bay, we got the interior of the B-58 Hustler painted up and installed inside one side of the fuselage. This later got closed up:
That concludes the Hangar portion of our tour. Not enough was done in the shipyards to justify touring them, so on to the Motor Pool:
Here in the Motor Pool, we finished u the construction of the German SdKfz-9 with the crane and now it is ready for paint:
In the next bay, we spent a lot of time on this next project. It has always been a dream to complete the T26-E4 Super Pershing with all the hydraulics and additional armor. So, I found the kit and some white styrene tubes and strips and went to work.
First, the lower hull and suspension was built:
Then we built the basic turret:
All the wheels and sprockets were then added and allowed to dry:
Next were the tracks and naturally one of the roadwheels had to be a pain and not cooperate:
While all that was drying, we returned to the turret to work on all the added equipment that was installed on this tank. First, the added mantlet armor and 'ears' were cut out and built; I had to layer some of these since I had no thicker sheets or strips of styrene:
Next these were added to the front of the turret. I had to cut off and replace the muzzle brake in order to install the main plate because it was too big to fit through that center hole:
Later we started the mounts on the mantlet for the hydraulics:
I didn't have exact measurements here so al this was done by eye; flying by the seat of my pants. I had some photos that helped a little as I was building these, but eventually, I came up with this for the hydraulics:
Sometime later I got them installed and the cover added. It is all quite crude, but it is done. I will be trying to refine this a bit later:
The last mod to the turret is the counterweight at the back that I built up:
Now except for refinements, this turret is done. Once I get the tracks and roadwheels to cooperate, I'll close up the hull and then start on the spaced armor on the front and other mods on the fuselage.
That concludes our short tour of the facilities for today. Thank you all for looking in comments are welcome. That being said, it might be quite a few days, or even a week or more to reply, due to the upcoming tight schedule I will be starting.
Thanks again to all.
The Duke
Virtuoso of Miniatures
"Do you know what the chain of command is? It's the chain I get and beat you with 'till you understand who's in ruttin' command!"
-Jayne Cobb, Firefly Episode 2 "The Train Job"
We are modelers - the same in spirit, in hunger to insanely buy newly released kits, hustlers in hiding our stash from our better halves and experts in using garbage as replacements for after-market parts.
Virtuoso of Miniatures
"Do you know what the chain of command is? It's the chain I get and beat you with 'till you understand who's in ruttin' command!"
-Jayne Cobb, Firefly Episode 2 "The Train Job"
We are modelers - the same in spirit, in hunger to insanely buy newly released kits, hustlers in hiding our stash from our better halves and experts in using garbage as replacements for after-market parts.

Re: Maddog Manufacturing Open for 2024
A lot of very fine smash in’ o’ the plastic, Mark. Love the fluorescent, neon 310!
To make each build less crappy than the last one. Or, put another way, "Better than the last one, not as good as the next one!"..
-
BlackSheep214
- Elite Member
- Posts: 13596
- Joined: Sun Apr 06, 2014 8:47 pm
Re: Maddog Manufacturing Open for 2024
What Lyle said...
Glow in the dark yellow..... LOLOLOL!
Glow in the dark yellow..... LOLOLOL!
“Who controls the skies, controls the fate of this Earth”
Author unknown- 352nd Fighter Group, Blue-Nosed Bastards of Bodney
“Send one plane it’s a sortie; send two planes it’s a flight; send four planes it’s a test of airpower. - Richard Kohn
Author unknown- 352nd Fighter Group, Blue-Nosed Bastards of Bodney
“Send one plane it’s a sortie; send two planes it’s a flight; send four planes it’s a test of airpower. - Richard Kohn
-
Medicman71

- Elite Member
- Posts: 11396
- Joined: Mon Apr 07, 2014 9:32 am
- Location: Houston, Tx
Re: Maddog Manufacturing Open for 2024
Hey Mark, can you turn down the yellow. It's a bit bright. 
Mike
Sponsored by Boeing, Lockheed Martin, Northrop Grumman, Saab, BAE, and Dassault
Sponsored by Boeing, Lockheed Martin, Northrop Grumman, Saab, BAE, and Dassault
-
Duke Maddog
- Elite Member
- Posts: 7700
- Joined: Tue Jun 03, 2014 11:22 am
- Location: Rowland Heights, CA
Re: Maddog Manufacturing Open for 2024
Thank you guys for the awesome comments! LOL! I wish I could turn down the yellow! Wow that makes it hard to build! Gotta get paint on it soon.
The Duke
Virtuoso of Miniatures
"Do you know what the chain of command is? It's the chain I get and beat you with 'till you understand who's in ruttin' command!"
-Jayne Cobb, Firefly Episode 2 "The Train Job"
We are modelers - the same in spirit, in hunger to insanely buy newly released kits, hustlers in hiding our stash from our better halves and experts in using garbage as replacements for after-market parts.
Virtuoso of Miniatures
"Do you know what the chain of command is? It's the chain I get and beat you with 'till you understand who's in ruttin' command!"
-Jayne Cobb, Firefly Episode 2 "The Train Job"
We are modelers - the same in spirit, in hunger to insanely buy newly released kits, hustlers in hiding our stash from our better halves and experts in using garbage as replacements for after-market parts.
-
Duke Maddog
- Elite Member
- Posts: 7700
- Joined: Tue Jun 03, 2014 11:22 am
- Location: Rowland Heights, CA
Re: Maddog Manufacturing Open for 2024
Happy fourth of July! It's time I finally started a new tour showing all the work we got done during the last half of June. So, all aboard the trams for the next tour of the facilities here and remember to keep hands and feet inside at all times.
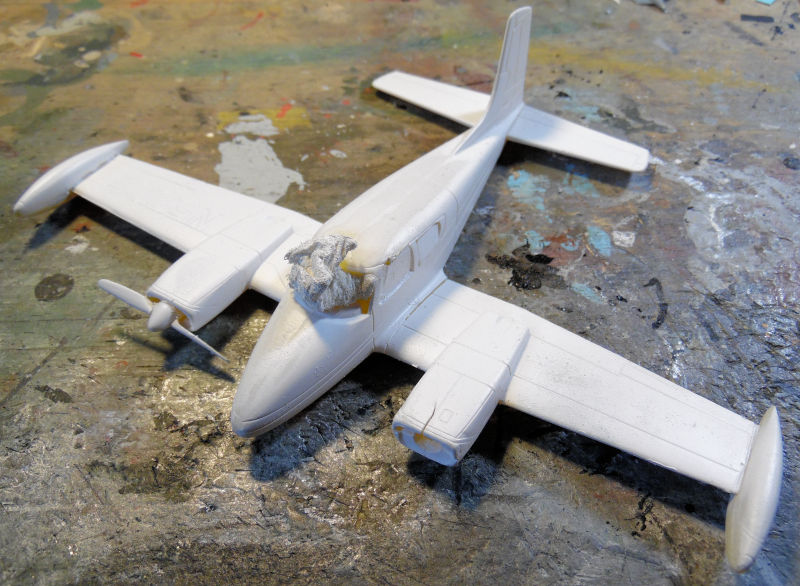
Our first stop as always is the Hangar. Here we have a few things happening, mostly some paint being sprayed before my window screen was removed. In this first bay, the Beechcraft Super 18 and the Cessna 310 both got base coats of white:
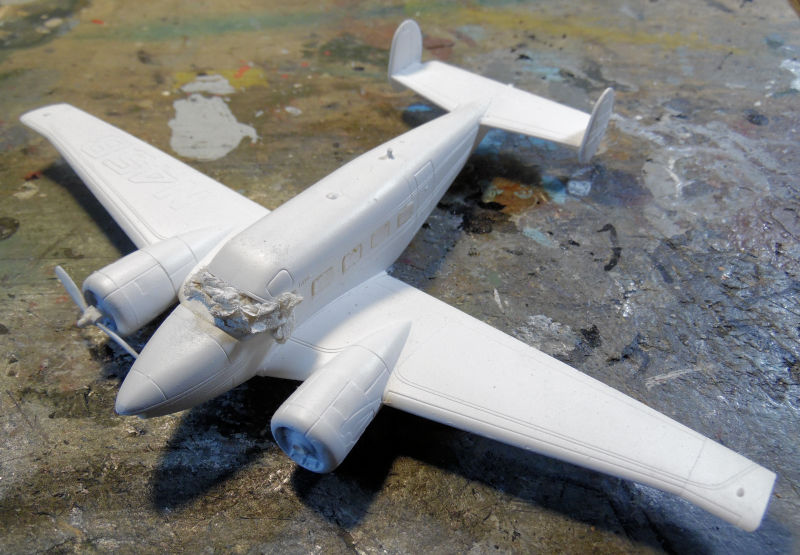
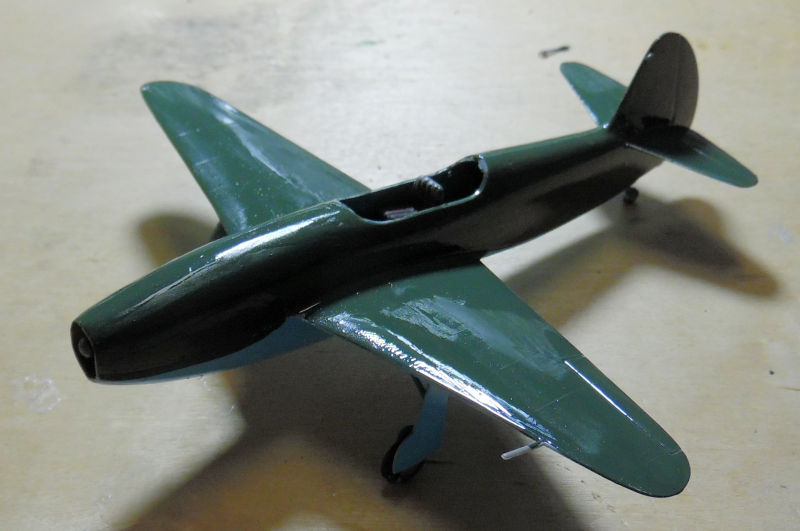
Gonna be some touch up there before decals are attempted. In this next bay, my Russian Yak 15 got the top coat of green on it:
Later when that was dry, decals went on along with the canopy:
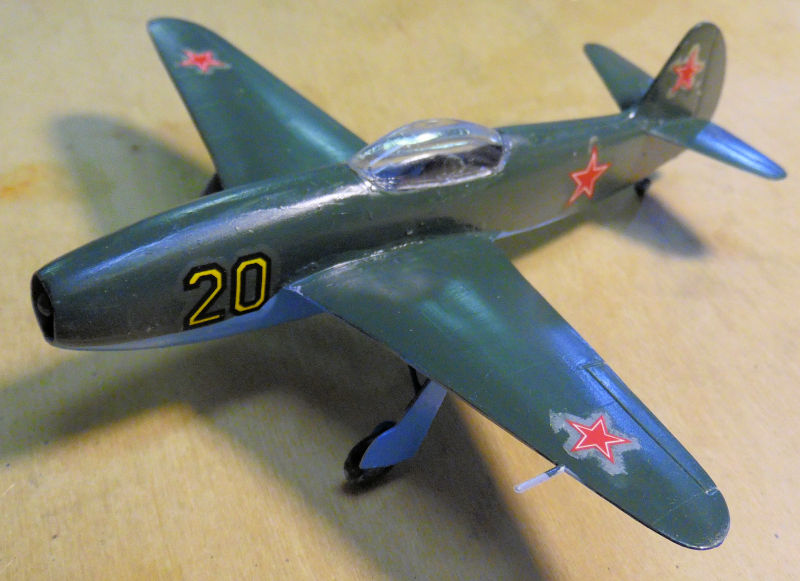
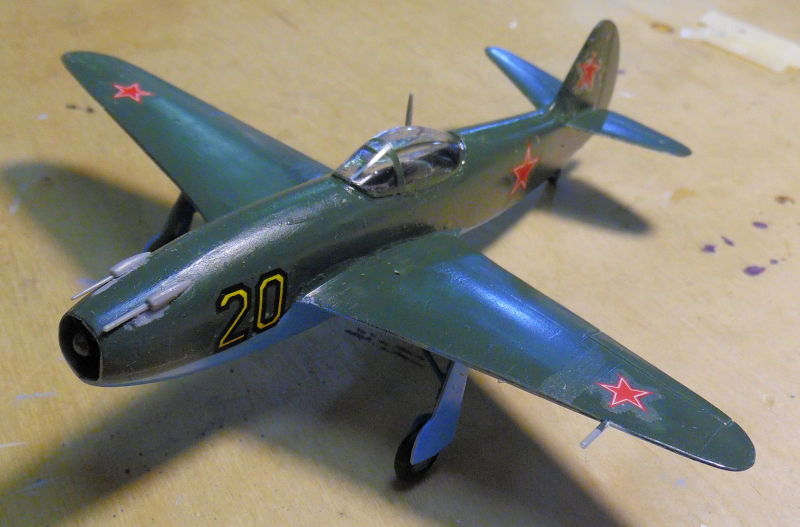
Yes the decals silvered pretty badly, we punctured them with a fine Exacto blade tip and slathered them with Solvaset, eliminating all that. However, the film covering these is matte so they still appear to be silvered. If I shoot this with a dull coat, it all should blend in. Meanwhile, the canopy frame was painted and the final detail parts were added::
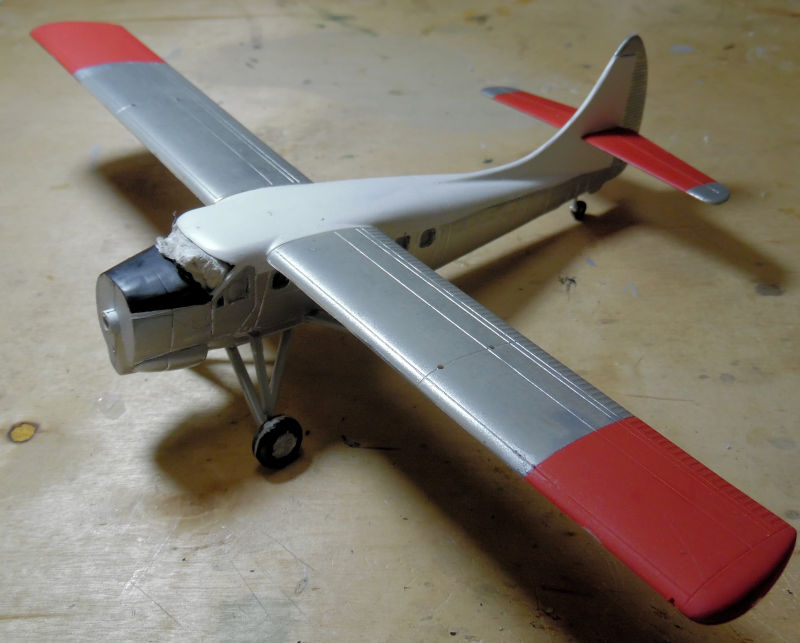
In the next bay over, we have the Otter finally being assembled. The wings and tail went on and the landing gear was installed. Yes the one tail piece is drooping, that was fixed later:
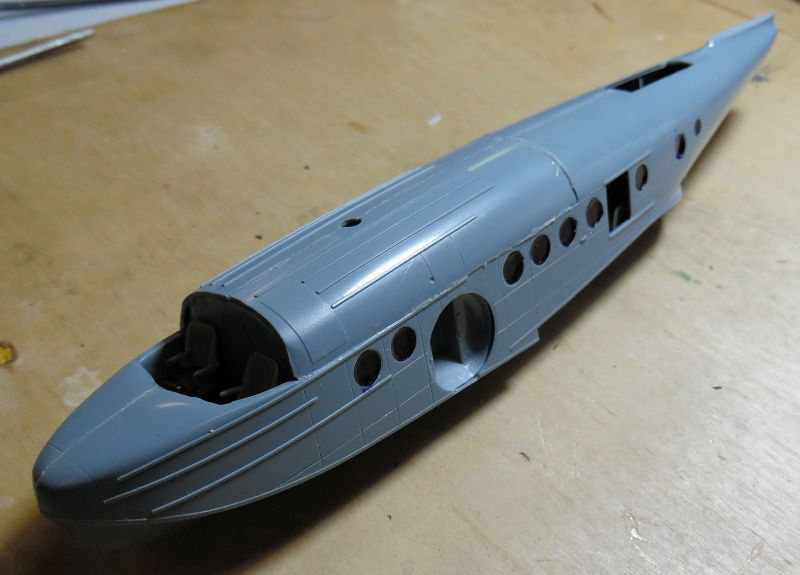
Moving on to the next bay, we got the fuselage of the JRS-1 all assembled as best we could. Later putty and sanding was done to smooth this out:
In this final bay, we started another Matchbox kit of the Swedish Tunnen jet fighter. This was also given to me later after the Distressed Kit Auction. This was fast and easy to build as well, we got this far before I finally took pics:
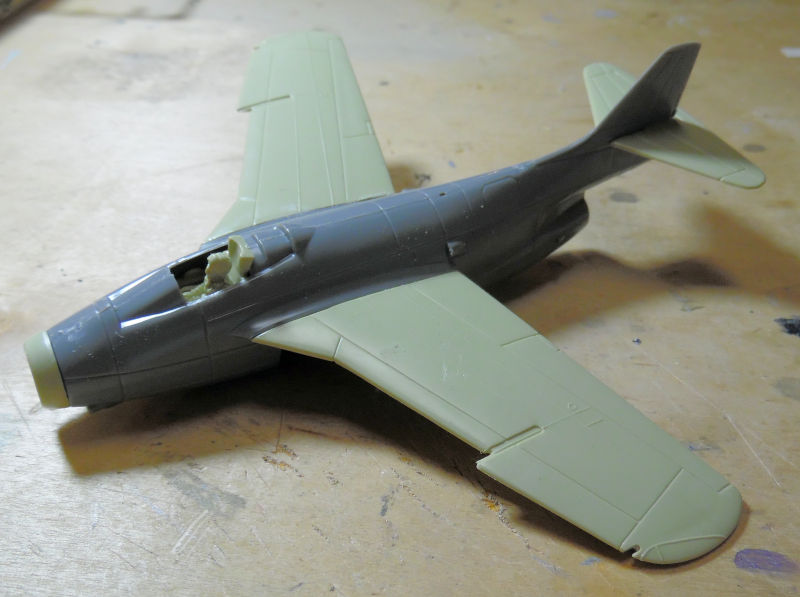
Gotta love this canyons for panel lines! That concludes the Hangar portion of our tour, now on to the Shipyards.....
Here in the shipyards we upped our production a bit to see if we could get some of these launched. We had also started a couple that looked fast and easy, more or less.
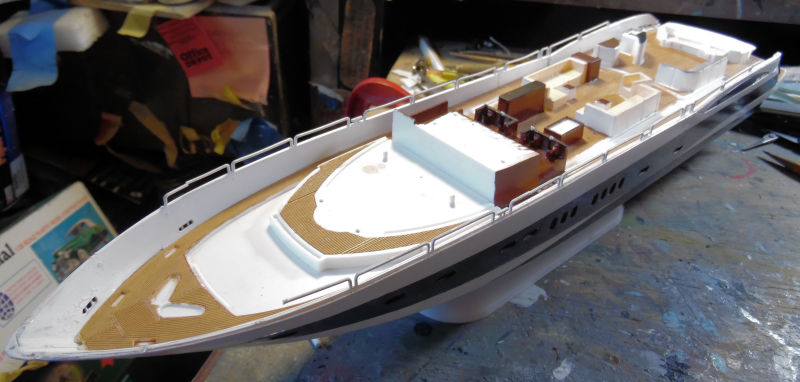
In this first slipway we have one of our 1/72 scale motor boats under construction. After fighting the paint on the hull for too long, it is finally at least acceptable so the main decks were finally glued in place:
Later most of the interior was installed before the sprue holding the remaining interior parts disappeared:
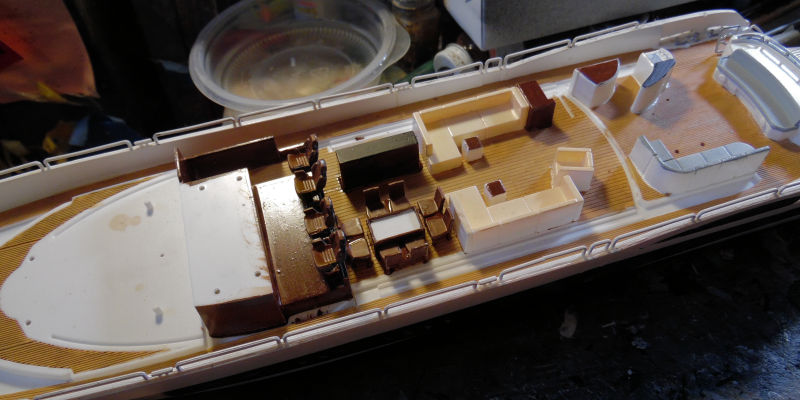
That is where that is for now. Moving to the next slipway, we have the little Hunt class destroyer escort finally getting the railings and other photo-etch parts before paint:
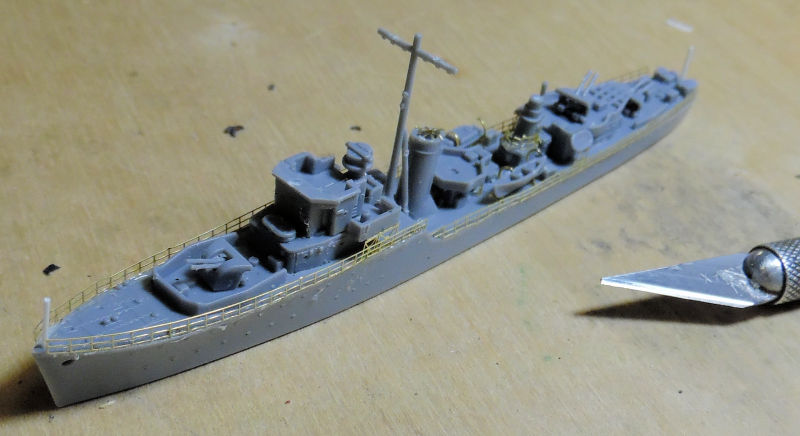
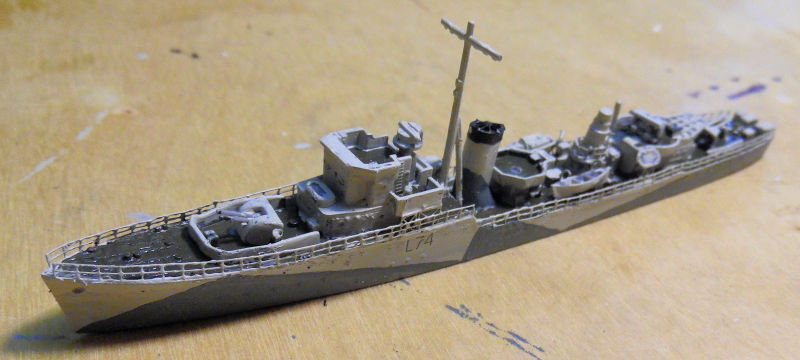
This thing is 1/700 scale so the Exacto blade is there to show the size of this little thing. Later it got paint and decals, making it HMS Middleton:
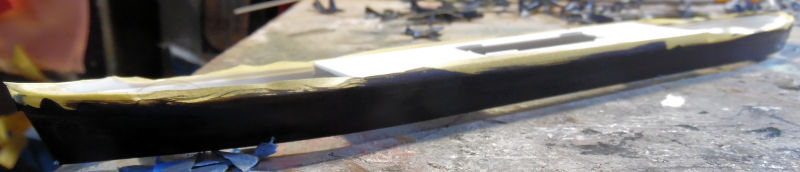
In this next slipway, the hull of the Nitta Maru got paint on it:
Once that was dry, the decks and superstructure went on, followed by the stack. Additional painting was done as well:
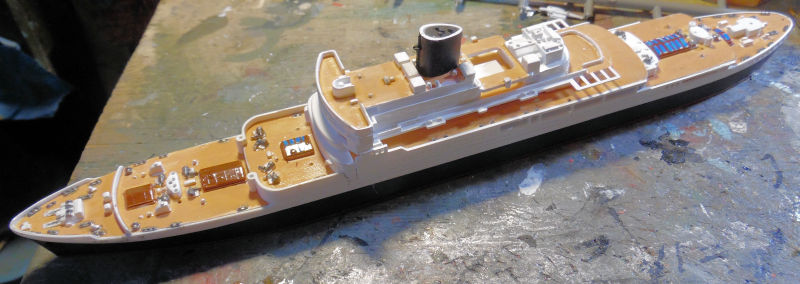
Later on, decals went on:
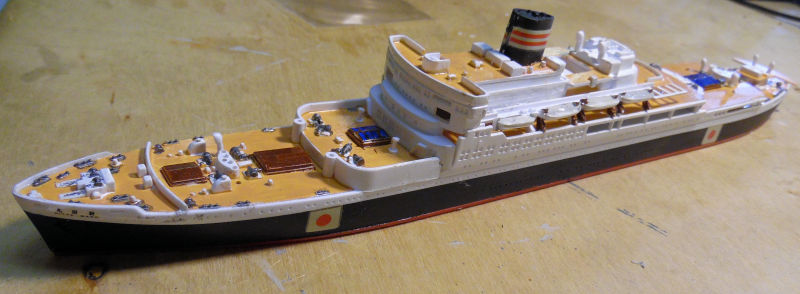
The decals had been hit with Solvaset and naturally I messed up while touching up details:
I left that to be fixed later and started with all the masts and cranes, getting this far before moving on to other things:
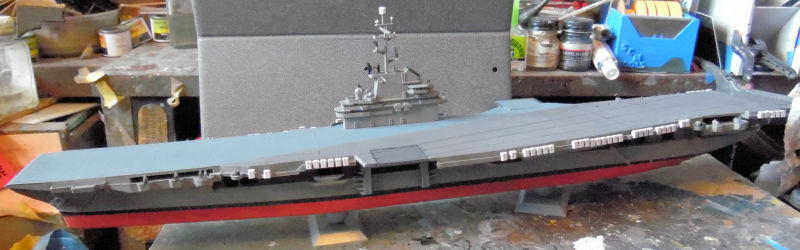
Moving on to the next slipway, the USS Shangri-La got all the final details added. except the deck edge antennae. The Island was also cemented in place:
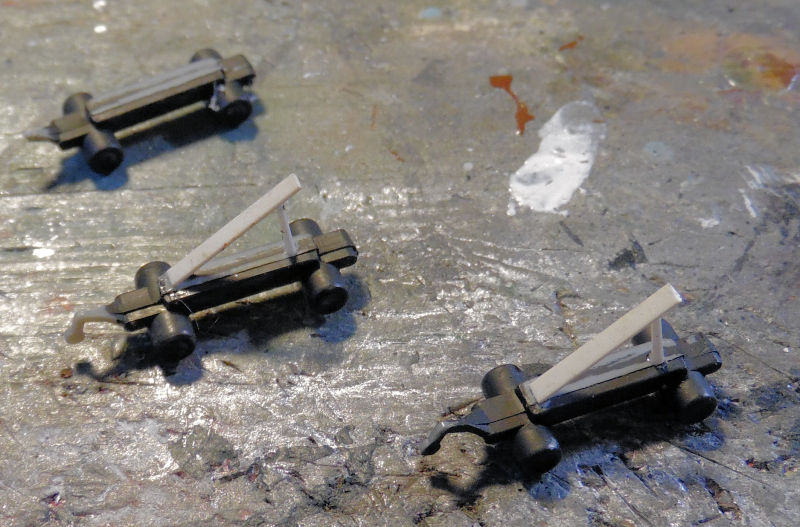
In doing the air wing and looking over the Regulus launch vehicles, I noticed that none were in firing position, so we took two and added a raised launch rail:
Afterward, we added all the decal markings to the deck. They didn't give enough of certain lengths so we improvised:
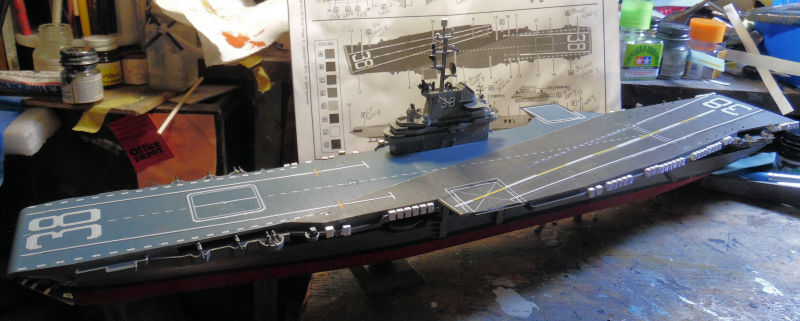
It may not be accurate but it works well enough for me:
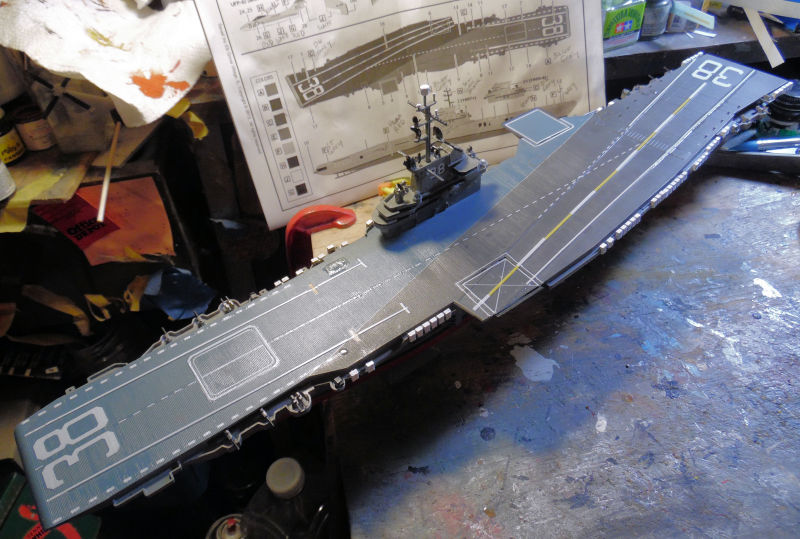
And that concludes our tour of the Shipyards, now on to the Motor Pool....
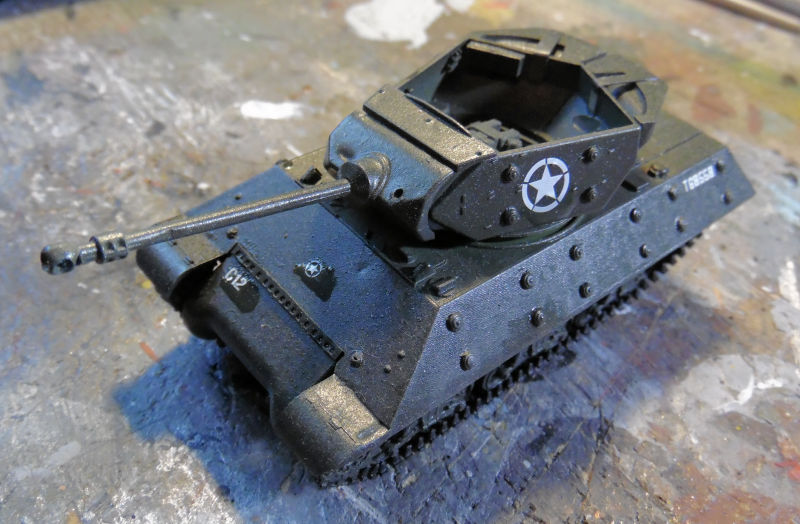
Here in the Motor Pool, a lot has been happening. In the first bay, the M10 Achilles got decals. They may not be accurate, but I couldn't find anything that matched what I had in my decal spares box, so I chose what looked best and ran with it:
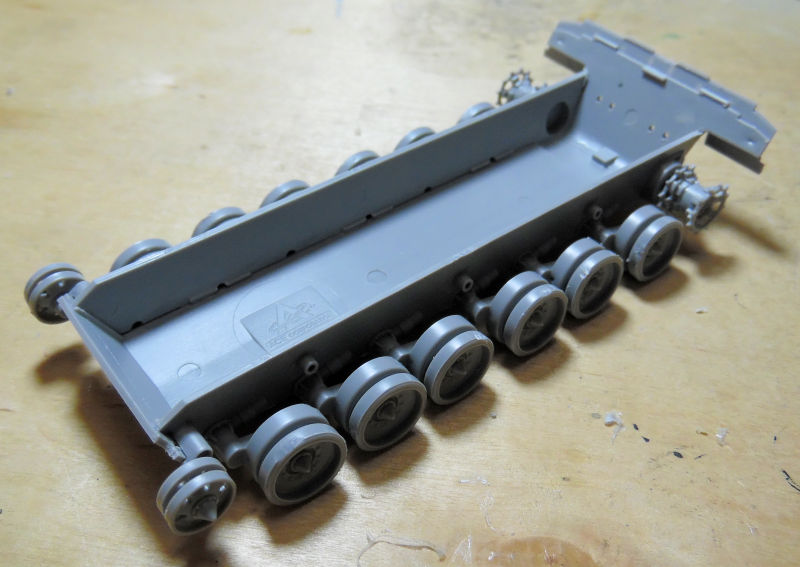
While on the subject of British vehicles; in this next bay we started on another British tank, the Challenger III. First was the lower hull:
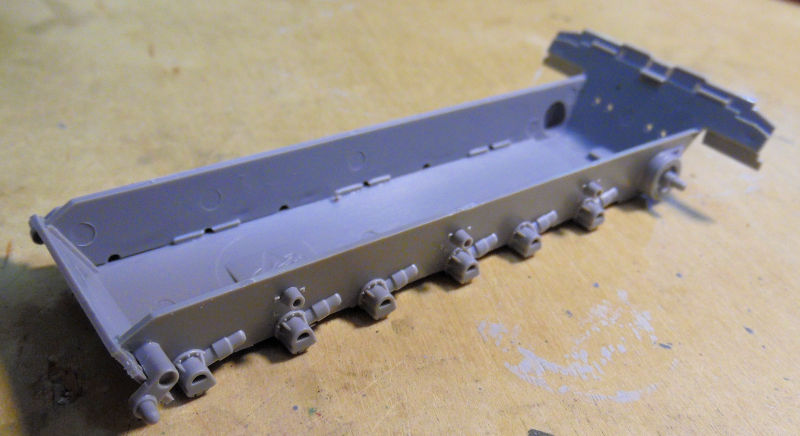
The roadwheels and sprockets went on later:
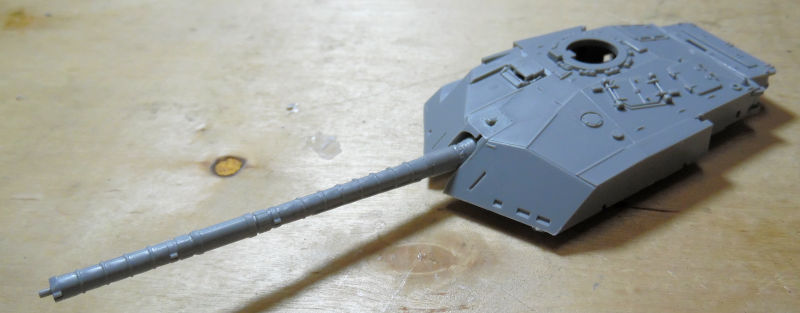
While waiting for them to dry, we built the turret. Only the basic assembly was started:
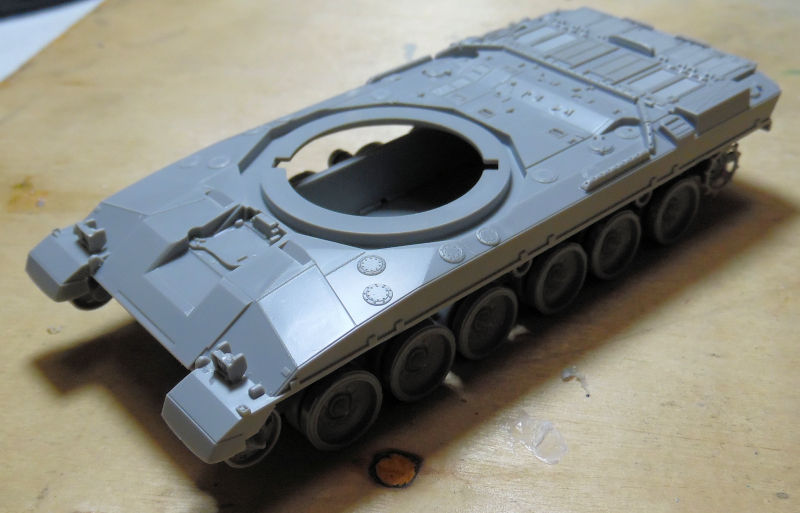
The upper hull was worked on next, not much to do there, but here it is dry-fit on the lower hull:
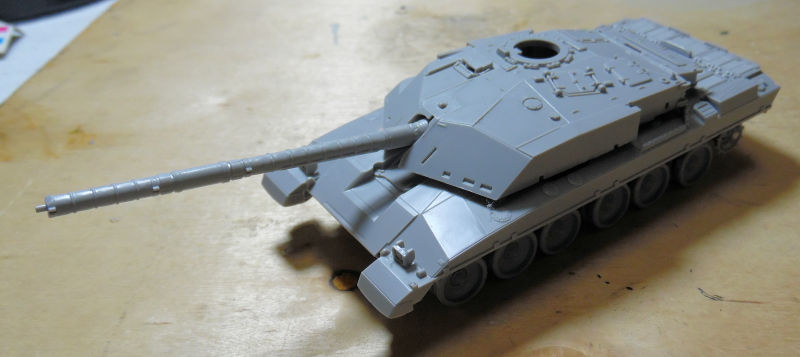
Then the turret was added to the dry-fit upper hull:
Moving on to the next bay, we are finally are able to move forward on a shelf queen that was stalled because the main gun trunnion assembly was lost. Well, it turned up:
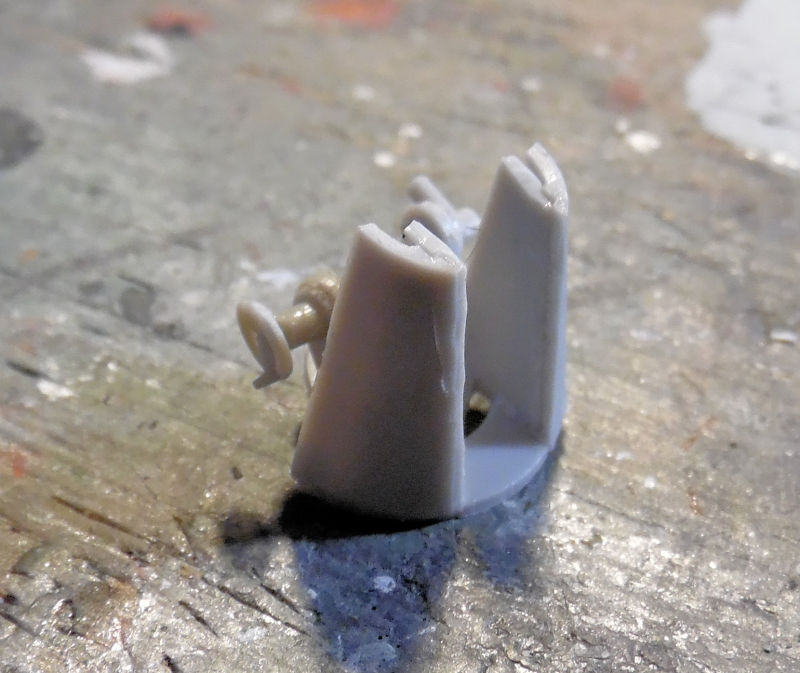
You can see from this dry fit in place, why this stalled:
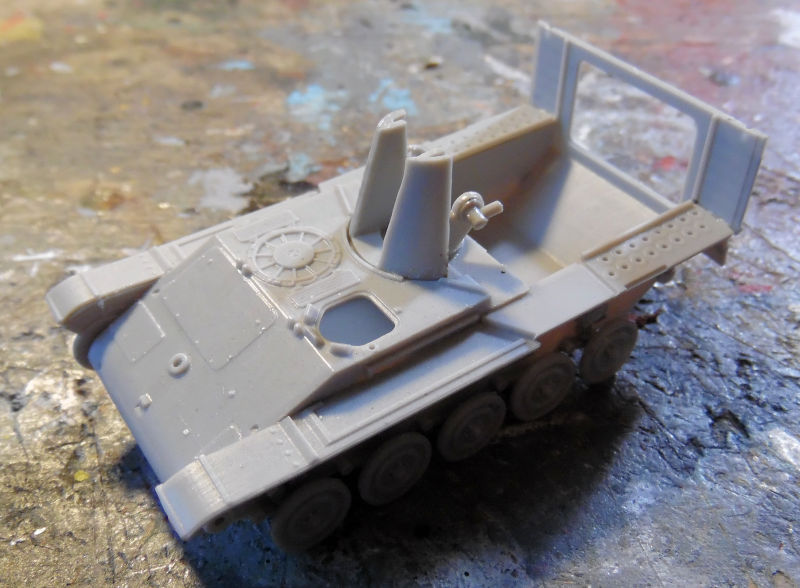
The gun was finally installed into place:
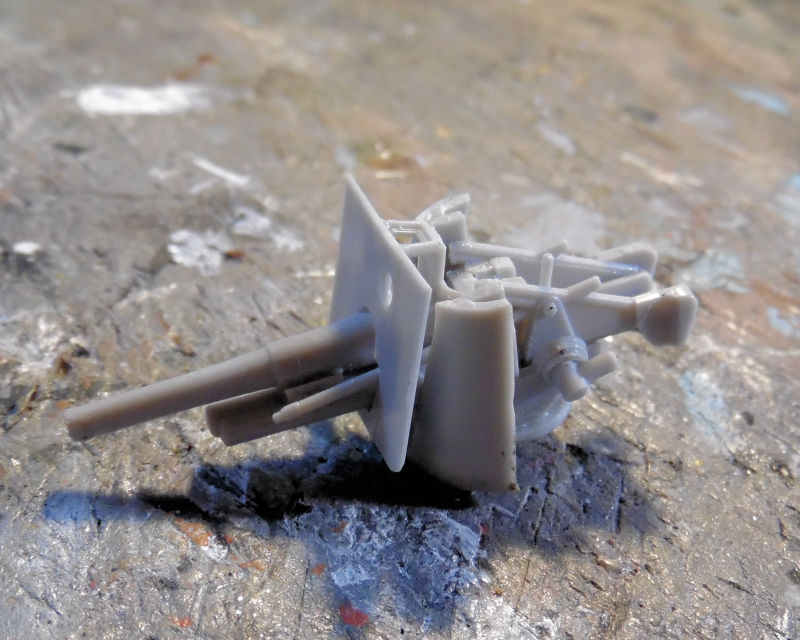
We then dry fit this in place so the front superstructure panels could be added:
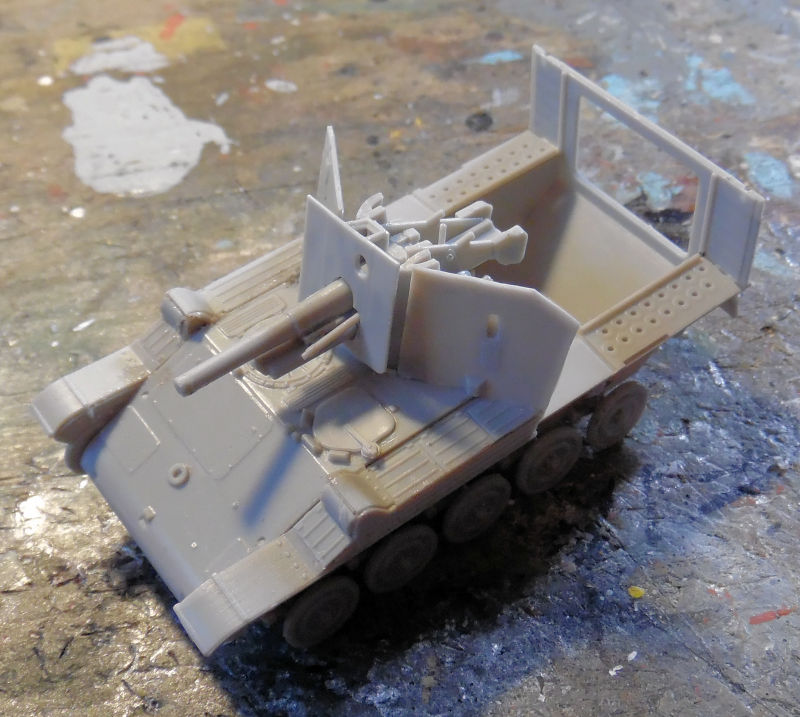
The shells were then added to the interior:
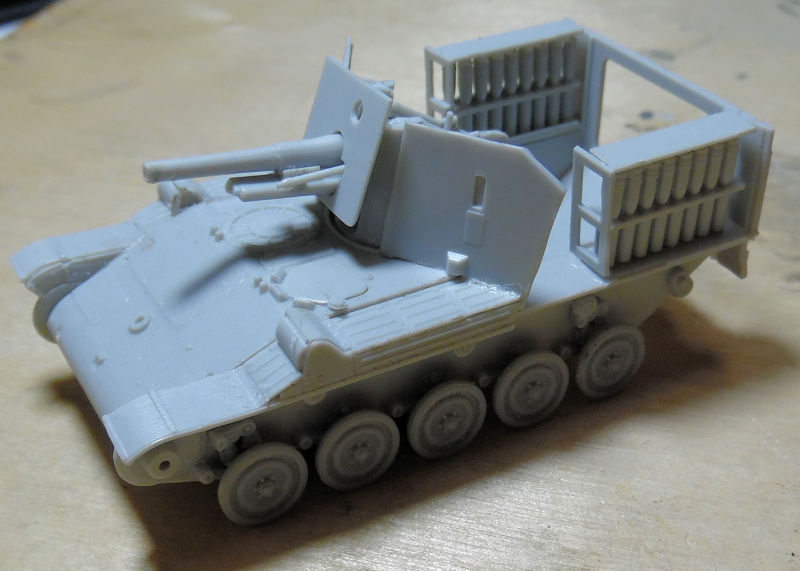
Things were moving along well until it was time to add the side walls. That's when we saw that the front panels were way off alignment, so off they came again:
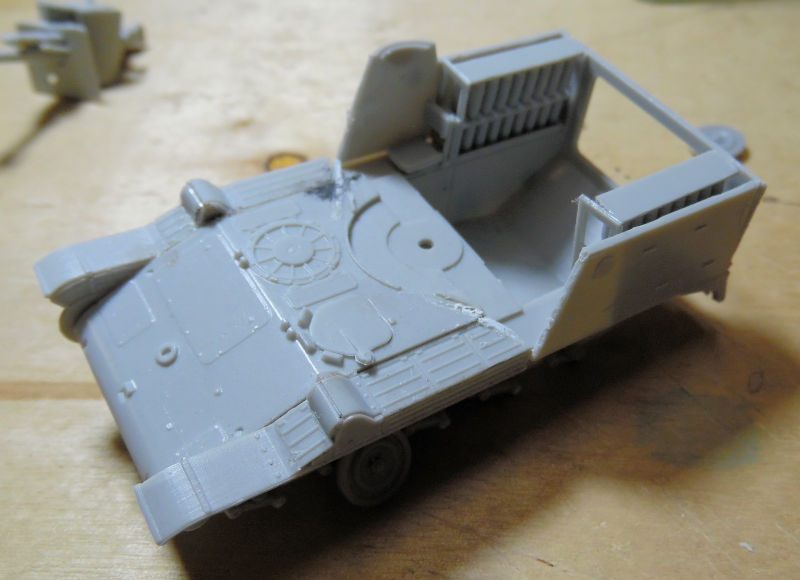
Naturally during this whole attempt to fix the upper superstructure, all these decided to break off and try to fly:
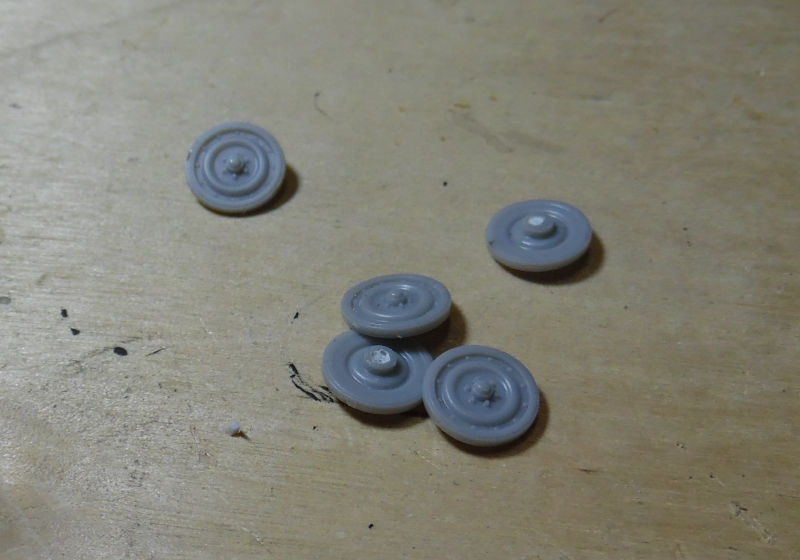
I'll leave them off until the upper structure is finally assembled properly and then these will go back on.
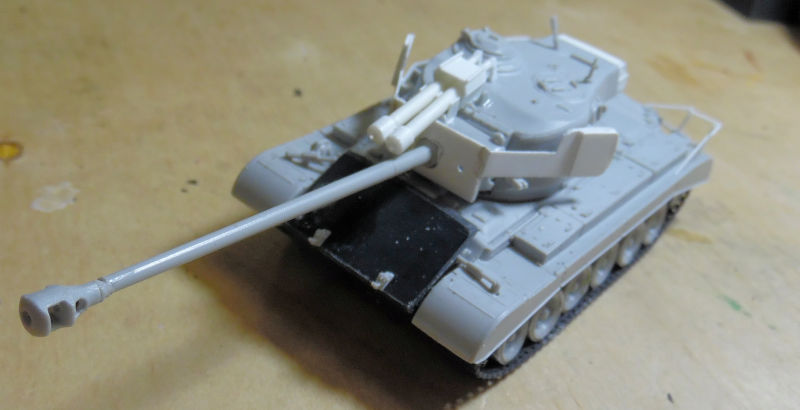
Moving on to this last bay, we have the T26-E4 which got the front spaced armor installed on the front. Don't worry, that fingerprint disappeared:
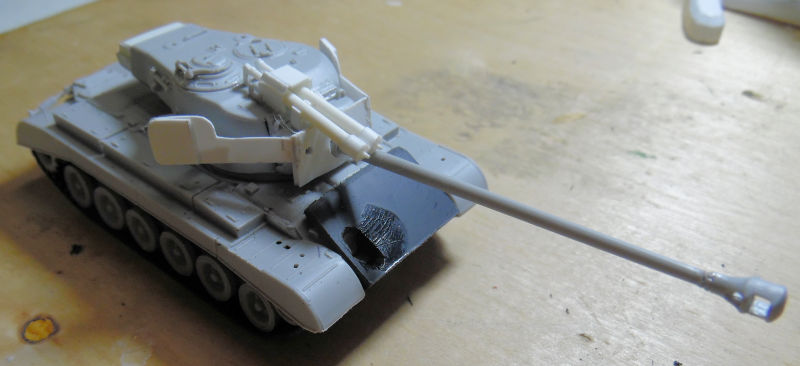
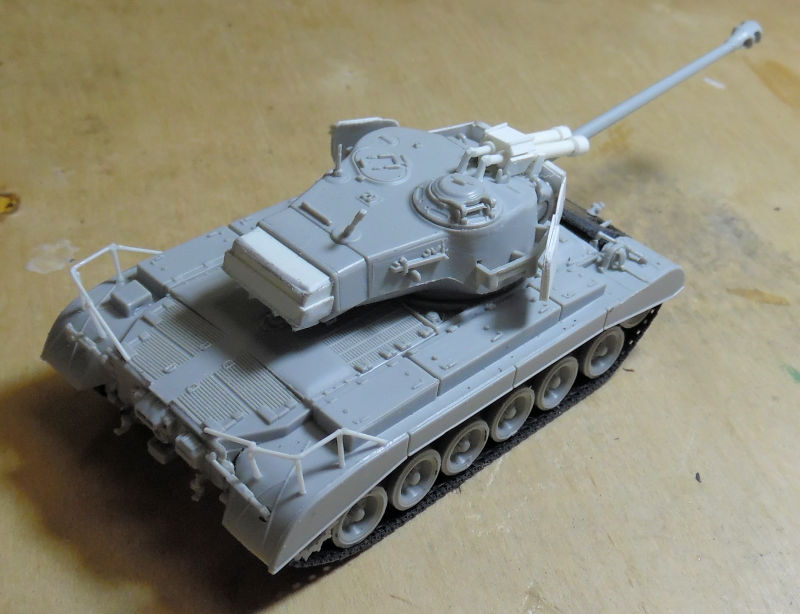
Later we added the stowage rails on the rear deck that were added to this tank:
This was now ready for paint so a base of Olive Drab was sprayed:
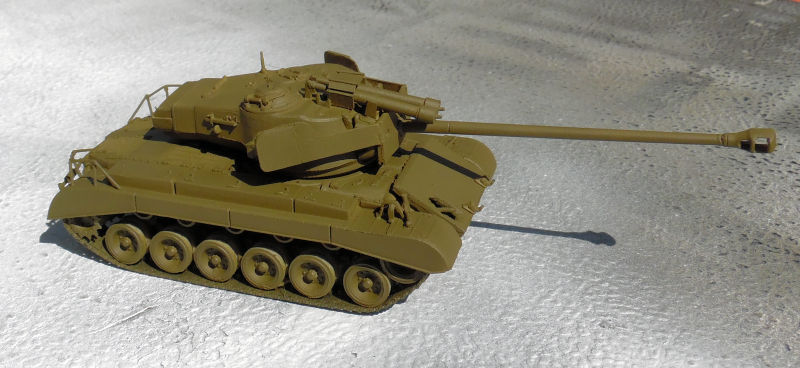
This was shot outside and I didn't adjust the color when editing this but this next shot shows this tank after we modulated the base coat with a lighter OD green:
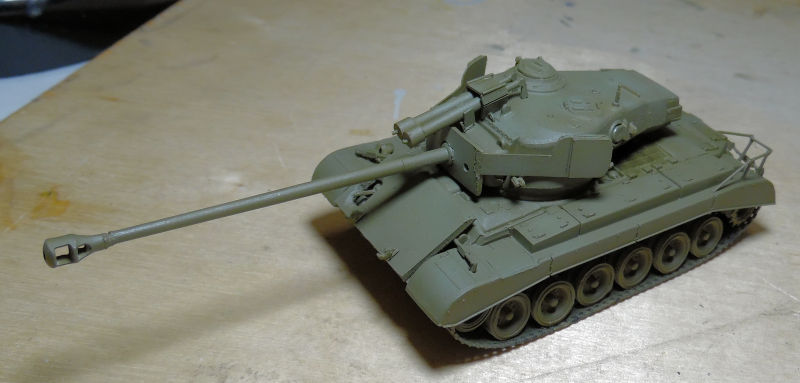
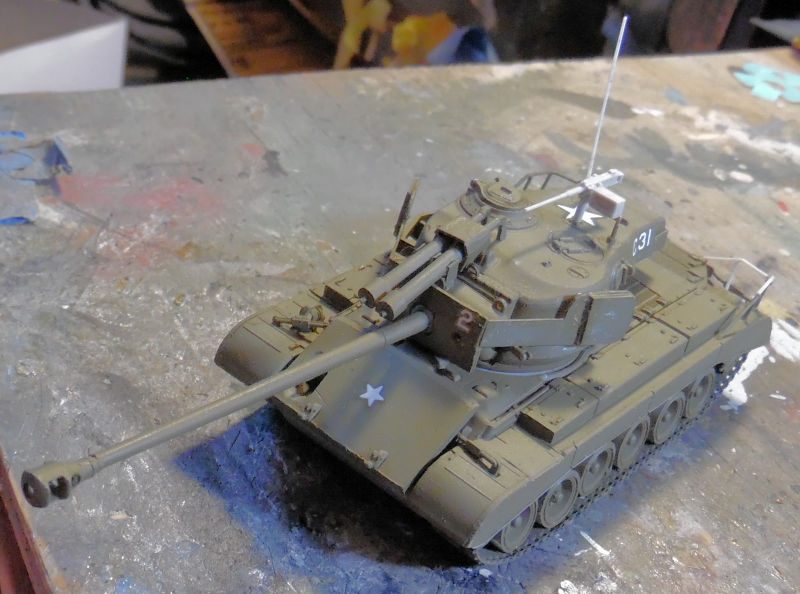
Finally we raided the decal spares box again and came up with some markings that most closely matched what I saw in ref pics. I also took some artistic license and added a star in the front so friendly forces wouldn't mistake that plate armor for the front of a Panther and I added the star in top of the turret for aircraft recognition. We also added the machine gun on top, the antenna, and repaired one of the stowage racks on the back:
And that completes our tour for this week (month?) I hope you enjoyed it. Thank you all for stopping in; comments are always welcome!
Our first stop as always is the Hangar. Here we have a few things happening, mostly some paint being sprayed before my window screen was removed. In this first bay, the Beechcraft Super 18 and the Cessna 310 both got base coats of white:
Gonna be some touch up there before decals are attempted. In this next bay, my Russian Yak 15 got the top coat of green on it:
Later when that was dry, decals went on along with the canopy:
Yes the decals silvered pretty badly, we punctured them with a fine Exacto blade tip and slathered them with Solvaset, eliminating all that. However, the film covering these is matte so they still appear to be silvered. If I shoot this with a dull coat, it all should blend in. Meanwhile, the canopy frame was painted and the final detail parts were added::
In the next bay over, we have the Otter finally being assembled. The wings and tail went on and the landing gear was installed. Yes the one tail piece is drooping, that was fixed later:
Moving on to the next bay, we got the fuselage of the JRS-1 all assembled as best we could. Later putty and sanding was done to smooth this out:
In this final bay, we started another Matchbox kit of the Swedish Tunnen jet fighter. This was also given to me later after the Distressed Kit Auction. This was fast and easy to build as well, we got this far before I finally took pics:
Gotta love this canyons for panel lines! That concludes the Hangar portion of our tour, now on to the Shipyards.....
Here in the shipyards we upped our production a bit to see if we could get some of these launched. We had also started a couple that looked fast and easy, more or less.
In this first slipway we have one of our 1/72 scale motor boats under construction. After fighting the paint on the hull for too long, it is finally at least acceptable so the main decks were finally glued in place:
Later most of the interior was installed before the sprue holding the remaining interior parts disappeared:
That is where that is for now. Moving to the next slipway, we have the little Hunt class destroyer escort finally getting the railings and other photo-etch parts before paint:
This thing is 1/700 scale so the Exacto blade is there to show the size of this little thing. Later it got paint and decals, making it HMS Middleton:
In this next slipway, the hull of the Nitta Maru got paint on it:
Once that was dry, the decks and superstructure went on, followed by the stack. Additional painting was done as well:
Later on, decals went on:
The decals had been hit with Solvaset and naturally I messed up while touching up details:
I left that to be fixed later and started with all the masts and cranes, getting this far before moving on to other things:
Moving on to the next slipway, the USS Shangri-La got all the final details added. except the deck edge antennae. The Island was also cemented in place:
In doing the air wing and looking over the Regulus launch vehicles, I noticed that none were in firing position, so we took two and added a raised launch rail:
Afterward, we added all the decal markings to the deck. They didn't give enough of certain lengths so we improvised:
It may not be accurate but it works well enough for me:
And that concludes our tour of the Shipyards, now on to the Motor Pool....
Here in the Motor Pool, a lot has been happening. In the first bay, the M10 Achilles got decals. They may not be accurate, but I couldn't find anything that matched what I had in my decal spares box, so I chose what looked best and ran with it:
While on the subject of British vehicles; in this next bay we started on another British tank, the Challenger III. First was the lower hull:
The roadwheels and sprockets went on later:
While waiting for them to dry, we built the turret. Only the basic assembly was started:
The upper hull was worked on next, not much to do there, but here it is dry-fit on the lower hull:
Then the turret was added to the dry-fit upper hull:
Moving on to the next bay, we are finally are able to move forward on a shelf queen that was stalled because the main gun trunnion assembly was lost. Well, it turned up:
You can see from this dry fit in place, why this stalled:
The gun was finally installed into place:
We then dry fit this in place so the front superstructure panels could be added:
The shells were then added to the interior:
Things were moving along well until it was time to add the side walls. That's when we saw that the front panels were way off alignment, so off they came again:
Naturally during this whole attempt to fix the upper superstructure, all these decided to break off and try to fly:
I'll leave them off until the upper structure is finally assembled properly and then these will go back on.
Moving on to this last bay, we have the T26-E4 which got the front spaced armor installed on the front. Don't worry, that fingerprint disappeared:
Later we added the stowage rails on the rear deck that were added to this tank:
This was now ready for paint so a base of Olive Drab was sprayed:
This was shot outside and I didn't adjust the color when editing this but this next shot shows this tank after we modulated the base coat with a lighter OD green:
Finally we raided the decal spares box again and came up with some markings that most closely matched what I saw in ref pics. I also took some artistic license and added a star in the front so friendly forces wouldn't mistake that plate armor for the front of a Panther and I added the star in top of the turret for aircraft recognition. We also added the machine gun on top, the antenna, and repaired one of the stowage racks on the back:
And that completes our tour for this week (month?) I hope you enjoyed it. Thank you all for stopping in; comments are always welcome!
The Duke
Virtuoso of Miniatures
"Do you know what the chain of command is? It's the chain I get and beat you with 'till you understand who's in ruttin' command!"
-Jayne Cobb, Firefly Episode 2 "The Train Job"
We are modelers - the same in spirit, in hunger to insanely buy newly released kits, hustlers in hiding our stash from our better halves and experts in using garbage as replacements for after-market parts.
Virtuoso of Miniatures
"Do you know what the chain of command is? It's the chain I get and beat you with 'till you understand who's in ruttin' command!"
-Jayne Cobb, Firefly Episode 2 "The Train Job"
We are modelers - the same in spirit, in hunger to insanely buy newly released kits, hustlers in hiding our stash from our better halves and experts in using garbage as replacements for after-market parts.