Maddog Manufacturing Open for 2024

Show off your completed work! One or two pictures and a brief explanation. Let others have a quick look at your finished masterpieces!
Post Reply
User avatar
BlackSheep214
Elite Member
Posts: 13409
Joined: Sun Apr 06, 2014 8:47 pm

Re: Maddog Manufacturing Open for 2024

Post by BlackSheep214 »

Looks like a lot got accomplished. Well done, Mark! :shoutout: :shoutout: :shoutout:
“Who controls the skies, controls the fate of this Earth”

Author unknown- 352nd Fighter Group, Blue-Nosed Bastards of Bodney

“Send one plane it’s a sortie; send two planes it’s a flight; send four planes it’s a test of airpower. - Richard Kohn
User avatar
Duke Maddog
Elite Member
Posts: 7668
Joined: Tue Jun 03, 2014 11:22 am
Location: Rowland Heights, CA

Re: Maddog Manufacturing Open for 2024

Post by Duke Maddog »

Thank you Blacksheep! I am very happy with the progress here.
The Duke
Virtuoso of Miniatures

"Do you know what the chain of command is? It's the chain I get and beat you with 'till you understand who's in ruttin' command!"
-Jayne Cobb, Firefly Episode 2 "The Train Job"

We are modelers - the same in spirit, in hunger to insanely buy newly released kits, hustlers in hiding our stash from our better halves and experts in using garbage as replacements for after-market parts.
User avatar
Duke Maddog
Elite Member
Posts: 7668
Joined: Tue Jun 03, 2014 11:22 am
Location: Rowland Heights, CA

Re: Maddog Manufacturing Open for 2024

Post by Duke Maddog »

Time for another short tour of Maddog Manufacturing today! Anyone wishing to join this one, feel free to board the trams and remember to keep all arms and legs inside at all times.


Our first stop in the Hangar, has a couple projects going. In this first bay, we got the interior of the Cessna 172 painted up and the instrument panel detailed:

Image

Later it was fitted inside the fuselage. You'll note I tried something different, masking the windows before installing them:

Image

This will be painted and decaled later.

In the next bay, we got the pilot figure of the Swedish Tunnen painted, as well as some other cockpit detail:

Image

Later, all was closed up, masked, and shot with silver basecoat. Decals went on next:

Image

Yes, those are the original kit decals. They went on surprisingly well considering their age. However, some still required some 'persuasion' in the form of Tamiya Extra Thin cement.

In this final bay, we didn't get much done on the JRS-1, but the main canopy was masked and installed. A few more detailed parts to add and this will be ready for basecoat:

Image

While that was drying, we decided to get the engines installed inside the cowlings:

Image


And that is our tour of the Hangar for now, on to the Shipyards.


Here in the first slipway, we are starting a new destroyer for a Group Build for anything that floats on another boards. This is what was chosen:

Image

The keel was laid down and the bridge sections and forward superstructure were built up. The rear stack and structure are only dry fit at this time:

Image

It doesn't show here but the rear superstructure is cemented down and additional detail parts were added. We're hoping to get paint on this soon:

Image

In the next bay, we have been trying to get this massive Japanese PT boat out of the slipways and out to her base so extra work has gone into this. First off, all the railings have finally been rigged:

Image

Later, all the extra additional parts were added to the superstructure. The main mast is only dry fit here for removal to prevent breakage later:

Image

This is when I realized that the one side of the superstructure was missing parts that would normally block the view of the interior, so we scratched up some bulkheads for that side. It's a good thing I hadn't glued down the main superstructure:

Image

After that was trimmed and painted, windows were installed and some additional touch up painting was done:

Image

Image

Superstructure was then re-installed in a dry fit and additional hull detailed were painted. There's still lots to do on this but it is getting closer to being done:

Image

The frustrating thing about this is it gives me stickers, not decals and they are all on a single piece of glossy plastic. I'm not sure what to do about that at this time.


Anyway, that concludes the tour of the Shipyards; now on to the Motor Pool.


In the Motor Pool here, we have been trying to get things caught up on some projects, and started a couple more. In this first bay, we finally managed to get the superstructure of this French gun fully assembled. It took a bit of a fight, with us having to remove almost all of it and rebuilding it:

Image

Later we installed all the broken wheels back on and then added the tracks when they were dry:

Image

We may get this painted soon, along with about seven other projects.

In this next bay is another project I've been wanting to do for a good long time. It was about time to start on this US Marine M274 Mule with a recoilless rifle on it. Basic assembly was easy:

Image

This model is barely an inch long. Later I'll post a pic of it with an Exacto blade so everyone can get an idea of how small this is.

Later on the detail parts were added and the photo-etch parts installed. After they were dry, we started on the photo-etch railing around the bed:

Image

Eventually, the railing got installed all the way around:

Image

The recoilless rifle was only dry fit so off it came to be painted separately, while we painted the rest of the vehicle:

Image

That one is about ready for completion. That being said, let's look into the next bay where we started a German flatcar again, only this one is sporting a 128mm anti-aircraft gun. The bogies were started first, we did one, then the other:

Image

There are some extremely delicate pats in there that don't necessarily fit well in that so you can see why we delayed doing the second one for a bit:

Image

After that the basic flatcar was assembled:

Image

While that was all drying, we started on the gun, making the barrel first:

Image

Several detail parts later and after the trunnions were built, this gun is starting to look like an AA gun:

Image

We then built the mounting box for this and dry-fit it on the flatcar:

Image

The gun mount was the added to the gun sub-assembly and now it's looking more like it should:

Image

Again it's only dry fit so we were able to get some additional parts on it to complete the sub-assembly:

Image

Image

Finally, we got started on trying to replicate a wood colored base. I'm only partially pleased with the result; more experimentation will be needed:

Image


And that concludes our tour of Maddog Manufacturing once again. Thank you all for joining the tour; I hope you enjoyed it. Comments are always welcome.
The Duke
Virtuoso of Miniatures

"Do you know what the chain of command is? It's the chain I get and beat you with 'till you understand who's in ruttin' command!"
-Jayne Cobb, Firefly Episode 2 "The Train Job"

We are modelers - the same in spirit, in hunger to insanely buy newly released kits, hustlers in hiding our stash from our better halves and experts in using garbage as replacements for after-market parts.
User avatar
Gary Brantley
Elite Member
Posts: 2738
Joined: Tue Apr 08, 2014 9:40 pm
Location: Cameron, Texas

Re: Maddog Manufacturing Open for 2024

Post by Gary Brantley »

Lots of progress to report, Mark! :grin: Lookin' good, dude! :shoutout:
User avatar
BlackSheep214
Elite Member
Posts: 13409
Joined: Sun Apr 06, 2014 8:47 pm

Re: Maddog Manufacturing Open for 2024

Post by BlackSheep214 »

Gary Brantley wrote: Thu Jul 18, 2024 3:09 pm Lots of progress to report, Mark! :grin: Lookin' good, dude! :shoutout:
:P1:
“Who controls the skies, controls the fate of this Earth”

Author unknown- 352nd Fighter Group, Blue-Nosed Bastards of Bodney

“Send one plane it’s a sortie; send two planes it’s a flight; send four planes it’s a test of airpower. - Richard Kohn
User avatar
Duke Maddog
Elite Member
Posts: 7668
Joined: Tue Jun 03, 2014 11:22 am
Location: Rowland Heights, CA

Re: Maddog Manufacturing Open for 2024

Post by Duke Maddog »

Thank you Gary and Blacksheep!
The Duke
Virtuoso of Miniatures

"Do you know what the chain of command is? It's the chain I get and beat you with 'till you understand who's in ruttin' command!"
-Jayne Cobb, Firefly Episode 2 "The Train Job"

We are modelers - the same in spirit, in hunger to insanely buy newly released kits, hustlers in hiding our stash from our better halves and experts in using garbage as replacements for after-market parts.
User avatar
Stikpusher
Moderator
Posts: 21180
Joined: Sat Apr 05, 2014 8:37 pm
Location: Ceti Alpha 5

Re: Maddog Manufacturing Open for 2024

Post by Stikpusher »

Nice stuff Mark! That rail car with the 128mm flak gun is too cool! :shoutout:
"Surely I have made my meaning plain? I intend to avenge myself upon you, Admiral. I have deprived your ship of power, and when I swing 'round, I intend to deprive you of your life."

FLSM
User avatar
Duke Maddog
Elite Member
Posts: 7668
Joined: Tue Jun 03, 2014 11:22 am
Location: Rowland Heights, CA

Re: Maddog Manufacturing Open for 2024

Post by Duke Maddog »

Thank you Carlos! I totally agree!
The Duke
Virtuoso of Miniatures

"Do you know what the chain of command is? It's the chain I get and beat you with 'till you understand who's in ruttin' command!"
-Jayne Cobb, Firefly Episode 2 "The Train Job"

We are modelers - the same in spirit, in hunger to insanely buy newly released kits, hustlers in hiding our stash from our better halves and experts in using garbage as replacements for after-market parts.
User avatar
Duke Maddog
Elite Member
Posts: 7668
Joined: Tue Jun 03, 2014 11:22 am
Location: Rowland Heights, CA

Re: Maddog Manufacturing Open for 2024

Post by Duke Maddog »

Wow, it's been over a month so now it's time for a quick tour of the facilities again. This has been a slow month due to some other obligations and a serious injury that I've mostly recovered from. Also, this will be the last tour until I return from my vacation to Florida on September 14th. I'm going to visit my family and celebrate my mother's 90th birthday with her.

So, without further ado, let's board the trams and see what the latest progress has been happening at Maddog Manufacturing.......


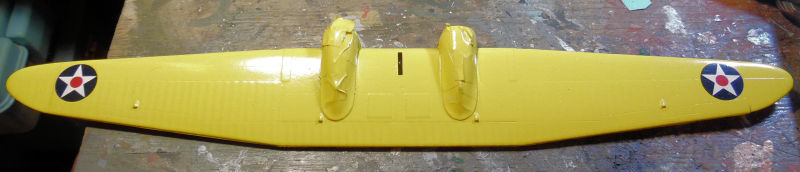
Starting in the Hangar, we have in this first bay the JRS-1. We got the wing masked and then painted yellow. After it dried, we applied the decals:
Image

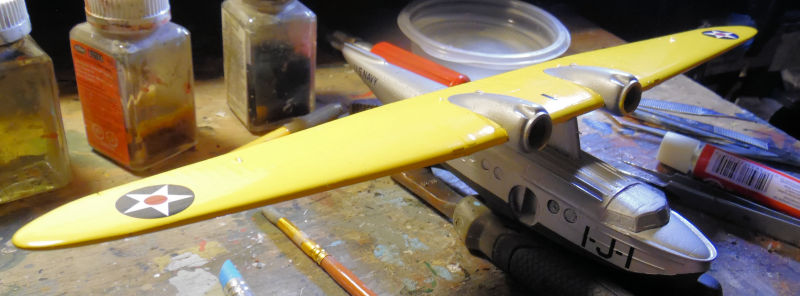
Later, the main wing was cemented to the fuselage which had also gotten the decals applied:
Image

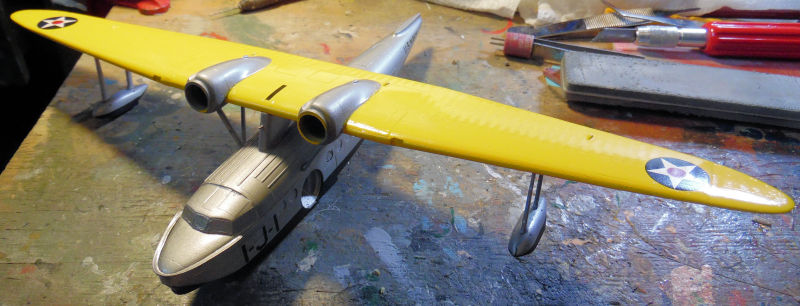
Afterward, the support struts and the outer pontoons were added to the wing. The pontoons will get support cables later:
Image

Still a lot to do with that but I still need the screen in my window before I can airbrush again. Until then, we shall move on to the next bay where
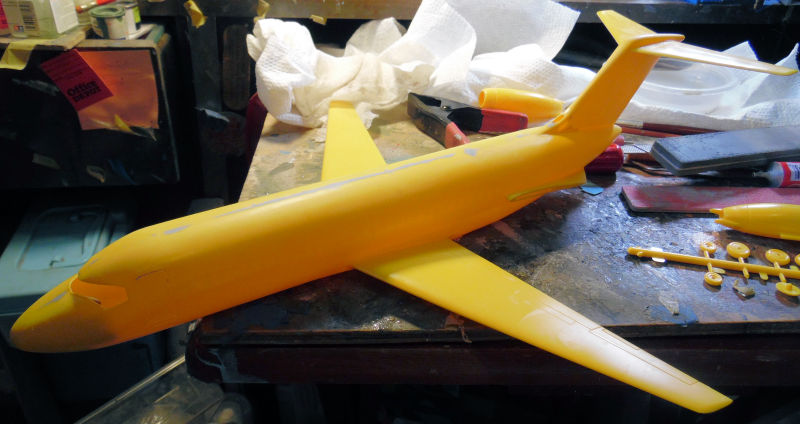
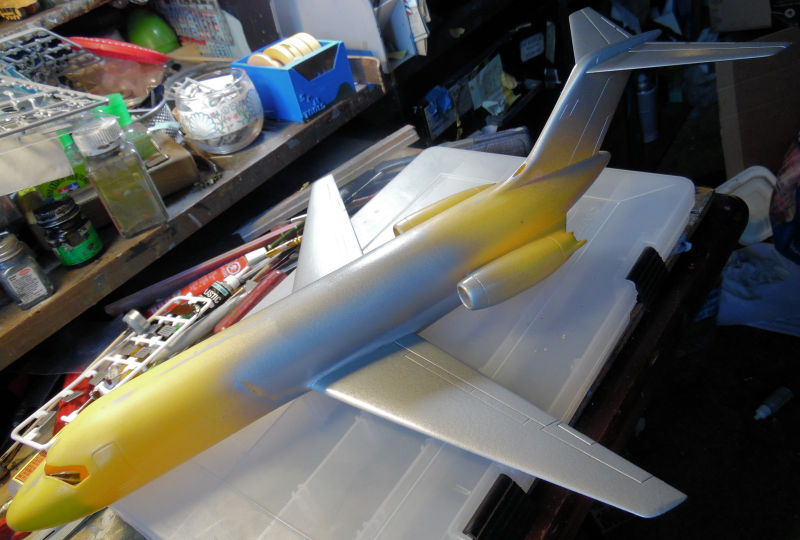
we started a 1/72 scale DC-9 in Hughes Airwest markings. This was a kit that I'd picked up at the San Diego Model Show. It had the parts for two almost complete kits inside and the yellow one had been started. Some parts were missing as you'll see soon. First, the wings and tail were all assembled and cemented to the already built fuselage:
Image

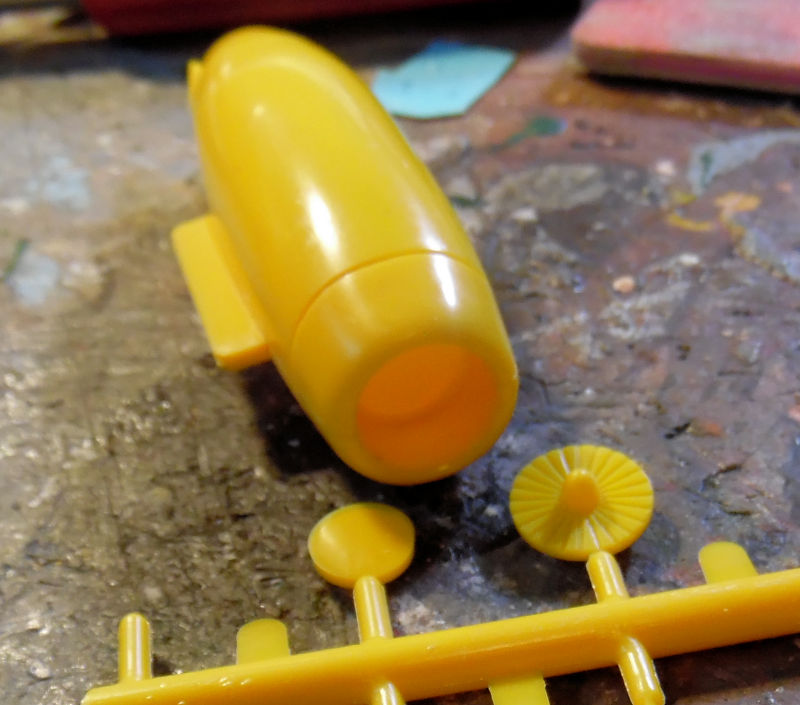
Now we discovered what some of the missing pieces were. The previous builder had built the engines, but neglected to put in the end parts:
Image

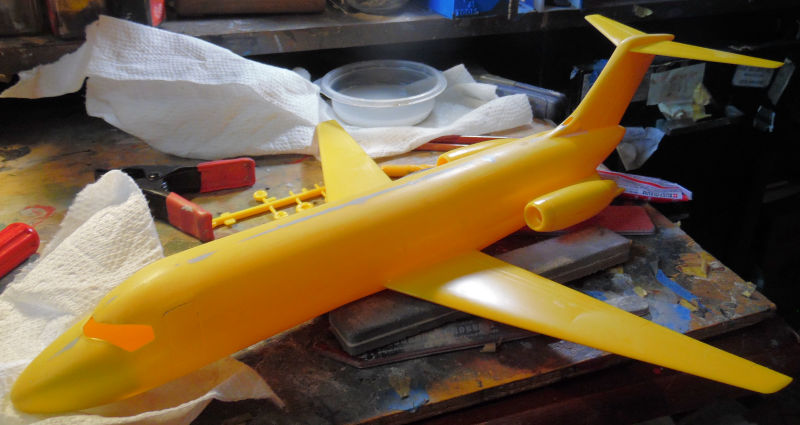
These went in okay, but the other set was missing so one engine has no end pieces. Not gonna worry about it. We installed the engines anyway:
Image

Later, we shot the metallic on the wings and tail:
Image

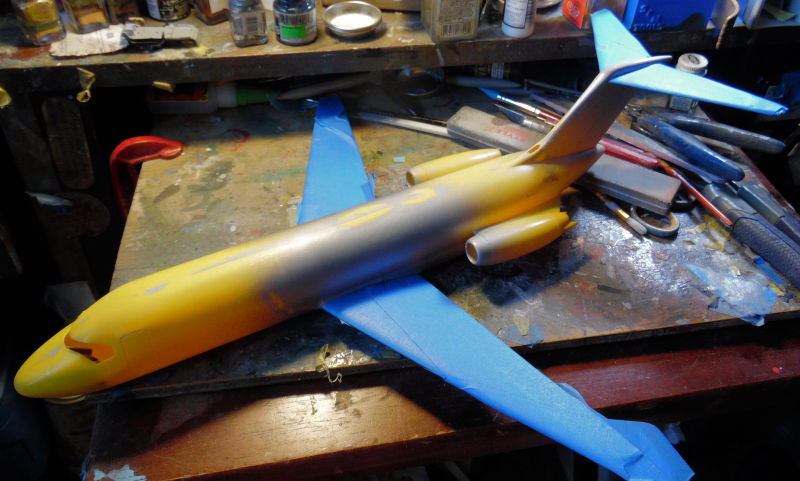
After that dried, we masked off the wings to try and shoot some yellow on this using a rattle can:
Image

So far the yellow has been a dismal failure so no pics until I can get it right.....

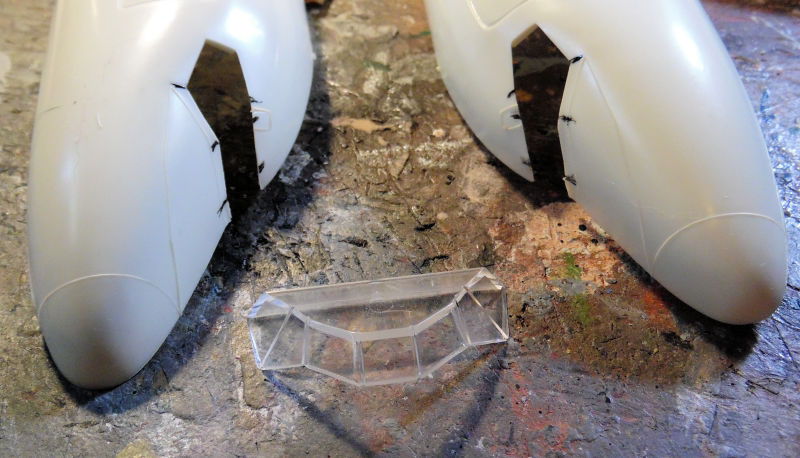
Meanwhile, we looked at starting the second kit in the box, and found one more part that was missing: the main cockpit windscreen. So, using the original one as a template, we marked where the windscreen struts are supposed to go so we could fashion some new ones and use clear sheet to add the panes:
Image

Later I found a third DC-9 kit that had both Hughes Airwest and TWA markings, so now I need to source another airline decal sheet for a 1/72 scale DC-9....

That's it for the Hangar for now, let's head out to the Shipyards to see what's going on..


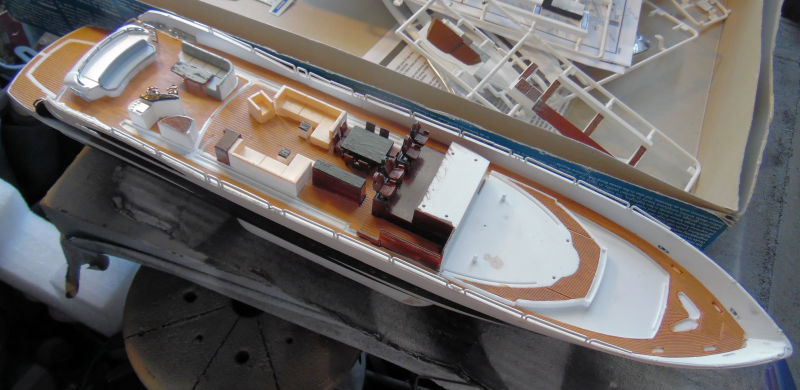
Here in the Shipyards, we continued to work on the Sunseeker Predator 108. Lots of little parts being added to bigger parts and some decals being applied, but nothing worth shooting pics for. I did shoot one pic of the Predator interior now that it is done:
Image

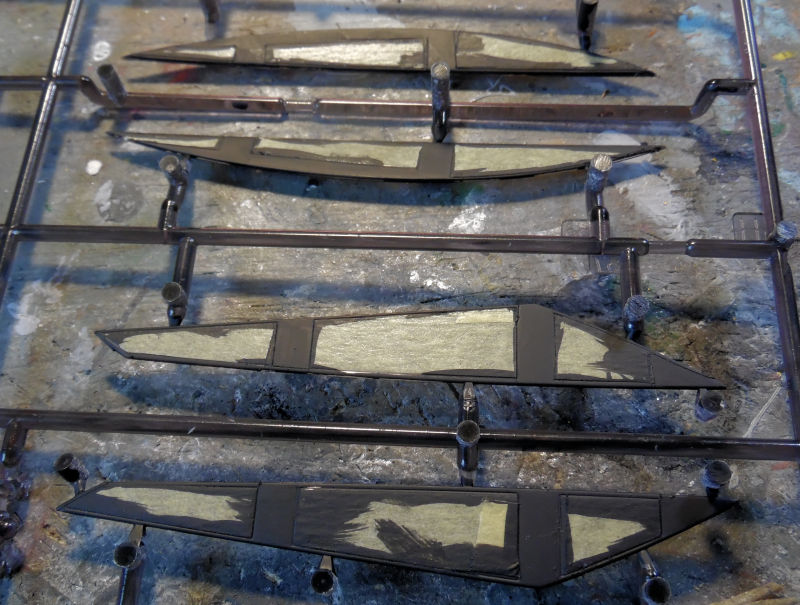
I also saw how the some of the tinted windows needed some black paint on some framework, so we masked off the parts and painted them black on the inside:
Image

That way when they are installed the black will be gloss on the outside....

All there is left right now is to finish the instrument panel decals and then close this upper cabin up. Then we'll see what else needs to be done before this is finished.

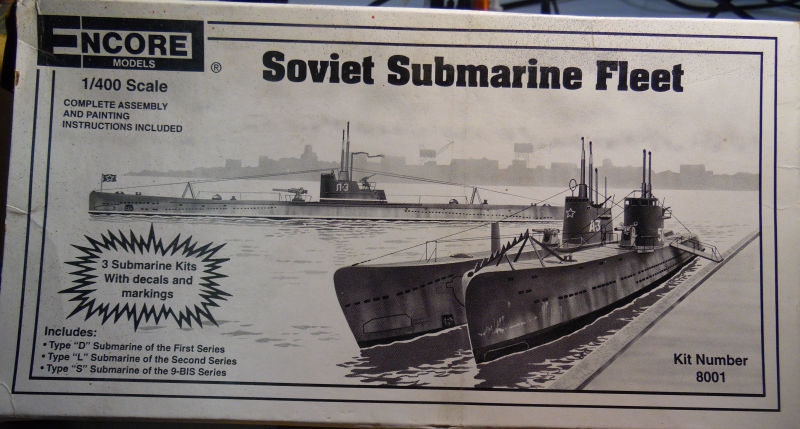
In the next three slipways, we got to work on three Soviet Submarines from WWII. This was a kit that included all three boats:
Image

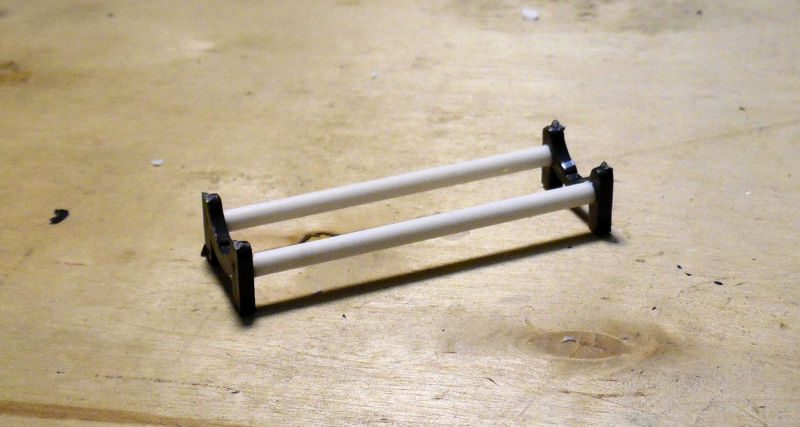
Now one of these had been started and has been a shelf queen for at least two decades. It was the first one, the Type D. One thing I wanted to do was put these on their stands so they would stay in place while things dried. Unfortunately, they did not add an crossbar for the stand pieces so we improvised:
Image

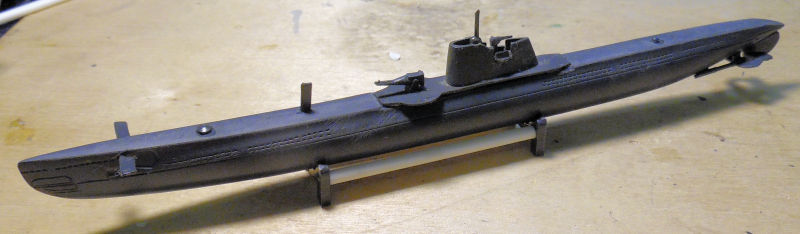
Later, all the missing pieces that I had not added in the past were installed on this hull and conning tower. Now this Type D is waiting for paint:
Image

Next, a stand for the next one, a Type L:
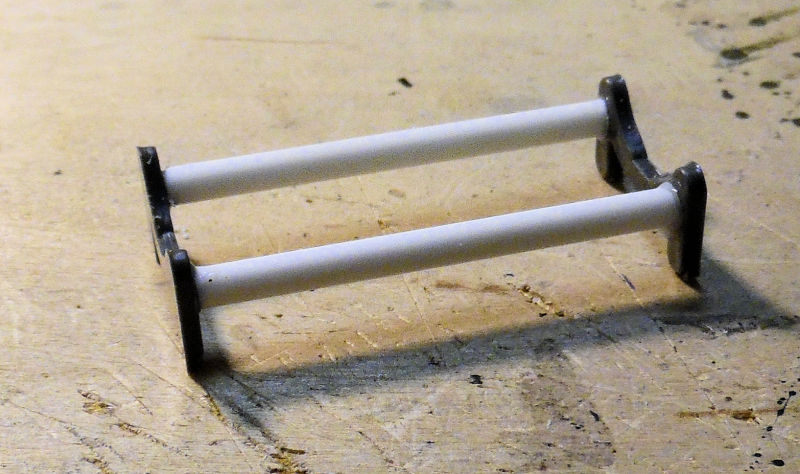
Image

Yes it's shorter, I was running out of that size sprue. However, the hull and conning tower were built up and all the detail parts installed. This Type L is waiting for paint:
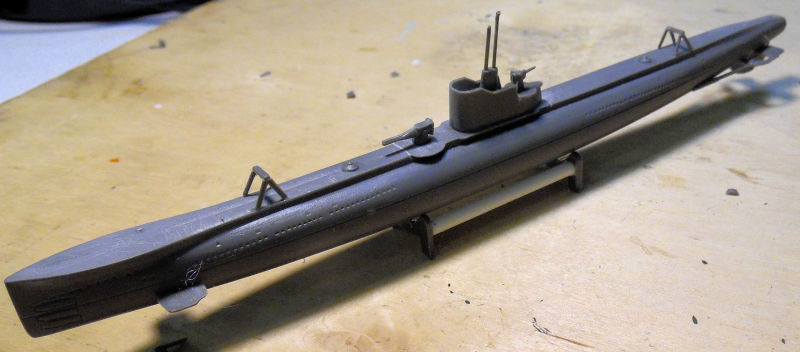
Image

Finally we started on the last one, a Type S. Yes, I built a stand for it, but you don't need to see another stand for this one. The hull was put together first like before:
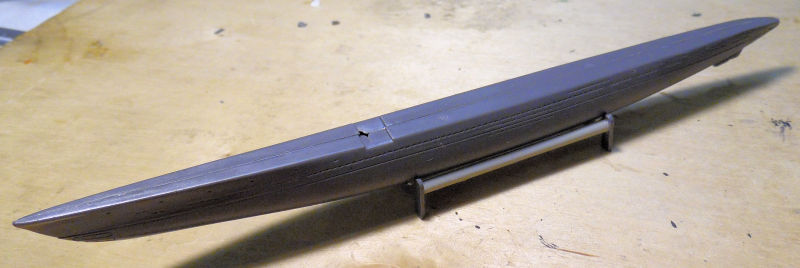
Image

Before too long, the conning tower was built and all the other detail parts were added. This Type S boat is waiting for paint:

Image

Just for fun, here's all three of them together:
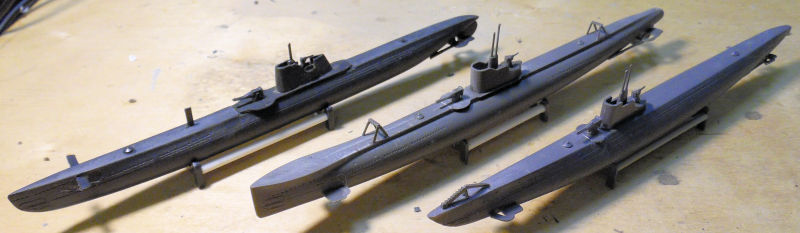
Image

That completes the tour of the Shipyards for now, let's move on to the Motor Pool...


Here in the Motor Pool, there's a couple of started vehicles and more work on my monstrosity.

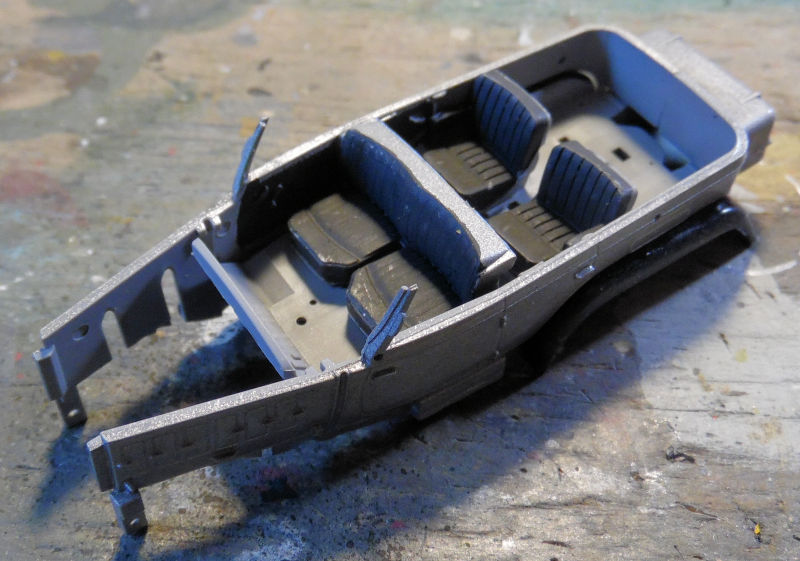
Let's start with the German Staff Car. This is a snap together kit, but I'm using glue here and there. The first thing we did was to shoot a metallic color over all the body panels and such:
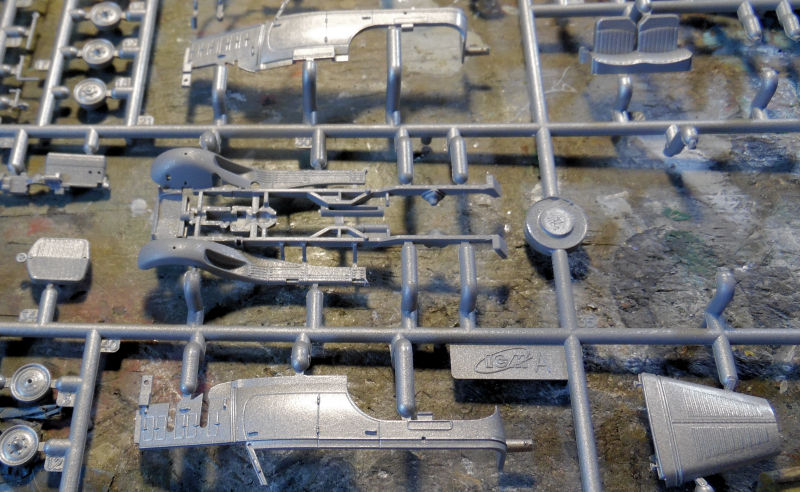
Image

Later, details were painted when the metallic color had dried:
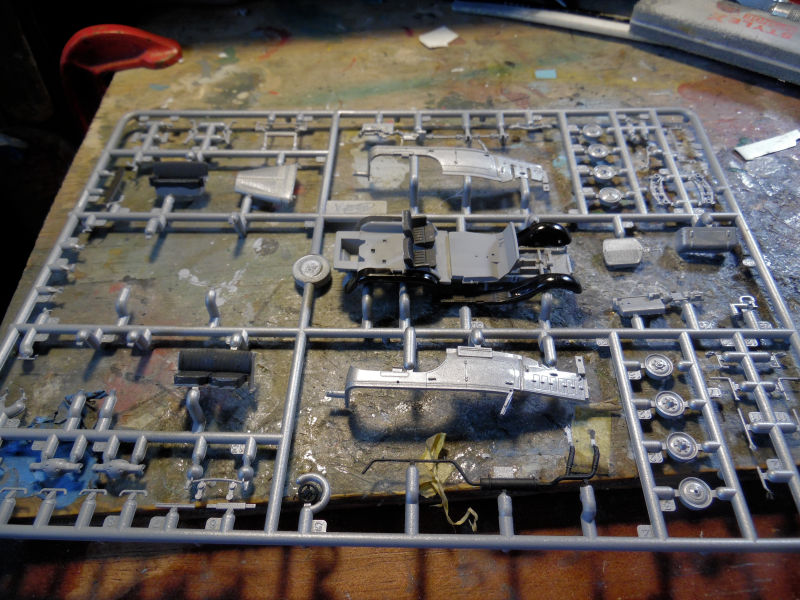
Image

Finally, some assembly got done:

Image

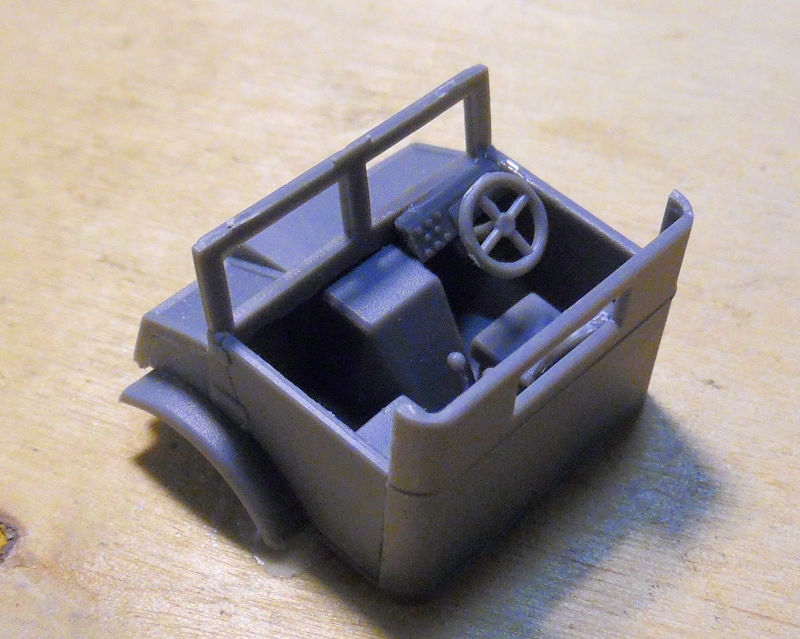
That's all for that one now, in the next bay we started a Chevy wrecker for a group build on another Forums. First was the tiny engine:
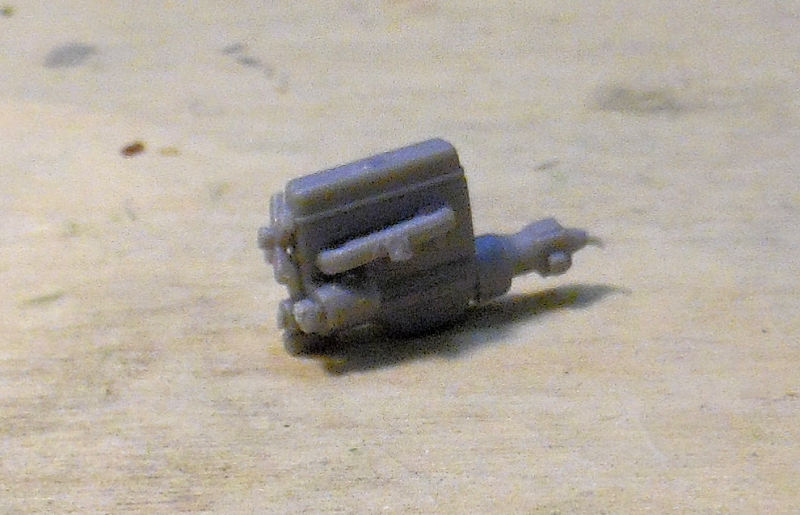
Image

Next the cab which will go over that engine:
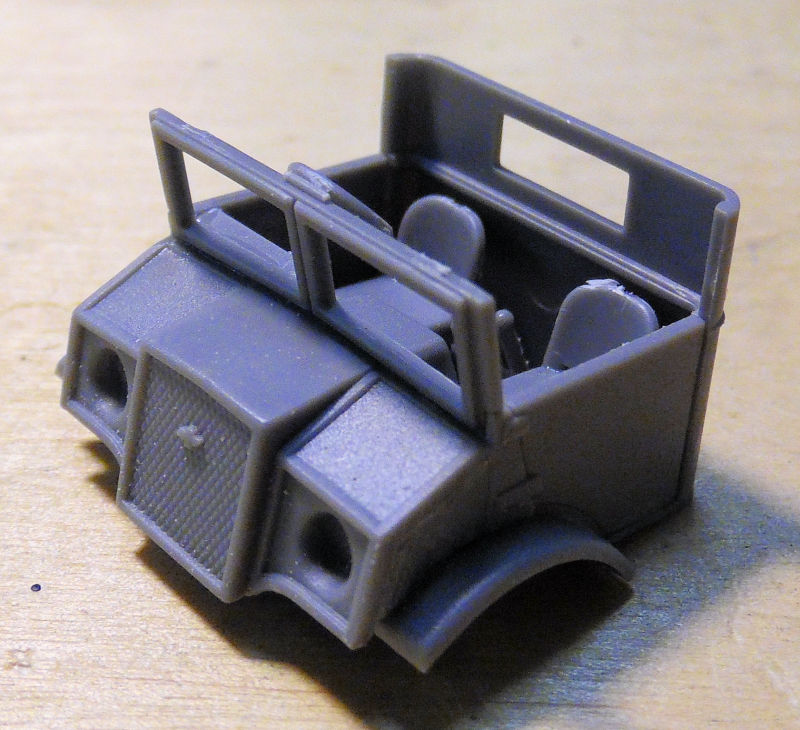
Image

Image

And that is where we stopped on that one.

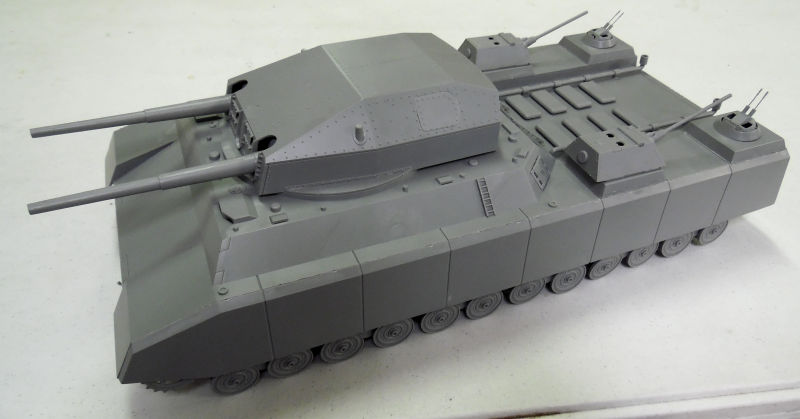
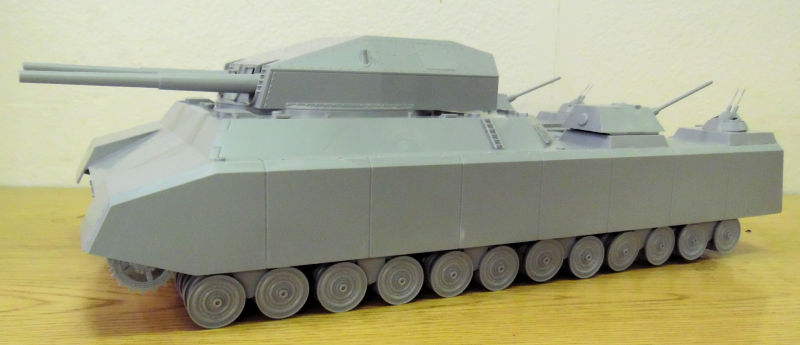
In this final bay, we continued to build all the bogies for the P.1000 Ratte until they were all done. Afterward when everything was dry, we installed them all on the lower hull and then snapped the upper hull on them so they would dry in the proper position to lock into the connection points on the upper hull skirts. Here is what it looked like:
Image

Image

Now all I need to do is figure out the rear idler wheels and why they are fitting so loosely. Then maybe we can start installing the tracks if possible.

Still trying to figure out what camouflage pattern I want to put on this; the box art pattern is just too butt-ugly!!

Maybe an ambush pattern................


And that completes this tour of Maddog Manufacturing, I hope you enjoyed it. Thank you all for taking the tour and comments are always welcome.
The Duke
Virtuoso of Miniatures

"Do you know what the chain of command is? It's the chain I get and beat you with 'till you understand who's in ruttin' command!"
-Jayne Cobb, Firefly Episode 2 "The Train Job"

We are modelers - the same in spirit, in hunger to insanely buy newly released kits, hustlers in hiding our stash from our better halves and experts in using garbage as replacements for after-market parts.
User avatar
BlackSheep214
Elite Member
Posts: 13409
Joined: Sun Apr 06, 2014 8:47 pm

Re: Maddog Manufacturing Open for 2024

Post by BlackSheep214 »

Gotta love yellow wing birds. What’s not to love? I’m unfamiliar with the last tank type. Looks like a good one.

Not too surprised to see yellow sprue on that airliner. Typical of kits when they came in colored sprues. Yuck… :giggles:
“Who controls the skies, controls the fate of this Earth”

Author unknown- 352nd Fighter Group, Blue-Nosed Bastards of Bodney

“Send one plane it’s a sortie; send two planes it’s a flight; send four planes it’s a test of airpower. - Richard Kohn
Post Reply

Return to “Member's Gallery”