
Maddog Manufacturing Open for 2024
-
Brandons_Iron

- Advanced Member
- Posts: 496
- Joined: Tue Jan 21, 2020 11:18 am
- Location: Eastern Idaho
Re: Maddog Manufacturing Open for 2024
Amazing and really cool stuff. I don't know how you manage to keep track of so many builds all at once. I do 2 or 3 at a time and I feel full up, can't handle anymore. You Sir, are a monster builder.
BrandonK
If you can't fix it with duct tape, you're not using enough duct tape.
If you can't fix it with duct tape, you're not using enough duct tape.
-
Stikpusher

- Moderator
- Posts: 21379
- Joined: Sat Apr 05, 2014 8:37 pm
- Location: Ceti Alpha 5
Re: Maddog Manufacturing Open for 2024
Man that Ratte is quite the fanciful machine Mark! I can’t wait to see what you do with this. 
"Surely I have made my meaning plain? I intend to avenge myself upon you, Admiral. I have deprived your ship of power, and when I swing 'round, I intend to deprive you of your life."
FLSM
FLSM
-
Duke Maddog

- Elite Member
- Posts: 7700
- Joined: Tue Jun 03, 2014 11:22 am
- Location: Rowland Heights, CA
Re: Maddog Manufacturing Open for 2024
Thank you Blacksheep! Yes, I like yellow winged birds too. Painting them is a pain though, but knowing this particular one went looking for the Japanese fleet after the Pearl Harbor attack compelled me to make this version. The last tank is a fictional vehicle; a concept considered in 1942 called the P.1000 Ratte. It's mai armament was going to be the 13" guns from the Scharnhorst class of battleship. I had heard they had already started making the roadwheels for it but that's about as far as they got. The only reason I'm building this is because I hope to make it a 'carrying case' for my smaller (real) vehicles. That model is more than two feet long. Yeah, the airliner molded in yellow is rather blinding, but it sure helps when painting it yellow. Now if I could only get that coat to go smooth!
Thank you Brandon! I appreciate the compliments. Keeping track isn't that hard for me fortunately, probably due to me having built this way for years. Part of my system is that I keep everything back in it's original boxes when I finish working on them. When the assemblies become too big; I have a shelf to hold them. Another thing that helps is looking back on this Thread to see what I bypassed and bring it back to the front burner to work on. Looking at past WIP pics in the Gallery helps remind me of models I need to get back to as well.
Thank you Carlos! I'm still considering options on that Ratte. Yesterday I was trying to mount the tracks on the bogies; what a challenge! That is gonna take awhile!
Thank you Brandon! I appreciate the compliments. Keeping track isn't that hard for me fortunately, probably due to me having built this way for years. Part of my system is that I keep everything back in it's original boxes when I finish working on them. When the assemblies become too big; I have a shelf to hold them. Another thing that helps is looking back on this Thread to see what I bypassed and bring it back to the front burner to work on. Looking at past WIP pics in the Gallery helps remind me of models I need to get back to as well.
Thank you Carlos! I'm still considering options on that Ratte. Yesterday I was trying to mount the tracks on the bogies; what a challenge! That is gonna take awhile!
The Duke
Virtuoso of Miniatures
"Do you know what the chain of command is? It's the chain I get and beat you with 'till you understand who's in ruttin' command!"
-Jayne Cobb, Firefly Episode 2 "The Train Job"
We are modelers - the same in spirit, in hunger to insanely buy newly released kits, hustlers in hiding our stash from our better halves and experts in using garbage as replacements for after-market parts.
Virtuoso of Miniatures
"Do you know what the chain of command is? It's the chain I get and beat you with 'till you understand who's in ruttin' command!"
-Jayne Cobb, Firefly Episode 2 "The Train Job"
We are modelers - the same in spirit, in hunger to insanely buy newly released kits, hustlers in hiding our stash from our better halves and experts in using garbage as replacements for after-market parts.

Re: Maddog Manufacturing Open for 2024
Cool stuff Mark!
Stuart Templeton 'I may not be good but I'm slow...'

Re: Maddog Manufacturing Open for 2024
That is a lot going on and going quite nicely, too.
Havr you ever thought about dumping all the parts in a bin and just building a giant "what-if"?
Havr you ever thought about dumping all the parts in a bin and just building a giant "what-if"?
To make each build less crappy than the last one. Or, put another way, "Better than the last one, not as good as the next one!"..
Re: Maddog Manufacturing Open for 2024
Mark's the reason Hollywood went over to CGI for it's sci-fi spaceships - they couldn't find enough kits to make anything out of!
Stuart Templeton 'I may not be good but I'm slow...'
-
Duke Maddog
- Elite Member
- Posts: 7700
- Joined: Tue Jun 03, 2014 11:22 am
- Location: Rowland Heights, CA
Re: Maddog Manufacturing Open for 2024
Lyle, you and Stuart are a scream! LOL!! Thank you for the honor guys, and Lyle; I have considered trying to find a way to make something crazy with most of my parts!
Well it's been a good long time since I had a tour, thanks to work and a three-week-long vacation; so now it's time to get one started again. There's not as much to see now in the hangar as there is in the other areas, but I did make some progress since I returned from vacation. So, all aboard the trams and enjoy the tour!
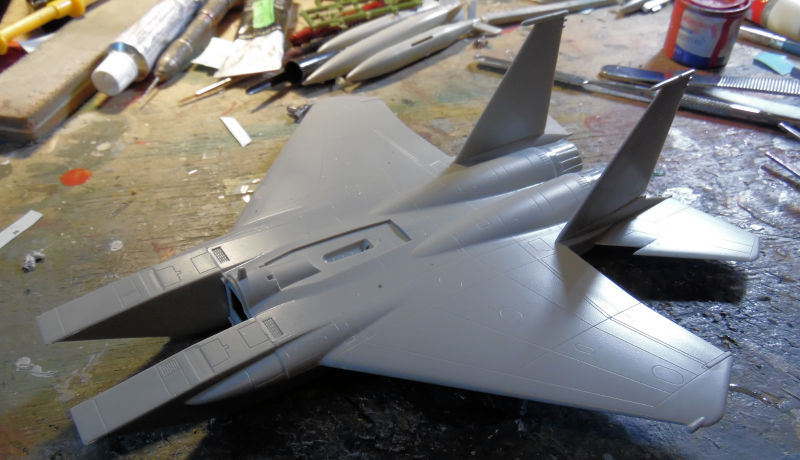
As always, we'll start in the Hangar. In this first bay, we have a new model started, an F-15 C Eagle. We only got this far:
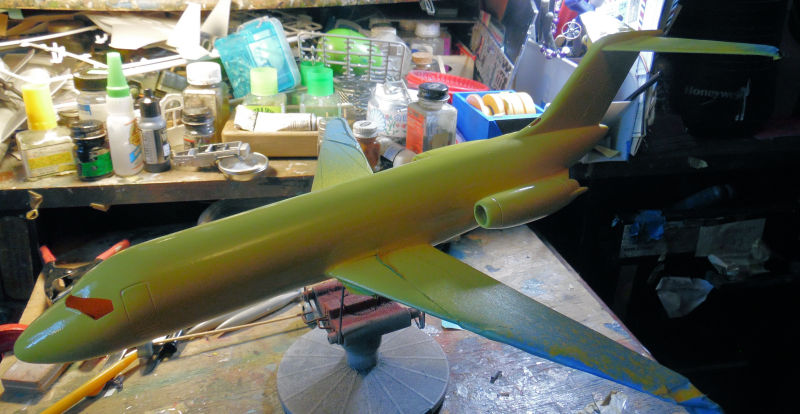
In the next bay is the DC-9, all painted up with the yellow. I just need to find the Hughes Airwest decals for this and then I can move on:
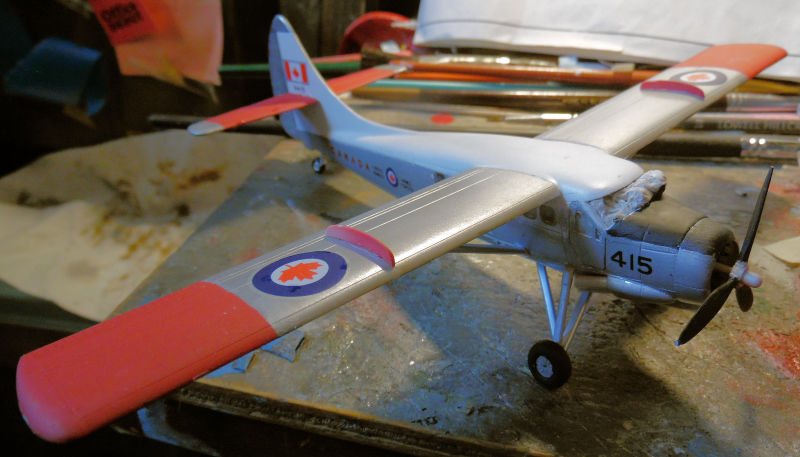
In this next bay is the Canadian Otter. The decals were applied and the cowl and engine installed. The propeller needs some extra work, but once that is done, this bird will be ready for delivery:
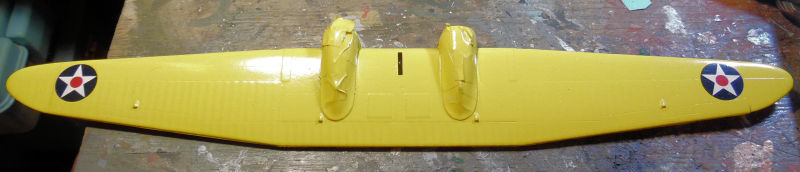
Finally, the last bay here shows the Navy JRS-1 Flying Boat. Decals were applied to the wing and fuselage:
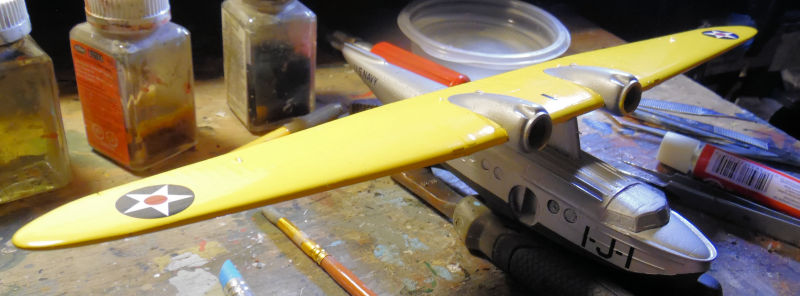
Later the outer pontoons were installed:
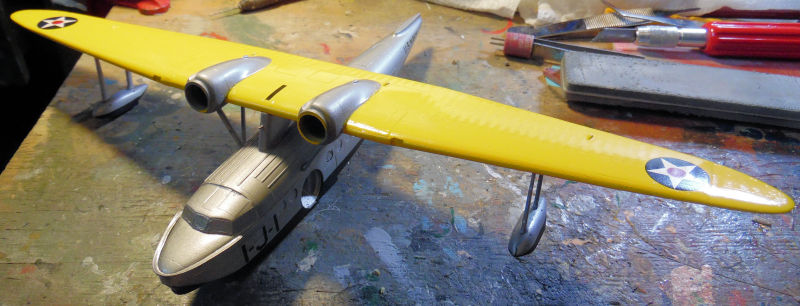
Eventually, I got the tail painted and made ready to install it:
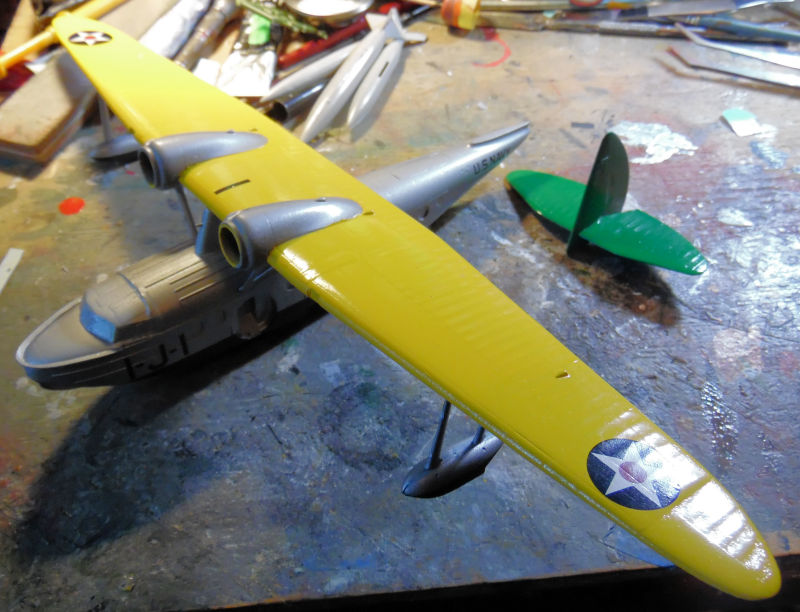
The instructions called for wires on the outer pontoons so I applied some stretched sprue:
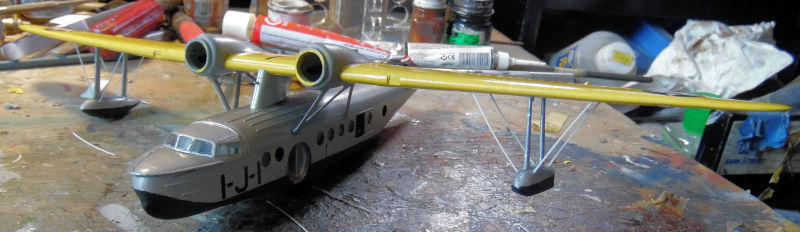
Later the tail was installed as well as the landing gear:
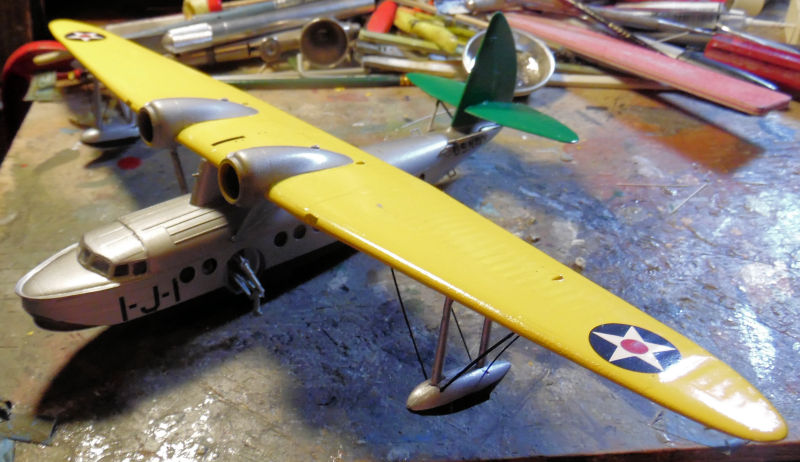
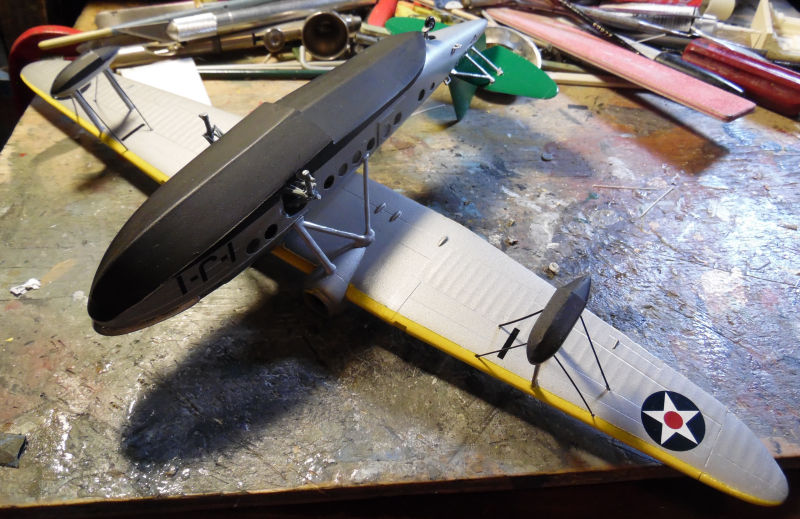
And that was all we got done in the Hangar, now on to the Shipyards....
Here in the Shipyards, we managed to get the three Soviet fleet submarines painted up and ready for decals:
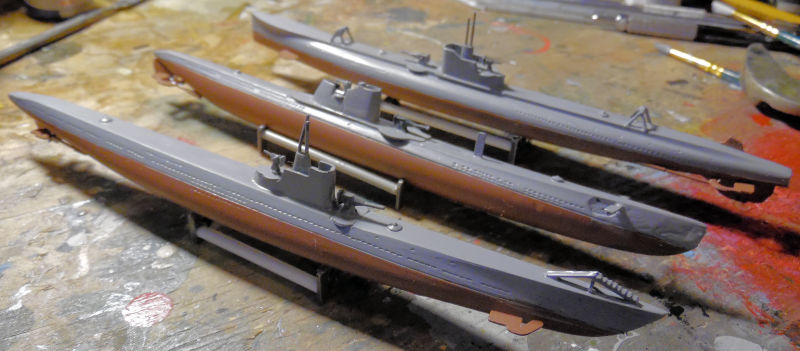
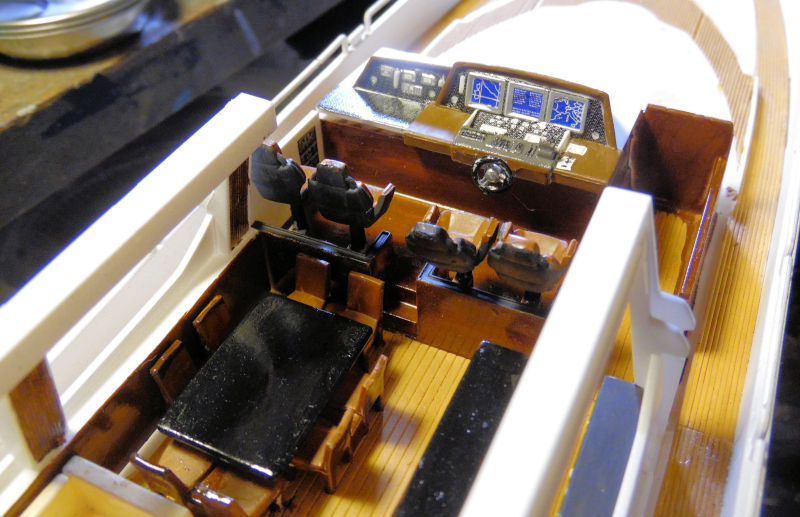
In the next bay, a lot was done on the Sunseeker Predator 108. First we applied all the decals to the instrument panel for the helm:
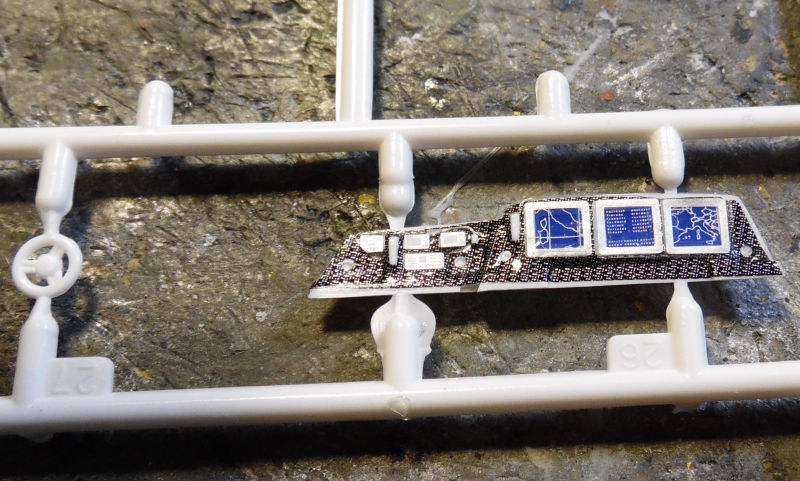
Once it was ready it got installed in the interior:
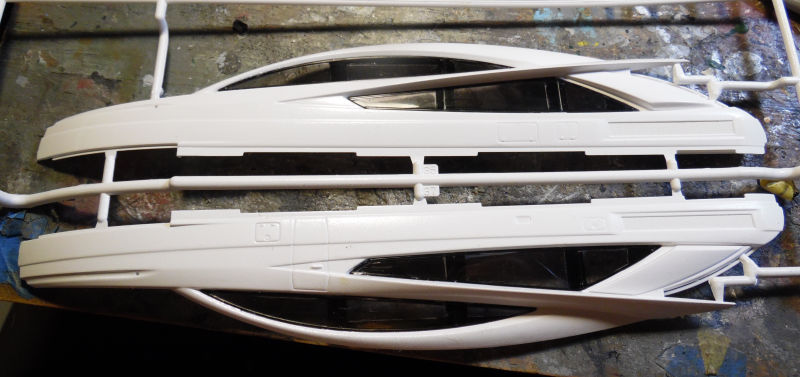
While all that was drying, the glass got installed in the side panels for the upper cabin:
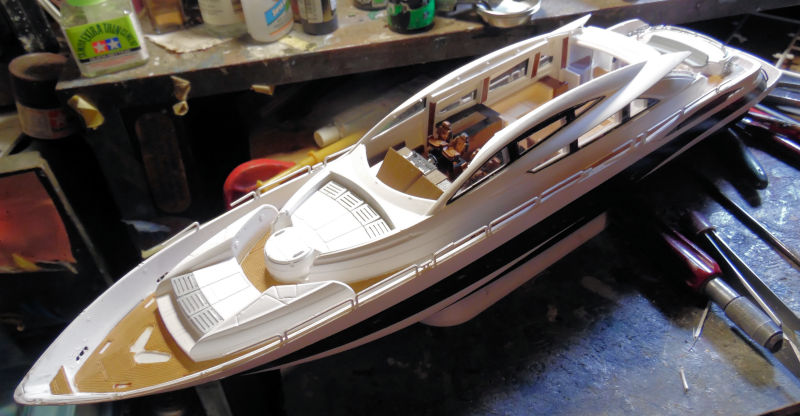
Later the upper cabin was built up:
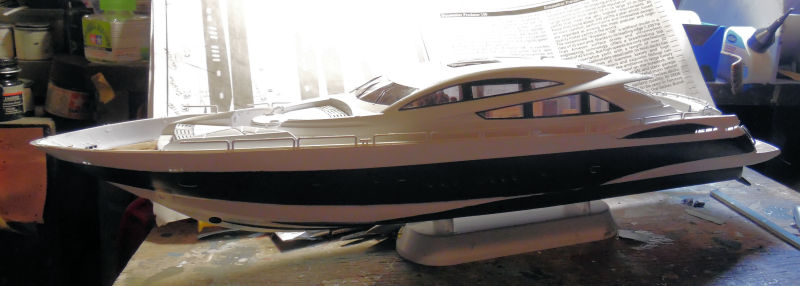
Once that was dry, the windscreen, glass doors and roof were added to the cabin, finally completing almost all the construction on this:
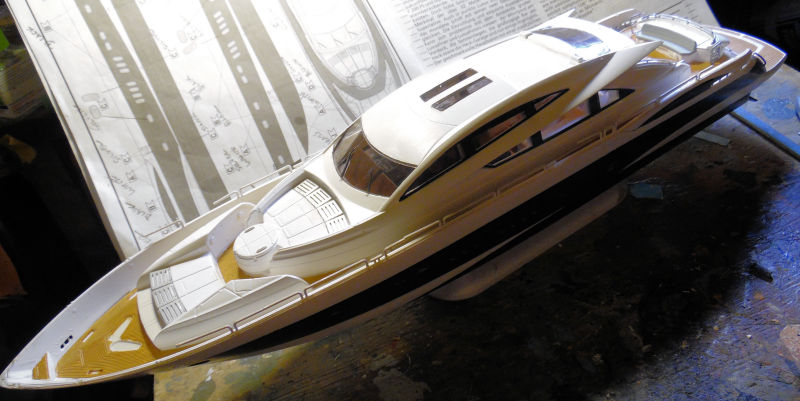
Later on the engines were installed underneath. The propellers were going on last to prevent any breakage and loss before this was done:
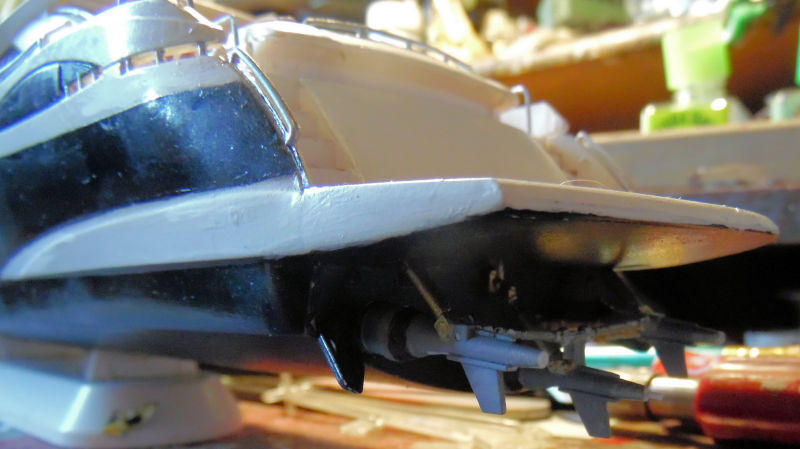
Finally the radar and sensor platform were built and painted. Here it is just sitting on top of the cabin. A few more touch ups were needed before that would be cemented down, as well as some final repairs and decals:
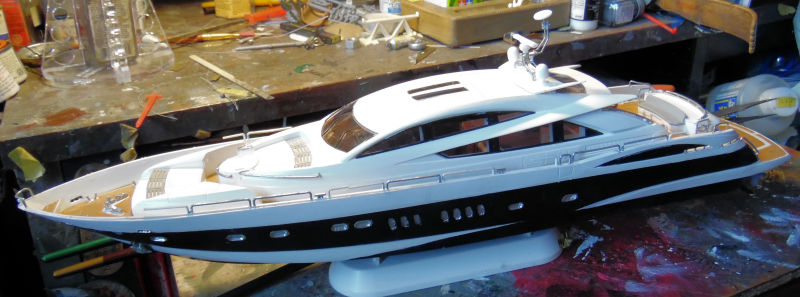
That completes this part of the tour through the shipyards; now on to the Motor Pool to a few more projects in the works.
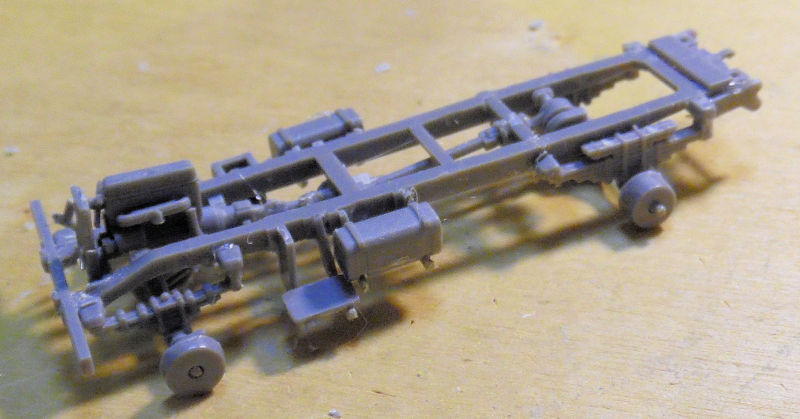
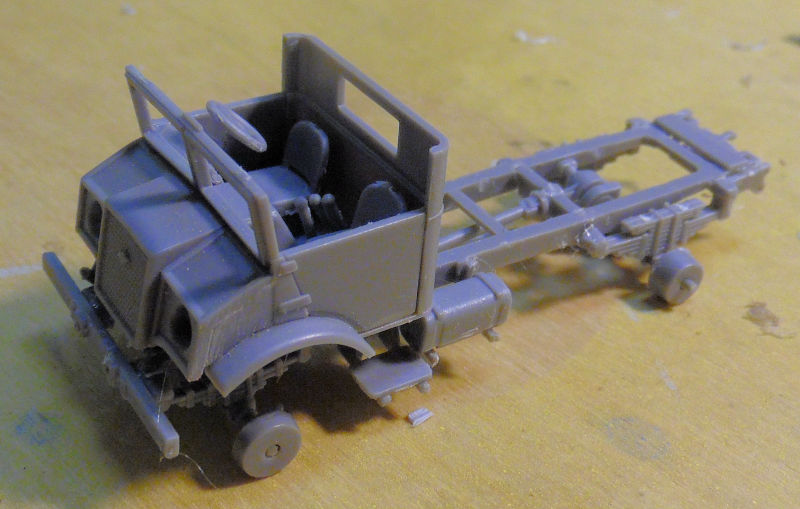
In this first bay we are working on a Chevrolet CWT-15 wrecker for my Canadian Army. The first thing done was the cab which was shown in the last tour. This time the chassis was built up:
The cab was then test fit to see how it fits, looking good:
Later the rear bed was built, along with the wrecker arm frame:
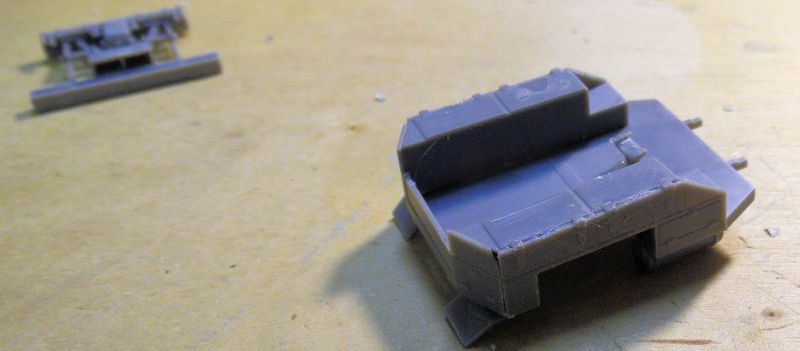
Paint should start on that soon.
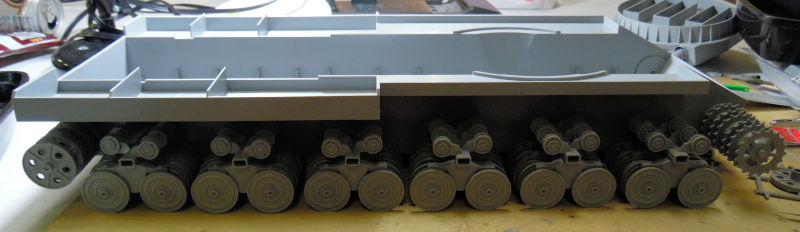
In the next bay, we went back to the P.1000 Ratte, adding all the bogies to the lower hull since they were finally all done. The idler wheels were also fixed so they would sit properly:
Later, I started to try and add the tracks to this since I'd been slowly snapping links together into lengths I could put together to make a full track:
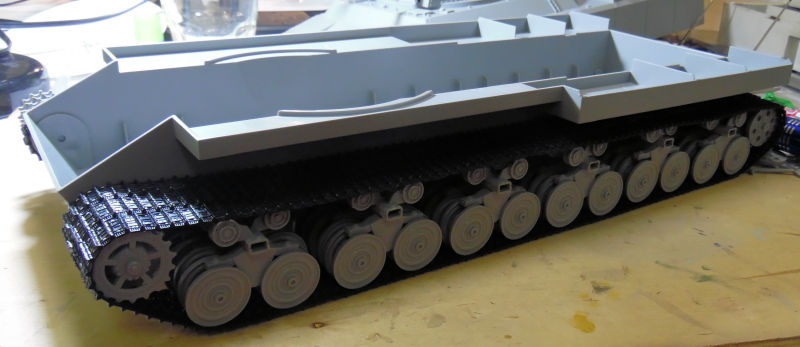
It doesn't show well here but the tracks were way too loose so I made an effort to try and remove sections to make them fit better. I did this also because of a concern I might not have enough length to complete the other side. The results were way below satisfaction so I'll have to try again later.
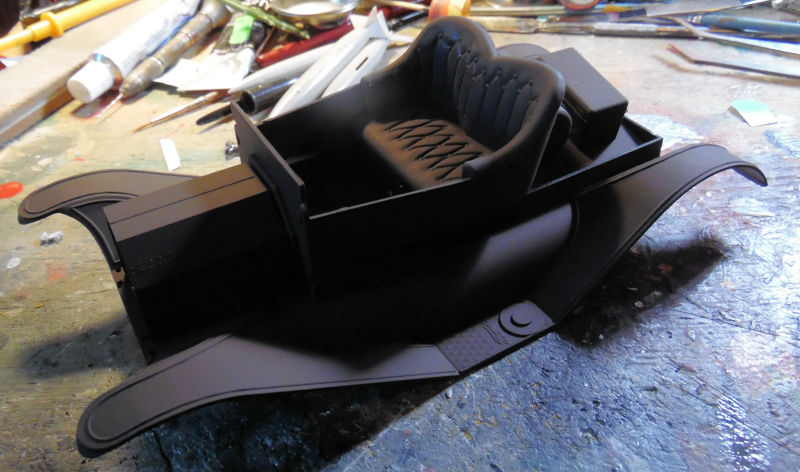
Meanwhile, I started a larger scale car; this one is the 1/12 scale Ford Model T, which came in any color you wanted as long as it was black. So after basic assembly, it was painted black:
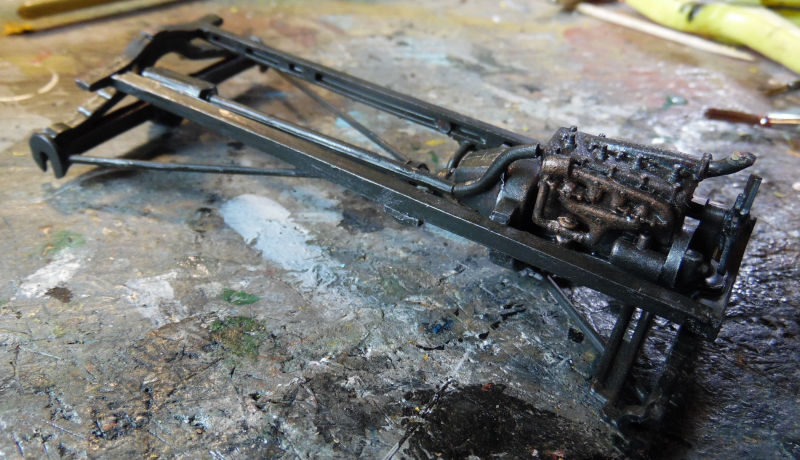
That was as far as we got with that. The next large vehicle, slightly smaller at 1/24 scale is a Shelf Queen that I was determined to get off the bench. First up, the chassis was painted again, with details added to the engine that won't be seen:
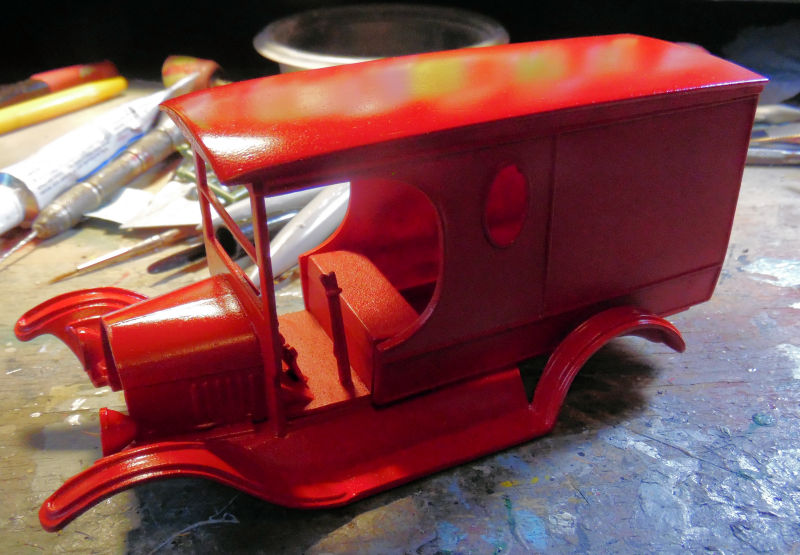
Then the body and fenders were dry-fit together, repainted again and glossed:
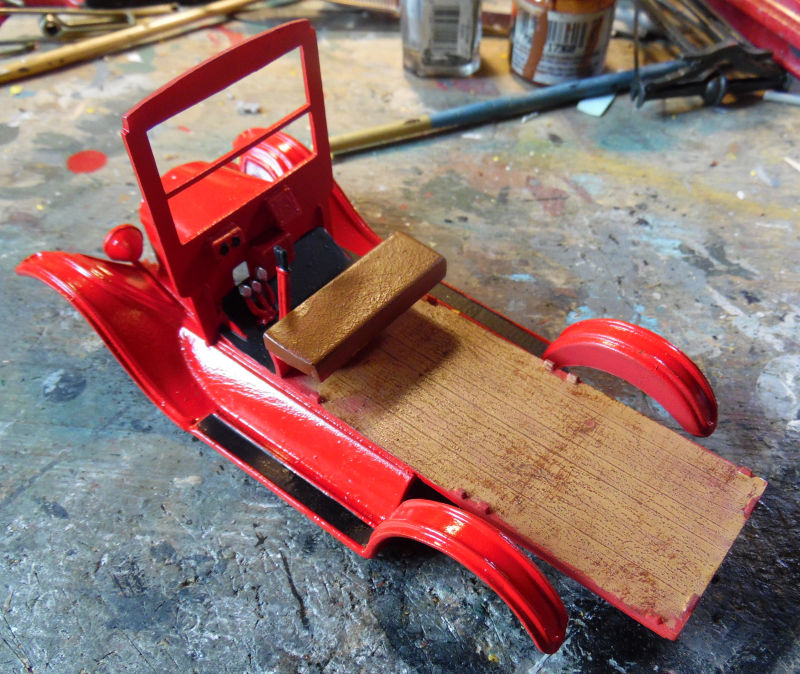
When that was dry enough, it was taken apart again and the interior woodwork was done along with the leather seat:
Then we did the roof; it was nice of Revell to mold in the wood grain detail:
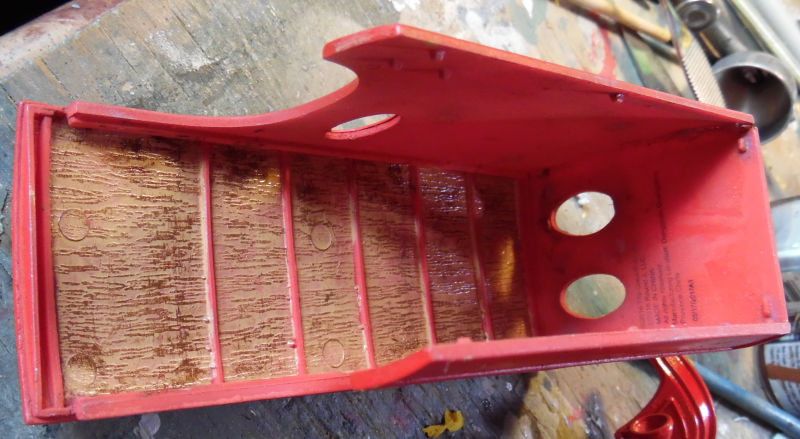
No, I didn't remove or fill in the ejector pin marks. I didn't want to destroy all the great wood grain detail that I could not replace, and I didn't want this on my workbench any longer than it had to be; it had already been sitting here far too long!
The windows were added, the final interior parts like the steering wheel were installed and the whole thing glued together. The wheels and tires were then added to the chassis; it was quite a fight to get them to all touch the ground. Once that battle was won, the body was cemented to the chassis:
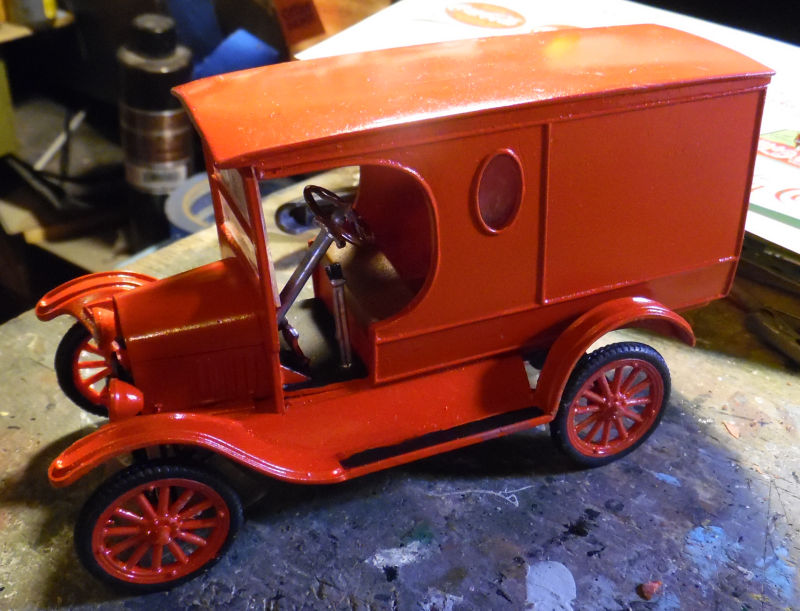
As you can see if you look closely; the radiator was missing, but I kept going. Decals were added next; I wanted to make this as colorful as I could to a point:
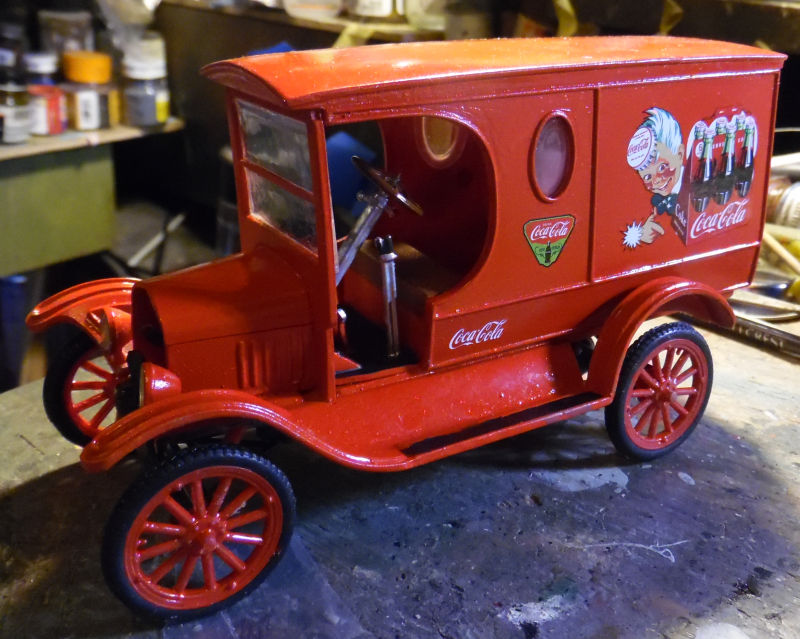
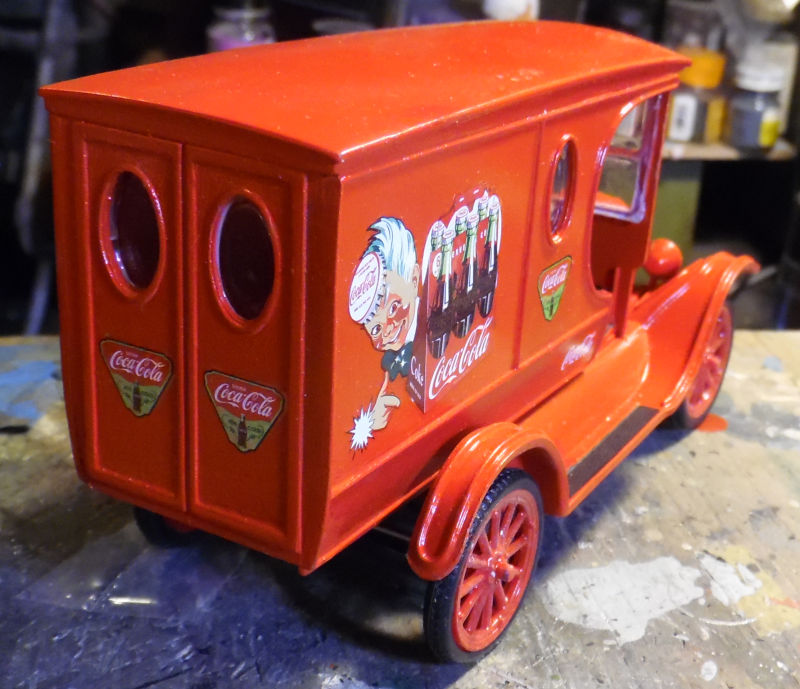
Finally, after a day or so, the radiator turned up and was immediately installed on the front, and the hand crank added. Headlight lenses were glued in too:
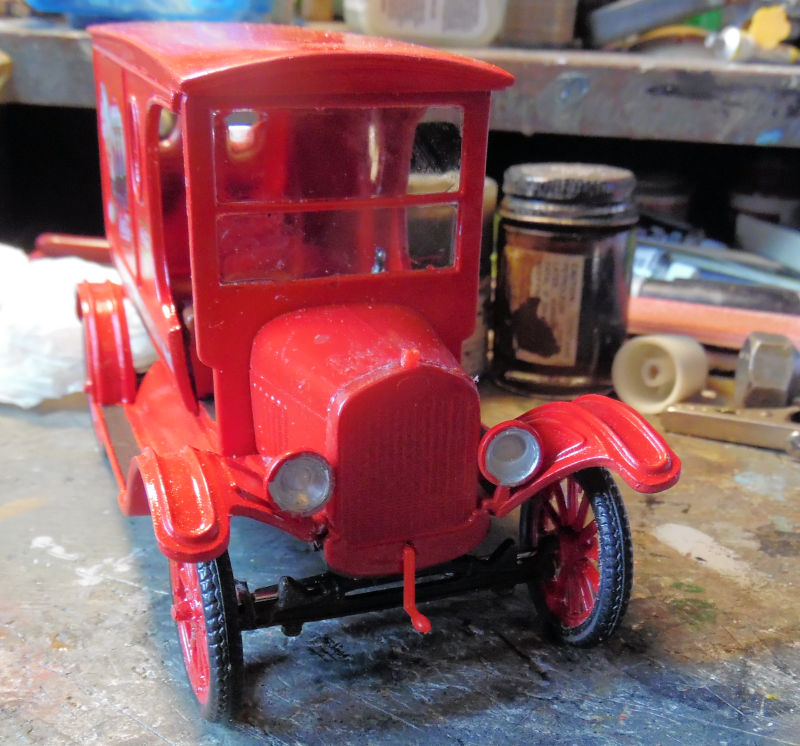
It ain't too much longer before this is finished.
That concludes this tour of the latest work being done here at Maddog Manufacturing; I hope you enjoyed it. Thank you all for coming along; comments are welcome.
Well it's been a good long time since I had a tour, thanks to work and a three-week-long vacation; so now it's time to get one started again. There's not as much to see now in the hangar as there is in the other areas, but I did make some progress since I returned from vacation. So, all aboard the trams and enjoy the tour!
As always, we'll start in the Hangar. In this first bay, we have a new model started, an F-15 C Eagle. We only got this far:
In the next bay is the DC-9, all painted up with the yellow. I just need to find the Hughes Airwest decals for this and then I can move on:
In this next bay is the Canadian Otter. The decals were applied and the cowl and engine installed. The propeller needs some extra work, but once that is done, this bird will be ready for delivery:
Finally, the last bay here shows the Navy JRS-1 Flying Boat. Decals were applied to the wing and fuselage:
Later the outer pontoons were installed:
Eventually, I got the tail painted and made ready to install it:
The instructions called for wires on the outer pontoons so I applied some stretched sprue:
Later the tail was installed as well as the landing gear:
And that was all we got done in the Hangar, now on to the Shipyards....
Here in the Shipyards, we managed to get the three Soviet fleet submarines painted up and ready for decals:
In the next bay, a lot was done on the Sunseeker Predator 108. First we applied all the decals to the instrument panel for the helm:
Once it was ready it got installed in the interior:
While all that was drying, the glass got installed in the side panels for the upper cabin:
Later the upper cabin was built up:
Once that was dry, the windscreen, glass doors and roof were added to the cabin, finally completing almost all the construction on this:
Later on the engines were installed underneath. The propellers were going on last to prevent any breakage and loss before this was done:
Finally the radar and sensor platform were built and painted. Here it is just sitting on top of the cabin. A few more touch ups were needed before that would be cemented down, as well as some final repairs and decals:
That completes this part of the tour through the shipyards; now on to the Motor Pool to a few more projects in the works.
In this first bay we are working on a Chevrolet CWT-15 wrecker for my Canadian Army. The first thing done was the cab which was shown in the last tour. This time the chassis was built up:
The cab was then test fit to see how it fits, looking good:
Later the rear bed was built, along with the wrecker arm frame:
Paint should start on that soon.
In the next bay, we went back to the P.1000 Ratte, adding all the bogies to the lower hull since they were finally all done. The idler wheels were also fixed so they would sit properly:
Later, I started to try and add the tracks to this since I'd been slowly snapping links together into lengths I could put together to make a full track:
It doesn't show well here but the tracks were way too loose so I made an effort to try and remove sections to make them fit better. I did this also because of a concern I might not have enough length to complete the other side. The results were way below satisfaction so I'll have to try again later.
Meanwhile, I started a larger scale car; this one is the 1/12 scale Ford Model T, which came in any color you wanted as long as it was black. So after basic assembly, it was painted black:
That was as far as we got with that. The next large vehicle, slightly smaller at 1/24 scale is a Shelf Queen that I was determined to get off the bench. First up, the chassis was painted again, with details added to the engine that won't be seen:
Then the body and fenders were dry-fit together, repainted again and glossed:
When that was dry enough, it was taken apart again and the interior woodwork was done along with the leather seat:
Then we did the roof; it was nice of Revell to mold in the wood grain detail:
No, I didn't remove or fill in the ejector pin marks. I didn't want to destroy all the great wood grain detail that I could not replace, and I didn't want this on my workbench any longer than it had to be; it had already been sitting here far too long!
The windows were added, the final interior parts like the steering wheel were installed and the whole thing glued together. The wheels and tires were then added to the chassis; it was quite a fight to get them to all touch the ground. Once that battle was won, the body was cemented to the chassis:
As you can see if you look closely; the radiator was missing, but I kept going. Decals were added next; I wanted to make this as colorful as I could to a point:
Finally, after a day or so, the radiator turned up and was immediately installed on the front, and the hand crank added. Headlight lenses were glued in too:
It ain't too much longer before this is finished.
That concludes this tour of the latest work being done here at Maddog Manufacturing; I hope you enjoyed it. Thank you all for coming along; comments are welcome.
The Duke
Virtuoso of Miniatures
"Do you know what the chain of command is? It's the chain I get and beat you with 'till you understand who's in ruttin' command!"
-Jayne Cobb, Firefly Episode 2 "The Train Job"
We are modelers - the same in spirit, in hunger to insanely buy newly released kits, hustlers in hiding our stash from our better halves and experts in using garbage as replacements for after-market parts.
Virtuoso of Miniatures
"Do you know what the chain of command is? It's the chain I get and beat you with 'till you understand who's in ruttin' command!"
-Jayne Cobb, Firefly Episode 2 "The Train Job"
We are modelers - the same in spirit, in hunger to insanely buy newly released kits, hustlers in hiding our stash from our better halves and experts in using garbage as replacements for after-market parts.
-
Brandons_Iron
- Advanced Member
- Posts: 496
- Joined: Tue Jan 21, 2020 11:18 am
- Location: Eastern Idaho
Re: Maddog Manufacturing Open for 2024
I have a sickness and I like to build many things. You Sir, put me to shame in both what you are willing to build and how much at a time. Awesome stuff. Keep it coming.
BrandonK
If you can't fix it with duct tape, you're not using enough duct tape.
If you can't fix it with duct tape, you're not using enough duct tape.
-
BlackSheep214

- Elite Member
- Posts: 13594
- Joined: Sun Apr 06, 2014 8:47 pm
Re: Maddog Manufacturing Open for 2024
Man... who doesn't love old cars. That yacht looks great. Welcome back, Mark.
“Who controls the skies, controls the fate of this Earth”
Author unknown- 352nd Fighter Group, Blue-Nosed Bastards of Bodney
“Send one plane it’s a sortie; send two planes it’s a flight; send four planes it’s a test of airpower. - Richard Kohn
Author unknown- 352nd Fighter Group, Blue-Nosed Bastards of Bodney
“Send one plane it’s a sortie; send two planes it’s a flight; send four planes it’s a test of airpower. - Richard Kohn
-
Duke Maddog
- Elite Member
- Posts: 7700
- Joined: Tue Jun 03, 2014 11:22 am
- Location: Rowland Heights, CA
Re: Maddog Manufacturing Open for 2024
Brandon, I agree; I have that same sickness. I think I'm terminal too! LOL! Thank you for the awesome compliments! Stay tuned; I do have more forthcoming.
Thank you Blacksheep! I'm so glad to be back!
Thank you Blacksheep! I'm so glad to be back!
The Duke
Virtuoso of Miniatures
"Do you know what the chain of command is? It's the chain I get and beat you with 'till you understand who's in ruttin' command!"
-Jayne Cobb, Firefly Episode 2 "The Train Job"
We are modelers - the same in spirit, in hunger to insanely buy newly released kits, hustlers in hiding our stash from our better halves and experts in using garbage as replacements for after-market parts.
Virtuoso of Miniatures
"Do you know what the chain of command is? It's the chain I get and beat you with 'till you understand who's in ruttin' command!"
-Jayne Cobb, Firefly Episode 2 "The Train Job"
We are modelers - the same in spirit, in hunger to insanely buy newly released kits, hustlers in hiding our stash from our better halves and experts in using garbage as replacements for after-market parts.