Good morning, Kari! I hope you’re feeling better. I’m glad you are seeing this continuation since your comments and your own examples of building continue to inspire me!
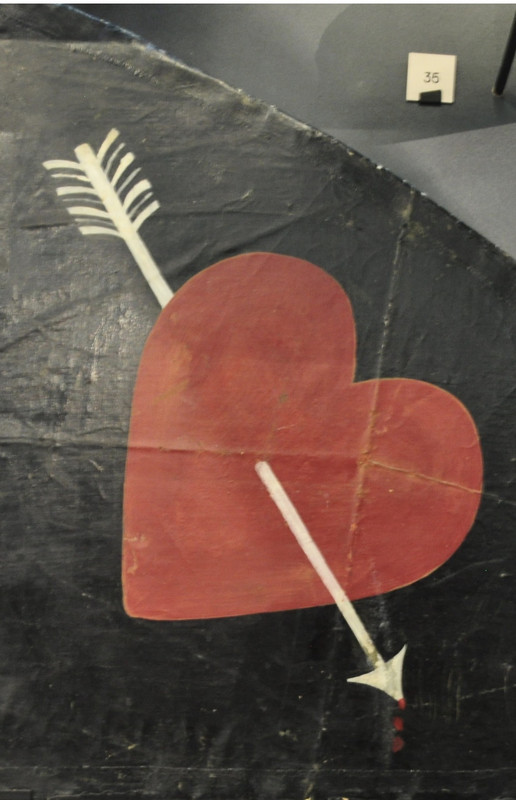
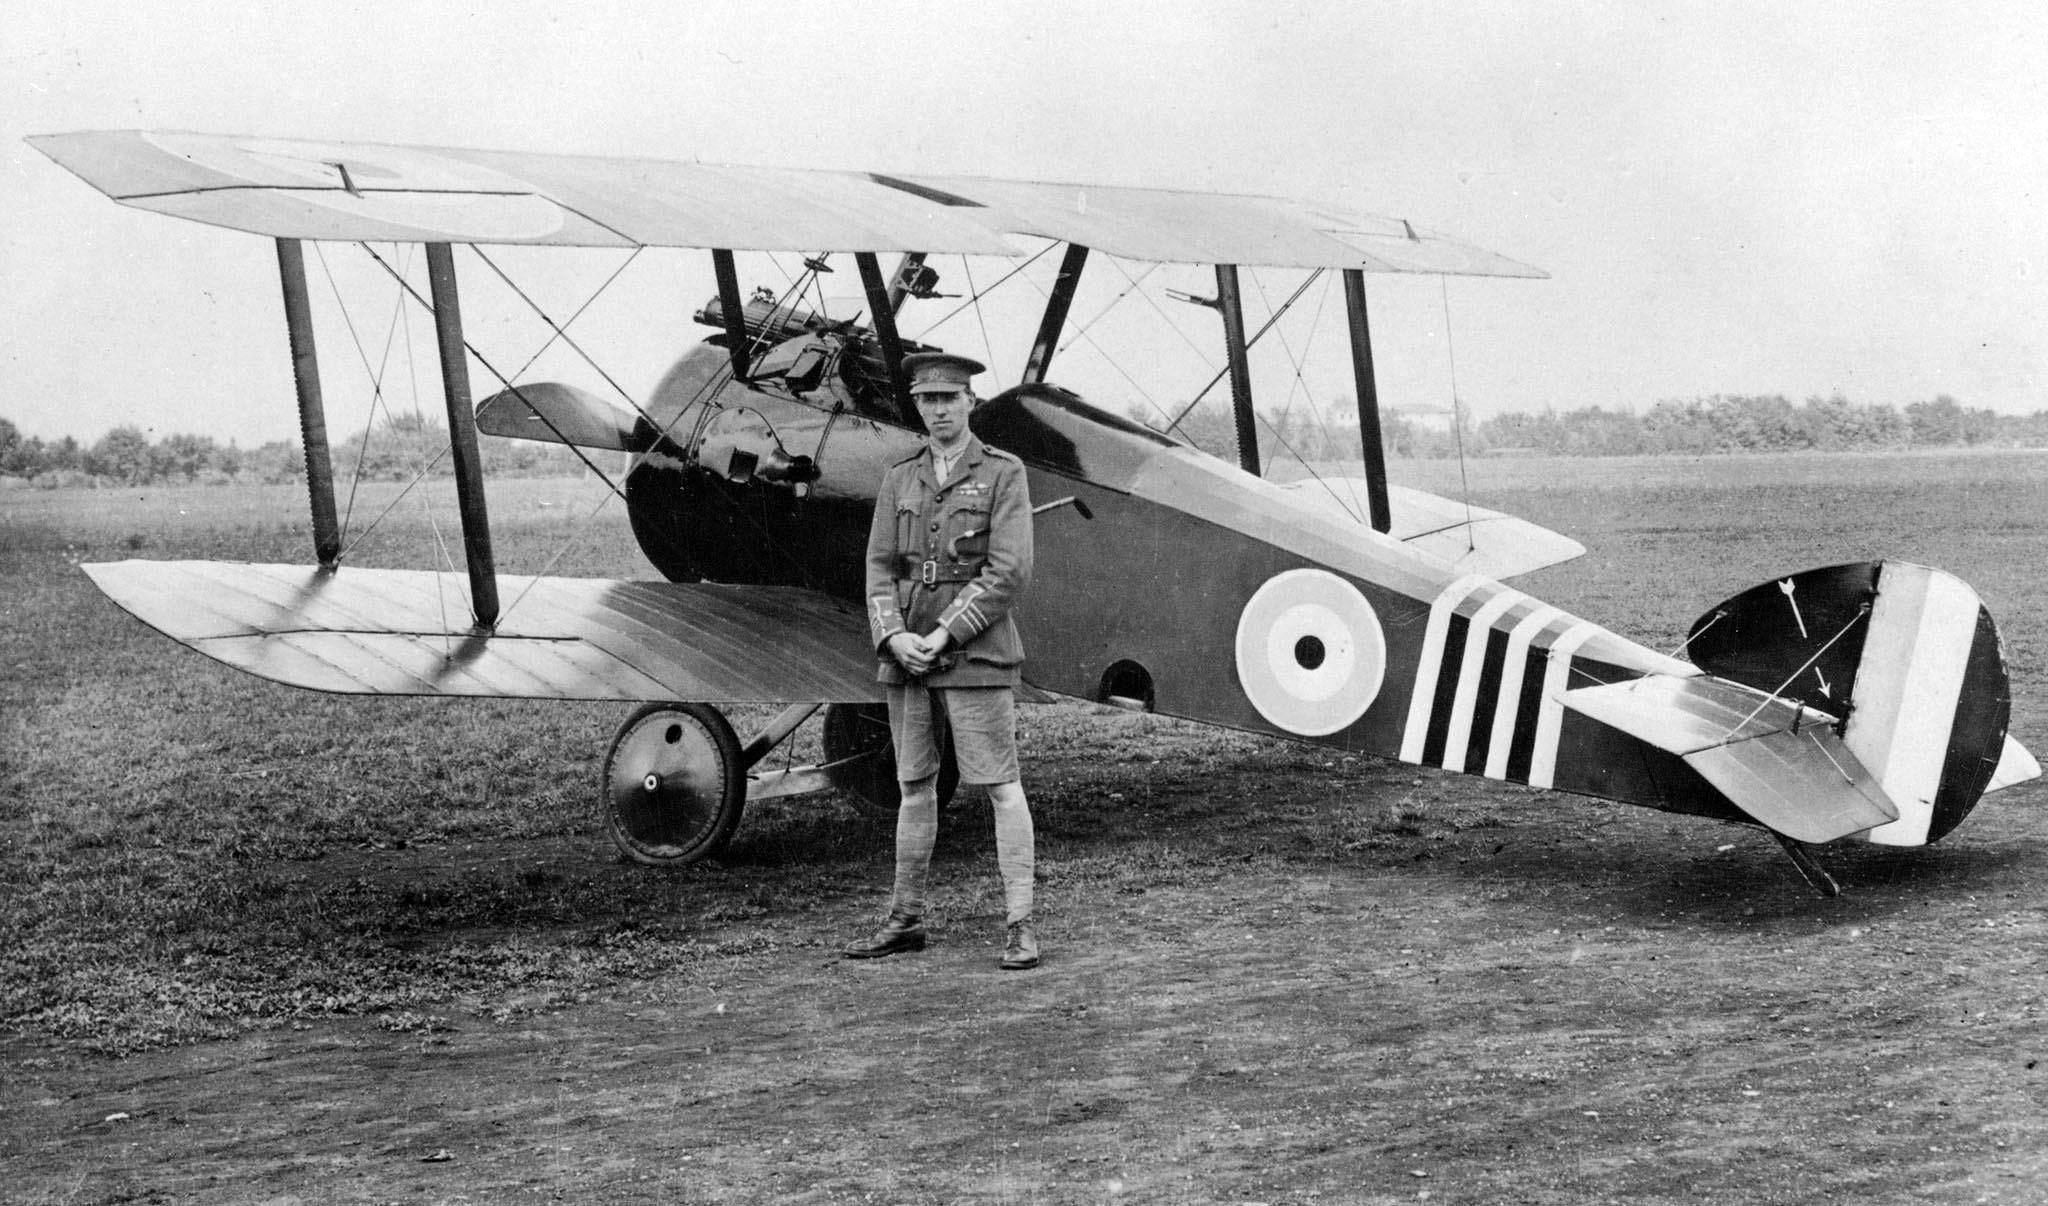
This is supposedly a real piece of canvas from his aircraft which was saved by Barker. Does this mean if the tail section was painted black that the cockpit section was too? I’ve been basing everything off a photo of the repaired aircraft with a red nose cap, red cowling ring and chocolate brown overall doped finish. Way back at the start I began with a profile that depicted a glossy black cowling. It’s all a bit confusing and enjoyable as a puzzle.
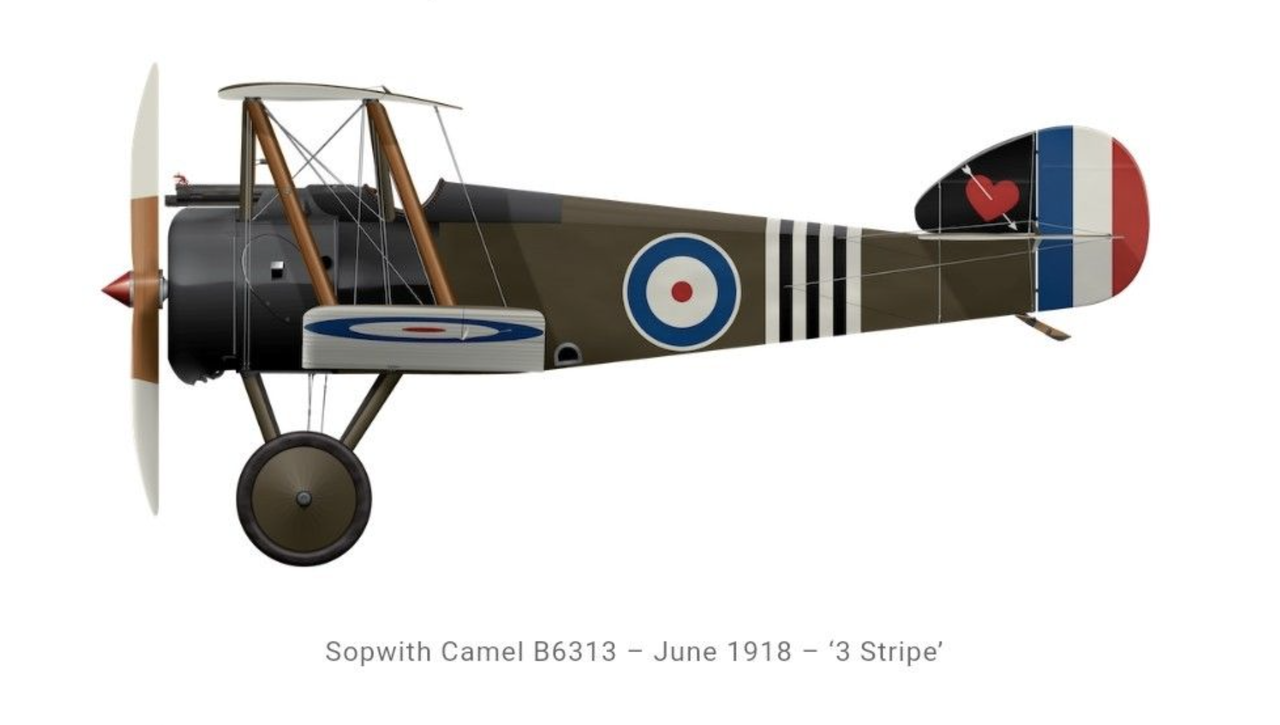
Color Profile
Unknown Artist
Source: Pinterest
The propellor “cap” is not pointed, so that’s one aspect here that is wrong.
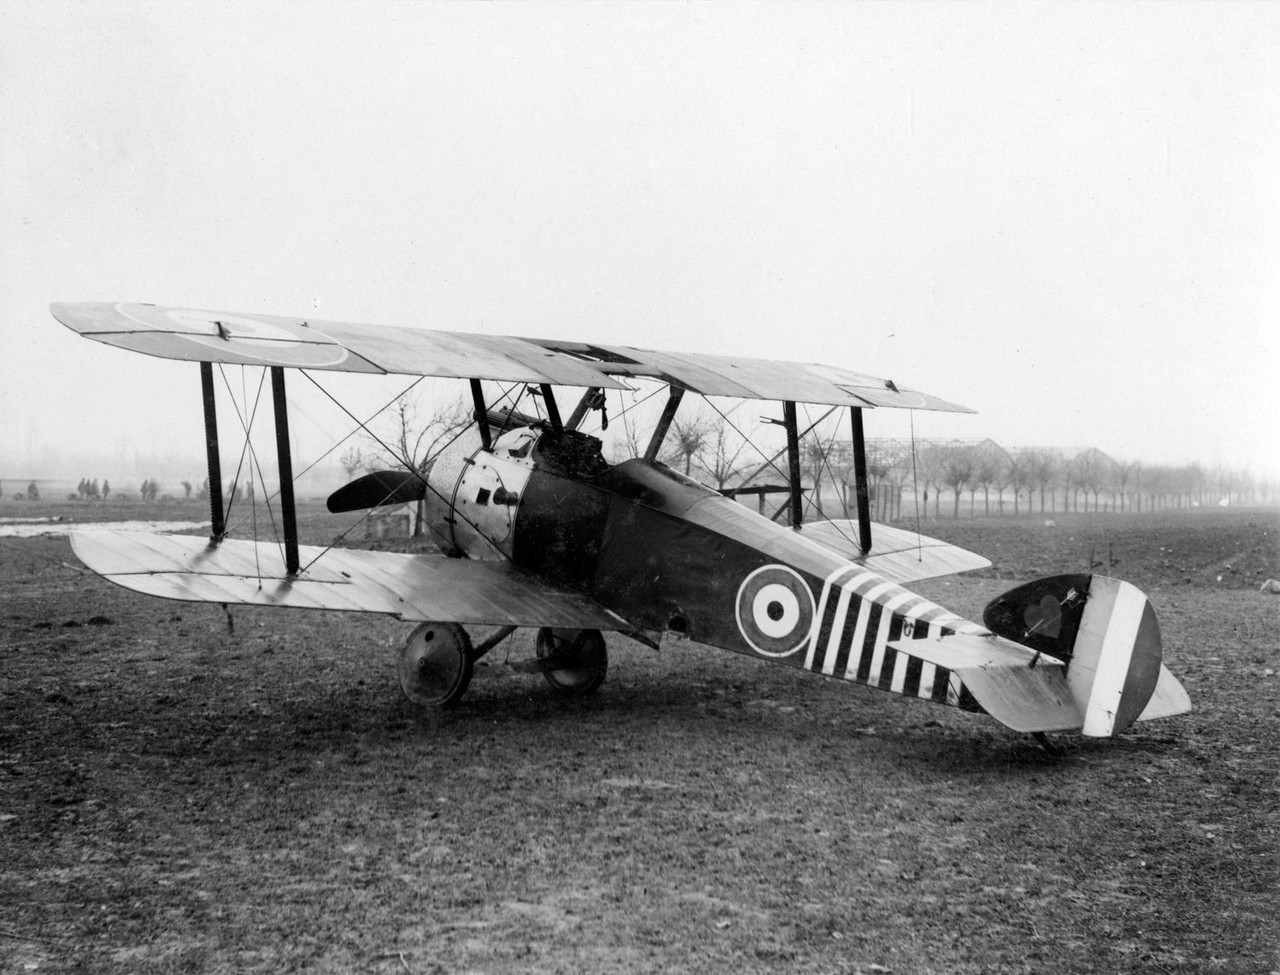
Now we know that the center of the roundel and the rear portion of the fin flash are red, as well as the heart on the tail. And based off your piece of fabric that the tail is black. But due to the properties of the film used for this photo, there is almost no contrast between the red and the black to differentiate the two colors. The cowling and cockpit area are high gloss, and appear to be in the same color… you are going to have to make a best guestimate and go with that, since I seriously doubt that an autochrome photo of this aircraft will turn up…
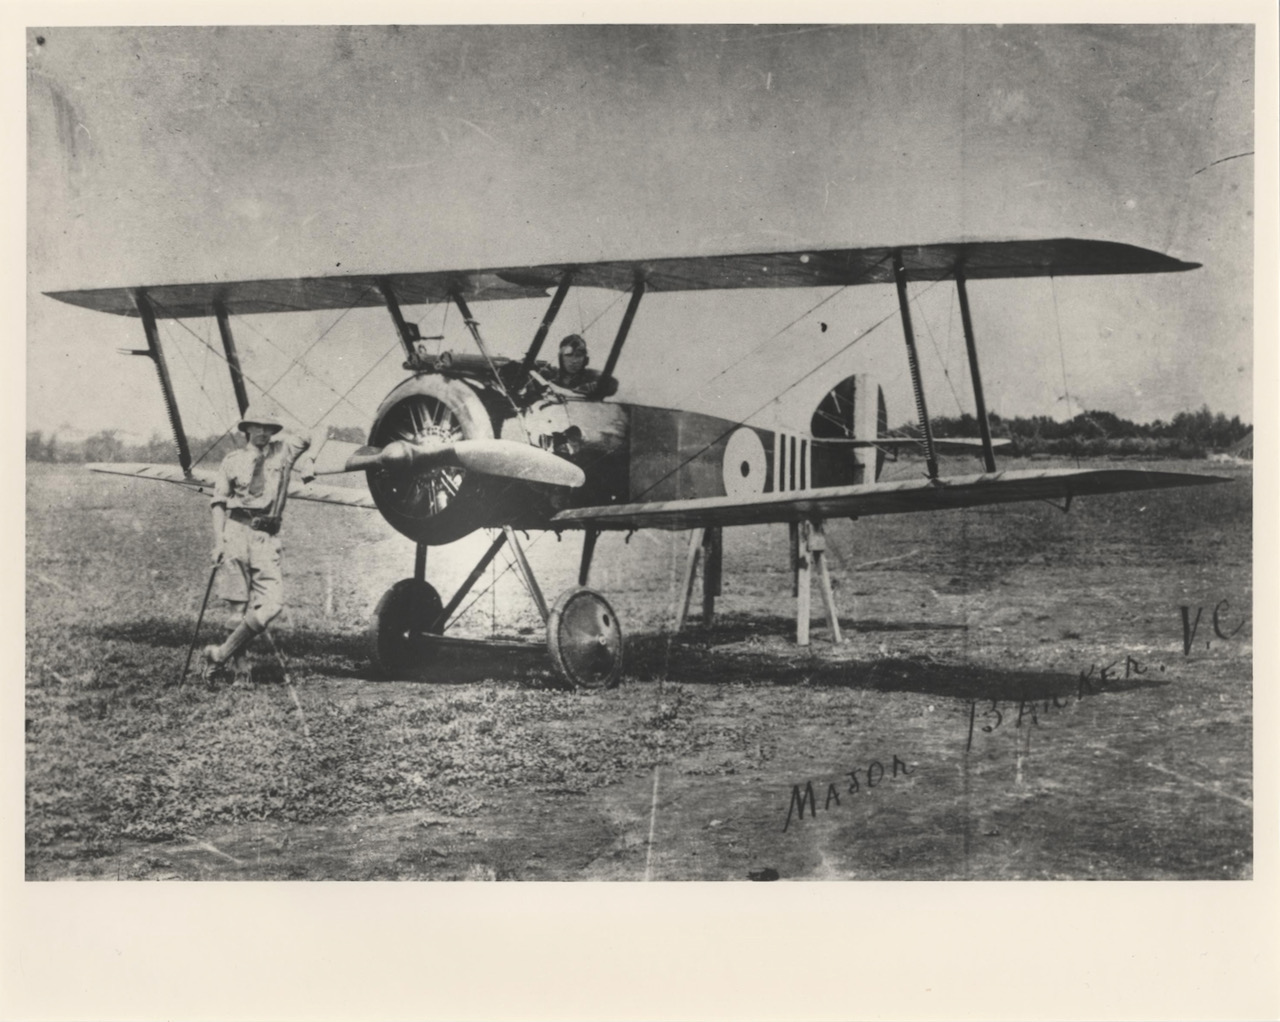
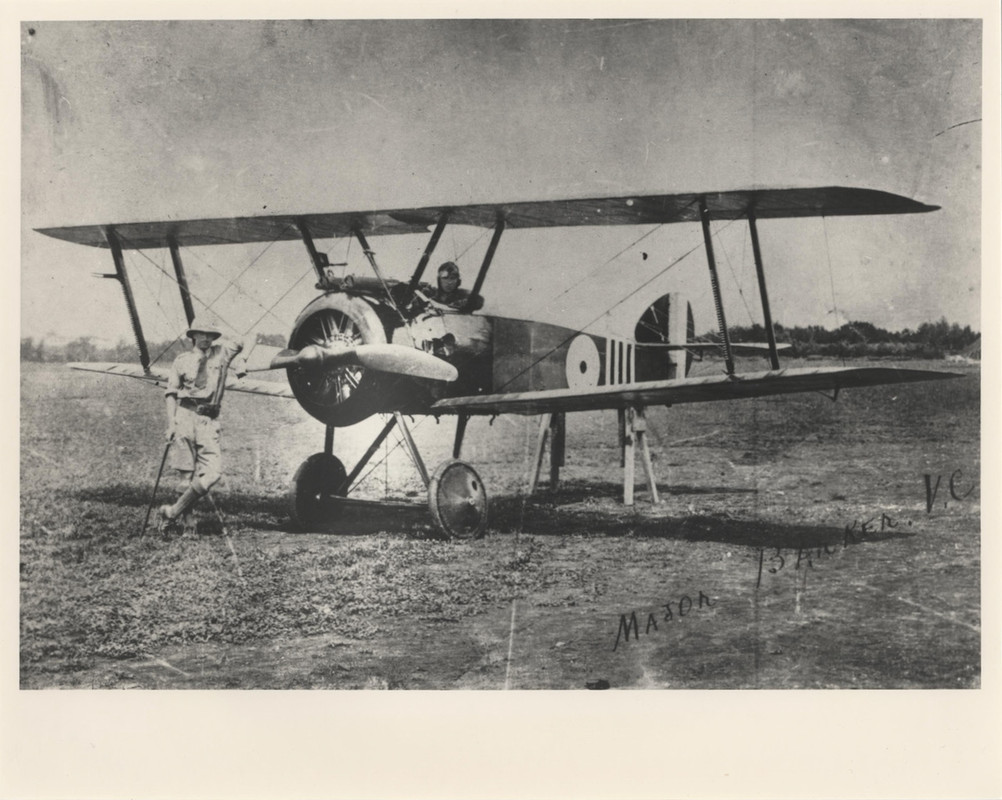
Now here is another aircraft similarly marked, but with a bare metal cowling area, and far more rear fuselage striping…. Is it the same aircraft? Without seeing a serial number, no way to confirm.
"Surely I have made my meaning plain? I intend to avenge myself upon you, Admiral. I have deprived your ship of power, and when I swing 'round, I intend to deprive you of your life."
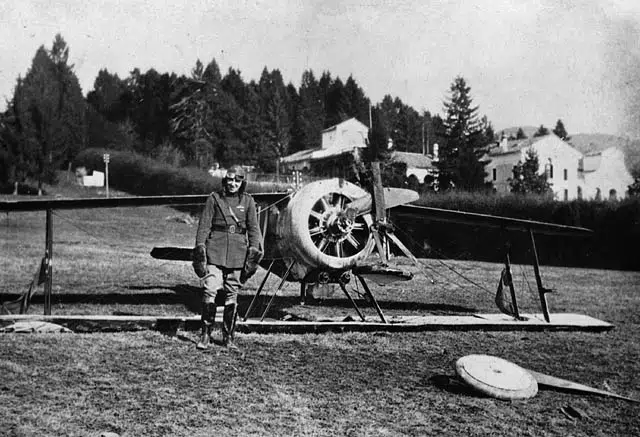
You made solid points, Carlos! Thank you so much. What I can tell you is that Barker’s aircraft was his throughout his service, and exists in three iterations. First is as delivered, then second as it was repaired from being flipped in an airfield accident. The post accident version you shared is the “It’s fixed photo” with Barker inside and the aircraft up on a support. That’s the version I’ve been fiddling with. Version one had a factory finished unpainted cowling, version 2 had been painted with some dark high gloss paints. The third version is the last photo you shared with a brand new cowling that’s been updated with aerodynamic slots which are visible in a head on series of photos.
Born in Manitoba, William George Barker is the most decorated soldier in Canadian history. His military career began in late 1914 as an enlisted man. Sent to France in late 1915, he soon became a Royal Flying Corps BE.2 gunner/observer and officer. In late 1916, he began pilot training and proved to be an aggressive airman and excellent marksman. After a stint as an observer pilot, he was assigned to 28 Squadron in September 1917, where his year-long Sopwith Camel odyssey began. Flying mostly in Italy, with 28, 66, and 139 Squadrons successively, Barker took B6313 with him, which was highly unusual.
Following reassignment in 1918 as a training commander in England, he worked his way to France for a further taste of combat. He was awarded the Victoria Cross for his epic engagement with 15 or more Fokker D.VIIs over the Western Front. He ended the war with 50 official victories, including aircraft and balloons. Barker pursued an aviation business and military career in postwar Canada. He was tragically killed at the age of 35 while demonstrating a Fairchild KR-21 in 1930.
Choose your point in time my friend and run with it. Some airframes lived multiple lives in the course of their service careers. Apparently this one did, which makes the possibilities much greater.
The WWI Flying Ace approves.
"Surely I have made my meaning plain? I intend to avenge myself upon you, Admiral. I have deprived your ship of power, and when I swing 'round, I intend to deprive you of your life."
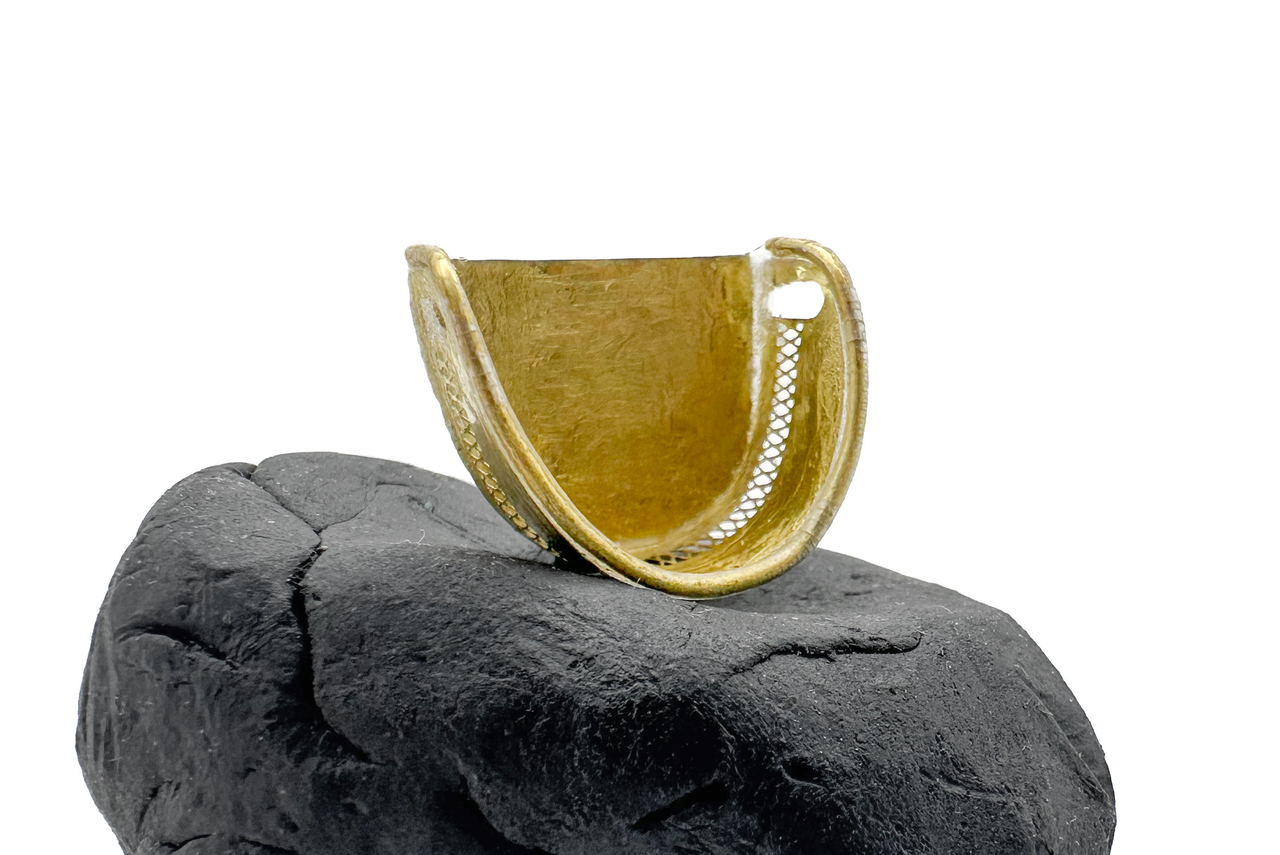
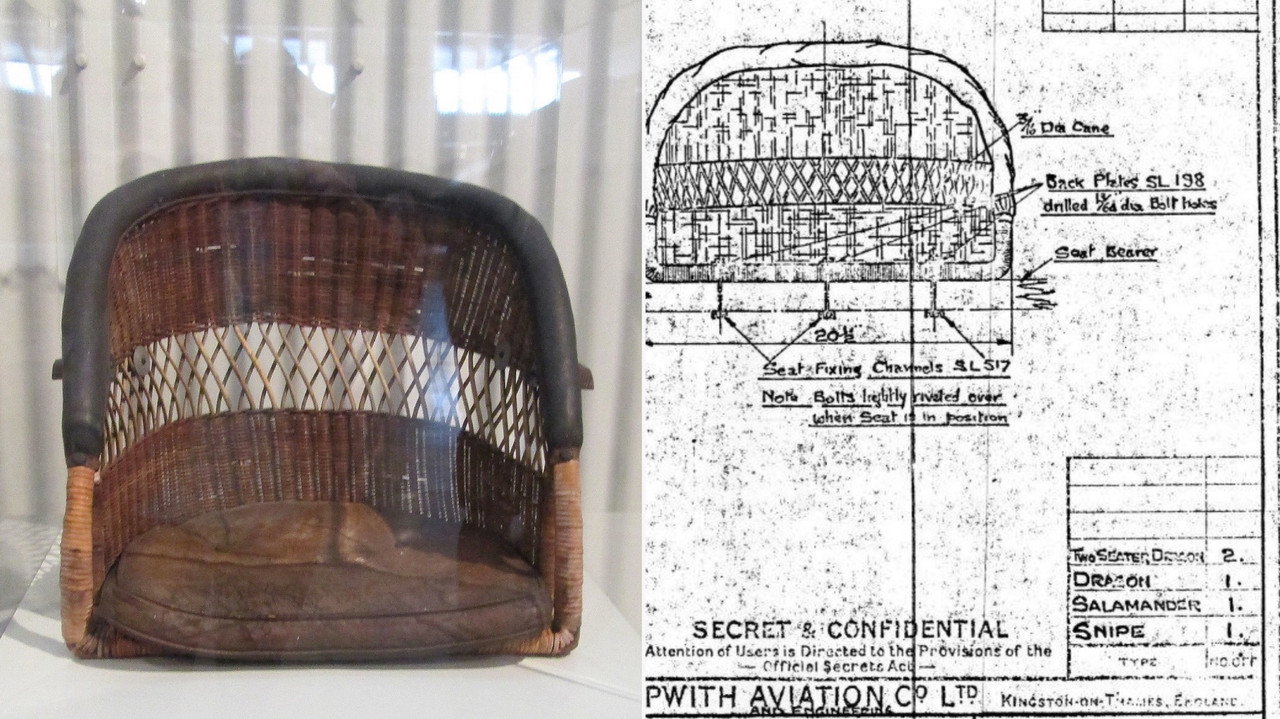
The Golden Throne! The photo angle is weird, I know! I have the chair on its back to let the CA cure. I had quite a few troubles with the bending and fitting of the pieces. I added a hand formed brass wire edge of my own devising, proud of that yes, no tools used only my hands, but the two piece seat did not join up bottom to back at the the very edge; I resorted to gap filling CA to hold things together. Let's see how this looks once it cures. Fingers crossed. Forgot to add that I think I'll add a piece of styrene to the very bottom and glue that down for support. I need to make the cushion, too.
The seat looks great! The wire added to the edge of the backing is an excellent touch!
"Surely I have made my meaning plain? I intend to avenge myself upon you, Admiral. I have deprived your ship of power, and when I swing 'round, I intend to deprive you of your life."
Thank you, Carlos! That means a lot to me! I’ve been letting the CA cure twice as long as recommended. It’s still keeping its shape, thankfully. I was worried the edges would pop apart. Compound curves and glue are tough to keep aligned, that’s for sure. The brass etch from Tom’s Modelworks is superior. Highly recommended. As far as I know still in production. I should check that. I think he’s in Laguna Beach. Yep, just checked. Still going strong.
Stikpusher wrote: ↑Sat Jan 17, 2026 9:05 am
The seat looks great! The wire added to the edge of the backing is an excellent touch!
Grateful for your support! All I see are my mistakes fitting the back around the seat bottom. It’s still holding together. I’m going to add the cushion tonight, using putty.