
PM sent.speedgraflex wrote: ↑Fri Apr 03, 2026 1:37 pmWhat I need are the fine grits—320, 400—and superfine grit of 800. I have run out of everything and foolishly didn’t stock up when I had the coin. Do you any of those? Right now I’m using a nail file and two scraps of 2500. Let me know, Lyle. Thanks.
Revell H-291 by speedgraflex
Re: Revell H-291 by speedgraflex
To make each build less crappy than the last one. Or, put another way, "Better than the last one, not as good as the next one!"..
-
speedgraflex

- Moderator
- Posts: 11273
- Joined: Fri Feb 10, 2017 11:08 pm
- Contact:
-
speedgraflex
- Moderator
- Posts: 11273
- Joined: Fri Feb 10, 2017 11:08 pm
- Contact:
Re: Revell H-291 by speedgraflex
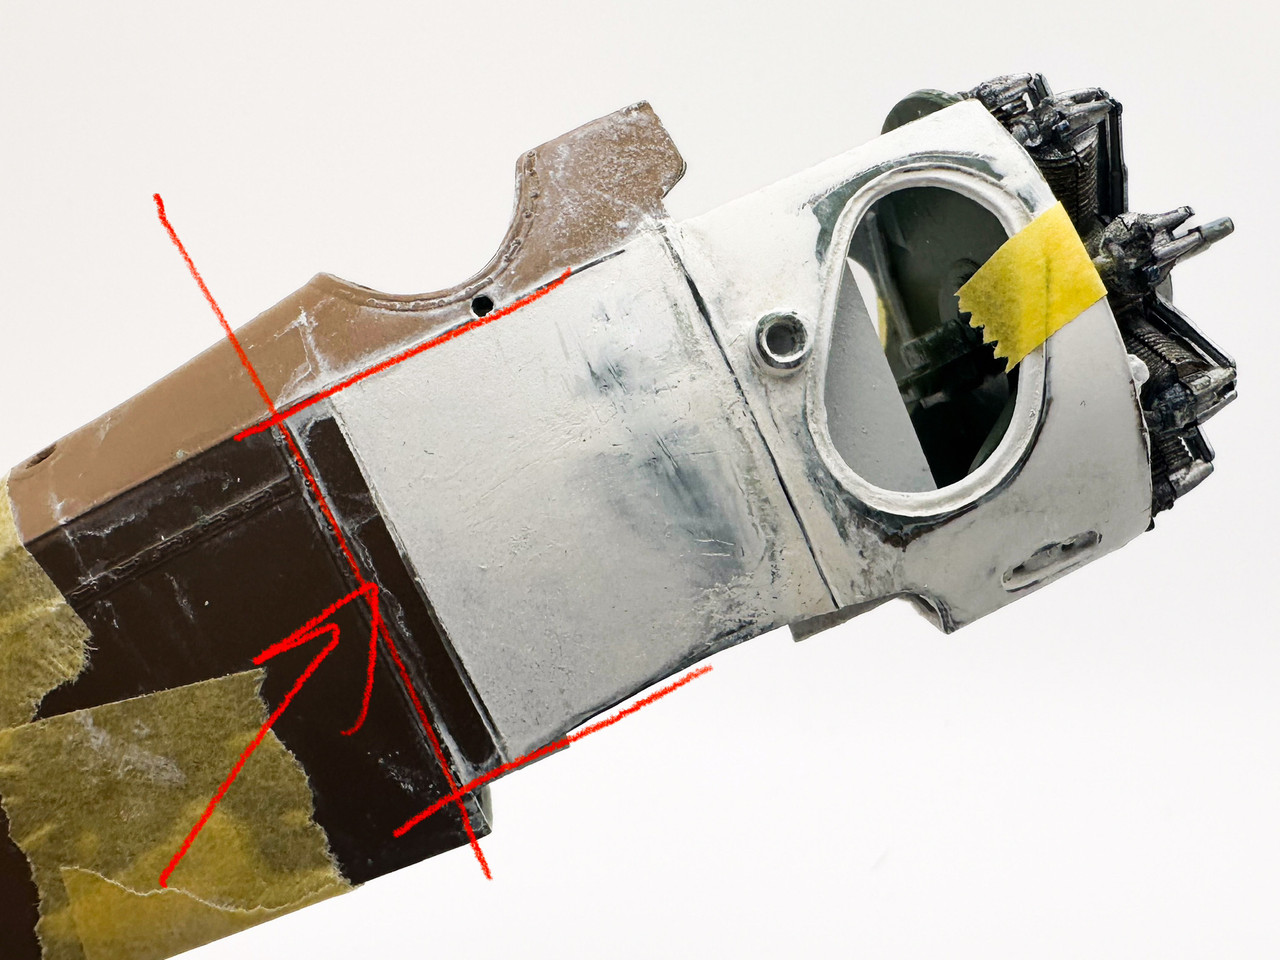
So I goofed and didn’t mask off the area correctly. Over four applications of Milliput have helped to create an edge line as thick as the piece of Tamiya tape abutting the edge. What should I do? Remask and feather towards the edge? Help, advice needed.
Update! Whether that’s supposed to be there or not, that is a genuine Revell trench line! So I’m okay. Maybe. Don’t answer that.
Make more models!

Re: Revell H-291 by speedgraflex
Great work Bruce. I can see you are pouring your heart and soul into this build. looking forward to the next update!
Big Joe: 'You just keep those Tigers busy and we'll take care of the rest.'
Oddball: 'The only way I got to keep them Tigers busy is to let them shoot holes in me...'
My Stash https://www.scalemates.com/profiles/mat ... 53&p=stash
Oddball: 'The only way I got to keep them Tigers busy is to let them shoot holes in me...'
My Stash https://www.scalemates.com/profiles/mat ... 53&p=stash
Re: Revell H-291 by speedgraflex
Feather it out.
To make each build less crappy than the last one. Or, put another way, "Better than the last one, not as good as the next one!"..
-
speedgraflex
- Moderator
- Posts: 11273
- Joined: Fri Feb 10, 2017 11:08 pm
- Contact:
Re: Revell H-291 by speedgraflex
First—Happy Easter to all my Christian friends! Carlotta tells me that “Little Easter” which is celebrated tomorrow is a big event and she will be traveling to spend the day with her friends. As she was telling me this she was asking me if this was also celebrated in the United States. I’m pretty sure it is, but I wasn’t sure.
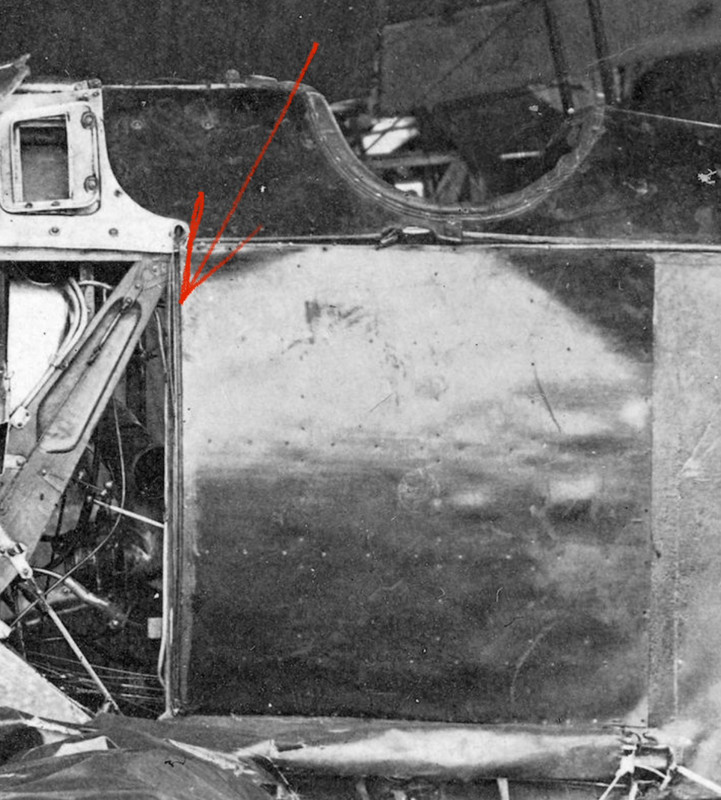
Chris—I thank you for following along. I am learning a lot from your approach to your Monogram jet fighter project. It does showcase how much trial and error is involved in correcting mold design simplifications; the errors and omissions that creep into building a scale model. I’m truly not sure I’ve taken the right approach here. I first tried using some brass leftovers to create the locking wire that holds the cover to the area where the ammunition is stored and used and ejected; I could not find anything suitable so I switched to plastic which I could cut, sand and shape. The issue is maintaining this shape during the putty process. I’m afraid I’ve made a bit of a mistake here, so I have been looking at my other Albion Alloy tubes—the steel versions, not brass—and considering what will happen if I tear up the plastic strip and replace it.
Lyle—thank you for following along and all of your support. I did take your suggestion and created a Milliput slurry which I floated over a pared down trench.
Make more models!
-
speedgraflex
- Moderator
- Posts: 11273
- Joined: Fri Feb 10, 2017 11:08 pm
- Contact:
Re: Revell H-291 by speedgraflex
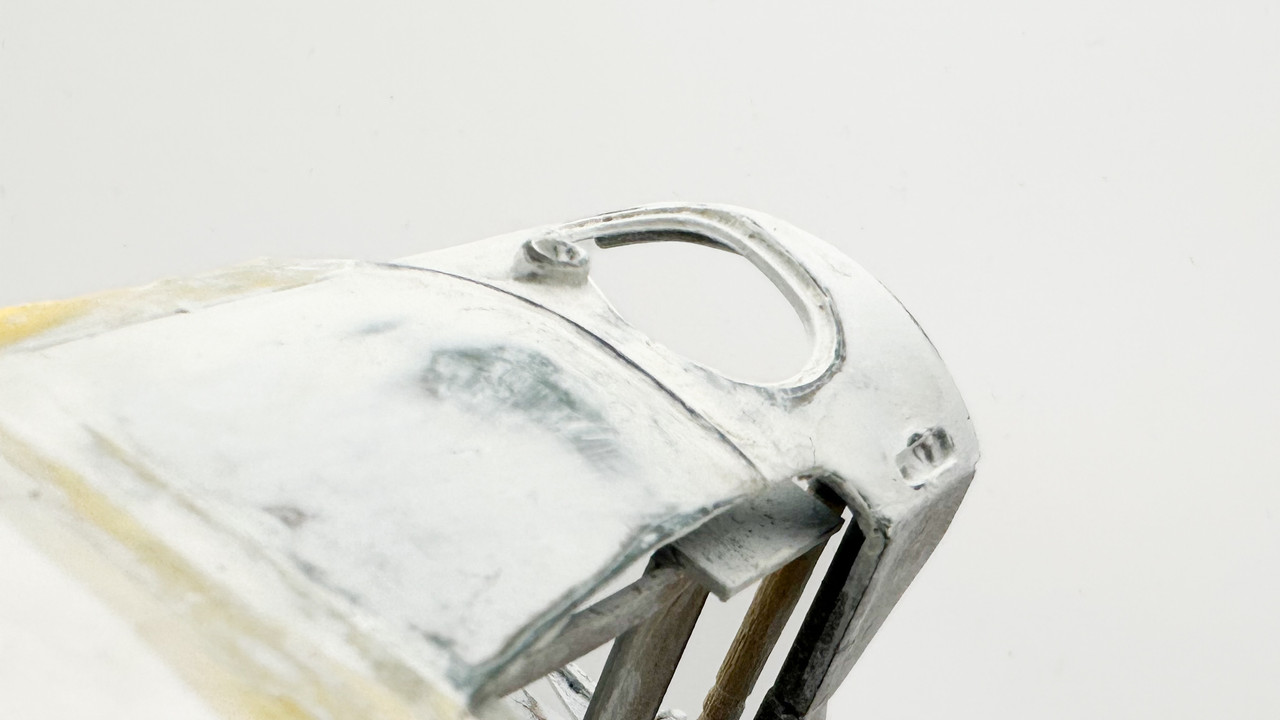
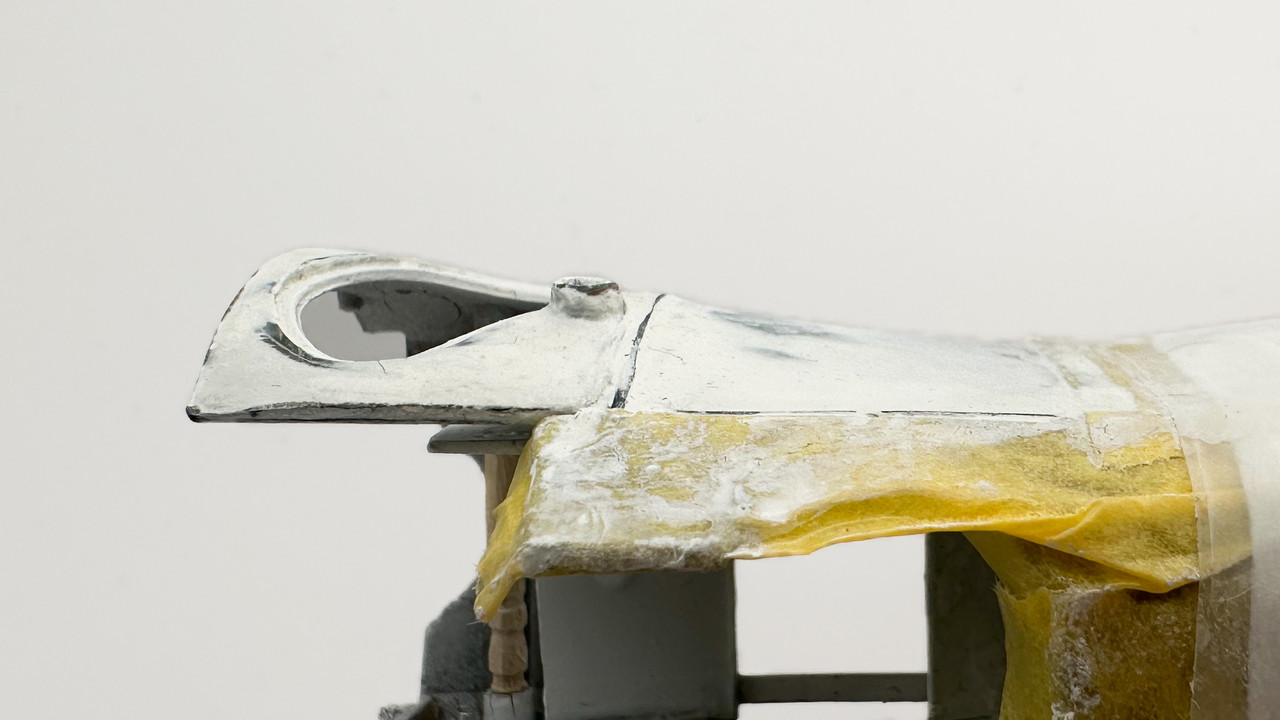
I’m happy with the port side clip barring the final check with primer; I’m reworking the starboard side which is not quite satisfactory!
Make more models!
-
speedgraflex
- Moderator
- Posts: 11273
- Joined: Fri Feb 10, 2017 11:08 pm
- Contact:
Re: Revell H-291 by speedgraflex
This is quite a good representation of the wee bit of detail I’m obsessed with adding.
Make more models!
-
Medicman71

- Elite Member
- Posts: 11247
- Joined: Mon Apr 07, 2014 9:32 am
- Location: Houston, Tx
Re: Revell H-291 by speedgraflex
Your research on the subject is pretty impressive!
Mike
Sponsored by Boeing, Lockheed Martin, Northrop Grumman, Saab, BAE, and Dassault
Sponsored by Boeing, Lockheed Martin, Northrop Grumman, Saab, BAE, and Dassault
-
speedgraflex
- Moderator
- Posts: 11273
- Joined: Fri Feb 10, 2017 11:08 pm
- Contact:
Re: Revell H-291 by speedgraflex
Thanks, Mike! I'm not sure if using the Windsock Data File is good or bad for what is it? AMS? Advanced Modeling Syndrome? I like to remember when you sent me an image with the title "We're all a bit mad here," which takes some of the sting out of spending several hours on something like this.
Here's the starboard fuselage side again. Photos taken just after the initial filling with Milliput. As the putty cures over the next couple of hours, I'll be smoothing and shaping this more.
Two notes: the buildup around the intake was removed after taking the photos and the overall will be reduced somewhat from where it is now. I try to work in very light fills because Milliput in particular benefits (like Epoxy Sculpt does) from added layers quite nicely and smoothly.
Make more models!