
Revell 1/32 P-51D - Smithsonian
-
Stikpusher

- Moderator
- Posts: 21386
- Joined: Sat Apr 05, 2014 8:37 pm
- Location: Ceti Alpha 5
Re: Revell 1/32 P-51D - Smithsonian
If the Milliput does not work, try some sprue of an appropriate thickness. The leading edge of the flaps should be rounded.Or at least the upper edge for a quarter round surface
"Surely I have made my meaning plain? I intend to avenge myself upon you, Admiral. I have deprived your ship of power, and when I swing 'round, I intend to deprive you of your life."
FLSM
FLSM
-
Stikpusher
- Moderator
- Posts: 21386
- Joined: Sat Apr 05, 2014 8:37 pm
- Location: Ceti Alpha 5
Re: Revell 1/32 P-51D - Smithsonian
Here is a site with lot more original drawings if you want to detail her out...
http://legendsintheirowntime.com/P51/P5 ... 07_DA.html
http://legendsintheirowntime.com/P51/P5 ... 07_DA.html
"Surely I have made my meaning plain? I intend to avenge myself upon you, Admiral. I have deprived your ship of power, and when I swing 'round, I intend to deprive you of your life."
FLSM
FLSM

Re: Revell 1/32 P-51D - Smithsonian
Amazing what a couple of iced teas will make you do. That and a few vanilla wafers....I have no will power. The Milliput seems to have set. So far, it has not come loose. Now for the carving, sanding, sanding, sanding, sanding, do it over.....BlackSheep214 wrote:Yup. Gusty, brave move. I know you can do this, Lyle.mustang1989 wrote:Good lookin' kit from what I can see. Gutsy move with the flaps. I dunno if I would have done it. .......maybe with AM parts I might've....

To make each build less crappy than the last one. Or, put another way, "Better than the last one, not as good as the next one!"..
Re: Revell 1/32 P-51D - Smithsonian
Thanks for the site, Stik. I really like going through those....until I get more bright ideas. I thought of the sprue solution late last night. I'm running on a couple of hours of sleep and coffee right now. Could be an interesting day.Stikpusher wrote:If the Milliput does not work, try some sprue of an appropriate thickness. The leading edge of the flaps should be rounded.Or at least the upper edge for a quarter round surface
To make each build less crappy than the last one. Or, put another way, "Better than the last one, not as good as the next one!"..
-
bitbite

- Advanced Member
- Posts: 226
- Joined: Thu Apr 10, 2014 7:29 pm
- Location: The Queen Anne's Revenge, blockading Charleston Harbor
Re: Revell 1/32 P-51D - Smithsonian
Quick! Someone get him another iced tea!! Extra sugar! And a shot of espresso! Post haste!I'm running on a couple of hours of sleep and coffee right now. Could be an interesting day.

-
lawdog114
- Master Member
- Posts: 534
- Joined: Tue May 20, 2014 11:46 pm
- Location: Olmsted Township, Ohio
Re: Revell 1/32 P-51D - Smithsonian
Very brave Lyle. I love both iced tea and Vanilla wafers....looking good. 
Can you fly this plane and land it? Surely you can't be serious? I am serious, and don't call me Shirley
Re: Revell 1/32 P-51D - Smithsonian
Brave or stupid....so close together. Okay.....
The Miliput stayed put in one flap and popped out on the other. It stayed in one piece, so I used some snot, (CA really...calm down) and glued it in place. Then began carving, sanding, repeating to shape it as best as an amateur could. Used Bondo to smooth it over and fill the irregularities.


The wing surfaces will be mostly hidden, I hope. I still have a bit of work to do here...ya think? I did one side with bondo and miliput and the other with styrene sheet. Meh.


The somewhat poor fit became evident on trying to close up the nose. The engine was a booger and at this point is basically loose. The framing is so flimsy it is scary. Bondo, oh Bondo....I crave your healing properties, your fine sanding dust. Bondo you are my friend.


The Miliput stayed put in one flap and popped out on the other. It stayed in one piece, so I used some snot, (CA really...calm down) and glued it in place. Then began carving, sanding, repeating to shape it as best as an amateur could. Used Bondo to smooth it over and fill the irregularities.
The wing surfaces will be mostly hidden, I hope. I still have a bit of work to do here...ya think? I did one side with bondo and miliput and the other with styrene sheet. Meh.
The somewhat poor fit became evident on trying to close up the nose. The engine was a booger and at this point is basically loose. The framing is so flimsy it is scary. Bondo, oh Bondo....I crave your healing properties, your fine sanding dust. Bondo you are my friend.
To make each build less crappy than the last one. Or, put another way, "Better than the last one, not as good as the next one!"..

Re: Revell 1/32 P-51D - Smithsonian
I admire your lack of fear!!!!
My first time dropping flaps like this was also on a P-51 (1/32 Hasegawa).
I take a different approach....
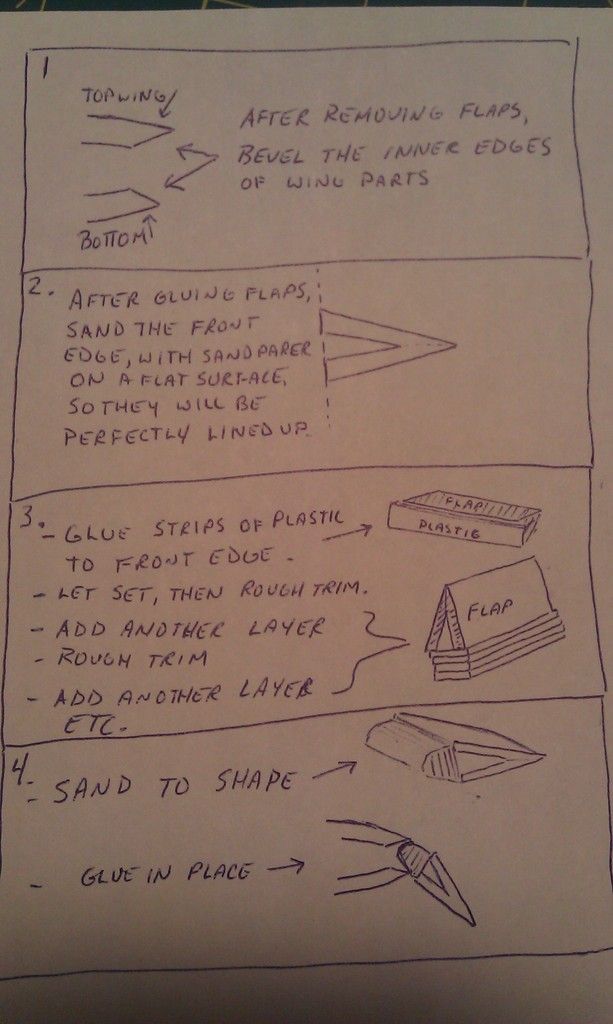
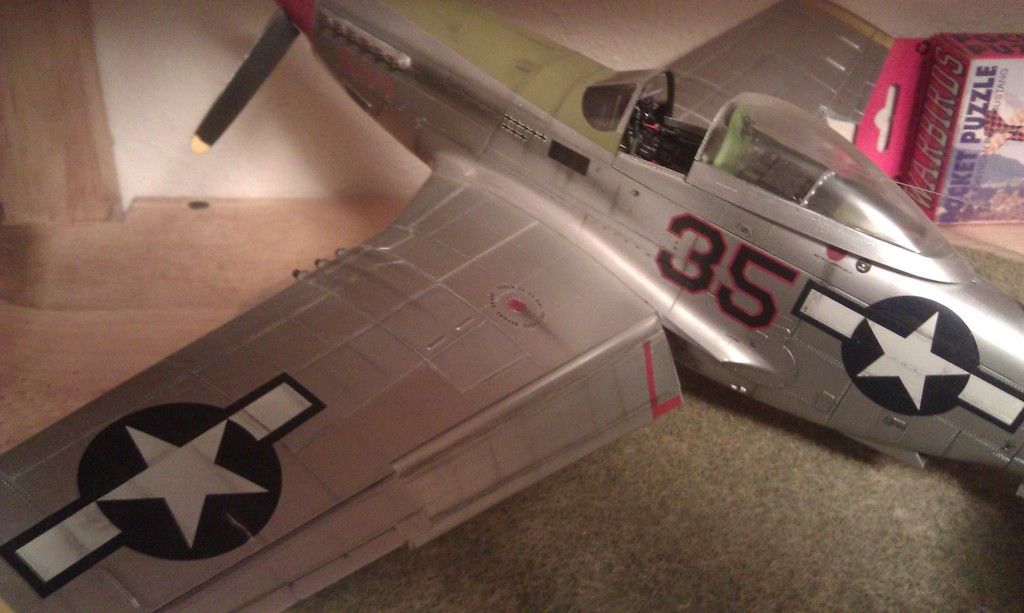
I did the same thing with my latest project.
You can see the white plastic added to the front of the flaps...(four strips)

In place...
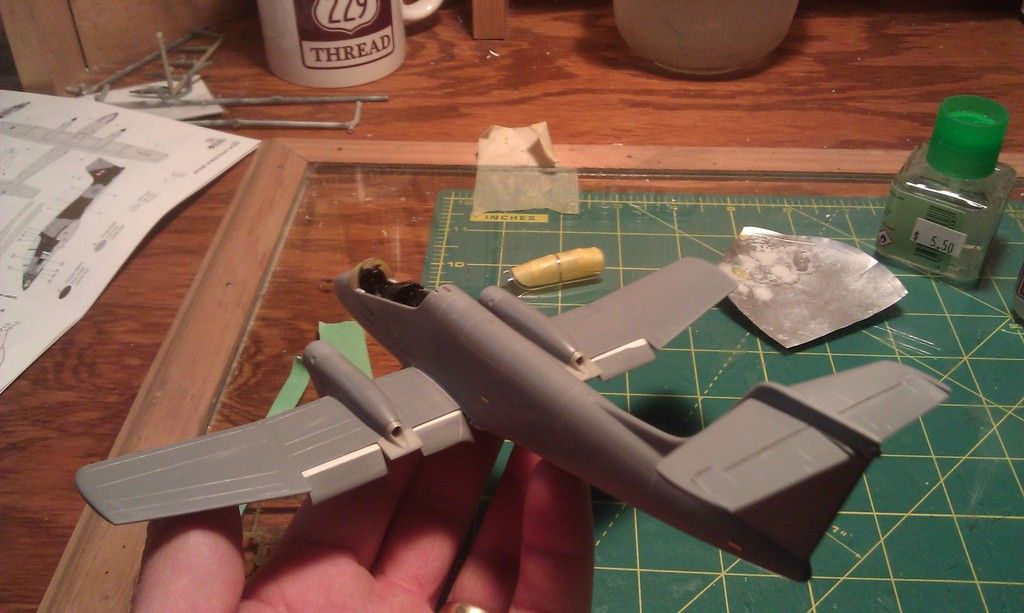
My first time dropping flaps like this was also on a P-51 (1/32 Hasegawa).
I take a different approach....
I did the same thing with my latest project.
You can see the white plastic added to the front of the flaps...(four strips)
In place...
Re: Revell 1/32 P-51D - Smithsonian
I think somewhere in the deep, dark, you're-gonna-regret-this recesses of my mind, that is what I intended...but could not visualize. Thanks so much for putting it in a easy to use format! I am quite happy with how the flaps came out. Not so much with the wings, but hey, it is only plastic. I took the styrene off the one side and filled with some bondo. May go back and try a bit of this approach. Stay tuned.
To make each build less crappy than the last one. Or, put another way, "Better than the last one, not as good as the next one!"..
Re: Revell 1/32 P-51D - Smithsonian
I know exactly where you were going!
I think the key though, is to bevel the inner edges of the wing parts, so the flap leading edge fits inside.
I think the key though, is to bevel the inner edges of the wing parts, so the flap leading edge fits inside.