Ventura Mk. II RAF Revell 1/48
-
Stikpusher

- Moderator
- Posts: 21386
- Joined: Sat Apr 05, 2014 8:37 pm
- Location: Ceti Alpha 5
Re: Ventura Mk. II RAF Revell 1/48
You could always try gap filling super glue for that troublesome seam area. Just sand it after it dries but before it cures and gets hard as concrete...
"Surely I have made my meaning plain? I intend to avenge myself upon you, Admiral. I have deprived your ship of power, and when I swing 'round, I intend to deprive you of your life."
FLSM
FLSM
-
Paul

- Addicted Member
- Posts: 1069
- Joined: Mon Mar 17, 2014 9:09 am
- Location: Under your bed, muwahahahaha
Re: Ventura Mk. II RAF Revell 1/48
Let the tenax sit in the seam before you press the part together, Lyle. The bond should take in about 10 to 15 seconds.
I like how far you have come here. It looks good.
I like how far you have come here. It looks good.


Re: Ventura Mk. II RAF Revell 1/48
Looking Good Lyle - I'm sure you'll be able to sort those pesky seams out.
Do you have another kit you could rob a tailwheel from?
Do you have another kit you could rob a tailwheel from?
Stuart Templeton 'I may not be good but I'm slow...'

Re: Ventura Mk. II RAF Revell 1/48
I have gone back and hit it with a think CA and that seems to be holding.Stikpusher wrote:You could always try gap filling super glue for that troublesome seam area. Just sand it after it dries but before it cures and gets hard as concrete...
To make each build less crappy than the last one. Or, put another way, "Better than the last one, not as good as the next one!"..
Re: Ventura Mk. II RAF Revell 1/48
Okay. I'll do that. Thanks for the tip and kind words.Paul wrote:Let the tenax sit in the seam before you press the part together, Lyle. The bond should take in about 10 to 15 seconds.
I like how far you have come here. It looks good.
To make each build less crappy than the last one. Or, put another way, "Better than the last one, not as good as the next one!"..
Re: Ventura Mk. II RAF Revell 1/48
Any Progress Lyle?
Stuart Templeton 'I may not be good but I'm slow...'
Re: Ventura Mk. II RAF Revell 1/48
Well, after many weeks of inactivity...this one may be back on the move. Revell finally sent me the parts I requested for the tail wheel assembly - three in total. I may try to cast a few of the main strut, since I plan on cutting it and trying to drill out the remainder in the fuselage and the replacement.
To make each build less crappy than the last one. Or, put another way, "Better than the last one, not as good as the next one!"..
-
Stikpusher
- Moderator
- Posts: 21386
- Joined: Sat Apr 05, 2014 8:37 pm
- Location: Ceti Alpha 5
Re: Ventura Mk. II RAF Revell 1/48
 Lyles back!!!
"Surely I have made my meaning plain? I intend to avenge myself upon you, Admiral. I have deprived your ship of power, and when I swing 'round, I intend to deprive you of your life."
FLSM
FLSM
Re: Ventura Mk. II RAF Revell 1/48
Well.............Could be interesting. Should I just try to drill out the remaining piece? or what? Open for suggestions.
Here is what it is supposed to be like:

What is now, and the seam has been taken care of.
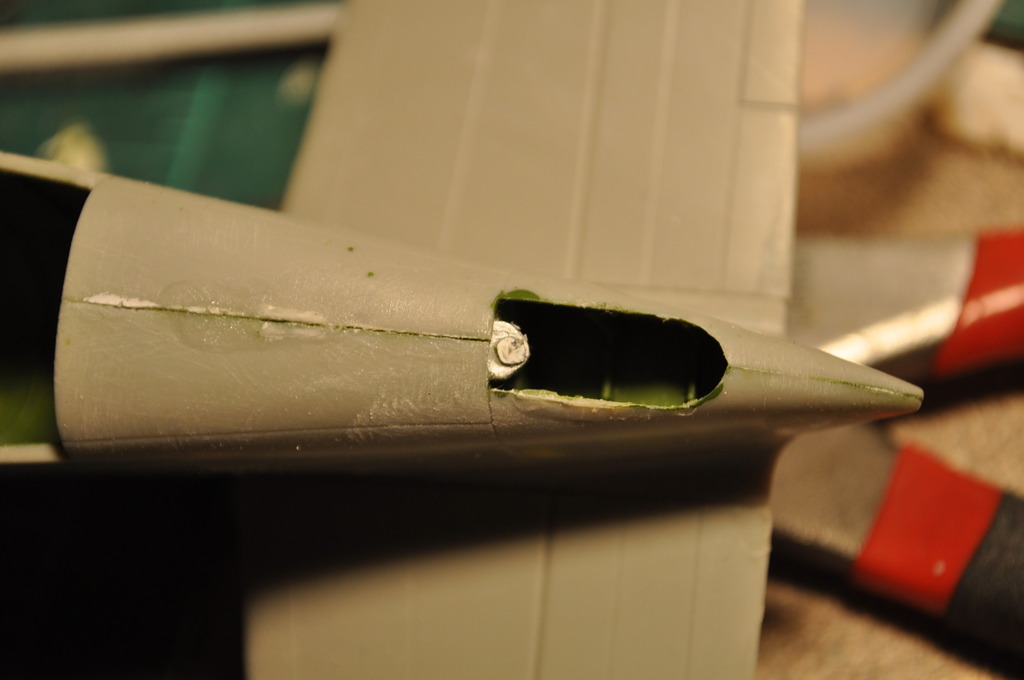
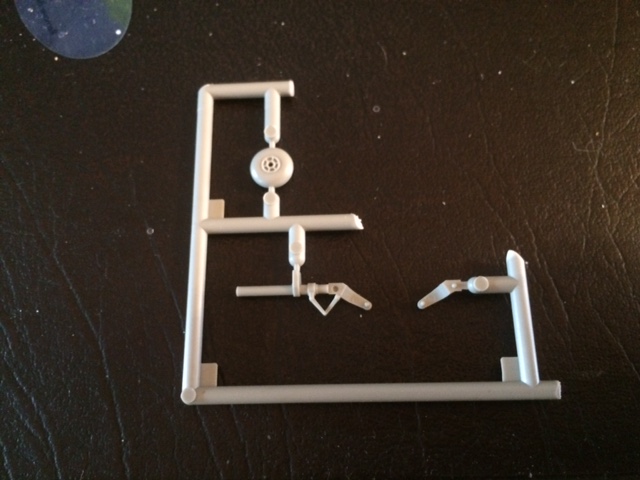
and the replacement parts. The break is about in the middle of the part, where it is attached to the tree. Everything to the left of that point is inside the fuselage.. ... bottom, left.
Here is what it is supposed to be like:
What is now, and the seam has been taken care of.
and the replacement parts. The break is about in the middle of the part, where it is attached to the tree. Everything to the left of that point is inside the fuselage.. ... bottom, left.
To make each build less crappy than the last one. Or, put another way, "Better than the last one, not as good as the next one!"..

Re: Ventura Mk. II RAF Revell 1/48
Two things I would try are 1) drill into the piece still attached to the model for a piece of wire, brass or even paperclip wire, and on the new part cut off the shaft at the collar where the sprue attaches and drill a matching hole for the wire, super glue the two together AFTER you finish painting, decaling, etc. just in case.  Or 2) if you think you can drill out the part still in the fuselage, try to drill it out as far as you can, doesn't have to all the way, and then cut down shaft of the new part to fit the depth you drilled into the old piece and glue in. I think those are probably the two best options.
Or 2) if you think you can drill out the part still in the fuselage, try to drill it out as far as you can, doesn't have to all the way, and then cut down shaft of the new part to fit the depth you drilled into the old piece and glue in. I think those are probably the two best options.