JKim's Completed Builds (Restored..Again!)

Show off your completed work! One or two pictures and a brief explanation. Let others have a quick look at your finished masterpieces!
User avatar
jkim
Elite Member
Posts: 4073
Joined: Mon Apr 10, 2017 4:03 pm

Re: JKim's Completed Builds

Post by jkim »

Ok... I should finish what I've started and describe the rest of the Blue 16 painting process. After my color modification of the engine cowling, the model was given a gloss coat and the decals were applied. After the decals were sealed with another gloss coat, I tried some salt chip fading. I didn't photograph this part of the build but essentially you give your model surface a coat of water and then sprinkle salt crystals (I like to use ground rock salt) on in random areas. Once dry, you spray a second color over the dried salt. Once you wash off the dried salt crystals, the random spots are revealed. You can use this method to create paint chipping but I like using it to impart a raggedy and spotty fading effect to the upper surfaces.

Here is what the application of salt looks like on a P-38 followed by a photo of the results.
Image
Image

On Blue 16, the effect was subtle. Too subtle and was almost disappeared after the final flat coat was applied.
Image
Image

A dark pastel panel wash (my own mix) was applied to highlight the recessed details. I've heard some opposing opinions on the highlighting of panel lines. I highlight all of my panel lines with some sort of wash. However, I am not of the opinion that this is the most "accurate" way to weather an aircraft but I much prefer the look of a panel line filled with a wash than a panel line that hasn't been filled. In my opinion, an unfilled panel line looks exactly like what it is: a engraved groove upon a plastic surface. The filling of the line with a darker wash serves to highlight the panel but also helps to visually turn a 3-D groove into a 2-D line... if that makes any sense.
Image
Image

The panel wash is sealed with a flat coat. I like how the rivets add some visual interest to the surfaces without being too dramatic. They fade away nicely as you step away from the model.
Image
Image
Image
Last edited by jkim on Tue Jun 04, 2019 2:01 pm, edited 2 times in total.
John aka JKim
-----------<><
Image
User avatar
Stikpusher
Moderator
Posts: 21188
Joined: Sat Apr 05, 2014 8:37 pm
Location: Ceti Alpha 5

Re: JKim's Completed Builds

Post by Stikpusher »

Very interesting use of the salt chip method... I've only seen it before as bare metal chipping. I like this color spotting effect. :hmm:
"Surely I have made my meaning plain? I intend to avenge myself upon you, Admiral. I have deprived your ship of power, and when I swing 'round, I intend to deprive you of your life."

FLSM
User avatar
Thomas_M
Admin
Posts: 4244
Joined: Fri Dec 13, 2013 9:43 am
Location: Bad Wurzach - Germany
Contact:

Re: JKim's Completed Builds

Post by Thomas_M »

I know what a wash is. And I know about pastels. But, how do you make a pastel wash?
Sorry for the silly question...
User avatar
jkim
Elite Member
Posts: 4073
Joined: Mon Apr 10, 2017 4:03 pm

Re: JKim's Completed Builds

Post by jkim »

Stikpusher wrote:Very interesting use of the salt chip method... I've only seen it before as bare metal chipping. I like this color spotting effect. :hmm:
Yes, you can get some interesting effects using this method. It's a bit tedious getting all of the salt off though. Any missed areas will have the tendency to turn white after drying completely so you have to make sure to remove it all prior to application of a clear coat.
Thomas_M wrote:I know what a wash is. And I know about pastels. But, how do you make a pastel wash?
Sorry for the silly question...
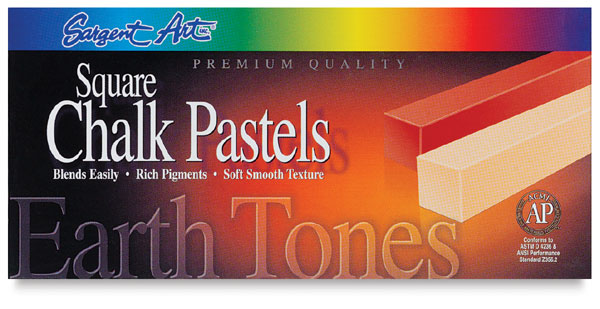
Not silly at all. I make my liquid washes from pastel chalk. I just scrape some powder from an appropriate color piece of chalk, add water and a drop of dishwashing soap to break the surface tension, mix it well and presto! you have a liquid wash that you can run into recessed details like panel lines. The important thing is to use PASTEL chalk not OIL. I've had good results using these...

Image
John aka JKim
-----------<><
Image
User avatar
Stikpusher
Moderator
Posts: 21188
Joined: Sat Apr 05, 2014 8:37 pm
Location: Ceti Alpha 5

Re: JKim's Completed Builds

Post by Stikpusher »

John, you are a wealth of fresh information and techniques. Thank you for sharing.
"Surely I have made my meaning plain? I intend to avenge myself upon you, Admiral. I have deprived your ship of power, and when I swing 'round, I intend to deprive you of your life."

FLSM
User avatar
Thomas_M
Admin
Posts: 4244
Joined: Fri Dec 13, 2013 9:43 am
Location: Bad Wurzach - Germany
Contact:

Re: JKim's Completed Builds

Post by Thomas_M »

:P1:

Absolutely! It´s like a fresh breeze of air reading your so informative posts and see the pictures of amazing builds! Hey, I even thought about to do some modelling again myself!
User avatar
jkim
Elite Member
Posts: 4073
Joined: Mon Apr 10, 2017 4:03 pm

Re: JKim's Completed Builds

Post by jkim »

Just passing on the things that I have recently learned! The internet has truly enabled a new generation of modelers.
John aka JKim
-----------<><
Image
User avatar
speedgraflex
Moderator
Posts: 11358
Joined: Fri Feb 10, 2017 11:08 pm
Contact:

Re: JKim's Completed Builds

Post by speedgraflex »

Blue 16 inspires me with the Horten. I was not terribly keen on the green-brown approach; the green gray camouflage on Blue 16 is quite something! Not having an actual plane to study leads me in a lot of different directions! I am grateful for your posts, John!
Make more models!
User avatar
jkim
Elite Member
Posts: 4073
Joined: Mon Apr 10, 2017 4:03 pm

Re: JKim's Completed Builds

Post by jkim »

Thanks for the comments! Since I've shown a peek of the P-38 undergoing the salt fading procedure, I may as well show the finished pictures. This is the 1/48 scale Academy P-38J kit. I threw quite a bit of aftermarket stuff at it including the Aires resin cockpit, Eduard resin wheels, Eduard turbocharger units and intakes, Eduard photoetch set, Master brass gun barrels and decals by Cutting Edge Decals.

Image
Image
Image
Image
Image
Image
Image
Image
Image

Image
Image
Image
Image
Image
Image
Last edited by jkim on Tue Jun 04, 2019 2:02 pm, edited 2 times in total.
John aka JKim
-----------<><
Image
User avatar
mostrich
Admin
Posts: 3105
Joined: Sun Apr 06, 2014 2:13 pm
Location: Hamburg, Germany
Contact:

Re: JKim's Completed Builds

Post by mostrich »

That's a very nice P-38. I heard a lot of horror stories about the Academy kit. Warped fuselage parts, bad overall fit, sink marks etc.
What are your experiences?
Post Reply

Return to “Member's Gallery”