1/32 Hasegawa Fw190D-9 Black One

Post your work in progress of your aircraft builds in here.
User avatar
speedgraflex
Moderator
Posts: 11358
Joined: Fri Feb 10, 2017 11:08 pm
Contact:

Re: 1/32 Hasegawa Fw190D-9 Black One

Post by speedgraflex »

This project is coming together so well, John! It is exciting to see how your research informs each decision. The history lessons are as potent as the model building itself. I nearly fell off my chair when I saw - or thought I saw - the yellow tail! It was a glimpse of the illustration at the bottom of a photo that set off my reaction!

Image

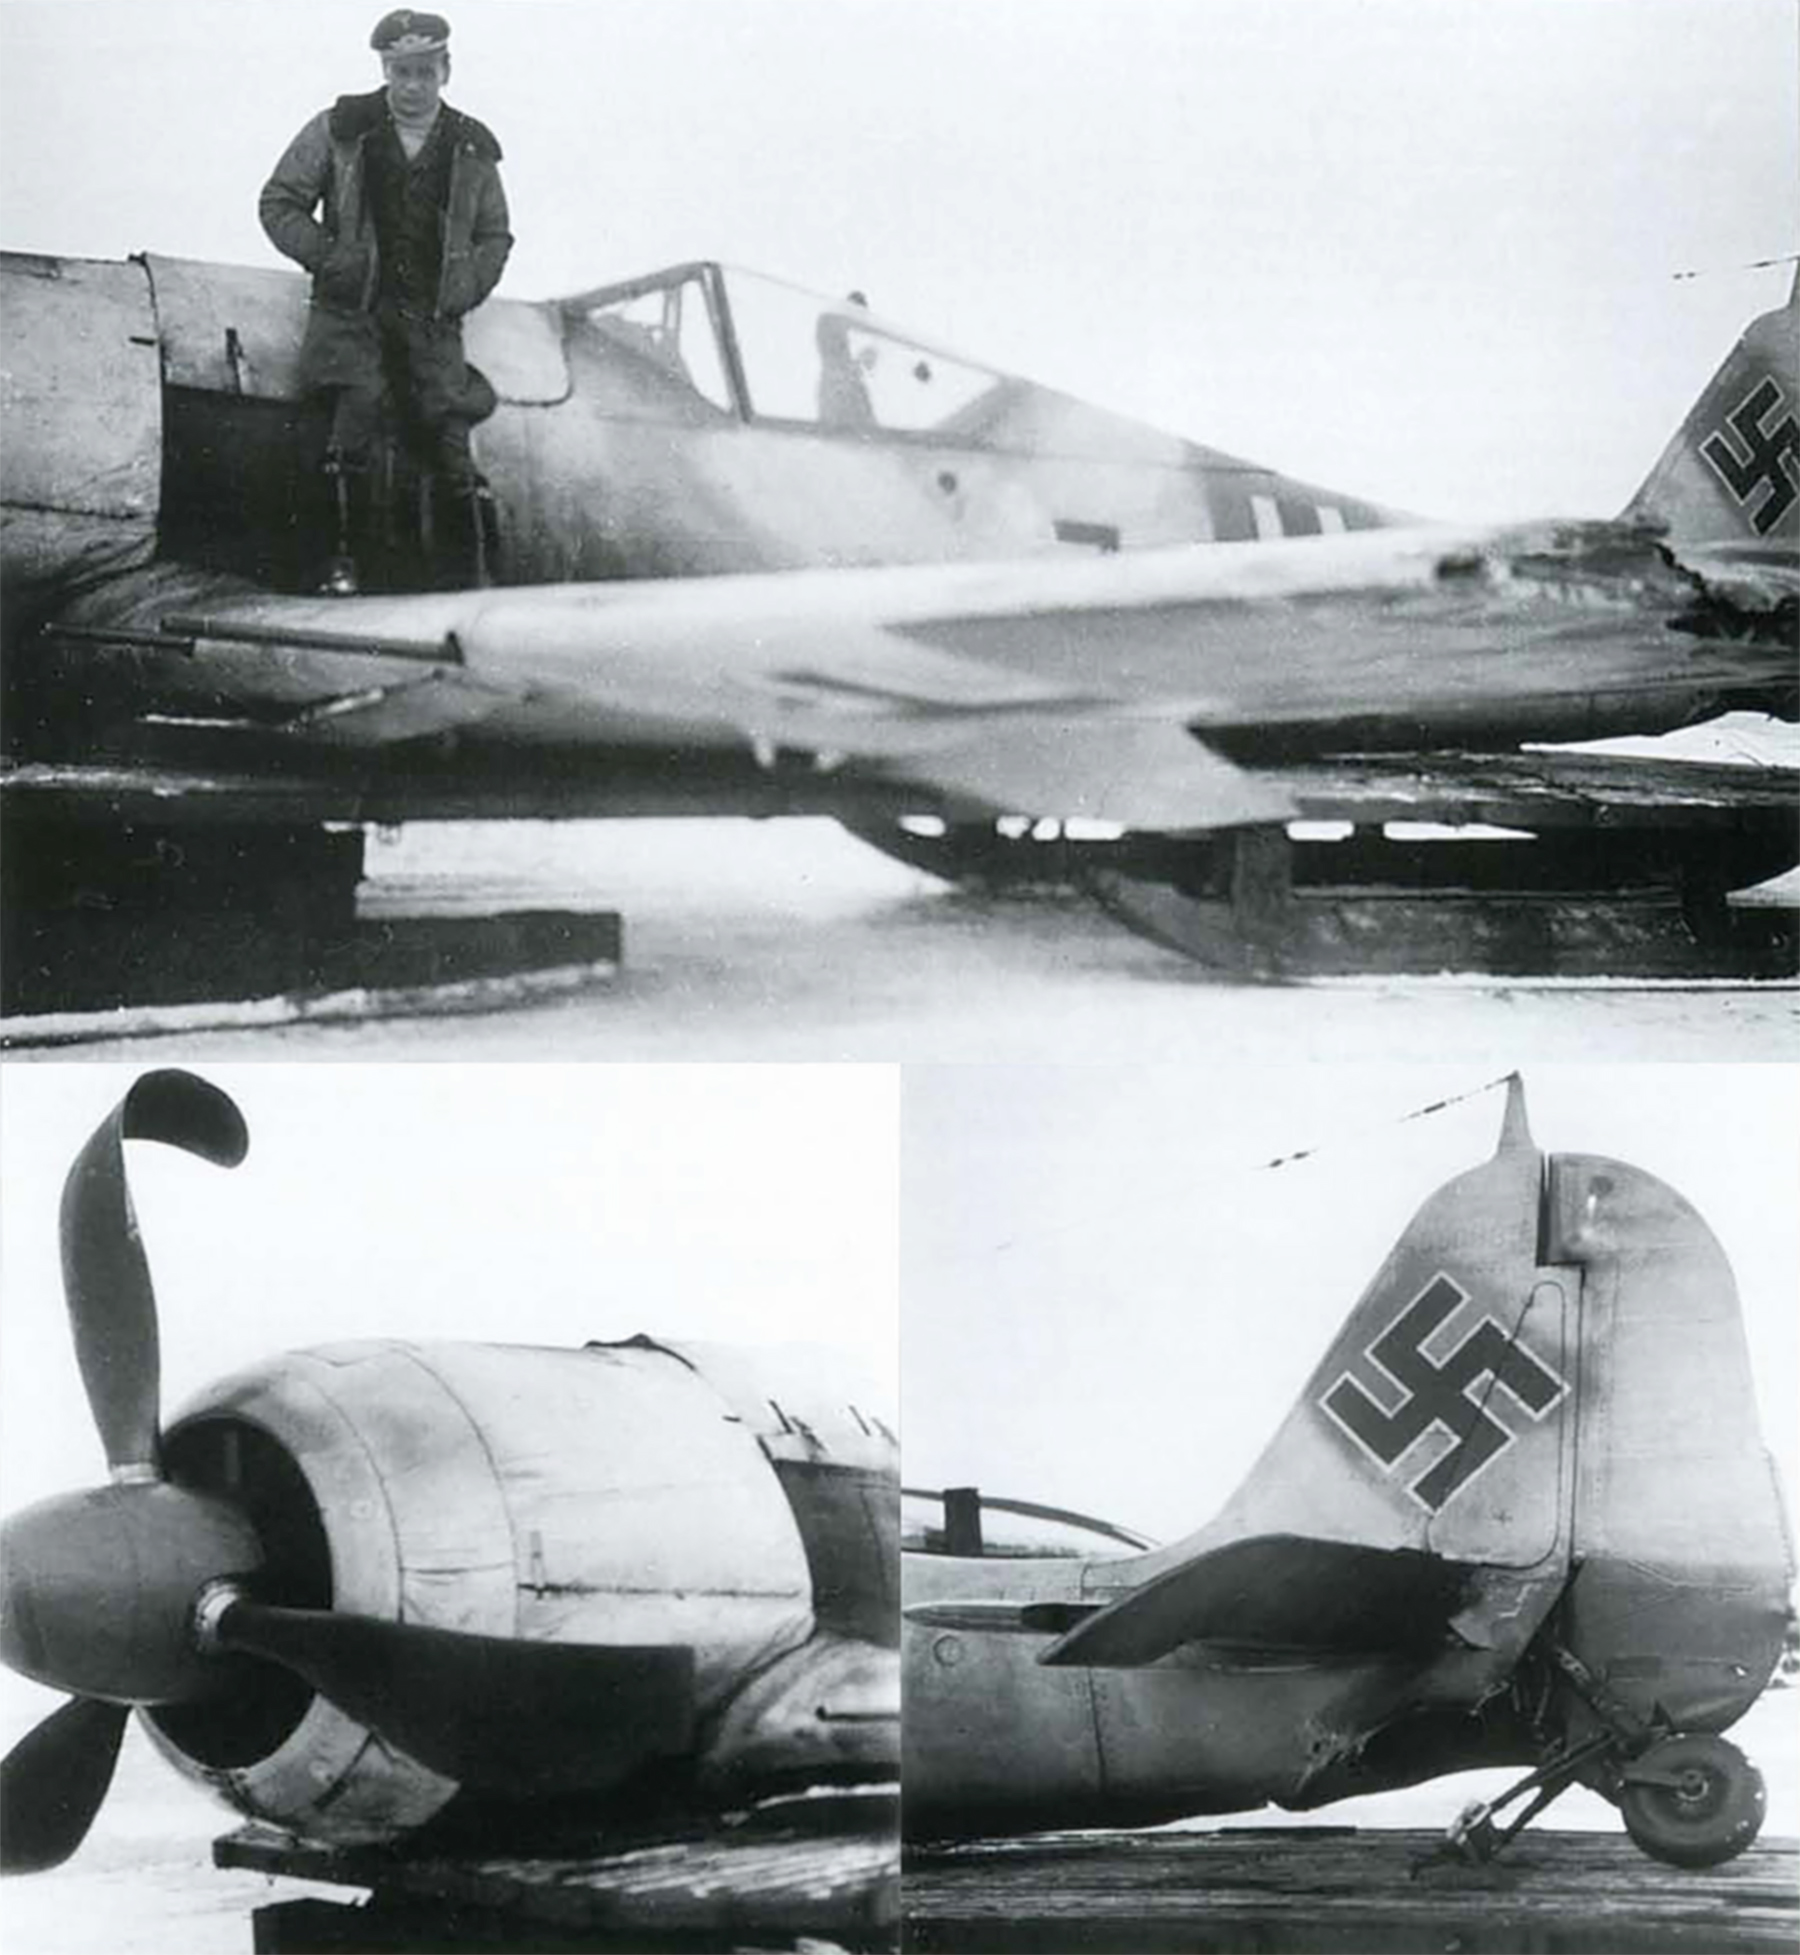
Above is a photo associated with Dortenmann, from a collection of photos belonging to his son. The caption is simply: "H Dortenmann JG 54." One of the earlier aircraft he flew? What's great is to see how rugged field painting can be! A lot of overspray, and the red tag on the fin is blasted solid yellow. To my mind, this would be the way yellow tails were painted in the field: one pass horizontally masked. So many examples of "Black 1" have perfectly painted tails. Makes you wonder, or at least makes me wonder....
Make more models!
User avatar
jkim
Elite Member
Posts: 4073
Joined: Mon Apr 10, 2017 4:03 pm

Re: 1/32 Hasegawa Fw190D-9 Black One

Post by jkim »

Very cool pic! The W. Nr. is visible (550885) so you can track it as an A-6. That rough spray could also be the winter white-wash on the Eastern Front?
Image

The rough, ragged effect is hard to pull off. Often times it just looks like the modeler was being sloppy.
John aka JKim
-----------<><
Image
User avatar
speedgraflex
Moderator
Posts: 11358
Joined: Fri Feb 10, 2017 11:08 pm
Contact:

Re: 1/32 Hasegawa Fw190D-9 Black One

Post by speedgraflex »

Image

Black 7! You're absolutely spot on, with your photo, John! Forgive my mistakenly assuming the tail could be yellow. Obviously not. Black 7 is part of an 1/48 Eduard A-6 kit which I purchased used about two months ago. I plumb forgot that Black 7 was one of the schemes. I actually was not sure what I was going to do with an Anton—kit or subject, but now perhaps I do.
Make more models!
User avatar
jkim
Elite Member
Posts: 4073
Joined: Mon Apr 10, 2017 4:03 pm

Re: 1/32 Hasegawa Fw190D-9 Black One

Post by jkim »

Notice that the yellow on the lower rudder and the fuselage band appears to be a very dark color. Result of the type of film used? Crandall notes this effect often in both Dora volumes.

Black 7 is a very interesting scheme. It's very similar to one I am contemplating for an upcoming G-6/G-14 flown by Hartmann.

The trademark yellow tail of Dortenmann's Black 1 was the objective tonight. The yellow for the under-cowling was masked off as well.
Image
Image

Tamiya Yellow is one of those colors that do not cover very well. So I toned down the mottling on the tail using neutral gray. I don't want the yellow to perfectly uniform so I've left the underlying base ragged.
Image

The lower cowling, being RLM 76 Light Blue, didn't need any treatment and I sprayed the yellow directly onto the 76.
Image

Here is the tail. The yellow turned out ok on the port side but the masking tape lifted some tape off the white fuselage band as well as a bit of RLM 76.
Image

I fixed the RLM 76 first and managed to pull up even more of the white! The masks for the W. Nr. and swastika are removed to reveal the green mottle on 76. Hopefully the swastika mask and W. Nr. decal will fit into those areas.
Image

I ran into more paint lifting on the other side of the tail.
Image

This starboard side poses a bit of a dilemma for me. The paint edges continue to lift off of the plastic surface as if it doesn't have a good grip. Perhaps a bit of fingertip grease has compromised the original painting surface? I need to feather the paint edges down as much as possible so that the repair doesn't stand out but the paint keeps peeling off and the spot gets bigger and bigger. I sprayed the area with a bit of RLM 76 to gauge how noticeable the edge is. I'll take a closer look tomorrow and attempt a repair. This is a multi-layer area topped off with hairspray between the RLM76/82 and yellow... very tricky to correct. :headbang:
Image
John aka JKim
-----------<><
Image
User avatar
Stikpusher
Moderator
Posts: 21189
Joined: Sat Apr 05, 2014 8:37 pm
Location: Ceti Alpha 5

Re: 1/32 Hasegawa Fw190D-9 Black One

Post by Stikpusher »

What paint are you using that lifted, and what brand of tape?
"Surely I have made my meaning plain? I intend to avenge myself upon you, Admiral. I have deprived your ship of power, and when I swing 'round, I intend to deprive you of your life."

FLSM
User avatar
speedgraflex
Moderator
Posts: 11358
Joined: Fri Feb 10, 2017 11:08 pm
Contact:

Re: 1/32 Hasegawa Fw190D-9 Black One

Post by speedgraflex »

Sending you good vibes this morning, John. I would be tempted to put the adhesion issue with the Tamiya acrylics upon the Alclad 600. I know Alclad’s acrylic clear is designed to be used in exactly the way you used it, as an intermediary clear stage protection before adding more color coats, but it looks like even the light coating of Alclad reduced surface tension just enough for the finicky Tamiya color coat to sit on top of the clear, and cure to itself instead of bonding to the Alclad coat underneath. I know you mentioned oils from skin, but I resist that as an hypothesis because of your working methods. You are extremely careful. The other possibility would be the adhesion of the Tamiya tape curing to freshly painted overlapping edges. I have seen that happen when colors are “pulled” over each other to create a hard demarcation line.

As far as any ideas about touching up the affected areas, I know you will find a solution. I was thinking about how I would approach this, though. I would isolate the area, reduce the tack level on the Taniya tape (at least one potential cause for the peeling), and reduce the color coat... not by sanding but by a small amount of cleaner. I have found in my few years working with Tamiya acrylics that a spot reduction is my approach.

I look forward to seeing your approach, which I believe will be additive layers with a blended edge.
Make more models!
User avatar
jkim
Elite Member
Posts: 4073
Joined: Mon Apr 10, 2017 4:03 pm

Re: 1/32 Hasegawa Fw190D-9 Black One

Post by jkim »

The paint that lifted were Tamiya Acrylics... Gloss Black from the pre-shade, custom mix of RLM 76, custom mix of RLM 82 for the mottling, the hairspray layer and then the yellow. The tape is yellow Tamiya Tape.

Not sure what is causing it but I've experienced it before although the paint peeling to this extent is new. The paint lifted all the way to the plastic surface. The surface was not primed but had been fine sanded after the riveting. Not ruling out the finger oil as part of the problem as I know I've held the Dora with my fingers here as well as the fuselage area where the other lifting occurred. I'm guessing it's mostly because of the thin paint mixes that I use. I can fix it but given the multiple color layers on the tail plus the hairspray chipping, it's going to be a bit of a pain!

A bit of iso alcohol (thinner) might be considered as part of the cleanup. Thanks for leading me to that thought, Bruce!
John aka JKim
-----------<><
Image
User avatar
speedgraflex
Moderator
Posts: 11358
Joined: Fri Feb 10, 2017 11:08 pm
Contact:

Re: 1/32 Hasegawa Fw190D-9 Black One

Post by speedgraflex »

Best wishes, John! Thanks for the details. Your plan for repair and touch up is good. I also think you may net even better results from adding subtle variations to the colors, but I understand you want to create a unified whole first. Good luck!
Make more models!
User avatar
jkim
Elite Member
Posts: 4073
Joined: Mon Apr 10, 2017 4:03 pm

Re: 1/32 Hasegawa Fw190D-9 Black One

Post by jkim »

Thanks for the support! Time for some paint repair!

I started by sanding down the edges of the lifted paint on the tail with some coarse Micromesh. I then shot this area lightly with Tamiya Lacquer thinner. I was hoping it would somehow soak through the multiple layers of paint and magically fuse everything to the model's plastic surface.
Image

The magic thinner trick didn't work and the edges of the "hole" got bigger. I had to stop at some point or else I'd be taking the paint off the whole tail.
Image

I shot the area with some neutral gray to kill the hard-edged color contrast and then the yellow. It's hard to see in the photos but there is a VERY slight edge to the repair areas but I'm hoping to eliminate those by a combination of light Micromesh work and the clear coats that are yet to come. I'm pleased with how the repair came out and can breathe a sigh of relief.
Image

Jumping over the white ID band on the other side, I masked the stripe using de-tackified Tamiya tape (dabbed the adhesive side on my finger tips a few times).
Image

Again, the repair area was sprayed with neutral gray and then white. And again, there is a very slight edge to the repair area.
Image

Time to pause and game plan for the next step. Here is how Black 1 looks to this point.
Image
Image
Image

Immediate next step will be to chip the leading edge of the tail fin. And then the masked markings.
John aka JKim
-----------<><
Image
User avatar
speedgraflex
Moderator
Posts: 11358
Joined: Fri Feb 10, 2017 11:08 pm
Contact:

Re: 1/32 Hasegawa Fw190D-9 Black One

Post by speedgraflex »

Your repairs look great, John. Great job! I was holding my breath about how your fixes would turn out, so I am glad your successes were so high. Both tail fin yellow and id band white look extremely good; smooth and clear of color bloom effects. By the tone of your narrative, I can tell you are immensely relieved and feeling good. Job well done!
Make more models!
Post Reply

Return to “Aircraft Work in Progress”