1/32 Hasegawa Fw190D-9 Black One

Post your work in progress of your aircraft builds in here.
User avatar
jkim
Elite Member
Posts: 4073
Joined: Mon Apr 10, 2017 4:03 pm

Re: 1/32 Hasegawa Fw190D-9 Black One

Post by jkim »

Thanks guys! I use that wing for test sprays. It's been wiped down a couple of times already and I reckon I'll do it again when I needed another paint mule.

The wave markings was masked and painted today. The Oramask 810 behaves identically to the Montex Masks. I'm quite sure they are the same material.

Image


I had to do some touch-ups where the mask was not perfectly circular.

Image
Image


Now I have to do some selective weathering on confined part of the model. I'll start with a pastel wash first so the tail band area was given a spray of Alclad Aqua Gloss.

Image
John aka JKim
-----------<><
Image
User avatar
KSaarni
Elite Member
Posts: 5621
Joined: Sun Apr 06, 2014 7:13 am
Location: Gent, Belgium
Contact:

Re: 1/32 Hasegawa Fw190D-9 Black One

Post by KSaarni »

jkim wrote: I had to do some touch-ups where the mask was not perfectly circular.
Very interesting, very exciting to follow this John. A quick question, how come it was not perfectly circular ? Is it because of the surface of the 190 is not straight and therefore distorts the "circularity" ?

- Kari
---
On the bench:

MiniArt 1:48 - Junkers F13 Float Plane


https://www.facebook.com/GrundAsk-Scale ... 721218708/
User avatar
jkim
Elite Member
Posts: 4073
Joined: Mon Apr 10, 2017 4:03 pm

Re: 1/32 Hasegawa Fw190D-9 Black One

Post by jkim »

Thanks Kari! Actually, it was the mask itself that was not perfectly circular. It may be a function of the cutting algorithm because this slight imperfection was repeated in the same place on all of the masks. I drafted the masks myself using AutoCAD and so I know that there were no angle points in the drawing that I created.
John aka JKim
-----------<><
Image
User avatar
mustang1989
Moderator
Posts: 5035
Joined: Tue Mar 18, 2014 8:35 pm

Re: 1/32 Hasegawa Fw190D-9 Black One

Post by mustang1989 »

jkim wrote:Thanks Kari! Actually, it was the mask itself that was not perfectly circular. It may be a function of the cutting algorithm because this slight imperfection was repeated in the same place on all of the masks. I drafted the masks myself using AutoCAD and so I know that there were no angle points in the drawing that I created.
Man if it's one thing I hate doing it's applying those godforsaken bands on a 190 D-9 fuselage!!! Great turn out BTW. :shoutout: :shoutout: :shoutout: :shoutout: I did mine with friggin tape and I can tell you those...........are a pain. :rant:
User avatar
speedgraflex
Moderator
Posts: 11358
Joined: Fri Feb 10, 2017 11:08 pm
Contact:

Re: 1/32 Hasegawa Fw190D-9 Black One

Post by speedgraflex »

John,

I read your posts earlier today, but I wanted to wait until I was at home to see your photography on the big monitor! It is always a sincere pleasure to see all of the details present as well as the repairs being made so carefully! What is your lighting set up for your work bench? Thanks in advance, sincerely! What a ride this has been so far, just simply the best sequence of documentation on a masterful creation!!! Cheers! Warm regards on a cooled off desert night!!!


:shoutout:
Make more models!
User avatar
KSaarni
Elite Member
Posts: 5621
Joined: Sun Apr 06, 2014 7:13 am
Location: Gent, Belgium
Contact:

Re: 1/32 Hasegawa Fw190D-9 Black One

Post by KSaarni »

speedgraflex wrote:John,

I read your posts earlier today, but I wanted to wait until I was at home to see your photography on the big monitor! It is always a sincere pleasure to see all of the details present as well as the repairs being made so carefully! What is your lighting set up for your work bench? Thanks in advance, sincerely! What a ride this has been so far, just simply the best sequence of documentation on a masterful creation!!! Cheers! Warm regards on a cooled off desert night!!!


:shoutout:
That's a really good question and would almost need its own thread! I am not at all satisfied with my current "office lamp" setup and would want something better, without needing to "pay myself sick", so to say..

- Kari
---
On the bench:

MiniArt 1:48 - Junkers F13 Float Plane


https://www.facebook.com/GrundAsk-Scale ... 721218708/
User avatar
jkim
Elite Member
Posts: 4073
Joined: Mon Apr 10, 2017 4:03 pm

Re: 1/32 Hasegawa Fw190D-9 Black One

Post by jkim »

I'm not really happy with my lighting set-up either but it has to do until I can get the space re-arranged. I am modeling on a small student's desk. The chair is an office type with the backrest broken off. The bookshelves, like everything else in the room, are discards from my children's rooms. The single car garage that I have converted into my modeling space is lit by 2-3 banks of fluorescent tube lighting. At the desk I have two lamps that provide focused illumination.

In the future, I want to get rid of all of the clutter that has accumulated in this storage space and re-configure the modeling space to be more comfortable and efficient.
John aka JKim
-----------<><
Image
User avatar
jkim
Elite Member
Posts: 4073
Joined: Mon Apr 10, 2017 4:03 pm

Re: 1/32 Hasegawa Fw190D-9 Black One

Post by jkim »

The tail area and the cowling have been given pastel washes. The major aspects of this repair are now complete. After the cowling was reattached, I gave the repair areas some subtle post-shading with a watery brownish-black to dirty it up. The whole model was then given a flat coat to help unify all of the disparate elements together.

This edition of Black 1 will be a closed canopy. The minor bits and pieces will be added and then I'll take some better photos of her before she gets sent back in a box.

Image
Image
John aka JKim
-----------<><
Image
User avatar
mustang1989
Moderator
Posts: 5035
Joined: Tue Mar 18, 2014 8:35 pm

Re: 1/32 Hasegawa Fw190D-9 Black One

Post by mustang1989 »

I'd be very happy with that!!
User avatar
jkim
Elite Member
Posts: 4073
Joined: Mon Apr 10, 2017 4:03 pm

Re: 1/32 Hasegawa Fw190D-9 Black One

Post by jkim »

The repair on Black 1 is just about finished. I just have to attach the various external bits and pieces and the aerial so I'll probably wait until the weekend to do that.

In the meantime, I'm working on a little add-on. Figures are really not my thing so I'm just kind of winging it. The chair was a bit of a challenge to cobble together. Warped resin plus none-too-positive attachment points. I just had to glue one joint at a time and hoped that all of the cross members would straighten each other out. Which they did, for the most part.
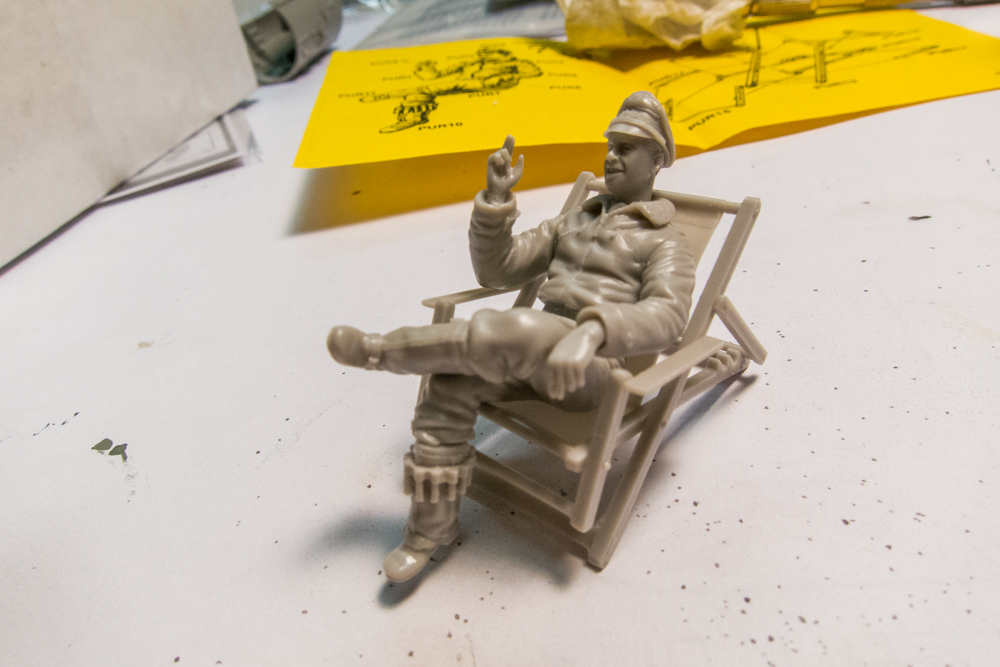
Image


The body of the figure has been glued together. I've smoothed out the joints using putty, primed it and have painted the pants intermediate blue. I painted the chair frame tan and then brushed some dark brown and red oil paints on it to simulate wood grain. I'll let that dry before painting the canvas part.
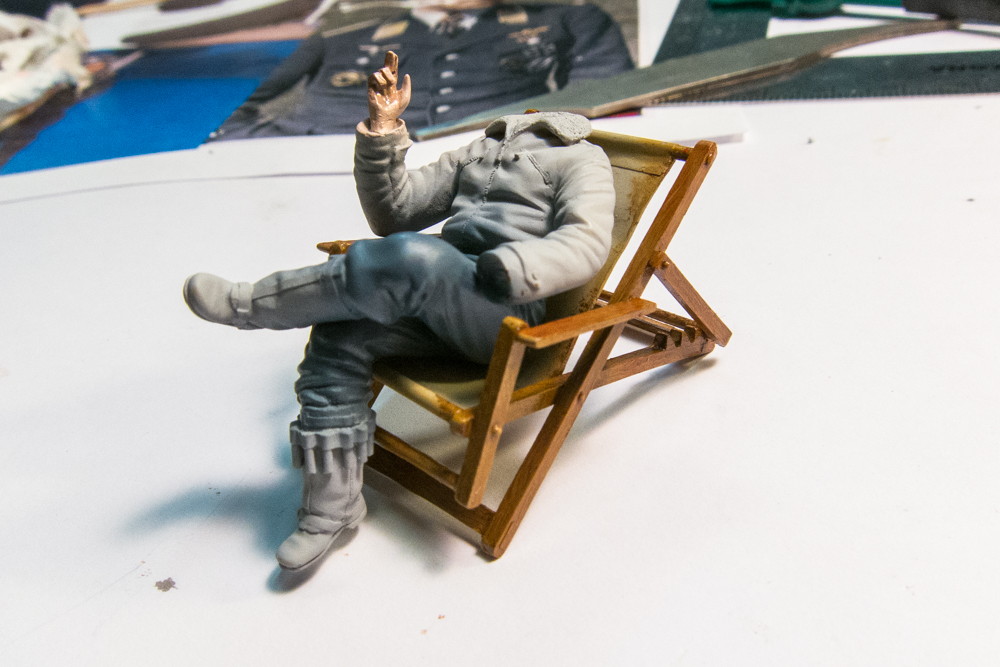
Image


I thought it'd be easier to paint the head by itself so I've not attached it yet. The head was painted with Tamiya and Gunze acrylics. Dry-brushing doesn't work very well at this small size so to smooth out the shading transitions, I used a brush dabbed with some color and iso alcohol to perform the blending.
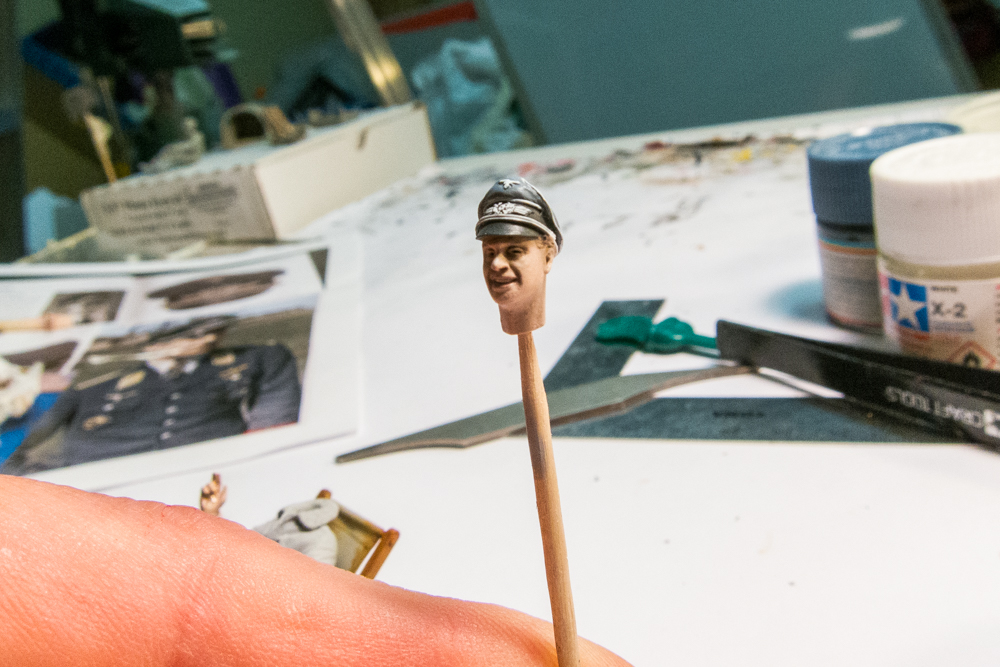
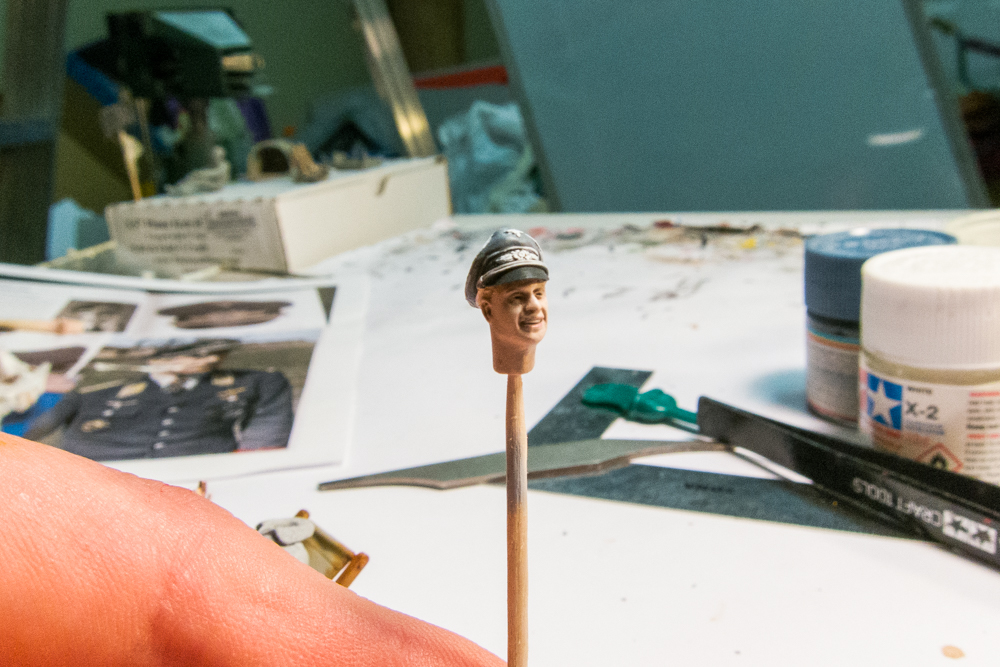
Image
Image
John aka JKim
-----------<><
Image
Post Reply

Return to “Aircraft Work in Progress”

