There is so much wisdom as a result of experience in a “Two kit build.” I think this is amazing in so many ways. I often thought a kit should contain secondary sprues with small parts on them. It’s often heart breaking to read when a piece goes MIA or is crushed or broken or inserted upside down side during assembly.
One reason I started building model planes was to learn techniques, however I find car builders to be a fascinating look within to the essential problem: how to paint convincingly at scale. The problem is not solved easily. I wish I could see video of your washing technique, actually. That is so easy to screw up with a heavy hand.
All the best.
56 Ford F-100 "Demon II"-Completed-04/15
-
speedgraflex

- Moderator
- Posts: 11534
- Joined: Fri Feb 10, 2017 11:08 pm
- Contact:
Re: 56 Ford F-100 "Demon II"-A Tad Bit More-03/11
Make more models!
-
Duke Maddog

- Elite Member
- Posts: 7700
- Joined: Tue Jun 03, 2014 11:22 am
- Location: Rowland Heights, CA
Re: 56 Ford F-100 "Demon II"-A Tad Bit More-03/11
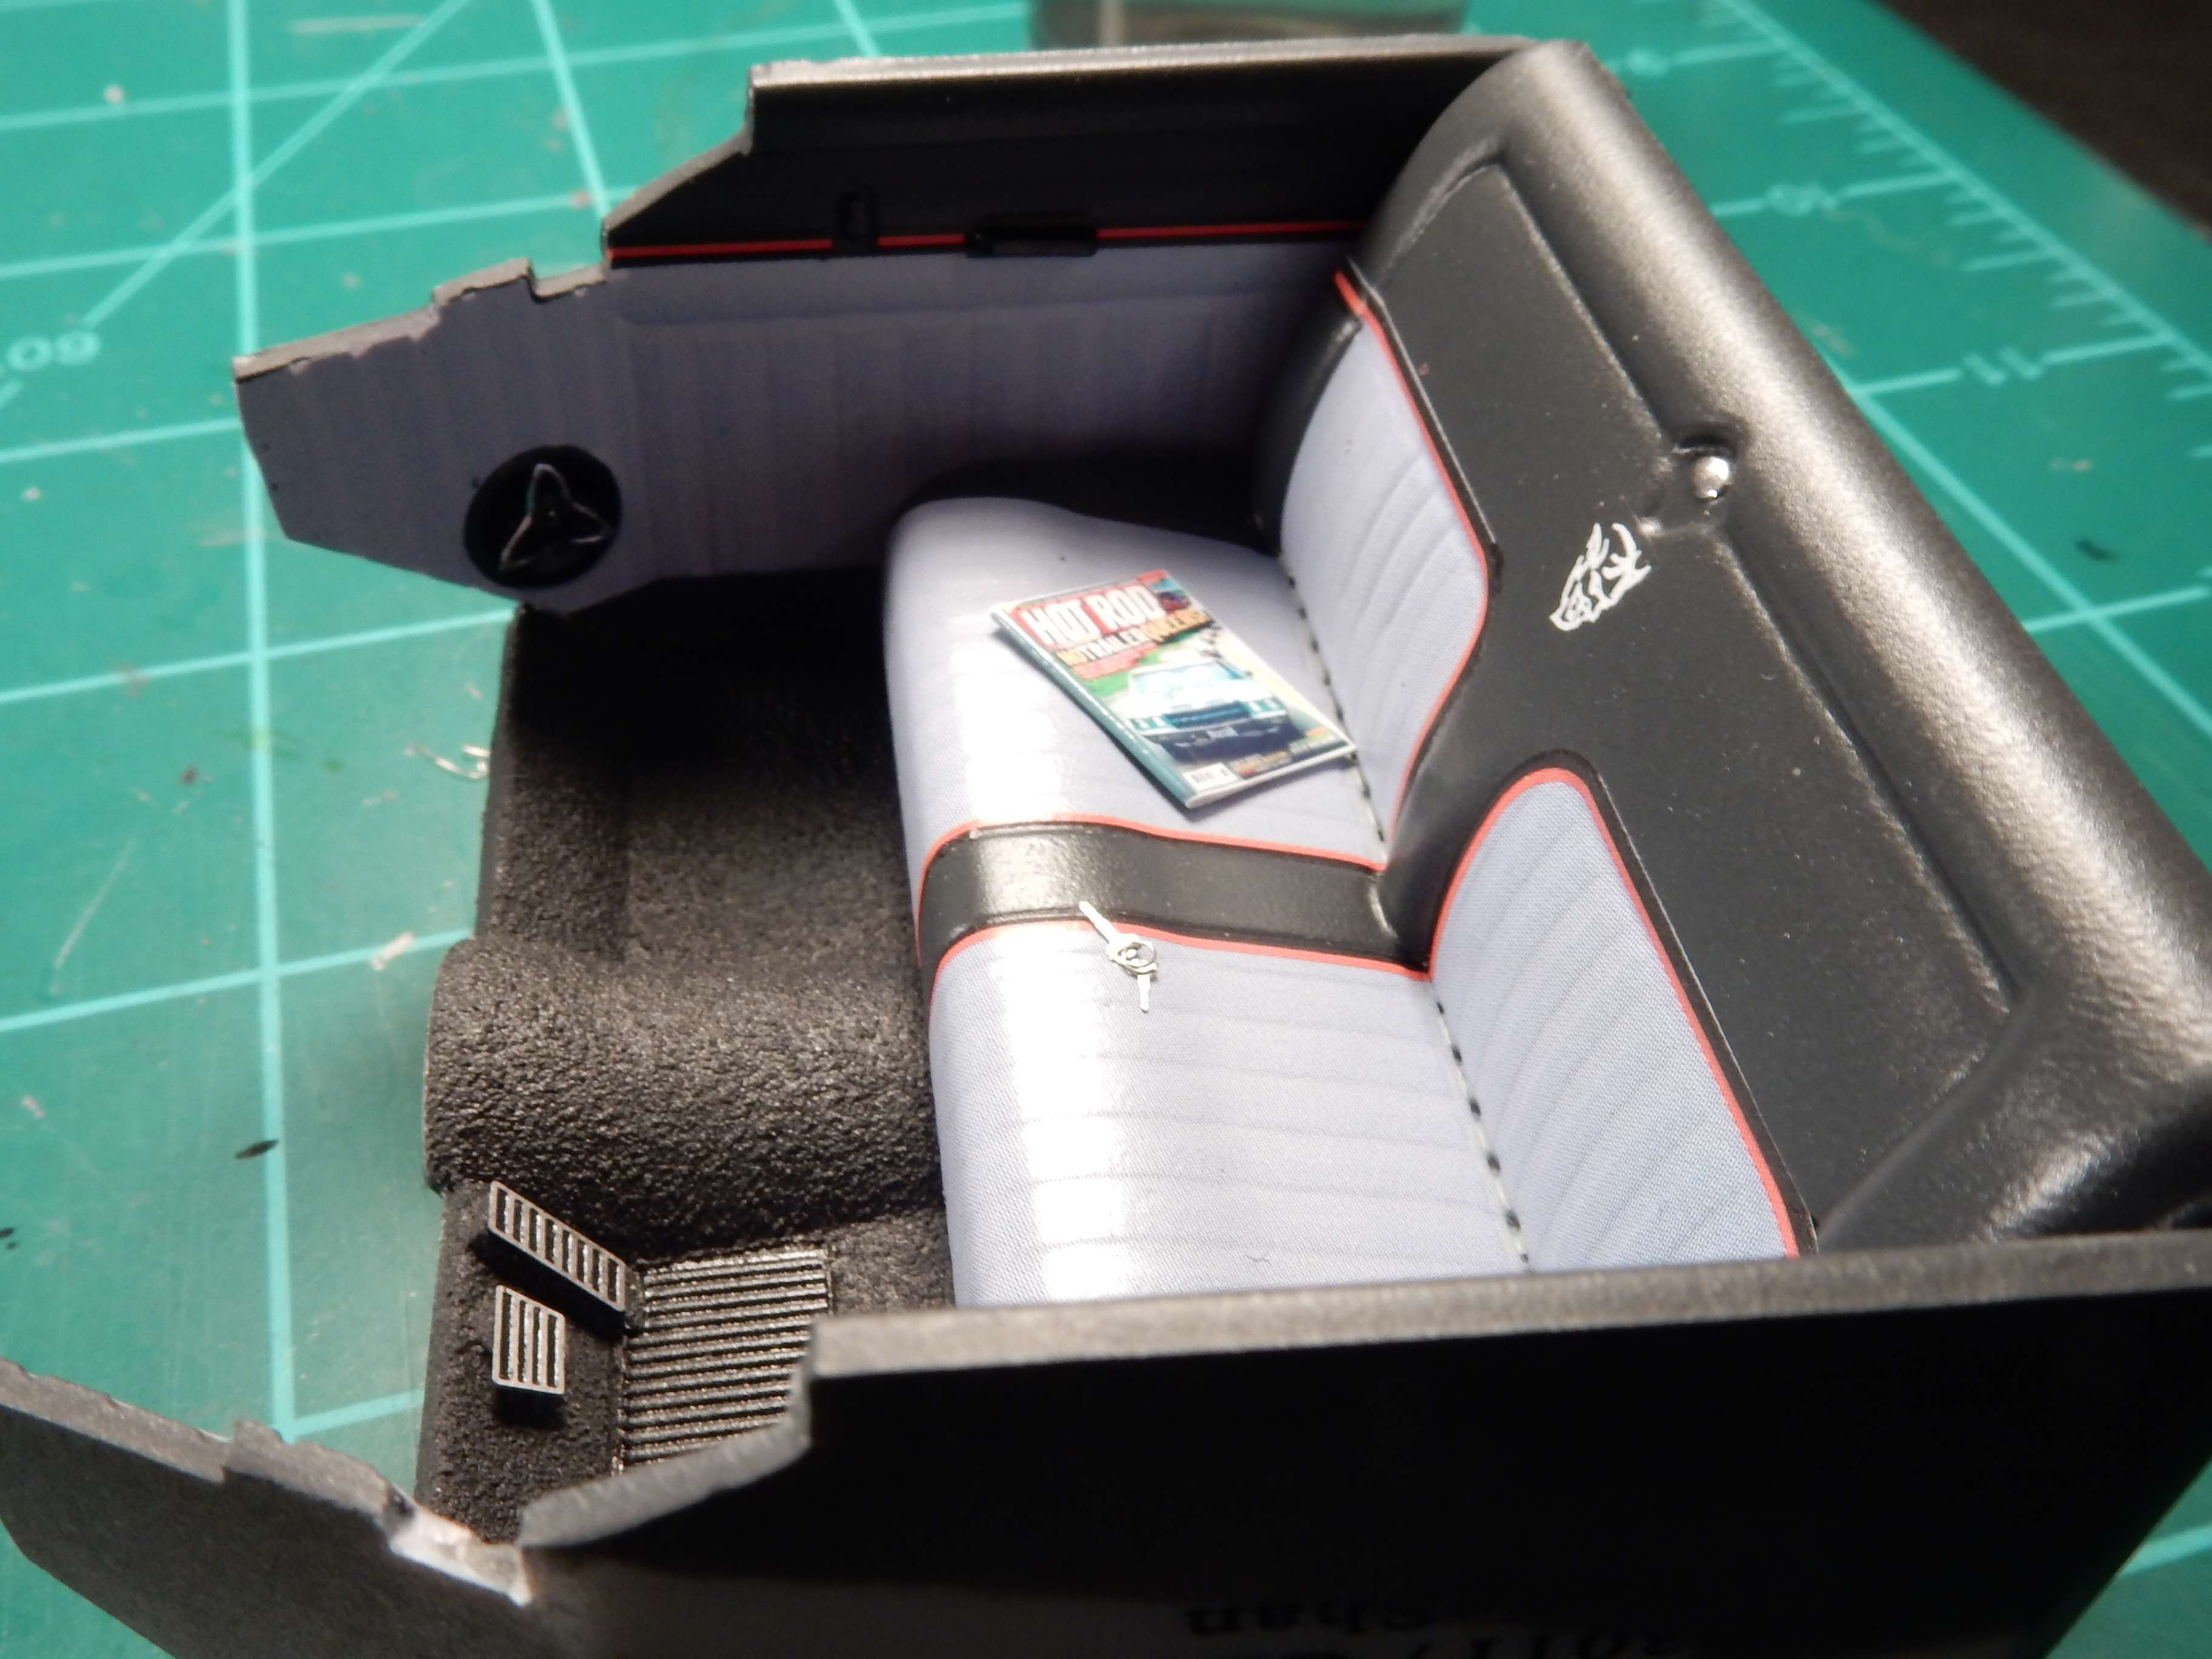
That interior looks amazing Joe! I love the addition of the magazine. Maybe you could add a pair of sunglasses too.
Way to go and congrats on figuring out the fix for getting that interior inside the cab.
Way to go and congrats on figuring out the fix for getting that interior inside the cab.
The Duke
Virtuoso of Miniatures
"Do you know what the chain of command is? It's the chain I get and beat you with 'till you understand who's in ruttin' command!"
-Jayne Cobb, Firefly Episode 2 "The Train Job"
We are modelers - the same in spirit, in hunger to insanely buy newly released kits, hustlers in hiding our stash from our better halves and experts in using garbage as replacements for after-market parts.
Virtuoso of Miniatures
"Do you know what the chain of command is? It's the chain I get and beat you with 'till you understand who's in ruttin' command!"
-Jayne Cobb, Firefly Episode 2 "The Train Job"
We are modelers - the same in spirit, in hunger to insanely buy newly released kits, hustlers in hiding our stash from our better halves and experts in using garbage as replacements for after-market parts.
-
mustang1989

- Moderator
- Posts: 5044
- Joined: Tue Mar 18, 2014 8:35 pm
Re: 56 Ford F-100 "Demon II"-A Tad Bit More-03/11
Thanks Brent, Carlos , Tom, Bruce and Mark!
Something about the "carpet" and the way I did it just did NOT agree with me. I textured the flooring by spraying some Rustoleum Textured paint from a spray can and then coated the textured paint with a coat of flat black. The more I looked at it the more I caught myself thinking that if I had flocked the flooring in black it would've had a slight semi gloss and some depth to it. The way I had it painted there was neither quality there. Just ..................................flat bland black was it. So I thought a minute...... and decided to apply some Tamiya Clear in a light coating. The results turned out better to me.
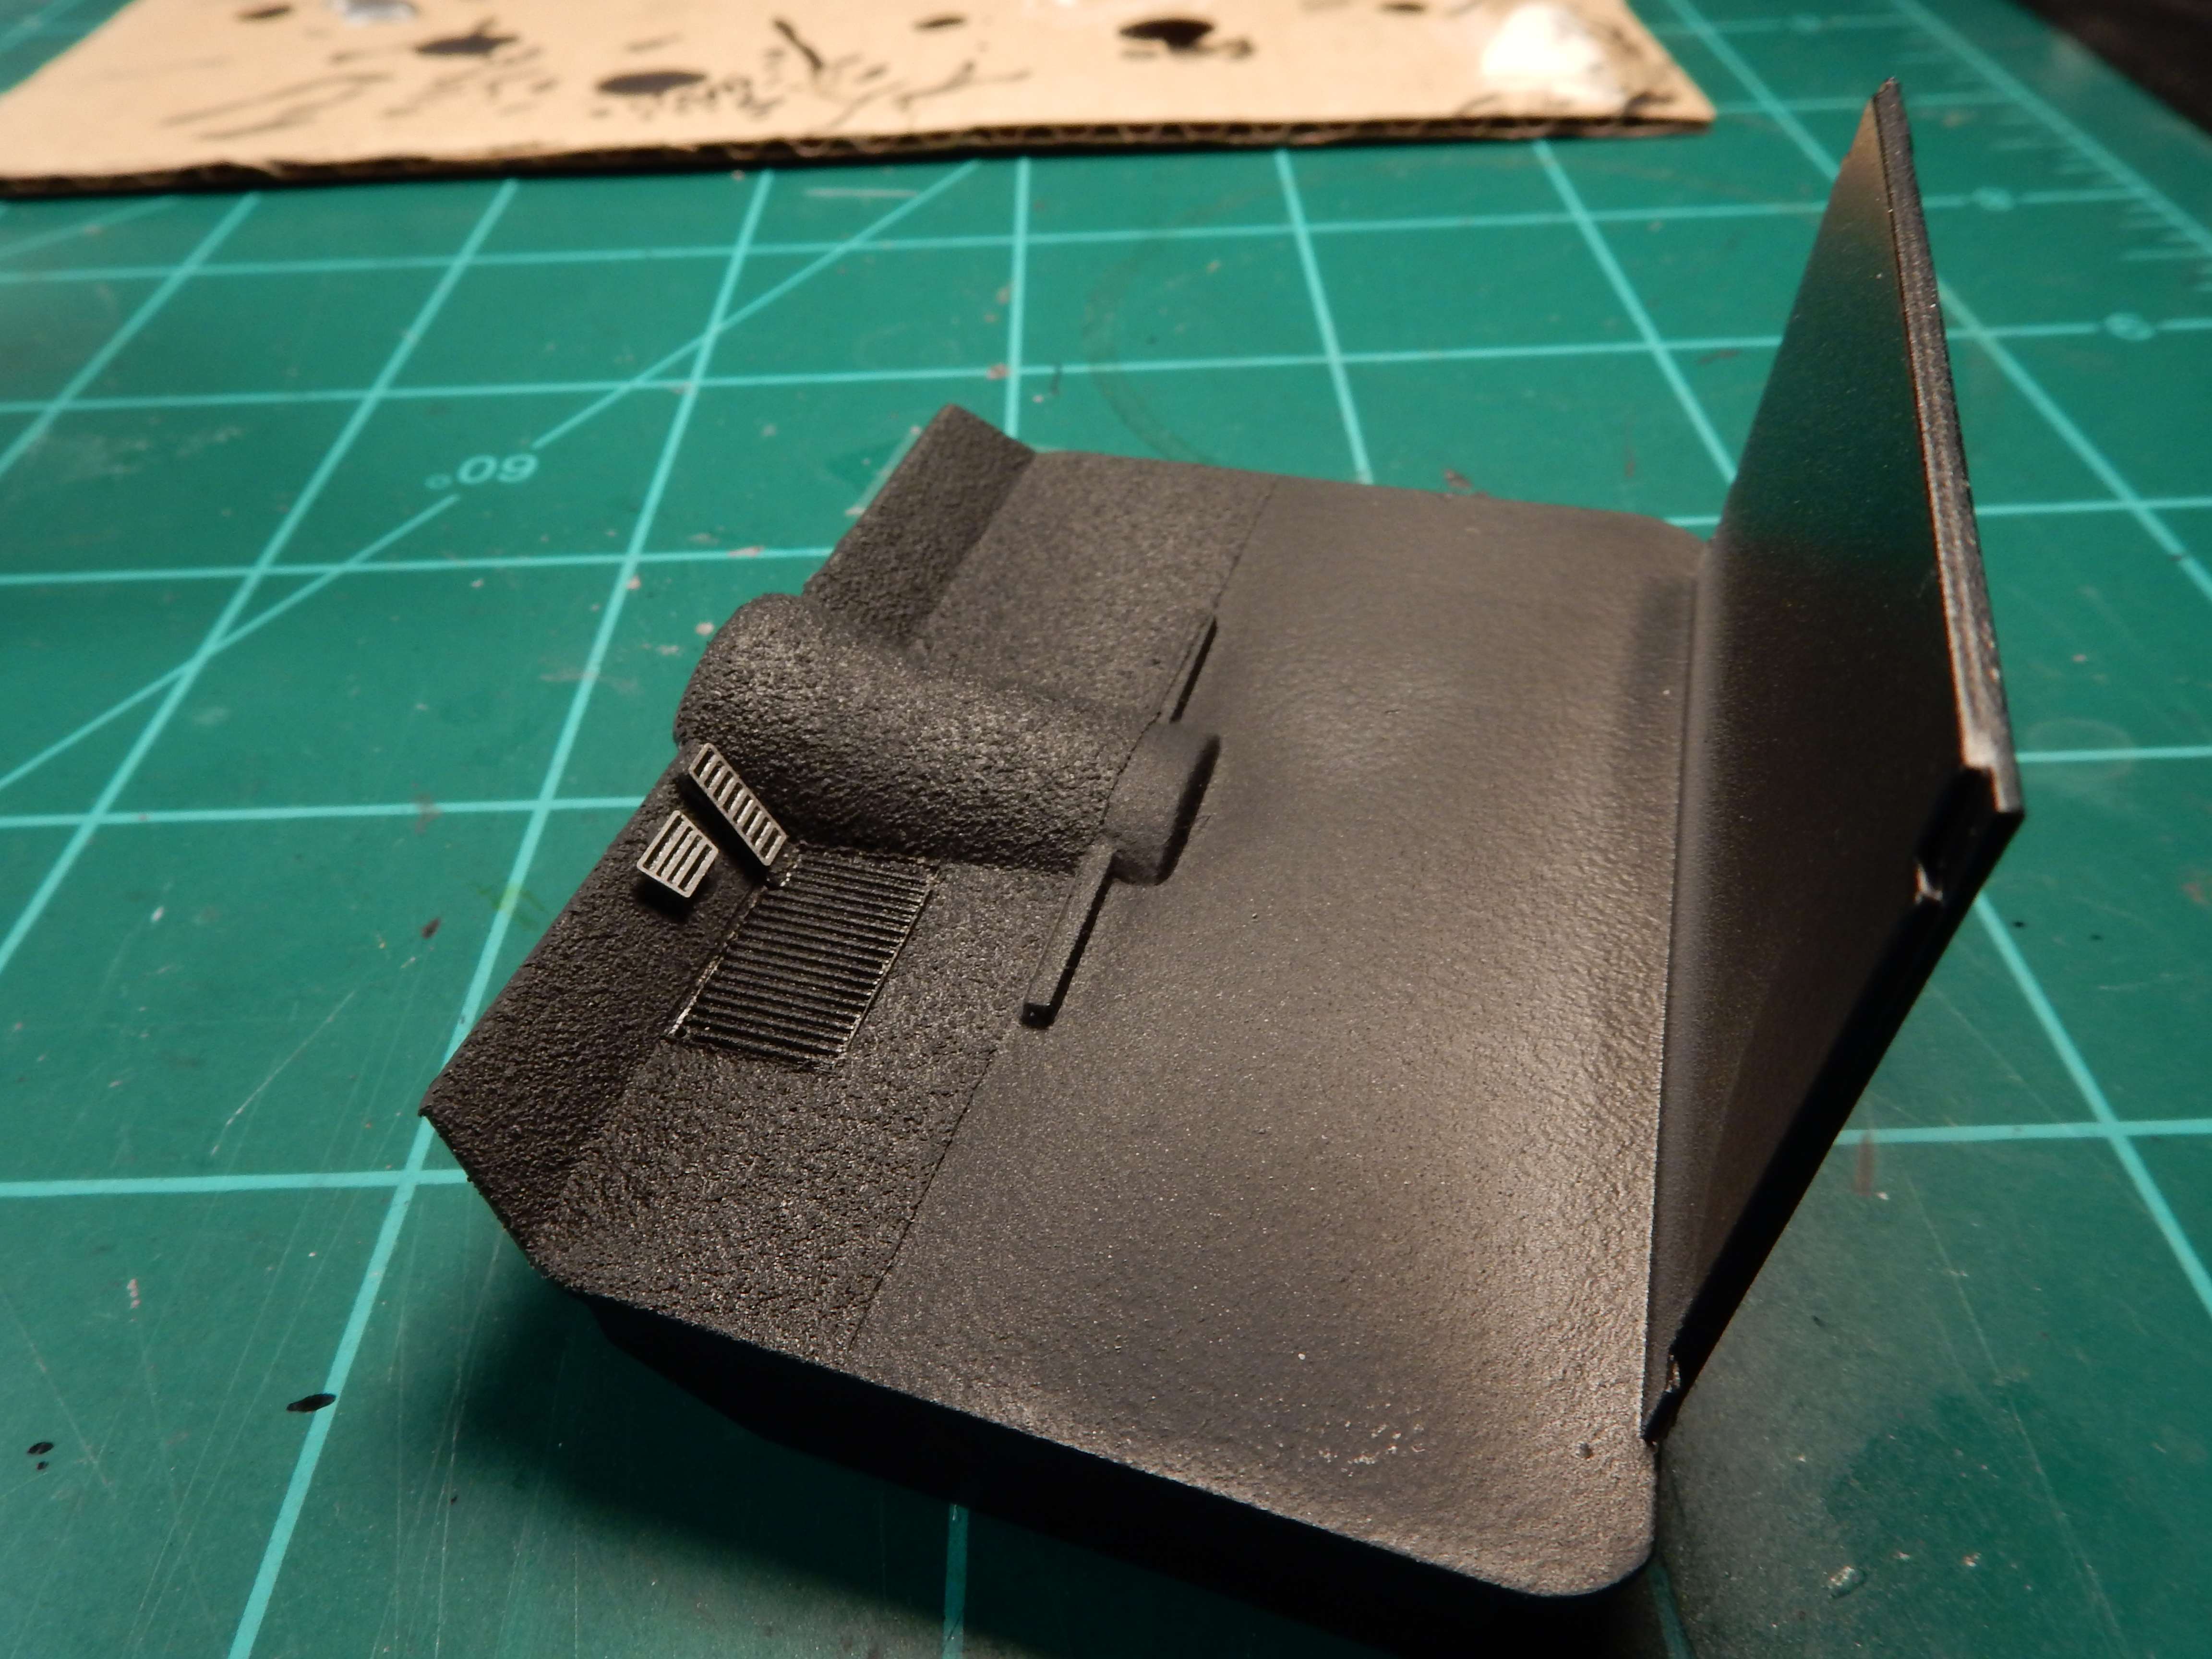
To recap. Before:

and after. Just a tad bit more depth and more correct finish IMO:
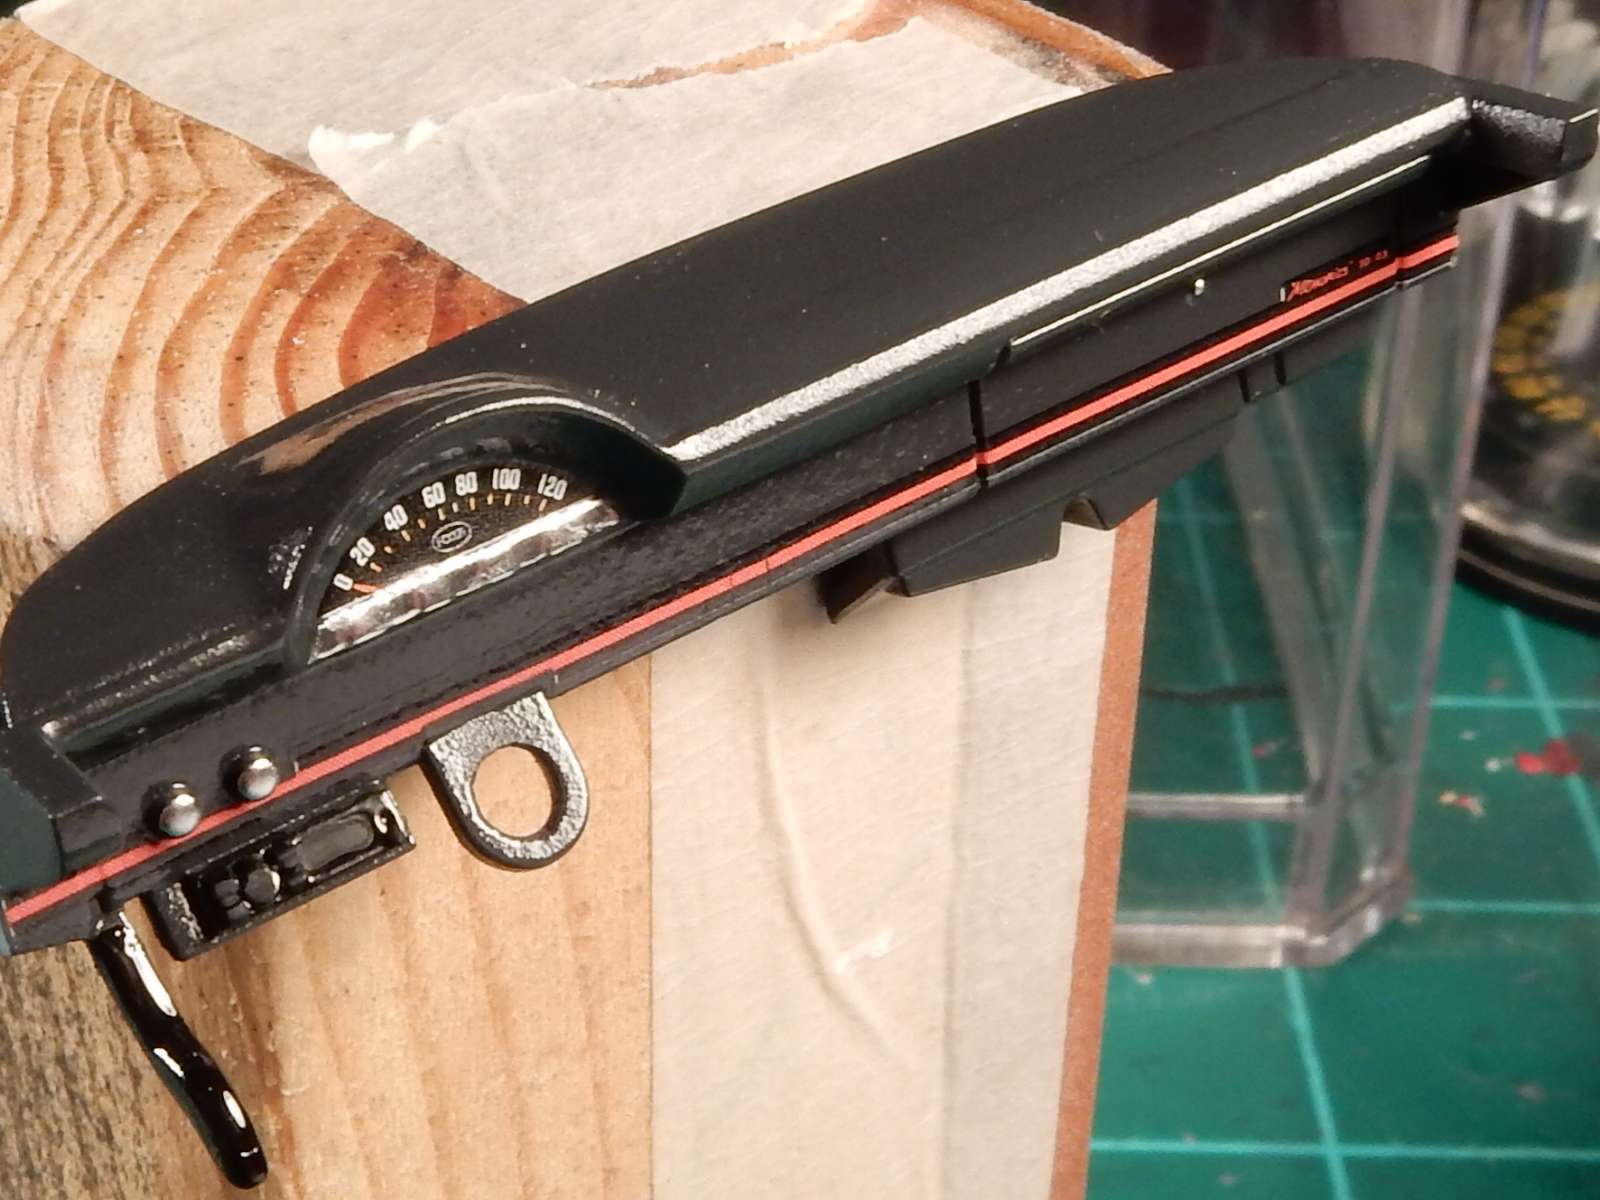
I've also got the dash finished. I really don't consider this to be one of the better dashes I've done for two reasons. 1.) I think I could've done better and 2.) when I was done with this dash I had and still have the feeling of .......................that's it????!!!!
Any ways here's the dash:
Something about the "carpet" and the way I did it just did NOT agree with me. I textured the flooring by spraying some Rustoleum Textured paint from a spray can and then coated the textured paint with a coat of flat black. The more I looked at it the more I caught myself thinking that if I had flocked the flooring in black it would've had a slight semi gloss and some depth to it. The way I had it painted there was neither quality there. Just ..................................flat bland black was it. So I thought a minute......
and decided to apply some Tamiya Clear in a light coating. The results turned out better to me.To recap. Before:
and after. Just a tad bit more depth and more correct finish IMO:
I've also got the dash finished. I really don't consider this to be one of the better dashes I've done for two reasons. 1.) I think I could've done better and 2.) when I was done with this dash I had and still have the feeling of .......................that's it????!!!!
Any ways here's the dash:
-
mustang1989
- Moderator
- Posts: 5044
- Joined: Tue Mar 18, 2014 8:35 pm
Re: 56 Ford F-100 "Demon II"-A Tad Bit More-03/11
Gonna have to do something about that radio. I aint likin' THAT at all. Dang macro shots!!!! 
-
Stikpusher

- Moderator
- Posts: 21386
- Joined: Sat Apr 05, 2014 8:37 pm
- Location: Ceti Alpha 5
Re: 56 Ford F-100 "Demon II"-A Tad Bit More-03/11
Maybe you could do better, but it still looks damn good to me.
And yes, the macro shot from a digital camera has no mercy. It often shows flaws the Mk.I eyeball will miss in regular vision.
And yes, the macro shot from a digital camera has no mercy. It often shows flaws the Mk.I eyeball will miss in regular vision.
"Surely I have made my meaning plain? I intend to avenge myself upon you, Admiral. I have deprived your ship of power, and when I swing 'round, I intend to deprive you of your life."
FLSM
FLSM
-
mustang1989
- Moderator
- Posts: 5044
- Joined: Tue Mar 18, 2014 8:35 pm
Re: 56 Ford F-100 "Demon II"-A Tad Bit More-03/11
Thanks Carlos and you're definitely right about those macro shots. I use them as tools all the time. 
-
Duke Maddog
- Elite Member
- Posts: 7700
- Joined: Tue Jun 03, 2014 11:22 am
- Location: Rowland Heights, CA
Re: 56 Ford F-100 "Demon II"-A Tad Bit More-03/11
I do like the improvement on the floor. Way to go!
I agree about the dash... there doesn't seem to be much there for it. I'm looking forward to seeing what you do for the radio. Wouldn't it normally be mounted below the center of the dash? Unless it is a CB radio that is....
I agree about the dash... there doesn't seem to be much there for it. I'm looking forward to seeing what you do for the radio. Wouldn't it normally be mounted below the center of the dash? Unless it is a CB radio that is....
The Duke
Virtuoso of Miniatures
"Do you know what the chain of command is? It's the chain I get and beat you with 'till you understand who's in ruttin' command!"
-Jayne Cobb, Firefly Episode 2 "The Train Job"
We are modelers - the same in spirit, in hunger to insanely buy newly released kits, hustlers in hiding our stash from our better halves and experts in using garbage as replacements for after-market parts.
Virtuoso of Miniatures
"Do you know what the chain of command is? It's the chain I get and beat you with 'till you understand who's in ruttin' command!"
-Jayne Cobb, Firefly Episode 2 "The Train Job"
We are modelers - the same in spirit, in hunger to insanely buy newly released kits, hustlers in hiding our stash from our better halves and experts in using garbage as replacements for after-market parts.
-
speedgraflex
- Moderator
- Posts: 11534
- Joined: Fri Feb 10, 2017 11:08 pm
- Contact:
Re: 56 Ford F-100 "Demon II"-A Tad Bit More-03/11

For this, the designer hid the electronics in the glove box.

Make more models!

Re: 56 Ford F-100 "Demon II"-A Tad Bit More-03/11
Indeed! But then again, I also use the macro mode as a perfect magnifier, works really good for that purpose!Stikpusher wrote:Maybe you could do better, but it still looks damn good to me.
And yes, the macro shot from a digital camera has no mercy. It often shows flaws the Mk.I eyeball will miss in regular vision.
And Joe, I think the dashboard looks just absolutely perfect, regardless of macro or not!
- Kari
---
On the bench:
Eduard 1:48 - Fokker D.VII OAW
https://www.facebook.com/GrundAsk-Scale ... 721218708/
On the bench:
Eduard 1:48 - Fokker D.VII OAW
https://www.facebook.com/GrundAsk-Scale ... 721218708/
-
mustang1989
- Moderator
- Posts: 5044
- Joined: Tue Mar 18, 2014 8:35 pm
Re: 56 Ford F-100 "Demon II"-A Tad Bit More-03/11
Thank you guys so much.
Ok folks I've got a little bit of progress to report today.
Well guys since I couldn't use the wheels that I wanted I decided to use my favorites which are the Weld Draglites. The only problem with those are that 99.9999% of the rear wheels that I've seen whether they are resin or kit supplied have the bead locks on the wheel.......................which I do NOT want for a streetable vehicle.
Here's where we start. A set of resin Draglites from Competition Resins:
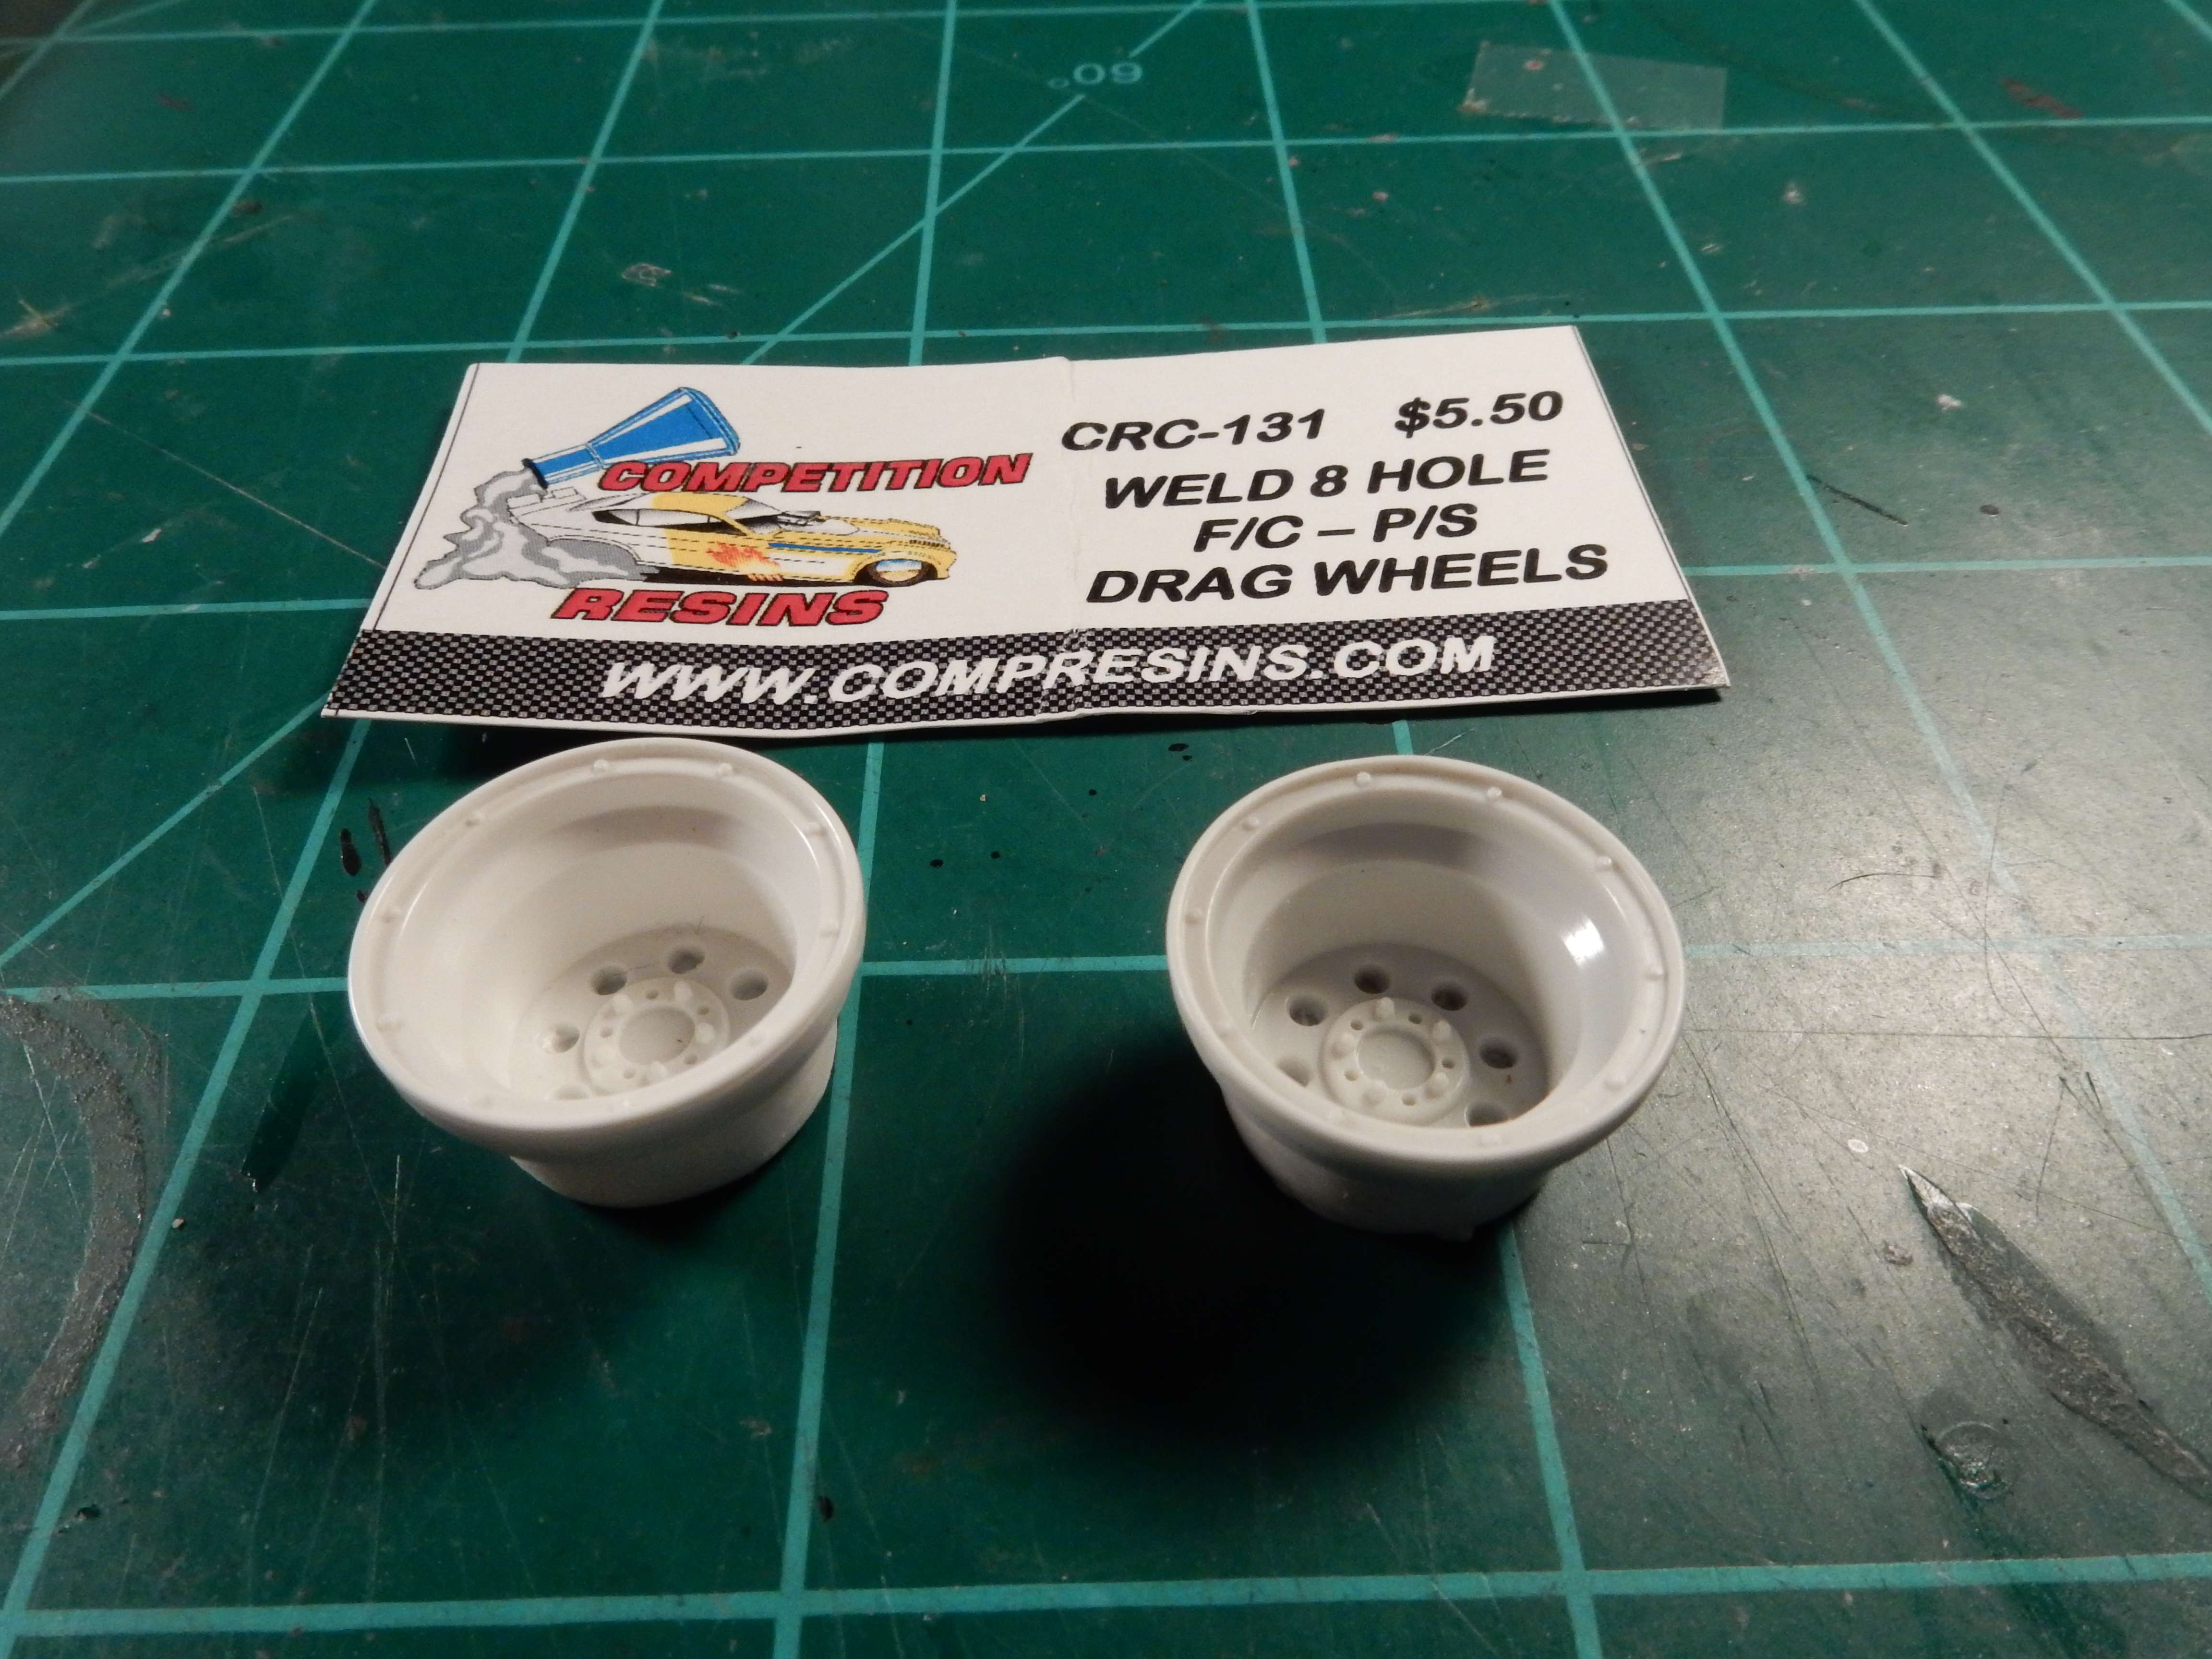
After some research I found what I want to coat the wheels with. This months issue of Scale Auto has a whole 5 page article devoted to the different methods of chrome coating and clearing. After reading through it I'll be going with the Molotow chrome with Spaz Stix Ultimate Clear both of which I ordered last night. Here's after removing the bead locks and drilling out all the wheel holes, center hole and the unused lug stud holes and cleaning it up a bit as compared to the untouched one on the right.

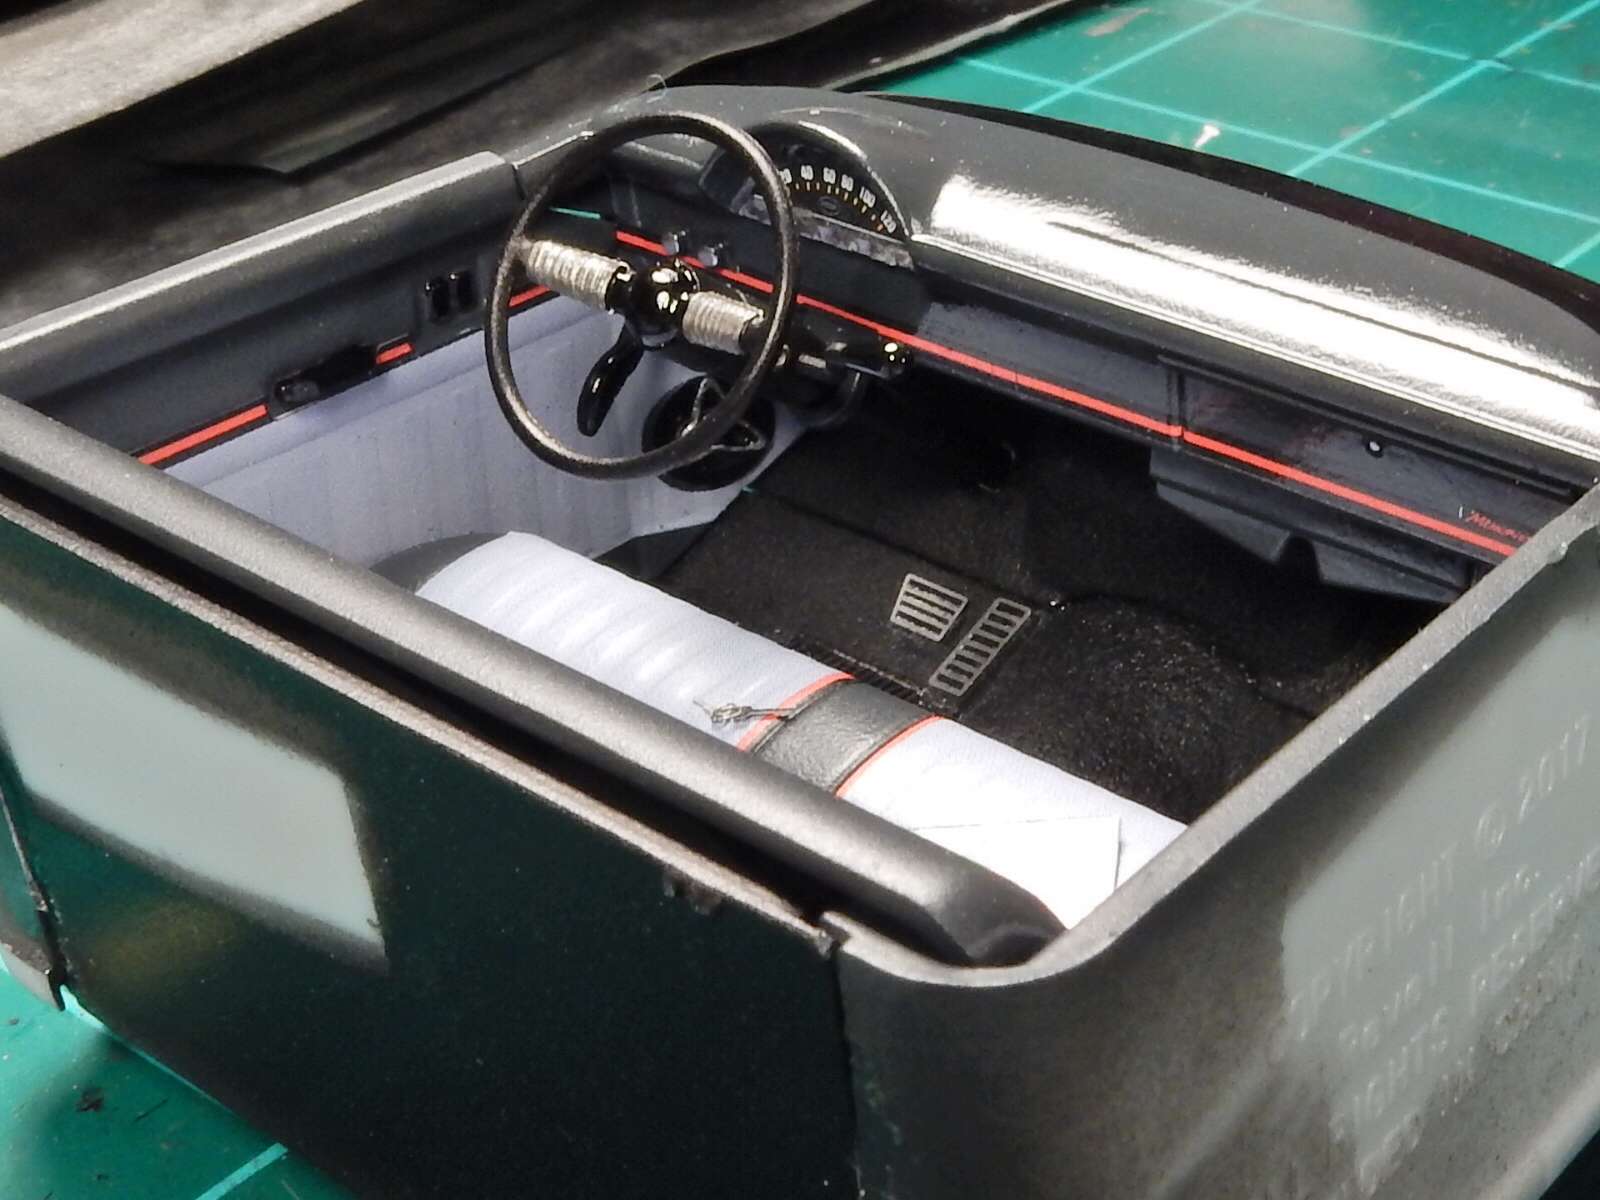
I found a block of time last night to work on the interior so I could finish it up this morning. I ended up not relocating the radio after all but I did touch it up to where it didn't look so dang hideous. Most of my work from here on out will be devoted to exterior paint & finish as well as wheels & tires. I'm going to have my hands full with all of that.

Ok folks I've got a little bit of progress to report today.
Well guys since I couldn't use the wheels that I wanted I decided to use my favorites which are the Weld Draglites. The only problem with those are that 99.9999% of the rear wheels that I've seen whether they are resin or kit supplied have the bead locks on the wheel.......................which I do NOT want for a streetable vehicle.
Here's where we start. A set of resin Draglites from Competition Resins:
After some research I found what I want to coat the wheels with. This months issue of Scale Auto has a whole 5 page article devoted to the different methods of chrome coating and clearing. After reading through it I'll be going with the Molotow chrome with Spaz Stix Ultimate Clear both of which I ordered last night. Here's after removing the bead locks and drilling out all the wheel holes, center hole and the unused lug stud holes and cleaning it up a bit as compared to the untouched one on the right.
I found a block of time last night to work on the interior so I could finish it up this morning. I ended up not relocating the radio after all but I did touch it up to where it didn't look so dang hideous. Most of my work from here on out will be devoted to exterior paint & finish as well as wheels & tires. I'm going to have my hands full with all of that.