Dragon 1/35 Sd.Kfz. 250/3, Tunisia, 1942.

Re: Dragon 1/35 Sd.Kfz. 250/3, Tunisia, 1942.
Bruce, you have done a fantastic job on that motor. I’m rather speechless at it. I think it’s fantastic. I really like how you assembled those references, studied them, and recreated that motor so far. I think you’ve done a fantastic job of grinding out the detail of all those components and assembling them together. Your attention to scale and detail really shows with this. And it’s looking incredible. Man, that has got to be some hard work! Wow!!
Kenny X
Head Mother Trucker In-Charge @ Kenny X’s Reichs Winzigkleines Flugzeugewerks *and now* Airboat Records, too!
Head Mother Trucker In-Charge @ Kenny X’s Reichs Winzigkleines Flugzeugewerks *and now* Airboat Records, too!
Re: Dragon 1/35 Sd.Kfz. 250/3, Tunisia, 1942.
... I mean I try not to cuss too much on this forum but damn it bro, that’s just some serious effing incredible work. Holy shit!
I really want to be able to scratchbuild stuff like this one day. I mean, my God, man! Gee wiz!
I really want to be able to scratchbuild stuff like this one day. I mean, my God, man! Gee wiz!
Kenny X
Head Mother Trucker In-Charge @ Kenny X’s Reichs Winzigkleines Flugzeugewerks *and now* Airboat Records, too!
Head Mother Trucker In-Charge @ Kenny X’s Reichs Winzigkleines Flugzeugewerks *and now* Airboat Records, too!
-
speedgraflex

- Moderator
- Posts: 11535
- Joined: Fri Feb 10, 2017 11:08 pm
- Contact:
Re: Dragon 1/35 Sd.Kfz. 250/3, Tunisia, 1942.
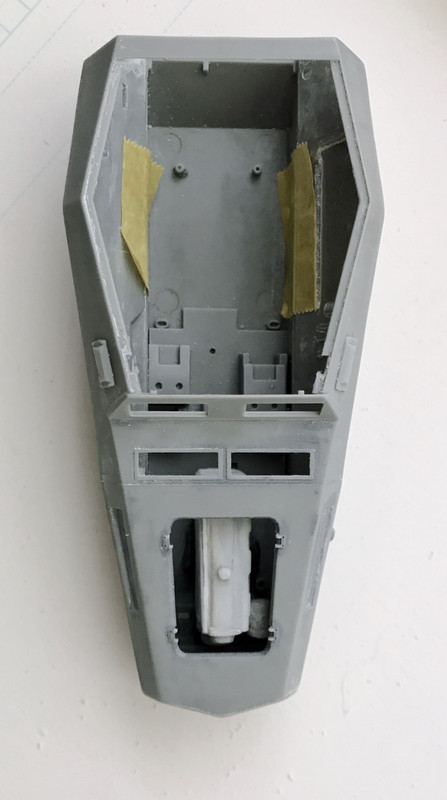
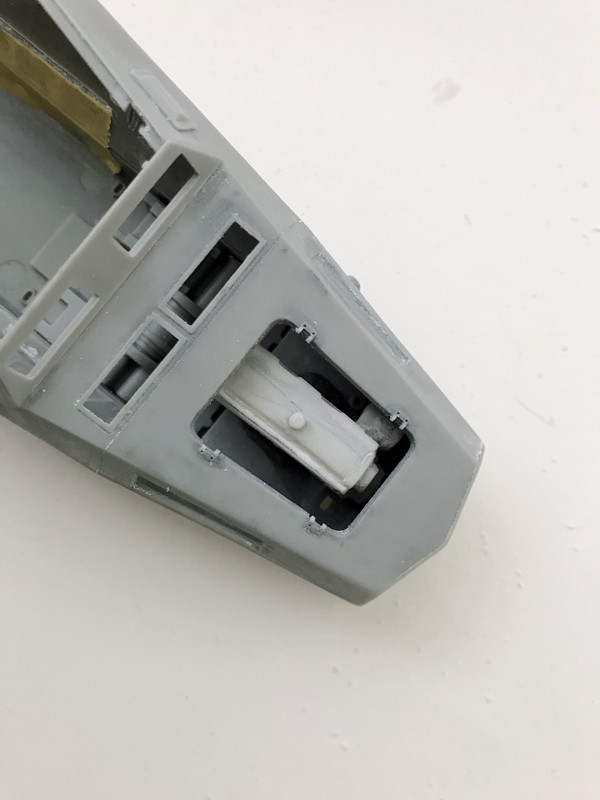
Kenny-X, strength and honor, just like the Roman Empire used to do it. I take your words to heart. Thank you for them. They are bloody good words; raw meat to throw to wolves and lions and possibly small children. You would know more than I about the children. I have been making an improvement to the valve cover.
Make more models!
Re: Dragon 1/35 Sd.Kfz. 250/3, Tunisia, 1942.
Once again, precise and thorough work. I dig it. This is going to be awesome.
Kenny X
Head Mother Trucker In-Charge @ Kenny X’s Reichs Winzigkleines Flugzeugewerks *and now* Airboat Records, too!
Head Mother Trucker In-Charge @ Kenny X’s Reichs Winzigkleines Flugzeugewerks *and now* Airboat Records, too!
-
speedgraflex
- Moderator
- Posts: 11535
- Joined: Fri Feb 10, 2017 11:08 pm
- Contact:
Re: Dragon 1/35 Sd.Kfz. 250/3, Tunisia, 1942.
KX—
I finally found decent reference for building! What always happens or what usually happens: I start with some side views and interpret, but lo and behold I found front, left and right views on a site specifically restoring all manner of old engines:
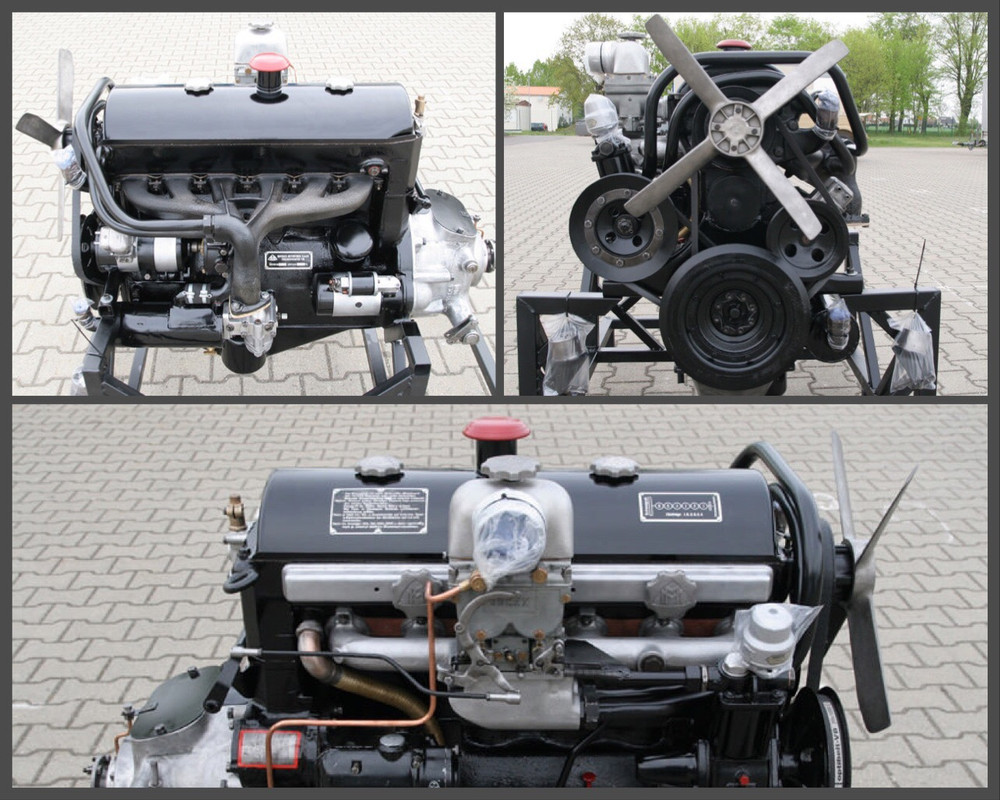
What a huge help; what a beautiful beast. Also note in the first frame that they did some modding to the manifold, but this being a hi-performance restorer it's his call. I am just happy to have those clear views! Thank you so much for following along. I know the road is bumpy but I sincerely appreciate the company.
I finally found decent reference for building! What always happens or what usually happens: I start with some side views and interpret, but lo and behold I found front, left and right views on a site specifically restoring all manner of old engines:
What a huge help; what a beautiful beast. Also note in the first frame that they did some modding to the manifold, but this being a hi-performance restorer it's his call. I am just happy to have those clear views! Thank you so much for following along. I know the road is bumpy but I sincerely appreciate the company.
Make more models!

Re: Dragon 1/35 Sd.Kfz. 250/3, Tunisia, 1942.
Wow, those are fantastic pictures! It seems there's always a geek who's ready to throw his freetime on every ol' rusty thing that exists out there.
-
speedgraflex
- Moderator
- Posts: 11535
- Joined: Fri Feb 10, 2017 11:08 pm
- Contact:
Re: Dragon 1/35 Sd.Kfz. 250/3, Tunisia, 1942.
Check it out!mostrich wrote:Wow, those are fantastic pictures! It seems there's always a geek who's ready to throw his freetime on every ol' rusty thing that exists out there.
http://www.rosenow-restaurierung.de/service.html
Make more models!
Re: Dragon 1/35 Sd.Kfz. 250/3, Tunisia, 1942.
Aaaand...
it's a German!
of course
it's a German!
of course
-
speedgraflex
- Moderator
- Posts: 11535
- Joined: Fri Feb 10, 2017 11:08 pm
- Contact:
Re: Dragon 1/35 Sd.Kfz. 250/3, Tunisia, 1942.
Genau!mostrich wrote:Aaaand...
it's a German!
of course
Make more models!
-
speedgraflex
- Moderator
- Posts: 11535
- Joined: Fri Feb 10, 2017 11:08 pm
- Contact:
Re: Dragon 1/35 Sd.Kfz. 250/3, Tunisia, 1942.
The Ghost of Shep Payne
As I move forward I often imagine Shep in his workroom, attending to the details of his dioramas, with such care, but if any revelation comes from a ghostly visitation it would be (I paraphrase) when he suggested that a diorama was a landscape painting! Of course it is, but then, regardless of detailed execution, there is effect. If you are wondering how this relates to building a Maybach HL 41 engine it is this—what is seen of the engine will be apparent from three places, the most obvious one being the hood, and the second and third places being the open side panels (one still on my To Do List) on the left and right. Therefore, what matters most, the effect, is what will be seen through the openings. My task is to make the information successfully read as a Maybach HL 42, but I don’t have to build every detail, I have to create an effective presentation that is in scale and provides all the details visible at scale through the three openings.
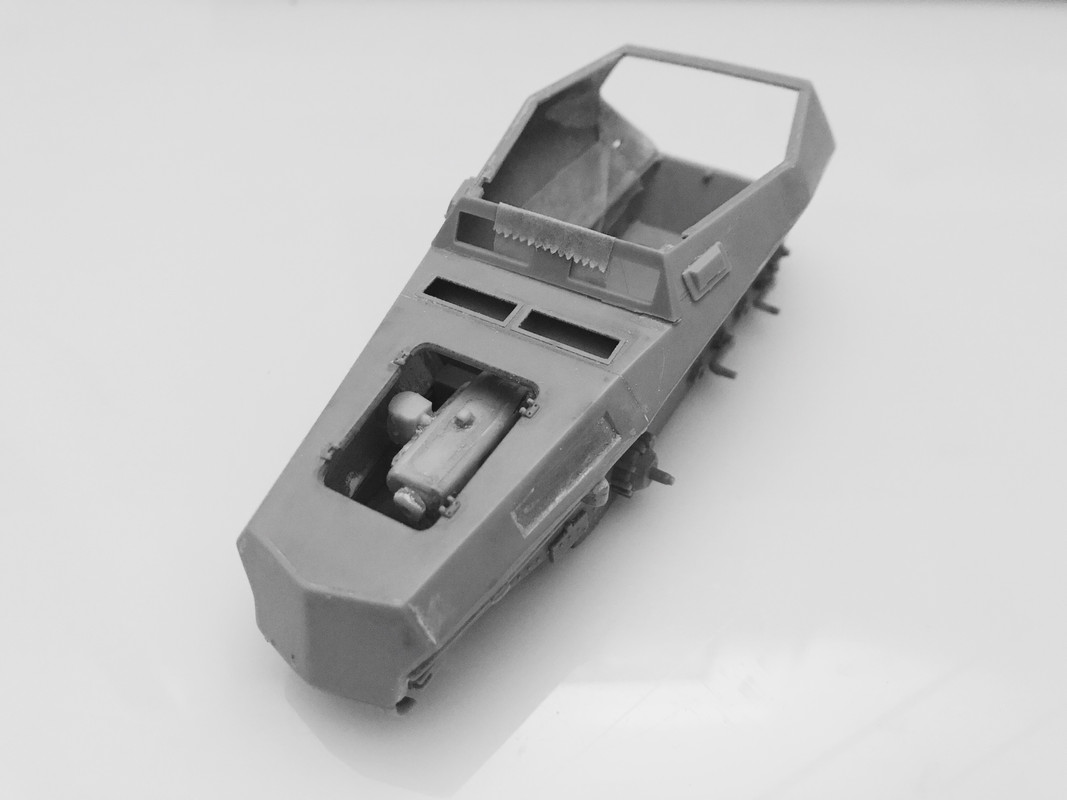
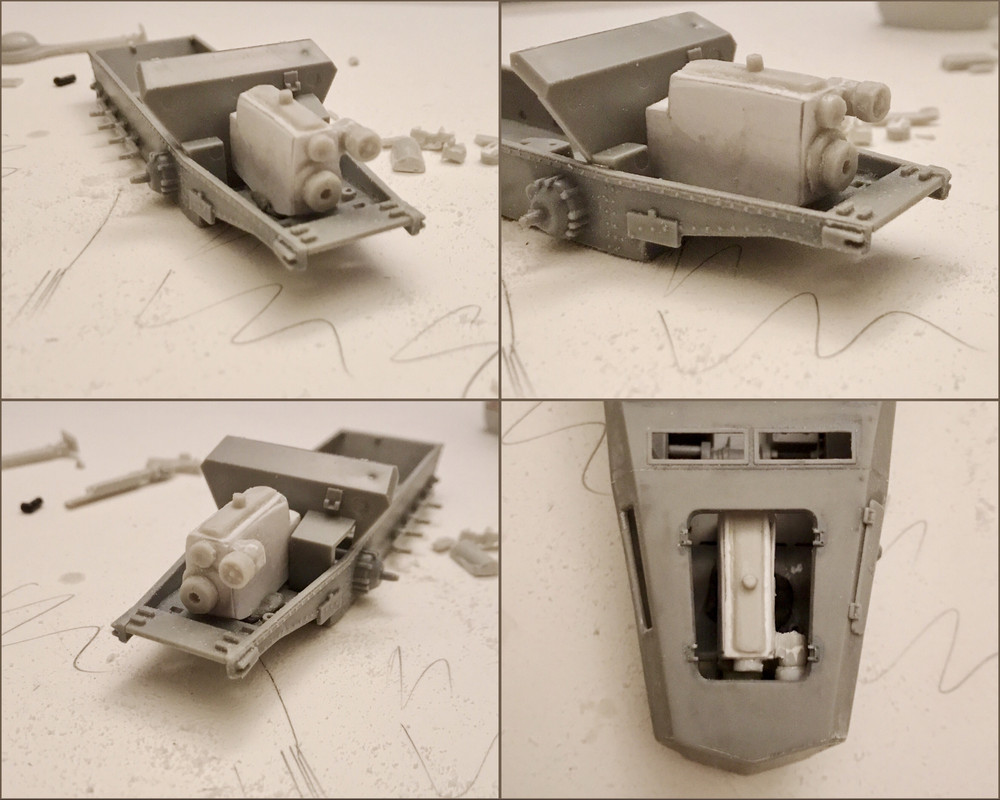
So I went back, lopped off the valve cover and inlet manifold areas, created a new piece of card to serve as the base of the engine. This serves as a better support, as it is designed like an I-Beam inside, as well as a better fit inside the compartment. This is actually closer to blueprints I studied of the actual engine—from the front the engine has a thick top and bottom, but a very narrow waist. I am tempted to write that her “curves” are quite trim, and now the model represents this design to a much greater degree—because it is a visible effect. I also added one side’s inlet manifold, and free-balled the drilling of the openings. I lost a drill bit in the process, but I did manage to align the holes in a straight line. The other side will wait until after I temp in the steering wheel column because that does quite clearly pass alongside the engine and is a visible effect.
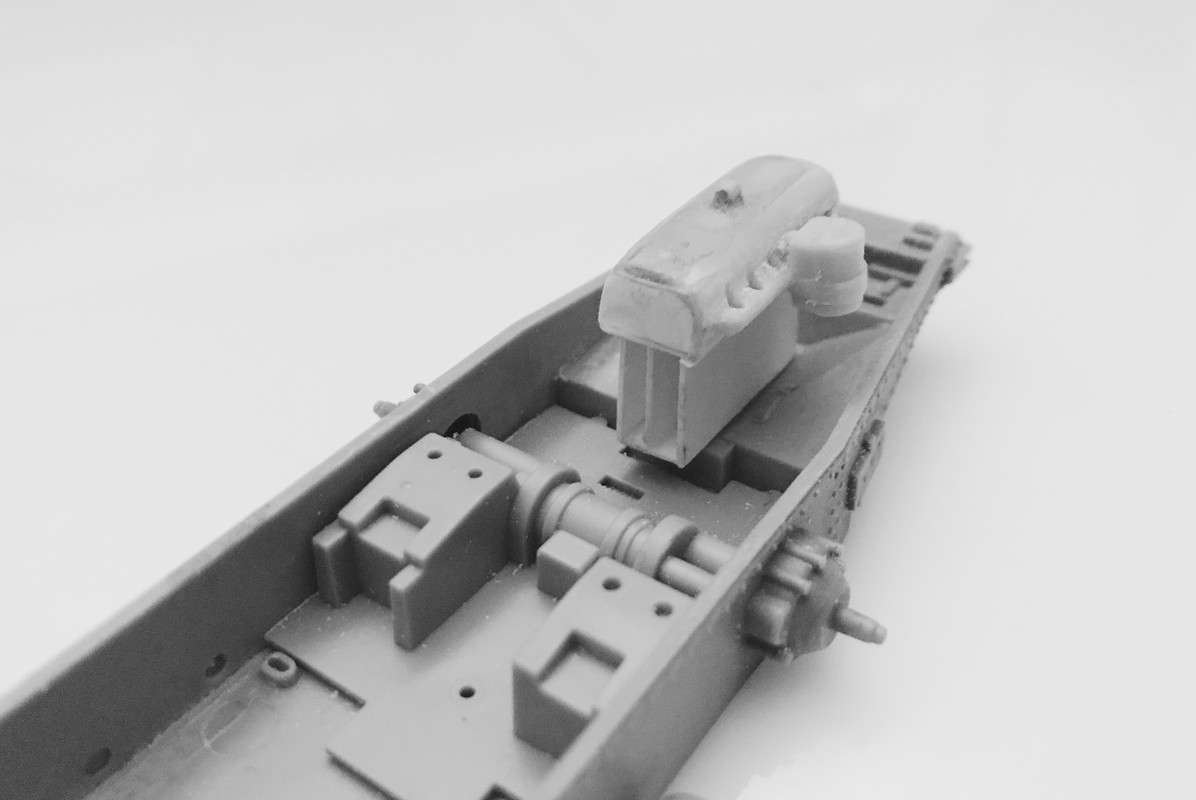
The photos show the results as well as the burrs and dust from drilling and sanding. I usually let the glue cure an entire day before cleaning those off completely.
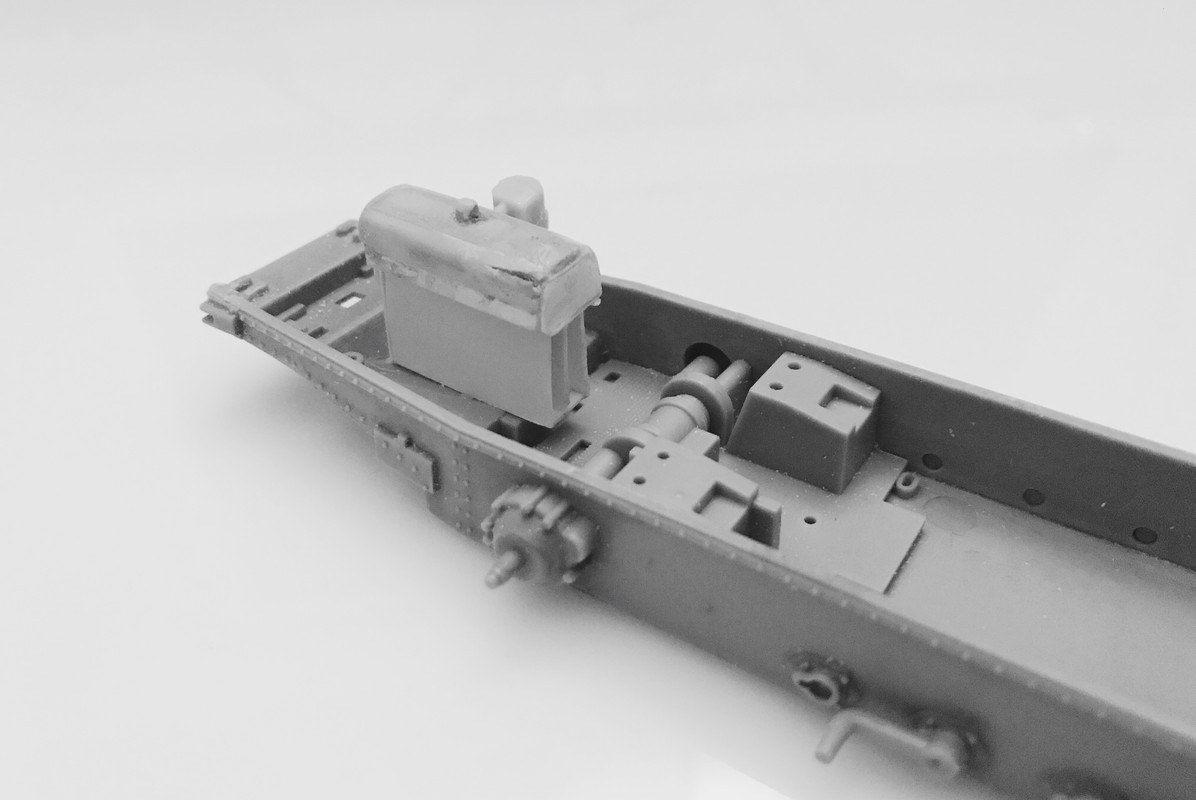
I repositioned and added the central flywheel. When I started to reshape the largest one, the piece skipped through my fingers and dropped and possibly bounced far away. At any rate, I knew that was time to quit for the night.
As I move forward I often imagine Shep in his workroom, attending to the details of his dioramas, with such care, but if any revelation comes from a ghostly visitation it would be (I paraphrase) when he suggested that a diorama was a landscape painting! Of course it is, but then, regardless of detailed execution, there is effect. If you are wondering how this relates to building a Maybach HL 41 engine it is this—what is seen of the engine will be apparent from three places, the most obvious one being the hood, and the second and third places being the open side panels (one still on my To Do List) on the left and right. Therefore, what matters most, the effect, is what will be seen through the openings. My task is to make the information successfully read as a Maybach HL 42, but I don’t have to build every detail, I have to create an effective presentation that is in scale and provides all the details visible at scale through the three openings.
So I went back, lopped off the valve cover and inlet manifold areas, created a new piece of card to serve as the base of the engine. This serves as a better support, as it is designed like an I-Beam inside, as well as a better fit inside the compartment. This is actually closer to blueprints I studied of the actual engine—from the front the engine has a thick top and bottom, but a very narrow waist. I am tempted to write that her “curves” are quite trim, and now the model represents this design to a much greater degree—because it is a visible effect. I also added one side’s inlet manifold, and free-balled the drilling of the openings. I lost a drill bit in the process, but I did manage to align the holes in a straight line. The other side will wait until after I temp in the steering wheel column because that does quite clearly pass alongside the engine and is a visible effect.
The photos show the results as well as the burrs and dust from drilling and sanding. I usually let the glue cure an entire day before cleaning those off completely.
I repositioned and added the central flywheel. When I started to reshape the largest one, the piece skipped through my fingers and dropped and possibly bounced far away. At any rate, I knew that was time to quit for the night.
Make more models!