
jkim wrote:I really like what you've done in the cockpit, Kenny. From the modulation of the interior base color to the detail painting highlighted with washes, you've made the molded details look very three dimensional. Maybe not as detailed as a photoetch set but I think it has more impact. Well done!
Thanks John!
I like photo etch IP’s, always will, but lately I am leaning toward not using the PE anyplace else in the cockpit and opting to use the kit cockpit as-is without the other PE stuff. Paint it and wash it well and it looks great. And I can see where resin would be even better, in terms of giving me more detail to work with when painting. And that three dimensional depth was exactly what I was shooting for and I appreciate your commenting on it, it feels good to have hit the mark.
Today has been interesting. I got called into a teleconference for the past few hours, only the stuff they needed me to work on wasn’t working properly so they had to call the vendors to join and help fix it. I couldn’t do anything until they were done, so Iwas just kind of sitting there fielding the odd question here and there, and, well, *this* happened;
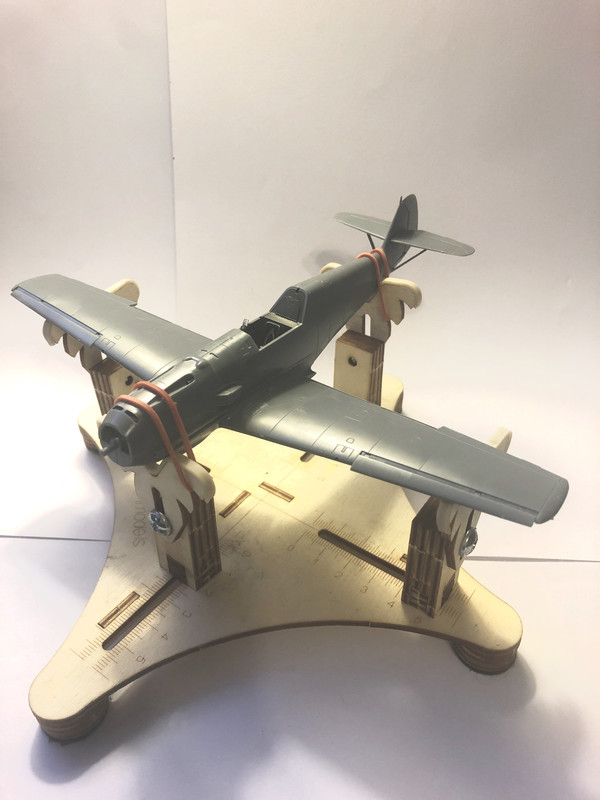

Yeah.
All I wanted to do was seal the fuselage. But then, this.
I guess I’m experiencing the Tamiya “Shake The Box” phenomena.
Dihedral is good. Wing roots are good. Rear stabs at the tail are squared up and the struts fit perfectly, although I did manage to break one in half whilst removing it from the sprue (no problem, just glue one half in, then wet the broken end with Extra Thin, then glue the other half into the hole and maneuver the broken ends together and POW! fixed.)
Nothing to fill. A few spots to sand but that’ll be easy. So yeah, I guess just wait for this cool front to pass so that I can prime her and start painting. Gee wiz!







 ) and every Friday off this month plus I'm off from December 21st til January 2nd. I go back to work on the 3rd of January. Whattaya expect?! LMAO!!! I didn't take a summer vacation this year...
