1/32 Hasegawa Fw190D-9 Red One

Re: 1/32 Hasegawa Fw190D-9 Red One
EXACTLY... with the visor on! I've done some seriously tiny paint repairs using the airbrush in this manner.
John aka JKim
-----------<><

-----------<><
-
mustang1989

- Moderator
- Posts: 5044
- Joined: Tue Mar 18, 2014 8:35 pm
Re: 1/32 Hasegawa Fw190D-9 Red One
LOL! I guess that's a small part of why I exited the aircraft building scene and went to automotive builds. I was using that visor literally all the time on my German camouflage schemes.jkim wrote:EXACTLY... with the visor on! I've done some seriously tiny paint repairs using the airbrush in this manner.

-
Medicman71

- Elite Member
- Posts: 11396
- Joined: Mon Apr 07, 2014 9:32 am
- Location: Houston, Tx
Re: 1/32 Hasegawa Fw190D-9 Red One
Wow! The camo looks just incredible!!! I suck at paint to thinner ratios and pressures. I can never get it right. I feel that I'll never get it that good.
Mike
Sponsored by Boeing, Lockheed Martin, Northrop Grumman, Saab, BAE, and Dassault
Sponsored by Boeing, Lockheed Martin, Northrop Grumman, Saab, BAE, and Dassault
Re: 1/32 Hasegawa Fw190D-9 Red One
It just takes a little practice, that's all. And straying away from the concept that the airbrush should lay down a color in one or two passes.
There was some work that I did last night that I didn't report. The grey "7" on the starboard fuselage was sprayed out and replaced with a light blue.
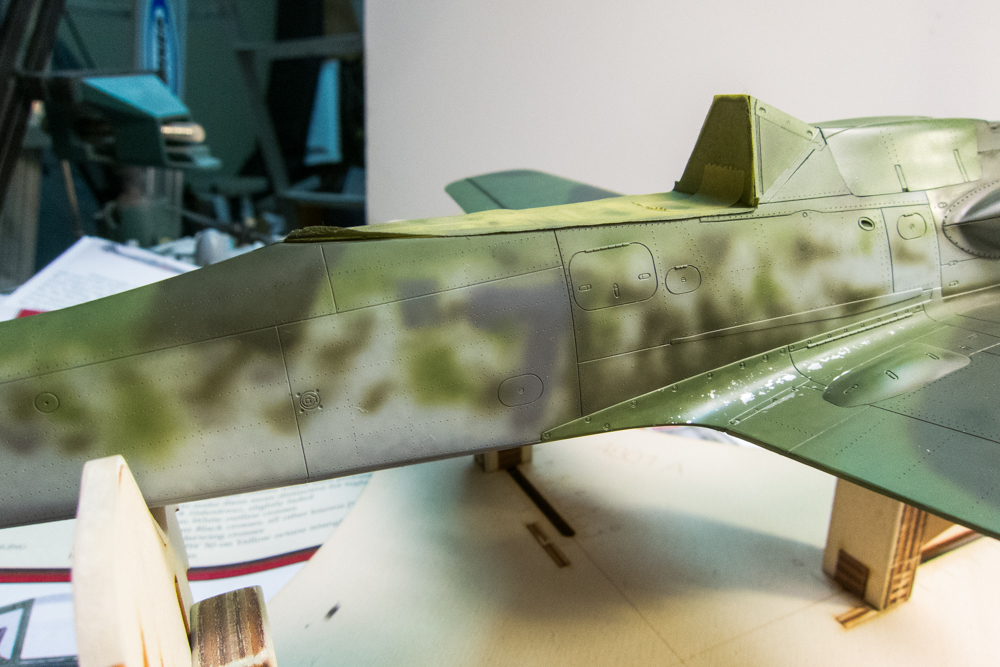
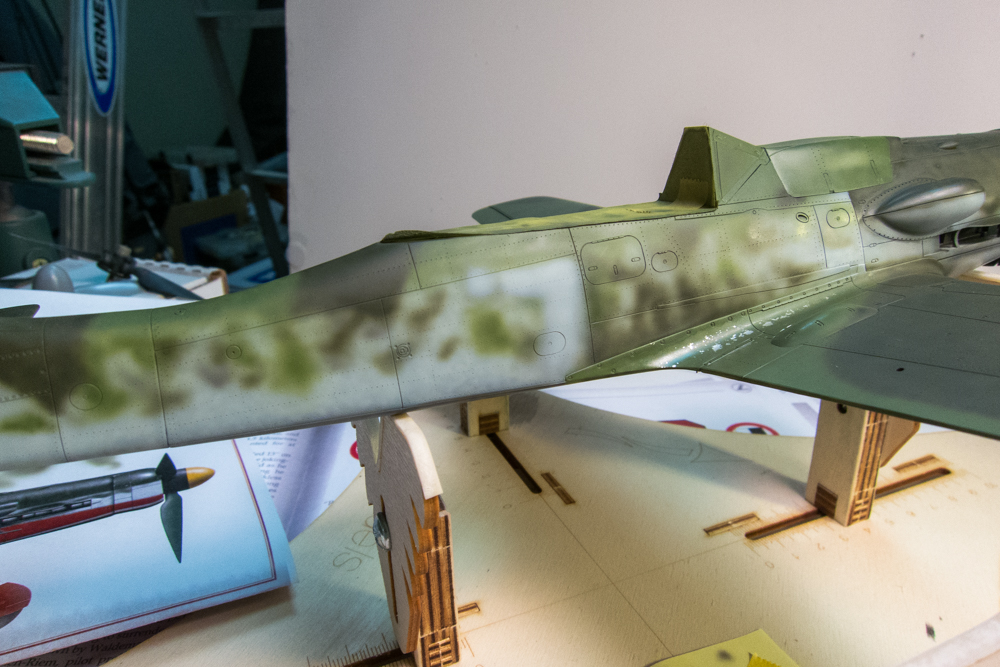
After the topside touch-ups, the camo was given a clear coat (Alclad Aqua Gloss) to seal the paint. I applied masking around the perimeter of the red/white zone and a base coat of white was sprayed on. This was where I left Red 1 last night.
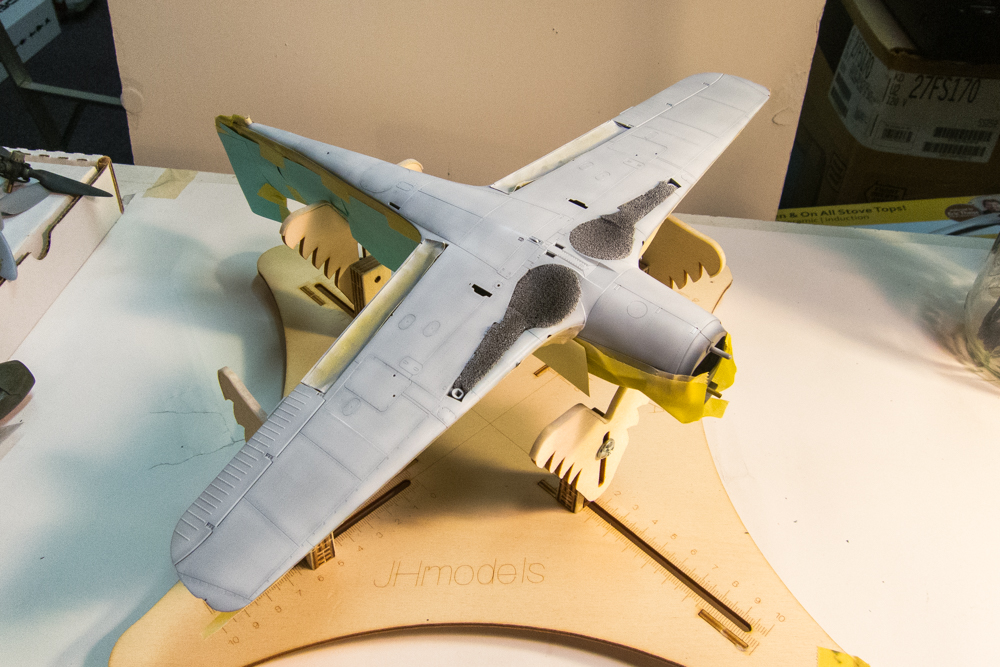
This evening, I set about cutting long strips of masking tape for the stripes. I'm worried about all of this tape. I had a problem with paint coming up with the masking tape on my last build. In guard against that, I've been very conscious of wiping down the surfaces prior to painting and then wearing gloves to avoid getting any finger oils under the paint job.
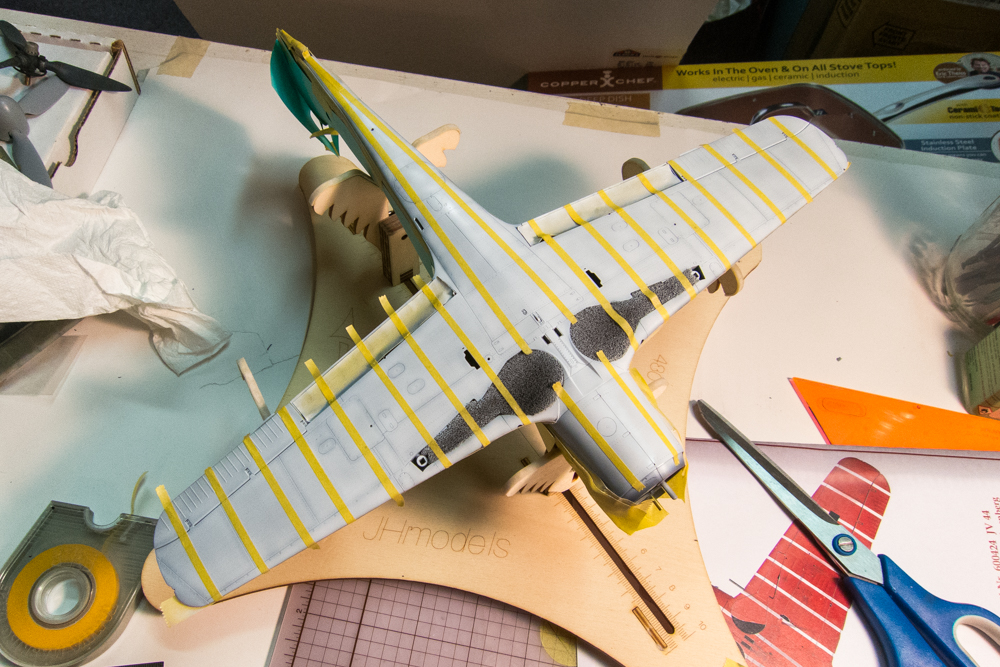
Once the stripe masks are put into place, the red is sprayed on. For both the white and red, I've increased my paint mixtures to 2:1 thinner-to-paint. There is no pre-shading to dial in and I'm just looking for solid coverage.

After the red is sprayed on and left to dry for about 30 minutes, the tape is removed. Halfway through, it's looking really good. No big tape lifts of the topside camo!

There are some very small spots where the stripe mask was not all the way down but overall, the stripes came out great.

The perimeter masking was removed VERY carefully and again, I didn't experience any tape lift. It looks like my precautions paid off.

There are some areas of overspray but the areas are very small and look to be easily correctable.
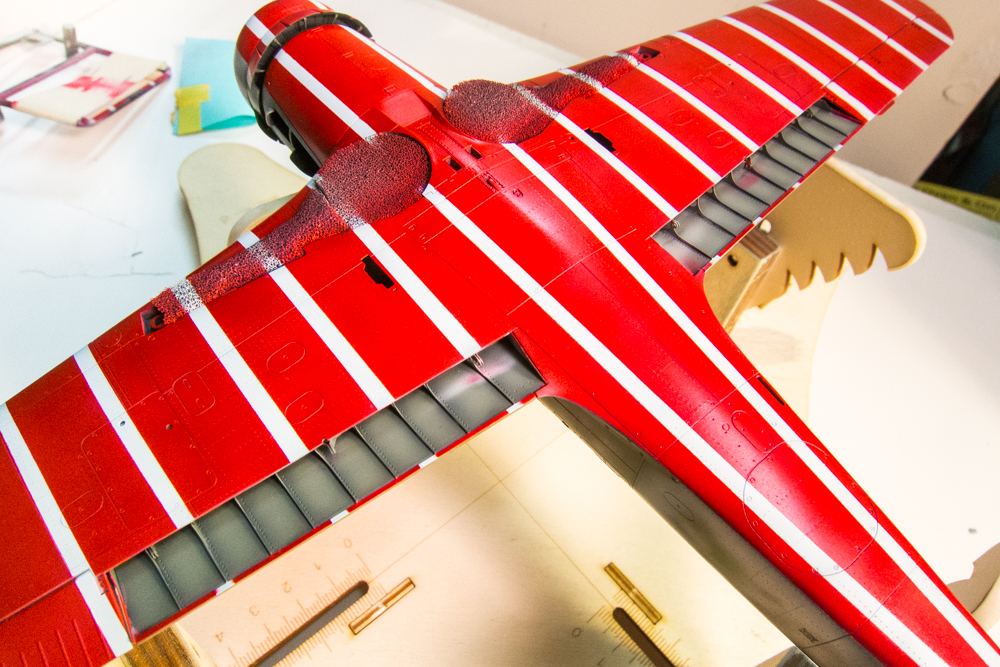
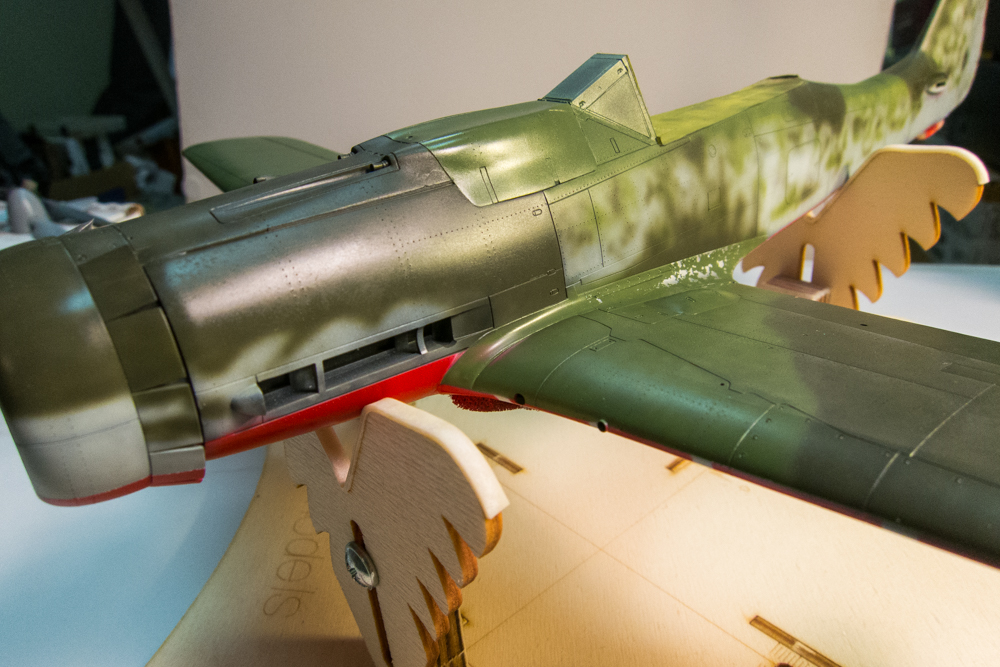
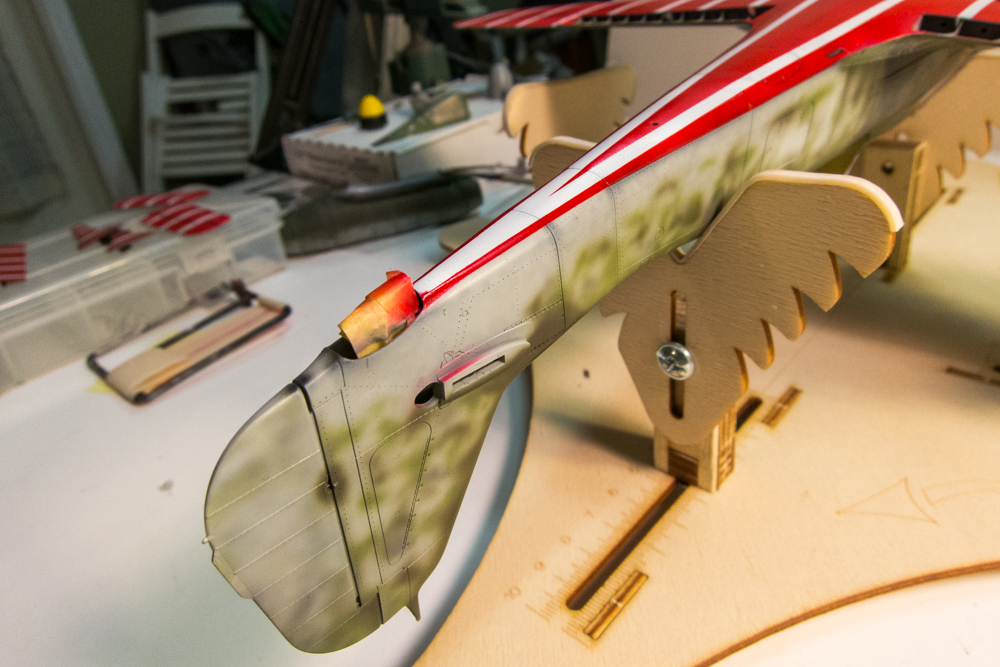
I'm going to give the bottom a quick seal of Aqua Gloss, make some overspray repairs and then it'll be time to start the markings!
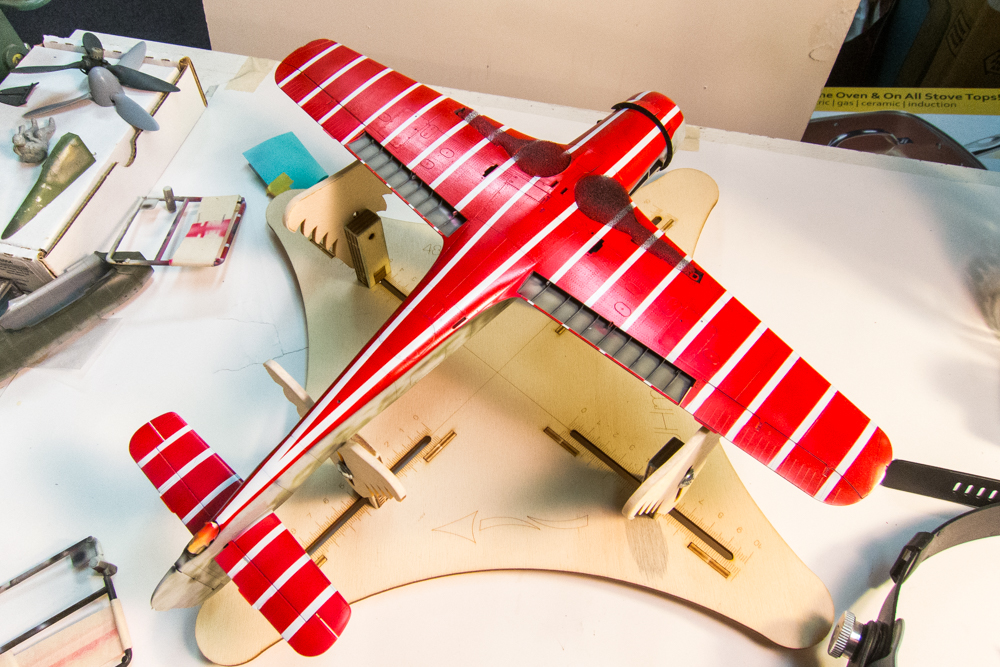
There was some work that I did last night that I didn't report. The grey "7" on the starboard fuselage was sprayed out and replaced with a light blue.
After the topside touch-ups, the camo was given a clear coat (Alclad Aqua Gloss) to seal the paint. I applied masking around the perimeter of the red/white zone and a base coat of white was sprayed on. This was where I left Red 1 last night.
This evening, I set about cutting long strips of masking tape for the stripes. I'm worried about all of this tape. I had a problem with paint coming up with the masking tape on my last build. In guard against that, I've been very conscious of wiping down the surfaces prior to painting and then wearing gloves to avoid getting any finger oils under the paint job.
Once the stripe masks are put into place, the red is sprayed on. For both the white and red, I've increased my paint mixtures to 2:1 thinner-to-paint. There is no pre-shading to dial in and I'm just looking for solid coverage.
After the red is sprayed on and left to dry for about 30 minutes, the tape is removed. Halfway through, it's looking really good. No big tape lifts of the topside camo!
There are some very small spots where the stripe mask was not all the way down but overall, the stripes came out great.
The perimeter masking was removed VERY carefully and again, I didn't experience any tape lift. It looks like my precautions paid off.
There are some areas of overspray but the areas are very small and look to be easily correctable.
I'm going to give the bottom a quick seal of Aqua Gloss, make some overspray repairs and then it'll be time to start the markings!
John aka JKim
-----------<><
-----------<><
-
BlackSheep214

- Elite Member
- Posts: 13598
- Joined: Sun Apr 06, 2014 8:47 pm
Re: 1/32 Hasegawa Fw190D-9 Red One
[quote="jkim"]Thanks guys! Before jumping back onto Red 1, I wanted to report a new product that I just picked up. I saw this on Facebook (dmminiatures, I think) being used as a way to impart random fade effects.
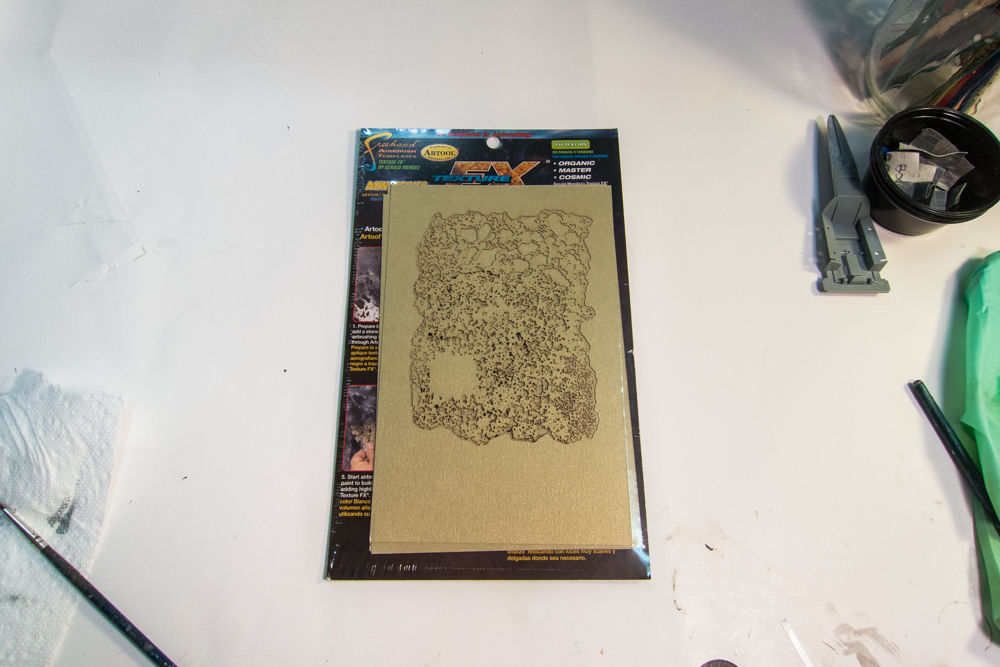
I have heard and seen this product somewhere before and had thought about purchasing something like that myself.
As far as the underside work, I got nothing except...
Wow!
I have heard and seen this product somewhere before and had thought about purchasing something like that myself.
As far as the underside work, I got nothing except...
Wow!
“Who controls the skies, controls the fate of this Earth”
Author unknown- 352nd Fighter Group, Blue-Nosed Bastards of Bodney
“Send one plane it’s a sortie; send two planes it’s a flight; send four planes it’s a test of airpower. - Richard Kohn
Author unknown- 352nd Fighter Group, Blue-Nosed Bastards of Bodney
“Send one plane it’s a sortie; send two planes it’s a flight; send four planes it’s a test of airpower. - Richard Kohn

Re: 1/32 Hasegawa Fw190D-9 Red One
Stunning paintwork 
Stuart Templeton 'I may not be good but I'm slow...'
Re: 1/32 Hasegawa Fw190D-9 Red One
A bit of clean-up work to document. Some of this stuff is minor and hardly noticeable but I was compelled to correct as much of it as I could see. Over-spray and a bit of white paint got lifted by the mask.

The airbrush is the ultimate paint repair tool. Using ultra-thin mixes at low pressure and working under a magnification visor, you can make perfect repairs. First, careful masking with tape and a post-it.

The red came out a bit "hot" and pooled on the edge of the tape. That caused the minor removal of the paint on the red side.
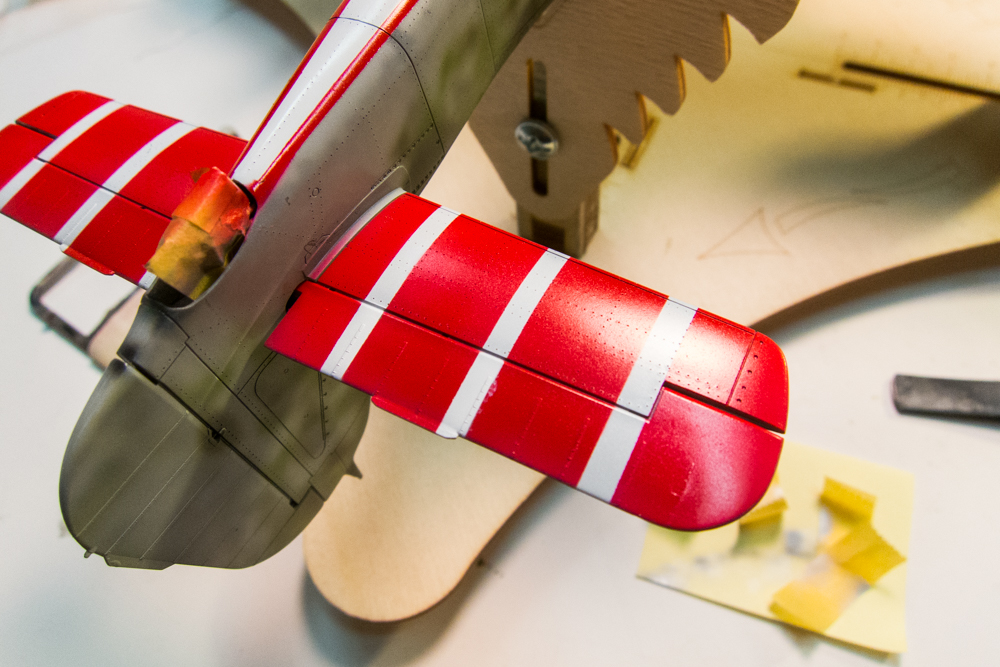
I let this dry thoroughly before masking on the white side and spraying a touch of red. I still need to fix the overspray at bottom root of the horizontal stabilizers, which will be easy since the stabs are still removable at this point.
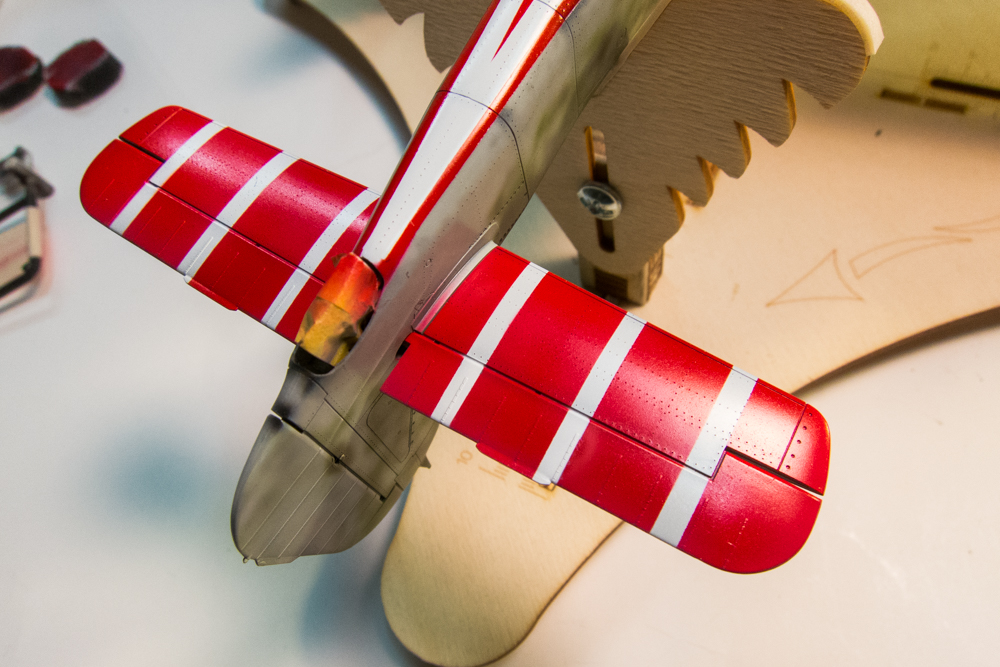
I was slightly off when masking the brass flaps so I'll have to make a slight adjustment to line the stripes up better.
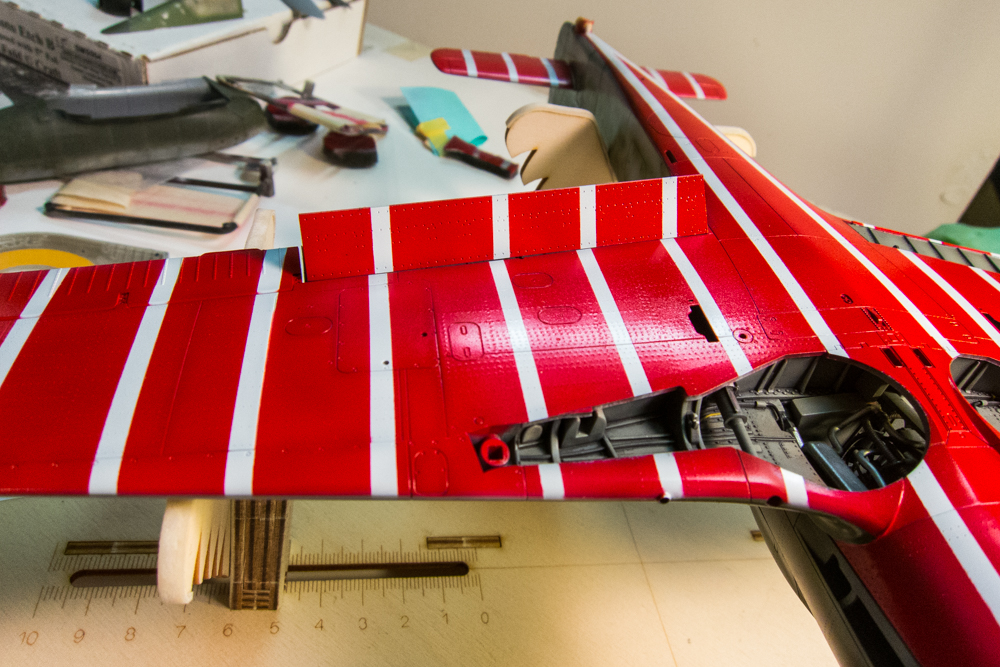
The overspray in the upper flaps and the landing gear wells has been fixed.
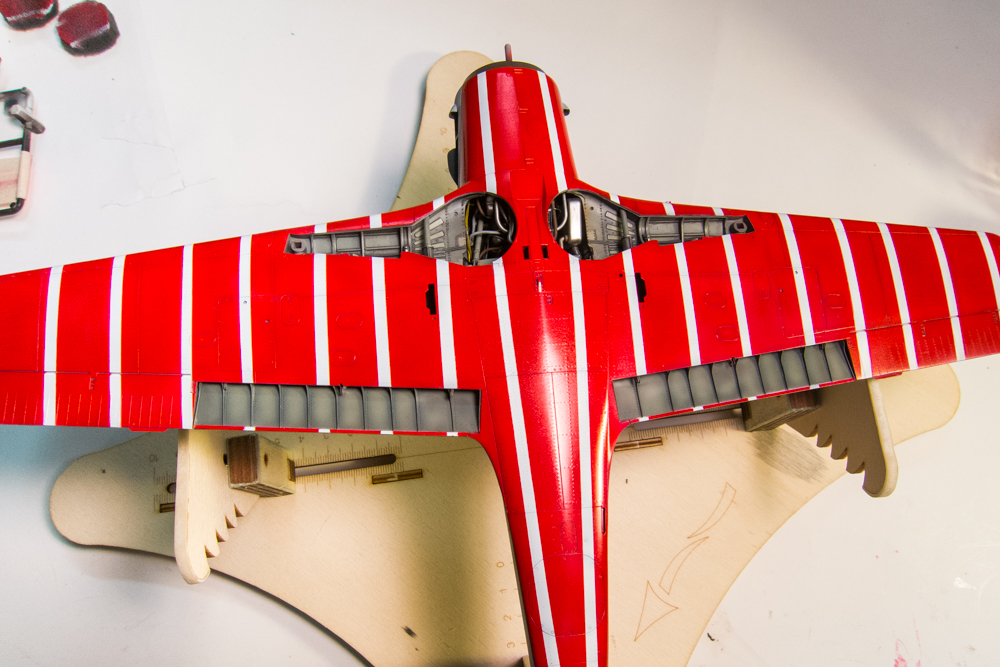
With the landing gear sponge masks removed and the radiator cowling attached, you can start to see a more "mature" Dora.

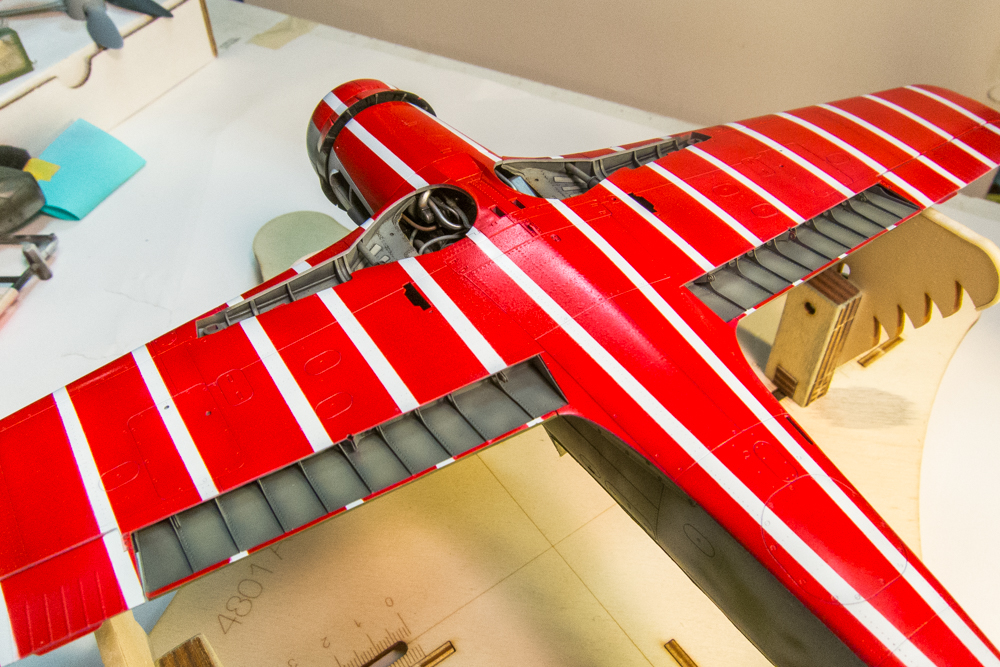

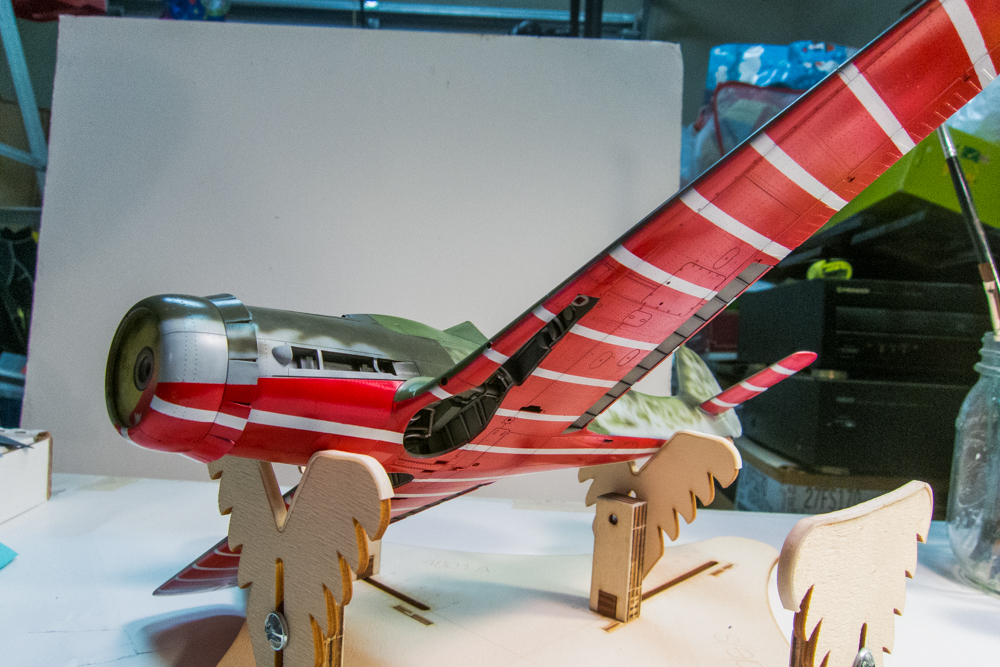
Most of the small paint repairs have been complete and I can say that the striping is finished. Markings will be the next major task!

The airbrush is the ultimate paint repair tool. Using ultra-thin mixes at low pressure and working under a magnification visor, you can make perfect repairs. First, careful masking with tape and a post-it.
The red came out a bit "hot" and pooled on the edge of the tape. That caused the minor removal of the paint on the red side.
I let this dry thoroughly before masking on the white side and spraying a touch of red. I still need to fix the overspray at bottom root of the horizontal stabilizers, which will be easy since the stabs are still removable at this point.
I was slightly off when masking the brass flaps so I'll have to make a slight adjustment to line the stripes up better.
The overspray in the upper flaps and the landing gear wells has been fixed.
With the landing gear sponge masks removed and the radiator cowling attached, you can start to see a more "mature" Dora.
Most of the small paint repairs have been complete and I can say that the striping is finished. Markings will be the next major task!
John aka JKim
-----------<><
-----------<><






-
Stikpusher

- Moderator
- Posts: 21386
- Joined: Sat Apr 05, 2014 8:37 pm
- Location: Ceti Alpha 5
Re: 1/32 Hasegawa Fw190D-9 Red One

The “wow” factor on this just jumped off the dial! Bravo!
"Surely I have made my meaning plain? I intend to avenge myself upon you, Admiral. I have deprived your ship of power, and when I swing 'round, I intend to deprive you of your life."
FLSM
FLSM